Carving Natural Storage Into Driftwood Shelves
Why let your treasures sit precariously on top when they could be sheltered within the wood’s own history? Flat shelves are a modern invention that leads to cluttered, exposed surfaces. Mimicking the ‘tide-pools’ found on the coast allows you to carve natural niches into your driftwood that protect your most fragile items. It’s not just a shelf; it’s a sanctuary.
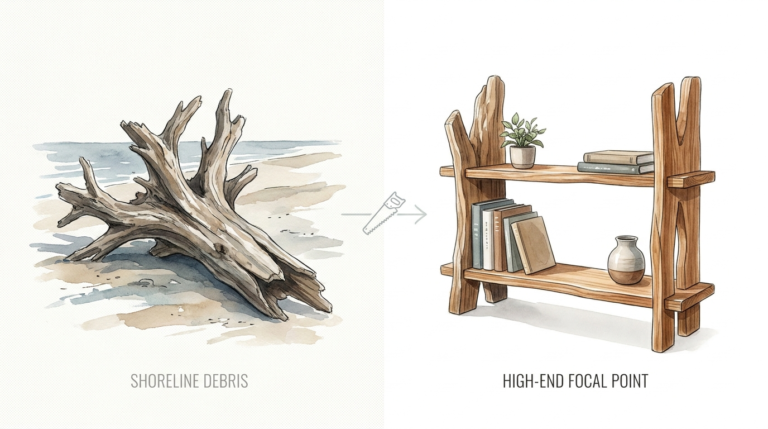
[affiai]Found wood carries the rhythm of the water in every fiber. Most people see a piece of driftwood and think only of its top surface. They treat it like a standard plank, ignoring the depth hidden beneath the weathered exterior. This approach misses the true potential of reclaimed timber. When you carve directly into the heart of the wood, you create a permanent home for your belongings rather than a temporary resting place.
Natural storage is about working with the grain instead of against it. Driftwood often arrives with soft spots, hollows, or interesting knots that guide the hand of the maker. These features are not flaws; they are invitations. Transform these areas into basins, and you turn a simple piece of wall decor into a functional vault that keeps your valuables safe from the hazards of a busy home.
Stepping away from the flat-pack mentality requires a shift in perspective. You must learn to look at a log and see the empty space within. This guide provides the blueprint for hollowing out those spaces with precision and grit. Whether you are housing an heirloom watch or a collection of sea glass, the sheltered basin offers a level of security that a flat board can never match.
Carving Natural Storage Into Driftwood Shelves
Carving natural storage involves hollowing out specific sections of a driftwood slab to create recessed basins or “niches.” These pockets act as built-in containers that keep items from sliding or falling. In the real world, this technique mimics the way water erodes rock along a coastline, creating small pools that trap and protect marine life. For the woodworker, it is a way to integrate functionality directly into the art.
Most driftwood shelves serve a purely aesthetic purpose, providing a narrow, often uneven surface for display. Natural storage basins change that dynamic. Instead of balancing a ring or a key on a sloping edge, you place it inside a carved depression where gravity works in your favor. This method is particularly useful for items that are round, fragile, or prone to rolling, such as fountain pens, crystals, or vintage coins.
This technique finds its home in rustic, coastal, and minimalist interior designs. It appeals to those who value the “wabi-sabi” philosophy—finding beauty in imperfection and transience. A shelf with a carved basin looks as if it grew out of the wall specifically to hold its contents. It creates a seamless transition between the furniture and the objects it supports, grounding the room in organic textures.
Contextually, these shelves are often found in entryways as “catch-alls” or in bedrooms as nightstand alternatives. They solve the problem of limited space by removing the need for extra bowls or trays. The wood itself becomes the container. This integration reduces visual clutter and emphasizes the raw, unrefined power of the reclaimed material.
How to Carve Your Sanctuary Basin
Selection is the first and most critical step. Choose a piece of driftwood that is at least three inches thick to allow for a deep enough recess without compromising structural integrity. Look for “punky” or soft sections where the wood has already begun to decay; these areas are easier to hollow out, provided you stabilize them later. Harder woods like oak or cedar will require more patience but offer a more durable final product.
Map your basins using a piece of chalk or a soft pencil. Follow the natural flow of the grain and avoid carving too close to the edges where the wood is thinnest. You want to leave at least an inch of “meat” around the perimeter to prevent cracking. Use a drill with a Forstner bit to remove the bulk of the material. Set your drill press or hand drill depth stop to ensure you do not punch through the bottom of the shelf.
Refining the basin requires hand tools or a rotary tool like a Dremel. A sharp wood carving gouge is the traditional choice for a smooth, hand-carved finish. Work from the center outward, following the grain to prevent tear-out. If you prefer a modern approach, a rotary tool with a tungsten carbide burr allows for rapid material removal and intricate shaping. Keep the edges of the basin slightly rounded to maintain the “tide-pool” aesthetic.
Smoothing the interior is a test of endurance. Start with 60-grit sandpaper to remove tool marks and gradually work your way up to 220-grit. Driftwood is notoriously porous, so the interior of the basin will soak up finish quickly. Apply a coat of wood stabilizer or thin epoxy if the wood feels brittle. This step turns a dusty hole into a polished, glass-like surface that feels good to the touch.
Benefits of Carved Basins
Fragile items gain an extra layer of protection from accidental bumps. A standard shelf offers no resistance if a sleeve catches on a vase or a cat decides to explore the mantel. Carved niches act as a physical barrier, keeping items centered and stable. This “sheltered” environment significantly reduces the risk of breakages in high-traffic areas of the house.
Visual organization becomes effortless when every item has a designated home. Instead of a pile of keys and mail, a carved basin creates a specific “landing zone” that looks intentional. The depth of the basin hides the lower half of the objects, which helps mask the “messy” appearance of small, mismatched items. It creates a cleaner silhouette for the shelf as a whole.
The aesthetic appeal of a carved basin is unmatched by flat shelving. It highlights the three-dimensional nature of the wood, drawing the eye into the grain rather than just across it. When light hits the recessed area, it creates shadows and highlights that emphasize the weathered texture of the driftwood. This depth adds a sense of luxury and custom craftsmanship to the piece.
Durability increases when you use stabilizers within the basins. Treating the interior of the carved section with resin or hard wax creates a moisture-resistant barrier. This makes the basins ideal for holding items like air plants or damp keys that might otherwise damage raw wood. You are essentially creating a waterproof lining within the organic frame of the shelf.
Challenges and Common Pitfalls
Structural failure is the most common error among beginners. Carving too deep or too wide can leave the shelf brittle and prone to snapping under weight. This is especially true with driftwood, which may have internal rot that isn’t visible on the surface. Always check the density of the wood before you commit to a deep basin. If the wood feels “squishy” under a screwdriver, it needs stabilization before carving.
Grain direction causes significant frustration during the hollowing process. Driftwood has often been tumbled and twisted by the sea, leading to unpredictable grain patterns. If you carve against the grain, the wood will splinter and “chip out,” leaving a jagged, ugly surface. Sharp tools are your only defense here. Dull chisels will crush the fibers rather than cutting them, ruining the organic look you are trying to achieve.
Dust management is a serious health concern when working with reclaimed wood. Driftwood often contains salt, sand, and microorganisms that can be harmful when inhaled. Sanding out a deep basin creates a concentrated plume of fine dust. Always wear a high-quality respirator and work in a well-ventilated area. Neglecting this step can lead to respiratory irritation or more serious long-term issues.
Improper mounting often leads to disaster once the shelf is loaded. Because a carved shelf is heavier on the back (where the wood is intact) and lighter in the front (where it is hollowed), the center of gravity shifts. Standard brackets may not be enough to keep the shelf level. Using heavy-duty floating shelf rods that penetrate deep into the solid parts of the wood is the best way to ensure the sanctuary stays on the wall.
Limitations of the Carved Method
Wood thickness dictates the maximum depth of your storage. You cannot carve a two-inch deep basin into a two-inch thick piece of wood. A safety margin of at least 3/4 of an inch is necessary to prevent the bottom from bowing or cracking over time. This means that thin, flat pieces of driftwood are unsuitable for this technique. You must hunt for the heavy, blocky chunks of timber.
Environmental factors like humidity can cause the wood to expand and contract. Because you have removed a significant amount of material from the center of the wood, the remaining shell is more sensitive to these changes. In very dry or very damp climates, the basin might develop small “check” cracks. These are natural and often add to the character, but they can be a deal-breaker for those seeking a pristine finish.
Weight capacity is naturally lower than a solid shelf of the same size. Removing the core of the wood reduces its ability to handle heavy loads like large books or heavy pottery. These basins are intended for “curios”—small, light treasures that need a home. Attempting to use a hollowed-out driftwood shelf for a full library of hardbacks will eventually lead to structural failure.
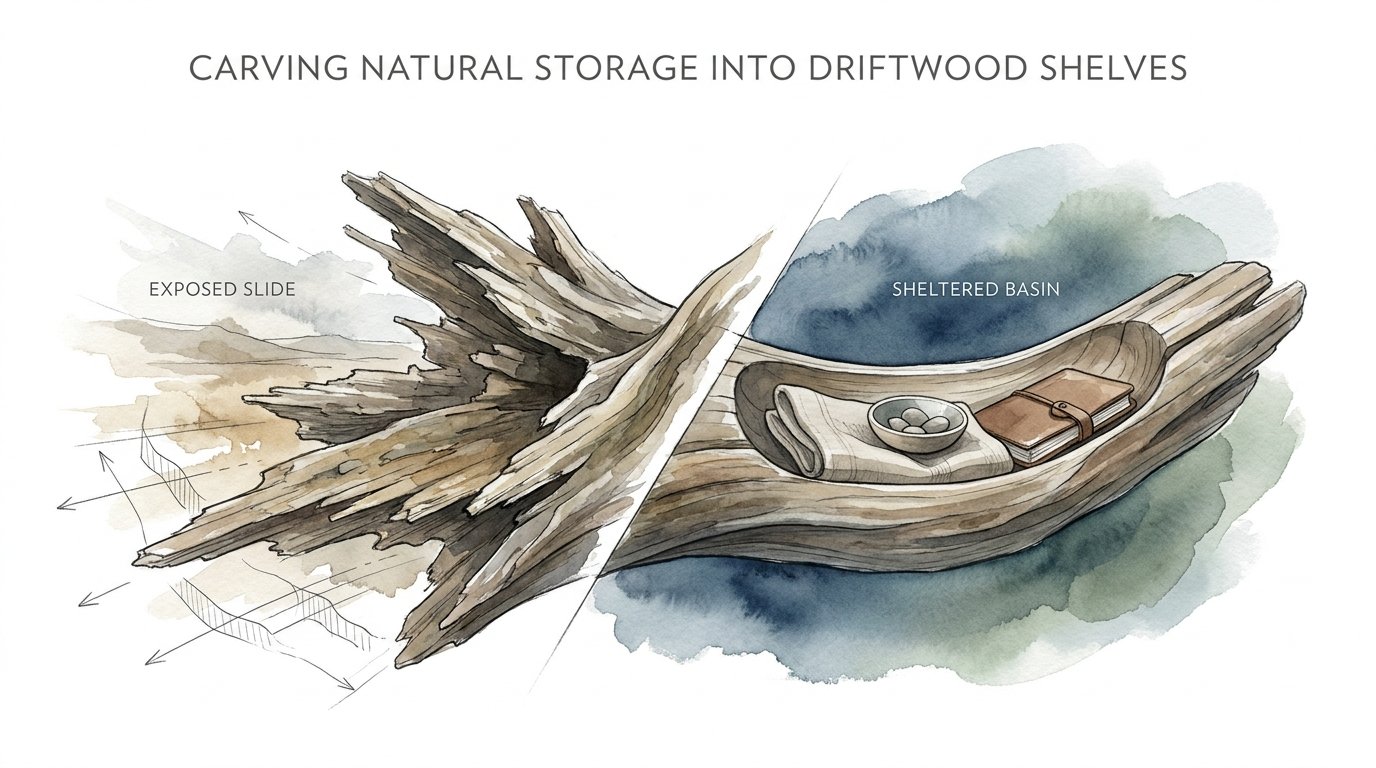
Exposed Slide vs. Sheltered Basin
Understanding the difference between an Exposed Slide and a Sheltered Basin helps you decide which project to undertake. An exposed slide is essentially a traditional flat shelf surface, while a sheltered basin is the carved-out niche discussed in this article. Both have their place in a home, but they serve very different masters.
| Factor | Exposed Slide (Flat) | Sheltered Basin (Carved) |
|---|---|---|
| Security | Low; items can slide off easily. | High; items are contained within walls. |
| Skill Level | Beginner; requires simple mounting. | Intermediate; requires carving and finishing skills. |
| Maintenance | Easy to dust with a single wipe. | Requires detailed dusting inside the niche. |
| Aesthetic | Modern, clean, and minimalist. | Rustic, organic, and sculptural. |
| Cost | Lower; requires fewer tools. | Higher; requires carving bits and stabilizers. |
Choosing an exposed slide is best for rotating displays where you change the decor frequently. The flat surface allows for items of any size or shape. A sheltered basin is a commitment to a specific item or type of item. It is a more intimate form of storage that honors the object it holds. If the goal is utility and speed, go flat; if the goal is safety and soul, go deep.
Practical Tips for a Better Finish
Sharpen your tools before every session. A sharp edge allows you to slice through the weathered exterior of the driftwood like butter. Dull tools require more force, which increases the likelihood of a slip. You should be able to shave a thin curl of wood with almost no pressure. If you are struggling to move the chisel, it is time to return to the honing stone.
Use a “relief cut” strategy when hollowing. Instead of trying to take out large chunks at once, make a series of vertical cuts with your drill or chisel. This breaks the tension of the wood fibers and makes the material easier to remove in small, controlled pieces. Patience prevents the wood from splitting along hidden internal cracks that you cannot see from the outside.
Stabilize the wood with a resin infusion if it feels soft. Products like Cactus Juice or thin cyanoacrylate (CA) glue can be dripped into the basin after carving. These liquids soak into the fibers and harden, turning a punky piece of wood into something as strong as plastic. This is especially helpful for the bottom of the basin, which needs to be the strongest part of the shelf.
Seal the interior with a matte finish to preserve the natural look. Glossy finishes can make the basin look like plastic, which ruins the organic “tide-pool” vibe. A matte polyurethane or a simple beeswax and mineral oil blend will protect the wood while keeping the texture visible. Apply multiple thin coats rather than one thick one to avoid “pooling” in the corners of the niche.
Advanced Considerations: Integrated Features
Hidden lighting can transform a carved basin into a dramatic display piece. Small, battery-operated LED “fairy lights” or recessed puck lights can be installed in the roof of a deep niche. This illuminates the treasure within and casts a warm glow over the wood’s texture. You will need to carve a small channel on the back of the shelf to hide the wires or battery pack.
Reinforcing the basin with contrasting materials adds a modern twist. Some practitioners line their carved niches with felt, leather, or even a thin layer of hammered copper. This protects the wood from scratches and provides a soft landing for delicate jewelry. Use a high-quality contact cement to ensure the liner stays flush against the curved walls of the basin.
Multi-level basins allow for complex organizational systems. Instead of one large hole, you can carve a series of tiered niches of varying depths. This works exceptionally well for desk organizers where you might need a shallow spot for paperclips and a deep one for pens. It requires a high level of spatial planning and steady hand-eye coordination.
Examples of Sheltered Storage
Consider the “Entryway Sentinel.” This is a thick piece of cedar driftwood with a deep, three-inch wide basin carved near the left edge. The basin is finished with dark walnut oil to provide contrast against the silvery-grey exterior. It serves as the primary home for a set of brass keys. Because the basin is deep, the keys never rattle or fall, even when the front door slams nearby.
Another scenario involves the “Bedside Sanctuary.” A narrow, curved branch is mounted as a floating shelf. Two small, shallow basins are carved into the thickest part of the branch. One holds a pair of reading glasses, and the other holds a wedding ring. The natural curve of the wood wraps around the items, making them feel like they are being cradled by the tree itself. This setup eliminates the need for a bulky nightstand in a small bedroom.
A “Maritime Display” shelf uses a series of five small basins carved along the length of a long, flat piece of pine driftwood. Each basin holds a single perfect seashell found on the same beach as the wood. The basins are lined with clear epoxy to mimic the look of water. This creates a powerful narrative of the sea, showing both the wood and its contents in their natural, “tide-pool” state.
Final Thoughts
Carving natural storage into driftwood is an act of reclaiming the wild. It moves beyond the clinical perfection of modern furniture and embraces the rugged, unpredictable history of the timber. By creating sheltered basins, you provide your treasures with a home that is as unique as they are. This process requires a steady hand and a willingness to listen to what the wood wants to become.
Pioneer grit isn’t just about hard work; it is about smart work. Every gouge and every sanded curve should serve a purpose. Whether you are a beginner picking up a chisel for the first time or a seasoned maker looking for a new challenge, the “tide-pool” shelf offers a rewarding path. It turns a piece of debris into a sanctuary that will stand the test of time and utility.
Experiment with different depths and textures as you grow in your craft. No two pieces of driftwood are identical, meaning no two shelves will ever be the same. This inherent uniqueness is the greatest strength of the carved basin. Apply these techniques to your next find, and watch as a simple piece of wood transforms into a functional masterpiece that guards your history with its own.
Sources
1 melanieabrantes.shop (https://melanieabrantes.shop/blogs/news-updates/carving-safety-precautions) | 2 createroom.com (https://www.createroom.com/blogs/q-as/what-are-the-pros-and-cons-of-open-shelving-versus-closed-cabinets-in-a-craft-room) | 3 youtube.com (https://www.youtube.com/watch?v=6_4Bpltbnkg) | 4 youtube.com (https://www.youtube.com/watch?v=ggDsw1nQDQ8) | 5 etsy.com (https://www.etsy.com/listing/1738229195/driftwood-shelf-12-to-47-walnut-shelf) | 6 wikihow.com (https://www.wikihow.com/Preserve-Driftwood) | 7 youtube.com (https://www.youtube.com/watch?v=c3j9o7yTMss) | 8 youtube.com (https://www.youtube.com/watch?v=SKWH708rsGA) | 9 ihome-studio.com (https://ihome-studio.com/blogs/news/open-vs-closed-shelving) | 10 kitchensolvers.com (https://kitchensolvers.com/the-pros-and-cons-of-open-shelving-vs-closed-cabinets/) | 11 housedigest.com (https://www.housedigest.com/1841059/upcycle-driftwood-diy-shelf-natural-decor/) | 12 slowdeco.es (https://slowdeco.es/en/blogs/slowlife/open-vs-closed-shelving-pros-and-cons) | 13 hawk-hill.com (https://www.hawk-hill.com/diy-floating-driftwood-shelf/) | 14 schaaftools.com (https://www.schaaftools.com/blogs/beginner-guides-fundamentals/what-type-of-woodcarving-is-right-for-me) | 15 thespooncrank.com (https://thespooncrank.com/wood-carving-tools-techniques-and-safety/) | 16 woodsculptingtools.com (https://woodsculptingtools.com/blogs/news/essential-safety-tips-for-wood-carving) | 17 quora.com (https://www.quora.com/Whats-the-best-way-to-seal-a-piece-of-driftwood-for-an-art-project) | 18 hometalk.com (https://www.hometalk.com/diy/upcycle/q-how-to-preserve-large-driftwood-piece-44401954) | 19 youtube.com (https://www.youtube.com/watch?v=4Tc_mfY8gQI)