• Skip to main content
  • Skip to primary sidebar
  • Terms and Conditions
  • Privacy Policy
  • Contact

Driftwood 4 Us

Just About Driftwood

DriftWood Art

Filling in Pin Holes with Burn in Stick in a 3D Epoxy Project

October 3, 2023 by admin

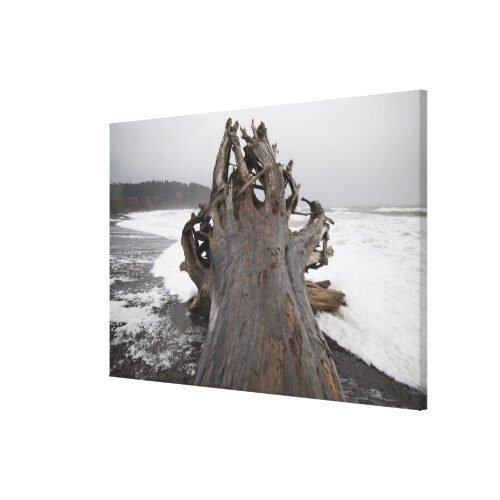
In this informative article, you will learn how to create a stunning 3D epoxy filled object using various materials such as driftwood, rocks, slabs, and branches. The step-by-step process involves using tools like sanding disks, quick coat, thickening powder, tint, orbital sander, burn in stick, and sandpaper. The article highlights the importance of flattening the bottom of the project, filling cracks and crevices with tinted quick coat, sanding off excess epoxy, and applying multiple seal coats for a polished finish. The project described in the article focuses on transforming a piece of driftwood into functional art, showcasing the enjoyable and rewarding process of working with epoxy.

Filling in Pin Holes with Burn in Stick in a 3D Epoxy Project

Introduction to the 3D Epoxy Project

The process described in this article involves creating a 3D epoxy filled object using various materials such as driftwood, rocks, slabs, branches, and more. The project aims to turn these objects into functional art by filling them with epoxy and transforming their appearance. The use of a specific set of tools is required to successfully complete the project.

Tools Required for the Project

To effectively carry out the 3D epoxy project, you will need the following tools:

  • 50 Grit Metal Fiber Sanding Disk: This tool is essential for the initial flattening of the bottom of your project to provide stability.
  • SCC Quick Coat: Quick Coat is the epoxy product that will be used throughout the project for sealing and coating.
  • Thickening Powder: The thickening powder is used to add thickness to the quick coat when filling cracks and crevices.
  • Tint – SCC Ocean Blue Metallic Powder: The tint is used to add color and create an accentuated effect in the cracks and crevices of the project.
  • Orbital Sander: The orbital sander will be used to smooth the project surface during the sanding process.
  • Burn in Stick: The burn in stick is used to fill in any pin holes or imperfections in the project.
  • Sandpaper: Various grits of sandpaper will be needed to sand the project to achieve a smooth surface.
  • Gloves: It is important to wear gloves throughout the project to protect your hands from epoxy and other materials.

Filling in Pin Holes with Burn in Stick in a 3D Epoxy Project

This image is property of i.ytimg.com.

Step 1: Flattening the Bottom of the Project

To ensure stability, the first step is to flatten the bottom of the project. This can be done using either sandpaper or a sanding disk. By flattening the bottom, the project will be able to sit evenly and securely on any surface.

Step 2: Smoothing and Rounding Out Sharp Areas

In this step, any branches or unwanted protrusions in the project should be removed. The goal is to create a smooth and rounded surface, free from any sharp areas that could cause injury or interfere with the epoxy application.

Filling in Pin Holes with Burn in Stick in a 3D Epoxy Project

Step 3: Mixing and Applying Tinted Quick Coat

To add color and accentuate the cracks and crevices in the project, a tinted quick coat is mixed and applied. The quick coat is prepared by combining SCC Quick Coat with thickening powder and tint – SCC Ocean Blue Metallic Powder. The thickening powder helps prevent the epoxy from oozing out of the project, while the tint adds the desired color effect. The tinted quick coat is then applied to the cracks and crevices using your hands, ensuring full coverage.

Step 4: Sanding off Excess Quick Coat

After the tinted quick coat has dried for approximately three hours, excess epoxy needs to be removed. This can be done using a metal sanding disk, specifically a 50 grit one. The aim is to remove the excess epoxy while retaining it in the cracks and crevices to create a textured effect. Once the excess is sanded off, a random orbital sander can be used to further smooth the surface.

Filling in Pin Holes with Burn in Stick in a 3D Epoxy Project

Step 5: Sanding the Entire Project Smooth

To achieve a completely smooth surface, the entire project needs to be sanded. This can be done using various grits of sandpaper, starting with a lower grit (e.g., 60) and gradually working your way up to a higher grit (e.g., 220). The sanding process is crucial in achieving the desired smoothness and preparing the project for the next steps.

Step 6: Applying Seal Coats Using Quick Coat

In this step, seal coats are applied to the entire project using SCC Quick Coat. The quick coat should be mixed without any thickening powder or metallic colors. The seal coats are applied by rubbing the epoxy all over the project using gloved hands. Multiple seal coats are recommended to achieve a glossy finish.

Step 7: Torching to Remove Air Bubbles

After each seal coat is applied, it is important to torch the project to remove any air bubbles that may have formed during the epoxy application. This can be done by lightly passing a torch flame over the surface of the epoxy. The heat helps the bubbles rise and pop, resulting in a smoother finish.

Step 8: Filling in Pin Holes with Burn in Stick

At this stage, any pin holes or imperfections in the project need to be filled. This is where the burn in stick comes into play. The burn in stick should be heated with a torch and then used to fill in the pin holes. Once the epoxy has cooled, excess can be scraped off using a razor blade. The project should then be sanded with 220 grit sandpaper to smooth any rough patches.

Step 9: Repeating the Process for 3 Seal Coats

To achieve the desired finish, the sealing process needs to be repeated for a total of three seal coats. Each seal coat should be applied, torched to remove air bubbles, and any pin holes filled with the burn in stick following the same process described in previous steps. The project should be sanded with 220 grit sandpaper between each coat to ensure a smooth surface.

Conclusion

Through the processes outlined in this article, it is possible to transform ordinary objects such as driftwood into beautifully transformed pieces of functional art. The use of epoxy, along with the appropriate tools and techniques, allows for the creation of unique and visually stunning projects. The project described here serves as an example of the possibilities that can be achieved with the 3D epoxy technique, and it can be a simple and enjoyable process for anyone interested in trying their hand at creating their own 3D epoxy project.

Filed Under: DriftWood Art Tagged With: 3D Epoxy Project, Burn in Stick, Filling, Pin Holes

Crafting Unique Art Pieces from Driftwood

October 2, 2023 by admin

In this video titled “Crafting Unique Art Pieces from Driftwood,” produced by CBC NL, you will meet Garfield Stringer, a talented artist who utilizes his kayak to find extraordinary pieces of driftwood. He skillfully crafts these one-of-a-kind driftwood pieces into stunning works of art. Holding the belief that every piece of driftwood has a story, Stringer carefully selects driftwood with intriguing twists, turns, and beautiful grains. With his passion for creating unique and captivating art, he aims to convey a sense of movement and character in his pieces. Stringer’s art has not only provided him with an outlet for creativity but has also served as a means of finding solace during challenging times, such as the pandemic. His dedication to his craft and ability to add the next chapter to each piece of driftwood makes his art truly exceptional.

Crafting Unique Art Pieces from Driftwood

This image is property of i.ytimg.com.

Choosing the Right Driftwood

Determining the size and shape

When choosing driftwood for your art piece, consider the size and shape that will best suit your vision. Think about the final dimensions of your project and the space in which it will be displayed. Driftwood comes in a variety of sizes, from small pieces that can be held in your hand to larger, more substantial logs. Determine the scale that works best for your desired outcome.

Evaluating the condition

Inspect the condition of the driftwood before beginning your project. Look for signs of rot, damage, or decay that may affect its structural integrity or overall appearance. Ensure that the wood is sturdy and free from pests or infestations. It’s important to choose driftwood that is in good condition to ensure the longevity and quality of your artwork.

Looking for unique features

Driftwood can offer a variety of unique features that add character and interest to your art piece. Look for pieces with interesting twists, turns, or bends that create visual appeal. Consider the natural grain and texture of the wood as well. Each piece of driftwood has its own story to tell, so choose pieces that speak to you and align with your artistic vision.

Considering the source

The source of your driftwood can also impact your art piece. Driftwood can come from oceans, lakes, or rivers, and each environment may offer a distinct look and feel. Consider the aesthetic you wish to achieve and the specific characteristics associated with different sources of driftwood. Understanding the origin of your driftwood can enhance the storytelling aspect of your art.

Preparing the Driftwood

Removing excess materials

Before you start working with the driftwood, it’s important to remove any excess materials that may be attached, such as seaweed, barnacles, or other debris. Use a stiff brush or scraper to gently remove these substances without damaging the wood. This step will create a clean surface for the next stages of preparation.

Cleaning and sanitizing

To ensure that your driftwood is free from bacteria or other contaminants, it’s essential to clean and sanitize it properly. Use a mild detergent and water to gently scrub the surface of the wood, removing any dirt or grime. Rinse thoroughly and allow the driftwood to dry completely before proceeding.

Sanding and smoothing

To achieve a smooth and polished finish, sanding is necessary. Start with coarse-grit sandpaper to remove any rough edges or splinters. Gradually move to finer grits to achieve a smooth surface. Pay attention to the grain of the wood and sand in the direction of the grain for the best results.

Preserving the wood

Preserving the driftwood is crucial to maintain its natural beauty and protect it from decay. Apply a wood preservative or sealer to the surface of the wood, following the manufacturer’s instructions. This will help prevent cracking, warping, or further damage over time. Choose a product that is suitable for both interior and exterior use, depending on where your artwork will be displayed.

Designing the Art Piece

Exploring different art styles

Before you start sketching your concept, take the time to explore different art styles and techniques. Look for inspiration in books, galleries, or online platforms to broaden your knowledge and spark creativity. Experimenting with different styles will allow you to find your own unique artistic voice.

Sketching the concept

Once you have a clear idea of the art style you want to pursue, start sketching your concept. Use a pencil and paper to create rough sketches, focusing on the composition, shapes, and forms you want to incorporate. This stage allows you to visualize your ideas and make any necessary adjustments before moving forward.

Incorporating other materials

Driftwood can be combined with other materials to add depth and visual interest to your art piece. Consider incorporating elements such as shells, stones, glass, or metal to create texture and contrast. Experiment with different materials to find the perfect combination that enhances the natural beauty of the driftwood.

Creating a balanced composition

When arranging the driftwood and other materials, it’s essential to create a balanced composition. Pay attention to the placement of each element and consider the overall visual flow of the piece. Strive for harmony and balance in terms of color, shape, and size. Step back and evaluate your composition from different angles to ensure a pleasing and cohesive result.

Enhancing the Natural Features

Highlighting the grain and texture

The grain and texture of driftwood are beautiful natural features that can be accentuated in your artwork. Consider using techniques such as wood burning or painting to highlight these details. By bringing attention to the unique characteristics of the wood, you can create a more visually captivating art piece.

Emphasizing unique shapes

Driftwood often comes in intriguing and irregular shapes that can add visual interest to your artwork. Emphasize these unique shapes by strategically placing them within your composition. Use lighting and shadow to enhance the three-dimensional qualities of the driftwood and create a dynamic and engaging art piece.

Adding depth and dimension

To add depth and dimension to your driftwood art, consider layering different pieces or elevating certain elements. Use glue or other adhesive methods to secure the driftwood in a way that creates depth and visual intrigue. Play with perspective and explore three-dimensional techniques to make your artwork truly stand out.

Using natural finishes

When it comes to finishing your driftwood art piece, opt for natural finishes that enhance its organic beauty. Consider using oils, waxes, or varnishes that are specifically designed for wood. These finishes will protect the wood while maintaining its natural appearance, highlighting the unique characteristics of the driftwood.

Crafting Unique Art Pieces from Driftwood

Creating Sculptures

Building a strong base

When creating driftwood sculptures, it’s important to start with a strong and stable base. Choose a solid material such as metal, stone, or wood that can support the weight of the driftwood. Secure the base firmly to ensure the stability and longevity of your sculpture.

Choosing the right tools

The tools you use will depend on the specific sculpting techniques you employ. Basic tools such as a saw, drill, and sandpaper are essential for shaping and refining the driftwood. Consider investing in additional tools such as chisels, rasps, or carving knives to achieve more intricate details and textures.

Carving and shaping techniques

Carving and shaping driftwood require patience and precision. Start by removing excess material using a saw or knife, gradually refining the shape and form of the wood. Experiment with different carving techniques to achieve the desired texture and visual effect. Take breaks as needed to step back and evaluate your progress.

Assembling the pieces

Once you have carved and shaped the driftwood, it’s time to assemble the pieces into your desired sculpture. Use adhesives or screws to secure the individual elements, ensuring they are firmly attached. Pay attention to the placement and alignment to create a cohesive and visually pleasing sculpture.

Making Wall Hangings

Creating a backing board

To create a wall hanging with driftwood, you will need a sturdy backing board to support the weight of the piece. Choose a material such as plywood or solid wood that can withstand the stress. Cut the backing board to the desired size and shape, ensuring it complements the overall design of your artwork.

Attaching the driftwood securely

When attaching the driftwood to the backing board, consider using a strong adhesive or screws, depending on the weight and size of the piece. Place the driftwood in your desired arrangement and carefully secure each piece to the backing board. Take precautions to ensure the driftwood is firmly attached to prevent any accidents or damage.

Incorporating other decorative elements

To add visual interest to your wall hanging, consider incorporating other decorative elements such as shells, sea glass, or metal accents. These additional materials can be attached to the driftwood or the backing board, creating a layered and textured effect. Experiment with different combinations until you achieve the desired result.

Adding a hook or mounting system

To hang your driftwood wall art, you will need to attach a hook or mounting system to the back of the backing board. Choose a sturdy hook or hanging mechanism that can support the weight of the artwork. Take into consideration the size and shape of the piece to ensure it hangs securely and remains level on the wall.

Crafting Unique Art Pieces from Driftwood

Crafting Functional Pieces

Making driftwood furniture

Driftwood can be transformed into unique and eye-catching furniture pieces. Use larger logs or branches to create table legs, chair frames, or benches. Combine the driftwood with other materials such as glass or metal to construct functional and artistic furniture that adds a rustic or coastal touch to any space.

Constructing shelves and storage units

Driftwood can also be used to construct shelves and storage units, providing both practicality and aesthetic appeal. Choose driftwood pieces with interesting shapes or textures to serve as the structure for your shelves. Secure the pieces together using screws or adhesives, ensuring they are sturdy and can support the weight of the items you wish to display or store.

Designing lighting fixtures

Driftwood can create captivating and unique lighting fixtures that add warmth and character to any room. Consider using smaller driftwood branches or pieces to create chandeliers, pendant lights, or table lamps. Combine the driftwood with other materials such as glass or metal to achieve the desired lighting effect.

Building planters and vases

Driftwood planters and vases can bring a touch of nature and organic beauty to your indoor or outdoor spaces. Use larger pieces of driftwood to construct planters for small trees or shrubs. Alternatively, hollow out smaller driftwood logs to create unique vases for flowers, succulents, or other plants. Ensure proper drainage if using driftwood planters.

Exploring Different Artistic Themes

Nautical-inspired pieces

Driftwood naturally evokes a sense of the seaside, making it a perfect material for nautical-inspired artwork. Explore themes such as seashells, anchors, ships, or marine life to infuse your artwork with a coastal vibe. Incorporate colors like blues, whites, and sandy tones to further enhance the nautical aesthetic.

Rustic and natural designs

Embrace the rugged beauty of driftwood by creating rustic and natural designs. Allow the unique shapes and textures of the wood to take center stage, and consider combining the driftwood with other natural elements such as moss, stones, or feathers. The earthy and organic feel of these designs will create a warm and inviting atmosphere.

Abstract and contemporary styles

Driftwood can also be used to create abstract and contemporary art pieces that play with form, texture, and negative space. Experiment with unconventional arrangements, asymmetrical compositions, or geometric shapes to create visually striking and thought-provoking art. Explore the use of bold colors or metallic accents to achieve a modern and contemporary look.

Whimsical and fantasy creations

Let your imagination run wild and create whimsical and fantasy-inspired driftwood art. Transform driftwood into magical creatures, mythical beings, or enchanted landscapes. Combine the wood with other materials such as feathers, beads, or fabric to add a touch of whimsy. These creations will spark joy and imagination in both children and adults.

Tips for Beginners

Start with smaller pieces

If you’re new to working with driftwood, it’s best to start with smaller pieces. Working on a smaller scale allows you to practice techniques and experiment with different designs without feeling overwhelmed. As you gain confidence and skill, you can gradually move on to larger and more complex projects.

Experiment with different techniques

Don’t be afraid to experiment with different techniques to discover what works best for you. Try out wood burning, carving, painting, or other forms of artistry to find your unique style. By exploring various techniques, you can develop your skills and create more diverse and captivating driftwood art.

Seek inspiration from other artists

Look to other artists who work with driftwood for inspiration and guidance. Study their techniques, compositions, and use of materials to gain insights and new perspectives. Follow driftwood artists online or attend local art exhibitions to expand your artistic horizons and learn from those who have mastered the craft.

Practice patience and persistence

Working with driftwood requires patience and persistence. It may take time to find the perfect piece, refine your technique, or bring your vision to life. Embrace the process and enjoy the journey, knowing that each piece you create is unique and a reflection of your artistic growth.

Conclusion

Creating art from driftwood is not only a creative outlet but also a chance to connect with nature and tell stories through each unique piece. By choosing the right driftwood, preparing it properly, designing your art piece, and enhancing its natural features, you can bring out the beauty and character of the wood. Whether you choose to create sculptures, wall hangings, functional pieces, or explore diverse themes, driftwood art offers endless possibilities for artistic expression. Embrace the adventure, let your creativity flow, and enjoy the art that comes to life in your hands.

Filed Under: DriftWood Art Tagged With: Art, Driftwood, Unique

DIY with Driftwood: Design and Decoration

October 1, 2023 by admin

In the fascinating world of DIY, there is a material that holds endless possibilities for design and decoration: driftwood. Get ready to embark on a creative journey as you learn various driftwood crafting ideas. By the end of this article, you will be armed with the knowledge and inspiration to transform these weathered pieces of wood into stunning works of art. Whether you’re a seasoned DIY enthusiast or just starting out, this guide will provide you with step-by-step instructions and helpful tips to bring out your inner designer.

Get your creative juices flowing as Decor Tips presents a captivating video featuring DIY with driftwood. Throughout the video, you’ll be immersed in a world of design and decoration ideas that will leave you feeling inspired and ready to take on your next project. From unique wall hangings and dreamcatchers to intricate table centerpieces and stylish shelving, this video covers a wide range of possibilities for incorporating the beauty of driftwood into your home decor. So, grab your tools and let your imagination soar as you embark on this exciting journey of DIY with driftwood.

DIY with Driftwood: Design and Decoration

This image is property of i.ytimg.com.

1. Introduction to Driftwood Crafting

Welcome to the wonderful world of driftwood crafting! If you’re someone who loves nature-inspired decor and enjoys getting creative with DIY projects, then working with driftwood might just be your new favorite hobby. Driftwood has a unique, weathered appearance that adds a touch of rustic charm to any space. In this article, we will explore everything you need to know about driftwood, including where to find it, the essential tools and materials you’ll need, different design and decoration ideas, techniques for working with driftwood, safety tips, maintenance and preservation, as well as tips for showcasing your beautiful driftwood creations. So get ready to embark on a journey of creativity and bring the beauty of nature into your home with driftwood crafting!

2. Understanding Driftwood

2.1 What is Driftwood?

Driftwood is wood that has been washed ashore by the sea or other bodies of water. It is typically the remnants of trees or branches that have fallen into rivers or streams and been carried by the water currents until they are deposited on beaches or riverbanks. The action of the water, combined with exposure to the elements, gives driftwood its unique appearance, characterized by a weathered, worn, and smooth texture.

2.2 Where to Find Driftwood

Driftwood can be found along coastlines, beaches, rivers, and lakes. The best time to search for driftwood is after a storm or during low tide, when the water recedes and reveals a treasure trove of beautiful pieces. Keep in mind that collecting driftwood from beaches may be restricted or prohibited in certain areas, so always check the local regulations and obtain any necessary permits before collecting driftwood.

3. Tools and Materials for Driftwood Crafts

3.1 Essential Tools

To start your driftwood crafting journey, you will need a few essential tools. These include:

  • Handsaw or chainsaw: A handsaw is ideal for smaller driftwood pieces, while a chainsaw is necessary for larger logs or branches.
  • Drill: A drill with various drill bits is essential for drilling holes in the driftwood to attach pieces together or for other decorative purposes.
  • Sandpaper or sanding blocks: Sanding is crucial to smooth out rough edges and surfaces of the driftwood.
  • Wood glue: Wood glue is used to bond pieces of driftwood together securely.

3.2 Additional Materials

In addition to the essential tools, you may also need some additional materials depending on your driftwood crafting project. These materials can include:

  • Nails and screws: These are useful for securely attaching driftwood pieces to create structures or larger art pieces.
  • Wire: Wire is great for creating hanging mobiles or adding decorative elements to your driftwood crafts.
  • Paint or stain: Adding a pop of color or a touch of stain can enhance the natural beauty of the driftwood and complement your overall design.
  • Varnish or sealant: Applying a protective finish to your driftwood crafts will help preserve their beauty and protect them from the elements.

4. Cleaning and Preparing Driftwood

4.1 Removing Dirt and Debris

Before you begin working with driftwood, it’s important to clean it thoroughly to remove any dirt, sand, or debris that may be stuck to its surface. Start by rinsing the driftwood with water to remove loose dirt. For stubborn dirt or residue, you can scrub the driftwood with a stiff brush or toothbrush. Avoid using harsh detergents or chemicals, as they may damage the wood or affect its natural appearance.

4.2 Treating the Driftwood

After cleaning, it is recommended to treat the driftwood to ensure its longevity and protect it from pests. One of the most common methods is to soak the driftwood in a mixture of water and bleach. This will help kill any bacteria or insects that may be present. Make sure to dilute the bleach properly and use gloves and protective eyewear when handling it. After soaking, rinse the driftwood thoroughly with water and let it dry completely before starting your crafting project.

DIY with Driftwood: Design and Decoration

5. Driftwood Design and Decoration Ideas

Now that you have clean and prepared driftwood, it’s time to let your creativity shine with some amazing design and decoration ideas. Here are a few popular options to get you inspired:

5.1 Driftwood Wall Art

Create stunning wall art by arranging driftwood pieces in different patterns or shapes. You can create a mosaic-like design or arrange them in the form of a tree, heart, or any other shape that appeals to you. Secure the pieces together using nails, screws, or strong glue. Once your creation is complete, hang it on your wall and enjoy the beautiful rustic charm it brings to your space.

5.2 Driftwood Sculptures

Let your imagination run wild and turn the driftwood pieces into unique sculptures. Use your handsaw and drill to cut and shape the driftwood into various forms, such as animals, abstract shapes, or even human figures. Combine different pieces and attach them securely using nails or screws. A driftwood sculpture can serve as a captivating centerpiece for your home or garden.

5.3 Driftwood Mobiles

Create a whimsical and soothing atmosphere by making driftwood mobiles. Attach several pieces of driftwood to a wire or string, making sure to create a balance. Hang the mobile from the ceiling or a sturdy branch, and watch it dance and sway with the gentlest breeze. Driftwood mobiles are perfect for adding a touch of nature-inspired serenity to nurseries, bedrooms, or outdoor spaces.

5.4 Driftwood Mirrors

Add a touch of coastal charm to your home by incorporating driftwood into a mirror frame. Choose a large circular or rectangular mirror and attach driftwood pieces around the edges using strong glue or nails. The natural texture and irregular shapes of the driftwood will add a unique and eye-catching element to your mirror, turning it into a statement piece for any room.

5.5 Driftwood Jewelry

Get crafty and create beautiful jewelry pieces using small sections of driftwood. Drill small holes in the driftwood pieces and string them together to create unique necklaces, bracelets, or earrings. You can also combine driftwood with other materials, such as beads or seashells, to add an extra touch of whimsy and personalized style to your jewelry designs.

5.6 Driftwood Candle Holders

Enhance the warm and cozy ambiance of your space by making driftwood candle holders. Choose a thick and sturdy piece of driftwood and drill holes deep enough to hold tea light or votive candles securely. Arrange the candle holders on a mantel, dining table, or outdoor patio for a rustic and inviting glow.

5.7 Driftwood Coasters

Protect your surfaces in style with driftwood coasters. Cut driftwood pieces into small circular or square shapes and sand them smooth. Finish with a coat of varnish or sealant to protect against moisture and make them easy to wipe clean. These unique coasters will not only keep your tabletops safe but also add a touch of natural beauty to your living space.

5.8 Driftwood Planters

Turn driftwood into charming planters for small succulents or air plants. Find a sturdy piece with a natural crevice or cavity that can accommodate the plants. Place a small container filled with soil inside the crevice and insert the plants. You can also use a strong adhesive to attach small plant pots directly to the driftwood. These driftwood planters can be displayed on tabletops, shelves, or hung on walls.

5.9 Driftwood Wreaths

Put a unique spin on the traditional wreath by creating one with driftwood. Start with a circular base, such as a wire wreath form or a sturdy branch bent into a circle. Attach small sections of driftwood to the base using wire or strong glue, arranging them in a way that creates a visually appealing pattern. Hang the driftwood wreath on your front door or use it as a decorative accent on interior walls.

5.10 Driftwood Lamps

Illuminate your space with the mesmerizing glow of driftwood lamps. Start with a sturdy piece of driftwood as the base and attach a lamp fixture to it. You can choose to keep the natural shape of the driftwood or carve out spaces to hold the lamp shade or light bulb. The warm light shining through the cracks and textures of the driftwood will create a cozy and inviting atmosphere in any room.

6. Techniques for Working with Driftwood

Now that you have some design ideas in mind, let’s explore the techniques for working with driftwood to bring your creations to life.

6.1 Drilling Holes in Driftwood

Drilling holes in driftwood is a common technique used to attach pieces together or add decorative elements. Start by marking the exact spot where you want to drill the hole. It’s essential to use a drill bit suitable for wood and choose the appropriate size based on your project. Place the driftwood securely on a workbench or clamp it down to prevent it from moving. Slowly drill through the marked spot, applying gentle pressure. Be careful not to drill too fast or exert too much force, as this can cause the wood to splinter or crack.

6.2 Sanding and Shaping Driftwood

Sanding is an important step to smooth out rough edges and surfaces of the driftwood. Start with a coarse-grit sandpaper or sanding block to remove any stubborn imperfections or uneven surfaces. Gradually progress to finer-grit sandpaper or block to achieve a smoother finish. Remember to sand in the direction of the wood grain to avoid creating scratches or marks on the surface. If you want to shape the driftwood, use a handsaw or chainsaw to carefully cut or trim the wood according to your desired design.

6.3 Attaching Driftwood Pieces

When attaching driftwood pieces together, it’s crucial to ensure a secure and lasting bond. If you’re using nails or screws, pre-drill holes slightly smaller than the nails or screws to prevent the wood from splitting. Apply a strong wood glue to the surfaces that will be in contact and press the pieces firmly together. Let the glue dry completely according to the instructions on the label before moving or applying any pressure to the assembled pieces. For larger or heavier driftwood structures, consider using additional reinforcement, such as brackets or metal plates, to provide added stability.

DIY with Driftwood: Design and Decoration

7. Safety Tips for Driftwood Crafts

While working with driftwood can be a fun and fulfilling experience, it’s essential to prioritize safety. Here are some safety tips to keep in mind:

7.1 Using Protective Gear

Always wear appropriate protective gear when working with driftwood. This includes safety goggles or glasses to protect your eyes from flying debris or wood particles, gloves to protect your hands from splinters, and a dust mask or respirator to prevent inhaling dust or fumes when sanding or drilling.

7.2 Handling Tools Correctly

Familiarize yourself with the proper handling and usage of the tools needed for driftwood crafts. Read the instruction manuals of the tools and follow the manufacturer’s recommendations for safe operation. Use tools that are in good working condition and use them according to their intended purpose. Never force a tool or use excessive pressure, as this can lead to accidents or damage.

7.3 Disposing of Waste Properly

When you have finished your driftwood crafting project or have accumulated waste material, ensure their proper disposal. Driftwood scraps can be saved for future projects or repurposed, while sawdust and other wood waste can be collected and used as mulch for garden beds. If you are unable to reuse or repurpose the waste, dispose of it according to the local regulations and guidelines for wood and organic waste.

8. Maintenance and Preservation of Driftwood Crafts

To keep your driftwood crafts looking beautiful and in good condition, it’s important to follow proper maintenance and preservation techniques. Here are some tips to help you maintain the longevity and aesthetic appeal of your driftwood creations:

8.1 Cleaning and Dusting

Regularly dust your driftwood crafts to remove any dirt or debris that may accumulate on the surface. Use a soft cloth or feather duster to gently wipe away dust. If your driftwood becomes soiled or stained, you can clean it with a mixture of mild soap and water. Avoid using abrasive cleaning products or harsh chemicals, as they can damage the wood and affect its natural appearance.

8.2 Protecting from Moisture

Driftwood is inherently porous and can absorb moisture if not properly protected. To prevent damage from moisture, avoid placing your driftwood crafts in areas with high humidity or direct contact with water. If you have driftwood planters or outdoor driftwood structures, consider applying a waterproof sealant or outdoor varnish to protect the wood from moisture and extend its lifespan.

8.3 Avoiding Direct Sunlight

Prolonged exposure to direct sunlight can cause the colors of driftwood to fade and the wood to become brittle. To preserve the natural beauty of your driftwood crafts, keep them away from windows or areas where they are exposed to intense sunlight. If you do want to display driftwood near a window, consider using UV-protective window film or curtains to filter out the harmful rays of the sun.

9. Showcasing Your Driftwood Creations

Congratulations on creating beautiful driftwood crafts! Now it’s time to showcase and display them in the best possible way. Here are some tips and DIY ideas to help you create visually appealing displays for your driftwood creations:

9.1 Decor Tips for Displaying Driftwood

  • Group similar pieces together: Create visual impact by grouping similar driftwood crafts together. Arrange them on a mantel, shelf, or table, ensuring they are adequately spaced and balanced.
  • Mix textures and materials: Combine driftwood with other natural materials, such as seashells, pebbles, or dried flowers, to create dynamic and interesting displays.
  • Use contrasting backgrounds: Display lighter-colored driftwood against a dark or textured backdrop to make it stand out, or vice versa.
  • Incorporate lighting: Highlight the textures and shadows of your driftwood crafts by adding subtle lighting, such as string lights, spotlights, or candles.
  • Rotate displays seasonally: Change your display with the seasons or holidays to keep your decor fresh and exciting. Add seasonal elements, such as leaves or ornaments, to your driftwood creations for a festive touch.

9.2 DIY Driftwood Display Ideas

  • Driftwood wall shelf: Attach a horizontal piece of driftwood to your wall and use it as a floating shelf to display small decorative items or plants.
  • Driftwood photo frames: Use smaller sections of driftwood to create unique frames for your favorite photographs or artwork. Attach the driftwood pieces around the edges of the photo using strong glue.
  • Driftwood curtain tiebacks: Create rustic and elegant curtain tiebacks by wrapping sections of driftwood in decorative twine and attaching them to the sides of your curtains.
  • Driftwood ladder display: Lean a large driftwood log against a wall and hang lightweight blankets, towels, or scarves from the branches to create a functional and artistic display.
  • Driftwood jewelry holder: Attach smaller pieces of driftwood to a wooden or metal base and use them to hang and organize your necklaces, bracelets, and earrings.

10. Conclusion

Driftwood crafting offers endless possibilities for creativity and decoration. Whether you choose to create wall art, sculptures, jewelry, or functional items like candle holders or planters, working with driftwood allows you to bring a touch of nature’s beauty into your home. Remember to always follow safety precautions, properly clean and prepare your driftwood, and maintain your creations to ensure their longevity. So gather your tools, collect some driftwood, and let your imagination soar as you embark on a satisfying journey of driftwood crafting. Have fun and enjoy the natural beauty of this unique material!

Filed Under: DriftWood Art Tagged With: Decoration, Design, DIY, Driftwood

Brian’s Workshop – 007 (Driftwood Art)

October 1, 2023 by admin

Step into the fascinating world of Brian’s Workshop – 007 (Driftwood Art). In this captivating video brought to you by Shaw Community Link, host Brian Hoffos showcases his incredible talent for transforming ordinary driftwood into exquisite pieces of art. With his do-it-yourself woodwork projects, Brian guides you through the process of creating your own masterpieces.

Join the Shaw Community Link and discover the endless possibilities of woodwork as Brian demonstrates the intricate techniques of working with driftwood. From simple pieces to more complex designs, Brian’s Workshop offers a wide range of projects for all skill levels. Whether you’re a seasoned woodworker or a beginner looking for a new hobby, this video is sure to inspire and ignite your creative spirit. Celebrate, engage, and connect with Brian’s Workshop – the ultimate destination for woodworking enthusiasts.

Brian’s Workshop – 007 (Driftwood Art)

About Brian’s Workshop

Welcome to Brian’s Workshop! In this episode, host Brian Hoffos will guide you through the process of transforming driftwood into a beautiful piece of art. Whether you’re a beginner or a seasoned DIY enthusiast, this project is perfect for anyone looking to unleash their creativity and create a unique artwork. So grab your tools and let’s get started on this exciting driftwood art project!

Introduction to Driftwood Art

Driftwood art is a form of artistic expression that involves using pieces of driftwood, which are naturally weathered and worn by the elements, to create stunning and intricate artworks. The organic shapes and textures of driftwood provide a unique aesthetic that is perfect for creating one-of-a-kind pieces. Not only is driftwood art visually appealing, but it also allows you to repurpose natural materials and give them a new lease on life.

Brians Workshop - 007 (Driftwood Art)

This image is property of i.ytimg.com.

Tools and Materials Needed

Before we dive into the process of creating driftwood art, let’s go over the tools and materials you’ll need for this project. Here’s a list of what you’ll need to get started:

  • Driftwood pieces of varying sizes and shapes
  • Sandpaper (medium and fine grit)
  • Wood glue
  • Clamps
  • Pliers or wire cutters
  • Hammer and nails
  • Saw
  • Paint and brushes (optional)
  • Varnish or sealant

Make sure to gather all these materials before you begin. You can find driftwood at the beach or purchase it from a local supplier specializing in natural materials.

Finding and Preparing Driftwood

The first step in creating your driftwood art masterpiece is finding and preparing the driftwood. Head to your nearest beach or shoreline and keep an eye out for interesting pieces of driftwood. Look for wood that has been naturally weathered and features unique textures and shapes.

Once you’ve collected your driftwood, it’s time to prepare it for the artwork. Start by cleaning the wood using a brush to remove any dirt or debris. Next, use sandpaper to smooth out any rough edges or splinters. Start with a medium grit sandpaper and switch to a finer grit for a smooth finish.

Brians Workshop - 007 (Driftwood Art)

Choosing a Design

Now that your driftwood is clean and prepared, it’s time to choose a design for your artwork. This is where your creativity can truly shine! You can create abstract shapes, animal sculptures, or even incorporate the driftwood into a larger art piece. Sketch out your design or find inspiration from other driftwood art pieces to help you visualize your creation.

Creating the Base

To ensure that your driftwood art is stable and secure, you’ll need to create a base to attach the pieces to. This can be a simple wooden plank or a more intricate wooden frame. Measure and cut the base according to the size and shape of your design. Use a saw to cut the wood and sand any rough edges.

Once you have your base ready, use wood glue to attach the driftwood pieces to the base. Apply the glue generously and press the driftwood firmly onto the base. Use clamps to hold the pieces in place while the glue dries.

Brians Workshop - 007 (Driftwood Art)

Assembling the Driftwood

Once the base is complete, it’s time to assemble the driftwood pieces according to your chosen design. Arrange the pieces on the base and experiment with different orientations until you’re satisfied with the composition. Once you’re happy with the placement, use wood glue to attach the pieces to each other. This may require some patience and precision, but the end result will be well worth it.

Adding Finishing Touches

Now that your driftwood art is assembled, it’s time to add some finishing touches to enhance its visual appeal. If you want to add color to your artwork, you can use paint and brushes to add pops of color to the driftwood or the base. Alternatively, you can leave the driftwood in its natural state for a more rustic look. Get creative and experiment with different techniques to achieve the desired effect.

Sealing and Preserving the Artwork

To protect your driftwood art and ensure its longevity, it’s important to seal and preserve it. Apply a varnish or sealant to the entire artwork, including the base and driftwood pieces. This will not only enhance the colors and textures but also protect the wood from moisture damage and fading.

Displaying and Caring for Driftwood Art

Congratulations, you’ve created a stunning piece of driftwood art! Now it’s time to display and care for your artwork. Choose a location that showcases your piece and complements its unique aesthetic. Avoid placing the art in direct sunlight or areas prone to high humidity, as this can damage the wood over time. Regularly dust and clean the artwork to keep it looking its best.

Conclusion

Driftwood art is a captivating and rewarding DIY project that allows you to unleash your creativity while repurposing natural materials. By following the steps outlined in this article, you can create your own unique driftwood masterpiece. Remember to have fun, experiment with different designs, and let your imagination run wild. So go ahead, gather your tools, and embark on this artistic journey with Brian’s Workshop!

Filed Under: DriftWood Art Tagged With: driftwood art

Driftwood Beach House Dad’s Shack sign poster

April 8, 2019 by admin

Driftwood Beach House Dad’s Shack sign poster

Driftwood Beach House Dad's Shack sign poster

Driftwood Beach House Dad’s Shack sign poster

Driftwood Beach House Dad’s Shack sign poster DAD’S SHACK – Add your own text or own family
name!! customise the text!! It’s so easy. Beachcombers delight, a range of tasteful gifts
inspired by the sea, the sand and the washed up driftwood treasures that can be found there.
Plus a judicious use of Photoshop of course. Check out the full range.

wall poster driftwood beach sign, custom house sign family name, wall poster custom house sign, beach-house paper poster family name, custom beach house poster, driftwood beach house poster, beach yacht ocean family sign, nautical summer house wall poster, driftwood beach custom poster art, dad's shack driftwood sign poster
Driftwood Beach House Dad’s Shack sign poster

Filed Under: DriftWood Art Tagged With: Driftwood

Driftwood Beach House family sign poster

April 8, 2019 by admin

Driftwood Beach House family sign poster

Driftwood Beach House family sign poster

Driftwood Beach House family sign poster

Driftwood Beach House family sign poster. Add your own family name!! customise the text!!
It’s so easy. Beachcombers delight, a range of tasteful gifts inspired by the sea, the sand and
the washed up driftwood treasures that can be found there. Plus a judicious use of Photoshop of
course. Check out the full range.

driftwood beach designer range, wall poster driftwood beach sign, custom house sign family name, wall poster custom house sign, beach-house paper poster family name, custom beach house poster, driftwood beach house poster, beach yacht ocean family sign, nautical summer house wall poster, driftwood beach custom poster art
Driftwood Beach House family sign poster

Filed Under: DriftWood Art Tagged With: Driftwood

Driftwood Beach House family sign poster 2

April 8, 2019 by admin

Driftwood Beach House family sign poster 2

Driftwood Beach House family sign poster 2

Driftwood Beach House family sign poster 2

Driftwood Beach House family sign poster – horizontal version. Driftwood Beach House sign
poster. Add your own family name!! customise the text!! It’s so easy. Beachcombers delight, a
range of tasteful gifts inspired by the sea, the sand and the washed up driftwood treasures
that can be found there. Plus a judicious use of Photoshop of course. Check out the full range.

driftwood beach designer range, wall poster driftwood beach sign, custom house sign family name, wall poster custom house sign, beach-house paper poster family name, custom beach house poster, driftwood beach house poster, beach yacht ocean family sign, nautical summer house wall poster, driftwood beach custom poster art
Driftwood Beach House family sign poster 2

Filed Under: DriftWood Art Tagged With: Driftwood

Crab on Driftwood Canvas Print

April 8, 2019 by admin

Crab on Driftwood Canvas Print

Crab on Driftwood Canvas Print

Crab on Driftwood Canvas Print

A red crab perched on a piece of driftwood on the beach. Pebbles and coarse sand.

red crab, driftwood, pebbles, beach, coarse sand, ocean, sea creature, sea life, nautical, ocean art
Crab on Driftwood Canvas Print

Filed Under: DriftWood Art Tagged With: Driftwood

A giant tree, come ashore as driftwood, on First Canvas Print

April 8, 2019 by admin

A giant tree, come ashore as driftwood, on First Canvas Print

A giant tree, come ashore as driftwood, on First Canvas Print

A giant tree, come ashore as driftwood, on First

AssetID: 116354963 / Ethan Welty / A giant tree, come ashore as driftwood, on First Beach near
La Push, Olympic Peninsula, Washington.

horizontal, outdoors, focus, selective focus, long exposure, usa, water, wave, day, sea, beach, washington state, scenics, color image, coastline, driftwood, copy space, no people, photography, la push beach
A giant tree, come ashore as driftwood, on First Canvas Print

Filed Under: DriftWood Art Tagged With: Driftwood

Driftwood Faux Canvas Print

April 8, 2019 by admin

Driftwood Faux Canvas Print

Driftwood Faux Canvas Print

Driftwood

Every once in a while, we need to escape and spend some quiet time on the beach.

driftwood, beach, ocean
Driftwood Faux Canvas Print

Filed Under: DriftWood Art Tagged With: Driftwood

  • « Previous Page
  • Page 1
  • Page 2
  • Page 3
  • Page 4
  • Page 5
  • Page 6
  • …
  • Page 59
  • Next Page »

Primary Sidebar

Driftwood4us.com, is a participant in the Amazon Services LLC Associates Program, an affiliate advertising program designed to provide a means for sites to earn advertising fees by advertising and linking to amazon.com.