Imagine stumbling upon a little café tucked away in a charming corner of town, with a name that simply piques your curiosity: Lykke Driftwood. This delightful café, named after the Danish word for happiness and the whimsical allure of driftwood, offers a cozy refuge where you can retreat from the hustle and bustle of everyday life. Step inside and be greeted by the warm ambience, filled with fragrant aromas and the buzz of friendly conversations. With its eclectic menu, inviting atmosphere, and attentive staff, Lykke Driftwood promises to be an enchanting experience that will leave you yearning for more.
What is Lykke Driftwood?
Definition
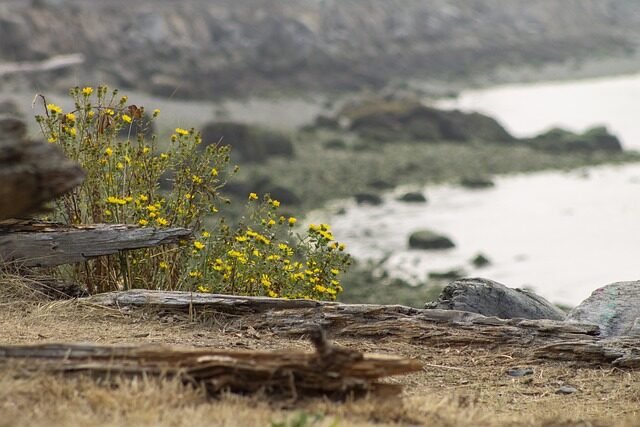
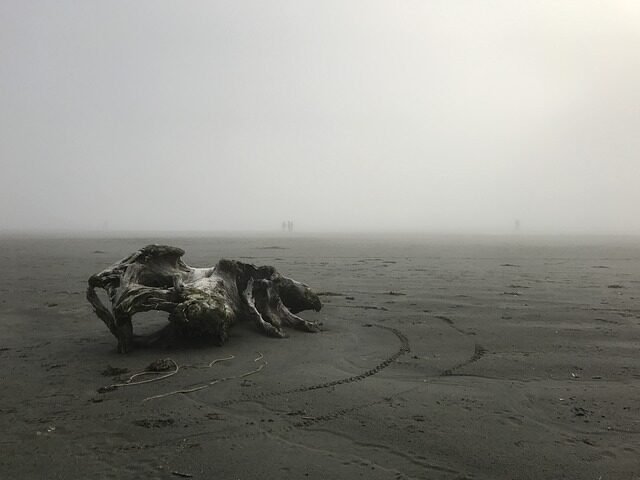
Lykke Driftwood refers to pieces of wood that have been naturally weathered and worn down by the elements, particularly water. These driftwood pieces are often found on coastlines, rivers, or other bodies of water and are known for their unique and beautiful appearance.
Characteristics
Lykke Driftwood is characterized by its smooth texture, bleached or weathered appearance, and unique shapes. The wood has been polished by the constant motion of the water, giving it a distinct and natural beauty. Each piece of Lykke Driftwood is one-of-a-kind, with its own unique patterns, colors, and size.
Origin
Lykke Driftwood originates from various sources, including fallen trees, logs carried by rivers, or branches washed up on shores. Over time, these wooden pieces are shaped by the constant movement of the water, transforming them into unique works of art.
Benefits of Lykke Driftwood
Natural and Eco-friendly
One of the major benefits of Lykke Driftwood is its natural and eco-friendly nature. Unlike mass-produced home decor items, Lykke Driftwood is a sustainable and environmentally conscious choice. By using driftwood in your home decor, you are reducing waste and promoting recycling, as these wooden pieces would have otherwise been left to decay or disposed of. Choosing Lykke Driftwood products means you are making a positive impact on the environment.
Unique Home Decor
Lykke Driftwood brings a unique and natural touch to any home decor. The distinct patterns, textures, and shapes of driftwood make it a perfect choice for adding a rustic and coastal vibe to your living space. Whether you use it as wall art, candle holders, or sculptures, Lykke Driftwood effortlessly enhances the aesthetic appeal of any room.
Versatility and Many Uses
Lykke Driftwood can be utilized in a variety of ways, making it a versatile option for gifting. From wall art and jewelry to wind chimes and picture frames, there are endless possibilities when it comes to using driftwood in creative and artistic ways. Its versatility ensures that there is something for everyone, regardless of their style or preferences.
Lykke Driftwood Gift Ideas
Driftwood Wall Art
One of the most popular uses of Lykke Driftwood is creating stunning wall art pieces. Whether it’s a large driftwood installation or a smaller piece incorporated into a mixed-media artwork, driftwood wall art adds a unique and natural element to any space.
Driftwood Candle Holders
For a cozy and romantic ambiance, driftwood candle holders are a perfect choice. These candle holders, crafted from beautifully shaped driftwood pieces, create a warm and rustic atmosphere in any room.
Driftwood Jewelry
Driftwood can also be transformed into stunning pieces of jewelry, such as necklaces, bracelets, and earrings. The natural beauty of the driftwood makes these jewelry pieces unique and eye-catching.
Driftwood Hanging Shelves
Driftwood hanging shelves are a practical and stylish way to display small plants, books, or decorative items. These shelves add a touch of natural charm to any room and are a great gift option for those who love both functionality and aesthetics.
Driftwood Wind Chimes
The soothing sound of wind chimes is always a delightful addition to any outdoor space. Driftwood wind chimes, with their unique shapes and textures, create a calming and melodious atmosphere wherever they are hung.
Driftwood Picture Frames
Adding a driftwood picture frame to your favorite photographs or artwork is a wonderful way to showcase cherished memories. The natural and rustic charm of the driftwood enhances the beauty of the picture and adds a personal touch to your decor.
Driftwood Mobiles
Driftwood mobiles are a perfect gift for children or anyone who appreciates whimsical and artistic decor. These mobiles, crafted from driftwood and assorted trinkets, create a captivating display that adds charm and wonder to any space.
Driftwood Garden Decor
Bring the natural beauty of driftwood to your garden with driftwood planters, birdhouses, or garden sculptures. These unique and eco-friendly decor pieces will transform your outdoor space into a serene and enchanting oasis.
Driftwood Keychains
Driftwood keychains are small and portable gift options that make a big impact. Carved or shaped driftwood pieces attached to keychains add a rustic and natural touch to everyday items.
Driftwood Sculptures
For those who appreciate art and craftsmanship, driftwood sculptures are an excellent gift choice. These intricate and carefully crafted pieces showcase the beauty of the natural wood and create a stunning focal point in any room.
How to Choose Lykke Driftwood Gifts
Consider the Recipient’s Style and Preferences
When selecting a Lykke Driftwood gift, it’s important to consider the recipient’s personal style and preferences.
Check for Quality and Durability
To ensure that your Lykke Driftwood gift lasts for years to come, it’s essential to check for quality and durability. Inspect the driftwood for any signs of damage or weakness, such as cracks or splintering. Choose pieces that are sturdy and well-crafted, as they are more likely to withstand the test of time.
Consider the Size and Scale
Consider the size and scale of the Lykke Driftwood gift in relation to the recipient’s living space. A large driftwood sculpture may overpower a small room, while a tiny piece may get lost in a larger space. Aim for a balance that ensures the gift will be noticed and appreciated without overwhelming the surroundings.
Think about the Practicality
While the aesthetic appeal of Lykke Driftwood gifts is undeniable, it’s also important to consider their practicality. Will the gift serve a functional purpose or act purely as a decorative item? Considering the practicality ensures that the recipient will be able to enjoy and make use of the gift in their daily life.
Consider the Purpose and Placement
Lastly, think about the purpose and placement of the Lykke Driftwood gift. Will it be a focal point in a room, or blend seamlessly into the existing decor? Will it be displayed indoors or outdoors? Taking into account the purpose and intended placement of the gift ensures that it will be appreciated and admired in its intended environment.
DIY Lykke Driftwood Gift Ideas
Driftwood Dream Catcher
Create a unique and beautiful driftwood dream catcher using a combination of driftwood pieces, feathers, and decorative string. This DIY project makes for a meaningful and personalized gift.
Driftwood Coastal Wreath
Craft a coastal-themed wreath using various sizes and shapes of driftwood. Add seashells, rope, or other beach-inspired elements for a charming and eye-catching front door decor piece.
Driftwood Jewelry Organizer
Transform a driftwood branch into a practical and stylish jewelry organizer. Attach hooks or small nails to the driftwood and hang necklaces, bracelets, and earrings for a functional and visually pleasing storage solution.
Driftwood Wall Hanging
Combine driftwood pieces with macrame or other textile materials to create a stunning wall hanging. This DIY project allows for endless creativity and customization, making it a meaningful and unique gift.
Driftwood Terrarium
Build a mini terrarium using driftwood as the base. Add small succulents or air plants, along with decorative stones or moss, for a delightful and low-maintenance gift that brings a touch of nature indoors.
Driftwood Mirror Frame
Revamp a plain mirror by using driftwood pieces to create a rustic and coastal-inspired frame. This DIY project adds character and charm to any mirror, making it a thoughtful and personalized gift.
Driftwood Sconces
Craft stylish and natural driftwood sconces by attaching candle holders to driftwood branches. These sconces create a warm and inviting atmosphere in any room when paired with candles.
Driftwood Wine Rack
Build a unique wine rack using driftwood pieces. This DIY project adds a touch of elegance and nature to any wine enthusiast’s home, making it a perfect gift for wine lovers.
Driftwood Table Centerpiece
Create a captivating driftwood table centerpiece by arranging driftwood pieces in a decorative bowl or tray. Add candles, seashells, or other coastal elements to enhance the aesthetic appeal.
Driftwood Planters
Transform driftwood pieces into charming planters for small succulents or herbs. This DIY project brings nature indoors and makes for a thoughtful and eco-friendly gift option.
Where to Buy Lykke Driftwood Gifts?
Online Marketplaces
Online marketplaces such as Etsy, Amazon, and eBay offer a wide variety of Lykke Driftwood gifts. You can browse through different products, compare prices, and read reviews to find the perfect gift for yourself or your loved ones.
Local Artisan Fairs and Craft Shows
Support local artisans and discover unique Lykke Driftwood gifts by visiting artisan fairs and craft shows in your area. These events often showcase handmade and one-of-a-kind pieces that cannot be found elsewhere.
Specialty Home Decor Stores
Specialty home decor stores may carry Lykke Driftwood gifts, particularly those with a coastal or rustic theme. Visit these stores to explore a curated selection of driftwood products and seek expert advice on choosing the perfect gift.
Beachside Souvenir Shops
If you are near a beach or coastal area, souvenir shops are a great place to find Lykke Driftwood gifts. These shops often source driftwood locally and offer a range of unique and coastal-inspired products.
Antique and Vintage Stores
Antique and vintage stores can be treasure troves for finding Lykke Driftwood gifts with a historical or vintage charm. You may come across beautifully aged driftwood pieces that evoke a sense of nostalgia.
Lykke Driftwood Gift Wrapping Ideas
Natural Brown Paper and Twine
Wrap your Lykke Driftwood gift in natural brown paper, giving it an organic and earthy look. Tie it together with twine for a simple yet elegant finishing touch.
Decorative Sea-inspired Wrapping Paper
Opt for decorative wrapping paper with sea-inspired prints or motifs, such as seashells, waves, or nautical themes.
Rustic Gift Baskets
Place your Lykke Driftwood gift in a rustic gift basket with some dried grass or straw. This not only presents the gift beautifully but also adds an element of nature and rusticity.
Driftwood Tags and Embellishments
Attach a small piece of driftwood as a tag or embellishment to your wrapped gift. This adds a personal and thematic touch, enhancing the overall presentation.
Dried Flowers and Seashells
Enhance your Lykke Driftwood gift by adding dried flowers or seashells to the gift wrapping. This adds a delicate and whimsical touch, paying homage to the coastal beauty of driftwood.
Lykke Driftwood as a Sustainable Gift Option
Reducing Waste and Promoting Recycling
Choosing Lykke Driftwood gifts not only adds a unique touch to your decor but also promotes sustainability. By repurposing driftwood, you are reducing waste and giving new life to discarded materials.
Preserving Natural Beauty
Lykke Driftwood gifts showcase the natural beauty of wood that has been sculpted by the elements. By incorporating driftwood into your decor, you are preserving the inherent beauty of these unique pieces and appreciating the wonders of nature.
Supporting Local Artisans and Small Businesses
Many Lykke Driftwood gifts are handmade by local artisans or small businesses.

Eco-friendly Alternative to Mass-produced Products
In a world dominated by mass-produced products, Lykke Driftwood gifts offer a refreshing alternative. By opting for handmade or naturally sourced products, you are choosing items with a lower environmental impact while adding a touch of individuality to your gift-giving.
Caring for Lykke Driftwood Gifts
Regular Dusting and Cleaning
To keep your Lykke Driftwood gifts looking their best, it is important to regularly dust and clean them. Use a soft cloth or brush to remove any dirt or dust that may have accumulated on the surface of the driftwood.
Avoiding Direct Sunlight and Moisture
Direct sunlight and excessive moisture can cause the color of the driftwood to fade or the wood to deteriorate. To ensure the longevity of your Lykke Driftwood gifts, it is best to keep them away from windows or areas prone to moisture.
Treating with a Protective Finish
To protect the surface of your Lykke Driftwood gifts, you can apply a protective finish. Be sure to choose a finish that is suitable for use on wood and follow the manufacturer’s instructions for application.
Repairing and Restoring Driftwood
If your Lykke Driftwood gift becomes damaged or starts to show signs of wear, don’t worry. You can repair and restore it with a few simple steps. Fill any cracks or holes with wood filler, sand down any rough edges, and apply a fresh coat of finish to restore its beauty.
Conclusion
Lykke Driftwood gifts offer a unique and eco-friendly option for adding natural charm and beauty to any home decor. From wall art to jewelry and beyond, the versatility of driftwood allows for endless creative possibilities. When choosing or creating Lykke Driftwood gifts, consider the recipient’s style, check for quality and durability, and think about the practicality and purpose of the gift. Whether purchased from online marketplaces or found in local stores, Lykke Driftwood gifts make for thoughtful and sustainable presents. By caring for these gifts and appreciating their natural beauty, you can enjoy them for years to come.


