Diy Balcony Storage Bench Ideas
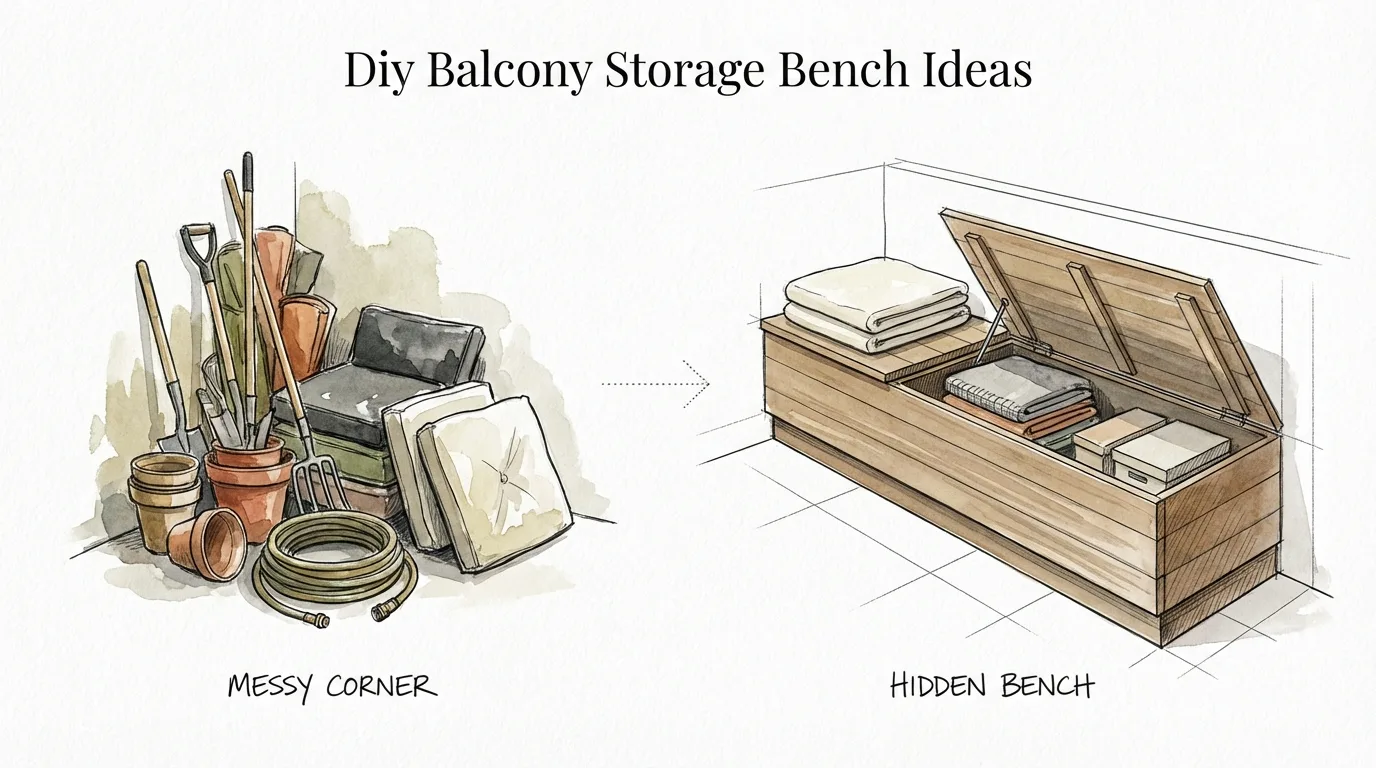
The secret to a 50 sq ft oasis is hiding the mess in plain sight. If your balcony feels like a storage unit, you’re doing it wrong.  . Build a dual-purpose storage bench to reclaim your peace of mind and your square footage.
Living in the city usually means sacrificing space. Your balcony shouldn’t be the place where old potting soil and folded chairs go to die. It should be your sanctuary. A DIY balcony storage bench is the ultimate “cheat code” for urban dwellers. It offers a place to sit and a place to hide the clutter.
Imagine sliding onto a cedar bench with a coffee in hand. You aren’t looking at bags of charcoal or messy garden tools. They are tucked away right beneath you. This project is approachable even for beginners. It requires basic tools and a weekend of effort. The result is a custom piece of furniture that fits your space perfectly.
Every inch counts when you are dealing with limited square footage. Standard furniture often leaves awkward gaps. Building your own allows you to maximize every millimeter. You can match the wood to your floor or contrast it for a bold look. Let’s transform that concrete slab into a high-end retreat.
Diy Balcony Storage Bench Ideas
A DIY balcony storage bench is a multi-functional furniture piece designed to provide seating while doubling as a storage chest. In the world of small-space design, these are often called “double-duty” pieces. They solve the two biggest problems of apartment living: where to sit guests and where to put the “extra stuff.” These benches are typically built using weather-resistant materials to withstand rain, sun, and humidity.
Think of it as a trunk that you can actually sit on. Real-world applications range from tiny Juliet balconies to expansive rooftop terraces. On a narrow balcony, a slim storage bench along the railing creates a pathway while providing a place to lounge. In a corner, an L-shaped bench can turn a dead zone into a social hub. These projects exist because store-bought options are often too big, too small, or made of cheap plastic that cracks after one season in the sun.
Visualizing the concept is easy. Picture a sleek wooden box with a hinged top. You might see vertical slats for a modern look or a solid plywood face for something more industrial. Some people build them with “IKEA hacks” using pre-existing units, while others start from scratch with raw lumber. Whether you need to store bulky cushions or small hand trowels, the design is entirely up to you.
The Classic Box Bench
This is the most popular design for beginners. It is essentially a sturdy rectangular box with a reinforced lid. It works in almost any space. You can use it as a standalone seat or push it against a wall. The flat top also makes it a great secondary surface for drinks or books when you aren’t sitting on it.
The L-Shaped Sectional
If you have a corner to fill, this is the gold standard. It provides maximum seating for gatherings. One side usually remains a dedicated bench, while the other holds the storage compartment. It creates a “nook” feeling that makes even the smallest balcony feel like a room.
The Slat-Style Modernist
This design uses thin wood slats with small gaps between them. It looks incredibly high-end and airy. The gaps aren’t just for style; they provide ventilation. This is crucial if you are storing items that might get slightly damp, like gardening gloves or outdoor rugs.
How to Build Your Storage Bench Step-by-Step
Building a storage bench is a process of layering. You start with a strong skeleton and then dress it up. Underlying principles include structural integrity for seating and weatherproofing for longevity. Follow these steps to ensure your bench doesn’t just look good but lasts for years.
Step 1: Measurement and Planning
Measure your balcony twice. You need to account for door swings and drainage slopes.  . Most balconies slope slightly away from the building. Ensure your bench won’t trap water against the wall. Decide on a height (standard is 17–19 inches) and depth (standard is 16–20 inches).
Step 2: Material Selection
Choose your wood wisely. Cedar and teak are the kings of the outdoors because they have natural oils that resist rot. Pressure-treated pine is a budget-friendly alternative. You will also need exterior-rated screws (stainless steel or galvanized) and heavy-duty hinges. Do not use interior screws; they will rust and fail within months.
Step 3: Constructing the Frame
Build the “skeleton” using 2×4 or 2×2 lumber. Create two rectangular frames for the top and bottom. Connect them with four vertical corner posts. Use wood glue and pocket hole screws for the strongest joints. Make sure the frame is perfectly square using a carpenter’s square.
Step 4: Adding the Siding
Attach your “skin” to the frame. This could be plywood panels or individual slats. If using slats, use a spacer (like a 1/4 inch scrap of wood) to keep the gaps even. This gives the bench its finished look. Attach the siding from the inside if you want to hide the screw heads.
Step 5: The Lid and Hinges
Build a solid lid that overhangs the bench by about half an inch. This helps shed water away from the storage area. Use T-hinges or piano hinges for a smooth open. For an advanced touch, add gas struts (like the ones on a car trunk) so the lid stays open while you’re digging for supplies.
Step 6: Finishing and Sealing
Sand everything smooth. Apply a high-quality outdoor stain or sealer. Even rot-resistant wood like cedar needs protection from UV rays to prevent it from turning gray. If you want a pop of color, use exterior-grade latex paint with a primer.
Benefits of a DIY Storage Bench
The practical benefits of building your own bench are measurable. First, you get a custom fit. Most retail furniture is “one size fits most,” which rarely works in the odd corners of urban apartments. By building it yourself, you reclaim the maximum amount of usable space.
Another major advantage is durability. Store-bought “resin” storage boxes are prone to UV degradation. They become brittle and eventually crack. A wooden DIY bench made of cedar or teak can last 15 to 20 years with minimal maintenance. It is an investment in your home’s functionality.
Consider the psychological benefit. Clutter is a known stressor. Having a dedicated “hidden” spot for your outdoor mess immediately calms the environment. You are effectively turning a storage problem into a lifestyle solution. Plus, the sense of accomplishment from building something with your own hands is a massive boost.
- Cost Savings: High-end teak benches can cost over $1,000. You can build a similar version for $200–$400.
- Customization: You choose the color, the wood, and the features (like built-in cup holders).
- Increased Property Value: Well-made outdoor furniture makes a balcony look like an intentional living space during resale.
Challenges and Common Mistakes
One common pitfall is ignoring the weight. A solid wood bench filled with heavy tools can put significant stress on a balcony. Always check your building’s weight limits. Most modern concrete balconies handle 40–60 lbs per square foot, but older wood-frame structures may be much lower.
Another mistake is failing to allow for wood expansion. Wood is a living material. It grows and shrinks with humidity. If you build your bench too tightly without gaps or flexible joints, the wood will warp or crack. This is why “slat” designs are often safer for beginners than solid plywood boxes.
Drainage is often forgotten. If your bench sits flat on the floor, water will pool underneath it. This leads to mold and rot. Always add “feet” or small plastic glides to the bottom of your bench to keep it a quarter-inch off the ground. This allows air to circulate and water to flow toward the balcony drain.
Using the wrong hardware is a silent killer. Standard zinc screws will react with the tannins in cedar and leave ugly black streaks down your wood. Always use stainless steel or specifically coated “deck screws.” It seems like a small detail, but it determines if your bench looks professional or amateur after the first rainstorm.
Limitations: When This May Not Be Ideal
A DIY storage bench isn’t always the right answer. Environmental constraints play a huge role. If your balcony is completely exposed to extreme salt spray (right on the ocean), even the best wood will require intense monthly maintenance. In these cases, high-quality marine-grade polymer might be a better, albeit less “DIY-friendly,” choice.
Rental restrictions can also be a hurdle. Some HOAs or landlords prohibit “built-in” furniture that is attached to the structure. If you cannot drill into the walls or floor, your bench must be completely freestanding and heavy enough not to move in high winds. Always check your lease before you start sawing.
Finally, consider your physical ability and tool access. While this is a beginner project, it still involves heavy lifting and sharp tools. If you don’t have a space to cut wood (like a garage or a workshop), doing it on a small balcony can be messy and loud, potentially annoying your neighbors. You might need to have your lumber pre-cut at the hardware store.
DIY Build vs. Store-Bought Comparison
Choosing between building and buying depends on your budget, time, and how long you plan to live in your current space. A custom build offers the best value for long-term residents, while a store-bought unit is a quick fix for a temporary lease.
| Feature | DIY Custom Bench | Store-Bought (Retail) |
|---|---|---|
| Average Cost | $150 – $400 | $200 – $1,200 |
| Durability | High (Solid Wood) | Medium to Low (Plastic/MDF) |
| Lifespan | 15+ Years | 3 – 7 Years |
| Fit | Perfect (Millimeter Precision) | Standard (Fixed Sizes) |
| Complexity | Moderate (Requires Tools) | Low (Flat Pack Assembly) |
Practical Tips and Best Practices
Apply these tips immediately to elevate your project from a basic box to a piece of professional furniture. These adjustments improve efficiency and maintenance.
Use a breathable liner. Instead of just throwing items into the wooden box, staple a heavy-duty landscape fabric or a plastic bin inside. This keeps the wood from touching wet soil or damp rags, preventing rot from the inside out. It also prevents spiders from making your storage bench their new headquarters.
Invest in Sunbrella fabric. If you are adding cushions to the top of your bench, do not use standard indoor pillows. They will mold within a week. Sunbrella or similar outdoor-rated acrylic fabrics are UV resistant and hydrophobic. They might cost more upfront, but they won’t fade or smell.
Don’t skip the sanding. Sanding isn’t just for looks. On a bench, rough edges can snag your clothes or give you splinters. Use 80-grit sandpaper to shape the edges and 120-grit for the final finish. Pay extra attention to the corners where people’s legs will rub against the wood.
- Level the legs: Use adjustable furniture feet to compensate for the balcony’s slope.
- Pre-drill holes: Always pre-drill your screw holes. This prevents the wood from splitting, especially near the ends of boards.
- Weatherstripping: Add a thin layer of rubber weatherstripping under the lid to make the storage compartment nearly waterproof.
Advanced Considerations for Serious Makers
For those who want to go beyond the basics, consider modularity and integrated tech. If you live in an apartment, you will eventually move. Design your bench in sections that can be unbolted. This makes it much easier to carry down a flight of stairs or fit into a moving truck.
Integrated lighting is another game-changer. You can install low-voltage LED strip lights under the lip of the bench. This provides “under-glow” that makes your balcony look like a luxury lounge at night. It also helps you see what you’re grabbing from the storage area after the sun goes down.
If you are a serious plant parent, consider a “hybrid” bench. You can leave one end of the bench open as a built-in planter box. Ensure this section is lined with pond liner and has its own drainage hole that leads away from the storage side. This creates a seamless look where the greenery appears to be growing out of your seating.
Pneumatic lid stays are a small investment that offers a “premium” feel. Instead of the lid slamming shut, these hydraulic arms allow it to close slowly and safely. This is especially important if you have children or if you want to avoid loud bangs that might bother your neighbors in the middle of the night.
Real-World Examples and Scenarios
Let’s look at how this works in practice. Take “Scenario A”: A 4×10 foot balcony in a downtown high-rise. . The owner has three bags of potting soil, two folding chairs, and a bag of charcoal cluttering the corner. By building a 6-foot long, 18-inch deep bench along the short wall, all of that mess disappears. The owner now has permanent seating for three people and enough room for a small bistro table in the center. The balcony feels twice as large because the floor is finally visible.
In “Scenario B,” a corner patio gets an L-shaped storage bench build. The user builds the frame out of pressure-treated lumber for cost but faces it with Western Red Cedar for beauty. They add a 3-inch foam cushion upholstered in a deep navy outdoor fabric. The result is a “nook” that functions as an outdoor living room. They use the storage compartment specifically for a heavy-duty weather cover, which they pull out to protect their table when a storm is coming.
Simple numbers show the value. A standard bag of potting soil is about 1 cubic foot. A 48-inch bench that is 18 inches deep and 18 inches high offers roughly 9 cubic feet of storage. That is enough room for 6 bags of soil, several hand tools, and a watering can—all tucked away in a space that used to just be “dead air.”
Final Thoughts
The secret to a functional home isn’t always more space; it is smarter space. A DIY balcony storage bench is a perfect example of intentional design. It tackles the clutter of urban living while adding comfort and style. By choosing the right materials and following a structured build process, you create a piece of furniture that outlasts anything found in a big-box store.
Don’t let the technical details intimidate you. Start with a simple plan and take it one cut at a time. Whether you choose the luxury of teak or the rustic charm of cedar, the goal is the same: reclaim your oasis. Once you see the “mess” disappear into your new bench, you will wonder how you ever lived without it.
Experiment with colors and textures to make the space your own. This project is just the beginning. Once you master the storage bench, you might find yourself looking at vertical planters or custom folding tables. The more you build, the more your balcony becomes a true extension of your home. Get your tools ready—it’s time to build your retreat.
Sources
1 helpfuldestination.com (https://helpfuldestination.com/best-balcony-storage-for-small-spaces/) | 2 luxenhome.com (https://luxenhome.com/blogs/the-workshop/top-space-saving-furniture-picks-for-small-apartments) | 3 wilkerdos.com (https://wilkerdos.com/easy-diy-storage-bench/) | 4 declutterinminutes.com (https://declutterinminutes.com/storage-benches-for-small-home-storage/) | 5 wilkerdos.com (https://wilkerdos.com/how-to-build-a-storage-bench-in-8-easy-steps/) | 6 timbercity.co.za (https://timbercity.co.za/blog/home-improvement-trends-and-inspiration/patio-storage-bench-plans-the-ultimate-guide-to-building-your-own/) | 7 designcafe.com (https://www.designcafe.com/blog/home-interiors/balcony-storage-ideas/) | 8 povison.com (https://www.povison.com/guide/best-storage-furniture-for-small-spaces) | 9 familyhandyman.com (https://www.familyhandyman.com/project/how-to-build-an-outdoor-storage-bench/) | 10 decoroutdoor.com (https://decoroutdoor.com/blog/outdoor-furniture-materials-guide-frames-tabletops-wood/) | 11 manmadediy.com (https://www.manmadediy.com/outdoor-storage-bench/) | 12 quantumbazaar.com (https://www.quantumbazaar.com/teak-wood-vs-cedar-wood-which-is-better-for-outdoor-furniture/) | 13 forestplywood.com (https://forestplywood.com/blog/lumber/the-best-types-of-wood-for-outdoor-furniture/) | 14 eco-outdoor.com (https://www.eco-outdoor.com/en-us/outdoor-design/teak-vs-cedar-outdoor-furniture) | 15 urbanmicrotips.com (https://urbanmicrotips.com/balcony-weight-limits-renters/)