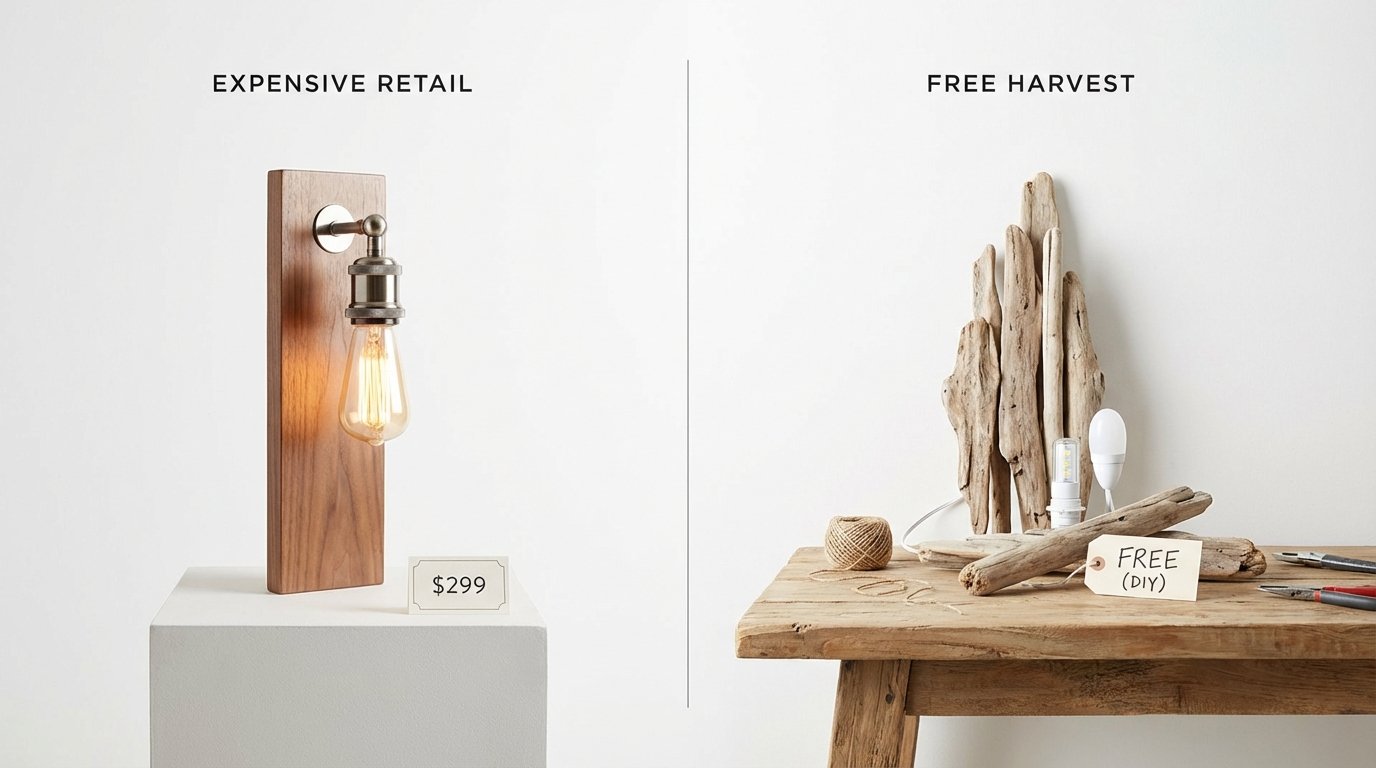
Diy Driftwood Sconce Cost Comparison
The ocean doesn’t charge for its masterpieces, so why are you paying a middleman for the tide’s leftovers? Retailers will charge you a premium for ‘distressed’ wood that was actually made in a factory. Meanwhile, the most beautiful, authentic, and durable light fixtures are being delivered to your local shoreline every day for exactly $0. Stop spending your paycheck on a ‘vibe’ that you can harvest yourself with a simple wiring kit and a morning walk.
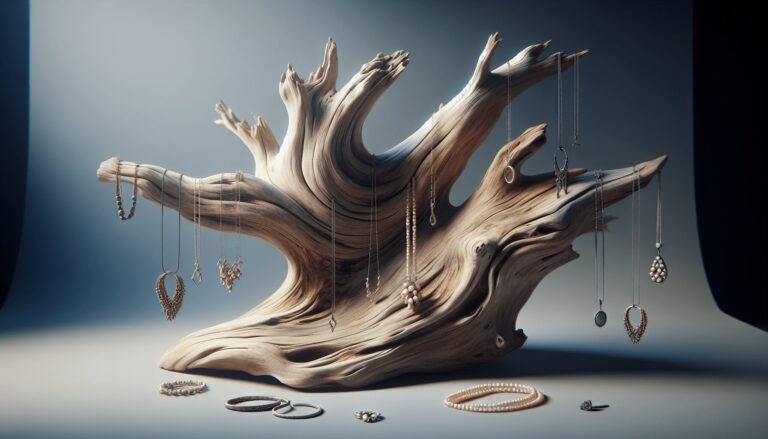
Finding a piece of wood that has been tumbled by the Pacific or bleached by the Atlantic for a decade is more than just a hobby. It is a way to bring the raw, unyielding energy of the coast into a home without the sterile polish of a big-box store. A DIY driftwood sconce is a marriage of utility and natural history. You are taking something the world threw away and turning it into a focal point that breathes life into a room.
Building your own lighting isn’t just about saving money, though the savings are substantial. It is about the grit of the process: the hunt for the right branch, the patient cleaning of salt and sand, and the careful assembly of electrical components. This guide will walk you through every step of the journey, from the beach to the bedroom wall.
Diy Driftwood Sconce Cost Comparison
A DIY driftwood sconce is the ultimate exercise in high-end aesthetics on a shoestring budget. If you walk into a luxury home goods store like West Elm or browse curated collections on One Kings Lane, you will see ‘driftwood-inspired’ or authentic driftwood lighting priced anywhere from $100 to over $600 per fixture [1.26, 1.27]. These pieces are often marketed as artisanal, but they carry the heavy markup of retail overhead and global shipping.
Retail versions often use cast resin or mass-produced wood that has been sandblasted to mimic the real thing. When you harvest your own, the wood is free. Your only real costs are the electrical components and the mounting hardware. A basic plug-in pendant kit or a simple candelabra wiring set generally costs between $10 and $25 [1.15, 1.23]. Add in a few dollars for heavy-duty drywall anchors or a mounting bracket, and you are looking at a total investment of roughly $30 for a piece that looks like it belongs in a Five-Star coastal resort.
The value isn’t just in the dollars saved. It is in the authenticity of the material. A factory can’t replicate the specific patterns of wood rot, the unique curves created by years of tidal pressure, or the silvery patina of genuine sun-bleaching. You are trading a few hours of labor for a one-of-a-kind sculpture that also happens to light up your hallway.
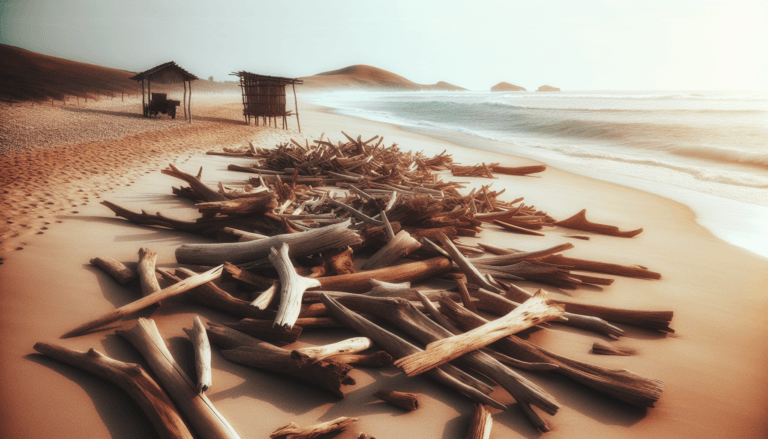
The Hunt: Where and How to Harvest
The foundation of a great sconce is the wood itself. You are looking for ‘character’ wood—pieces with interesting bends, forks, or a particularly weathered texture. Hardwoods like oak, cedar, or cypress are the gold standard because they hold up best to the drilling and mounting process [1.13]. Softwoods can work, but they are more prone to crumbling if they have spent too long submerged.
Before you start filling your trunk, you must understand the local laws. 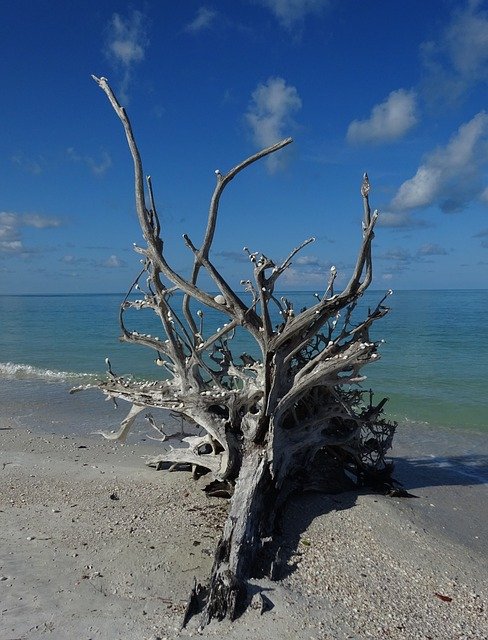 . Regulations vary wildly depending on where you are. In many areas, such as Washington State DNR beaches, you can legally collect driftwood for personal use, but taking wood from National Parks or State Parks is strictly prohibited and can result in heavy fines [1.5, 1.16]. In California, personal collection is often limited to 50 pounds or one piece per day [1.22]. Always check with the local Department of Natural Resources to ensure your harvest is legal and ethical.
Look for wood that is ‘bone dry’ and has already lost its bark. Bark is where most pests hide, and a barkless piece is a sign that the ocean has already done the heavy lifting of cleaning the wood for you. Avoid pieces that feel ‘spongy’ or have a chemical smell, as these may have been treated with creosote or other toxic preservatives [1.7].
The Preparation: Cleaning and Curing
Nature is beautiful, but it can be dirty. Driftwood is often a high-rise apartment for sand gnats, mold spores, and algae [1.10]. Bringing a raw piece of wood into your home without cleaning it is an invitation for trouble. The goal is to sanitize the wood without destroying its natural silver-gray patina.
The first step is a thorough scrubbing. Use a stiff-bristle brush and plain water to knock off loose sand, salt, and dried seaweed [1.7, 1.9]. Once the surface is clean, you need to disinfect the interior. A solution of one part household bleach to nine parts water is the industry standard for home decor prep [1.4, 1.10]. Submerge the wood in this mixture for 12 to 24 hours. This kills any remaining bacteria and helps even out the wood’s color by lifting dark tannin stains [1.10].
After the bleach bath, rinsing is critical. Hose the wood down thoroughly and let it dry in a sunny, well-ventilated area. This can take anywhere from a few days to a full week depending on the thickness of the branch [1.10]. 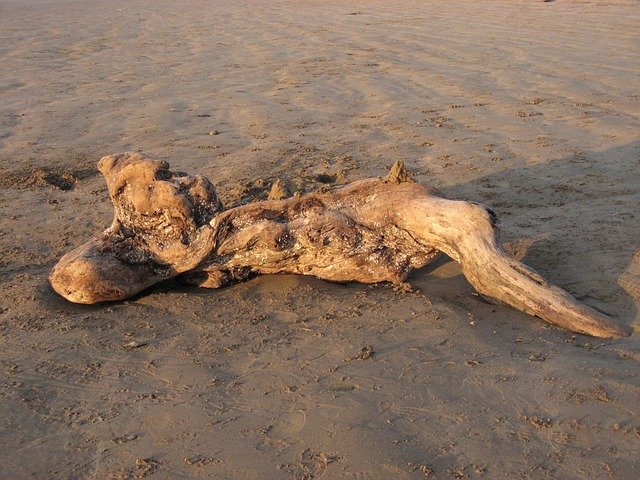 . If you are in a rush, some makers use a low-heat oven (around 110°F) to speed up the process, but air drying is safer for the wood’s structural integrity [1.7, 1.9].
The Build: Wiring and Assembly
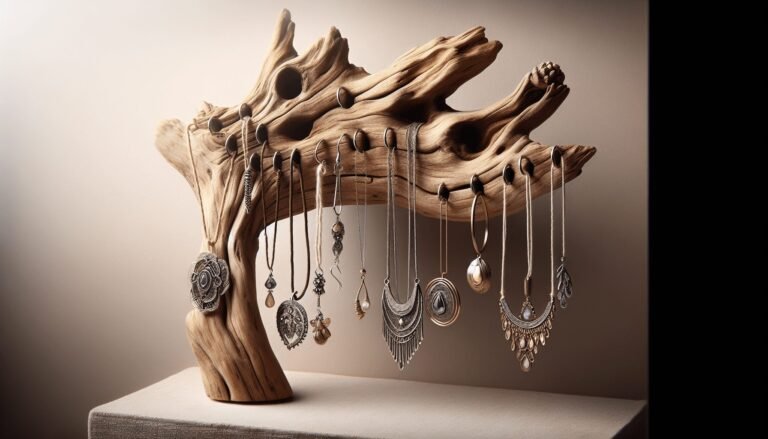
Transforming a branch into a light fixture requires a basic understanding of electrical components. You have two main choices: a ‘plug-in’ style or a ‘hardwired’ style. For most beginners, a plug-in pendant kit with a toggle switch is the easiest route. These kits come pre-assembled with a plug, a cord, and a socket, meaning you don’t have to worry about complex wiring [1.13, 1.19].
If you want the cord to be invisible, you will need to drill through the center of the wood. This is where a ‘ship auger bit’ becomes your best friend. These long, spiral bits are designed to bore deep, straight holes through thick timber [1.11, 1.12]. Drilling slowly and clearing chips frequently will prevent the bit from binding or cracking the wood.
Once the hole is bored, thread the cord through and secure the socket at the top. You can use a bit of wood glue or a small set screw to keep the socket from wobbling. For a more ‘pioneer’ look, some builders prefer to wrap the cord around the exterior of the wood using decorative manila rope or leather thongs to hide the wire while adding a secondary texture [1.2, 1.13].
Benefits of DIY Driftwood Lighting
Creating your own lighting offers more than just a sense of accomplishment. It allows for complete customization of the ‘temperature’ and ‘feel’ of your space. Most retail lamps come with standard sockets and generic shades. When you build your own, you choose the cord color, the socket material (brass, nickel, or ceramic), and the type of bulb that best suits your room’s vibe.
Authentic driftwood is incredibly durable. Because it has survived the harsh environment of the ocean, it is naturally resistant to many of the issues that plague standard lumber. It has already done its shrinking and warping. What you see is what you get, and a well-prepped piece will last for decades as a permanent fixture in your home.
There is also the undeniable benefit of the story. Every time someone asks where you got your light, you aren’t pointing to a catalog; you are recounting a morning spent on a specific beach and the work you put into making it functional. That level of personal connection to your decor is something money simply cannot buy.
Challenges and Common Mistakes
The biggest mistake beginners make is failing to account for the weight of the wood. Driftwood can be deceptively heavy, especially if it hasn’t fully dried out. Mounting a heavy branch to a wall using only standard screws will eventually result in a hole in your drywall and a broken fixture. Always use heavy-duty toggle bolts or find a stud when mounting [1.13, 1.14].
Electrical safety is another area where shortcuts lead to disaster. Because wood is flammable, you must ensure that the light bulb is not in direct contact with the driftwood [1.14]. Using LED bulbs is a smart move because they produce very little heat compared to traditional incandescent bulbs [1.23]. Furthermore, never use a cord that is frayed or a socket that feels loose.
Another common pitfall is over-bleaching. While you want to kill the bugs, leaving wood in a high-concentration bleach solution for too long can break down the lignin—the stuff that keeps wood strong [1.10]. This leads to ‘pulpy’ wood that crumbles when you try to drill it. Stick to the 1:9 ratio and the 24-hour limit to keep the wood structurally sound.
Limitations of This Method
While driftwood is versatile, it isn’t always the right choice for every environment. In extremely humid rooms, like a small bathroom without a fan, untreated driftwood can eventually develop mold if it wasn’t sealed correctly during the preparation phase [1.3]. In these cases, applying a matte polyurethane or a wood oil is necessary to create a moisture barrier.
Scale is also a limitation. Finding the perfect piece for a large double-sconce can be difficult. Nature doesn’t often provide two perfectly symmetrical branches. If you need a matching pair, you may have to hunt for weeks or settle for ‘complementary’ pieces rather than identical ones. This ‘asymmetry’ is part of the charm, but it can be frustrating for those who prefer a more formal, balanced interior design.
Finally, the legality of collection cannot be ignored. If you live in a landlocked state or an area with strict environmental protections, sourcing the wood may require a road trip or an online purchase. Buying driftwood online is an option, but it adds to the cost and removes the personal experience of the hunt.
Practical Tips and Best Practices
Invest in the right tools. A standard twist bit won’t make it through a 10-inch branch. Buy a 12-inch or 18-inch auger bit if you plan on doing internal wiring [1.11, 1.17]. It will save you hours of frustration and potentially save your piece of wood from cracking.
Test your mount before wiring. Hold the wood against the wall and mark exactly where you want it. Sometimes a branch looks great on the table but awkward once it’s vertical. Use a temporary ‘french cleat’ or a heavy-duty keyhole hanger to ensure the wood sits flush against the wall [1.14, 1.18].
Don’t skip the sealer. If you like the raw look, use a dead-matte finish. This protects the wood from dust and fingerprints without giving it a ‘plastic’ shine. For a more rustic look, linseed oil or even simple cooking oil can bring back some of the wood’s natural depth after the bleaching process [1.3, 1.7].
Advanced Considerations
For those looking to take their craft to the next level, consider integrating smart home technology. Using a smart bulb allows you to dim your driftwood sconce via phone or voice command, which is perfect for creating an evening ‘mood’ without having to install a physical dimmer switch. This is particularly useful for plug-in fixtures that might have hard-to-reach toggle switches.
You can also experiment with ‘mixed media.’ Incorporating elements of copper piping or iron brackets can transition the look from ‘coastal’ to ‘industrial-organic.’ Using a Forstner bit to create a recessed ‘pocket’ for the socket allows the light to appear as if it is growing directly out of the wood [1.15].
If you are comfortable with basic carpentry, you can create ‘shadow box’ sconces. By mounting thin slices of driftwood inside a wooden frame, you can create a back-lit art piece that provides a soft, diffused glow rather than a direct light. This technique is excellent for hallways where you want subtle guidance rather than bright illumination [1.14, 1.23].
Example Scenario: The Minimalist Entryway Sconce
Imagine you found a sun-bleached branch of cedar on a trip to the coast. It is about 24 inches long with a slight curve and a fork at the top. You want to turn this into a reading light for a guest nook.
After cleaning and bleaching the wood, you decide to go with a ‘wrap-style’ wiring to keep things simple. You purchase a 15-foot cord kit with a woven jute exterior and a vintage-style Edison bulb. . You screw a heavy-duty black iron hook into a wall stud. You then drape the branch over the hook, securing it with a small, hidden finishing nail.
The cord is wrapped three times around the main body of the branch, with the bulb hanging precisely 12 inches below the fork. The result is a sculptural, functional piece of art that cost you less than $25 in materials and provides a warm, inviting glow that sets the tone for the entire entryway.
Final Thoughts
Building a DIY driftwood sconce is an exercise in seeing the potential in what others have discarded. It is about stepping away from the “buy now” culture and engaging with the natural world to create something that is both beautiful and functional. The grit required to clean, prep, and wire these pieces is rewarded every time you flip the switch.
You don’t need a workshop full of expensive tools or a degree in interior design to make this work. All you need is a good pair of walking shoes, a basic understanding of safety, and the patience to let the wood dry. The shore provides the material; you provide the vision.
Take the time to find the right piece. Respect the local laws and the ecosystem. Once you bring that piece of the ocean home, treat it with the care a masterpiece deserves. Your walls—and your wallet—will thank you.
Sources
1 99wfmk.com (https://99wfmk.com/michigan-driftwood-collection-rules/) | 2 pages.dev (https://how-to-bleach-driftwood.pages.dev/) | 3 dksstores.com (https://vertexaisearch.cloud.google.com/grounding-api-redirect/AUZIYQFbv6BP6KYPxbMb7Iyx3dhkZgJBEt3W3_cIKBoP_LSFjrC8ci2yFndHCyRz8DP7WW-_RfB7csjoaIioRJaa9ElCV91ESWT4VZip1Cu3m37zBufdWIxI8MyKF5WjkP4=) | 4 timesunion.com (https://www.timesunion.com/foodandhome/home-design/article/DIY-driftwood-sconce-6471444.php) | 5 nhregister.com (https://www.nhregister.com/homeandgarden/article/DIY-driftwood-sconce-6471444.php)