Driftwood Art Diy Wall Hangings
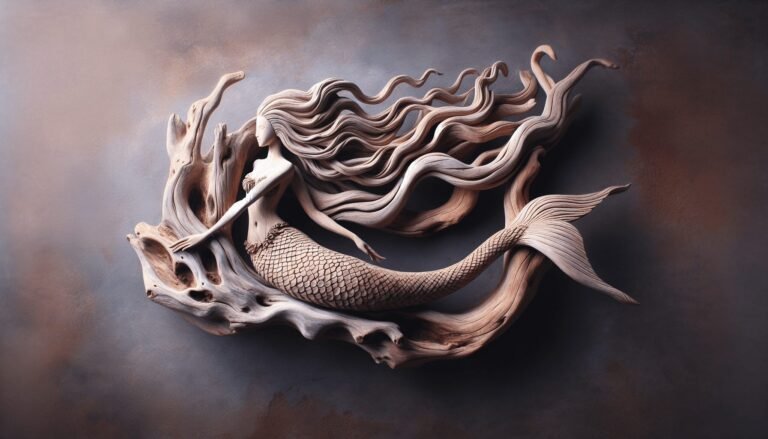
Discover the creative world of driftwood art with these delightful DIY wall hangings. Made using pieces of driftwood, these unique creations bring a touch of nature’s beauty into your home. Crafted with love and attention to detail, these wall hangings offer a charming and rustic addition to any space. Get ready to embark on a journey of creativity as you explore the endless possibilities of driftwood art DIY wall hangings.

This image is property of images.pexels.com.
Materials needed
To create your own driftwood wall hanging, you will need the following materials:
Driftwood pieces
Collect a variety of driftwood pieces in different shapes and sizes. Look for smooth, weathered pieces that have washed up on the beach.
Assorted seashells and sea glass
Gather an assortment of seashells and sea glass to add decorative elements to your driftwood wall hanging. Look for shells in various shapes and sizes, and choose sea glass in colors that complement your desired color scheme.
Hot glue gun
A hot glue gun will be your best friend when it comes to securing the different components of your wall hanging together. Make sure you have plenty of glue sticks on hand.
Jute twine or fishing line
You will need jute twine or fishing line to create the macrame hanger for your driftwood wall hanging. Choose a sturdy material that can support the weight of the driftwood.
Scissors
Having a good pair of scissors is essential for cutting and trimming various materials throughout the creative process.
Acrylic paint and paintbrushes
To add a touch of color to your driftwood wall hanging, gather some acrylic paint in your preferred color scheme. Make sure to have a variety of paintbrushes on hand for different techniques and details.
Preparing the driftwood
Before you can start creating your wall hanging, it’s important to properly prepare the driftwood. Follow these steps to ensure your driftwood is clean and ready to use:
Clean the driftwood
Begin by cleaning the driftwood to remove any dirt, debris, or salt. Use a soft brush or cloth to gently scrub the surface. If necessary, you can also rinse the driftwood with water.
Sand the driftwood
Next, use sandpaper to smooth out any rough edges or splinters on the driftwood. Sanding will also help enhance the natural texture of the wood.
Apply a clear protective finish
To preserve the natural beauty of the driftwood and protect it from the elements, apply a clear protective finish. This can be a spray-on sealant or a brush-on varnish. Follow the instructions on the product for proper application.
Creating the base
Now that your driftwood is prepared, it’s time to create the base of your wall hanging. Follow these steps to create a sturdy foundation for your design:
Arrange the driftwood pieces
Lay out your driftwood pieces in a design that you find aesthetically pleasing. Experiment with different arrangements until you find the perfect composition.
Use the hot glue gun to secure them together
Once you are satisfied with the arrangement, carefully apply hot glue to the points where the driftwood pieces meet. Press them together firmly to create a strong bond. Be cautious when working with hot glue to avoid burns.
Let it dry completely
Allow the glue to dry completely before moving on to the next steps. This will ensure that the base of your wall hanging is secure and stable.
Adding decorative elements
Now comes the fun part – adding decorative elements to your driftwood wall hanging. Let your creativity shine with these steps:
Attach seashells and sea glass to the driftwood
Using your hot glue gun, carefully attach seashells and sea glass to the surface of the driftwood. Consider different arrangements and patterns to achieve the desired look.
Experiment with different designs and patterns
Feel free to experiment with different designs and patterns when attaching the decorative elements. Create a symmetrical or asymmetrical design, or let the natural shapes of the materials guide your creativity.
Ensure they are securely fastened
As you attach the seashells and sea glass, make sure they are securely fastened to the driftwood. Apply enough glue to create a strong bond, but be careful not to add excessive amounts that may be visible.

This image is property of images.pexels.com.
Painting the driftwood
Adding a bit of color to your driftwood wall hanging can make it even more visually appealing. Follow these steps to paint your driftwood:
Choose a color scheme
Decide on a color scheme that complements your overall design. Consider using colors that evoke a coastal or beachy vibe, or choose hues that match your existing home decor.
Apply a base coat
Using a paintbrush, apply a base coat of your chosen color to the entire surface of the driftwood. This will provide a solid foundation for adding details and patterns later on.
Add details and patterns with different colors
Once the base coat is dry, use different paint colors to add details and patterns to the driftwood. Consider painting intricate designs, stripes, or even simple dots. Let your imagination guide you.
Let it dry completely
Allow the paint to dry completely before moving on to the next steps. This will prevent smudging or smearing of the paint.
Enhancing with accessories
To add a personal touch and extra flair to your driftwood wall hanging, consider enhancing it with accessories. Follow these steps to take your creation to the next level:
Attach small hooks or knobs for hanging
To make your wall hanging functional, attach small hooks or knobs to the back of the driftwood. This will allow you to easily hang it on a wall.
Add additional embellishments like beads or charms
If you want to add more visual interest, consider attaching additional embellishments such as beads or charms. Thread them onto jute twine or fishing line and tie them to the driftwood.
Personalize with initials or quotes
To make your driftwood wall hanging even more meaningful, personalize it with initials or quotes. Use paint or permanent markers to add these personal touches to the driftwood.

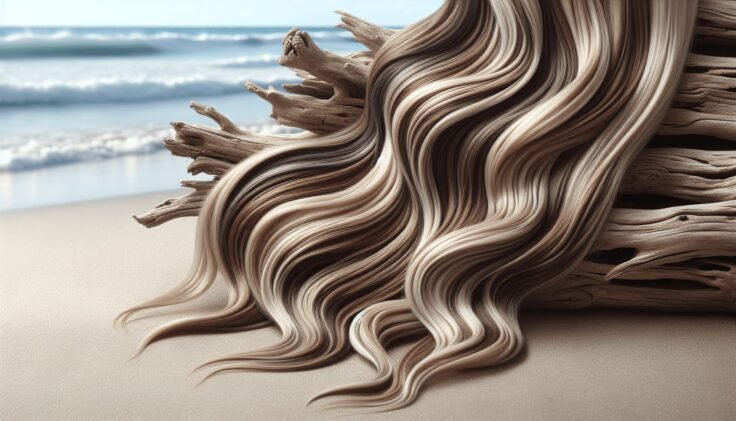
This image is property of images.pexels.com.
Creating a macrame hanger
To display your driftwood wall hanging in style, consider creating a macrame hanger. Follow these steps to create a beautiful and functional hanger:
Cut four lengths of jute twine or fishing line
Measure and cut four equal lengths of jute twine or fishing line. The length will depend on how long you want your wall hanging to hang.
Tie them together at the top to create a loop
Take the four lengths of twine or fishing line and tie them together at the top, creating a loop. Make sure it is secure and tight.
Divide the strands into pairs and tie knots about halfway down
Divide the strands into pairs and tie knots about halfway down from the top loop. This will create a decorative macrame pattern.
Create additional knots further down for extra support
To provide additional support, create additional knots further down the strands. These knots will help hold the driftwood and prevent any sagging.
Hang the driftwood wall hanging from the top loop
Once your macrame hanger is complete, hang the driftwood wall hanging from the top loop. Adjust the length as desired and ensure it is securely attached.
Alternative hanging methods
If macrame is not your style or you prefer a different hanging method, there are alternative options to consider. Explore these ideas for hanging your driftwood wall hanging:
Attach a sawtooth hanger to the back of the driftwood
For a more traditional hanging method, attach a sawtooth hanger to the back of the driftwood. This will allow you to easily hang it on a nail or hook.
Use removable adhesive hooks to hang the driftwood
If you want a temporary and removable hanging solution, consider using adhesive hooks specifically designed for hanging lightweight items. This option is ideal for renters or those who like to frequently change their decor.
Experiment with different types of hooks and hardware
Take a trip to your local hardware store and explore different types of hooks and hardware that can be used to hang your driftwood wall hanging. Get creative and find a solution that suits your style and needs.

Displaying and caring for driftwood wall hangings
Once you have hung your driftwood wall hanging, it’s important to properly care for it to ensure its longevity. Follow these tips for displaying and caring for your driftwood art:
Hang the driftwood away from direct sunlight to prevent fading
Direct sunlight can cause the colors on your driftwood wall hanging to fade over time. Hang it in a location where it is protected from direct sunlight to preserve its vibrancy.
Avoid hanging in areas prone to high humidity or moisture
Driftwood is a natural material that can be influenced by humidity and moisture. Avoid hanging your wall hanging in areas prone to high humidity, such as bathrooms or near moisture sources, to prevent damage.
Dust the driftwood regularly to keep it clean
To keep your driftwood wall hanging looking its best, dust it regularly with a soft cloth or duster. This will help remove any dirt or buildup that may accumulate over time.
Inspect and reattach any loose elements periodically
Periodically inspect your driftwood wall hanging for any loose elements or attachments. If you notice anything coming loose, use hot glue or other appropriate adhesive to reattach them securely.
Exploring driftwood art variations
Once you have mastered the art of creating driftwood wall hangings, you can explore other variations of driftwood art. Here are a few ideas to inspire your creativity:
Create a driftwood mobile
Using driftwood pieces of various lengths, create a driftwood mobile that can be hung from the ceiling or in front of a window. Attach small seashells, bells, or other lightweight objects to add movement and visual interest.
Make a driftwood photo display
Combine driftwood pieces with small clothespins or clips to create a unique photo display. Attach photos, postcards, or other mementos to the driftwood to showcase your favorite memories.
Design a driftwood mirror frame
If you’re feeling ambitious, use a large piece of driftwood to create a frame for a mirror. Attach the mirror to the driftwood using appropriate adhesive or hardware, and hang it on a wall for a stunning focal point.
With these comprehensive steps and ideas, you’re well on your way to creating beautiful and personalized driftwood wall hangings. Let your imagination run wild and enjoy the process of crafting your own unique piece of art. Happy creating!