Driftwood Art With Resin
Have you ever marveled at the intricate beauty of driftwood? If so, then you’re in for a treat! In this article, we will explore the captivating world of driftwood art enhanced with resin. Brace yourself for a mesmerizing journey where natural elements meet modern craftsmanship, resulting in unique and stunning pieces that capture the essence of nature’s raw beauty. So, get ready to be inspired and discover how driftwood and resin come together to create exquisite works of art that will leave you in awe.
Introduction to Driftwood Art with Resin
What is driftwood art?
Driftwood art is a unique form of artistic expression that involves using pieces of wood that have been washed up on shorelines or riverbanks. These pieces of driftwood have been naturally weathered and worn by the elements, resulting in their distinct and rustic appearance. Artists can transform this natural material into stunning works of art by incorporating various techniques and mediums, such as resin.
What is resin?
Resin is a viscous liquid substance that hardens when mixed with a catalyst or hardener. It is widely used in art and craft projects for its ability to create a clear and durable finish. Resin can be poured into molds or directly onto surfaces to encapsulate and preserve objects, adding a glossy and polished look.
Combining driftwood and resin
The combination of driftwood and resin creates a visually striking contrast between the organic and the synthetic. The natural textures and shapes of the driftwood are enhanced and preserved by the smooth and glass-like finish of the resin. This pairing allows artists to blend the beauty of nature with the versatility of a synthetic material, resulting in stunning pieces of art that can become conversation starters.
Why create driftwood art with resin?
Creating driftwood art with resin offers countless possibilities for self-expression and creativity. By incorporating resin into driftwood art, you can transform simple pieces of wood into unique and eye-catching decorative items or functional pieces. The resin provides a protective layer that not only enhances the aesthetic appeal but also preserves the wood, ensuring its longevity. Additionally, working with driftwood and resin allows you to combine your love for nature with the joy of creating something beautiful.
Materials and Tools
Driftwood
The foundation of any driftwood art with resin project is, of course, the driftwood itself. When sourcing driftwood, look for pieces that have interesting shapes, textures, and character. Ensure that the wood is sturdy and free from any rot or pests. Walk along the shores of beaches, search riverbanks, or even visit local driftwood vendors to find the perfect pieces that inspire you.
Resin
Choosing the right resin is essential for achieving the desired results in your driftwood art. There are various types of resin available, such as epoxy resin or polyester resin. Research and select a resin that suits your project’s requirements, considering factors like curing time, viscosity, and workability. Consider using a food-safe resin if you plan to create functional pieces like coasters or bowls.
Resin molds
Resin molds come in a wide array of shapes and sizes, allowing you to create different forms and dimensions in your artwork. From simple geometric molds to intricate designs like seashells or flowers, the possibilities are endless. Choose molds that complement the style and theme of your driftwood art, ensuring that they are suitable for use with resin.
Mixing containers
You will need proper containers for mixing resin and hardener to ensure accurate ratios and thorough blending. Select containers that are made of materials that are compatible with resin, such as silicone or plastic. These containers should be easy to pour from and have measurement markings to help you achieve the correct ratios.
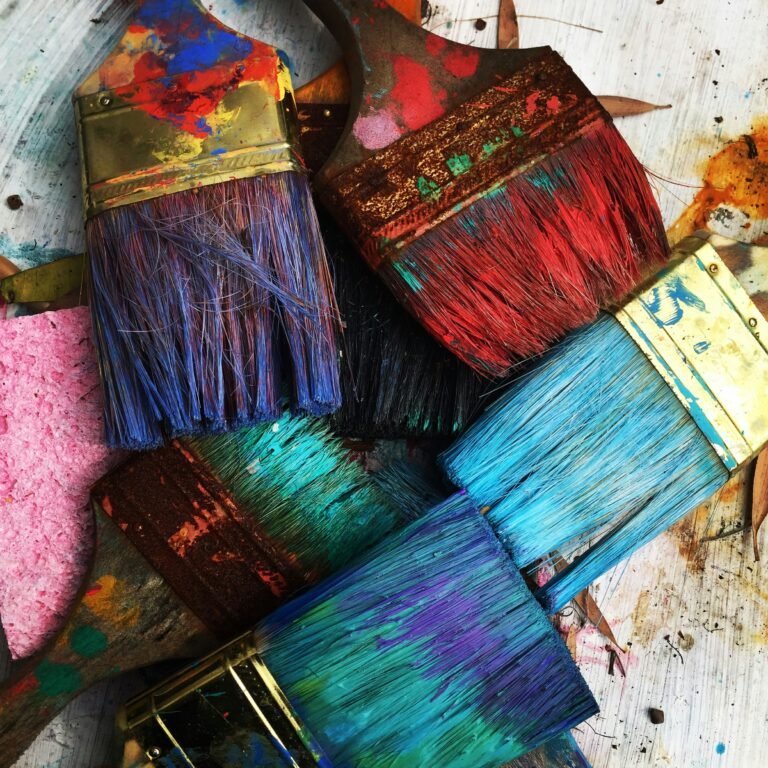
Color pigments
Adding color pigments or dyes to your resin allows you to customize and enhance the appearance of your driftwood art. Choose pigments that are specifically designed for resin, as regular paints may not mix properly or cause undesired reactions. Experiment with different colors and effects to create unique and captivating pieces that reflect your artistic vision.
Measuring cups
Accurate measurement is crucial when working with resin. Use measuring cups specifically designed for resin to ensure precise ratios of resin to hardener. These cups often have markings for different ratios, making it easier to achieve consistent results. It is important to strictly follow the recommended ratios provided by the manufacturer to ensure proper curing and avoid potential issues.
Mixing sticks
When combining resin and hardener, you will need mixing sticks to thoroughly blend the two components. Wooden craft sticks or disposable plastic stirrers are commonly used for this purpose. Make sure to mix slowly and evenly, scraping the sides and bottom of the container to ensure that the resin and hardener are fully incorporated and no streaks remain.
Heat gun or torch
To eliminate air bubbles that may appear in the resin during the mixing and pouring process, a heat gun or torch can be used. These tools help to release trapped air, resulting in a smooth and bubble-free surface. Carefully follow the manufacturer’s instructions when using a heat gun or torch, as excessive heat may cause damage or discoloration.
Protective gear
Working with resin requires safety precautions to protect yourself from potential hazards. Wear gloves to protect your hands from skin irritation or allergic reactions. It is also advisable to wear safety glasses to shield your eyes from resin splatters or fumes. If you are working in a poorly ventilated area or with a high volume of resin, consider wearing a respirator mask to protect your respiratory system.
Optional: Sandpaper, saws, drills
Depending on your artistic vision, you may need additional tools to shape or modify the driftwood. Sandpaper of various grits can be used to smooth the surface or remove rough edges. Saws or drills may be necessary to trim or cut the driftwood into specific sizes or create unique designs. Use caution and appropriate safety measures when using these optional tools.

Preparing Driftwood
Cleaning and drying the driftwood
Before incorporating driftwood into your resin art, it is important to clean and dry the wood properly. Rinse the driftwood under water to remove any loose debris, dirt, or salt. Use a soft brush or cloth to gently scrub away any stubborn dirt. Once cleaned, place the driftwood in a well-ventilated area to dry naturally. Make sure to allow enough time for the wood to fully dry before proceeding with other preparations.
Removal of loose debris and bark
Inspect the driftwood for any loose debris or bark that may interfere with the resin application. Gently remove any loose pieces by hand, taking care not to damage the natural form of the wood. Use a small brush or toothbrush to remove any stubborn debris from crevices or intricate patterns.
Trimming and cutting driftwood as needed
To achieve the desired size or shape for your project, you may need to trim or cut the driftwood. Use saws or other cutting tools suitable for working with wood to carefully modify the driftwood. Measure and mark the areas to be cut before proceeding, and ensure that you have a clear vision of the final design to avoid any unnecessary alterations.
Sanding the surface for a smooth finish
To achieve a smooth and polished surface on the driftwood, sanding is often necessary. Start with a coarse-grit sandpaper to remove any rough areas or sharp edges. Gradually move to finer-grit sandpaper to achieve a smooth and even finish. Sand in the direction of the wood grain to avoid creating scratches or blemishes. Clean the driftwood thoroughly after sanding to remove any dust or residue.
Optional: Drilling holes for unique designs
If you wish to incorporate unique designs or create hanging pieces, drilling holes in the driftwood can be a creative option. Use a wood drill bit suitable for the size of the hole you desire. Mark the drilling points carefully and secure the wood firmly before proceeding. Take your time and use gentle pressure to avoid splintering or damaging the driftwood.
Preparing Resin
Choosing the appropriate resin type
Selecting the right type of resin is crucial for the success of your driftwood art project. Epoxy resin and polyester resin are commonly used for art projects, each with its own characteristics. Epoxy resin provides excellent clarity and UV resistance, making it ideal for projects that will be exposed to sunlight. Polyester resin is generally more affordable but may yellow over time. Consider the specific requirements of your project and choose the resin type that best suits your needs.
Measuring resin and hardener ratios
Achieving the correct resin to hardener ratio is crucial for resin to cure properly. Carefully follow the manufacturer’s instructions provided with the resin you have chosen. Measure the resin and hardener accurately using the recommended measuring cups or a digital scale. It is essential to maintain the proper ratio to ensure proper curing time and avoid potential issues such as sticky or uncured resin.
Mixing resin and hardener thoroughly
Evenly mixing the resin and hardener is essential to activate the curing process successfully. Pour the measured resin and hardener into a clean mixing container, ensuring that you have enough space for thorough blending. Use a mixing stick or stirrer to slowly and continuously stir the resin and hardener together. Scrape the sides and bottom of the container to ensure that no unmixed resin or hardener remains. Continue stirring until the mixture is clear and homogeneous.
Adding color pigments or dyes if desired
If you want to add color to your resin, this is the time to incorporate pigments or dyes. Follow the manufacturer’s instructions for the specific pigments or dyes you are using, as the concentration and mixing ratios may vary. Add a small amount of the chosen pigment or dye to the resin mixture and stir thoroughly until the color is evenly distributed. Keep in mind that the resin will appear lighter when it is cured, so adjust the color intensity accordingly.

Creating Driftwood Art with Resin
Pouring a resin base in a mold
Start by selecting a mold that complements the size and shape of your driftwood pieces. Place the mold on a level surface and ensure that it is clean and free from any dust or debris. Slowly pour a small amount of the mixed resin into the mold, covering the base evenly and reaching the desired thickness. Use a heat gun or torch to remove any air bubbles that may have formed during pouring. Allow the resin base to partially cure according to the manufacturer’s instructions.
Arranging and securing the driftwood
Once the resin base has partially cured, carefully arrange the prepared driftwood pieces on top of the base. Place them in a way that you find aesthetically pleasing, considering the shape and texture of each piece. Gently press the driftwood into the resin to secure it in place, ensuring that it is embedded deep enough to prevent detachment during subsequent resin pouring.
Pouring resin over the driftwood
Once the driftwood is securely positioned, mix additional resin following the same process as before. Slowly pour the resin over the arranged driftwood, covering the pieces completely. Use a heat gun or torch to remove any air bubbles that may have formed during pouring. Take your time and ensure that the resin flows evenly, completely encapsulating the driftwood. Allow the resin to partially cure.
Removing air bubbles with a heat gun or torch
After pouring the resin, small air bubbles may be trapped within the mixture. Use a heat gun or torch to carefully move the flame across the surface of the resin. This gentle heat application will cause the air bubbles to rise and pop, leaving a smooth and bubble-free finish. Be cautious not to overheat the resin or linger in one area for too long, as this can cause damage or discoloration.
Adding more layers for dimension and effects
For added depth and visual interest, consider pouring additional layers of resin over the initial layer. Allow each layer to partially cure before pouring the next, following the manufacturer’s recommended cure times. Take your time and experiment with different techniques, such as pouring resin in specific areas or creating waves and ripples by tilting the mold. This layering process can add dimension and create stunning effects in your artwork.
Experimenting with different techniques and designs
Driftwood art with resin provides endless opportunities for experimentation and creativity. Explore different techniques and designs to make your artwork truly unique. Play with color pigments, embedding other materials like shells or stones, or even try creating resin rivers or lacing effects. Allow yourself to experiment and let your imagination guide you. Don’t be afraid to mix and match techniques to achieve the desired effect in your driftwood art.
Curing and Finishing
Allowing the resin to cure according to instructions
After the final layer of resin has been poured, it is crucial to allow the resin to cure fully according to the manufacturer’s instructions. The curing time can vary depending on the resin type and thickness of your artwork. Place your project in a dust-free and well-ventilated area, away from direct sunlight or heat sources. Avoid handling the resin during the curing process to prevent fingerprints or other marks on the surface.
Sanding the cured piece for a smooth surface
Once the resin has fully cured, you may notice imperfections on the surface, such as unevenness or minor blemishes. To achieve a smooth and flawless finish, gently sand the cured resin using various grits of sandpaper. Start with a coarse-grit sandpaper and progressively move to finer-grit sandpaper to achieve a polished and smooth surface. Wipe away any dust or debris after sanding.
Applying a protective finish like varnish or epoxy
To protect your driftwood art and enhance its visual appeal, consider applying a protective finish such as varnish or epoxy. These finishes provide an additional layer of protection against scratches and yellowing, while also adding a glossy and professional look to your artwork. Follow the manufacturer’s instructions for the specific finish you choose, ensuring that it is compatible with the cured resin and driftwood.
Adding hanging hardware or display stands
If you intend to hang your driftwood art or display it in a specific way, it is important to add suitable hanging hardware or display stands. Choose hardware and fixtures that are strong enough to support the weight of your artwork. Consider the design and size of your piece to select the appropriate hanging mechanisms or stands. Securely attach the hardware or stands to the back or base of your artwork using appropriate tools and fasteners.
Optional: Incorporating other elements like shells or stones
To add extra visual interest and enhance the theme of your driftwood art, you can incorporate other elements like shells, stones, or other found objects. Choose objects that complement the natural feel of the driftwood and accentuate its beauty. Secure these elements in place using the resin itself or adhesive suitable for use with the materials you are incorporating. Take care not to overwhelm the overall design, ensuring that the driftwood remains the focal point of the artwork.
Tips and Tricks
Choose driftwood with interesting shapes and textures
When selecting driftwood for your art projects, choose pieces that have unique shapes, textures, and character. The distinct features of the driftwood will contribute to the overall visual appeal of your artwork. Look for driftwood with unusual twists or natural holes, as these can be emphasized with resin and create eye-catching focal points.
Use multiple layers of resin for a captivating look
To achieve depth and dimension in your artwork, consider pouring multiple layers of resin. Each layer adds visual interest and can create captivating effects when combined with the natural beauty of the driftwood. Take your time and allow each layer to partially cure before pouring the next. Experiment with different resin pouring techniques to achieve the desired look in your driftwood art.
Experiment with adding different colors and effects
Resin provides a fantastic opportunity to unleash your creativity by adding different colors and effects to your driftwood art. Experiment with different pigments, dyes, and techniques to achieve unique and stunning results. Consider creating colorful swirls, gradients, or even resin rivers flowing through the driftwood. Don’t be afraid to push your boundaries and explore the endless possibilities.
Ensure proper ventilation when working with resin
Working with resin can release fumes that may be harmful when inhaled. It is essential to work in a well-ventilated area to minimize exposure to these fumes. Open windows or use fans to ensure proper air circulation. If necessary, consider wearing a respirator mask to provide additional protection. Always refer to the manufacturer’s safety data sheets and follow their guidelines for working with resin.
Follow safety guidelines and wear protective gear
Resin can be potentially hazardous if not handled properly. Protect yourself by wearing gloves to prevent skin irritation or allergic reactions. Safety glasses should be worn to shield your eyes from resin splashes or fumes. Consider wearing a long-sleeved shirt and pants to minimize the risk of skin contact. Familiarize yourself with the safety precautions recommended by the resin manufacturer and take appropriate measures to ensure your safety.
Practice patience to achieve desired results
Working with driftwood and resin requires patience and attention to detail. Take your time at each stage of the process, ensuring that you follow the recommended curing times and allow the resin to fully cure before handling or finishing your artwork. Rushing or skipping steps may result in an unsatisfactory outcome, so remember to be patient and enjoy the creative journey.
Take breaks to assess and adjust design as needed
Throughout the creation of your driftwood art, it is important to take breaks to step back and assess your work. View your artwork from different angles and distances to identify any areas that may need adjustment or improvement. Sometimes a fresh perspective can reveal opportunities to enhance the overall design or make small adjustments that will elevate the final piece. Don’t hesitate to make changes as needed to achieve the desired result.
Inspiration and Ideas
Ocean-themed wall art
Create captivating ocean-themed wall art by combining driftwood and resin. Arrange driftwood pieces to resemble waves or marine creatures, then pour resin to encapsulate and enhance the natural beauty. Use pigmented resin to mimic the colors of the ocean, adding depth and visual interest. Hang the finished artwork on a wall to bring the tranquility and beauty of the ocean into your living space.
Driftwood resin coasters
Design stunning coasters by embedding small driftwood pieces into resin molds. Use circular or square molds to create shapes that resemble ocean or river stones. Pour resin into the molds, arranging driftwood pieces on top. Experiment with different colors and effects to create unique coasters that will be both functional and decorative.
Driftwood and resin jewelry
Create one-of-a-kind jewelry pieces by incorporating small driftwood fragments into resin pendants or earrings. Pour resin into small silicone molds, embedding the driftwood pieces in different arrangements. Add pigments or dyes to the resin to enhance the overall design. Once cured, attach findings like jump rings or earring hooks to transform these unique resin and driftwood creations into wearable art.
Sculptural driftwood and resin pieces
Combine driftwood and resin to create three-dimensional sculptures that reflect your artistic vision. Experiment with different arrangements and shapes, allowing the resin to flow around and interact with the driftwood. Use multiple layers of resin to add dimension and depth to your sculptures. The combination of organic and synthetic materials will evoke a sense of harmony and intrigue.
Functional driftwood furniture with resin accents
Craft functional and visually appealing furniture pieces by incorporating driftwood and resin accents. For example, you can create a coffee table with a glass or resin top, showcasing pieces of driftwood beneath the surface. Use resin to bond the driftwood securely and create a smooth and even surface. The result will be a unique and functional furniture piece that serves as a conversation starter.
Sharing and Selling Your Art
Photographing your artwork
To showcase your driftwood art with resin, it is essential to capture high-quality photographs that highlight the details and beauty of your pieces. Use natural lighting or studio lighting to ensure proper illumination. Experiment with different angles and compositions to find the best way to represent your artwork visually. Consider using props or staging to create an appealing and engaging backdrop for your photographs.
Building an online portfolio or social media presence
In today’s digital age, building an online presence is an effective way to share and promote your driftwood art. Create an online portfolio or website to showcase your artwork, providing detailed descriptions and high-resolution images. Additionally, consider establishing a presence on social media platforms dedicated to art and crafts. Regularly update your online platforms with new creations and engage with other artists and enthusiasts to expand your network and reach a wider audience.
Participating in craft fairs or art markets
Craft fairs and art markets offer excellent opportunities to showcase and sell your driftwood art with resin. Research local events and apply to become a vendor. Prepare a visually appealing booth or display to attract potential buyers. Provide information about your creative process and engage with visitors to discuss your artwork. Participating in these events not only allows you to sell your pieces but also helps you connect with fellow artists and art enthusiasts.
Collaborating with galleries or local shops
Establishing collaborations with galleries or local shops can provide exposure and expand the reach of your driftwood art. Approach galleries or shops that align with your artistic style and inquire about displaying or selling your artwork on consignment. Build relationships with storeowners or curators to explore additional opportunities for showcasing your work, such as solo or group exhibitions.
Exploring custom commission opportunities
As your reputation and portfolio grow, you may receive custom commission requests from individuals interested in acquiring a personalized driftwood art piece. Be open to these opportunities and collaborate closely with clients to understand their vision and requirements. Tailor your artwork accordingly, ensuring that it reflects the client’s preferences while staying true to your artistic style. Custom commissions can be rewarding both creatively and financially.
Conclusion
Driftwood art with resin offers a unique and captivating way to combine the beauty of nature with the versatility of a synthetic material. By incorporating driftwood and resin, artists can create stunning pieces that evoke a sense of wonder and appreciation for the natural world. Whether through wall art, jewelry, or functional pieces, working with driftwood and resin allows individuals to explore their creativity and showcase their unique artistic vision. Embrace the possibilities offered by this art form, and let your imagination soar as you create beautiful driftwood art with resin.