Stop replacing your paths every spring and start building something the tide couldn’t even move. Soft mulch is a temporary fix that turns into a muddy mess. Sun-hardened driftwood planks are a legacy solution that gets more beautiful and durable with every passing decade.
There is a certain grit in choosing materials that have already survived the worst the ocean could throw at them. While modern landscaping catalogs push plastic pavers and dyed wood chips, the seasoned gardener looks toward the shoreline. Driftwood isn’t just debris; it is timber that has been salt-cured, sun-bleached, and stripped of its weakest fibers by the relentless movement of water.
Building a path from these reclaimed treasures is an act of patience and a nod to the pioneers who used what the land provided. This guide will walk you through the art of the legacy stepway, moving beyond the superficial and into the structural. You are not just laying a walkway; you are anchoring a piece of the coast into your own soil.
Driftwood Garden Path Ideas
A driftwood garden path is a functional landscape feature constructed using weathered wood salvaged from beaches, riverbanks, or lakefronts. Unlike standard pressure-treated lumber, driftwood carries a silver-grey patina and a unique, irregular texture that cannot be replicated in a factory. It represents a marriage between rugged utility and high-art aesthetics, often used in coastal, cottage, or xeriscape garden designs.
In the real world, these paths serve as more than just a way to keep your boots dry. They act as “Legacy Stepways”—structures intended to outlast the gardener who laid them. Whether you are using thick, heavy planks as traditional steps or smaller “corduroy” style logs to cross a sandy patch of yard, driftwood provides a solid, non-compressive surface that handles foot traffic with ease.
Visualize a path that winds through tall beach grasses or sits nestled among river stones. The wood doesn’t fight the landscape; it belongs to it. Because the wood has already lost its tannins and sap through years of exposure, it sits in a state of suspended animation, resisting the rapid rot that plagues fresh-cut softwoods.
Common iterations include the “Plank Walk,” which utilizes flat-faced pieces of heavy timber, and the “Mosaic Inlay,” where smaller, weathered chunks are set into gravel or sand like puzzle pieces. Each approach offers a different level of stability and visual weight, allowing you to tailor the path to the specific needs of your terrain.
The Coastal Corduroy Path
Inspired by old logging roads, this style involves laying uniform driftwood branches or small logs perpendicular to the direction of travel. It is particularly effective in boggy or sandy areas where a flat plank might sink. The gaps between the logs provide excellent drainage, and the texture offers superior grip for climbing slight inclines.
The Sun-Bleached Stepping Stone
For a more minimalist look, large, flat cross-sections of driftwood can be used as individual stepping “stones.” These are often partially buried to ensure they don’t shift underfoot. This style works best in high-traffic areas where you want to maintain a sense of open space while still providing a clear, solid route through the garden.
How to Build a Driftwood Walkway
Constructing a path from irregular, reclaimed wood requires more forethought than laying uniform bricks. You must account for the varied shapes, the legalities of collection, and the foundational requirements that keep wood from shifting in the soil. 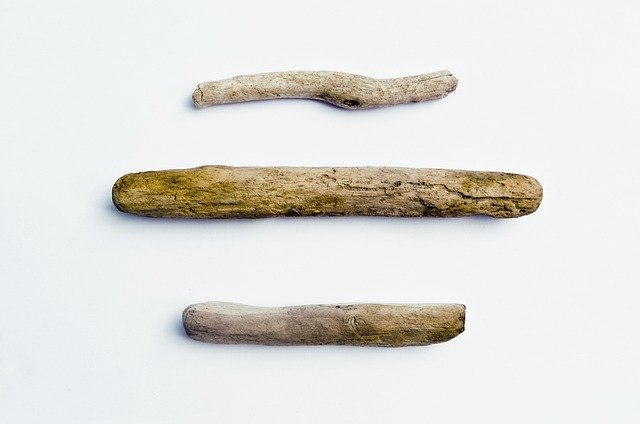 . Follow these steps to ensure your path is as sturdy as a pier.
Step 1: Legal Sourcing and Sorting
Before you head to the beach with a truck, you must understand the laws of your region. In many states, such as California, you are limited to 50 pounds or one piece of driftwood per day for personal use. Oregon allows personal-use collection but prohibits the use of power saws or mechanized equipment on the shore. Always verify with local beach managers or the Bureau of Land Management to ensure you aren’t disturbing protected habitats.
Once you have your wood, sort it by thickness and “face.” You want pieces with at least one relatively flat side to serve as the walking surface. Cull any pieces that show signs of active boring insects or “soft rot,” where the wood feels spongy even when dry. True driftwood should be “iron-hard” to the touch.
Step 2: Curing and Cleaning
Even though the wood looks dry, it likely holds internal moisture and salts. Lay your collection out on a gravel bed or concrete pad in full sun for at least 15 to 30 days. This “cures” the wood, allowing any remaining moisture to dissipate and ensuring the wood won’t warp once it is anchored into your path.
Scrub each piece with a stiff-bristled brush to remove sand, dried salt, and loose organic matter. If you are worried about pests, a light spray of a white vinegar and water solution can act as a natural deterrent without the need for harsh chemicals. Avoid using heavy oils or stains initially, as the beauty of driftwood lies in its natural silvering.
Step 3: Excavation and Base Preparation
A common mistake is laying driftwood directly on top of the grass. This traps moisture and accelerates decay.  . Instead, excavate a trench roughly 4 to 6 inches deep and as wide as your intended path. Level the soil at the bottom and compact it firmly using a hand tamper.
Line the trench with a heavy-duty geotextile fabric. This prevents weeds from pushing through and keeps your drainage layers from mixing with the native soil. Fill the first 2 inches of the trench with coarse crushed gravel (often called 3/4-minus). This layer is the “skeleton” of your path, providing the necessary drainage to keep the wood dry during the rainy season.
Step 4: Layout and Anchoring
Position your driftwood pieces on top of the gravel. For a “plank” style path, butt the ends together closely. For “corduroy” paths, leave a 1/2-inch gap between logs to allow for water runoff and the expansion of the wood. Use a level to ensure no single piece sits significantly higher than its neighbor, which creates a trip hazard.
To keep the wood from “walking” or shifting over time, you must anchor the larger pieces. Drive 12-inch galvanized rebar pins or long stainless steel timber screws through the wood and into the ground. If using screws, pre-drill your holes to prevent the sun-hardened wood from splitting. Once the wood is secured, fill the remaining gaps with pea gravel, crushed shells, or coarse sand to lock everything in place.
Benefits of the Legacy Stepway
Choosing driftwood over traditional mulch or store-bought pavers offers several practical advantages that align with a long-term gardening philosophy. The primary benefit is resilience. Because driftwood has already been “processed” by the ocean, it has lost the sugars and starches that typically attract wood-destroying fungi and insects.
The thermal properties of wood are also superior to stone or concrete in many climates. Driftwood does not hold the searing heat of a summer sun like dark slate or asphalt does, making it a “foot-friendly” choice for paths near pool areas or coastal cottages where people often walk barefoot. Conversely, in the winter, wood provides a warmer, less icy surface than solid stone.
From a cost-efficiency standpoint, a driftwood path can be significantly cheaper than high-end pavers if you have access to a legal sourcing site. While the labor is higher, the material cost is essentially zero. Over a decade, a driftwood path maintains its integrity, whereas a mulch path would need to be replenished 10 times, costing hundreds of dollars and dozens of hours in maintenance.
Finally, the aesthetic evolution of driftwood is unmatched. . Most garden materials look their best the day they are installed and slowly degrade. Driftwood does the opposite. As it continues to weather in your garden, the silver patina deepens, and the grain becomes more pronounced. It doesn’t get “old”—it gets “seasoned.”
Challenges and Common Mistakes
One of the most frequent errors in building a driftwood path is ignoring surface traction. While weathered wood is naturally textured, certain types of driftwood can become incredibly slick when wet, especially if they develop a layer of microfilm or algae. If your path is in a shaded, damp area, you must actively manage the surface to prevent it from becoming a “slip-and-slide.”
Another pitfall is the unevenness of thickness. Unlike milled 2x4s, driftwood varies wildly in diameter. If you don’t spend time digging “pockets” for thicker logs so they sit flush with thinner ones, the resulting path will be an obstacle course. This is not just a comfort issue; it is a safety concern for anyone with mobility challenges.
Mistakes also happen during the anchoring phase. Gardeners often think the weight of the wood will keep it in place. However, heavy rains can cause wood to float or shift if the base isn’t properly drained. Without rebar pins or deep-set gravel, you may find your path “migrating” after a particularly wet winter.
Avoid using “punky” wood. This is wood that looks like driftwood but is actually just rotting log pieces. If you can push your thumbnail into the wood and leave a deep indentation, that piece is too far gone. It will crumble within a season and create a soft spot in your walkway that is difficult to repair.
Limitations: When This May Not Be Ideal
Despite its durability, a driftwood path isn’t a universal solution. In arid, desert environments, the lack of moisture can cause driftwood to become brittle and eventually splinter. The salt content that preserves it in coastal areas isn’t present to help maintain its structural integrity in a dry, landlocked backyard. In these cases, stone or decomposed granite is often a better choice.
Environmental constraints also play a role. If your garden is in a high-velocity flood zone, a wood path—even an anchored one—poses a risk. Wood is naturally buoyant. In a major flood event, these “legacy” steps can become dangerous projectiles or wash away entirely, leaving your landscape scarred and your path gone.
There is also the accessibility factor. A driftwood path, by its very nature, is irregular. It is not an ideal choice for paths intended for wheelchairs, walkers, or those with significant balance issues. If you require a path that meets ADA standards, you would be better served by smooth, poured concrete or tightly jointed pavers.
Comparison: Legacy Stepway vs. Temporary Mulch
Understanding the difference between a permanent driftwood solution and a temporary mulch fix is essential for planning your garden’s future. The following table breaks down the key metrics for each approach.
| Feature | Legacy Driftwood Path | Temporary Mulch Path |
|---|---|---|
| Lifespan | 15–30+ years | 1–2 years |
| Material Cost | Low to Zero (Reclaimed) | Moderate (Recurring) |
| Installation Labor | High (Precision required) | Low (Spread and rake) |
| Drainage | Excellent (With gravel base) | Poor (Saturates over time) |
| Stability | Rigid and non-compressive | Soft and easily displaced |
Practical Tips and Best Practices
To get the most out of your driftwood installation, you should focus on the small details that improve longevity and safety. One of the best practices is to mix your materials. Bordering your driftwood path with river rock or large cobbles provides a visual “frame” and helps keep the wood from shifting laterally.
If you find that your wood is too smooth and becomes slippery after rain, you can apply a grit additive. Clear wood sealers can be mixed with fine sand or specialized non-slip “shark grip” additives. Painting a thin strip of this mixture down the center of each plank provides the traction needed for safe year-round use without ruining the look of the wood.
- Check for “Spalling”: Periodically inspect the ends of the logs. If the wood begins to separate into layers (spalling), use a small amount of waterproof wood glue or a stainless steel trim nail to secure the layers before they break off.
- Seasonal Cleaning: Use a leaf blower or stiff broom to keep the gaps between the wood clear of organic debris. If leaves are allowed to sit and rot between the logs, they create a “compost” effect that will eventually rot even the hardiest driftwood.
- Manage the Moss: While a bit of moss looks nostalgic, too much makes the path dangerous. Spray a 50/50 water and white vinegar solution on the wood during the spring to kill off moss spores without damaging the surrounding plants.
Advanced Considerations: Scaling and Engineering
For those looking to take their driftwood path to a professional level, consider the structural engineering of slopes. Driftwood can be used as the “risers” for garden stairs. By burying a large log vertically and backfilling it with gravel and smaller wood planks, you create a terraced staircase that mimics the natural erosion patterns of a coastal bluff.
Another advanced technique is the lighting integration. Because driftwood is often hollowed out by the sea, it provides perfect natural “channels” for low-voltage LED wiring. You can tuck small “puck” lights or strip lighting underneath the overhang of a driftwood plank. This creates a “floating” effect at night, illuminating the path without visible fixtures.
Consider the soil chemistry. Driftwood from the ocean carries salt. While most of this is washed away by rain, a high concentration of driftwood in a small area can slightly increase the salinity of the immediate soil. When choosing plants to border your path, opt for salt-tolerant species like Sea Kale, Rosemary, or ornamental grasses to ensure your garden thrives alongside your legacy stepway.
Example Scenario: The Beachfront Entry
Imagine a property on the Pacific Northwest coast. The owner wants a path from the driveway to the front door that feels like a natural extension of the beach. Instead of using pressure-treated decking, they source heavy cedar driftwood planks from a nearby cove.
The path is built with 4-inch deep gravel drainage and anchored with rebar pins. The gaps are filled with crushed oyster shells. After five years, the surrounding beach grass has grown up against the silver wood. The path never needs to be stained or replaced. Even after a major winter storm, the “Legacy Stepway” remains solid, while the neighbor’s bark mulch path has washed into the street.
In another scenario, a small urban backyard uses driftwood as a “bridge” over a dry creek bed made of river stones. The short, 6-foot span uses two massive driftwood logs as the “stringers” with smaller, weathered slats screwed on top. It creates a focal point that is both art and infrastructure, proving that driftwood can work in spaces far from the actual coast.
Final Thoughts
Building a garden path from driftwood is a commitment to a different kind of beauty. It is an acknowledgment that the materials provided by the earth, weathered by time and tide, are often superior to anything we can manufacture. By moving away from the cycle of temporary mulch and toward a “Legacy Stepway,” you are creating a permanent feature that respects the history of the wood.
This process requires more than just manual labor; it requires an eye for detail and a respect for the law. Sourcing responsibly and building with a focus on drainage and anchoring ensures that your path will stand the test of time. As the years go by, the silver-grey timber will become a part of the soil itself, a durable testament to your vision for a garden that is both rugged and refined.
Do not be afraid to experiment with the irregular shapes and textures you find. Each piece of wood has a story, and as you lay them into your path, you are writing the next chapter. Start small, build deep, and let your garden tell a story of resilience that a simple bag of mulch could never convey.
Sources
1 wikihow.com (https://www.wikihow.com/Preserve-Driftwood) | 2 gardendesign.com (https://www.gardendesign.com/landscape-design/garden-paths.html) | 3 usda.gov (https://www.fs.usda.gov/t-d/pubs/htmlpubs/htm07232804/page10.htm) | 4 sos.state.or.us (https://vertexaisearch.cloud.google.com/grounding-api-redirect/AUZIYQEm5PBssnO0MyV1rzR3-geFm6Sue3xdtzLHgtFuejUBb2lef8ErKuG_tE6appKbJlfoyZbJULg_T98T7povjxq3bTdrdX2lHK_Nbc7OLBtaldg4uqLvsX6H6zv62vST-y2a0sbsZrBIK18TCyQm0AuG8WuyUrPA7XU2VSFKs8DU4y5U17xWrnmTGJ2X1GI3vOw=) | 5 homedepot.com (https://www.homedepot.com/c/ah/how-to-build-a-walkway/9ba683603be9fa5395fab901b281332) | 6 truegridpaver.com (https://www.truegridpaver.com/diy-walkway/)