Driftwood Mirror
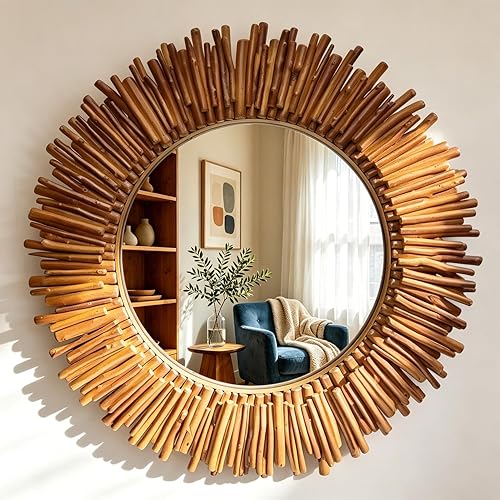
Have you ever wondered how to incorporate a touch of nature and rustic charm into your home decor? Creating a driftwood mirror might just be the answer. This unique home accessory is not just a mirror but a piece of art that tells a story of nature’s journey. From the shores to your walls, driftwood offers a sense of peaceful coastal living infused with a rustic elegance. Let’s explore what makes a driftwood mirror so special and how you can craft one yourself.


What Is Driftwood?
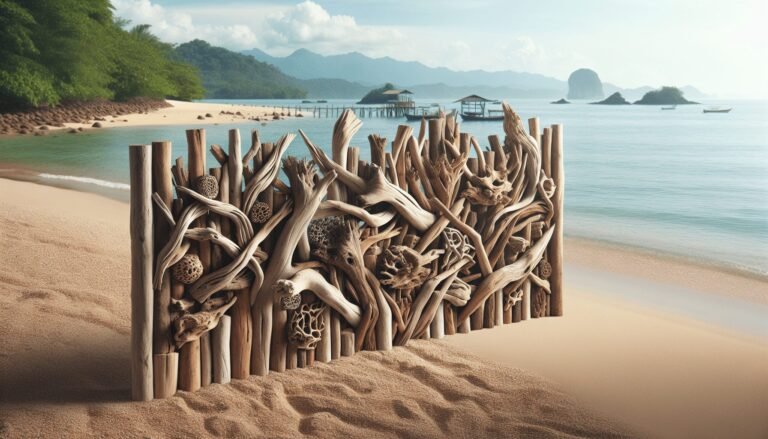
Driftwood is wood that has been washed onto the shore by the action of winds, tides, or waves. Over time, it becomes smooth and water-worn, each piece unique in its texture and shape. Using driftwood in home decor brings a sense of organic beauty and natural history indoors.
Properties of Driftwood
| Property | Description |
|---|---|
| Shape | Varied and irregular, often gnarled and twisted |
| Texture | Smooth, weathered, and often porous |
| Color | Typically gray or brown with bleached patches |
| Size | Ranges from small twigs to large branches |
| Source | Commonly found on beaches, lakesides, and riverbanks |
Each piece of driftwood is naturally formed, making it distinct, and perfect for adding a touch of nature to any decor.
Why Choose a Driftwood Mirror?
Driftwood mirrors are more than functional objects; they are conversational pieces that bring the outdoors in. By choosing a driftwood mirror, you’re opting for a sustainable and eco-friendly home decor item that reflects your love for nature.
Aesthetic Appeal
The rustic beauty and uneven textures of driftwood offer a stark contrast to contemporary, polished decor. This creates a balanced look that is both inviting and visually appealing.
Sustainability
Collecting driftwood does not harm living trees and is an eco-friendly way to enhance your home. Each piece of wood has been naturally weathered and deposited by waterways, minimizing its environmental impact.
Versatility
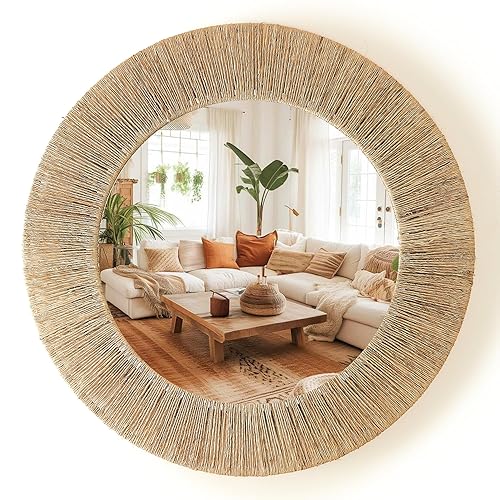
Driftwood mirrors fit into various decor styles, including coastal, rustic, bohemian, and shabby chic. Their neutral tones allow them to complement a variety of color schemes and interior designs.
Materials Needed for a Driftwood Mirror
Creating a driftwood mirror is a fulfilling DIY project. Here’s what you’ll need:
| Material | Purpose |
|---|---|
| Driftwood | Main frame material |
| Mirror | Centerpiece |
| Strong adhesive (e.g., E6000) | Securing driftwood to the mirror |
| Backing board | For attaching the mirror |
| Saw and sandpaper | Cutting and smoothing |
| Wood glue | Additional securing material |
| Hanging hardware | For wall mounting |
By gathering these materials, you’re halfway toward crafting a unique decor piece.
Selecting the Right Driftwood
Before you start gluing pieces together, it’s crucial to choose the right driftwood. Select various sizes and shapes to create an interesting and dynamic frame for your mirror.
Tips for Selecting Driftwood
- Look for Smooth Texture: Weathered pieces with a smooth surface are preferable for a more refined look.
- Varied Shapes and Sizes: This adds depth and a natural appearance to your mirror.
- Dry Wood Only: Ensure that the wood is completely dried to prevent mold and decay.
- Consider Color Tones: While driftwood is generally neutral-toned, mixing slightly different shades can add richness to the frame.

Preparing the Driftwood
Once you’ve gathered your driftwood, you’ll need to prepare it for assembly. This step is crucial to ensure your mirror is not only beautiful but also durable.
Cleaning
Clean off any sand, dirt, or salt from the driftwood. Use a brush and warm, soapy water for the best results. Rinse the wood thoroughly and let it dry in the sun.
Cutting and Sanding
- Cutting: Trim any driftwood pieces that are too long or have awkward shapes. A small hand saw works well for this task.
- Sanding: Smooth out any rough edges using sandpaper. This helps the pieces fit snugly together and look polished.
Assembling Your Driftwood Mirror
Now that your driftwood pieces are prepared, you can start the assembly process.
Creating the Frame
- Layout the Design: Arrange your driftwood pieces around the mirror on a flat surface. Experiment with different layouts until you find the one that looks the best.
- Attach to the Backing Board: Secure the mirror to a backing board using wood glue. This adds stability and makes it easier to attach the driftwood.
- Gluing Driftwood: Begin attaching the driftwood pieces to the backing board with strong adhesive. Start with the larger pieces and fill in gaps with smaller ones. Ensure the pieces are tightly fitted.
Finishing Touches
Once the glue has dried (usually 24 hours), inspect your mirror for any loose pieces. Reinforce them with wood glue if necessary. Smooth out any final rough edges with sandpaper.
Adding Hanging Hardware
Attach hanging hardware to the back of the mirror. Ensure it is securely fastened to support the weight of the driftwood and mirror.
Caring for Your Driftwood Mirror
To keep your driftwood mirror looking its best, regular maintenance is essential.
| Care Tip | Method |
|---|---|
| Dusting | Use a soft cloth to remove dust |
| Cleaning Glass | Wipe with a glass cleaner |
| Checking Adhesive | Regularly inspect and re-glue if needed |
By following these simple care tips, your driftwood mirror will remain a stunning feature in your home for years to come.
Creative Variations and Ideas
Once you’ve mastered the basics of creating a driftwood mirror, you can experiment with various creative ideas to enhance your design further.
Adding Other Natural Elements
Incorporate seashells, small pebbles, or even dried seaweed into your frame for extra texture and interest. Secure these additional elements with the same strong adhesive.
Different Shapes and Sizes
Instead of a traditional rectangular or circular mirror, consider creating mirrors in other shapes like oval, hexagonal, or even abstract forms. This adds a unique twist to your decor.
Using Colored Driftwood
While natural tones are classic, you can also experiment with colored driftwood. Paint or stain some pieces before assembling your mirror to add a pop of color and suit your interior theme.
The Benefits of a DIY Driftwood Mirror
Creating your own driftwood mirror provides several benefits beyond the aesthetic appeal.
Personal Satisfaction
The process of making something with your own hands brings a sense of achievement and satisfaction. It allows you to express your creativity and craftsmanship.
Customization
Crafting your own driftwood mirror means you can fully customize it to your preferences. You control the size, shape, design, and additional elements.
Budget-Friendly
A DIY driftwood mirror is often more budget-friendly than purchasing a ready-made one. It’s a cost-effective way to add a high-end look to your home without breaking the bank.
Frequently Asked Questions
Is Driftwood Safe to Use Indoors?
Yes, driftwood is safe to use indoors as long as it is thoroughly cleaned and dried. This prevents potential mold or pest issues.
Where Can I Find Driftwood?
Driftwood can commonly be found along beaches, lakesides, and riverbanks. If you don’t live near a water body, you can purchase driftwood from craft stores or online retailers.
What If I Can’t Find Enough Driftwood?
If you can’t find enough driftwood, you can complement your pieces with reclaimed wood or other natural materials. This still provides a rustic and cohesive look.
Conclusion
A driftwood mirror is more than a reflective surface; it’s a unique piece of art that brings a touch of nature and elegance into your home. From gathering materials to the final touches, creating a driftwood mirror is a rewarding project that showcases your creativity and love for nature. Whether you choose to make a small accent mirror or a large statement piece, a driftwood mirror will surely become a cherished part of your home decor. Happy crafting!