Driftwood Room Divider For Studio Apartments
Don’t just hide your bed; build a structure that defines your home. Most studio dwellers use cheap, temporary dividers that make the room feel smaller. By installing vertical driftwood ‘bones’ as a permanent partition, you add architectural weight and legacy quality to a space, making it feel intentional and expensive.
Living in a studio apartment often feels like a constant compromise between sleeping in your kitchen or eating in your bedroom. Traditional solutions involve folding screens or flimsy curtains that do little more than clutter the visual field. They lack the permanence of a true home and the grit of a space meant to last generations. Moving beyond these temporary fixes requires a shift in perspective, focusing on materials that carry a history and a physical presence.
Driftwood offers a unique solution for the modern pioneer living in a concrete jungle. These pieces of timber have been cured by the elements, stripped of their weaknesses by salt and stone, and left with a structural integrity that new lumber cannot match. When positioned vertically, they act as pillars of a ghost wall, defining zones of rest and activity without the suffocating weight of drywall.
This guide explores the transition from a cluttered open room to a structured sanctuary. You will learn how to source, treat, and install these natural elements to create a legacy-quality partition. It is time to stop hiding your life behind a screen and start building the bones of your home.
Driftwood Room Divider For Studio Apartments
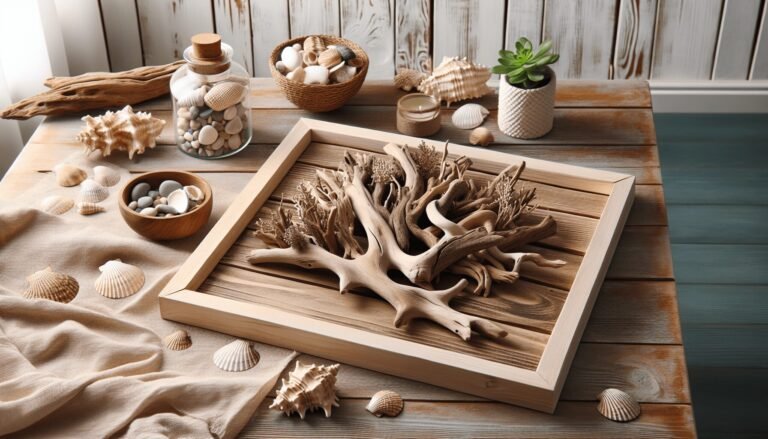
A driftwood room divider is a functional art installation that uses weathered, scavenged wood to create a vertical partition between living zones. Unlike a solid wall, this structure uses “vertical bones”—large, structurally sound branches or trunks—to suggest a boundary while maintaining sightlines and airflow. It exists to solve the fundamental problem of the studio apartment: the lack of architectural transition.
In the real world, these dividers find their place between the sleeping area and the living space. They provide a psychological cue that you are entering a different room, even when the square footage remains unchanged. This approach is rooted in biophilic design, which suggests that humans thrive when surrounded by natural textures and irregular, organic shapes. The driftwood brings a piece of the coast or the riverbank into the home, grounding a sterile apartment in the weight of the natural world.
Conceptually, you are not building a fence; you are planting an indoor forest. The spacing between the driftwood pieces allows light from a single window to reach the deepest corners of the studio. This preserves the “airy” feel of an open plan while providing enough visual interference to make the bed feel like a private retreat. It is a permanent solution for someone who views their apartment as a long-term residence rather than a temporary stopover.
Sourcing and Preparing the Timber
Finding the right wood is the foundation of a successful build. You cannot simply drag a fallen branch from the woods and expect it to behave in a climate-controlled room. True driftwood has been submerged, tumbled, and bleached by the sun, a process that naturally removes sap and soft tissues, leaving behind the hardened heartwood.
Scavenging the Shoreline
The best specimens are found along flowing rivers or ocean beaches, especially after high rainfall when the water recedes to reveal new treasures. Coastal wood is often preferred for its salt-cured durability, but river wood offers a smoother, more “sculpted” aesthetic. When selecting a piece, look for structural “bones” that are at least 3 to 5 inches in diameter if they are intended to span from floor to ceiling. Ensure there is no evidence of termites, wood-boring insects, or deep rot. A healthy piece of driftwood should feel surprisingly heavy for its size and produce a solid “thunk” when struck.
The Deep Clean
Found wood carries a history of microbes, salt, and potential pests. You must deep clean every piece before it enters your living space. Start by power washing or scrubbing the wood with a stiff brush to remove sand and loose debris. For smaller pieces, a soak in a bleach solution—approximately 2 teaspoons of bleach per gallon of water—for 4 to 12 hours will sanitize the wood and kill any lingering spores. Larger trunks that cannot be submerged should be scrubbed with a stronger bleach solution and left to dry in a shaded, well-ventilated area.
Curing and Stabilizing
Wood is a living material that reacts to humidity. If you install “wet” wood, it will shrink, crack, or pull away from its anchors as it dries in your apartment. Professional builders often use a homemade kiln or a sunny, sheltered spot to dehydrate the wood completely. This process can take several days to weeks depending on the thickness of the branch. Once dry, the wood should be sanded with 60 to 120-grit sandpaper to remove sharp protrusions while preserving the natural “weathered” patina. A final wipe-down with mineral oil or a matte polyurethane sealer will protect the wood from domestic moisture and prevent splintering.
Installation Techniques for Vertical Bones
The goal is to create a structure that feels integrated into the apartment’s architecture. Depending on your DIY skill level and rental constraints, there are three primary ways to install a driftwood divider.
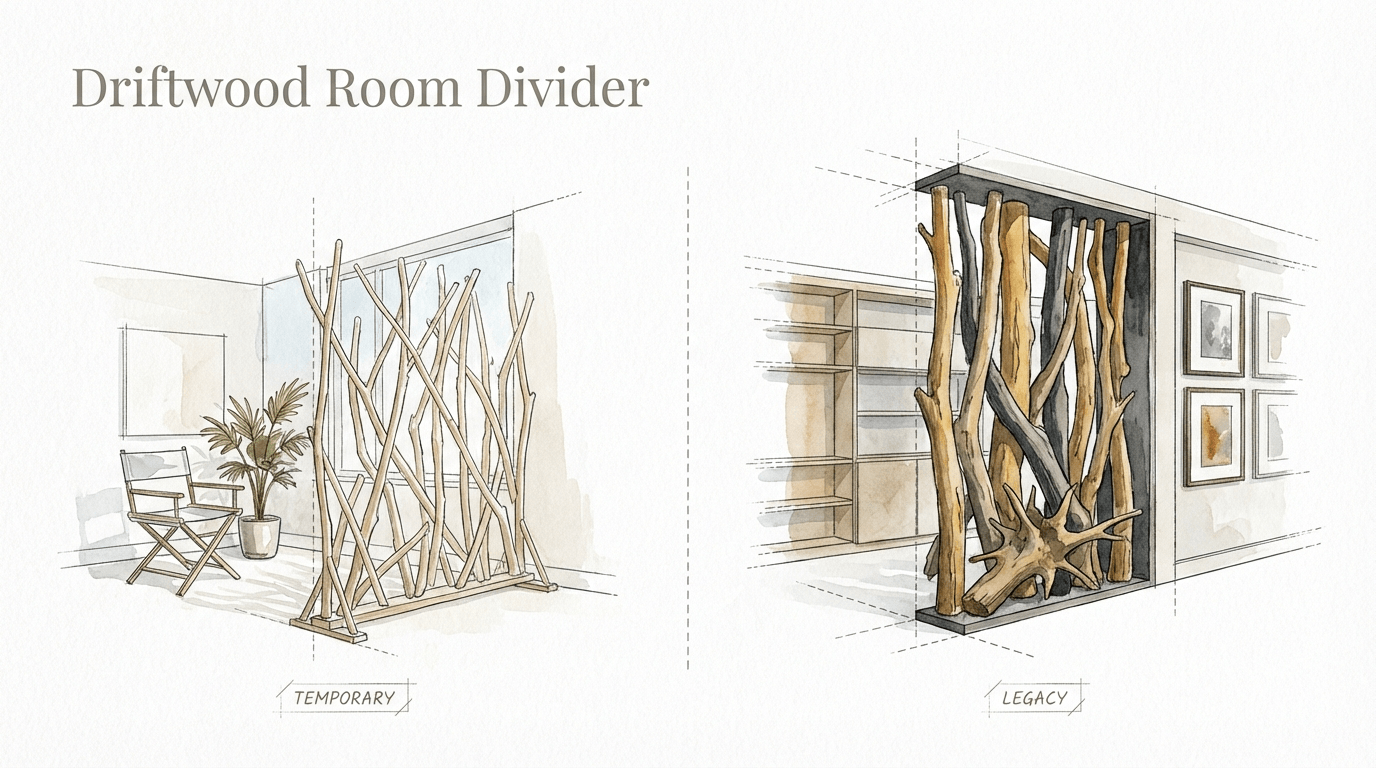
The Floor-to-Ceiling Tension Method
This method is ideal for renters who cannot drill into the floor. It involves creating a “sandwich” of two horizontal timber beams—one secured to the ceiling joists and one resting on the floor. The driftwood branches are then measured and cut to a “press-fit” length between these two beams. By using heavy-duty double-sided carpet tape or non-slip rubber pads on the bottom beam, you can create a stable partition that stays in place through friction and the weight of the wood itself. This creates a vertical “slat” look using organic shapes instead of uniform lumber.
The Weighted Base System
If you prefer a more scattered, “forest” look, you can secure individual driftwood branches into weighted containers. Using a 2.5-quart steel pail or a similar sturdy vessel, you can set the base of the branch in Plaster of Paris. The weight of the plaster—once dry—provides a low center of gravity that prevents the branch from toppling. These containers can then be hidden inside a long, wooden planter box or behind decorative stones. This method allows you to move the “trees” around until you find the perfect visual balance.
Structural Anchoring
For a permanent, legacy-grade installation, the driftwood should be anchored directly into the building’s framing. This involves using a stud finder to locate the ceiling joists and floor plates. Long lag screws or T-nuts are used to secure the top and bottom of each branch. To hide the hardware, you can drill a pilot hole into the branch, countersink the screw, and then plug the hole with a small piece of matching wood or a mixture of sawdust and wood glue. This creates a seamless, built-in look that appears as if the wood grew directly out of the apartment’s structure.
Benefits of Natural Wood Partitions
A driftwood divider offers more than just a visual barrier. It changes the physical and psychological environment of the studio.
Acoustic Dampening: Hard, flat surfaces like drywall and glass bounce sound, creating echoes in small spaces. The irregular, porous surface of weathered driftwood breaks up sound waves, providing a subtle but noticeable improvement in the room’s acoustics. This makes the sleeping area feel quieter and more shielded from the noise of a television or kitchen appliances.
Preservation of Light: Unlike a bookcase or a solid screen, a vertical driftwood partition allows natural light to filter through the gaps. This is vital in studios where there might only be one window. You get the privacy of a separate room without the dark, boxed-in feeling of a traditional wall.
Architectural Integrity: Installing a permanent or semi-permanent structure adds “bones” to the room. It stops the apartment from looking like a collection of furniture and starts making it look like a designed home. 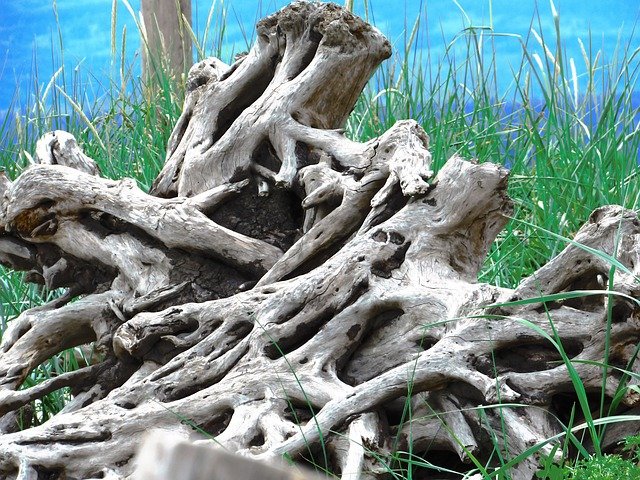 . This “legacy” quality is what separates a mature living space from a college dorm room.
Challenges and Common Mistakes
Working with organic materials requires a different mindset than working with dimensional lumber from a big-box store. Mistakes are often made during the preparation phase.
One of the most frequent errors is failing to account for the “settling” of the wood. Natural branches are rarely perfectly straight. If you anchor a branch that still has a high moisture content, it will warp as it dries, potentially pulling out of the ceiling or creating gaps in your joinery.  . Always ensure your wood is “room-dry” before the final installation.
Another common mistake is over-processing the wood. Beginners often sand away too much of the natural texture or apply a high-gloss finish that makes the driftwood look like plastic. The beauty of this material lies in its matte, silvered patina. Use clear, matte sealers or natural oils to preserve the “bone-like” quality of the wood rather than trying to make it look like a piece of polished mahogany.
Stability is the final hurdle. A tall branch is essentially a long lever. If the base is not wide enough or the top is not securely braced, a small bump can cause the entire structure to fail. If you are using weighted bases, ensure the container’s width is at least one-fifth the height of the branch to prevent tipping.
Limitations and Renter Constraints
While a driftwood divider is a stunning addition, it is not suitable for every environment. You must consider the structural and legal limitations of your space.
Weight Loads: Large driftwood logs can be incredibly heavy. If you are planning a massive installation in an older building with thin subflooring, you must ensure the weight is distributed across multiple joists. A concentrated load of several hundred pounds of wood in a small area could lead to floor deflection over time.
Rental Agreements: Most standard leases prohibit drilling into the floor or ceiling. If you cannot get written permission from your landlord, you must stick to the tension or weighted-base methods. Even “non-destructive” methods like double-sided tape can damage certain types of laminate or hardwood finishes, so testing a small area is mandatory.
Space Requirements: Driftwood is bulky. In a very small studio (under 300 square feet), a thick driftwood partition might take up too much physical “walking” space. In these cases, it is better to use thinner, more sculptural branches rather than heavy trunks to avoid making the room feel claustrophobic.
Comparison: Driftwood vs. Alternative Dividers
Choosing the right material depends on your budget, skill level, and the aesthetic you want to achieve. The following table compares driftwood to common alternatives.
| Feature | Driftwood Divider | Pine Slat Wall | IKEA Kallax / Bookcase |
|---|---|---|---|
| Visual Style | Organic, Rustic, Unique | Modern, Linear, Uniform | Functional, Boxy, Mass-Produced |
| Installation Difficulty | High (Custom Joinery) | Medium (Straight Cuts) | Low (Freestanding) |
| Material Cost | Low (Scavenged) | Medium | Medium |
| Light Penetration | Excellent | Good | Poor (if filled) |
| Permanence | Legacy / Structural | Semi-Permanent | Temporary / Moveable |
Practical Tips and Best Practices
Applying these techniques requires a balance of engineering and artistry. . Use these tips to ensure your divider looks intentional and stays secure.
- Vary the Density: Do not place the branches at perfectly even intervals. Clustering three branches closer together near the wall and spacing them out toward the center of the room creates a more natural, “growing” appearance.
- Use Leveling Shims: Ceilings and floors in old buildings are never perfectly parallel. Use thin wood shims at the top of your branches to ensure a tight fit before screwing them in. Hide the shims with a small bead of caulk or a decorative rope wrap.
- Maintain the Luster: Driftwood can look “dusty” over time. Every six months, wipe the wood down with a cloth lightly dampened with linseed oil. This nourishes the wood and brings back the depth of the grain without adding a fake shine.
- Incorporate Greenery: Air plants (Tillandsia) thrive when tucked into the crevices of driftwood. They require no soil and add a living element to your “ghost wall,” reinforcing the biophilic benefits of the structure.
Advanced Considerations: Lighting and Integration
For those who want to take their partition to a professional level, consider integrating technology into the natural wood. Hidden LED strip lighting can be routed into the back of a large driftwood trunk, creating a soft, indirect glow that highlights the texture of the bark at night. This turns the divider into a primary light source for the room, eliminating the need for bulky floor lamps.
You can also consider “hybrid” structures where driftwood is combined with other materials. For instance, suspending glass shelves between two sturdy driftwood pillars creates a functional display area for books or ceramics. This requires precision drilling and the use of heavy-duty shelf pins, but it maximizes the utility of the partition in a small studio.
Finally, think about the future removal of the structure. If you are anchoring into a ceiling with a “popcorn” or textured finish, consider installing a thin, flat piece of trim (a “furring strip”) first. Secure the driftwood to this strip. When you move out, you only have to patch the few holes where the strip was attached, rather than dozens of individual branch holes.
Example Scenario: The Industrial Loft Partition
Imagine a 500-square-foot industrial studio with 12-foot ceilings and concrete floors. A traditional folding screen would look lost in such a vast, vertical space. Instead, the resident sources five 10-foot “skeletal” cedar trunks from a local riverbank. After cleaning and sealing the wood with a matte water-based finish, they use a floor-to-ceiling tension frame made of dark-stained oak.
The trunks are positioned between the bed and the main living area, spaced roughly 8 inches apart. This creates a rhythmic, vertical pattern that echoes the tall windows of the loft. By night, small spotlights on the floor aim upward through the branches, casting long, dramatic shadows across the ceiling. The result is a space that feels like a high-end designer suite, built with materials that cost nothing but a day’s labor and a bit of grit.
Final Thoughts
A driftwood room divider is more than a simple piece of furniture. It is a statement about how you choose to occupy your space. By choosing materials with history and installing them with structural intent, you transform a temporary apartment into a permanent home. The “bones” of the driftwood provide a framework for your life, offering privacy, light, and a connection to the natural world that modern construction often lacks.
Building this structure requires patience—the patience to find the right wood, the patience to let it dry, and the precision to install it correctly. However, the reward is a legacy-quality architectural feature that will last as long as the building itself. Whether you are a renter looking for a non-destructive zoning solution or a homeowner wanting to add organic weight to a sterile room, the vertical driftwood bone is the ultimate tool for defining your domain.
Do not settle for the flimsy and the temporary. Look to the water, find your timber, and start building. Your home deserves a structure that reflects the strength and character of its inhabitant.
Sources
1 dormtherapy.com (https://www.dormtherapy.com/room-divider-ideas-100013172) | 2 youtube.com (https://www.youtube.com/watch?v=AP7xBKVXW7A) | 3 andorwillow.com (https://andorwillow.com/blogs/blog/best-ways-to-separate-studio-bedroom-from-living-room) | 4 mymumthedreamer.com (https://mymumthedreamer.com/how-to-clean-driftwood-for-crafting/) | 5 extremehowto.com (https://extremehowto.com/install-a-wood-plank-ceiling/) | 6 thenordroom.com (https://www.thenordroom.com/studio-apartment-room-divider-ideas/) | 7 dtwooddecor.com (https://www.dtwooddecor.com/driftwood-coffee-table-care-and-maintenance/) | 8 wikihow.com (https://www.wikihow.com/Clean-Driftwood) | 9 trendhunter.com (https://www.trendhunter.com/trends/driftwood-room-dividers) | 10 diydriftwood.com (https://diydriftwood.com/driftwood-refinishing-techniques/) | 11 etwoodcrafts.com (https://etwoodcrafts.com/blogs/news/how-to-build-a-room-divider-wall) | 12 hgtv.com (https://www.hgtv.com/decorating/design-ideas/install-tongue-and-groove-wood-floors-on-a-ceiling)