Modern plastic racks fail in months, but the wood that survived the Atlantic can hold your weight forever. We’ve traded the durability of solid timber for wobbly plastic that clutters our halls. Go back to the ancestral way: vertical logs that dry your boots and save your floor space.
Imagine walking into a home where the furniture doesn’t just hold your belongings but tells a story of survival. Most modern entryways are a graveyard of snapped plastic pegs and sagging particle board shelves. These mass-produced eyesores struggle to hold a single pair of heavy work boots without groaning. They are designed for a disposable world, destined for a landfill the moment the first heavy winter sets in.
True utility requires grit. It requires materials that have been tempered by the elements. A driftwood shoe rack isn’t just a Pinterest-friendly decoration; it is a structural commitment to the way things used to be built. When you mount a vertical log to your wall, you are reclaiming the verticality of your home, turning a cramped, narrow hallway into a functional mudroom.
The transition from MODERN PLASTIC RACK vs ANCESTRAL LOG POSTS is more than an aesthetic choice. It is a shift from thin-walled polymers to dense, salt-cured fibers. Whether you are a city dweller with a sliver of an entryway or a country homesteader dealing with real mud, the vertical log system offers a solution that respects both your space and your footwear.
In this guide, we will explore why solid timber is the only logical choice for high-traffic zones. We will walk through the process of harvesting, treating, and installing a driftwood rack that will outlast the house it stands in.
Driftwood Shoe Rack For Narrow Hallways
A driftwood shoe rack is a vertical storage system built from reclaimed timber that has been naturally seasoned by water and sun. Unlike horizontal benches that consume precious floor width, this system utilizes the “dead space” on your walls. It consists of a central spine—often a sturdy piece of sun-bleached driftwood—fitted with staggered pegs or branches designed to hold shoes and boots upside down.
This design exists because narrow hallways are the primary bottleneck of the modern home. In many urban apartments or older cottages, the entryway is a slender strip of floor where a standard 12-inch deep shoe rack becomes a tripping hazard. By shifting the storage to a vertical log post, you reduce the footprint to nearly zero. You aren’t just storing shoes; you are clearing a path.
In real-world terms, imagine the “mudroom” of a 19th-century logging camp. There was no room for delicate furniture. Boots were hung on wall-mounted pegs near the heat source to ensure they were dry by dawn. The driftwood rack brings this rugged efficiency into the modern aesthetic. It uses the natural curves and strength of the wood to create a “boot tree” that looks like a piece of sculpture when empty and a heavy-duty organizer when full.
Visualizing this is easy: think of a tall, silvered piece of cedar or oak mounted firmly to a wall stud. Sturdy dowels or the natural branches of the wood extend outward at an upward angle. Your boots slide onto these pegs, soles facing out. Gravity does the work of keeping them secure, while the open air circulates inside the boot, preventing the damp rot that ruins leather.
The Anatomy of the Ancestral Rack: How to Do It
Building a driftwood shoe rack requires a blend of beachcombing intuition and basic carpentry. You cannot simply pull a log out of the surf and bolt it to your drywall. The wood must be prepared to live indoors, or you risk bringing rot, salt, and pests into your living space.
The process begins with the hunt. 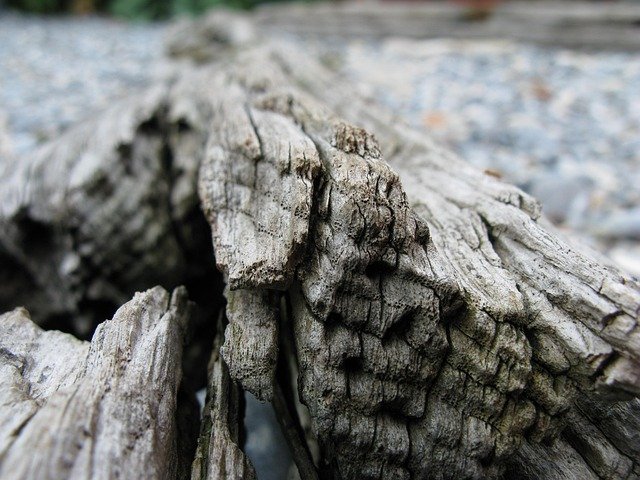 . You are looking for “hard” driftwood—pieces that feel heavy for their size and do not crumble when poked with a finger. . Avoid wood that smells of chemicals or has a waxy, oily sheen, as these may have been treated with creosote or other industrial toxins. Ideal candidates are cedar, oak, or juniper, which are naturally rot-resistant.
Once you have your timber, the sanitation phase is mandatory. Start by scrubbing the log with a stiff brush to remove sand, dried algae, and loose bark. Most experts recommend a deep soak in a solution of one part bleach to nine parts water. This kills any lingering bacteria or wood-boring insects. Let the wood submerge completely for at least 24 hours. If the log is too large for a tub, you can use a plastic-lined trough.
After the soak, the wood must dry. This is where most beginners fail. Driftwood is often waterlogged to its core. Bringing it inside too early will lead to warping or mold. Leave the wood in a dry, shaded area with good airflow for at least two to four weeks. For a truly professional finish, some practitioners use a DIY kiln or a low-temperature oven setting (below 200 degrees Fahrenheit) to ensure the core moisture is gone.
The assembly involves drilling holes for your pegs. If your driftwood has strong natural branches, you can leave them as-is. However, most functional racks use 1-inch thick hardwood dowels. Drill into the central log at a 15-to-20-degree upward angle. . This angle is critical; it ensures that heavy boots stay put and don’t slide off onto the floor. Use a high-quality wood glue and a countersunk screw from the back of the log to secure each peg.
Benefits of Solid Timber over Plastic
The most immediate benefit of a driftwood shoe rack is its sheer weight-bearing capacity. A cheap plastic rack is held together by friction and thin plastic tabs. When you load it with four pairs of wet, size-12 leather boots, the frame begins to parallelogram. Over time, the plastic becomes brittle, especially if it’s near a radiator or exposed to UV light from a window. Solid driftwood, having survived the ocean, is indifferent to your heavy footwear.
Airflow is the second major advantage. Traditional shoe cubbies trap moisture. When you slide a damp shoe into a confined plastic box, you are creating a petri dish for bacteria and odors. The vertical log post keeps shoes “in the round.” Air can move freely around the exterior and, more importantly, up into the shaft of the boot. Storing boots upside down on a peg is the fastest way to dry them naturally without the risk of cracking the leather with direct heat.
Space efficiency in narrow hallways cannot be overstated. A horizontal rack might hold six pairs of shoes but occupies four square feet of floor space. A vertical driftwood rack can hold the same six pairs while occupying the footprint of a single soda can. This “verticality” opens up the hallway, making the home feel larger and more organized the moment you step through the door.
Finally, there is the environmental and aesthetic factor. Every plastic rack eventually ends up in a landfill. A driftwood rack is a carbon-sequestering piece of history. It brings a “pioneer-grit” aesthetic to the home—a reminder of the natural world that balances the sterile lines of modern architecture. It is a conversation piece that serves a vital domestic function.
Challenges and Common Mistakes
Working with natural materials presents hurdles that you won’t find in an IKEA box. The most common mistake is failing to secure the rack to the wall properly. A vertical log, especially when loaded with boots, acts as a long lever. If you use simple drywall anchors, the weight will eventually pull the rack out of the wall, leaving a massive hole. You must locate the wall studs and use 3-inch or 4-inch heavy-duty lag screws to anchor the timber directly to the home’s frame.
Another pitfall is “tannin bleed.” Many types of driftwood, particularly oak, contain high levels of tannins. If the wood isn’t properly sealed, moisture from wet boots can cause these tannins to leach out, staining your wall or the boots themselves. To avoid this, after the wood is fully dry, apply several coats of a high-quality sealer. Linseed oil or tung oil provide a natural, matte look, while a clear polyurethane offers a more robust moisture barrier.
Ignoring the “splinter factor” is a mistake that leads to ruined socks. Driftwood is often rugged and weathered. While this looks great, the tiny fibers can snag delicate shoe linings. Every peg and every inch of the main log should be sanded with progressively finer grits—starting at 80 and ending at 220—until the surface is smooth to the touch.
Spacing errors also plague DIY projects. If you place the pegs too close together, the boots will overlap, preventing airflow and making it difficult to grab a pair in a hurry. A good rule of thumb is to allow at least 10 inches of vertical space between pegs for standard shoes and 16 inches for tall boots.
Limitations and Realistic Constraints
While the driftwood shoe rack is a superior storage solution, it isn’t universal. One major limitation is capacity. A single log post can comfortably hold 4 to 8 pairs of shoes. If you have a family of five with a collection of 50 pairs, a single vertical rack won’t solve your problem. You would need a forest of logs, which might overwhelm a small hallway.
Environment also plays a role. In extremely humid climates, even treated wood can struggle if there is zero airflow. If your hallway is a windowless, unventilated closet, a driftwood rack might still fall prey to surface mold if you hang soaking-wet boots on it daily. In these cases, the rack should be placed near a vent or a ceiling fan.
The “industrial load” is another consideration. While driftwood is strong, it is not indestructible. If you have specialized equipment—like heavy steel-toed logging boots or deep-sea wading boots that weigh 10 pounds each—you cannot rely on thin natural branches. You must use thick, kiln-dried hardwood dowels reinforced with steel bolts to ensure the “pegs” don’t snap under the leverage.
Finally, there is the matter of “mess.” Storing boots upside down means that any mud or water on the soles will drip. If you have expensive hardwood floors or white carpets, you cannot simply let the boots drip onto the floor. You will need to place a small, high-walled copper or rubber tray at the base of the log to catch the debris.
Comparison: Modern Plastic vs. Ancestral Log Posts
To understand the value of this approach, we must look at the measurable differences between the two systems.
| Feature | Modern Plastic Rack | Ancestral Log Post |
|---|---|---|
| Durability | Low (prone to cracking/sagging) | Extreme (outlasts the home) |
| Hallway Footprint | 12″–18″ depth (bulky) | 4″–6″ depth (ultra-slim) |
| Boot Drying Speed | Slow (trapped air) | Fast (360° airflow) |
| Maintenance | None (replace when broken) | Occasional oiling |
| Environmental Impact | High (petrochemical based) | Low (reclaimed/natural) |
The table makes the choice clear for those who value longevity. While the plastic option is cheaper upfront, its “cost per year of use” is significantly higher. The log post is an investment in both time and craftsmanship that pays dividends in reclaimed floor space and boot health.
Practical Tips and Best Practices
If you are ready to build, keep these best practices in mind to ensure a professional result.
- Harvest after a storm: The best driftwood is pushed high onto the beach after a major swell. This wood has been battered and “cleaned” by the heavy surf, leaving only the strongest heartwood behind.
- Use a Stud Finder: Never guess where your wall studs are. A vertical log is too heavy for toggles. Mark your studs clearly with a pencil before you even pick up your drill.
- The “Heel Hook” Method: When installing pegs, test them with your largest pair of boots. The peg should sit deep enough into the boot that the heel “hooks” slightly over the end. This prevents the boot from rotating or falling if the wall is bumped.
- Stagger Your Pegs: Don’t align your pegs in a perfect vertical line. Stagger them left and right. This allows the boots to “nest” together, maximizing the number of pairs you can fit on a single log.
- Rubber Feet: If the log rests on the floor, glue a piece of heavy-duty rubber or felt to the bottom. This prevents the log from scratching your floor and acts as a barrier against any moisture that might wick up from the ground.
These small adjustments make the difference between a “craft project” and a permanent piece of home infrastructure. Attention to detail is what separates the ancestral way from the modern shortcut.
Advanced Considerations: Scaling and Stability
For those with larger homes or more demanding footwear needs, you can scale the system by creating a “pioneer wall.” This involves mounting multiple driftwood logs side-by-side, creating a structural forest in your entryway. When doing this, ensure you are anchoring each log to a different stud (usually 16 inches apart in modern construction). This distributes the weight across the entire wall frame rather than stressing a single point.
Stability is also a factor of the wood’s shape. If your driftwood is perfectly round, it will want to roll against the wall. Advanced builders will “flat-back” the log. Use a drawknife or a planer to remove a half-inch of material from the side that will touch the wall. This creates a flat mating surface that prevents the rack from twisting over time.
Consider the species of wood for specialized environments. If your rack will be in a non-climate-controlled mudroom or a porch, stick with Atlantic Cedar or Cypress. These woods contain natural oils that repel insects and resist rot even in the dampest conditions. If the rack is strictly for dry, indoor use, the silvered “skeletons” of Maple or Birch offer a stunning, bone-white aesthetic that fits modern minimalist decor.
For the ultimate “pro” setup, integrate a boot scraper at the base. You can mount a stiff-bristled brush or a repurposed cast-iron scraper to the bottom of the log. This encourages guests to clean their boots before they ever touch the rack, keeping your hallway cleaner and your driftwood looking its best.
Example Scenario: The Rain-Soaked Monday
To see the system in action, consider a typical winter Monday. You arrive home with a pair of heavy, water-logged leather boots covered in road salt and slush.
In a house with a standard plastic rack, you would kick those boots onto a flat shelf. The water would pool under the sole, soaking into the leather. The salt would sit in the crevices of the plastic, eventually causing it to discolor and crack. By Tuesday morning, the interior of the boots would still be clammy, and the hallway would smell of wet dog.
In the ancestral home, you slide those boots onto the driftwood pegs. The slush drips harmlessly into the copper tray below. Because the boots are upside down, the heavy, moist air inside the boot falls out, replaced by the warm, rising air of the house. By morning, the leather is dry and supple. The hallway is clear, the path is open, and the vertical log stands as a silent, silvered guardian of your entryway.
Final Thoughts
The return to solid timber isn’t about rejecting technology; it’s about remembering what works. Modern plastic racks are a symptom of a “fast furniture” culture that prioritizes convenience over character. By choosing the driftwood path, you are opting for a system that respects the physics of drying and the reality of small living spaces.
A driftwood shoe rack is more than a place to put your sneakers. It is a piece of the coast brought inland, a functional sculpture that provides 360-degree airflow and unmatched durability. It takes a narrow hallway—the most frustrating part of many homes—and turns it into a showcase of rugged utility.
Whether you harvest your timber from a rocky coastline or a riverbank, the process of building your own rack connects you to a lineage of makers who knew that if you want something to hold your weight forever, you look to the trees. Experiment with the angles, sand the grain until it shines, and reclaim your hallway from the clutter of the modern world.
Sources
1 decortie.co.uk (https://decortie.co.uk/blogs/news/maximising-small-entryways-the-ultimate-guide-to-hallway-shoe-storage-2) | 2 youtube.com (https://www.youtube.com/watch?v=zfu2XkmSJaI) | 3 reddit.com (https://www.reddit.com/r/Bushcraft/comments/1da9fpg/whats_the_consensus_on_putting_hot_rocks_from_the/) | 4 applog.com (https://www.applog.com/blog/log-homes-throughout-the-centuries)