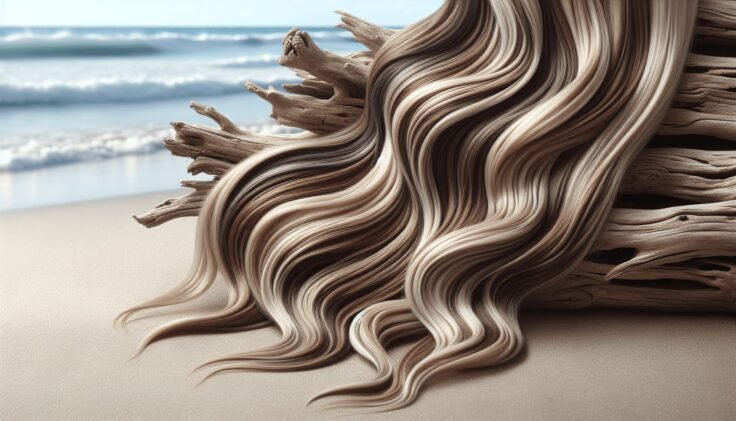
Driftwood Vertical Lamp Diy For Studio Apartments
Small rooms don’t need more light; they need better shadows. Anyone can stick a light strip to a wall, but a pro knows how to use natural textures to diffuse that light into a work of art. This vertical driftwood light column takes up zero floor space while becoming the soul of the room.
Living in a studio apartment often feels like a constant battle against the square footage. Most people try to solve the gloom by flooding every corner with overhead LEDs, turning a cozy sanctuary into a sterile interrogation room. Real character comes from the interplay of light and texture, and nothing provides a more complex surface than wood sculpted by the tides.
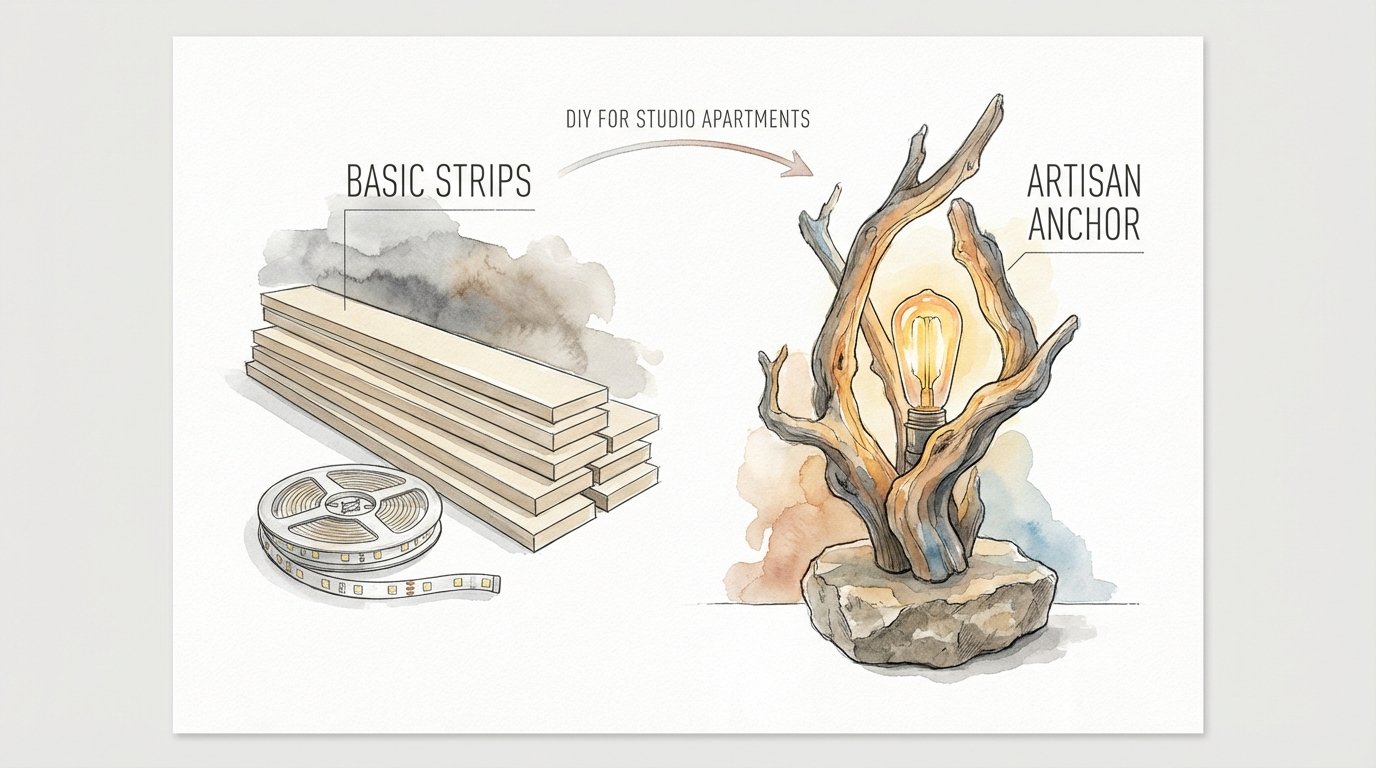
This project is about reclaiming your space and your atmosphere. We aren’t just building a lamp; we are anchoring a piece of the natural world into a modern, cramped environment. It’s a marriage of “Artisan Anchor” aesthetics—the rugged, heavy, and permanent—and the “Basic Strip” utility that keeps our modern lives running.
Building this requires a bit of grit, a steady hand with a drill, and the patience to let nature dictate the final form. If you’re tired of mass-produced plastic and want a light that tells a story of the sea and the forest, you’ve found your next mission.
Driftwood Vertical Lamp Diy For Studio Apartments
A vertical driftwood lamp is essentially a floor-to-ceiling (or near-floor) pillar of natural wood that houses a hidden light source. Unlike traditional lamps that sit on tables or have wide, tripping-hazard bases, this vertical column utilizes the “dead space” in corners or narrow gaps between furniture. It exists to turn a structural necessity into a sculptural focal point.
Studio apartments suffer from a lack of architectural depth. 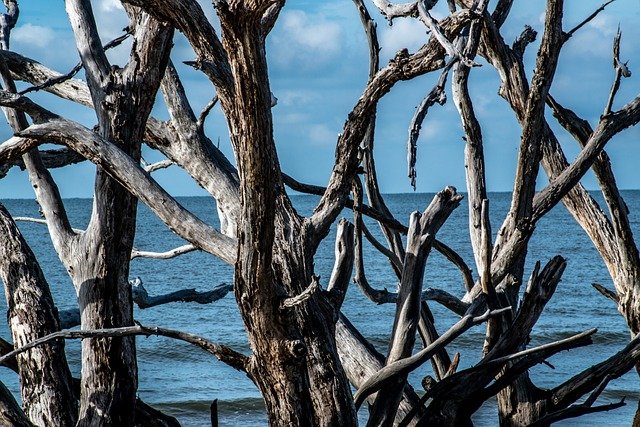 . This DIY solution creates a vertical line that draws the eye upward, making the ceiling feel higher and the room more expansive. By using wood found on shorelines or riverbanks, you introduce organic curves that break up the harsh right angles of apartment walls and windows.
In the real world, these lamps serve as “anchor pieces.” They provide ambient “wall-grazing” light, which is a technique where the light source is placed close to a textured surface to highlight its highlights and shadows. This creates a sense of warmth and history that no flat-panel light can replicate. It’s the difference between a campfire and a flashlight.
Whether you find your wood at the coast or along a muddy riverbank, the goal remains the same: to find a piece with enough structural integrity to stand tall and enough character to be worth looking at even when the light is off.
How to Build Your Vertical Light Column
Success starts with the hunt. You need a piece of wood that is relatively straight but possesses enough “gnarl” to create interesting shadows. Look for hardwoods like oak, cedar, or even manzanita if you’re out West, as these won’t rot as easily and can handle the heat of a light source.
Preparation is where most people fail. You cannot simply drag a log from the beach into your bedroom. It is likely home to salt, sand, and hitchhiking insects. Start by power-washing the piece to remove loose debris, then soak it in a solution of one part bleach to ten parts water for at least 24 hours. This kills bacteria and prevents your apartment from smelling like a swamp.
Once the wood is bone-dry—which can take a week in the sun or a few hours in a DIY kiln—it’s time to drill. You will need a long spade bit (at least 12-16 inches) to create a channel for the wiring. Drill from the base upward as straight as possible. If the wood is too curved for a single long hole, you may need to drill “access points” along the back of the trunk and “fish” the wire through in sections.
For the base, a heavy metal plate or a thick slab of reclaimed hardwood works best. A top-heavy lamp is a liability in a small apartment. Secure the driftwood to the base using zinc-plated nipples (threaded pipes) and nuts. This creates a solid “spine” that ensures your lamp won’t topple when someone accidentally bumps it during a dinner party.
The lighting element can be a standard lamp kit or a high-CRI (Color Rendering Index) LED strip. If using a strip, mount it into a recessed groove on the backside of the wood so the light “grazes” the wall behind it. This hides the “Basic Strip” hardware and focuses the attention on the “Artisan Anchor” of the wood itself.
Step-by-Step Assembly Checklist
- Clean and sanitize the wood using a bleach soak or heat treatment.
- Sand the surface with 80-grit to 220-grit paper to prevent splinters while keeping the texture.
- Drill the wire channel using a 3/8-inch spade bit.
- Mount the wood to a heavy base (weighted steel or heavy oak).
- Install a UL-listed lamp socket or LED channel.
- Wire the plug and add an in-line floor switch for easy operation.
Benefits of Vertical Natural Lighting
The most immediate benefit is the conservation of floor space. In a 400-square-foot studio, every inch is a premium. A vertical lamp has a footprint of perhaps six inches but provides a massive amount of visual “weight.” It replaces the need for bulky floor lamps that usually have legs stretching out into your walking path.
Texture-driven lighting also improves the “perceived quality” of your light. Standard bulbs emit light in a 360-degree sphere, often hitting you directly in the eyes. A driftwood lamp acts as a natural diffuser. The wood absorbs some of the light and redirects the rest, creating a soft, warm glow that is much easier on the eyes during evening hours.
Another advantage is the unique “fingerprint” of the piece. No two pieces of driftwood are the same. You are creating a bespoke furniture piece for the cost of a few hardware store parts. This adds a level of sophistication to an apartment that might otherwise be filled with “flat-pack” furniture.
Finally, there is a psychological benefit to bringing the outdoors in. Natural wood has been shown to reduce stress levels and create a more grounded atmosphere. In a high-rise or a dense urban environment, having a towering piece of nature in the corner of your room provides a vital connection to the world outside the concrete walls.
Challenges and Common Mistakes
Stability is the number one pitfall. Beginners often use a base that is too light, resulting in a lamp that sways or falls at the slightest touch. If your wood is five feet tall, your base needs to be either extremely heavy (at least 10-15 pounds) or physically anchored to the wall using a hidden bracket. Physics doesn’t care about your aesthetic.
Splitting the wood during the drilling process is another frequent error. Driftwood is often more brittle than fresh lumber because the salt and water have leached out the natural oils. Always pre-drill your holes and use sharp, high-quality bits. If you feel the drill getting stuck, back it out and clear the wood chips before proceeding.
Electrical safety should never be ignored. . Never run high-voltage wires through a narrow wooden channel without ensuring the insulation is intact. Using a “lamp kit” with a protective threaded pipe (nipple) is the safest way to go. If you are using LED strips, make sure the power supply is rated for the length of the strip to prevent overheating.
Many DIYers also forget to “cure” the wood properly. If you bring “wet” wood inside, it will shrink as it dries in your climate-controlled apartment. This can cause the wood to crack or, worse, cause the light fixtures to become loose and rattle. Give the wood ample time to reach “equilibrium” with your home’s humidity before you finalize the construction.
Limitations: When the Beach Doesn’t Belong Inside
Not every piece of wood is a candidate for a lamp. If the wood is “punky”—meaning it feels soft or spongy to the touch—it is already rotting. No amount of bleach or sealant will make it structurally sound. A vertical lamp needs to be a pillar of strength, and rot is a deal-breaker.
Environmental limitations also play a role. If you live in an extremely humid basement apartment, untreated driftwood can eventually develop mold or mildew. In these cases, you must seal the wood with a high-quality polyurethane or wax finish, which might change the “raw” look you were going for.
There are also practical trade-offs regarding light output. A driftwood lamp is an “accent” or “ambient” light source. It will not provide enough illumination to read a book comfortably across the room or to light up a kitchen for cooking. If you only have one light source in your studio, this shouldn’t be it. It’s meant to be part of a layered lighting strategy.
Lastly, check your local regulations. In some coastal areas, it is illegal to remove driftwood because it provides a habitat for local wildlife or prevents beach erosion. Always source your materials legally and ethically. If you can’t find it yourself, many specialty garden centers sell pre-cleaned “mopani” or “ghost wood” that is perfect for this application.
Artisan Anchor vs. Basic Strips
In the world of DIY lighting, there is a tension between the “Artisan Anchor”—pieces with heavy physical presence—and “Basic Strips,” which are the convenient, low-profile LED tapes. Understanding when to use which is the hallmark of a serious maker.
| Feature | Artisan Anchor (Driftwood) | Basic Strips (Commercial LED) |
|---|---|---|
| Visual Impact | High – Becomes a focal point. | Low – Meant to be hidden. |
| Complexity | Moderate to High. | Low – Peel and stick. |
| Light Diffusion | Natural and complex. | Harsh unless used with a diffuser. |
| Floor Space | Minimal (6-10 inch base). | Zero. |
The magic happens when you combine them. Using a “Basic Strip” hidden behind an “Artisan Anchor” gives you the modern control of dimming and color temperature with the timeless beauty of raw wood. It’s the best of both worlds for a studio apartment.
Practical Tips and Best Practices
If you find the perfect piece of wood but it’s just a little too wobbly, use the “fishing line trick.” Loop a high-test clear monofilament line around the top of the wood and anchor it to a small screw in the wall or ceiling. It will be invisible to the naked eye but will prevent the lamp from ever tipping over.
When selecting a light bulb, go for a “warm” temperature. Look for 2700K on the package. This mimics the color of a sunset and complements the natural browns and tans of the wood. A “cool white” bulb (5000K) will make your driftwood look grey and lifeless, like a piece of bleached bone in a laboratory.
Don’t over-sand. The beauty of driftwood lies in the weathered texture created by the elements. Use a wire brush to remove the loose, soft parts, but leave the deep grooves and knots intact. If you sand it down until it’s perfectly smooth, it will just look like a piece of lumber you bought at the hardware store.
Consider the “shadow cast.” Before you finalize the position of your light source, hold a flashlight behind the wood in a dark room. Move it around to see how the shadows fall on the wall. A few inches of movement can completely change the vibe of the room. You want the shadows to be soft and “feathered,” not sharp and scary.
Advanced Considerations for Practitioners
For those who want to take this project further, consider integrating smart-home technology. A Wi-Fi-enabled dimmer allows you to set the lamp to “Golden Hour” mode, where the light slowly fades in as the sun goes down. This helps regulate your circadian rhythm, which is often disrupted in studio apartments with limited windows.
You can also experiment with “Dual-Sided Lighting.” If your driftwood is thick enough, you can mount a warm white strip on the back for wall grazing and a low-intensity spotlight on the top to illuminate the wood’s crown. This creates a 3D lighting effect that makes the column look like it’s glowing from the inside out.
If you’re working with extremely large or heavy wood, structural engineering becomes a factor. You may need to create a “C-bracket” that mounts directly to the wall studs. The wood then “floats” an inch off the ground, which is a stunning visual effect that makes the heavy “Artisan Anchor” look weightless. This also makes cleaning underneath the lamp much easier.
Finally, think about the finish. While raw wood is beautiful, a coat of tung oil or linseed oil can bring out the “fire” in the grain. This is a permanent change, so test a small patch on the back first. Oil finishes also provide a layer of protection against the drying effects of indoor heating systems.
Example Scenarios
Imagine a 350-square-foot industrial loft with exposed brick and concrete floors. A five-foot piece of vertical cedar driftwood, mounted on a heavy black steel base, sits in the corner next to a leather armchair. The light is hidden in a vertical groove, casting a warm glow across the brick. The shadows from the gnarled wood create a “forest” effect on the ceiling, making the cold industrial space feel like a woodland retreat.
In another scenario, consider a coastal-themed studio with white walls and light-blue accents. A slender, sun-bleached piece of pine driftwood is used as a wall sconce. It’s anchored to the wall with hidden brackets and wrapped in a simple filament bulb cord. The light reflects off the white walls, creating a bright, airy feel that mimics the midday sun at the beach, even on a rainy Tuesday in the city.
Lastly, think of a minimalist apartment where “clutter” is a sin. A perfectly straight, three-foot piece of river-washed oak is mounted on the side of a bookshelf. It doesn’t look like a lamp; it looks like a piece of sculpture. But when evening falls, a hidden motion sensor activates a soft, dimmable LED strip that provides just enough light to navigate the room without needing to turn on the harsh overhead lights.
Final Thoughts
Creating a vertical driftwood lamp is more than just a weekend project; it is a way to reclaim the atmosphere of your home. By choosing better shadows over more light, you transform a small studio apartment into a place of depth and mystery. It requires a bit of “pioneer grit” to source the wood, clean it, and wire it correctly, but the result is a piece of furniture that no store can sell you.
The beauty of this system lies in its balance. You are taking a raw, unpredictable material and taming it with modern technology. It reminds us that even in the most cramped, urban environments, we can still find a connection to the wild places. It’s an “Artisan Anchor” in a world of temporary, disposable things.
Don’t be afraid to experiment with different wood types or lighting placements. 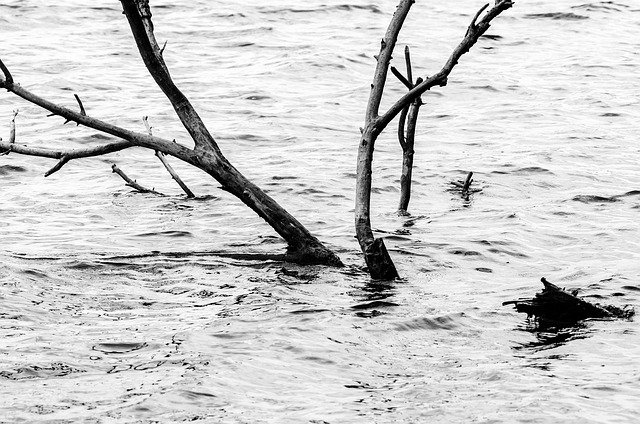 . The wood has already survived the sun, the wind, and the waves—it can handle a little bit of your trial and error. Build something that stands tall, casts a beautiful shadow, and makes your small space feel like a kingdom.
Sources
1 youtube.com (https://www.youtube.com/watch?v=bibML6DW_7Y) | 2 coohom.com (https://www.coohom.com/article/pillar-lighting-ideas-for-bedroom-design) | 3 lumen-8.com.au (https://lumen-8.com.au/news/importance-lighting-vertical-surfaces) | 4 hawk-hill.com (https://www.hawk-hill.com/how-to-clean-driftwood/) | 5 sunmory.com (https://www.sunmory.com/blogs/resources/how-to-make-driftwood-floor-lamp) | 6 scavengerchic.com (https://scavengerchic.com/2018/07/25/maine-driftwood-lamp-diy/) | 7 diydriftwood.com (https://diydriftwood.com/how-to-create-a-driftwood-lamp/) | 8 lustria.com (https://lustria.com/blogs/blog/how-to-make-a-driftwood-floor-lamp) | 9 mymumthedreamer.com (https://mymumthedreamer.com/how-to-clean-driftwood-for-crafting/) | 10 nhregister.com (https://www.nhregister.com/homeandgarden/article/DIY-driftwood-sconce-6471444.php) | 11 wikihow.com (https://www.wikihow.com/Clean-Driftwood) | 12 ambientwares.com (https://ambientwares.com/2428/5-things-to-keep-in-mind-when-building-lamps-diy-lighting/) | 13 mullanlighting.com (https://www.mullanlighting.com/us/blog/lighting-small-apartment/) | 14 instructables.com (https://www.instructables.com/Making-a-Driftwood-Lamp/) | 15 aqua-fish.net (https://en.aqua-fish.net/articles/aquarium-driftwood-faq-guide) | 16 getquipt.com.au (https://getquipt.com.au/blogs/news/the-difference-between-led-strips-and-traditional-lights-which-is-better) | 17 youtube.com (https://www.youtube.com/shorts/IOKEtWYmdV0) | 18 diydriftwood.com (https://diydriftwood.com/step-by-step-directions-driftwood-lamp/) | 19 dksstores.com (https://vertexaisearch.cloud.google.com/grounding-api-redirect/AUZIYQFN8ve-uzjuaUQ2tkXitXfXUwVCQvWC9iSxJon49YUmEP10z2fxRpVjQ2f7Ct4KchVSizYAIylRgw_NT02l2XFXhw1TkcOmqHUUQeaOJ3XPJ6LkedrvX4eubLEFbA==) | 20 stackexchange.com (https://diy.stackexchange.com/questions/38403/what-do-i-need-to-know-about-led-strip-lighting)