Are you letting your best beach finds rot in the mud before you can even use them? Most foragers treat their haul like trash, tossing it in a pile where moisture and microbes eat the grain. Precision storage turns a raw find into ‘beach-cured’ lumber. Controlling the airflow and salt-gradient evaporation locks in the structural integrity and prevents the dreaded ‘punky’ wood finish. Stop piling, start positioning.
Every piece of wood pulled from the shoreline is a ticking clock. Without a proper system to stabilize the fibers, that beautiful twisted branch will eventually become a crumbly mess of fungus and salt-cracked cellulose. Most people think “drying” is just about time, but time alone is a thief that steals the wood’s strength.
True seasoning is an active process. It requires understanding how water leaves the wood and how to invite the wind to do the heavy lifting. This guide walks you through the transition from raw, sodden beach-drift to high-end crafting material that will last for generations.
The goal is a stable, sterile, and structurally sound piece of timber. Whether you are building a custom dining table or a delicate piece of wall art, the foundation of your success is laid the moment the wood leaves the sand. Let’s look at how to do it right.
How To Season Driftwood For Crafting
Seasoning driftwood is the process of reducing the moisture content of a piece of scavenged wood until it reaches an equilibrium with its environment. Unlike kiln-drying, which uses heat to force moisture out quickly, seasoning relies on natural airflow to allow the wood to stabilize slowly. This slow pace is vital for driftwood because the wood has often already undergone significant cellular stress from salt saturation and water immersion.
At its core, seasoning is about managing the ‘bound water’ inside the wood cells. When you first find a piece of driftwood, it is likely saturated with ‘free water’—liquid that fills the gaps between the fibers. Once this is gone, the wood reaches the fiber saturation point. The real work begins after this, as you coax the moisture out of the cell walls themselves without causing the wood to check, crack, or warp beyond repair.
Real-world seasoning isn’t just about dryness; it’s about chemistry. Ocean driftwood is packed with salt, which is hygroscopic, meaning it naturally pulls moisture from the air. If you don’t address the salt, your wood will forever feel “clammy” and may even ruin any finish you apply later. Seasoning involves a dance between desalinization and evaporation.
The Step-By-Step Curing Process
Success starts with a clean slate. Before you even think about stacking your wood, you must remove the organic debris and salt that invite rot. Start by pressure-washing or vigorously scrubbing the piece with a stiff-bristled brush. This removes the outer layer of “slime,” algae, and loose sand that acts as a sponge for moisture.
Desalinization is the next critical phase. For smaller pieces, submerge the wood in a large tub of fresh water for several days, changing the water daily. This creates an osmotic draw, pulling the salt out of the wood fibers and into the fresh water. Larger logs can be left out in the heavy rain for a season, though this requires more patience and careful monitoring of the ground contact.
Sterilization is non-negotiable if you plan to bring the wood indoors. A solution of one part bleach to nine parts water is a standard soak for killing mold spores and wood-boring insects. Let the wood soak for 24 to 48 hours. If you prefer a more natural route, a concentrated salt-and-vinegar soak can work, but it won’t provide the same deep-level pest elimination as a mild bleach or borate solution.
Stacking is where the “Airflow Matrix” comes into play. Instead of a random heap, use stickers—small, uniform strips of dry wood—to separate each layer of your find. This ensures that air moves over every square inch of the wood’s surface. Elevate the entire stack at least six inches off the ground using cinder blocks or a wooden frame to prevent moisture from wicking up from the soil.
Benefits of Proper Seasoning
Structural stability is the primary reward for your patience. Wood that has been properly seasoned is less likely to “move” once it is turned into furniture. Because the cellular tension has been released slowly, the wood is less prone to the violent cracking that occurs when wet wood is brought into a heated home.
Finish quality is significantly improved on seasoned timber. Salt-saturated wood often rejects oils, waxes, and varnishes, leading to a blotchy or “chalky” appearance. By seasoning and desalinating correctly, you ensure that your wood finish bonds deeply with the fibers, highlighting the natural silver-grey patina or deep heartwood colors.
Pest and rot prevention are the final pillars. A well-seasoned piece of wood is an inhospitable environment for fungi and beetles. Once the moisture content drops below 20%, most rot-causing organisms go dormant or die. Bringing the moisture down to the 6-10% range for indoor use effectively mummifies the wood, preserving its shape and texture for the long haul.
Challenges and Common Mistakes
The most common error is rushing the clock. Foragers often bring a piece of driftwood home, scrub the sand off, and start building the next day. This trapped moisture will eventually force its way out, usually by splitting the wood down the middle or causing the piece to warp into a “C” shape that ruins your joinery.
Direct sun exposure is another trap for the unwary. While the sun helps with bleaching and initial drying, “cooking” a wet log in high heat causes the outside to dry much faster than the core. This creates “case hardening,” where the outer shell shrinks and crushes the inner fibers, leading to internal cracks that you won’t see until you start cutting or sanding the piece.
Neglecting the ends of the logs is a recipe for disaster. Moisture leaves wood ten to fifteen times faster through the end grain than through the sides. To prevent “checking”—those deep cracks at the ends—seal the ends of your larger pieces with wax or a dedicated end-grain sealer. This forces the moisture to leave through the sides, ensuring a more even and controlled drying process.
Limitations of Driftwood Seasoning
Not every piece of wood can be saved.  . Wood that has reached the “punky” stage—where it feels soft, spongy, or can be indented with a fingernail—is already too far gone for structural use. While you can sometimes stabilize these pieces with thin resins, they will never have the integrity of a truly seasoned find.
Climate plays a massive role in your success. If you live in a region with 90% humidity, your wood may never reach the 8% moisture content required for indoor furniture without the help of a dehumidifier or a small solar kiln. Seasoning is a partnership with your local atmosphere, and sometimes the atmosphere doesn’t want to cooperate.
Size also dictates feasibility. A massive cedar root ball may take three to five years to season fully through air-drying alone. For most hobbyists, the space and time required to cure large-scale timber are significant hurdles. . You must weigh the value of the find against the square footage it will occupy in your shop or yard for the next several seasons.
Comparison: Airflow Matrix vs. Random Heap
| Feature | Random Heap | Airflow Matrix |
|---|---|---|
| Drying Speed | Uneven and slow | Consistent and optimized |
| Risk of Rot | High (moisture pockets) | Very Low |
| Warping/Cracking | Common due to tension | Minimized via slow release |
| Pest Control | Invites infestation | Discourages pests |
| Required Effort | Zero setup | Moderate setup |
Practical Tips for Best Results
Invest in a pin-type moisture meter. You cannot eyeball the internal moisture of a log. A meter allows you to track the progress and know exactly when your wood has reached its equilibrium. Aim for 15-20% for outdoor projects and 6-10% for indoor furniture.
Use a fan in your drying area if the air is stagnant. Even a slow-moving ceiling fan can cut weeks off your seasoning time. Moving air prevents the “boundary layer” of humid air from sitting on the wood surface, which is often the primary bottleneck in the evaporation process.
Keep your wood in the shade for the first 75% of the drying time. This prevents the “case hardening” mentioned earlier. Once the wood feels light and dry to the touch, you can move it into a sunnier spot or a warmer workshop to finish off the final few percentage points of moisture.
Label your finds with the date and location of collection. It’s easy to forget which piece has been sitting for six months and which one just came off the beach last week. A simple wax crayon or a tag can save you the heartache of cutting into a piece that isn’t ready yet.
Advanced Considerations for Serious Crafters
If you are working with extremely dense hardwoods like oak or madrone driftwood, consider a “slow-dry” box. This is a simple insulated container with a small light bulb or a low-wattage heater that provides a very controlled increase in temperature. This mimics a professional kiln but at a pace that is safe for the fragile fibers of scavenged timber.
Stabilizing resins are a powerful tool for salvaging “near-punky” wood. By placing the dry wood in a vacuum chamber with stabilizing resin, you can replace the air in the soft cells with plastic. Once cured, the wood becomes as hard as rock and can be turned on a lathe or sanded to a glass-like finish.
Chemical markers can tell you if your desalinization was successful. A simple silver nitrate test on a small sliver of the wood can detect residual chlorides. For high-stakes commissions, this level of verification ensures that your finish will never fail due to salt leaching years down the line.
Scenario: From Beach Log to Fireplace Mantel
Imagine finding a six-foot long piece of water-logged cedar on the Pacific coast. It weighs 150 pounds and is dripping with salt water. If you were to take it home and immediately mount it above your fireplace, the heat would cause it to split like a thunderclap within a month.
Instead, you spend the first week pressure washing the mud and bark away. You then submerge the log in a livestock trough filled with fresh water for two weeks, changing the water three times. You notice the “beach smell” (the tannins and decaying organics) starts to fade as the wood cleans up.
After a bleach soak, you stack the cedar in your garage on a raised platform. You use 1×1 stickers every 18 inches. Six months later, your moisture meter shows 12%. You move it into the house for two weeks to acclimate to the indoor humidity. The final weight is now only 60 pounds. 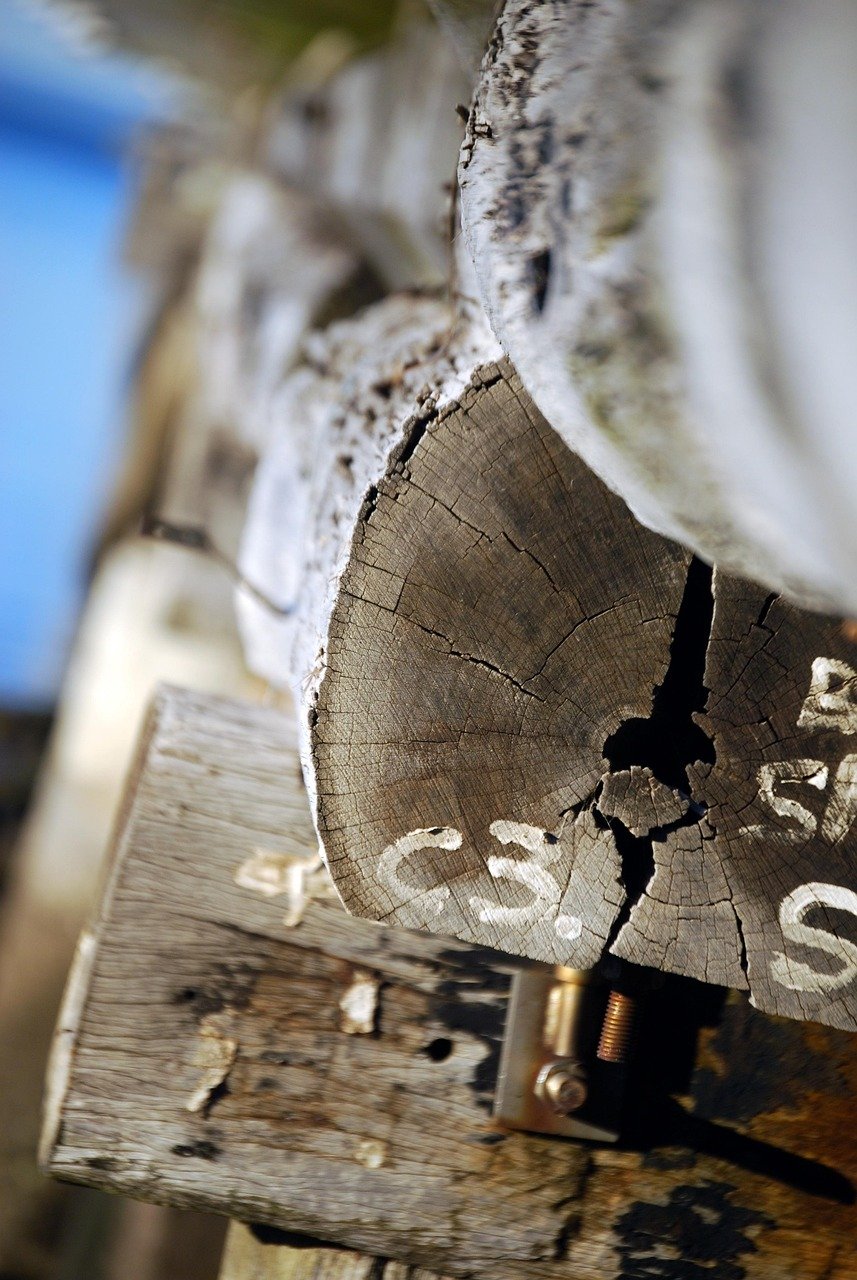 . The wood is light, stable, and ready for the final sanding and oiling. It looks like a million bucks and won’t move an inch.
Final Thoughts
Seasoning driftwood is an exercise in delayed gratification. It is the bridge between a piece of beach debris and a work of art. By respecting the natural physics of wood—how it holds water and how it reacts to the wind—you elevate your craftsmanship and ensure your work survives the test of time.
Remember that every piece of wood has a story, and the seasoning process is where you help write the ending. Don’t be afraid to experiment with different stacking methods or natural cleaners to find what works best in your specific climate. The wood will tell you when it’s ready; you just have to learn how to listen.
Start small, be patient, and stop letting those beautiful beach finds rot. Once you master the Airflow Matrix and the art of desalinization, you’ll never look at a piece of “trash” on the beach the same way again. Happy foraging.
Sources
1 boldesigninc.com (https://boldesigninc.com/kiln-dried-vs-seasoned-firewood/) | 2 hearth.com (https://www.hearth.com/talk/threads/difference-between-dry-and-seasoned-wood.65771/) | 3 chiassonsmoke.com (https://www.chiassonsmoke.com/blog/how-to-dry-out-fire-wood) | 4 wwgoa.com (https://www.wwgoa.com/post/steps-for-air-drying-lumber) | 5 exoticwoodzone.com (https://exoticwoodzone.com/blogs/e/h) | 6 k-timbers.com (https://k-timbers.com/top-4-wood-drying-methods-you-need-to-know/) | 7 rockler.com (https://www.rockler.com/learn/using-driftwood-in-woodworking)