Precision Woodworking Folding Desk Joints
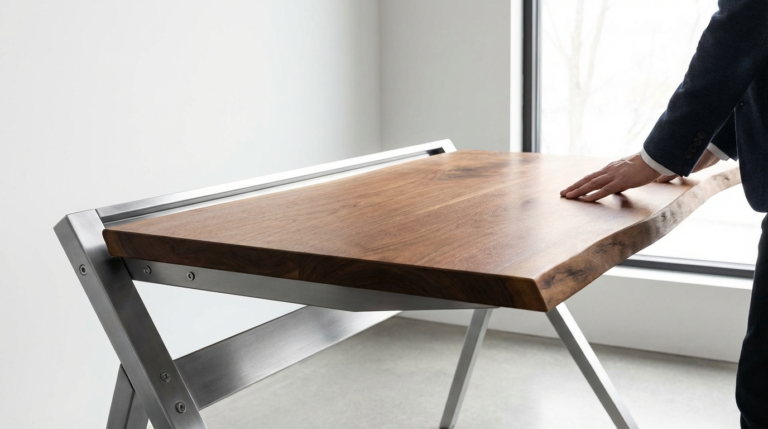
If your folding desk wobbles, you didn’t build it; you just assembled a collection of problems. Most DIYers rely on cheap hardware to hide bad joinery. We’re going the other way. Milling to the micron creates a folding mechanism that feels like a bank vault.
Stop settling for furniture that rattles every time you type. Precision woodworking transforms a simple utility item into a high-performance machine. This guide breaks down the techniques required to achieve legendary stability in folding furniture. We are moving past the world of “close enough” and entering the realm of absolute mechanical integrity.
Precision Woodworking Folding Desk Joints
Precision woodworking folding desk joints are the structural heart of any high-end collapsible furniture. Unlike standard fixed joinery, these joints must manage two conflicting states: perfect rigidity when locked and fluid movement when transitioning. Most commercial folding desks fail because they rely on thin metal brackets that flex under load. Precision joints replace that flimsy hardware with interlocking wood-on-wood geometry or high-tolerance integrated hinges.
These joints appear in campaign furniture, luxury yachts, and minimalist urban apartments where space is a premium. A well-executed knuckle joint or rule joint does not just look better; it provides a mechanical advantage. Traditional furniture makers used these techniques for centuries to create “Pembroke” tables and gate-leg desks that still function today. Using these methods ensures your desk survives decades of daily setup and teardown without losing its “snap.”
Integrated joinery also accounts for the unique challenges of solid wood. Steel does not expand when the humidity hits 80%, but cherry and oak certainly do. A precision joint incorporates tiny “relief” zones—measured in thousandths of an inch—to ensure the mechanism never binds. Achieving this level of fit requires a shift in mindset from “measuring with a tape” to “feeling with a feeler gauge.”
The Mechanics of the “Vault-Like” Feel
Creating a folding desk that feels solid requires mastering the physics of leverage and friction. Every pivot point is a potential failure site. If there is a microscopic gap in the hinge, that gap translates into a massive wobble at the edge of the desktop. Eliminating this “play” is the goal of precision milling.
Engineers call this tolerance management. In the workshop, we call it “sneaking up on the fit.” You start by milling your stock perfectly flat and square. Any twist in the board will act as a spring, fighting the folding mechanism and causing the joint to bind. Use a jointer and planer to get your components within 0.005 inches of thickness across their entire length.
Friction is your enemy during the fold but your friend during the lock. Strategic use of tapers can create a “wedging” effect. When the leg swings into place, a slight 1-degree taper on the mating surfaces can pull the joint tight, essentially locking the components together through compression. This creates a rock-solid feel that no screw-on hinge can ever replicate.
The Role of Center of Rotation
Successful folding joints rely on a consistent center of rotation. If you are using a knuckle joint, the pin must be perfectly centered within the rounded fingers. Even a 1/64-inch deviation will cause the joint to “cam” out, either creating a gap or forcing the wood to crush itself as it turns. Marking these centers requires a precision marking gauge and a sharp layout knife rather than a dull pencil.
How to Master the Knuckle Joint
The knuckle joint is the gold standard for folding desk supports. It is essentially a wooden hinge where interlocking “fingers” rotate around a central pin. This joint is commonly used for the swing-out legs that support a folding desktop.
Start by preparing two pieces of stock with identical thickness and width. Precision is non-negotiable here. Use a marking gauge set to the exact thickness of the wood to scribe a line around the end of both pieces. This creates a square “cube” at the end of the board where the knuckle will live.
Divide the width of the board into an odd number of equal sections—usually five. These will become your “fingers.” Use a pair of dividers to walk across the end grain until the points land exactly on your layout lines. This mechanical method is far more accurate than using a ruler and doing math. Transfer these lines to all four sides of the stock using a square and a marking knife.
Milling the Fingers
Waste away the alternating sections using a fine-tooth saw. Stay on the waste side of your knife lines. Professional results come from paring back to the line with a razor-sharp chisel. The goal is a sliding fit where the fingers of the two boards interlace with zero side-to-side play. If you can see light through the gaps, the joint is too loose.
Round the ends of the fingers to create the barrel of the hinge. Use the intersection of your layout lines on the side of the board as the center point for a compass. Scribe a circle and carefully plane the wood down to that arc. A block plane followed by a card scraper is the best way to achieve a smooth, consistent radius.
Drill a hole through the center of the assembled knuckles. A drill press is mandatory here to ensure the hole is perfectly perpendicular. Use a brass or steel rod as the pin for maximum durability. Wooden pins look great but can shear under the heavy lateral loads of a desk.
The Geometry of the Rule Joint
Rule joints are the classic solution for drop-leaf desks. This joint consists of a convex “roundover” on the main table and a matching concave “cove” on the folding leaf. When the leaf is down, the joint looks like a decorative molding. When it is up, the two surfaces meet in a seamless, supportive plane.
Geometry dictates the success of a rule joint. The center of the hinge pin must align perfectly with the center of the radius of the roundover. Most experts recommend “nudging” the hinge pin about 1/32 of an inch toward the edge of the table. This tiny offset creates a “clearance gap” as the leaf rotates, preventing the finished surfaces from rubbing together and ruining the wood.
Matching router bit sets are the easiest way to achieve this. However, high-end makers often use hand planes to tune the fit. You want the cove to “cradle” the roundover. When the leaf is raised, the shoulder of the roundover should provide a hard stop for the leaf, taking the weight off the hinges and transferring it into the main table structure.
Hinge Mortising for Rule Joints
Standard butt hinges will not work for a rule joint. You need specialized drop-leaf hinges with one leaf longer than the other. The long leaf spans the cove, allowing the hinge to reach the main table. Mortise these hinges with extreme care. If one hinge is deeper than the other, the leaf will sit at a slight tilt. Use a router plane to ensure the bottom of every mortise is at the exact same depth to within 0.002 inches.
Benefits of Precision Joinery
Choosing precision joinery over hardware offers measurable advantages in both performance and longevity. Most users notice the difference the moment they touch the furniture.
- Mechanical Stability: Precision-milled joints eliminate the “racking” or side-to-side sway common in folding furniture. The wood itself provides the structure, not a 12-cent screw.
- Aesthetic Integration: Traditional joints like the knuckle joint become a design feature. They signal a level of craft that mass-produced items cannot mimic.
- Longevity: Metal hinges eventually fatigue or pull out of the wood. A well-fitted wooden joint distributes stress across a much larger surface area, preventing localized wood failure.
- Tighter Tolerances: Hardware often requires “slop” to function. Precision joinery allows for “reveal gaps” as small as 0.5mm, creating a sleeker, more professional appearance.
Challenges and Common Mistakes
The biggest challenge in precision woodworking is managing the “stacking of errors.” If your table saw is 0.5 degrees out of square and your jointer is 0.01 inches off, the final joint will be a disaster.
One common mistake is failing to account for wood movement. Beginners often make joints “too tight.” A knuckle joint fitted to a “micron” in the winter will swell and shatter in the summer. Always leave a “midgie’s didge” of room for seasonal expansion. This is usually about the thickness of a piece of paper (0.003 to 0.004 inches).
Another error is relying on sandpaper to fix bad fits. Sandpaper rounds over crisp edges. For a folding mechanism to feel like a vault, the edges must remain dead-flat and sharp. Use hand planes and chisels for the final 0.005 inches of material removal. If you must sand, use a hard sanding block to prevent rounding.
The Trap of Softwoods
Using softwoods like pine for precision folding joints is usually a recipe for failure. The fibers are too easily crushed. A precision fit relies on the “hardness” of the cell walls to maintain its dimensions. Hardwoods like White Oak, Hard Maple, or Bubinga are preferred because they hold a sharp edge and resist the compression that leads to wobbles over time.
Limitations of High-Precision Joinery
Precision joinery is not always the best choice for every project. It requires a significant investment in time and high-quality tooling. A single knuckle joint can take a skilled woodworker several hours to execute perfectly.
Environmental stability is a major limitation. If you build a precision desk in a climate-controlled shop and then ship it to a humid coastal region, the joints may seize. This requires the maker to have a deep understanding of the “Equilibrium Moisture Content” (EMC) of their timber.
Furthermore, high-precision work is unforgiving. There is no wood filler that can hide a 1mm gap in a rule joint. If you over-cut a line, the part is usually scrap. This high stakes environment can be stressful for beginners who are still mastering basic tool control.
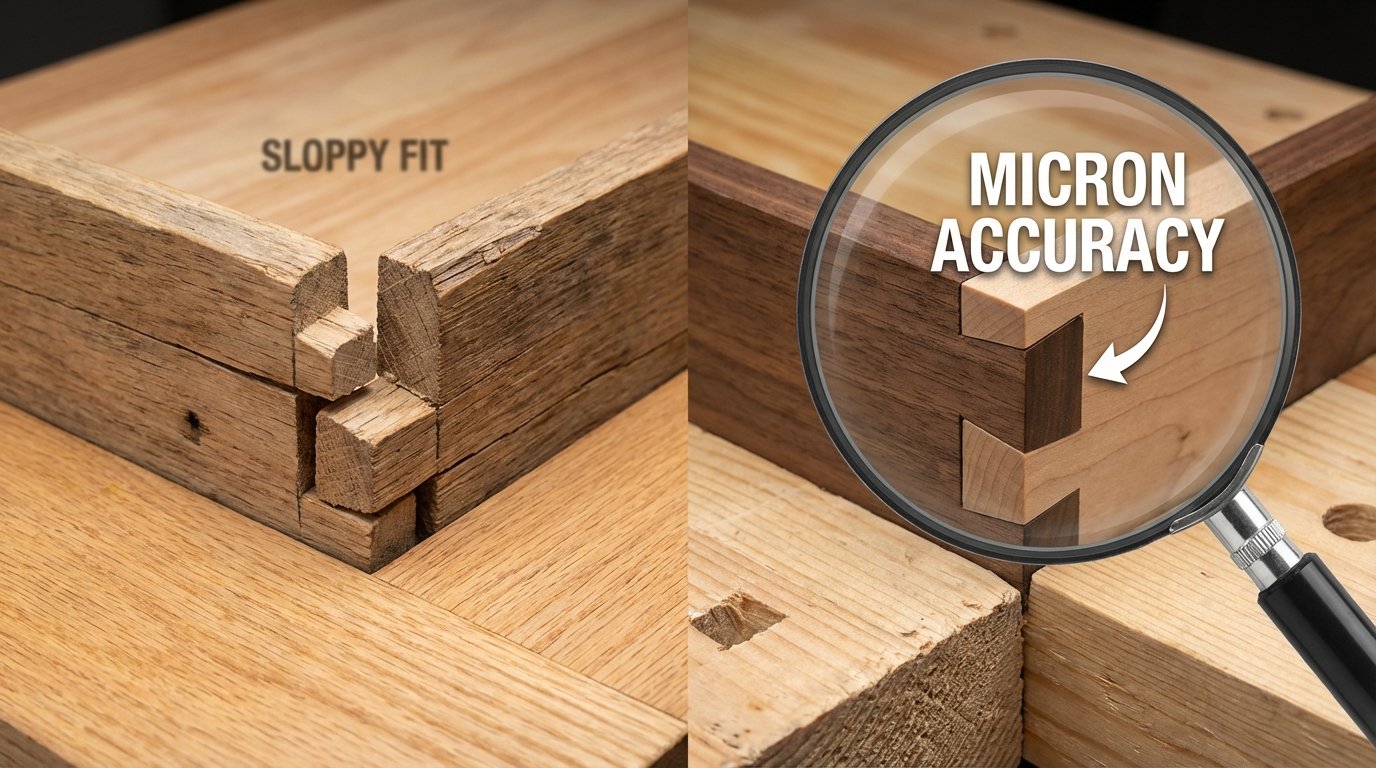
Comparison: Sloppy Fit vs. Micron Accuracy
| Feature | Sloppy Fit (Hardware Only) | Micron Accuracy (Precision Joinery) |
|---|---|---|
| Primary Support | Screws and Metal Brackets | Interlocking Wood Geometry |
| Lateral Stability | Low (Frequent Wiggle) | High (Vault-Like) |
| Setup Time | Fast (Minutes) | Slow (Hours/Days) |
| Tool Requirement | Basic Drill/Driver | Calipers, Chisels, Precision Planes |
| Expected Lifespan | 2–5 Years | 50–100+ Years |
Practical Tips for Instant Improvement
Immediate results come from upgrading your marking tools. Replace your carpenter’s pencil with a 0.5mm mechanical pencil or, better yet, a dedicated marking knife. A knife line severs the wood fibers, providing a physical “track” for your saw or chisel to follow.
Sharpen your chisels to a mirror polish. A dull chisel crushes wood fibers rather than slicing them. When you crush the fibers, the joint might feel tight initially, but it will quickly loosen as the crushed wood compresses further under use. Aim for an edge that can effortlessly shave arm hair.
Use “story sticks” instead of tape measures. Cut a scrap of wood to the exact length of a component. Use that scrap to set your fences and stops. This eliminates the chance of misreading a ruler and ensures every identical part is, in fact, identical.
The “Light Test”
Hold your dry-fitted joints up to a bright light source. If you see light through the seam, the surfaces are not flat. This is a brutal but effective way to audit your work. High-precision furniture makers aim for “total light blackout” across the entire mating surface of the joint.
Advanced Considerations: Tuning the Mechanism
Experienced practitioners focus on the “tactile feedback” of the mechanism. A folding desk should not just work; it should feel luxurious. This involves “easing” hidden edges. While visible edges stay sharp, internal corners where parts slide past each other should be slightly chamfered. This prevents “catching” and reduces friction.
Consider the “Pin Material” in articulated joints. While brass is traditional, some modern makers use carbon fiber rods for their extreme stiffness and low weight. The interface between the pin and the wood is a high-wear zone. Hardening the hole by applying a drop of thin Cyanoacrylate (CA) glue can create a “bush-like” surface that resists wear over thousands of cycles.
Moisture management is the final frontier. Seal every surface of the joint—including the internals—with a high-quality oil or wax. This slows down the wood’s reaction to humidity changes, keeping your “micron-accurate” fit stable throughout the seasons.
Example Scenario: The Campaign Desk
Imagine building a portable “Campaign Desk” designed to fold into a flat 3-inch thick package. Traditional construction would use six sets of brass hinges. Under the weight of a laptop and a person’s arms, those hinges would eventually sag.
Instead, we use a “Double Knuckle” support system. The legs are connected to the frame via five-finger knuckle joints with a 1/4-inch brass pin. The desktop itself uses a rule joint with a 3/32-inch fillet. By milling the leg knuckles 0.002 inches wider than the frame gaps, we create a “friction fit” that requires a firm push to close.
Once the desk is open, the weight of the top pushes the rule joint’s shoulder against the main frame. This mechanical “stop” means the hinges are under zero tension while the desk is in use. The result is a folding desk that feels as solid as a heavy oak dining table.
Final Thoughts
Precision woodworking folding desk joints represent the pinnacle of functional craft. Moving from “good enough” to “micron accuracy” changes the way you interact with your tools and your materials. This approach values the mechanical integrity of the wood itself over the convenience of cheap hardware.
Mastering the knuckle joint and the rule joint provides a foundation for building furniture that lasts generations. Stability is not an accident; it is the result of rigorous milling, sharp tools, and a deep understanding of geometry. Every thousandth of an inch you shave off brings you closer to that “bank vault” feel.
Start small. Practice these joints on scrap wood before moving to your final project. Focus on the feel of the fit and the crispness of your lines. Once you experience the rock-solid snap of a perfectly executed precision joint, you will never go back to “sloppy fit” construction again. Apply these techniques, and build something that truly earns its place in your home.
Sources
1 youtube.com (https://www.youtube.com/watch?v=hUXcMP5tHJ8) | 2 instructables.com (https://www.instructables.com/Make-a-Nuckle-Joint/) | 3 infinitytools.com (https://infinitytools.com/blogs/learn/good-things-come-in-pairs-especially-rule-joint-router-bits) | 4 youtube.com (https://www.youtube.com/watch?v=b2HHfumqqFM) | 5 woodcraft.com (https://www.woodcraft.com/blogs/cabinetry-furniture-making/master-the-classic-rule-joint) | 6 festoolownersgroup.com (https://festoolownersgroup.com/threads/tolerances-how-tolerant-are-you.3071/) | 7 theonebeanwoodworker.com (https://theonebeanwoodworker.com/joinery-techniques-in-furniture-making/)