Professional Driftwood Lighting Secrets
Most people see a lamp as a source of light; the expert sees it as a tool for sculpting the very soul of a room. Standard lighting just fills a room; precision lighting transforms it. Using the natural density and grain of driftwood to refract your light, you aren’t just illuminating space—you’re painting with it.
Walking along a weather-beaten coastline, most travelers see only debris. The artisan sees a skeleton of history, a piece of timber that has survived the crushing weight of the tides and the bleaching intensity of the sun. This wood has earned its character. When you bring that raw, pioneer-grit energy into a home, you aren’t just adding a piece of furniture. You are installing a narrative.
Mastering driftwood lighting requires more than a drill and a light kit. It demands an understanding of how light interacts with irregular, organic surfaces. It requires the patience to clean away decades of salt and the technical skill to hide modern electronics within ancient fibers. This guide serves as your roadmap from the shoreline to the showroom.
Professional Driftwood Lighting Secrets
Professional driftwood lighting is the art of integrating electrical illumination into wood that has been naturally weathered by water. This practice exists because humans have an innate craving for biophilic design—the connection to the natural world. In a modern landscape of plastic and cold metal, a driftwood lamp provides a tactile, grounding presence.
Designers use these pieces in high-end coastal retreats, rustic mountain lodges, and even minimalist urban lofts to provide a “living” focal point. The secret of the professional lies in the choice of wood. Not all washed-up timber is equal. Experts look for hardwoods like oak or cedar that have been stripped of their soft outer layers by the sea, leaving behind a dense, rock-hard core.
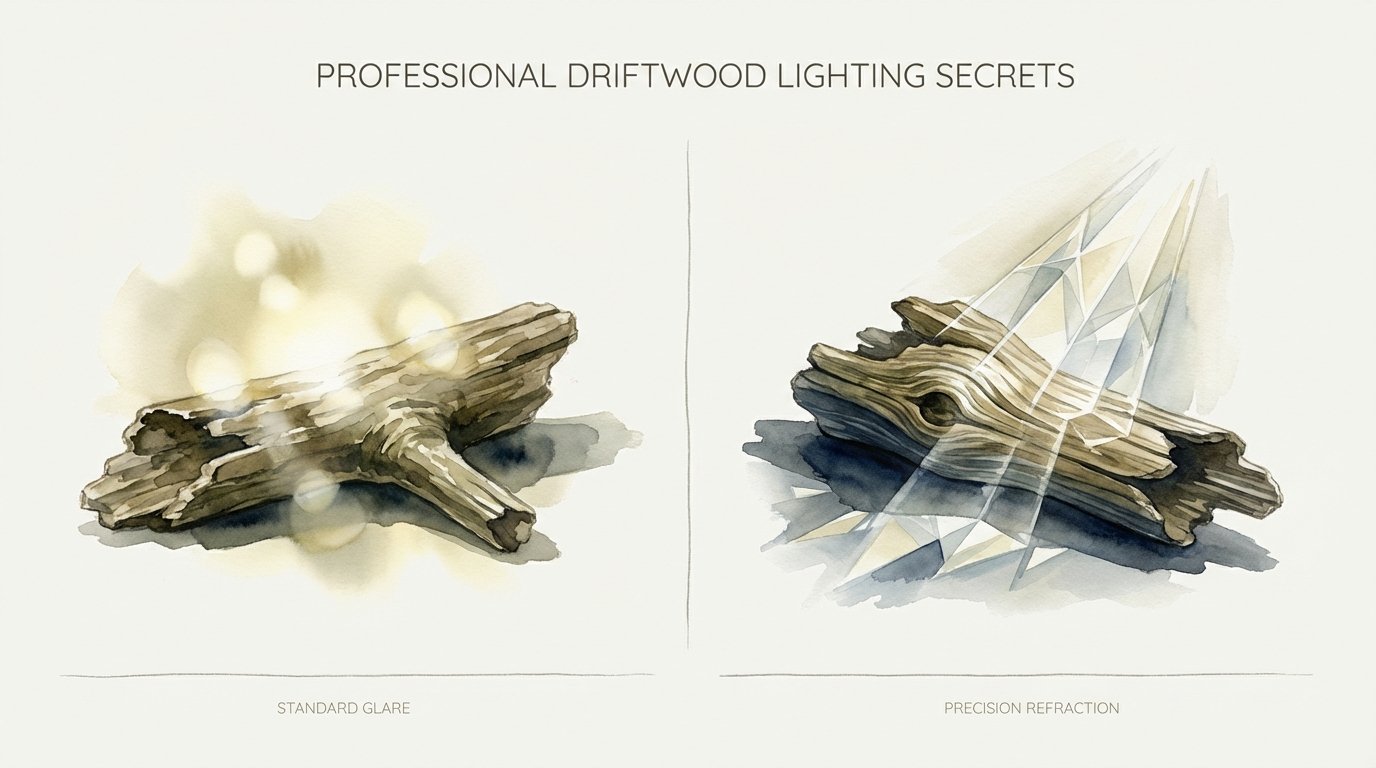
Precision refraction is the cornerstone of a high-quality build. While a standard lamp emits a flat, uniform glare that can feel clinical, the crags and deep grooves of driftwood break up the light. This creates a dance of shadows and highlights. The light doesn’t just hit the wall; it flows over the wood’s surface, highlighting every knot and silvered grain line.
Visualizing the final piece requires looking at the “flow” of the wood. A piece with strong vertical lines might become a stately floor lamp, while a tangled root system could serve as the base for a complex chandelier. Professionals often spend hours rotating a single piece under different light sources before they ever touch a tool. This ensures the wood’s best “face” is the one that will be bathed in light.
How to Master the Driftwood Lighting Process
Building a professional-grade lamp involves a rigorous sequence of preparation, structural engineering, and electrical integration. Each step must be respected to ensure the final product is both beautiful and safe for long-term use in a home environment.
Phase 1: Sourcing and Selection
Great lighting starts at the water’s edge. Collecting driftwood is a lesson in patience and legal awareness. Always check local regulations, as some beaches prohibit the removal of natural materials. Look for “silvered” wood that feels heavy for its size. This weight indicates density, which is essential for structural integrity.
Avoid wood that feels spongy or shows signs of active rot. If you can push your fingernail deep into the surface, the wood is likely too degraded to hold a lamp rod securely. Focus on pieces with interesting “negative space”—holes or tight curves where light can get trapped and glow from within.
Phase 2: Cleaning and Sterilization
Raw driftwood is a sanctuary for salt, sand, and microscopic life. Bringing untreated wood into a home can lead to pest infestations or the “weeping” of salt in humid weather. Start by scrubbing the piece with a stiff-bristle brush to remove loose debris. For deeper cleaning, use a high-pressure air hose to blow sand out of tight crevices.
Sterilization is non-negotiable. Submerge the wood in a solution of one part bleach to ten parts water for at least 24 hours. This kills mold spores and insect larvae. If the piece is too large for a container, you can use a spray-on application, though soaking is far more effective. Following the soak, the wood must dry completely. Depending on the thickness, this can take anywhere from two weeks to a month in a low-humidity environment.
Phase 3: Structural Engineering
Driftwood rarely sits flat on its own. You must create a stable base, often using a secondary material like steel, heavy slate, or a clean-cut block of walnut. Drilling the center hole for the lamp rod—known as a threaded nipple—is the most challenging part of the build.
Long, flexible drill bits are your best friend here. If the wood has a complex curve, you may need to drill from both ends and hope the holes meet in the middle. If a single hole is impossible, professionals often gouge a narrow channel along the back of the piece. They then tuck the wire into this channel and seal it with a mixture of sawdust and wood glue to hide the path.
Phase 4: Electrical Integration
Safety is the priority during the wiring phase. Use UL-listed lamp kits. If you are building a metal-heavy fixture, ensure the entire system is properly grounded. For the socket, an Edison-style base is traditional, but ensure the live wire is connected to the center pin of the socket to prevent shock hazards.
Modern builders often opt for LED components. LEDs produce significantly less heat than traditional incandescent bulbs. Since wood is flammable, minimizing heat buildup inside the “sculpture” is a critical safety consideration. Use dimmable LEDs to give the user control over the intensity of the refraction.
The Measurable Benefits of Driftwood Lighting
Choosing driftwood over mass-produced lighting offers several distinct advantages that appeal to both the aesthetic and the practical senses. These benefits are why the niche of natural-element lighting continues to grow in the luxury market.
* Uniqueness: Nature never repeats itself. Every piece of driftwood has a unique DNA of curves, knots, and textures. You are guaranteed to have a one-of-a-kind fixture that cannot be replicated by a machine.
* Biophilic Impact: Research suggests that incorporating natural elements into interior design reduces stress and improves mood. The organic shapes of driftwood provide a visual rest for the eyes in a world of sharp corners.
* Sustainability: Using driftwood is a form of high-end upcycling. You are taking a discarded natural product and giving it a second life as a functional piece of art, reducing the need for new plastic or metal manufacturing.
* Light Quality: The irregular surfaces of the wood act as a natural diffuser. Instead of a harsh “Standard Glare,” the light is softened and redirected, creating a warm, inviting atmosphere that mimics a sunset through trees.
* Durability: Sea-weathered hardwoods are incredibly tough. Having survived years in the ocean, they are resistant to the minor bumps and temperature changes of a typical home.
Challenges and Common Mistakes to Avoid
Even experienced woodworkers can stumble when transitioning to driftwood. The material is unpredictable and behaves differently than kiln-dried lumber found in a hardware store.
One common mistake is rushing the drying process. If you wire a piece that is still damp in its core, the wood will eventually shrink as it dries in your climate-controlled home. This shrinkage can loosen the lamp rod or, worse, put stress on the electrical wire, causing a short circuit. Always use a moisture meter to ensure the wood is below 10% moisture content before finishing.
Another pitfall is over-sanding. It is tempting to sand the wood until it is as smooth as a tabletop. Doing so strips away the very patina that makes driftwood valuable. Use light-grit sandpaper only to remove sharp splinters or rough patches that might catch on clothing. Preserve the “grayed” look of the exterior as much as possible.
Salt retention is a silent killer of electrical components. If the wood hasn’t been properly soaked in fresh water, the residual salt can corrode the brass or copper parts of your lamp kit over time. This leads to flickering lights and potential fire hazards. A thorough fresh-water soak followed by a distilled water rinse is the professional’s insurance policy.
Limitations: When Driftwood May Not Be Ideal
Despite its beauty, driftwood lighting isn’t the right choice for every scenario. Understanding these constraints will help you decide if a project is feasible or if a different material is required.
Environmental conditions play a huge role. Driftwood is highly sensitive to extreme humidity. In a bathroom or an outdoor patio, the wood can re-absorb moisture, leading to rot or a revival of dormant mold. Unless the wood is encased in a thick marine-grade resin, it should stay in dry, indoor environments.
Weight and balance are constant battles. Driftwood is often top-heavy or asymmetrical. Building a tall floor lamp out of a spindly branch requires a very heavy, wide base to prevent it from becoming a tipping hazard. If the room has high foot traffic, children, or pets, a delicate driftwood piece may be too risky.
Complexity of maintenance is another factor. The deep nooks and crannies of a complex root-base lamp are magnets for dust. Unlike a smooth glass lamp that can be wiped down in seconds, a driftwood lamp requires careful cleaning with canned air or a soft brush. For clients who want “zero-maintenance” decor, this might be a dealbreaker.
Standard Glare vs. Precision Refraction
Understanding the difference between a basic lighting fixture and a professional driftwood sculpture comes down to how light is managed. This table highlights the key differences between standard commercial lighting and the precision refraction found in expert-level driftwood builds.
| Feature | Standard Glare (Commercial) | Precision Refraction (Driftwood) |
|---|---|---|
| Light Distribution | Uniform, flat, and predictable. | Complex, varied, and directional. |
| Visual Comfort | Can be harsh or clinical. | Warm, diffused, and low-eye-strain. |
| Shadow Play | Minimal; shadows are hard-edged. | Rich; creates depth and “movement.” |
| Aesthetic Role | Functional utility. | Functional art centerpiece. |
| Material Life | Disposable plastic or thin metal. | Heirloom-quality weathered hardwood. |
Practical Tips and Best Practices
Success in driftwood lighting is often found in the small details. Implementing these best practices will elevate your work from a DIY hobby project to a professional-grade installation.
* Test the Light Early: Before you even drill a hole, place a temporary light source behind or inside the driftwood. Observe how the light hits the wall. This “mock-up” phase will reveal the best angle for the permanent socket.
* Use Hidden Channels: If you cannot drill through the center, use a small Dremel tool to carve a thin wire channel on the back. Once the wire is laid, fill the channel with a mixture of clear epoxy and fine driftwood dust. This makes the wire virtually invisible.
* Balance with the Base: A dark wood base like ebony or a cold material like concrete creates a beautiful contrast with the light-gray patina of the driftwood. It also provides the necessary weight for stability.
* Choose the Right Finish: A thick, glossy lacquer often looks cheap on driftwood. Opt for a matte finish or a simple wax. Hardwax oils are excellent because they protect the wood while maintaining the tactile, dry feel of the grain.
* Consider Cord Aesthetics: A cheap plastic cord can ruin the look of an organic lamp. Use fabric-covered cords in colors like “sand,” “jute,” or “charcoal” to complement the natural aesthetic.
Advanced Considerations for Serious Practitioners
If you want to move beyond the single table lamp, consider the complexities of multi-piece installations and smart home integration. These advanced techniques are where the true “sculpting of the soul of a room” occurs.
Scaling up to a chandelier requires a deep understanding of weight distribution and load-bearing capacity. You must ensure that the driftwood pieces are not only glued but mechanically fastened with internal steel supports. Wiring multiple bulbs through a single driftwood “root” often requires a centralized junction box hidden within the wood or the ceiling mount.
Integrating smart technology is the modern frontier. Using smart LEDs allows you to change the color temperature of the lamp throughout the day. You might want a crisp 4000K “daylight” setting to highlight the wood’s silver tones in the afternoon, but a warm 2200K “candlelight” glow for evening relaxation. Programming these transitions adds a layer of sophistication that traditional lamps cannot match.
Environmental ethics also play into advanced practice. Serious practitioners often document the source of their wood, providing a “provenance” for the piece. Knowing that a lamp was made from a cedar root salvaged after a specific storm in the Pacific Northwest adds immense value and story to the object.
Examples and Scenarios
To understand the versatility of this medium, let’s look at how different pieces of driftwood can be used to solve specific design problems.
Scenario 1: The Coastal Bedside Lamp
A builder finds a 14-inch piece of manzanita with three distinct branches reaching upward. By mounting this on a heavy slate base and installing a small LED bulb at the base of the “V” between branches, the light is forced to travel up the wood. This creates a soft, ambient glow that illuminates the bedside without the need for a bulky lampshade, perfect for a minimalist bedroom.
Scenario 2: The Dining Room Chandelier
A massive, 5-foot-long “ghost wood” branch is suspended from the ceiling by two industrial-strength steel cables. Five Edison bulbs are wrapped around the branch with vintage-style fabric cords. The light refracts off the twisted grain of the ghost wood, casting long, dramatic shadows across the dining table, turning every meal into a theatrical experience.
Scenario 3: The Vertical Floor Totem
A straight, thick piece of sea-bleached oak stands four feet tall. The builder carves a deep vertical slot along the center and installs an LED strip light. The light shines out from the heart of the wood, making the entire piece look like it is glowing from within. This “light totem” serves as both a source of illumination and a sculpture in a dark corner of a living room.
Final Thoughts
The journey from a piece of beach debris to a professional lighting fixture is one of transformation. It requires a blend of raw pioneer grit and technical precision. When you respect the wood’s history and understand the mechanics of light, you create something that transcends mere utility.
Driftwood lighting reminds us that beauty often comes from the struggle. The knots, the cracks, and the bleached surfaces are markers of survival. By illuminating these features, you bring a piece of the wild into the structured environment of the home. This creates a balance that modern manufacturing simply cannot replicate.
We encourage you to go out, find a piece of wood that speaks to you, and start the process. Whether you are a beginner or a serious practitioner, the act of sculpting light with the elements of the sea is a rewarding path. Experiment with different species, play with shadow, and remember that in the world of driftwood, the imperfections are exactly what make the piece perfect.
Internal linking to topics like natural wood finishing or advanced electrical safety for woodworkers can further deepen your expertise as you continue to build and refine your craft.
Sources
1 youtube.com (https://www.youtube.com/watch?v=oFwWrAq47io) | 2 theshrimpfarm.com (https://www.theshrimpfarm.com/posts/transform-your-tank-choosing-the-best-aquarium-driftwood-for-a-natural-aquascape/) | 3 medium.com (https://medium.com/@henrywalker/the-benefits-of-using-driftwood-chandeliers-in-home-fb293bbd9f53) | 4 scavengerchic.com (https://scavengerchic.com/2018/07/25/maine-driftwood-lamp-diy/) | 5 sunmory.com (https://www.sunmory.com/blogs/resources/how-to-make-driftwood-floor-lamp) | 6 youtube.com (https://www.youtube.com/watch?v=NdkxjLLJsYw) | 7 simplydiscus.com (https://www.simplydiscus.com/library/biotopes/natural/driftwood_treatment.shtml) | 8 diydriftwood.com (https://diydriftwood.com/how-to-clean-driftwood/) | 9 aprettyfix.com (https://aprettyfix.com/disinfect-driftwood/) | 10 rockler.com (https://www.rockler.com/learn/understanding-oil-and-wax-finishes)