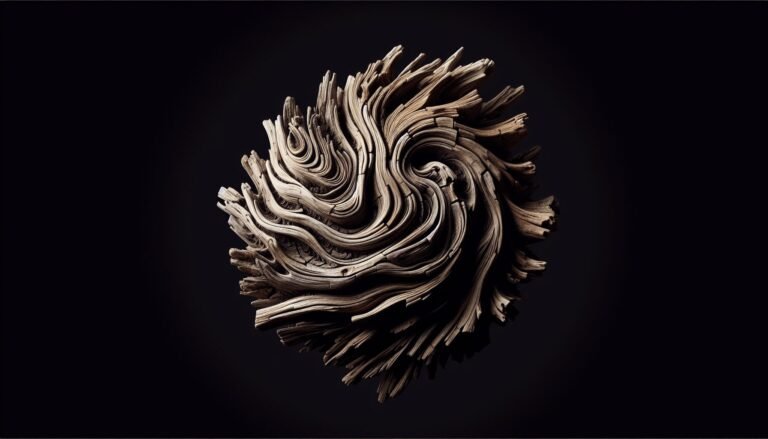
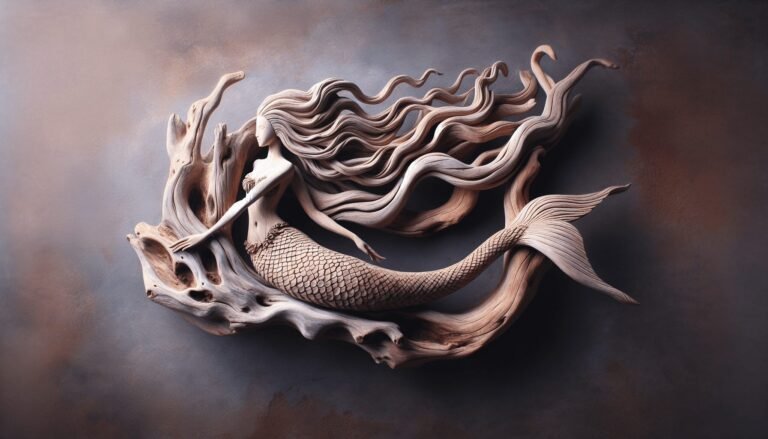
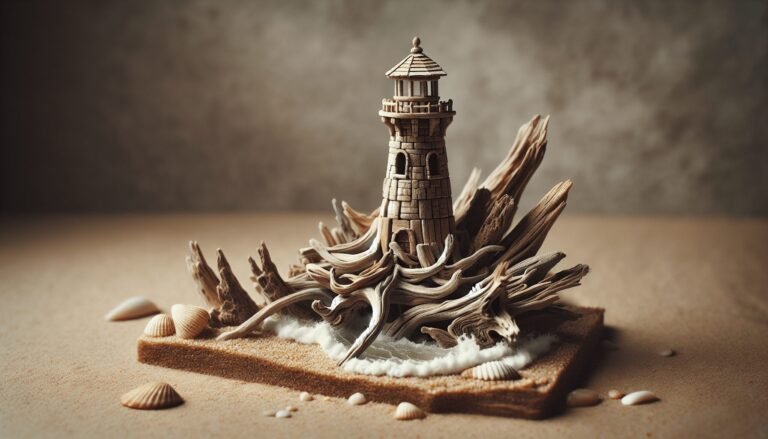
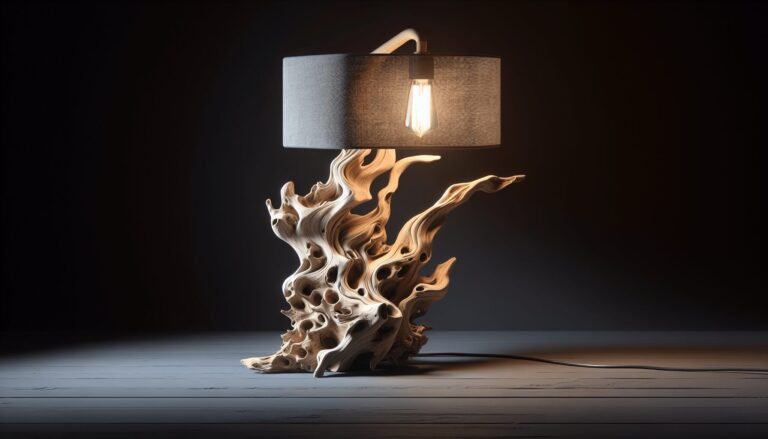
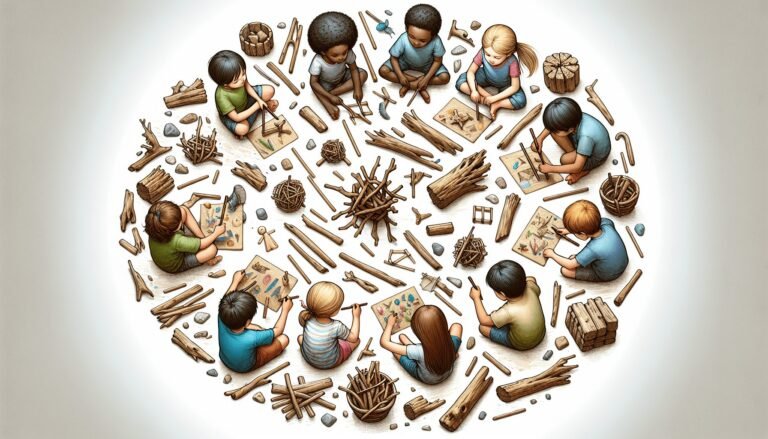
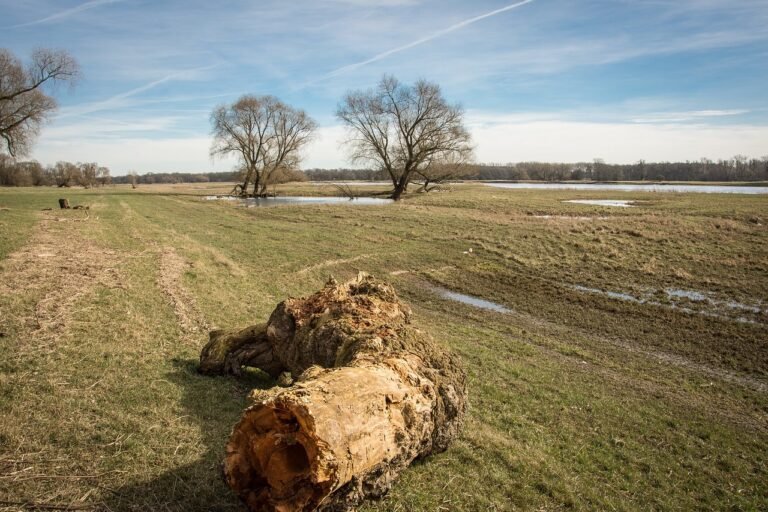
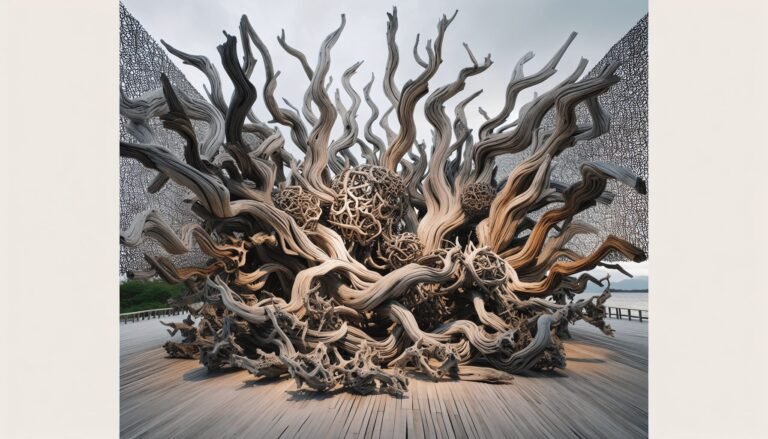
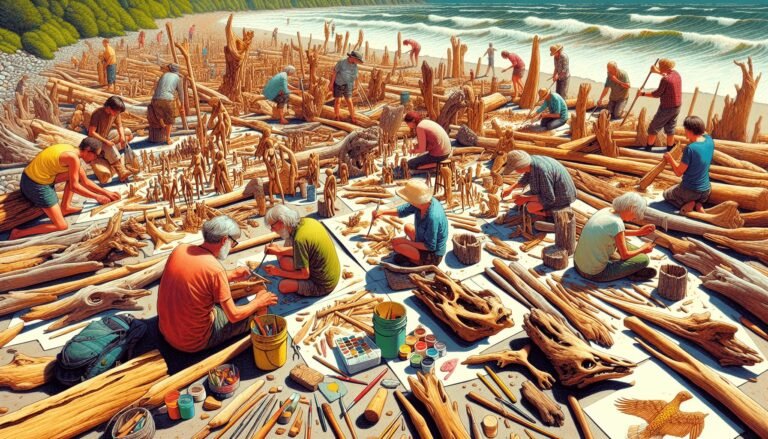
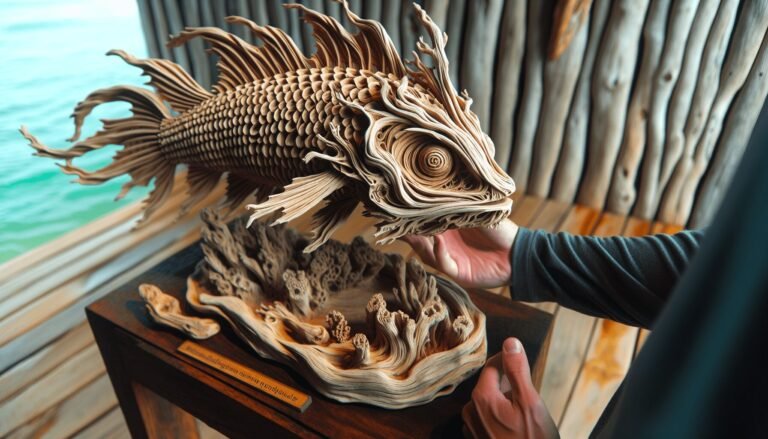
• Skip to main content
  • Skip to primary sidebar
  • Terms and Conditions
  • Privacy Policy
  • Contact

Driftwood 4 Us

Just About Driftwood

Art

Mermaid Driftwood Art

April 17, 2024 by admin

Imagine walking along a serene coastline, the calm waves lapping at your feet, when suddenly you stumble upon a sight that takes your breath away. Delicately crafted from weathered pieces of driftwood, beautiful mermaid sculptures emerge from the shore, bewitching all who lay eyes on them. These mesmerizing works of art, known as Mermaid Driftwood Art, capture the imagination and bring a touch of whimsical enchantment to any space they adorn. Dive into this article to discover the story behind these unique creations, as well as the talented artists who breathe life into the captivating world of mermaids.

1. What is Mermaid Driftwood Art?

– Definition of Mermaid Driftwood Art

Mermaid driftwood art refers to the creation of sculptures, typically in the form of mermaids, using pieces of driftwood as the main material. Driftwood is wood that has been washed up on the shore or found along riverbanks, which has been weathered and shaped by the water. Artists utilize these natural and unique pieces of driftwood to create stunning sculptures that embody the enchanting and mystical nature of mermaids.

– Origins and Inspirations

The origin of mermaid driftwood art can be traced back to coastal communities around the world. Inspired by the beauty and allure of mermaids, as well as the abundance of driftwood along their shores, artists began to see the potential in combining these elements to create one-of-a-kind artworks. Mermaid folklore and mythology, often associated with the sea and oceanic themes, have also served as a rich source of inspiration for artists in this genre.

– Materials Used in Mermaid Driftwood Art

The primary material used in mermaid driftwood art is, of course, driftwood. These weathered pieces of wood come in various shapes and sizes, adding an organic and rustic charm to the artwork. In addition to driftwood, artists may incorporate other materials such as seashells, coral, sea glass, and even paint or stains to enhance and bring their mermaid sculptures to life. The combination of these materials creates a visually captivating and textured piece of art.

2. Creating Mermaid Driftwood Art

– Finding Suitable Driftwood

The first step in creating mermaid driftwood art is finding suitable pieces of driftwood. Beaches, riverbanks, and lakeshores are great places to start your search. Look for driftwood that is weathered, smooth to the touch, and has interesting shapes or curves. The size and condition of the driftwood will depend on the desired size and complexity of your mermaid sculpture.

– Cleaning and Preparing the Driftwood

Once you have collected your driftwood, it’s important to clean and prepare it before starting the artwork. Remove any debris or loose bark by gently sanding the surface of the driftwood. Be careful not to alter the natural shape and texture too much, as these are the characteristics that make driftwood unique. If needed, you can also treat the driftwood with a sealant to preserve its quality and protect it from weathering over time.

– Designing the Mermaid

Before diving into the assembly of the sculpture, it’s helpful to design and plan the mermaid. Consider the posture, pose, and overall composition you want to achieve. Sketch out your ideas or create a rough outline to serve as a guide during the assembly process. This step allows you to envision the finished piece and make any necessary adjustments before moving forward.

– Assembling the Mermaid Sculpture

Using the driftwood pieces you have selected, begin assembling the mermaid sculpture. Arrange the driftwood in such a way that it resembles the human form of a mermaid. Pay attention to the flow and movement of the driftwood, making sure to create a sense of balance and harmony in the sculpture. Use nails, screws, or strong adhesive to securely attach the driftwood pieces together. Take your time and be patient, as the assembly process may require some trial and error.

Mermaid Driftwood Art

3. Techniques and Styles in Mermaid Driftwood Art

– Natural and Realistic Mermaids

One technique commonly used in mermaid driftwood art is creating natural and realistic-looking mermaids. Artists strive to capture the anatomical details and natural textures of real mermaids, ensuring that the sculpture evokes a sense of beauty and believability. Natural driftwood shapes and colors are often incorporated to enhance the realism of the mermaid sculpture, creating a captivating and enchanting piece of art.

– Abstract and Modern Mermaids

In contrast to the natural and realistic style, some artists choose to create abstract and modern mermaids. This style focuses more on the artistic interpretation of the mermaid form, often using unconventional driftwood shapes and bold colors to create visually striking sculptures. These abstract mermaids are a contemporary take on the traditional subject matter, pushing the boundaries of mermaid driftwood art and showcasing the artist’s unique perspective.

– Colorful and Whimsical Mermaids

Another popular style in mermaid driftwood art is the creation of colorful and whimsical mermaids. Artists use vibrant paints, stains, or dyes to bring an array of colors to their sculptures, adding a playful and joyful touch to the artwork. This style often incorporates additional embellishments such as shimmering seashells, sparkling beads, or even iridescent paints to enhance the whimsical nature of the mermaid sculptures. The result is a captivating and cheerful piece of art that brings joy and beauty to any space.

4. Enhancing Mermaid Driftwood Art

– Incorporating Shells and Seashells

To further enhance the mermaid driftwood art, artists often incorporate shells and seashells into the sculptures. These natural treasures from the sea add intricacy and detail to the artwork, mimicking the scales or textures of a mermaid’s tail. Shells can be arranged and attached to the driftwood using adhesives, creating a visually captivating and texturally interesting element. By integrating shells, artists bring an extra layer of authenticity and charm to their mermaid sculptures.

– Adding Coral and Sea Glass Accents

In addition to shells, coral and sea glass can be used as accents in mermaid driftwood art. Pieces of coral, whether real or artificial, can be strategically placed to mimic underwater coral reefs or add an organic dimension to the sculpture. Sea glass, with its smooth and translucent appearance, can bring a touch of elegance and sophistication to the artwork. Incorporating these elements adds depth and complexity to the mermaid driftwood art, making it more visually appealing and creating a sense of connection to the marine environment.

– Painting and Staining the Driftwood

Another way to enhance mermaid driftwood art is by painting or staining the driftwood. Artists can use various colors and techniques to bring out the natural beauty of the wood or create unique visual effects. For a rustic and natural look, a light stain or clear varnish can be applied to highlight the grain and texture of the driftwood. Alternatively, bold and vibrant paints can be used to add a pop of color to the sculpture, making it more eye-catching and distinct. The choice of colors and techniques depends on the artist’s vision and desired aesthetic for the mermaid driftwood art.

Mermaid Driftwood Art

5. Displaying Mermaid Driftwood Art

– Indoor Display Options

Mermaid driftwood art can be displayed indoors in various ways, depending on the size and style of the artwork. Larger sculptures can be showcased as standalone pieces, becoming a focal point in a room. Placing a mermaid sculpture on a mantelpiece, shelf, or console table allows it to be appreciated from different angles, adding a touch of whimsy and a coastal vibe to the interior decor. Smaller mermaid sculptures can be grouped together or displayed alongside other maritime-inspired items, such as seashells, nautical ropes, or framed ocean artwork, creating a cohesive and visually appealing display.

– Outdoor Display Options

If you have larger mermaid driftwood sculptures or a spacious outdoor area, consider displaying them in an outdoor setting. These sculptures can bring an enchanting and magical presence to gardens, patios, or poolside areas. Placing the mermaid sculpture near water features, such as fountains or ponds, enhances the connection to the aquatic theme and creates a serene and captivating outdoor focal point. Ensure the sculpture is protected from harsh weather conditions and direct sunlight to preserve its beauty and longevity.

– Showcasing in Coastal Themed Decor

Mermaid driftwood art effortlessly complements coastal-themed decor, making it an ideal choice for beach houses or anyone looking to bring the seaside charm into their home. When incorporating mermaid sculptures into a coastal-themed setting, consider pairing them with natural materials like sisal rugs, weathered wood furniture, and light, breezy textiles. Soft blues, sandy beige, and turquoise accents can be used in the overall color scheme to create a tranquil and beach-inspired ambiance. By integrating mermaid driftwood art into coastal decor, you can transform your space into a coastal oasis filled with whimsy and charm.

6. Mermaid Driftwood Art as a Gift

– Unique and Personalized Gift Idea

Mermaid driftwood art makes for a truly unique and personalized gift idea. Each sculpture is a one-of-a-kind piece of art, handcrafted by talented artists. Gifting a mermaid driftwood sculpture shows thoughtfulness and care, as it is a distinctive and meaningful piece that cannot be found in mainstream stores. The personal touch of a mermaid sculpture allows you to give a gift that is tailored to the recipient’s taste and interests, creating a lasting and memorable impression.

– Perfect for Mermaid and Ocean Lovers

For those who have a deep appreciation for the mystical allure of mermaids and a love for all things oceanic, mermaid driftwood art is the perfect gift. The sculptures capture the essence of mermaids, with their enchanting beauty and connection to the sea. The intricate craftsmanship and attention to detail in each piece attest to the artist’s passion and love for their craft. By gifting mermaid driftwood art to mermaid and ocean lovers, you are providing them with a meaningful and cherished piece that celebrates their interests and passions.

– Suitable for Different Occasions

Mermaid driftwood art is suitable for various occasions. Whether it’s a birthday, anniversary, housewarming, or any other special event, a mermaid sculpture can serve as a thoughtful and unique gift option. The versatility of mermaid driftwood art allows it to be appreciated and enjoyed by people of all ages and for different occasions throughout the year. Whether it’s given as a standalone gift or as part of a themed gift basket, mermaid driftwood art adds a touch of magic and beauty to any celebration.

7. Where to Find Mermaid Driftwood Art

– Local Art Fairs and Craft Markets

To discover mermaid driftwood art, visiting local art fairs and craft markets is a great starting point. Artisans and artists often participate in these events to showcase and sell their unique creations. These gatherings provide an opportunity to meet and connect with the artists directly, allowing you to learn more about their creative process and the inspiration behind their sculptures. Local art fairs and craft markets also offer a chance to support local artists and contribute to the growth of the arts community in your area.

– Online Artisan Marketplaces

In today’s digital age, online artisan marketplaces provide a convenient and accessible platform to discover and purchase mermaid driftwood art. Websites such as Etsy, Artful Home, and Handmade at Amazon feature a wide selection of mermaid driftwood sculptures from artists around the world. These online marketplaces often include detailed descriptions and high-quality photographs of the artwork, allowing you to explore various styles, sizes, and price ranges. Additionally, customer reviews and ratings provide valuable insights into the quality and customer satisfaction of the artists’ work.

– Commissioning Custom Pieces

For a truly personalized and unique mermaid driftwood art piece, consider commissioning a custom sculpture from a skilled artist. Many artists accept commission requests and are open to creating custom mermaid sculptures based on specific preferences or requirements. This allows you to collaborate with the artist, providing input and ideas to create a tailor-made piece that reflects your vision and style. Commissioning a custom mermaid driftwood sculpture ensures that you receive a truly one-of-a-kind artwork that holds special meaning to you or the recipient.

8. Caring for Mermaid Driftwood Art

– Dusting and Cleaning the Sculpture

To maintain the beauty of your mermaid driftwood art, regular dusting and cleaning are essential. Use a soft brush or dust cloth to gently remove any dust or debris that may accumulate on the surface of the sculpture. Avoid using harsh cleaning chemicals or abrasive materials, as they can damage or alter the natural texture of the driftwood. By incorporating regular cleaning into your routine, you can ensure that your mermaid sculpture remains vibrant and captivating for years to come.

– Protecting from Moisture and Direct Sunlight

Because mermaid driftwood art is often displayed in indoor and outdoor settings, it’s important to protect the sculptures from moisture and direct sunlight. Exposure to excessive moisture can cause the driftwood to decay or develop mold, compromising the integrity of the artwork. Avoid placing the sculptures in areas prone to high humidity or near water sources. Similarly, direct sunlight can fade or discolor the driftwood and any painted or stained areas. To preserve the artwork, consider placing it in a location where it is shielded from prolonged exposure to sunlight or using UV-protective coatings if necessary.

– Repairing and Restoring Damaged Pieces

In the unfortunate event that a mermaid driftwood sculpture becomes damaged, there are steps you can take to restore it. Minor damages, such as loose or broken pieces of driftwood or detached accents, can often be repaired using strong adhesive specifically designed for wood. Follow the instructions provided by the adhesive manufacturer and take care not to alter or damage the surrounding areas. For more extensive repairs, it may be necessary to consult with a professional woodworker or restoration specialist who can assess the damage and provide guidance on how to restore the artwork to its original condition.

9. DIY Mermaid Driftwood Art

– Step-by-Step Instructions

Creating your own mermaid driftwood art can be a rewarding and fulfilling experience. While the specific steps may vary depending on your design and preferences, here is a general overview of the process:

  1. Gather suitable pieces of driftwood: Visit beaches or riverbanks to collect driftwood pieces that are weathered and have interesting shapes.

  2. Clean and prepare the driftwood: Remove any debris or loose bark by gently sanding the surface. Treat the driftwood with a sealant to protect it.

  3. Design the mermaid: Sketch out your ideas or create an outline to guide the assembly process.

  4. Assemble the mermaid sculpture: Arrange the driftwood pieces to create the mermaid form. Securely attach the pieces together using nails, screws, or adhesive.

  5. Enhance the sculpture: Incorporate shells, sea glass, or other decorative accents to add detail and texture. Consider painting or staining the driftwood to enhance its appearance.

  6. Display and enjoy: Find a suitable spot to showcase your mermaid driftwood art and admire your creation.

– Tools and Materials Needed

To create your own mermaid driftwood art, you will need the following tools and materials:

  • Driftwood pieces in various shapes and sizes
  • Sandpaper or sanding block
  • Sealant or wood protectant
  • Nails, screws, or adhesive
  • Hammer, screwdriver, or glue gun
  • Shells, seashells, coral, sea glass, or other decorative accents
  • Paints, stains, or dyes (optional)
  • Brushes or sponges for painting (optional)
  • Protective gear (gloves, goggles, etc.)

– Tips and Tricks for Beginners

If you’re new to creating mermaid driftwood art, here are a few tips to help you get started:

  1. Start with smaller projects: Begin by creating smaller mermaid sculptures to practice your techniques and gain confidence before moving on to larger and more intricate designs.

  2. Explore different driftwood shapes: Look for driftwood pieces with interesting shapes and textures that can add character to your mermaid sculpture. Experiment with different combinations to find the best fit.

  3. Plan your design: Take the time to sketch out your ideas and make adjustments before starting the assembly process. This will help you visualize the finished product and ensure a more cohesive and balanced sculpture.

  4. Embrace imperfections: Remember that driftwood is inherently imperfect and unique. Embrace these natural imperfections as they contribute to the charm and character of the artwork.

  5. Be patient and flexible: Creating mermaid driftwood art requires patience and adaptability. Driftwood pieces may not always fit perfectly or behave as expected, so be prepared to make adjustments along the way.

10. Appreciating Mermaid Driftwood Art

– Symbolism and Meaning Behind Mermaids

Mermaids have long been associated with legends and myths, symbolizing femininity, allure, and a connection to the water. In mermaid driftwood art, these mythical creatures can evoke a sense of wonder and enchantment, inviting viewers to tap into their own imagination and embrace the beauty and mysteries of the ocean. The mermaid’s allure can also represent the human desire to explore, to be free-spirited, and to connect with nature.

– Connection to Coastal and Oceanic Themes

Mermaid driftwood art naturally aligns with coastal and oceanic themes, reflecting the allure and tranquility of the sea. By incorporating driftwood, shells, and other ocean-inspired elements, this art form celebrates the coastal lifestyle and fosters a sense of connection to the natural world. The sculptures serve as a reminder of the calming and rejuvenating effects of being near the water, allowing individuals to bring a touch of the ocean’s magic into their everyday lives.

– Impact on Home Decor and Art Collection

Mermaid driftwood art has a significant impact on home decor and art collections. The sculptures serve as unique and captivating focal points, adding a touch of whimsy and charm to any space. Whether displayed indoors or outdoors, mermaid driftwood art complements various design styles, from coastal and nautical themes to rustic and bohemian aesthetics. Additionally, the one-of-a-kind nature of these sculptures makes them stand out in art collections, offering a distinct and memorable piece for enthusiasts and collectors alike.

In conclusion, mermaid driftwood art combines the beauty of driftwood with the allure of mythical mermaids, resulting in enchanting and unique sculptures. From finding suitable driftwood and designing the mermaid to enhancing the artwork with shells and sea glass, mermaid driftwood art offers a wide range of techniques and styles. Whether displayed indoors or outdoors, mermaid driftwood art adds charm and a coastal touch to any space. It also serves as a personalized and meaningful gift for mermaid and ocean lovers, suitable for various special occasions. Whether purchased from local art fairs or online marketplaces, or created through a DIY approach, mermaid driftwood art brings creativity, symbolism, and a connection to nature into our lives, enhancing our appreciation of the mystical world that resides within the depths of the sea.

Filed Under: Driftwood Ideas Tagged With: Art, Driftwood, Mermaid

Lighthouse Driftwood Art

April 4, 2024 by admin

Imagine strolling along the sandy shores, the gentle waves crashing at your feet, when suddenly, a magnificent work of art catches your eye. Standing proudly atop a piece of weathered driftwood is a intricately crafted lighthouse, constructed entirely from the unique treasures brought in by the tides. This is the captivating world of Lighthouse Driftwood Art, where the beauty of nature and artistic expression intertwine to create stunning, one-of-a-kind pieces that will transport you to the tranquility of the coast.

Introduction

Welcome to the world of Lighthouse Driftwood Art! If you are a fan of coastal decor and appreciate unique, handcrafted pieces, then you are in for a treat. In this article, we will explore the fascinating art form of Lighthouse Driftwood Art, from its definition and origins to the materials and tools needed to create your own masterpiece. We will also delve into various design ideas, tips, and techniques, as well as the benefits and care of Lighthouse Driftwood Art. So, get ready to be inspired and let your creativity sail!

What is Lighthouse Driftwood Art?

Definition

Lighthouse Driftwood Art is a captivating form of art that combines the natural beauty of driftwood with the iconic imagery of lighthouses. It involves using driftwood pieces to construct lighthouse structures, which are then adorned with additional decorative elements. The end result is a unique and visually appealing artwork that beautifully captures the essence of coastal living.

Origins

The origins of Lighthouse Driftwood Art can be traced back to coastal communities and beachcombers who found inspiration in the abundance of driftwood along the shorelines. These creative artists saw the potential in combining natural materials with imaginative designs to create stunning lighthouse sculptures. Over time, the art form gained popularity and has become a beloved symbol of coastal decor.

Key Features

While each Lighthouse Driftwood Art piece is unique, there are some key features that characterize this art form. First and foremost, the use of driftwood as the primary material is central to the aesthetic appeal of these artworks. The weathered texture and varying shapes of the driftwood add a rustic and organic touch to the overall composition. Additionally, Lighthouse Driftwood Art often incorporates other elements, such as seashells, starfish, rope, and glass accents, to enhance the visual appeal and create a cohesive coastal theme.

Lighthouse Driftwood Art

Materials and Tools for Lighthouse Driftwood Art

Driftwood

The cornerstone of Lighthouse Driftwood Art is, of course, the driftwood itself. When selecting driftwood for your artwork, it is important to choose pieces that are sturdy, dry, and free from rot or pests. Look for driftwood with interesting shapes and unique textures that will add visual interest to your lighthouse sculpture. Remember to clean and sanitize the driftwood before using it in your artwork to remove any dirt or debris.

Lighthouse Components

In addition to the driftwood, you will need various components to construct the lighthouse structure. These components include a base or foundation for stability, a central column or tower, and a top section with a light or lantern. Depending on your design, you may also need windows, doors, and other architectural details. Consider using materials such as wood, foam, or clay to create these components, ensuring they are in proportion to the size of the driftwood pieces.

Additional Decorative Items

To add charm and authenticity to your lighthouse, consider incorporating additional decorative items. Seashells, starfish, fishing nets, rope, and glass accents can all be used to embellish your artwork and enhance the coastal theme. These items can be sourced from the beach, local craft stores, or even online retailers specializing in coastal decor.

Tools

To bring your vision to life, you will need a few basic tools. These may include a saw or pruners to cut the driftwood to the desired lengths, a drill or screws for assembly, sandpaper to smooth rough edges, and a hot glue gun or adhesive for securing the components together. Additionally, paint brushes and acrylic paints will be needed if you choose to add color or details to your lighthouse. It is always a good idea to wear protective gear, such as gloves and safety goggles, when handling the tools.

Creating a Lighthouse Driftwood Art Piece

Designing the Layout

Before diving into the assembly process, take some time to plan and design your lighthouse layout. Consider the size and shape of your driftwood pieces, as well as the overall height and proportions of the lighthouse structure. Sketch or visualize the placement of the different components and decorative items to ensure a cohesive and aesthetically pleasing design.

Preparing the Driftwood

Once you have your design in mind, it’s time to prepare the driftwood. Begin by cleaning the driftwood thoroughly, removing any dirt or debris. If needed, sand the surfaces to create a smooth texture and remove any splinters. If desired, you can also apply a clear sealer or wood preservative to protect the driftwood from further weathering and enhance its natural beauty.

Assembling the Lighthouse

Now comes the exciting part – assembling the lighthouse! Start by attaching the base or foundation to provide stability. Next, attach the central column or tower, ensuring it is securely fastened to the base. Depending on the design, you may need to attach additional sections to create the desired height and shape of the lighthouse. Use screws, nails, or a strong adhesive to hold the components together firmly.

Adding Decorative Elements

With the structure of your lighthouse in place, it’s time to add the decorative elements. This is where you can let your creativity shine! Attach seashells, starfish, fishing nets, and rope to enhance the coastal theme. Consider using a hot glue gun or adhesive specifically designed for outdoor use to ensure the decorative items are securely attached. Experiment with different placements and arrangements until you achieve the desired look.

Finishing Touches

To add the finishing touches to your Lighthouse Driftwood Art piece, consider adding color and details. Use acrylic paints to paint the components or create realistic effects such as windows, doors, or weathering. This step allows you to personalize your artwork and infuse your own creative style. Once the paint has dried, apply a clear protective coat to seal the paint and preserve the longevity of your artwork.

Lighthouse Driftwood Art

Inspiring Lighthouse Driftwood Art Ideas

Coastal Landscape Lighthouses

One popular design idea for Lighthouse Driftwood Art is to create a coastal landscape scene. This involves incorporating features such as sand dunes, waves, and beach grass around the base of the lighthouse. By combining the natural elements of the driftwood with these additional landscape elements, you can create a captivating and realistic coastal vignette.

Nautical Themed Lighthouses

For those who appreciate a more nautical theme, consider incorporating traditional nautical symbols and colors into your Lighthouse Driftwood Art. Think navy blue and white color palettes, anchors, ship wheels, and compass motifs. These elements will transform your artwork into a charming homage to the nautical world.

Lighthouses with Integrated Lighting

For a truly enchanting effect, consider adding integrated lighting to your Lighthouse Driftwood Art. This can be achieved by installing LED lights or small bulbs within the lighthouse structure. The gentle glow emitted from the light source will not only enhance the visual appeal but also create a warm and cozy ambiance in any room or outdoor space.

Miniature Lighthouses

If space is limited or you prefer a smaller-scale project, consider creating miniature lighthouses. Utilize smaller driftwood pieces and scale down the size of the components and decorative elements. These adorable creations can be displayed on shelves, mantels, or used as centerpieces, adding a touch of coastal charm to any space.

Whimsical and Artistic Lighthouses

For those who love whimsy and artistic expression, let your imagination run wild with unconventional designs. Play with abstract shapes, colors, and unexpected combinations of materials. Incorporate elements such as mosaic tiles, stained glass, or even recycled objects to create a one-of-a-kind lighthouse masterpiece that reflects your artistic flair.

Tips and Techniques for Lighthouse Driftwood Art

Selecting Quality Driftwood

When selecting driftwood for your Lighthouse Driftwood Art, choose pieces that are sturdy and free from rot or pests. Look for interesting shapes and unique textures, as these will enhance the visual appeal of your artwork. Always clean and sanitize the driftwood before using it in your artwork to remove any dirt or debris.

Using Adhesives or Nails

Depending on the design and stability required for your lighthouse, choose the appropriate method of attachment. For smaller decorative items, a hot glue gun or adhesive designed for outdoor use can be sufficient. However, for larger and more substantial components, consider using screws or nails to ensure a secure hold.

Achieving Realistic Paint Effects

If you choose to add color or details to your lighthouse, experiment with different paint techniques to achieve realistic effects. For example, dry brushing can create the illusion of weathered wood, while stippling can mimic the texture of stone or brick. Play with shades and hues to create depth and dimension, bringing your lighthouse to life.

Incorporating Natural Elements

Enhance the authenticity of your Lighthouse Driftwood Art by incorporating natural elements such as seashells, starfish, and driftwood fragments. These additions will not only complement the overall coastal theme but also add texture and visual interest to your artwork. Take a nature walk along the beach or explore craft stores to find these beautiful accents.

Creating Texture and Depth

To create texture and depth in your Lighthouse Driftwood Art, consider using materials such as sand, small pebbles, or even moss. Apply these materials to the base or surrounding landscape of your lighthouse, creating a realistic and tactile experience. These small details will make a big difference in the overall look and feel of your artwork.

Displaying and Caring for Lighthouse Driftwood Art

Choosing the Right Display Location

Once you have completed your Lighthouse Driftwood Art piece, it’s essential to choose the right display location to showcase your masterpiece. Consider placing it in a prominent spot where it can be admired, such as a mantel, shelf, or even as a focal point in a room. Additionally, if your artwork is suitable for outdoor display, make sure to choose a location protected from harsh weather conditions.

Cleaning and Maintenance

To keep your Lighthouse Driftwood Art looking its best, regular cleaning and maintenance are important. Dust the surface with a soft, dry cloth or use a brush with soft bristles to remove any dirt or debris. Avoid using harsh chemicals or abrasive cleaners, as they may damage the driftwood or painted surfaces. Be gentle when handling the artwork to prevent any accidental breakage.

Protecting from Environmental Elements

If you choose to display your Lighthouse Driftwood Art outdoors, it is crucial to protect it from environmental elements. Apply a clear weatherproof sealant or varnish to the entire surface of the artwork, including the driftwood and painted areas. This will provide a protective barrier against moisture, UV rays, and other potential damage caused by exposure to the elements.

Benefits of Lighthouse Driftwood Art

Connection to Nature

Lighthouse Driftwood Art allows you to bring a piece of the coastal environment into your home or outdoor space. The use of natural materials, such as driftwood and seashells, creates a connection to nature and evokes a sense of calm and relaxation. Each piece tells a unique and captivating story, reminding us of the beauty and serenity of the coast.

Unique and Handcrafted Decor

One of the greatest benefits of Lighthouse Driftwood Art is its uniqueness and handcrafted nature. Each artwork is a one-of-a-kind creation, meticulously crafted by the artist’s hands. By displaying Lighthouse Driftwood Art in your home, you are showcasing a piece of art that cannot be replicated, adding a touch of individuality and charm to your space.

Sentimental Value

Lighthouse Driftwood Art often holds sentimental value for both the artist and the owner. It may remind the artist of cherished coastal memories or serve as a tribute to their love for the ocean. For the owner, Lighthouse Driftwood Art can evoke a sense of nostalgia or act as a symbol of their passion for coastal living. These sentimental connections make each artwork truly meaningful and personal.

Popular Lighthouse Driftwood Art Artists

Artist 1

Artist 1 is a renowned Lighthouse Driftwood Art master who has gained recognition for their exceptional craftsmanship and attention to detail. Their artworks often feature intricate lighthouse designs, incorporating a multitude of driftwood pieces seamlessly. With a keen eye for composition and a passion for coastal aesthetics, Artist 1’s creations leave a lasting impression on all who admire them.

Artist 2

Artist 2’s Lighthouse Driftwood Art stands out for its whimsical and imaginative approach. Their designs often incorporate unconventional materials and vibrant colors, resulting in captivating and unique lighthouse sculptures. Artist 2’s artworks bring a sense of joy and playfulness to any space, making them highly sought after by collectors and enthusiasts alike.

Artist 3

Artist 3’s Lighthouse Driftwood Art showcases a blend of realism and artistic expression. Their attention to detail is remarkable, capturing the essence of lighthouses and coastal landscapes with precision. Through their skillful manipulation of driftwood and use of various decorative elements, Artist 3 creates breathtaking works of art that transport viewers to the serene shores of the coast.

Conclusion

Lighthouse Driftwood Art combines the natural beauty of driftwood with the iconic imagery of lighthouses to create unique and visually appealing artworks. By utilizing driftwood, lighthouse components, and additional decorative items, these handcrafted masterpieces capture the essence of coastal living and bring a touch of serenity and charm to any space. Whether you choose a coastal landscape design, a nautical theme, or let your imagination run wild with artistic expression, Lighthouse Driftwood Art offers endless possibilities for creativity and personalization. So, embrace the beauty of nature, let your creativity sail, and embark on your own Lighthouse Driftwood Art journey today!

Filed Under: Driftwood Ideas Tagged With: Art, Driftwood, Lighthouse

Driftwood Art Lamp

April 3, 2024 by admin

Imagine transforming a piece of weathered driftwood into a stunning work of art that also serves as a functional lamp. The Driftwood Art Lamp encapsulates the harmonious blend of nature and creativity, offering a unique and mesmerizing lighting solution for any space. Crafted with meticulous care, each driftwood lamp showcases the distinctive patterns and textures of the wood, creating a truly captivating piece that brings a touch of warmth and rustic charm to any room. Let the Driftwood Art Lamp illuminate your home with its natural beauty and artistic allure.

Driftwood Art Lamp

What is a driftwood art lamp?

Definition

A driftwood art lamp is a unique piece of home decor that combines the natural beauty of driftwood with the functionality of a lamp. It is a handcrafted creation made from various pieces of driftwood, carefully arranged and assembled to form a visually stunning and functional lighting piece.

Materials used

Driftwood art lamps are primarily made using driftwood, which is wood that has been washed ashore by the tide. This wood has a weathered and worn appearance, with unique textures and characteristics. In addition to driftwood, other materials used in the construction of these lamps include lamp fixtures, electrical wiring, and various accessories like lampshades or decorative elements.

The beauty of driftwood

Unique and natural appeal

One of the most captivating aspects of driftwood art lamps is their unique and natural appeal. The organic shapes and textures of the driftwood give each lamp a one-of-a-kind appearance. No two lamps are alike, as each piece of driftwood has been shaped by the ocean and weathered over time. This makes driftwood art lamps a fascinating and eye-catching addition to any interior space.

History and symbolism

Driftwood has a rich history and symbolism in various cultures around the world. In many coastal communities, driftwood is seen as a symbol of the ocean’s power and resilience. It carries with it a sense of adventure and mystery, as it has traveled vast distances before reaching the shore. By incorporating driftwood into the design of an art lamp, it not only adds natural beauty but also evokes a sense of connection to the sea and its stories.

Creating a driftwood art lamp

Collecting driftwood

The first step in creating a driftwood art lamp is to collect the driftwood itself. This can be done by visiting beaches or coastal areas where driftwood is commonly found. It is important to choose pieces of driftwood that are sturdy and in good condition. Look for interesting shapes and textures that will add visual appeal to the lamp.

Preparation and cleaning

Once the driftwood is collected, it needs to be properly prepared and cleaned before it can be used in the lamp. This involves removing any dirt, sand, or debris and ensuring that the wood is free from pests or rot. The driftwood may need to be washed and dried thoroughly to ensure its stability and durability.

Design and assembly

Designing a driftwood art lamp involves arranging the collected driftwood pieces in a visually pleasing and cohesive manner. This can be done by experimenting with different configurations until the desired look is achieved. Once the design is finalized, the driftwood is securely attached to a lamp fixture, and any additional accessories or embellishments are added. The lamp is then wired to ensure it can be used for lighting purposes.

Different styles of driftwood art lamps

Nautical theme

One popular style of driftwood art lamp is the nautical theme. This style often incorporates elements such as ropes, seashells, or anchors to enhance the oceanic feel of the lamp. The driftwood used in nautical-themed lamps may be arranged in the shape of a ship’s wheel, a lighthouse, or other maritime symbols. These lamps are perfect for beachfront or coastal-themed interiors.

Minimalist design

For those who prefer a more understated and modern look, driftwood art lamps can be designed in a minimalist style. This often involves clean lines and simplicity, with a focus on showcasing the natural beauty of the driftwood itself. Minimalist driftwood art lamps can complement a variety of interior styles and provide a subtle yet striking focal point in a room.

Rustic charm

Driftwood art lamps with a rustic charm embrace the weathered and aged appearance of the driftwood. These lamps may incorporate additional elements like burlap, twine, or vintage-style lampshades to enhance the rustic feel. They are perfect for creating a cozy and inviting atmosphere in cabins, lodges, or country-themed interiors.

Driftwood Art Lamp

Making a driftwood art lamp DIY

Tools and materials required

To make a driftwood art lamp yourself, you will need the following tools and materials:

  • Assorted pieces of driftwood
  • Lamp fixture with electrical wiring
  • Lampshade (optional)
  • Drill
  • Screws or adhesive
  • Wire cutters
  • Sandpaper
  • Protective gloves

Step-by-step instructions

  1. Begin by collecting driftwood from beaches or coastal areas. Choose pieces that are sturdy and interesting in shape and texture.
  2. Clean the driftwood thoroughly by removing any dirt, sand, or debris. Ensure that the wood is dry and free from pests or rot.
  3. Determine the design or configuration of your lamp. Experiment with different arrangements of the driftwood pieces until you are satisfied with the look.
  4. Attach the driftwood securely to the lamp fixture using screws or adhesive. Ensure that the lamp fixture is wired and ready for use.
  5. If desired, attach a lampshade to the lamp fixture to diffuse the light and add a decorative touch.
  6. Test the lamp to ensure it is functioning properly and adjust the arrangement of the driftwood if necessary.
  7. Optional: Apply a coat of clear sealant to the driftwood to enhance its durability and protect it from moisture or damage.
  8. Place your DIY driftwood art lamp in your desired location and enjoy the warm and natural glow it brings to your space.

Tips and tricks

  • When collecting driftwood, consider the size and shape of the lamp you intend to create. Choose pieces that are suitable for the overall design and dimensions of the lamp.
  • Play around with different lampshade styles to enhance the aesthetic of your driftwood art lamp. Opt for neutral tones or natural materials for a cohesive look.
  • Before using any electrical components, ensure that you have a basic understanding of electrical safety. If in doubt, consult a professional or seek assistance.

Using driftwood art lamps in interior design

Adding natural elements to your space

Driftwood art lamps offer a wonderful way to incorporate natural elements into your interior design. The organic textures and shapes of the driftwood bring a sense of the outdoors into your home, creating a calming and earthy atmosphere. These lamps can be used in various rooms, from the living room to the bedroom, bringing a touch of nature to any space.

Enhancing warmth and texture

The warm tones and unique patterns found in driftwood add a layer of depth and texture to a room. Whether used as a bedside lamp or on a console table, a driftwood art lamp becomes a focal point that complements other elements in the space. It adds visual interest and creates a cozy ambiance, particularly when the lamp is turned on, casting soft and warm light throughout the room.

Creating a focal point

Driftwood art lamps have the ability to become a striking focal point in any room. Their rustic and natural charm draws the eye and sparks conversation. Whether placed on a mantle, in a reading nook, or as a centerpiece on a dining table, a driftwood art lamp commands attention and serves as a statement piece that adds character and personality to the space.

Driftwood art lamp as a gift

Unique and thoughtful present

A driftwood art lamp makes for a truly unique and thoughtful gift. Its handmade nature and the natural beauty of the driftwood make it a stand-out present that is sure to be cherished by the recipient. The craftsmanship and attention to detail that goes into creating a driftwood art lamp show that you have put thought and care into the gift, making it even more special.

Suitable for various occasions

Whether it’s a birthday, anniversary, housewarming, or any other special occasion, a driftwood art lamp is a versatile gift that suits various events. Its timeless appeal and natural aesthetic make it a fitting present for people of all ages and tastes. From nature enthusiasts to interior design enthusiasts, a driftwood art lamp is sure to delight and impress.

Personalization options

One of the great things about driftwood art lamps is that they can be easily personalized. You can choose driftwood pieces that hold sentimental value or have a particular meaning to the person you are gifting it to. Additionally, you can select lampshades or accessories that reflect the recipient’s style or preferences. By adding these personal touches, you can create a truly meaningful and customized gift.

Where to find driftwood art lamps

Local artisans and craft fairs

One way to find driftwood art lamps is by visiting local artisans and craft fairs. These events often feature talented artists who specialize in creating unique and handcrafted items. By purchasing directly from the artist, you can not only support local talent but also have the opportunity to discuss the design and customization options for your driftwood art lamp.

Online platforms and websites

The internet offers a vast array of options when it comes to finding driftwood art lamps. Online platforms and websites dedicated to handmade and artisanal products showcase a wide range of driftwood art lamps from various artists and sellers. This allows you to browse through different styles and designs, compare prices, and find the perfect lamp to suit your preferences.

Custom orders

If you have a specific vision for your driftwood art lamp or want to incorporate personal elements into the design, consider reaching out to artists or artisans who offer custom orders. Many talented creators are happy to work closely with customers to bring their ideas to life. This way, you can have a driftwood art lamp that is truly unique and tailored to your taste.

Caring for your driftwood art lamp

Regular dusting and cleaning

To keep your driftwood art lamp looking its best, it is important to regularly dust and clean it. Use a soft cloth or duster to gently remove any dust or debris that may accumulate on the surface of the driftwood. Avoid using harsh cleaning chemicals or abrasive materials that could damage the wood or its finish.

Avoiding direct sunlight and moisture

Driftwood is susceptible to damage from direct sunlight and excessive moisture. To extend the lifespan of your driftwood art lamp, it is best to keep it away from windows or areas where it will be exposed to prolonged sunlight. Similarly, avoid placing the lamp in areas prone to high humidity or moisture, as this can cause the wood to warp or rot over time.

Repair and maintenance

If your driftwood art lamp experiences any damage or wear over time, it is possible to repair and maintain its condition. For minor scratches or imperfections, sand the affected area gently and apply a clear sealant to restore its appearance. If more significant damage occurs, such as loose driftwood pieces or electrical issues, it is recommended to seek professional help for repair or maintenance.

Conclusion and final thoughts

Appreciating the craftsmanship

Driftwood art lamps are not just functional lighting pieces; they are works of art that showcase the beauty and craftsmanship of the artist. The time and care that goes into collecting, preparing, and designing each lamp is evident in the final product. By owning a driftwood art lamp, you can appreciate the skill and dedication of the artist behind it.

The enduring beauty of driftwood

Driftwood has a timeless appeal and the ability to add a touch of nature to any space. As a material, it represents resilience and the strength of the ocean. Incorporating driftwood into the design of an art lamp not only brings this enduring beauty into your home but also creates a unique and captivating lighting piece that is sure to be a conversation starter.

Filed Under: Driftwood Ideas Tagged With: Art, Driftwood, Lamp

Driftwood Art Kids

April 2, 2024 by admin

Imagine a world where children transform discarded driftwood into breathtaking works of art. Driftwood Art Kids is a whimsical and creative adventure that empowers young minds to unleash their creativity while caring for the environment. Through this unique program, children learn to see beauty in the ordinary, turning forgotten pieces of driftwood into masterpieces that captivate the imagination. Get ready to embark on a journey where little hands become the artists and driftwood becomes their canvas. Driftwood Art Kids is where art meets sustainability, inspiring the next generation to make a positive impact on our planet, one beautiful creation at a time.

Introduction

The beauty of driftwood art

Driftwood art is a unique and captivating form of artistic expression that harnesses the beauty of nature. It involves creating artworks using pieces of driftwood, which are wooden materials that have been washed up on shore by the tides. The intricate and natural textures of driftwood add a touch of authenticity and charm to any artistic creation. Driftwood art serves as a reminder of the power and beauty of the ocean and can bring a sense of tranquility and peace into the spaces where these artworks are displayed.

Why kids love driftwood art

Kids are naturally drawn to the wonders of nature, and driftwood art provides an exciting opportunity for them to engage with the natural world through creativity. The process of collecting driftwood, selecting pieces, and transforming them into unique artworks sparks their curiosity and imagination. Driftwood’s irregular shapes and textures invite children to explore and experiment, allowing them to express their artistic ideas in a tactile and interactive way. Furthermore, driftwood art is an eco-friendly activity that promotes sustainability and encourages children to appreciate the beauty in found objects.

How driftwood art inspires creativity

Driftwood art serves as a limitless source of inspiration for kids’ creative endeavors. The unique shapes and textures of each piece of driftwood offer an opportunity for children to envision and explore various artistic possibilities. Whether it’s envisioning a driftwood sculpture, a mobile, or a picture frame, the organic nature of driftwood challenges youngsters to think outside the box and experiment with different artistic techniques. Engaging with driftwood art encourages children to think creatively, problem-solve, and develop their artistic skills while fostering a deeper connection with the natural world.

Getting started with driftwood art

Collecting driftwood

The first step in creating driftwood art is collecting the main component – driftwood itself. Taking a trip to the beach, lake, or river is a fantastic opportunity to embark on a driftwood treasure hunt with your child. Encourage them to search for unique pieces with interesting shapes and textures. It’s important to ensure that the driftwood you collect is free from any harmful substances or pests. Always prioritize safety by collecting driftwood from designated areas and avoiding unstable or rotting pieces.

Preparing the driftwood

Once you have gathered a variety of driftwood, it’s time to prepare it for the artistic process. Begin by rinsing the pieces thoroughly with fresh water to eliminate any salt or sand residue. Next, inspect the driftwood for any loose or splintered parts, and with the help of sandpaper, gently smoothen the edges to prevent injury. If you wish to enhance the natural beauty of the wood, you can also apply a clear varnish or sealant, which will protect the driftwood and help preserve its color and texture.

Tools and materials needed

To ensure a successful driftwood art project, it’s important to have the right tools and materials at hand. Here are some essential items you will need:

  • Driftwood (collected and prepared)
  • Craft glue or hot glue gun
  • Rope, string, or fishing line (for hanging or connecting pieces)
  • Paint, markers, or other coloring materials (optional)
  • Scissors or wire cutters (for cutting and shaping)
  • Drill (if you plan to create holes in the driftwood)

Driftwood Art Kids

Driftwood mobiles

Creating a driftwood mobile

Driftwood mobiles are a delightful way to display your child’s driftwood collection. These hanging artworks sway beautifully in the breeze and add a touch of natural elegance to any space. To start, choose a central piece of driftwood to act as the anchor for your mobile. Then, attach strings or fishing line to the anchor piece and tie various other pieces of driftwood to the strings, creating a balanced and aesthetically pleasing composition. You can also add lightweight accessories like seashells, feathers, or beads to further personalize the mobile.

Materials needed for a driftwood mobile

  • Driftwood pieces of various shapes and sizes
  • Craft glue or hot glue gun
  • Rope, string, or fishing line
  • Lightweight accessories (seashells, feathers, beads, etc.)
  • Scissors or wire cutters

Step-by-step guide to making a driftwood mobile

  1. Select a central piece of driftwood, ensuring it has a sturdy shape and size.
  2. Attach a length of rope or fishing line to the central piece, creating a loop for hanging.
  3. Cut several pieces of string to desired lengths for hanging the additional driftwood pieces.
  4. Tie one end of each string to the central piece at different points, ensuring an even distribution of weight.
  5. Attach pieces of driftwood to the free ends of the strings, using craft glue or a hot glue gun to secure them.
  6. Consider adding lightweight accessories such as seashells, feathers, or beads to the strings as well.
  7. Once all the driftwood pieces and accessories are attached, allow the glue to dry completely.
  8. Hang your completed driftwood mobile in a location where it can catch the breeze and spread its natural beauty.

By following these simple steps, you and your child can create a captivating driftwood mobile that will inspire wonder and awe.

Driftwood sculptures

Creating a driftwood sculpture

Driftwood sculptures allow children to transform nature’s discarded treasures into magnificent works of art. The key to driftwood sculptures is selecting pieces that fit together harmoniously, considering their shapes, sizes, and textures. Building a sculpture often involves assembling the driftwood pieces using craft glue or a hot glue gun, ensuring a secure connection between each element. This allows for endless creative possibilities and the chance to experiment with different arrangements and angles.

Materials needed for a driftwood sculpture

  • Driftwood pieces of various shapes and sizes
  • Craft glue or hot glue gun
  • Optional: wire or metal brackets for added stability
  • Protective gloves (if necessary)

Step-by-step guide to making a driftwood sculpture

  1. Collect and prepare driftwood pieces, ensuring they are clean, smooth, and dry.
  2. Carefully consider the desired shape or form of your sculpture and gather driftwood pieces that complement each other.
  3. Experiment with different arrangements, placing driftwood pieces together to find the perfect fit.
  4. Once you are satisfied with the arrangement, use craft glue or a hot glue gun to bond the pieces together securely.
  5. If necessary, you can add additional support by using wire or metal brackets as reinforcement.
  6. Allow the glue to dry completely before handling or moving the driftwood sculpture.
  7. Display your masterpiece in a prominent location where its natural beauty can be admired and appreciated.

With a bit of creativity and patience, your child can create awe-inspiring driftwood sculptures that showcase the beauty of nature.

Driftwood Art Kids

Driftwood picture frames

Creating a driftwood picture frame

Driftwood picture frames add a rustic and organic touch to cherished photographs and artwork. These frames are not only visually appealing but also provide a unique way to display treasured memories. Start by selecting the appropriate size of driftwood pieces to form the frame. Then, use craft glue or a hot glue gun to attach the pieces together, ensuring they form a solid frame that will securely hold the picture or artwork. For added stability, you can use small brackets or nails to reinforce the corners of the frame.

Materials needed for a driftwood picture frame

  • Driftwood pieces of appropriate size
  • Craft glue or hot glue gun
  • Picture or artwork to be framed
  • Small nails or brackets (optional)
  • Protective gloves (if necessary)

Step-by-step guide to making a driftwood picture frame

  1. Gather clean and dry driftwood pieces that are suitable for the desired size of your picture frame.
  2. Lay out the driftwood pieces in the shape of a frame, experimenting with different arrangements until you’re satisfied.
  3. Using craft glue or a hot glue gun, carefully apply adhesive to the joints where the driftwood pieces meet, securing them in place.
  4. If desired, reinforce the corners of the frame by using small nails or brackets.
  5. Allow the glue to dry completely before handling or moving the driftwood picture frame.
  6. Insert your chosen picture or artwork into the frame, ensuring it fits securely.
  7. Display your driftwood picture frame proudly, showcasing your cherished memories in a one-of-a-kind piece of art.

Driftwood picture frames not only provide a unique and stylish way to showcase your favorite photographs but also add a touch of coastal charm to any space.

Driftwood wind chimes

Creating driftwood wind chimes

Driftwood wind chimes are not only visually appealing but also create soothing sounds when kissed by the breeze. Making driftwood wind chimes requires some basic crafting skills and materials. Start by selecting different lengths of driftwood pieces, ensuring they create a pleasing and harmonious arrangement. Then, attach the driftwood pieces to a central wooden or metal ring using string, rope, or fishing line. Finally, attach smaller decorative pieces, such as seashells or glass beads, to create musical tinkling sounds when the wind blows.

Materials needed for driftwood wind chimes

  • Driftwood pieces of various lengths
  • Craft glue or hot glue gun
  • String, rope, or fishing line
  • Central wooden or metal ring
  • Decorative accessories (seashells, glass beads)
  • Optional: small bells or chimes for additional sound

Step-by-step guide to making driftwood wind chimes

  1. Collect and prepare driftwood pieces, ensuring they are clean, smooth, and dry.
  2. Select driftwood pieces of various lengths to create a visually appealing arrangement.
  3. Attach the larger driftwood pieces to a central wooden or metal ring using string, rope, or fishing line, ensuring they hang at different lengths for aesthetic variation.
  4. Attach smaller decorative pieces, such as seashells or glass beads, to the bottom ends of the driftwood pieces using craft glue or a hot glue gun.
  5. For an additional musical element, you can attach small bells or chimes at various points along the wind chimes.
  6. Allow the glue to dry completely before hanging your driftwood wind chimes in a location where they can catch the wind and create beautiful sounds.

Driftwood wind chimes not only create a sense of tranquility but also bring the beauty of nature into your outdoor living spaces.

Driftwood wall art

Creating driftwood wall art

Driftwood wall art is a stunning way to incorporate the natural textures of driftwood into your home decor. The organic shapes and earthy tones of driftwood lend themselves perfectly to creating visually appealing and unique wall installations. Begin by planning the desired design for your driftwood wall art. Then, using craft glue or a hot glue gun, attach the driftwood pieces to a sturdy backing, such as a wooden board or canvas. Finally, you can add additional decorative elements, such as dried flowers, shells, or pebbles, to enhance the overall composition.

Materials needed for driftwood wall art

  • Driftwood pieces of various shapes and sizes
  • Craft glue or hot glue gun
  • Sturdy backing (wooden board, canvas)
  • Optional: decorative elements (dried flowers, shells, pebbles)
  • Protective gloves (if necessary)

Step-by-step guide to making driftwood wall art

  1. Collect and prepare driftwood pieces, making sure they are clean, smooth, and dry.
  2. Plan the design for your driftwood wall art, considering the desired layout and composition.
  3. Attach the driftwood pieces to a sturdy backing, such as a wooden board or canvas, using craft glue or a hot glue gun.
  4. Experiment with different arrangements and angles to create an aesthetically pleasing composition.
  5. If desired, add additional decorative elements, such as dried flowers, shells, or pebbles, to enhance the overall design.
  6. Allow the glue to dry completely before hanging your driftwood wall art in a prominent location where it can become a captivating focal point.

Driftwood wall art adds a touch of natural beauty and elegance to any room, making it a perfect addition to your home decor.

Driftwood jewelry

Creating driftwood jewelry

Driftwood jewelry combines the earthy allure of driftwood with the elegance of wearable art. From necklaces to bracelets, this unique form of jewelry allows children to showcase their creativity and embrace their own personal style. Begin by selecting small and lightweight driftwood pieces that can be easily shaped and drilled. Then, using a combination of wire, strings, or cords, attach the driftwood pieces to create unique jewelry designs. Finally, add decorative elements such as beads, charms, or small stones to embellish the pieces.

Materials needed for driftwood jewelry

  • Small and lightweight driftwood pieces
  • Wire, strings, or cords
  • Small drill or hand drill (if necessary)
  • Beads, charms, or small stones
  • Optional: jewelry findings (clasps, jump rings)
  • Pliers or jewelry making tools

Step-by-step guide to making driftwood jewelry

  1. Collect and prepare small driftwood pieces, ensuring they are clean, smooth, and dry.
  2. Sketch out or visualize the desired design for your driftwood jewelry.
  3. Use a small drill or hand drill to create holes in the driftwood pieces, making it easier to attach them to the string or wire.
  4. Attach the driftwood pieces to a piece of wire, string, or cord, ensuring they are securely fastened.
  5. Add decorative elements, such as beads, charms, or small stones, to enhance the design and add visual interest.
  6. If necessary, use jewelry findings, such as clasps or jump rings, to create closures for necklaces or bracelets.
  7. Use pliers or jewelry making tools to secure the closures and make any necessary adjustments to the jewelry.
  8. Enjoy wearing your unique and nature-inspired driftwood jewelry, which serves as a beautiful accessory and a conversation starter.

Driftwood jewelry allows children to express their creativity and showcase their connection to nature in a wearable and fashionable way.

Driftwood critters

Creating driftwood critters

Driftwood critters are whimsical creatures that come to life through the imaginative use of driftwood. From adorable animals to mythical beings, creating driftwood critters allows children to explore the imaginative side of driftwood art. Start by selecting specific pieces of driftwood that resemble various animal features or mythical attributes. Then, using craft glue or a hot glue gun, assemble the driftwood pieces, ensuring they closely resemble the desired critter. Additional decorative elements, such as googly eyes or colored paints, can be added to bring each critter to life.

Materials needed for driftwood critters

  • Driftwood pieces of various shapes and sizes
  • Craft glue or hot glue gun
  • Googly eyes or colored paints (optional)
  • Optional: wire or metal brackets for added stability
  • Protective gloves (if necessary)

Step-by-step guide to making driftwood critters

  1. Collect and prepare driftwood pieces, ensuring they are clean, smooth, and dry.
  2. Determine the critter you wish to create and select specific driftwood pieces that resemble the desired features.
  3. Assemble the driftwood pieces using craft glue or a hot glue gun, carefully bonding them together to resemble the critter.
  4. If desired, add additional decorative elements such as googly eyes or colored paints to enhance the critter’s appearance.
  5. For added stability, you can use wire or metal brackets as reinforcement for larger or more complex critters.
  6. Allow the glue to dry completely before displaying your completed driftwood critter in a special spot where it can bring joy and delight.

Driftwood critters are a whimsical and imaginative way for children to unleash their creativity and transform the natural beauty of driftwood into enchanting creatures.

Driftwood home decor

Creating driftwood home decor

Driftwood home decor adds a touch of coastal charm and natural beauty to any living space. From candle holders to table centerpieces, driftwood can be used to create unique and eye-catching home decor pieces. Begin by selecting driftwood pieces that can be easily arranged or transformed into desired shapes. Then, using craft glue or a hot glue gun, assemble the driftwood pieces to create functional and visually appealing decor items. You can also add other decorative elements such as glass vases, tea lights, or colored ribbons to enhance the overall design.

Materials needed for driftwood home decor

  • Driftwood pieces of various shapes and sizes
  • Craft glue or hot glue gun
  • Decorative elements (glass vases, tea lights, colored ribbons)
  • Optional: woodworking tools (saw, drill)
  • Protective gloves (if necessary)

Step-by-step guide to making driftwood home decor

  1. Collect and prepare driftwood pieces, ensuring they are clean, smooth, and dry.
  2. Visualize or sketch out the design for your driftwood home decor piece.
  3. Select the appropriate driftwood pieces needed to create your desired decor item.
  4. Assemble the driftwood pieces together using craft glue or a hot glue gun, ensuring they form a sturdy and visually pleasing structure.
  5. If necessary, use woodworking tools such as a saw or drill to modify or shape the driftwood pieces to fit your design.
  6. Add optional decorative elements such as glass vases, tea lights, or colored ribbons to further enhance the overall aesthetic.
  7. Allow the glue to dry completely before displaying your driftwood home decor piece in a prominent location where it can add a touch of natural beauty to your space.

Driftwood home decor brings a sense of coastal tranquility and organic elegance into your living space, allowing you to showcase the captivating beauty of nature.

In conclusion, driftwood art captivates both children and adults with its unique beauty and endless creative possibilities. From driftwood mobiles to sculptures, picture frames, wind chimes, wall art, jewelry, critters, and home decor, there are countless ways to explore and express your creativity through this fascinating art form. By engaging with driftwood art, children can develop their artistic skills, problem-solving abilities, and appreciation for the natural world. So go ahead and embark on a driftwood adventure with your child, unlocking the wonders and magic of nature’s discarded treasures.

Filed Under: Driftwood Ideas Tagged With: Art, Driftwood, kids

Driftwood Art Ideas Creative Diy Projects

April 2, 2024 by admin

If you are looking for a unique and eco-friendly way to bring a touch of nature into your home, then driftwood art may be just what you need. This article will introduce you to a variety of creative DIY projects that can be done using driftwood. From stunning wall hangings to sculptural-style furniture, these ideas will inspire you to get crafty and turn this natural material into beautiful works of art.

nature, desktop background, outdoors
. Whether you are an experienced crafter or a beginner, these driftwood art ideas are sure to unleash your creativity and add a touch of rustic elegance to your living space.

Driftwood Mobiles

Materials needed for driftwood mobiles

To create a beautiful driftwood mobile, you will need the following materials:

  • Pieces of driftwood in various shapes and sizes
  • Fishing line or clear nylon thread
  • Small eye hooks
  • Beads or other decorative elements
  • A metal hoop or wooden dowel for hanging

Steps to create a driftwood mobile

Creating a driftwood mobile is a fun and creative project. Follow these steps to make your own:

  1. Start by gathering your driftwood pieces. Look for unique shapes and interesting textures.
  2. Clean the driftwood by gently rinsing it with water and allowing it to dry completely.
  3. Once the driftwood is dry, arrange the pieces in a pleasing composition. Play around with different arrangements until you find one you love.
  4. Using a small drill or awl, create holes in the driftwood where you want to attach the fishing line.
  5. Cut lengths of fishing line or clear nylon thread and thread them through the holes in the driftwood.
  6. Attach eye hooks to the metal hoop or wooden dowel, evenly spaced apart.
  7. Tie the other end of the fishing line to the eye hooks, making sure the driftwood pieces are at different heights.
  8. Add beads or other decorative elements to the fishing line for extra flair.
  9. Hang your driftwood mobile in a sunny window or from a tree branch, and enjoy the natural beauty it brings to your space.

Ideas for different styles and designs of driftwood mobiles

There are endless possibilities when it comes to designing driftwood mobiles. Here are a few ideas to spark your creativity:

  • Beach-inspired: Use seashells, starfish, and other ocean-themed decorations alongside the driftwood for a coastal vibe.
  • Bohemian: Incorporate colorful feathers, macrame accents, and vibrant beads to create a whimsical and boho-inspired mobile.
  • Minimalist: Keep it simple with just the driftwood and monochromatic thread for a sleek and modern look.
  • Nature-inspired: Add small pinecones, dried flowers, or moss to your driftwood mobile to bring a touch of the outdoors inside.
  • Personalized: Use small picture frames or miniature photographs to personalize your driftwood mobile and showcase cherished memories.

Driftwood Wall Art

Materials needed for driftwood wall art

To create stunning driftwood wall art, gather the following materials:

  • Large piece of driftwood
  • Saw or pruning shears
  • Sandpaper
  • Picture hanging kit or sawtooth hangers
  • Optional: Paint or wood stain

Steps to create driftwood wall art

Creating your own driftwood wall art is a great way to add a touch of rustic elegance to your space. Follow these steps to make your own:

  1. Begin by choosing a large piece of driftwood that speaks to you. Look for interesting shapes and textures.
  2. If necessary, trim the driftwood using a saw or pruning shears to achieve your desired shape and size.
  3. Use sandpaper to smooth out any rough edges or splintered areas on the driftwood.
  4. Decide if you want to paint or stain the driftwood. This step is optional but can add a pop of color or enhance the natural beauty of the wood. Allow the paint or stain to dry completely before moving on to the next step.
  5. Attach a picture hanging kit or sawtooth hangers to the back of the driftwood for easy hanging.
  6. Choose a prominent spot on your wall to display your driftwood art, and use nails or wall hooks to secure it in place.
  7. Step back and admire your handiwork – you now have a stunning piece of driftwood wall art that adds character and charm to your home.

Inspiring designs for driftwood wall art

Driftwood wall art can take on many forms, depending on your personal style and preferences. Here are a few design ideas to inspire you:

  • Geometric patterns: Arrange smaller pieces of driftwood in geometric shapes, such as triangles or hexagons, for a modern and visually striking wall art piece.
  • Nautical themes: Incorporate seashells, starfish, or rope into your driftwood wall art to create a coastal-inspired masterpiece.
  • Textured accents: Attach pieces of fabric, feathers, or even dried flowers to the driftwood to add texture and visual interest.
  • Boho-chic: Add macrame accents, tassels, or dreamcatcher elements to the driftwood for a bohemian-inspired wall art piece.
  • Personalized touches: Use woodburning tools to carve names, dates, or meaningful quotes into the driftwood for a one-of-a-kind piece with sentimental value.

Driftwood Sculptures

Materials needed for driftwood sculptures

To create stunning driftwood sculptures, gather the following materials:

  • Assorted pieces of driftwood in various shapes and sizes
  • Wood glue or epoxy resin
  • Sandpaper
  • Optional: Wood carving tools or a Dremel tool for shaping and detailing

Techniques to shape and assemble driftwood for sculptures

Driftwood sculptures allow you to unleash your creativity and transform raw materials into captivating works of art. Follow these techniques to shape and assemble your driftwood:

  1. Begin by selecting driftwood pieces that you find visually appealing. Look for interesting shapes, textures, and sizes.
  2. Use sandpaper to smooth out any rough edges or splintered areas on the driftwood.
  3. Determine the design or concept for your driftwood sculpture. Sketch out your ideas beforehand, or simply let the driftwood guide you as you work.
  4. If desired, use wood carving tools or a Dremel tool to shape and detail the driftwood. This step allows you to add your personal touch and bring out the natural beauty of each piece.
  5. Assemble the driftwood pieces by applying wood glue or epoxy resin to the areas where they will connect. Press the pieces together firmly and hold them in place until the adhesive dries.
  6. Take your time and experiment with different arrangements and angles to achieve the desired look for your driftwood sculpture.
  7. Allow the adhesive to fully cure before moving or displaying your sculpture. Follow the instructions on the adhesive product for the recommended drying time.

Examples of unique driftwood sculpture ideas

The possibilities for driftwood sculptures are limited only by your imagination. Here are some unique ideas to inspire your creativity:

  • Animal-inspired: Create driftwood sculptures that resemble animals, such as birds, fish, or even mythical creatures like dragons or unicorns.
  • Abstract forms: Let the shapes and textures of the driftwood dictate the design, and create abstract sculptures that evoke emotion and intrigue.
  • Functional art: Incorporate other elements, such as glass or metal, into your driftwood sculpture to create functional pieces, like lamps or side tables.
  • Wall-mounted sculptures: Attach driftwood pieces to a wooden backing or acrylic panel to create captivating wall-mounted sculptures that add depth and visual interest to a space.
  • Kinetic sculptures: Use hinges or other movable components to create driftwood sculptures that can be interacted with and set in motion.

Driftwood Candle Holders

Materials needed for driftwood candle holders

To create beautiful driftwood candle holders, gather the following materials:

  • Large pieces of driftwood
  • Saw or pruning shears
  • Tea light candles or votive candles
  • Drill with a paddle or spade bit (matching the diameter of the candle)
  • Sandpaper
  • Wood glue or epoxy resin (optional)

Step-by-step guide to making driftwood candle holders

Driftwood candle holders add a touch of rustic charm to any space. Follow these steps to create your own:

  1. Begin by selecting pieces of driftwood that are large enough to hold a candle securely. Look for sturdy and interesting-shaped pieces.
  2. Using a saw or pruning shears, trim the driftwood to your desired length, making sure the tops are flat and level.
  3. If necessary, use sandpaper to smooth out any rough edges or splintered areas on the driftwood.
  4. Determine where you want to place the candles on the driftwood. Mark these spots with a pencil or tape.
  5. Using a drill with a paddle or spade bit, create holes in the driftwood at the marked spots. The diameter of the holes should match the size of your candles.
  6. Test the fit of the candles in the holes. If they are too loose, apply a small amount of wood glue or epoxy resin to the inside of the holes to secure the candles in place.
  7. Allow the adhesive to dry completely before using the driftwood candle holders.
  8. Insert the tea light or votive candles into the holes, making sure they are level and secure.
  9. Place your driftwood candle holders on a heat-resistant surface, light the candles, and enjoy the cozy and enchanting ambiance they create.

Creative variations of driftwood candle holder designs

Driftwood candle holders offer endless possibilities for customization. Here are some creative variations you can try:

  • Clustered arrangement: Instead of creating individual candle holders, gather several small driftwood pieces and attach them together in an interesting cluster. This creates a visually striking display that can hold multiple candles.
  • Driftwood log: Find a larger, more substantial piece of driftwood and drill holes along the top surface to create a row of candle holders. This design resembles a log and makes a beautiful centerpiece for a dining table or mantel.
  • Hanging candle holders: Attach eye hooks to longer, slender pieces of driftwood and suspend them from the ceiling or a sturdy branch. Hang tea light or votive candles from the hooks for a mesmerizing display that adds a touch of whimsy to your space.
  • Driftwood and glass: Combine the natural beauty of driftwood with the elegance of glass by attaching glass votive holders or small glass jars to the driftwood. This creates a stunning juxtaposition of textures and materials, with the glowing candlelight casting a warm and inviting glow.

Driftwood Picture Frames

Materials needed for driftwood picture frames

To create unique and rustic driftwood picture frames, gather the following materials:

  • Small to medium-sized pieces of driftwood
  • Thin wooden frame or foam core board cut to desired size
  • Wood glue or epoxy resin
  • Picture or photograph to frame
  • Optional: Sandpaper and wood stain or paint

Steps to create a driftwood picture frame

Transform your favorite memories into works of art by framing them in driftwood. Follow these steps to create a driftwood picture frame:

  1. Begin by selecting small to medium-sized pieces of driftwood that will fit around the edges of your picture or photograph.
  2. If the driftwood is rough or splintered, use sandpaper to smooth out any imperfections.
  3. Lay out the pieces of driftwood around the edges of the wooden frame or foam core board to determine the desired arrangement.
  4. Apply wood glue or epoxy resin to the back of each piece of driftwood and press them firmly onto the frame or board. Make sure they are evenly spaced and align with the edges of the picture or photograph.
  5. Allow the adhesive to dry completely. Follow the instructions on the adhesive product for the recommended drying time.
  6. If desired, stain or paint the driftwood to enhance its natural beauty or add a pop of color.
    woman, beach, mirage
    . Allow the stain or paint to dry before moving on to the next step.
  7. Attach the picture or photograph to the back of the frame or board using tape or adhesive.
  8. Display your driftwood picture frame on a tabletop or hang it on the wall, and admire the unique and rustic charm it adds to your space.

Ideas for embellishing driftwood picture frames

Add a personalized touch to your driftwood picture frames by incorporating additional elements. Here are some ideas for embellishing them:

  • Seashells and starfish: Glue small seashells or starfish to the driftwood frame to enhance the coastal theme and add texture.
  • Twine or rope: Wrap twine or thin rope around a portion of the driftwood frame for a rustic and bohemian touch.
  • Dried flowers or foliage: Attach dried flowers or foliage to the driftwood frame for a whimsical and natural look. Consider using flowers or leaves from a special occasion or meaningful location.
  • Personal mementos: Incorporate small trinkets, charms, or vintage buttons into the driftwood frame to personalize it and add sentimental value.
  • Woodburning or carving: Use woodburning tools or small carving tools to add designs, names, or dates to the driftwood frame. This creates a truly one-of-a-kind piece that tells a story.

Driftwood Jewelry Hooks

Materials needed for driftwood jewelry hooks

Creating driftwood jewelry hooks allows you to showcase your favorite accessories while adding a touch of natural beauty to your space. Gather the following materials:

  • Long and sturdy driftwood branches or pieces
  • Hooks in various sizes and shapes
  • Sandpaper
  • Screwdriver or drill
  • Picture hanging wire or S-hooks
  • Nails or wall hooks for hanging

Techniques to attach hooks to the driftwood

Attaching hooks to your driftwood branches requires just a few simple techniques. Follow these steps to create your own driftwood jewelry hooks:

  1. Begin by selecting long and sturdy driftwood branches or pieces that are large enough to hold the hooks securely. Look for interesting shapes and textures.
  2. If necessary, use sandpaper to smooth out any rough edges or splintered areas on the driftwood.
  3. Determine where you want to place the hooks on the driftwood. Mark these spots lightly with a pencil.
  4. Using a screwdriver or drill, carefully create pilot holes at the marked spots on the driftwood. The size of the pilot holes should match the size of the hooks you are using.
  5. Attach the hooks to the driftwood by screwing them into the pilot holes. Make sure they are securely fastened.
  6. Attach picture hanging wire or S-hooks to the back of the driftwood, evenly spaced apart, to hang the jewelry hooks.
  7. Choose a prominent spot on your wall to display your driftwood jewelry hooks, and use nails or wall hooks to secure the hanging wire or S-hooks in place.
  8. Hang your favorite necklaces, bracelets, and earrings from the hooks, and enjoy the functional and decorative nature of your driftwood jewelry hooks.

Unique and decorative ways to arrange driftwood jewelry hooks

Driftwood jewelry hooks can be arranged in various ways to suit your personal style and storage needs. Here are some unique and decorative ideas to consider:

  • Branching arrangement: Choose a longer driftwood branch and attach multiple hooks along its length, creating a tree-like shape. This allows for abundant storage and adds visual interest to your wall.
  • Clustered design: Gather several smaller driftwood pieces and attach hooks to each one. Arrange the driftwood pieces in a clustered formation on the wall, creating an eye-catching and artistic display for your jewelry.
  • Cascading effect: Attach hooks of varying lengths to a large driftwood piece, allowing them to cascade down the wall. This creates a dynamic and visually striking arrangement that adds depth to your space.
  • Mixed media: Combine driftwood with other materials, such as copper or brass pipes, to create a unique and eclectic jewelry display. Attach the hooks to the driftwood and incorporate the pipes as additional hanging spaces for necklaces and bracelets.
  • Dual functionality: Use longer driftwood branches as both jewelry hooks and decorative shelving. Attach hooks to the driftwood, and place small trinkets or decorative items on top, creating a multi-functional and visually interesting display.

Driftwood Coasters

Materials needed for driftwood coasters

To create unique and eye-catching coasters using driftwood, gather the following materials:

  • Small to medium-sized driftwood pieces
  • Saw or pruning shears
  • Sandpaper
  • Cork or felt sheet
  • Scissors or utility knife
  • Wood glue or epoxy resin

Step-by-step instructions for making driftwood coasters

Driftwood coasters not only protect your surfaces, but they also bring a touch of nature into your home. Follow these steps to make your own driftwood coasters:

  1. Begin by selecting small to medium-sized driftwood pieces that are flat and even on one side. Look for interesting shapes and textures.
  2. If necessary, trim the driftwood pieces using a saw or pruning shears to achieve a more uniform shape or size.
  3. Use sandpaper to smooth out any rough edges or splintered areas on the driftwood.
  4. Cut or trace circles or squares from your cork or felt sheet, slightly smaller than the size of your driftwood pieces. These will serve as the backing for the coasters, protecting your surfaces.
  5. Apply wood glue or epoxy resin to the flat side of the driftwood pieces, and press them firmly onto the cork or felt cutouts. Make sure they are centered and align with the edges of the backing material.
  6. Allow the adhesive to dry completely. Follow the instructions on the adhesive product for the recommended drying time.
  7. Trim any excess cork or felt from the edges of the coaster, using scissors or a utility knife.
  8. Your driftwood coasters are now ready to use. Place them on your coffee table, dining table, or any other surface that needs protection and enjoy the natural beauty they bring to your space.

Inspiring designs and embellishments for driftwood coasters

Driftwood coasters can be customized and embellished to match your style and preferences. Here are some inspiring designs and embellishments to consider:

  • Painted edges: Use acrylic or wood paint to add a pop of color to the edges of your driftwood coasters. Choose shades that complement your decor or make a bold statement.
  • Woodburning or etching: Use woodburning tools or etching techniques to add designs, patterns, or personalized messages to the driftwood surface. This creates a truly unique and personalized coaster set.
  • Marbled effect: Use a technique called alcohol ink marbling to create a stunning and abstract effect on your driftwood coasters. Simply apply alcohol ink to the surface of the driftwood, and gently blow on it or manipulate it to create swirling patterns and colors.
  • Natural finishes: Enhance the natural beauty of the driftwood by applying a sealant or wood wax that brings out the unique grain and tones of the wood. This allows the coasters to blend seamlessly with any decor style.
  • Geometric patterns: Use masking tape or stencils to create geometric patterns on the driftwood surface. Paint over the tape or stencil, and remove it once the paint is dry to reveal clean and crisp lines.
  • Seashells and beads: Glue small seashells, beads, or other small decorative elements to the driftwood surface, adding a touch of whimsy and texture. Choose colors and shapes that complement your space and personal taste.

Driftwood Planters

Materials needed for driftwood planters

Gather the following materials to create unique and natural driftwood planters:

  • Large and sturdy driftwood pieces
  • Drill with a paddle or spade bit (matching the diameter of the plant container)
  • Sandpaper
  • Plant container or pot
  • Potting soil
  • Plants or succulents of your choice

Techniques to create a planter using driftwood

Driftwood planters bring a natural and organic element to your indoor or outdoor space. Follow these techniques to create your own driftwood planters:

  1. Begin by selecting large and sturdy driftwood pieces that can support the weight of your plant containers. Look for interesting shapes and textures.
  2. If necessary, use sandpaper to smooth out any rough edges or splintered areas on the driftwood.
  3. Determine where you want to place the plant container on the driftwood. Mark this spot lightly with a pencil.
  4. Using a drill with a paddle or spade bit, carefully create a hole in the driftwood at the marked spot. The diameter of the hole should match the size of your plant container.
  5. Test the fit of the plant container in the hole. It should fit snugly and securely.
  6. Fill the plant container with potting soil, leaving enough space for the plants or succulents.
  7. Plant your desired greenery in the container, making sure they are properly spaced and positioned.
  8. Place the plant container into the driftwood hole, ensuring it is level and secure.
  9. Display your driftwood planter in a sunny spot indoors or in a protected outdoor area, and enjoy the natural beauty it brings to your space.

Ideas for incorporating plants into driftwood planters

Driftwood planters provide a stunning backdrop for a wide variety of plants and succulents. Here are some ideas to consider when selecting plants for your driftwood planters:

  • Air plants: These low-maintenance plants are perfect for driftwood planters, as they require no soil and can attach themselves to the driftwood naturally.
  • Succulents: Choose a variety of small succulents that thrive in well-draining soil. Their colorful foliage and unique textures complement the rustic charm of driftwood.
  • Foliage plants: Select houseplants with broad leaves or interesting textures, such as pothos, ferns, or snake plants. These plants add lushness and bring a touch of the outdoors inside.
  • Herbs: Create a small herb garden by planting culinary herbs, such as basil, rosemary, or thyme, in your driftwood planter. Not only do they add fragrance and beauty, but they also provide fresh herbs for cooking.
  • Miniature flowers: Choose small flowering plants, like daisies or pansies, to add a pop of color and whimsy to your driftwood planter. These plants bring a garden-like feel to your space in a compact size.
  • Ornamental grasses: Incorporating ornamental grasses, such as feather grass or bunny tails, adds movement and a playful element to your driftwood planter. Their graceful, swaying nature complements the organic shape of the driftwood.

Driftwood Wind Chimes

Materials needed for driftwood wind chimes

Create whimsical and melodic driftwood wind chimes using the following materials:

  • Medium-sized driftwood pieces
  • Fishing line or clear nylon thread
  • Small eye hooks
  • Decorative beads or shells
  • Metal or wooden chime tubes or hollow bamboo segments
  • Optional: Paint or wood stain

Steps to assemble a driftwood wind chime

Assembling a driftwood wind chime allows you to bring soothing sounds and natural aesthetics to your outdoor space. Follow these steps to create your own:

  1. Begin by selecting medium-sized driftwood pieces that are interestingly shaped, with natural holes or crevices that can be threaded.
  2. If desired, paint or stain the driftwood pieces to enhance their natural beauty or add a pop of color. Allow the paint or stain to dry completely before moving on to the next step.
  3. Determine the arrangement of your driftwood pieces. Consider the size, shape, and thickness of each piece, as well as how they will hang and interact with each other when caught by the wind.
  4. Attach eye hooks to the driftwood pieces, making sure they are evenly spaced and positioned for optimal movement. It may be necessary to drill small pilot holes before screwing in the eye hooks.
  5. Cut lengths of fishing line or clear nylon thread, and secure them to each driftwood piece using the eye hooks. Make sure they are long enough to dangle freely and reach the desired chime tubes or bamboo segments.
  6. Attach your chosen chime tubes or hollow bamboo segments to the fishing line or clear nylon thread using knots or beads to keep them in place. Experiment with different lengths and combinations to achieve the desired sound and visual effect.
  7. Add decorative beads, shells, or other trinkets among the driftwood pieces and chime tubes to add extra flair and visual interest.
  8. Hang your driftwood wind chime from a tree branch or pergola where it can catch the wind, and let the soothing sounds fill your outdoor space.

Creative ideas for personalized driftwood wind chimes

Driftwood wind chimes can be personalized and customized to reflect your style and preferences. Here are some creative ideas to consider:

  • Coastal-inspired: Incorporate seashells, sand dollars, and pieces of coral or sea glass into your driftwood wind chime to create a beachy and coastal-inspired design.
  • Musical notes: Attach small metal chime tubes or metal keys to the fishing line or clear nylon thread, creating a wind chime that plays actual musical notes when the breeze passes through.
  • Colorful accents: Paint the driftwood pieces in vibrant colors or use multi-colored beads and trinkets to create a whimsical and colorful wind chime that adds a playful touch to your space.
  • Natural elements: Integrate feathers, pinecones, acorns, or small potted plants into your driftwood wind chime to bring a touch of nature and organic beauty to your outdoor environment.
  • Seasonal themes: Adapt your driftwood wind chime to reflect different seasons. Attach small ornaments, leaves, or flowers that are relevant to the current season, changing them out as the seasons transition.
  • Spiritual or symbolic: Incorporate meaningful charms, symbols, or gemstone beads into your driftwood wind chime, representing qualities or beliefs that are important to you. This adds a personal and spiritual touch to your outdoor space.

Driftwood Mirrors

Materials needed for driftwood mirrors

Create stunning and unique driftwood mirrors with the following materials:

  • Large and sturdy driftwood branches or pieces
  • Circular or rectangular mirror with a beveled edge
  • Wood glue or epoxy resin
  • Sandpaper
  • Picture hanging wire or D-rings
  • Nails or wall hooks for hanging

Step-by-step guide to making a driftwood mirror

Transform an ordinary mirror into a statement piece with a driftwood frame. Follow these steps to create your own driftwood mirror:

  1. Begin by selecting large and sturdy driftwood branches or pieces that are interestingly shaped and sized to accommodate your mirror.
  2. If necessary, use sandpaper to smooth out any rough edges or splintered areas on the driftwood.
  3. Determine the arrangement of the driftwood pieces around the mirror. Play around with different configurations until you find one that is visually appealing.
  4. Apply wood glue or epoxy resin to the back of each driftwood piece, and press them firmly onto the outer edge of the mirror.
    driftwood, beach, nature
    . Make sure they are evenly spaced and align with the edges of the mirror.
  5. Allow the adhesive to dry completely. Follow the instructions on the adhesive product for the recommended drying time.
  6. Attach picture hanging wire or D-rings to the back of the mirror, evenly spaced apart, for easy hanging.
  7. Choose a prominent spot on your wall to display your driftwood mirror, and use nails or wall hooks to secure it in place.
  8. Step back and admire your handiwork – you now have a stunning driftwood mirror that adds rustic elegance and a captivating focal point to your space.

Different styles and designs to enhance driftwood mirrors

Driftwood mirrors can be customized to suit various design styles and preferences. Here are some different styles and designs to enhance your driftwood mirror:

  • Sunburst design: Arrange the driftwood pieces in a sunburst pattern around the mirror for a dramatic and eye-catching effect.
  • Coastal-inspired: Attach small seashells, starfish, or pieces of coral to the driftwood frame to enhance the coastal theme and bring the beach indoors.
  • Layered effect: Use smaller driftwood pieces to create layers of texture and dimension around the mirror. Experiment with different lengths and thicknesses for a visually interesting and dynamic frame.
  • Minimalist design: Keep the driftwood frame simple and sleek, with clean lines and minimal embellishments. This style is perfect for modern and minimalist interiors, allowing the natural beauty of the driftwood to shine through.
  • Ornate and eclectic: Attach intricate wood carvings, vintage buttons, or other unique elements from your collection to the driftwood frame, creating an ornate and eclectic mirror that tells a story.
  • Geometric patterns: Arrange the driftwood pieces in geometric patterns, such as squares, triangles, or diamonds, for a contemporary and visually striking mirror frame.
  • Mixed media: Combine other materials, such as metal or stained glass, with the driftwood to create a mixed media mirror frame that adds depth and texture. This eclectic style allows you to experiment and create truly unique and dynamic mirrors.

Filed Under: Driftwood Ideas Tagged With: Art, DIY, Driftwood, projects

Driftwood Art Ideas Apartment

April 1, 2024 by admin

Imagine stepping into a beautifully curated apartment, where the walls are adorned with stunning pieces of art made entirely from driftwood. Every corner showcases the intricate craftsmanship and unique creativity of driftwood art, breathing life and a touch of nature into the space. This Driftwood Art Ideas Apartment is a haven for art enthusiasts, offering a serene and inviting ambiance that effortlessly blends contemporary living with the charm of nature’s wonders. With its captivating and one-of-a-kind art pieces, this apartment is a true testament to the artistic potential and versatility of driftwood. Get ready to be inspired and transported to a world where art and nature coexist harmoniously.

Driftwood Art Ideas Apartment

Driftwood Wall Art

Driftwood Photo Frame

Enhance the beauty of your apartment walls with driftwood photo frames. These unique and rustic frames bring a touch of nature into your living space. Crafted from carefully selected pieces of driftwood, each frame is one-of-a-kind, showcasing the natural grain, texture, and weathered charm of the wood. Whether you display cherished family photos or artistic snapshots, the driftwood photo frames provide a beautiful backdrop that adds warmth and character to any room.

Driftwood Wall Hanging

If you’re looking to add a statement piece to your apartment walls, consider driftwood wall hangings. These captivating art installations combine the organic beauty of driftwood with intricate designs and creative compositions. From abstract patterns to nature-inspired motifs, each wall hanging evokes a sense of tranquility and invites a conversation about the wonders of coastal landscapes. Whether you opt for a large focal piece or a cluster of smaller driftwood hangings, your walls will become a captivating focal point in your apartment.

Driftwood Sculpture

For those who appreciate the beauty of sculptures, driftwood sculptures offer a unique and artistic addition to your apartment decor. Crafted by talented artists, these sculptures transform weathered driftwood into captivating works of art. From abstract forms to intricate animal figures, each sculpture showcases the natural shape and texture of the wood while incorporating imaginative and thought-provoking designs. Placing a driftwood sculpture in your apartment not only adds visual interest but also serves as a wonderful reminder of the beauty and serenity of the coast.

Driftwood Furniture

Driftwood Coffee Table

Add a touch of coastal elegance to your living room with a driftwood coffee table. Crafted from carefully selected driftwood pieces, these tables offer a unique blend of rustic charm and contemporary design. The natural shapes and textures of the driftwood create a truly distinctive and eye-catching centerpiece for your space. Whether you prefer a simple and minimalist design or a more intricate and artistic approach, a driftwood coffee table is sure to impress your guests and provide a functional and stylish addition to your apartment.

Driftwood Chair

Create a cozy reading nook or a charming seating area with a driftwood chair. These beautifully crafted chairs combine the organic appeal of driftwood with comfortable seating options. The unique shapes and curves of the driftwood pieces make each chair a one-of-a-kind masterpiece. Whether you opt for a rocking chair, a lounge chair, or a dining chair, the addition of a driftwood chair brings a natural and rustic element to your apartment, inviting you to relax and enjoy the coastal vibe.

Driftwood Bookshelf

Organize your books, plants, and decorative items in style with a driftwood bookshelf. These stunning pieces provide not only functional storage but also a visually appealing display for your beloved items. The irregular shapes and sizes of the driftwood pieces create an interesting and dynamic structure, making each bookshelf a unique conversation starter. Whether you choose a large floor-standing bookshelf or a smaller wall-mounted option, a driftwood bookshelf adds a touch of nature and creativity to your apartment.

Driftwood Lighting

Driftwood Chandelier

Transform your apartment’s lighting with a driftwood chandelier. These exquisite fixtures bring a touch of coastal elegance to any room. Crafted from carefully arranged and sculpted pieces of driftwood, each chandelier is a stunning work of art that casts a warm and inviting glow in your space. Whether you prefer a more traditional chandelier design or a modern and abstract approach, the natural beauty of the driftwood combined with the soft illumination creates a mesmerizing ambiance that will captivate both residents and guests alike.

Driftwood Lamp

Illuminate your apartment with a unique and artistic driftwood lamp. These handcrafted lamps infuse your space with a warm and natural glow, creating a cozy and inviting atmosphere. Whether you choose a table lamp, a floor lamp, or a pendant lamp, the beauty of the driftwood’s grain and texture becomes a focal point of the room. With their organic shapes and rustic charm, driftwood lamps add a touch of coastal flair, bringing a piece of the beach into your home.

Driftwood Candle Holder

Enhance the ambiance of your apartment with the soft glow of candles housed in driftwood candle holders. These beautiful and functional pieces add a rustic and romantic touch to any room. Each candle holder is crafted from carefully selected driftwood pieces, bringing the charming essence of the coast into your living space. Whether you place them on your dining table, mantle, or in the bathroom, the combination of the flickering candlelight and the organic beauty of the driftwood creates a serene and soothing atmosphere.

Driftwood Mirror

Driftwood Framed Mirror

Add a touch of rustic elegance to your apartment with a driftwood framed mirror. These mirrors become more than just reflective surfaces; they become works of art that blend harmoniously with your decor. Each mirror is surrounded by carefully arranged driftwood pieces, showcasing the unique shapes and textures of the wood. The weathered and worn appearance of the driftwood adds character and visual interest, making it a stunning focal point in any room. Whether placed in the living room, bedroom, or hallway, a driftwood framed mirror brings a touch of coastal charm and natural beauty to your apartment.

Circular Driftwood Mirror

Make a statement with a circular driftwood mirror. The round shape of these mirrors adds a unique and eye-catching element to your apartment decor. Crafted from carefully selected driftwood, each circular mirror is surrounded by an irregular pattern of driftwood pieces, creating a captivating and artistic frame. Whether hung on the wall or propped up against a surface, a circular driftwood mirror brings a sense of harmony and tranquility to your living space, reflecting both your style and the rustic allure of the coast.

Oval Driftwood Mirror

Elevate your apartment’s aesthetic with an oval driftwood mirror. The smooth and curvaceous shape of these mirrors adds a touch of elegance and sophistication to any room. Crafted from meticulously arranged driftwood pieces, each oval mirror is enveloped in a frame that showcases the natural beauty of the wood. The varying shades and weathered textures of the driftwood create a captivating visual appeal, infusing your space with a coastal charm that perfectly complements your interior design style.

Driftwood Art Ideas Apartment

Driftwood Room Divider

Hanging Driftwood Room Divider

Create distinct living spaces within your apartment with a hanging driftwood room divider. These unique dividers not only provide privacy but also serve as artistic installations that add a touch of natural beauty to your living space. Crafted from carefully selected driftwood pieces, each divider features intricate designs and patterns that invite admiration and conversations. Whether used to separate the living room from the dining area or to create a cozy workspace, a hanging driftwood room divider becomes a captivating focal point that enhances the visual appeal of your apartment.

Freestanding Driftwood Room Divider

If you prefer a flexible and movable option, a freestanding driftwood room divider is the perfect solution. These versatile dividers not only create separate zones within your apartment but also serve as stunning decorative pieces. Each freestanding divider is constructed from carefully arranged driftwood pieces, showcasing the natural beauty and organic shapes of the wood. Position the divider wherever you desire, whether it’s to create a dressing area in the bedroom or a private study space in the living room. The freestanding driftwood room divider adds a touch of nature and artistic flair to your apartment while providing functionality and visual interest.

Driftwood Screen

Bring a touch of coastal charm and functionality to your apartment with a driftwood screen. These elegant and versatile pieces serve as decorative accents that also provide privacy and separation between different areas of your living space. Crafted from carefully selected driftwood pieces, each screen features a unique arrangement of driftwood that showcases the intricate beauty of the wood. Whether you use it to divide a room, create a cozy reading corner, or as a backdrop for a workspace, a driftwood screen becomes a stunning focal point that adds warmth and character to your apartment.

Driftwood Coat Rack

Wall-Mounted Driftwood Coat Rack

Stay organized and add a touch of coastal flair to your apartment entryway with a wall-mounted driftwood coat rack. These functional pieces provide a stylish and convenient solution for hanging coats, hats, scarves, and bags. Crafted from carefully selected driftwood pieces, each coat rack is a unique combination of natural beauty and practicality. The irregular shapes and textures of the driftwood create an eye-catching display that transforms your entryway into a welcoming and visually appealing space. Whether you have a small apartment or a larger foyer, a wall-mounted driftwood coat rack is a creative and space-saving way to keep your outerwear organized and add a touch of natural charm.

Freestanding Driftwood Coat Rack

For a more versatile and portable option, a freestanding driftwood coat rack offers the perfect solution. These charming and functional pieces provide a designated area to hang your coats, hats, and bags while adding a rustic and natural element to your apartment decor. Each freestanding coat rack is crafted from carefully arranged driftwood pieces, showcasing the unique shapes and textures of the wood. Whether placed near the door, in the bedroom, or in a corner of the living room, a freestanding driftwood coat rack offers both functionality and visual appeal, allowing you to keep your belongings organized in style.

Branches Driftwood Coat Rack

Add a whimsical and artistic touch to your apartment with a branches driftwood coat rack. These unique pieces blend the rustic charm of driftwood with the organic beauty of tree branches. Crafted from carefully selected driftwood and branches, each coat rack becomes a functional work of art. The irregular shapes and sizes of the driftwood and branches create an intriguing and visually captivating display for your coats and accessories. Whether placed in the entryway or showcased in the bedroom, a branches driftwood coat rack adds a touch of nature and creativity to your apartment while providing a convenient and stylish way to hang your outerwear.

Driftwood Table Centerpiece

Driftwood Candelabra

Create a captivating dining experience with a driftwood candelabra. Crafted from carefully selected driftwood pieces, these centerpiece additions offer an artistic and natural touch to your dining table. The organic shapes and textures of the driftwood become a visually stunning backdrop for the flickering candlelight. Whether you’re hosting a formal dinner party or enjoying a romantic meal for two, a driftwood candelabra enhances the ambiance, adding a warm and enchanting glow to your apartment. The combination of the rustic charm of driftwood with the soft illumination of candles creates an inviting and intimate setting that is sure to impress your guests or create a cozy atmosphere for a quiet night in.

Driftwood Succulent Planter

Bring nature indoors with a driftwood succulent planter. These unique and artistic pieces combine the beauty of driftwood with the vibrant colors and textures of succulent plants. Crafted from carefully selected driftwood pieces, each planter becomes a mini garden that brings life and aesthetic appeal to your apartment. The weathered and worn appearance of the driftwood contrasts beautifully with the lush greenery of the succulents, creating a striking and harmonious display. Whether placed on a coffee table, mantel, or window sill, a driftwood succulent planter adds a touch of natural beauty and tranquility to any room.

Driftwood Vase

Elevate your floral arrangements with a driftwood vase. These unique and artistic vases combine the natural beauty of driftwood with the elegance of fresh flowers. Crafted from carefully selected driftwood, each vase becomes a centerpiece that enhances the beauty and freshness of your floral displays. The irregular shapes and textures of the driftwood create a visually captivating backdrop for your blooms, adding a touch of rustic charm to your apartment. Whether you prefer a single stem or a vibrant bouquet, a driftwood vase complements any floral arrangement, bringing a sense of nature and artistry into your living space.

Driftwood Shelving

Floating Driftwood Shelves

Maximize storage and display space in your apartment with floating driftwood shelves. These versatile and stylish shelves provide a functional solution while adding a touch of coastal charm to any room. Crafted from carefully selected driftwood pieces, each floating shelf showcases the unique shapes and textures of the wood. Whether used in the kitchen to store spices, in the living room to display decorative items, or in the bathroom to hold toiletries, floating driftwood shelves offer a creative and practical way to organize and decorate your apartment. The natural beauty and rustic appeal of the driftwood make these shelves a visually interesting addition that complements a variety of interior styles.

Hanging Driftwood Shelf

Add a unique and artistic storage solution to your apartment with a hanging driftwood shelf. Crafted from carefully arranged driftwood pieces, these shelves offer a visually captivating and functional addition to any room. Whether used for books, plants, or decorative items, each hanging shelf becomes a statement piece that reflects your style and love for nature. With their irregular shapes and weathered textures, the driftwood pieces create a rustic and organic backdrop for your belongings, adding a touch of coastal elegance to your living space. Hang a series of these shelves in the living room, bedroom, or hallway to create a cohesive and visually appealing display.

Driftwood Ladder Shelf

Bring a touch of coastal elegance and practicality to your apartment with a driftwood ladder shelf. These unique and versatile shelves provide a stylish solution for storage and display. Crafted from carefully selected driftwood pieces arranged in the shape of a ladder, each shelf offers multiple tiers to showcase your books, plants, or decorative items. The natural beauty of the driftwood, with its irregular shapes and textures, creates a captivating backdrop that adds visual interest to any room. Whether used in the living room, bedroom, or bathroom, a driftwood ladder shelf becomes a functional and eye-catching addition that complements your interior design style while infusing a sense of coastal charm.

Driftwood Mobile

Driftwood Wind Chime

Add a soothing and melodic touch to your apartment with a driftwood wind chime. Crafted from carefully selected driftwood pieces, each wind chime becomes a unique and artistic installation that brings the beauty of nature indoors. The combination of the gentle breeze and the soft sound of the driftwood pieces creates a serene and calming atmosphere. Hang a driftwood wind chime near a window, on the balcony, or in the garden to enjoy the soothing melodies and infuse your living space with a coastal vibe. Whether you choose a simple and minimalist design or a more intricate and decorative option, a driftwood wind chime adds a touch of harmony and tranquility to your apartment.

Driftwood Bird Mobile

Bring the beauty of avian life into your apartment with a driftwood bird mobile. Crafted from carefully arranged driftwood pieces, each mobile becomes a stunning representation of birds in their natural habitat. The charming and artistic designs capture the essence of these winged creatures, adding a touch of whimsy and elegance to your living space. Hang a driftwood bird mobile in the living room, bedroom, or nursery to create a captivating focal point that sparks the imagination and invites a sense of wonder. With their organic shapes and rustic charm, driftwood bird mobiles infuse your apartment with the joy and beauty of nature.

Seashell and Driftwood Mobile

Combine the allure of the beach with the artistic beauty of driftwood with a seashell and driftwood mobile. These unique and eye-catching installations bring the coastal vibes into your apartment, evoking memories of warm sandy beaches and soothing ocean waves. Crafted from carefully selected driftwood pieces and seashells, each mobile becomes a fascinating fusion of natural elements. Hang a seashell and driftwood mobile near a window, in the bathroom, or on the porch to create a mesmerizing display that captures the essence of coastal living. The combination of the driftwood’s weathered charm and the seashells’ delicate beauty adds a touch of seaside elegance and serves as a constant reminder of the soothing power of the ocean.

Driftwood Table Decor

Driftwood Table Runner

Enhance the visual appeal of your dining table with a driftwood table runner. Crafted from carefully selected driftwood pieces, each table runner becomes a beautiful and artistic backdrop for your meals and gatherings. The irregular shapes and textures of the driftwood create a visually captivating display that adds a touch of rustic elegance to your apartment. Whether you’re hosting a formal dinner party or enjoying a casual brunch with friends, a driftwood table runner serves as a conversation starter and adds a coastal charm to your table setting. Combine it with your favorite tableware and floral arrangements to create a cohesive and visually stunning dining experience.

Driftwood Candle Centerpiece

Create a warm and inviting atmosphere with a driftwood candle centerpiece. Crafted from carefully selected driftwood pieces arranged in a captivating design, each centerpiece becomes a stunning display that combines the beauty of nature with the ambience of candlelight. The natural shapes and textures of the driftwood create a visually striking backdrop for the flickering candles, adding a touch of coastal charm to your dining or coffee table. Whether you’re hosting a romantic dinner for two or setting the mood for a cozy night in, a driftwood candle centerpiece offers a unique and elegant way to create a captivating and inviting ambiance.

Driftwood Place Card Holders

Add a touch of creativity and personalization to your dining experience with driftwood place card holders. Crafted from carefully selected driftwood pieces, these unique and artistic additions bring a coastal charm to your table setting. Each place card holder showcases the natural beauty and irregular shapes of the driftwood, creating a visually captivating and organic display. Whether you’re hosting a formal dinner party or a casual gathering, driftwood place card holders add a personalized touch that makes each guest feel special. Write or print their names on the place cards, insert them into the driftwood holders, and let these charming pieces guide your guests to their assigned seats.

In conclusion, driftwood art offers a wide range of creative and beautiful options to enhance your apartment decor. Whether you choose driftwood wall art, furniture, lighting, mirrors, room dividers, coat racks, table centerpieces, shelving, mobiles, or table decor, each piece brings the natural beauty of driftwood into your living space. Crafted by talented artists, these unique creations transform weathered driftwood into captivating works of art that add warmth, character, and a touch of coastal elegance to your apartment. Embrace the beauty of driftwood art and enjoy the endless possibilities it provides for transforming your living space into a serene and visually stunning coastal haven.

Filed Under: Driftwood Ideas Tagged With: Apartment, Art, Driftwood, ideas

Driftwood Art Installation

April 1, 2024 by admin

Imagine strolling along the sandy beach, waves gently crashing at your feet, when suddenly your eye catches a glimpse of a mesmerizing sight. A magnificent driftwood art installation stands tall against the backdrop of the azure sky, captivating all who pass by. The fusion of nature’s whimsical creations with the artistic prowess of the human hand brings forth a harmonious display of creativity. Each weathered and twisted piece of driftwood has been carefully arranged to form a masterpiece that tells a story of resilience and beauty. As you step closer, you cannot help but be astonished by the intricate details and the way the sunlight dances upon the wood, seemingly breathing life into it. The driftwood art installation, it beckons to you, inviting you to immerse yourself in its enchanting world.

I. Introduction

What is driftwood art?

Driftwood art refers to the creation and installation of artistic pieces using pieces of driftwood. Driftwood is wood that has been washed ashore by the currents of rivers, lakes, or oceans. It can be found on beaches, riverbanks, and other bodies of water. Driftwood art allows you to creatively repurpose and showcase these weathered pieces of wood, turning them into unique and visually appealing installations.

Importance of driftwood art installations

Driftwood art installations serve multiple purposes and bring numerous benefits to both the creators and the viewers. Firstly, they provide a way to connect with nature and the environment. By incorporating natural elements into your home or public spaces, you can create a sense of tranquility and bring the outdoors indoors.

Driftwood art also promotes creativity and self-expression. The unique shapes, textures, and colors of driftwood pieces offer endless possibilities for artistic interpretations. Each installation is a testament to the artist’s imagination and ability to transform humble materials into captivating works of art.

Furthermore, driftwood art installations can serve as conversation starters and focal points in spaces. They add a touch of natural elegance and rustic charm that can enhance the aesthetic appeal of any setting. By showcasing driftwood art, you are not only adding beauty to your surroundings but also inviting others to appreciate the beauty of nature.

II. Types of Driftwood Art Installations

1. Wall hangings

Wall hangings are one of the most popular forms of driftwood art installations. They can range from simple and minimalist designs to complex and intricate creations. Common wall hanging designs include geometric patterns, abstract compositions, and nature-inspired motifs. Driftwood pieces are attached to a backing board or frame and can be arranged in various configurations to suit your style and preference.

2. Sculptures

Driftwood sculptures are three-dimensional artworks that can be freestanding or wall-mounted. Artists use their creativity and skill to transform individual driftwood pieces into captivating sculptures that resemble animals, human figures, or abstract forms. Driftwood sculptures can vary in size and complexity, allowing for endless possibilities in terms of design and concept.

3. Mobiles

Mobiles are suspended artworks that can gently move and rotate with the air currents. They are often made by arranging multiple pieces of driftwood in a balanced and harmonious manner. Mobiles can create a mesmerizing visual display as the driftwood pieces sway and interact with each other. They are perfect for adding a touch of gracefulness and movement to any space.

4. Chandeliers

Driftwood chandeliers are stunning light fixtures that add a unique and rustic charm to any room. The combination of the natural beauty of driftwood with the warm glow of light creates a captivating ambiance. Driftwood chandeliers can vary in size and complexity, from small and simple designs to large, intricate installations. They can be customized to fit different interior styles and serve as a statement piece in any space.

5. Furniture

Driftwood furniture is an innovative and eco-friendly way to incorporate nature into your interior design. From driftwood coffee tables to driftwood bed frames, the possibilities are vast. The weathered and unique shapes of driftwood can add character and a sense of rustic elegance to any room. Driftwood furniture pieces are not only visually appealing but also durable and sustainable.

Driftwood Art Installation

III. Materials and Tools

1. Driftwood pieces

The main material for driftwood art installations is, of course, driftwood itself. When selecting driftwood, look for pieces that are sturdy, weathered, and have interesting shapes and textures. Pay attention to the size and weight of the driftwood pieces, as they will impact the overall design and installation process.

2. Nails, screws, or adhesives

Depending on the type of installation, you will need various fasteners such as nails, screws, or adhesives to securely attach the driftwood pieces together. It is important to choose the appropriate fasteners that can withstand the weight and environmental conditions of the installation location.

3. Hammer or drill

A hammer or drill is essential for driving nails or screws into the driftwood pieces and any backing boards or frames. Make sure to have the appropriate tools for the fasteners you are using to ensure a secure and stable installation.

4. Saw or carving tools

If you plan on shaping or carving the driftwood pieces to fit your design, a saw or carving tools will be necessary. These tools will allow you to create the desired shapes and remove any unwanted parts of the driftwood.

5. Sandpaper or sander

To achieve a smooth and polished finish, sandpaper or a sander can be used to remove any rough edges or splinters from the driftwood pieces. This step is crucial to ensure the safety and comfort of anyone who interacts with the installation.

IV. Selecting and Preparing Driftwood

1. Finding driftwood

Finding suitable driftwood can be an exciting adventure. Look for areas near bodies of water where driftwood is likely to wash ashore, such as beaches, riverbanks, or lake shores. Keep in mind that it is important to obtain driftwood legally and ethically. Avoid collecting driftwood from protected areas or private property without permission.

2. Cleaning and sterilizing

Before using driftwood for your art installations, it is essential to clean and sterilize it to remove any dirt, bacteria, or unwanted critters. To clean driftwood, gently scrub it with a brush and water. If needed, you can also use a diluted bleach solution to sanitize the wood. Allow the driftwood to dry thoroughly before proceeding with the installation process.

3. Inspecting for stability

Inspect the driftwood pieces for stability and structural integrity. Check for any signs of rot, insect damage, or weak spots that could compromise the installation’s durability. It is important to select driftwood that is solid and in good condition to ensure the longevity and safety of your art piece.

4. Preparing for installation

Depending on the type of installation, you may need to cut, shape, or assemble the driftwood pieces before installation. Measure and plan accordingly to ensure a precise fit and desired aesthetic. Sand any rough edges or surfaces to create a smooth finish that is safe to handle.

Driftwood Art Installation

V. Design and Planning

1. Determining the installation location

Before starting the design process, consider where you want to install your driftwood art piece. Whether it’s in your home or a public space, the location will influence the size, style, and theme of your installation. Take into account factors such as lighting, wall color, and existing decor to create a cohesive and visually pleasing display.

2. Sketching and visualizing the design

Once you have selected the installation location, sketch out your design ideas on paper or use digital tools to create a visual representation of your driftwood art. Experiment with different arrangements and compositions until you find a design that aligns with your vision.

3. Measuring and spacing considerations

Measure the dimensions of the installation space and consider the spacing between the driftwood pieces. Achieving balance and proportion is crucial to create a visually appealing and harmonious composition. Take into account any hanging or structural considerations to ensure a secure and stable installation.

VI. Construction Techniques

1. Adhering driftwood together

There are various methods to adhere driftwood pieces together, such as using adhesives, nails, screws, or wire. The choice of method depends on the type of installation and the desired aesthetic. Adhesives like wood glue or epoxy can provide a seamless and invisible bond, while visible fasteners can add a unique detail.

2. Drilling and fastening methods

Drilling holes and inserting screws or nails is another way to secure driftwood pieces together. This method provides additional stability and strength, especially for heavy or freestanding installations. Pre-drill holes to prevent the driftwood from splitting and ensure a secure connection.

3. Carving and shaping techniques

If you wish to carve or shape the driftwood pieces, use appropriate tools such as a saw, chisel, or carving knife. Take your time and work slowly to achieve the desired shapes and textures. Sand the carved surfaces to create a smooth finish that enhances the natural beauty of the driftwood.

VII. Safety Precautions and Maintenance

1. Handling sharp tools

When working with sharp tools such as saws, drills, or carving knives, it is crucial to prioritize safety. Wear protective gear such as gloves, goggles, and a dust mask to protect yourself from flying wood particles, sharp edges, and potential injuries. Follow proper tool usage guidelines and exercise caution at all times.

2. Proper ventilation and protection

If you are using adhesives or working in a confined space, ensure proper ventilation to prevent inhaling harmful fumes. Work in a well-ventilated area or use a respirator mask when necessary. Additionally, protect your work area with a drop cloth or plastic sheet to prevent any damage to surfaces.

3. Regular cleaning and dusting

To maintain the beauty and longevity of your driftwood art installation, it is important to regularly clean and dust the driftwood pieces. Use a soft brush or cloth to gently remove dust and dirt. Avoid using harsh cleaning agents that could damage the surface or finish of the driftwood.

4. Preventing pest infestation

To protect your driftwood art from pest infestation, inspect the installation periodically for signs of insects or other critters. Treat the wood with appropriate bug repellents or preventive measures to ensure the art piece remains free from damage.

VIII. Showcasing and Displaying

1. Lighting considerations

Considering the lighting of your driftwood art installation is crucial for showcasing its beauty. Experiment with different lighting techniques, such as spotlights, track lighting, or string lights, to highlight the textures and shapes of the driftwood. Adjust the intensity and angle of the lights to create dramatic shadows and enhance the visual impact.

2. Mounting options

Depending on the type of installation and the location, there are various mounting options to consider. For wall hangings, use secure hooks or mounting brackets to ensure stability and prevent damage to the wall. Freestanding sculptures or furniture may require additional support, such as a base or stand, to prevent tipping.

3. Indoor vs. outdoor installations

Consider the environmental conditions when determining whether to install your driftwood art indoors or outdoors. While driftwood is naturally weather-resistant, prolonged exposure to sunlight, rain, or extreme temperatures can cause damage over time. If you choose to install your artwork outdoors, treat the driftwood with a protective sealant or varnish to enhance its durability and preserve its natural beauty.

IX. Maintaining an Ethical Approach

1. Respect for nature and environment

When engaging in driftwood art installations, it is essential to maintain a respect for nature and the environment. Remember that driftwood is an integral part of coastal ecosystems and plays a crucial role in protecting shorelines. Avoid unnecessarily removing or damaging live or protected trees in search of driftwood.

2. Avoiding illegal driftwood collection

Ensure that you are collecting driftwood legally and abiding by local regulations. Some areas have restrictions on driftwood collection to protect sensitive ecosystems, wildlife habitats, or cultural heritage sites. Obtain necessary permits or permissions if required, and always respect protected areas or private property.

3. Promoting sustainable practices

Promote sustainable practices by using reclaimed or salvaged driftwood whenever possible. By incorporating driftwood that has already washed ashore, you contribute to reducing waste and minimizing your ecological footprint. Additionally, consider using non-toxic and eco-friendly materials for adhesives and protective finishes to minimize the environmental impact of your driftwood art.

X. Promoting Driftwood Art Installations

1. Exhibitions and art shows

Participating in art exhibitions and shows is an excellent way to showcase your driftwood art installations to a wider audience. Local galleries, art festivals, and community events often offer opportunities to display and sell your artwork. Take advantage of these platforms to connect with art enthusiasts, gain exposure, and receive feedback on your creations.

2. Online platforms and social media

In today’s digital age, online platforms and social media play a vital role in promoting art. Create a website or online portfolio to showcase your driftwood art installations. Use social media platforms such as Instagram, Facebook, or Pinterest to share photos, videos, and stories about your creative process. Engage with your audience, collaborate with other artists, and explore online art communities to expand your reach.

3. Collaborations with local artists

Collaborating with local artists can enrich your art practice and provide new inspiration. Connect with artists specializing in different mediums or styles to create unique and multidisciplinary art installations. Collaboration not only yields innovative and captivating artwork but also fosters a sense of community and support within the local art scene.

By following these steps and embracing the beauty and versatility of driftwood, you can create stunning art installations that captivate the imagination and bring a touch of nature into any space. Let your creativity soar, respecting and celebrating the wonderful gifts that nature provides.

Filed Under: Driftwood Ideas Tagged With: Art, Driftwood, Installation

How To Make Driftwood Art

March 31, 2024 by admin

So you’ve stumbled upon the mesmerizing beauty of driftwood art and now you’re eager to give it a try? Look no further! In this article, we’ll guide you through the enchanting process of creating your very own driftwood masterpiece. From scouring the shores for the perfect pieces to assembling them into a unique composition, you’ll learn all the tips and tricks needed to bring this captivating art form to life. Get ready to unleash your creativity and embark on a journey that will turn ordinary pieces of driftwood into stunning works of art that will captivate and inspire. Let’s dive right in, shall we?

How To Make Driftwood Art

Choosing the Right Driftwood

Finding driftwood from natural sources

When it comes to creating driftwood art, the first step is to find the perfect pieces of driftwood. Start by exploring natural sources such as beaches, riverbanks, or lakeshores. These areas are often great spots to find driftwood that has been naturally weathered and has interesting shapes and textures. Take your time to walk along these areas and keep an eye out for any driftwood that catches your attention.

Selecting driftwood with interesting shapes and textures

When choosing driftwood, look for pieces with unique shapes and textures that will add visual interest to your art piece. Consider driftwood that has twists, turns, and bends as these can create dynamic and captivating compositions. Look for pieces with interesting textures, such as rough or smooth surfaces, as these can add depth and contrast to your artwork. Remember, the more distinctive the driftwood, the more unique and visually appealing your art piece will be.

Considering the size and condition of the driftwood

Another crucial factor to consider when selecting driftwood is the size and condition of the pieces. Think about the scale of your intended art piece and choose driftwood accordingly. If you’re creating a large sculpture, you’ll likely need sizable pieces of driftwood. On the other hand, if you’re making a delicate wall hanging, smaller driftwood pieces may be more suitable. Additionally, ensure that the driftwood is in good condition, free from rot or damage, as this will impact the longevity and overall appearance of your art.

Cleaning and Preparing the Driftwood

Removing any dirt, sand, or debris from the driftwood

Once you have collected your chosen driftwood pieces, it’s crucial to clean them thoroughly before beginning the art-making process. Start by removing any dirt, sand, or debris that may have accumulated on the driftwood. Gently brush the surface using a soft-bristled brush or a toothbrush to dislodge any loose particles. Be careful not to damage the natural texture or shape of the driftwood while doing this.

Rinsing the driftwood with water

After removing the visible dirt and debris, it’s time to give the driftwood a good rinse with water. Fill a basin or a sink with lukewarm water and submerge the driftwood pieces. Gently swish them around, allowing the water to penetrate all the nooks and crannies. This step helps to remove any remaining dirt and grime that may be trapped on the surface of the wood.

Allowing the driftwood to dry completely

After rinsing, carefully remove the driftwood from the water and place them on a clean towel or drying rack. Allow the pieces to air dry completely. Depending on the size and moisture content of the driftwood, the drying process may take a few days or even a couple of weeks. It’s essential to ensure the driftwood is completely dry before using it in your artwork, as any residual moisture can lead to mold or warping.

Designing Your Driftwood Art Piece

Deciding on the type of art you want to create (sculpture, wall hanging, etc.)

Before diving into the assembly process, it’s crucial to have a clear vision of the type of driftwood art you want to create. Think about whether you’d like to make a driftwood sculpture, a wall hanging, a decorative centerpiece, or any other form of artwork. Understanding your desired outcome will guide your design choices and help you stay focused throughout the creative process.

Sketching or planning out your design

Once you have decided on the type of art you want to create, take some time to sketch or plan out your design. This step is especially important for more intricate pieces or compositions involving multiple driftwood elements. By sketching your design, you’ll have a visual reference that can act as a roadmap during the assembly stage. It also allows you to experiment with different arrangements and layouts before committing to a final design.

Considering the placement and arrangement of the driftwood pieces

As you sketch or plan your design, consider the placement and arrangement of the driftwood pieces. Play around with different configurations to determine the most aesthetically pleasing composition. Think about creating balance and symmetry, or alternatively, embrace asymmetry for a more dynamic and organic feel. Trust your intuition and experiment until you find the arrangement that best represents your artistic vision.

Preparing Materials and Tools

Gathering additional materials like glue, nails, wire, or paint

Depending on the specific driftwood art piece you’re creating, you may need additional materials to bring your design to life. Consider gathering materials such as glue, nails, wire, or paint that will help you assemble and enhance your driftwood artwork. Opt for high-quality materials that are suitable for the type of project you’re undertaking as these will contribute to the longevity and overall appearance of your finished piece.

Ensuring you have the necessary tools like a saw, drill, or sandpaper

In addition to materials, it’s essential to ensure you have the necessary tools to work with driftwood effectively. Common tools used in driftwood art include a saw, drill, sandpaper, pliers, and wire cutters. These tools will help you shape, alter, and connect the driftwood pieces as needed. Before starting your project, double-check that you have all the necessary tools on hand to avoid interruptions during the creative process.

Organizing your workspace for easy access to materials and tools

To streamline the art-making process, it’s essential to organize your workspace in a way that allows easy access to materials and tools. Create a designated area where you can spread out your driftwood pieces, work on your design, and have all your materials within reach. Consider using containers or drawers to keep small items like nails, wire, or beads organized. By keeping your workspace tidy and well-organized, you’ll find it easier to focus on your artistry and bring your vision to life.

How To Make Driftwood Art

Assembling the Driftwood Art

Laying out the driftwood pieces according to your design

Once you have all your materials and tools ready, it’s time to bring your driftwood art piece to life. Begin by laying out the driftwood pieces according to your design. Refer back to your sketches or plans and arrange the pieces in the desired configuration. This step allows you to get a visual representation of how the final piece will look and make any necessary adjustments before permanently securing the driftwood together.

Creating a sturdy base or foundation for your art piece if needed

Depending on the size and structure of your driftwood art piece, you may need to create a sturdy base or foundation to support it. This is particularly important for larger sculptures or wall hangings where stability is crucial. Consider using materials such as wood, metal, or even a sturdy fabric backdrop to provide a solid foundation for your art. Ensure that the base is secure and can effectively hold the weight and shape of your driftwood arrangement.

Attaching the driftwood together using appropriate methods (gluing, nailing, wiring)

To assemble the driftwood pieces, determine the most appropriate method of attachment. Common methods include gluing, nailing, or wiring the pieces together. When using glue, choose a high-quality adhesive suitable for wood and ensure that you apply it generously and evenly to create a strong bond. Nailing may be necessary for heavier pieces or when additional reinforcement is required. Wiring is often used for more intricate designs that require flexibility or when creating hanging pieces. Experiment with different attachment methods to find the one that works best for your specific driftwood art piece.

Adding Finishing Touches

Sanding the edges or surfaces of the driftwood for a smoother finish

Once the driftwood pieces are securely attached, it’s time to add the finishing touches to your art piece. Start by sanding the edges or surfaces of the driftwood to create a smoother finish. Use fine-grit sandpaper to gently sand away any rough or jagged edges, being careful not to alter the natural texture or shape of the driftwood. This step helps to enhance the overall appearance and tactile experience of your art piece.

Applying a protective varnish or sealant to enhance the natural beauty of the wood

To protect and enhance the natural beauty of the driftwood, consider applying a protective varnish or sealant. A clear varnish or sealant can help preserve the wood, prevent it from drying out or cracking, and enhance its natural colors and textures. Before applying the varnish, ensure that the driftwood is clean and completely dry. Follow the manufacturer’s instructions and apply the varnish evenly, taking care to cover all exposed surfaces.

Painting or staining the driftwood for a more vibrant or personalized look

If you’re interested in adding color or a personal touch to your driftwood art piece, consider painting or staining the wood. Choose paints or stains that are suitable for wood and experiment with different colors or tones to create the desired effect. Whether you opt for a vibrant and bold color or a subtle and muted shade, painting or staining can transform your driftwood art and make it even more visually striking. Take your time during this step and ensure that the paint or stain is applied evenly and allowed to dry completely before displaying your art.

Displaying and Caring for Your Driftwood Art

Choosing the right location to showcase your art piece

Once your driftwood art piece is complete, it’s time to find the perfect location to showcase it. Consider the size, shape, and aesthetic of your piece when choosing a spot. Larger sculptures may serve as stunning focal points in a room or outdoor space, while wall hangings can bring visual interest to a blank wall. Take into account the overall theme and style of the room or area you’re displaying your art in to ensure it harmonizes with its surroundings.

Considering the lighting and surroundings to enhance its impact

Lighting plays a crucial role in enhancing the impact of your driftwood art. Place your art piece in an area that receives adequate natural light to bring out the textures and colors of the driftwood. Alternatively, experiment with different types of indoor lighting to create dramatic or subtle effects. Consider the surroundings as well, as a well-curated space can further highlight the beauty of your driftwood art. Choose complementary decor or a background that enhances the visual impact of your artwork.

Regularly cleaning and dusting the driftwood art to maintain its appearance

To ensure the longevity and well-maintained appearance of your driftwood art, it’s essential to regularly clean and dust it. Use a soft brush or a dry microfiber cloth to gently remove any accumulated dust or debris. Avoid using cleaning solutions or water unless absolutely necessary, as excessive moisture may damage the wood or the finishes you have applied. By keeping your driftwood art clean and well-cared for, you can enjoy its beauty for years to come.

Exploring Advanced Techniques

Experimenting with different coloring techniques such as bleaching or dyeing

Once you’ve mastered the basics of creating driftwood art, you can start exploring more advanced techniques to further personalize your creations. Consider experimenting with different coloring techniques, such as bleaching or dyeing the driftwood. Bleaching can give the driftwood a beautiful, pale appearance, while dyeing allows you to introduce vibrant or subtle colors to your art piece. These techniques can add a unique touch and create even more visually striking effects.

Adding additional embellishments like shells, beads, or stones

To take your driftwood art to the next level, consider adding additional embellishments to your creations. Shells, beads, stones, or other natural materials can complement the driftwood perfectly and create intriguing textures and contrasts. Experiment with different combinations and arrangements to find the right balance between the natural beauty of the driftwood and the added embellishments. This allows you to infuse your own creativity and personal style into your artwork.

Creating more intricate patterns or designs with the driftwood

As your skills and confidence grow, challenge yourself to create more intricate patterns or designs with the driftwood. Combine smaller pieces to form delicate patterns or experiment with more complex arrangements. Let your imagination run wild and explore the endless possibilities that come with working with driftwood. By pushing yourself to create more intricate designs, you can continue to evolve as an artist and create truly unique and captivating pieces.

Gaining Inspiration and Learning from Others

Researching and exploring existing driftwood art pieces

To further expand your knowledge and gain inspiration, it’s essential to research and explore existing driftwood art pieces. Look for renowned driftwood artists and study their creations to understand their techniques and styles. Visit galleries, museums, or art exhibitions that feature driftwood art to gain a deeper appreciation for this form of artistry. By immersing yourself in the work of others, you can learn new approaches and ideas that will inform and enrich your own artistic journey.

Joining online communities or forums to connect with other driftwood artists

Connecting with other driftwood artists is a wonderful way to share ideas, ask questions, and learn from one another. Join online communities or forums dedicated to driftwood art to engage with like-minded individuals. These platforms provide an opportunity to showcase your work, receive feedback, and participate in discussions about driftwood art techniques, materials, and inspirations. Take advantage of the vast knowledge and support within the driftwood art community to further develop your skills and grow as an artist.

Attending workshops or classes to learn new techniques and approaches

Attending workshops or classes focused on driftwood art can be an invaluable learning experience. Look for local art centers or studios that offer classes or workshops specifically designed for driftwood art. These learning opportunities often provide hands-on instruction, guidance, and the chance to connect with experienced instructors. During these sessions, you can learn new techniques, receive feedback on your work, and gain insights into the art of driftwood from seasoned artists. Embrace the opportunity to expand your skills and deepen your understanding of this unique art form.

Selling or Exhibiting Your Driftwood Art

Taking high-quality photographs of your art for online sales or promotion

If you’re interested in sharing or selling your driftwood art, taking high-quality photographs is essential. Invest in a good camera or seek professional assistance to capture detailed, well-lit images that showcase the beauty and intricacy of your artwork. Consider different angles, lighting setups, and compositions to present your art piece in the best possible way. These photographs will serve as a powerful promotional tool, attracting potential buyers and generating interest in your driftwood art.

Applying to local galleries or art events to showcase your work

To gain exposure and exhibit your driftwood art, consider applying to local galleries or art events. Look for galleries or venues that specialize in showcasing unique and unconventional art forms. Research art events or craft fairs in your area that allow artists to display and sell their work. Prepare a professional portfolio showcasing your best pieces and reach out to these venues or event organizers with a concise and compelling artist statement. By securing a showcase for your driftwood art, you can introduce your work to a wider audience and potentially connect with buyers or collectors.

Setting appropriate pricing and marketing strategies for selling your driftwood art

When it comes to selling your driftwood art, setting appropriate pricing is crucial. Consider factors such as the size, complexity, materials used, and time invested in creating each piece. Research the market to understand the pricing range for similar artworks. Factor in expenses such as materials, tools, and any fees associated with exhibiting or selling your art. Additionally, develop marketing strategies to promote your work. Utilize online platforms, social media, and local networks to spread the word about your driftwood art and engage with potential buyers. By striking a balance between pricing and marketing, you can effectively sell your driftwood art while ensuring its value and appeal to collectors.

Filed Under: Driftwood Ideas Tagged With: Art, DIY, Driftwood

Driftwood Art Hanging Wind Chimes

March 30, 2024 by admin

Imagine adding a touch of whimsy and tranquility to your outdoor space with our exquisite Driftwood Art Hanging Wind Chimes. These stunning wind chimes are handcrafted with natural driftwood, creating a beautiful, rustic aesthetic that perfectly complements any garden or patio. Each piece is meticulously designed to create soothing melodies as the wind gently plays with the chimes, creating a peaceful ambiance that will instantly transport you to a place of serenity. Whether you’re looking to enhance your own outdoor oasis or searching for a unique gift for a loved one, our Driftwood Art Hanging Wind Chimes are the perfect choice.

Introduction to Driftwood Art Hanging Wind Chimes

Definition of driftwood art hanging wind chimes

Driftwood art hanging wind chimes are unique and beautiful decorative pieces that combine the natural beauty of driftwood with the soothing sounds of wind chimes. These artistic creations are made by incorporating various materials such as metal tubes, glass or acrylic beads, and natural fibers or feathers into carefully crafted wind chimes. They serve as both aesthetic ornaments and auditory delights, adding a touch of charm to any indoor or outdoor space.

Popularity and significance of driftwood art hanging wind chimes

Driftwood art hanging wind chimes have gained immense popularity in recent years due to their rustic yet elegant appeal. They bring a touch of nature into our living spaces, creating a serene and calming atmosphere. The unique combination of driftwood and wind chimes makes them stand out from traditional wind chimes, capturing the attention of art enthusiasts and nature lovers alike. Additionally, driftwood art hanging wind chimes hold sentimental value for many as they are often associated with cherished memories of beach vacations or nature walks.

Materials Used in Driftwood Art Hanging Wind Chimes

Driftwood

The main component of driftwood art hanging wind chimes is, of course, the driftwood itself. Driftwood is wood that has been washed ashore by the tides, rivers, or other bodies of water. It acquires its characteristic smooth texture and weathered appearance from exposure to water and natural elements. Each piece of driftwood used in these wind chimes has its own unique shape, size, and texture, making every art piece truly one-of-a-kind.

Metal tubes

Metal tubes are an essential element of driftwood art hanging wind chimes, producing the enchanting melodies that captivate our ears. The tubes are carefully selected to create distinct tones and harmonics as the wind passes through them. The length and diameter of the metal tubes determine the pitch and sound quality of the wind chimes, and skilled artists often experiment with different combinations to achieve the desired musical effect.

Glass or acrylic beads

To add a touch of color and visual interest to the wind chimes, glass or acrylic beads are incorporated into the design. These beads can come in various shapes, sizes, and colors, allowing for endless possibilities when it comes to creating unique and personalized wind chimes. The beads also reflect sunlight and create a beautiful interplay of light and shadow, enhancing the visual appeal of the driftwood art hanging wind chimes.

Natural fibers or feathers

To add a natural and organic touch to the wind chimes, artists often incorporate natural fibers or feathers. These materials not only complement the aesthetic appeal of driftwood but also add movement and texture to the overall design. They sway and flutter with the wind, adding a dynamic element to the wind chimes and giving them a sense of life and vitality.

Driftwood Art Hanging Wind Chimes

Crafting Techniques for Driftwood Art Hanging Wind Chimes

Collecting and preparing driftwood

The process of creating driftwood art hanging wind chimes begins with collecting and preparing the driftwood. Selecting pieces of driftwood that have interesting shapes and textures is crucial to creating visually appealing wind chimes. Once collected, the driftwood needs to be cleaned, removing any debris or unwanted materials. Some artists prefer to preserve the natural weathered surface of the driftwood, while others may choose to sand or treat it for a smoother finish.

Designing the wind chime layout

Before attaching any components, it is important to plan and design the overall layout of the wind chimes. This step involves arranging the driftwood pieces, metal tubes, beads, and other decorative elements in a visually pleasing and balanced manner. The layout will determine the visual flow and aesthetics of the wind chimes, so careful consideration is given to shapes, sizes, colors, and spacing.

Attaching metal tubes

Once the layout is finalized, the metal tubes are attached to the driftwood using sturdy strings or cords. It is essential to ensure that each tube is securely fastened to prevent them from coming loose or falling off. Different attachment techniques can be employed, such as drilling holes in the driftwood or using specialized connectors. The length and placement of the tubes can be adjusted to achieve the desired sound and musicality.

Adding beads and decorative elements

After the metal tubes are attached, glass or acrylic beads are added to the wind chimes. These beads can be threaded onto the strings or cords connecting the metal tubes. Artists often experiment with different combinations of bead colors and sizes to create a visually appealing and harmonious design. Additional decorative elements, such as seashells or charms, can also be incorporated to add a personal touch.

Incorporating natural fibers or feathers

To enhance the organic feel of the wind chimes, natural fibers or feathers are carefully integrated into the design. These materials can be attached to the driftwood or hung separately, creating movement and texture as the wind blows. Feathers, in particular, add a soft and delicate touch to the wind chimes, evoking a sense of freedom and whimsy.

Assembling the wind chime

Once all the components are attached and the design is complete, it is time to assemble the driftwood art hanging wind chime. This involves connecting all the strings or cords to a central hanging point, usually a sturdy ring or hook. It is important to ensure that the wind chime is properly balanced and level, allowing it to hang freely and produce its signature melodies when the wind passes through.

Different Styles and Themes of Driftwood Art Hanging Wind Chimes

Coastal or beach-inspired designs

Many driftwood art hanging wind chimes draw inspiration from the coastal environment. They feature elements such as seashells, starfish, or nautical-themed charms to evoke a sense of the beach. These wind chimes often incorporate soothing tones and light, airy designs, capturing the essence of a relaxing day by the ocean.

Nature and woodland motifs

For those who have a love for the outdoors, driftwood art hanging wind chimes inspired by nature and woodland themes are a perfect choice. These wind chimes may incorporate elements such as leaves, birds, or animals, creating a connection to the natural world. They often feature earthy tones and gentle melodies, bringing the tranquility of the forest into your surroundings.

Bohemian or rustic aesthetics

Driftwood art hanging wind chimes with bohemian or rustic aesthetics are characterized by a free-spirited and artistic flair. They may include vibrant and eclectic elements such as colorful beads, feathers, or even small trinkets. These wind chimes often have a whimsical charm and emit playful melodies, reflecting the carefree nature of the bohemian style.

Modern and contemporary styles

For those who prefer clean lines and minimalistic designs, modern and contemporary driftwood art hanging wind chimes are an ideal choice. These wind chimes often feature simple shapes and neutral color palettes, allowing the natural beauty of driftwood to take center stage. The melodies produced by these wind chimes are often soothing and meditative, creating a sense of calm and serenity.

Driftwood Art Hanging Wind Chimes

Meaning and Symbolism Behind Driftwood Art Hanging Wind Chimes

Connection to nature and the environment

Driftwood art hanging wind chimes symbolize our connection to nature and the environment. By incorporating elements such as driftwood and feathers, these wind chimes serve as a reminder of the beauty and importance of the natural world. They encourage us to appreciate the harmony found in nature and to foster a sense of environmental awareness and stewardship.

Relaxation and mindfulness

The gentle melodies produced by driftwood art hanging wind chimes have a soothing and calming effect on our minds and bodies. They serve as musical instruments that create a tranquil and peaceful ambience, allowing us to unwind and relax. Wind chimes can also act as a mindfulness tool, drawing our attention to the present moment and helping us find inner peace and serenity.

Musical and soothing qualities

The combination of driftwood and wind chimes creates a unique musical experience. The melodic sounds produced by the metal tubes as they sway in the wind bring joy and harmony to our surroundings. The gentle tinkling and soothing tones serve as a constant reminder of the beauty of sound and the power of music to uplift and inspire.

Creative Ideas and Inspiration for Driftwood Art Hanging Wind Chimes

Using seashells and sea glass

To enhance the coastal or beach-inspired theme of driftwood art hanging wind chimes, consider incorporating seashells or sea glass into the design. These elements not only add a sense of nostalgia for the ocean but also bring beautiful textures and colors to the wind chimes. The natural treasures found along the shore can serve as unique and eye-catching focal points in your driftwood art creation.

Incorporating colorful beads and crystals

For those who enjoy vibrant and lively designs, incorporating colorful beads and crystals can be a great idea. Experiment with different shapes, sizes, and hues to create a visually stunning and captivating wind chime. The interplay of light and color that occurs when the sun shines through the beads or crystals adds a touch of magic and whimsy to your driftwood art hanging wind chimes.

Personalizing with charms or trinkets

Make your driftwood art hanging wind chime truly one-of-a-kind by adding personal touches such as charms or trinkets. Whether it’s a sentimental object or a symbol that holds special meaning for you, incorporating these personal elements into the wind chime can infuse it with a deeper sense of connection and significance. This allows you to create a piece that resonates with your unique personality and experiences.

Experimenting with different lengths and sizes

Play with different lengths and sizes of driftwood, metal tubes, and beads to create a varied and dynamic wind chime. Varying the lengths of the metal tubes, for example, can produce different pitches and tones, adding complexity to the melody produced by the wind chimes. By experimenting with different combinations, you can create a wind chime that is visually interesting and captivating to listen to.

How to Hang and Display Driftwood Art Hanging Wind Chimes

Outdoor locations and options

Driftwood art hanging wind chimes are best enjoyed outdoors, where the wind can freely interact with them. Hang your wind chime in a location that receives a gentle breeze, such as a patio, gazebo, or garden. Consider hanging them near a seating area where you can relax and enjoy the soothing melodies produced by the wind chimes. Ensure that the wind chimes are not obstructed by nearby structures or plants, allowing them to move freely for optimal sound production.

Indoor placement and decoration

If you wish to enjoy your driftwood art hanging wind chimes indoors, there are still several options for placement and decoration. Hang them near an open window or balcony where they can catch a breeze or near a fan that can create movement. Alternatively, you can hang them as decorative pieces on a wall, adding a touch of artistic elegance to your interior space. Pairing them with complementary decor, such as potted plants or nature-inspired artwork, can further enhance the overall aesthetic.

Consideration of wind patterns and noise

When hanging your driftwood art hanging wind chimes, it is important to consider the wind patterns and potential noise levels. If you live in a particularly windy area, you may want to choose a location where the wind chimes won’t be excessively loud or disruptive. Additionally, be mindful of the proximity of your wind chimes to areas where the wind might carry the sound indoors, such as open windows or doors. Positioning them strategically can ensure that you can enjoy their melodies without them becoming overpowering.

Where to Find and Purchase Driftwood Art Hanging Wind Chimes

Local art galleries and exhibitions

Support local artists and artisans by visiting art galleries and exhibitions in your area. Many talented individuals create driftwood art hanging wind chimes and display them for sale in these venues. Not only will you have the opportunity to see a wide variety of styles and designs, but you can also interact with the artists themselves, gaining insights into their creative process and inspirations.

Handmade and artisan markets

Handmade and artisan markets are another great place to find unique driftwood art hanging wind chimes. These markets often showcase a diverse range of handcrafted items, allowing you to discover hidden gems and support small businesses. You may even have the chance to speak directly with the creators and learn more about the stories and techniques behind their art.

Online platforms and websites

In the digital age, the internet has opened up a world of possibilities for finding and purchasing driftwood art hanging wind chimes. Many artists sell their creations through online platforms and websites, providing a convenient way to explore a wide range of options from the comfort of your own home. Online shopping also allows you to compare prices and styles, read reviews, and find the perfect wind chime to suit your preferences and budget.

DIY Guide: Making Your Own Driftwood Art Hanging Wind Chimes

Step-by-step instructions

Making your own driftwood art hanging wind chime can be a rewarding and fulfilling project. Follow these step-by-step instructions to create your own unique piece:

  1. Gather driftwood: Collect driftwood pieces of different shapes and sizes, making sure they are clean and free from debris.

  2. Design the layout: Sketch out a layout for your wind chime, considering the placement of driftwood, metal tubes, beads, and other decorative elements.

  3. Prepare the driftwood: Sand the driftwood to achieve a smooth surface if desired. Drill small holes in the driftwood pieces to attach the metal tubes.

  4. Attach the metal tubes: Thread a sturdy string or cord through the drilled holes and attach the metal tubes. Ensure the tubes are securely fastened and evenly spaced.

  5. Add beads and decorative elements: Thread colorful beads onto the strings or cords between the metal tubes. Incorporate additional decorative elements such as seashells or charms.

  6. Incorporate natural fibers or feathers: Attach natural fibers or feathers to the driftwood or as separate hangings, adding movement and texture to the wind chime.

  7. Assemble the wind chime: Connect all the strings or cords to a central hanging point, such as a sturdy ring or hook. Adjust the lengths and ensure that the wind chime hangs freely and is balanced.

Tools and materials needed

To create your own driftwood art hanging wind chime, you will need the following tools and materials:

  • Driftwood pieces of varying sizes and shapes
  • Metal tubes of different lengths and diameters
  • Glass or acrylic beads in desired colors and sizes
  • Natural fibers or feathers
  • Sturdy strings or cords
  • Drill and drill bits (if desired for drilling holes in the driftwood)
  • Sandpaper (if desired for smoothing the driftwood surface)
  • Scissors or wire cutters (for cutting strings or cords)
  • Pliers (for attaching and securing components)

Tips and tricks for beginners

If you are new to creating driftwood art hanging wind chimes, here are some tips and tricks to help you get started:

  • Start with a simple design: Begin with a basic layout and gradually incorporate more elements as you gain confidence and experience.

  • Experiment with different materials: Don’t be afraid to mix and match different materials to create unique and visually appealing combinations.

  • Pay attention to balance: Ensure that your wind chime is balanced both visually and physically. Consider the weight and length of the driftwood pieces and metal tubes to achieve proper balance.

  • Test the sound quality: Before finalizing the placement of the metal tubes, test the sound produced by lightly tapping them to ensure a pleasing musicality.

  • Embrace imperfections: Remember that the beauty of driftwood art hanging wind chimes lies in their natural and rustic appeal. Embrace imperfections in the materials and allow them to enhance the overall aesthetic of your creation.

Exploring your own creative variations

Don’t be afraid to let your creativity flourish and experiment with your own variations on the traditional driftwood art hanging wind chimes. Incorporate elements that hold personal meaning for you, try different color combinations, or even explore unconventional materials. The possibilities are endless, and by allowing yourself to think outside the box, you can create a truly unique and personalized wind chime that reflects your individuality and style.

Gifting Driftwood Art Hanging Wind Chimes

Suitable occasions and recipients

Driftwood art hanging wind chimes make thoughtful and meaningful gifts for a variety of occasions and recipients. They can be given as housewarming presents to help create a serene and welcoming atmosphere in a new home. They are also fitting gifts for birthdays, anniversaries, or other special occasions, as they embody a sense of beauty, harmony, and connection to nature.

Symbolic meanings for different occasions

Driftwood art hanging wind chimes carry symbolic meanings that can make them even more special when given as gifts. For example, they can represent new beginnings and the ever-changing nature of life. The combination of driftwood and wind chimes symbolizes resilience and the ability to adapt to adversity, making them suitable gifts for someone going through a challenging time or embarking on a new chapter in their life.

Packaging and presentation ideas

When gifting driftwood art hanging wind chimes, consider the packaging and presentation to enhance the overall impact. A simple and natural touch can be achieved by wrapping the wind chime in brown kraft paper and securing it with a raffia ribbon or twine. Alternatively, placing the wind chime in a decorative gift box or bag with a personalized note adds an extra special touch. Including a small card explaining the symbolism behind the wind chime can also enhance the recipient’s understanding and appreciation of the gift.

In conclusion, driftwood art hanging wind chimes are not only aesthetically pleasing but also carry significant meaning and symbolism. They bring the beauty of nature into our living spaces, offer relaxation and mindfulness, and create delightful melodies that soothe the soul. Whether purchased or handmade, these unique decorative pieces are sure to captivate anyone who appreciates the harmonious combination of driftwood and wind chimes. So, consider adding a driftwood art hanging wind chime to your home or gifting one to a loved one to infuse their space with natural beauty and a touch of tranquility.

Filed Under: Driftwood Ideas Tagged With: Art, Driftwood, Hanging, Wind Chimes

Sea Glass Driftwood Art

March 28, 2024 by admin

Imagine walking along a pristine beach, the sound of the crashing waves filling your ears and the warm sand between your toes. As you make your way, you stumble upon a hidden treasure that immediately captures your attention – stunning works of art crafted from sea glass and driftwood. Each piece seems to tell a unique story, with vibrant colors and intricate designs that are as mesmerizing as the ocean itself. These exquisite creations not only showcase the beauty of nature but also the creativity and skill of talented artists who transform forgotten fragments into captivating masterpieces. Get ready to immerse yourself in the enchanting world of sea glass driftwood art, where imagination and nature intertwine to create true works of wonder. Sea Glass Driftwood Art is a captivating form of artistic expression that combines the beauty of sea glass and the rustic charm of driftwood. This unique art form involves creating stunning pieces by carefully arranging and assembling sea glass and driftwood in various designs and patterns. Whether it’s a mosaic, wind chimes, mobiles, or sculptures, sea glass driftwood art is a beautiful way to bring a touch of the ocean into your home decor.

Sea Glass Driftwood Art

This image is property of images.pexels.com.

Definition

Sea Glass Driftwood Art refers to the creation of art pieces using sea glass and driftwood as the primary materials. It involves collecting sea glass and driftwood from beaches, refining and preparing the materials, designing the artwork, and carefully assembling the final piece. The result is a visually striking and environmentally conscious form of art that showcases the inherent beauty of these natural elements.

Origins

The origins of sea glass driftwood art can be traced back to coastal communities where individuals discovered the beauty in discarded sea glass and weathered driftwood. The combination of these two materials proved to be a perfect way to showcase both the raw power of the ocean and the delicate nature of sea glass. What was once considered trash now became a means of artistic expression, allowing artists and enthusiasts to create unique and breathtaking pieces.

Materials Used

Sea glass and driftwood are the primary materials used in sea glass driftwood art. Sea glass, also known as beach glass or mermaid tears, is shards of glass that have been worn down and weathered by the ocean waves and sand. It is typically found along the shoreline, boasting a smooth and frosted appearance. Driftwood, on the other hand, refers to wood that has been washed ashore by waves, tides, and currents. The combination of these materials creates a harmonious blend of elements that enhances the visual appeal of the artwork.

Collecting Sea Glass and Driftwood

Collecting sea glass and driftwood is an essential part of creating sea glass driftwood art. To start, you’ll need to visit beaches known for their abundance of sea glass and driftwood. Search for pieces of sea glass in various colors and sizes, taking note of their condition and whether they are authentic or artificially tumbled. Similarly, look for driftwood with unique shapes, textures, and sizes that will complement your design. Remember to collect these materials responsibly and only take what is necessary, respecting the environment and its natural beauty.

Preparing the Materials

Once you have collected your sea glass and driftwood, it’s important to prepare them before creating your artwork. Begin by cleaning the sea glass to remove any dirt, sand, or debris. This can be done by gently rinsing the sea glass with water and using a soft brush to remove any stubborn particles. When cleaning driftwood, you may need to scrub it with a brush and mild soap to remove any algae or dirt. Allow the sea glass and driftwood to dry thoroughly before proceeding with your artistic endeavors.

Designing the Artwork

Designing your sea glass driftwood art involves envisioning the final piece and planning the arrangement of the materials. Consider the overall theme or concept you want to convey and choose a design that enhances it. Some artists prefer to sketch their design on paper beforehand, while others opt for a more intuitive approach. Experiment with different layouts, patterns, and combinations of sea glass and driftwood until you achieve the desired aesthetic. The design process is where your creativity truly shines, as you have the freedom to create something uniquely yours.

Assembling the Art Piece

Once you have finalized your design, it’s time to assemble the sea glass driftwood art piece. Use a strong adhesive, such as waterproof glue or epoxy, to secure the sea glass and driftwood in place. Take care to arrange the materials in a visually pleasing manner, paying attention to color contrast, texture, and balance. You may choose to incorporate other elements like shells, beads, or metal accents to add further interest to your artwork. Allow the adhesive to dry completely before handling or displaying the finished piece.

Mosaic

Mosaic sea glass driftwood art involves creating intricate patterns and designs by arranging small pieces of sea glass onto a larger surface. It’s a versatile technique that allows for endless possibilities in terms of color combinations and patterns. Mosaic art can be applied to a variety of objects, such as tabletops, mirrors, or wall hangings, and the use of driftwood as the base adds a rustic and natural touch to the overall composition.

Wind Chimes

Sea glass driftwood wind chimes are a whimsical and soothing addition to any outdoor space. By attaching sea glass and driftwood pieces to strings or chains, you can create a beautiful hanging sculpture that produces musical sounds when the wind passes through. The combination of the clinking sea glass and the gentle rustling of driftwood creates a calming and melodic experience, making wind chimes a popular choice among sea glass driftwood art enthusiasts.

Mobiles

Mobiles are another popular technique in sea glass driftwood art, offering a unique way to display and appreciate the beauty of these natural materials. By suspending sea glass and driftwood pieces from strings or wires, you can create a mobile that gently moves and catches the light. Whether hung indoors or outdoors, mobiles add a delightful and ethereal element to any space.

Sculptures

For those looking to create larger and more intricate art pieces, sculpting with sea glass and driftwood provides endless possibilities. From animal sculptures to abstract forms, the combination of the smooth sea glass and the organic shapes of driftwood allows artists to bring their imagination to life. Sculptures can be freestanding or mounted on a base, depending on the desired effect.

Quality and Authenticity

When choosing sea glass and driftwood for your artwork, it’s important to consider their quality and authenticity. Authentic sea glass is naturally tumbled and smoothed by the ocean, resulting in a frosted appearance and rounded edges. Artificially tumbled glass may lack the same allure and character as genuine sea glass. Similarly, driftwood should be naturally weathered and worn by the elements, with unique textures and shapes. Ensure that the materials you select are genuine and of high quality to create a truly exceptional piece of sea glass driftwood art.

Sea Glass Driftwood Art

This image is property of images.pexels.com.

Colors and Shapes

The colors and shapes of sea glass play a significant role in the overall aesthetic appeal of your artwork. Sea glass comes in a wide range of colors, including shades of green, blue, white, brown, and even ruby red or lavender. Consider the color palette you want to work with and choose sea glass pieces that complement each other harmoniously. The shape of the sea glass is also important, as it contributes to the overall design and pattern. Whether you prefer rounded pieces, flat shards, or unique shapes, each selection adds its own charm to the artwork.

Texture and Age

The texture and age of both sea glass and driftwood contribute to the character and uniqueness of your artwork. Sea glass should have a smooth and frosted texture, indicating that it has spent a considerable amount of time in the ocean. Pay attention to the sea glass’s patina and whether it shows signs of wear and tear. Driftwood, on the other hand, can have various textures, ranging from smooth to rugged. The age of the driftwood also adds to its visual appeal, as weathered pieces often have a more distinct and interesting appearance.

Sustainability and Ethics

Sea glass driftwood art offers a sustainable and ethical form of artistic expression. By using materials that are naturally sourced from the beach, artists contribute to the preservation of the environment. However, it’s essential to collect sea glass and driftwood responsibly. Only take what is necessary and consider the impact of your actions on the ecosystem. Furthermore, some countries and regions have regulations regarding the collection of sea glass and driftwood, so be sure to research and abide by the local laws when collecting these materials.

Beach Themes

One of the most common sources of inspiration for sea glass driftwood art is beach themes. The combination of sea glass and driftwood evokes images of sun-kissed shores, crashing waves, and the treasures found along the coastline. Artists often incorporate elements like seashells, starfish, or sand in their designs to enhance the beach theme further. Whether it’s a vibrant mosaic depicting the ocean or a mobile showcasing seashells and driftwood, beach-themed sea glass driftwood art captures the essence of coastal living.

Nautical Elements

Nautical elements are another popular source of inspiration for sea glass driftwood art. Anchors, ships, lighthouses, and ropes are commonly incorporated into the artwork, paying homage to the maritime heritage and culture. These symbols add a touch of nostalgia and evoke a sense of adventure and exploration. Whether it’s a wind chime resembling a ship’s wheel or a sculpture depicting a lighthouse, nautical-themed sea glass driftwood art brings the allure of the sea into your home.

Marine Life

Sea glass driftwood art offers an excellent opportunity to showcase the beauty and diversity of marine life. From graceful seahorses to majestic dolphins, artists can create stunning pieces inspired by the creatures that inhabit the ocean. By using sea glass in various colors and shapes, it’s possible to bring marine life to life in a unique and creative way. These pieces not only celebrate the beauty of animals but also serve as a reminder of the fragility of marine ecosystems.

Sea Glass Driftwood Art

This image is property of images.pexels.com.

Abstract Concepts

Sea glass driftwood art is not limited to representational themes. Many artists choose to explore abstract concepts, using the materials to create intriguing and thought-provoking pieces. Abstract sea glass driftwood art allows for a more subjective and interpretive experience, with each viewer finding their own meaning and connection to the artwork. From geometric patterns to flowing shapes, abstract sea glass driftwood art encourages exploration and invites contemplation.

Indoor Display Options

When it comes to displaying sea glass driftwood art indoors, the possibilities are endless. One popular option is to showcase smaller pieces, such as mosaics or sculptures, on shelves or mantels. They can be standalone statement pieces or part of a curated collection. Another option is to hang mobiles or wind chimes near windows or in open spaces, allowing them to catch the light and create a soothing atmosphere. Wall hangings featuring larger sea glass driftwood art can become the focal point of a room, adding a touch of elegance and natural beauty.

Outdoor Display Options

Sea glass driftwood art can also be displayed outdoors, adding a touch of whimsy and charm to your outdoor living spaces. Hang wind chimes from trees or gazebos, allowing the gentle breeze to play their melodies. Place sculptures or larger artworks in gardens or patio areas, creating a visually stunning focal point. Outdoor display options open up a world of possibilities for showcasing sea glass driftwood art, allowing you to bring nature-inspired beauty into your exterior spaces.

Lighting Considerations

Consider the lighting conditions when displaying sea glass driftwood art. Natural light can enhance the beauty of the sea glass, casting beautiful reflections and highlighting the intricate patterns. If displaying indoors, position the artwork near windows or under soft ambient lighting to maximize the visual impact. For outdoor display, consider placing the art piece in an area that receives dappled sunlight or strategically add subtle lighting, such as solar-powered lights, to illuminate the artwork at night.

Cleaning and Maintenance

To keep your sea glass driftwood art looking its best, regular cleaning and maintenance is essential. Use a soft brush or cloth to gently remove any dust or dirt that may accumulate over time. Avoid using harsh cleaning agents or abrasive materials that could damage or scratch the sea glass or driftwood. Additionally, inspect the artwork periodically for any signs of damage or loose pieces. Repair or replace as needed to ensure the longevity and continued beauty of your sea glass driftwood art.

Home Decor Pieces

Sea glass driftwood art pieces can be excellent additions to your home decor. Mosaic tabletops or trivets can add a pop of color and texture to your dining or living areas. Sculptures or mobiles can be displayed on shelves or mantels, adding an element of artistic expression to your interior design. Wall hangings featuring sea glass driftwood art can become stunning centerpieces or focal points of any room, creating a captivating and visually pleasing ambiance.

Sea Glass Driftwood Art

Jewelry and Accessories

Sea glass driftwood art extends beyond home decor pieces and can be incorporated into jewelry and accessories. From pendants to earrings, sea glass can be beautifully set in metal or wire-wrapped to create unique and eye-catching jewelry. Driftwood can also be used in accessories like hairpins or brooches, adding a touch of natural elegance to your personal style. Wearing sea glass driftwood art allows you to carry a piece of the ocean’s beauty wherever you go.

Wall Hangings

Wall hangings featuring sea glass driftwood art can transform the aesthetic of any space. Whether it’s a single large artwork or a collection of smaller pieces arranged in a gallery-style display, wall hangings create a captivating focal point that draws the eye and sparks conversation. Consider the size, colors, and theme of the artwork when choosing a location for your wall hanging, ensuring it complements the overall decor of the room.

Customized Artwork

One of the unique aspects of sea glass driftwood art is its customizability. Artists can create personalized pieces that reflect individual tastes, memories, or special occasions. From customized wall hangings featuring initials or dates to commissioned sculptures that capture beloved pets, the possibilities are endless. Customized sea glass driftwood art allows you to create truly one-of-a-kind pieces that hold sentimental value and add a personal touch to your home or gift-giving.

Connection to Nature

Sea glass driftwood art offers a unique connection to nature. By incorporating elements from the beach and the sea, these artworks bring a sense of tranquility, serenity, and awe that can only be found in nature’s creations. Displaying sea glass driftwood art in your home allows you to bring a piece of the ocean into your daily life, fostering a deeper connection to the natural world and reminding you of the beauty that lies beyond your doorstep.

Relaxation and Mindfulness

Engaging in sea glass driftwood art can be a therapeutic and meditative experience. The process of collecting materials, designing, and assembling the artwork requires focus and attention to detail, allowing you to be fully present in the creative process. As you work with the sea glass and driftwood, you may find a sense of calmness and relaxation wash over you. The gentle sound of clinking sea glass or swaying mobiles can further contribute to a peaceful and mindful ambiance, creating a sanctuary of tranquility in your home.

Upcycling and Environmental Consciousness

Sea glass driftwood art embodies principles of upcycling and environmental consciousness. By using discarded sea glass and driftwood that would otherwise end up in landfills or pollute the oceans, artists are giving these materials a new lease on life. Sea glass driftwood art showcases the beauty and potential in repurposing materials, demonstrating that creativity and environmentalism can go hand in hand. By displaying and appreciating sea glass driftwood art, you contribute to a more sustainable and eco-friendly mindset.

Unique and Handmade Artistry

Each piece of sea glass driftwood art is a unique handmade creation. No two pieces of sea glass are exactly alike, and driftwood comes in various shapes and sizes. Artists use their skills and creativity to transform these materials into stunning artworks that cannot be replicated. By owning a sea glass driftwood art piece, you possess a one-of-a-kind work of art that reflects the craftsmanship and artistry of the artist. The uniqueness of these artworks adds to their allure and enhances the value they hold.

Coastal-Themed Interiors

Sea glass driftwood art seamlessly fits into coastal-themed interiors. Whether you live by the sea or simply want to evoke the relaxed and peaceful atmosphere of coastal living, sea glass driftwood art can be a perfect addition to your home decor. Mosaic tabletops or wall hangings featuring ocean-inspired motifs can instantly transport you to sandy beaches and azure waters. Incorporating sea glass and driftwood into your coastal-themed interiors adds a natural and organic element that complements the overall aesthetic.

Bohemian and Rustic Styles

For those with a penchant for bohemian or rustic interior styles, sea glass driftwood art can provide the perfect accent piece. The combination of the weathered driftwood and the vibrant sea glass adds depth and texture to the overall design. Incorporate sea glass driftwood sculptures or mobiles into bohemian-inspired spaces to create an eclectic and artistic ambiance. In rustic interiors, wall hangings or tabletop mosaics featuring earthy tones and organic shapes harmonize beautifully with the natural elements found in these styles.

Focal Point and Statement Pieces

Sea glass driftwood art has the power to become a captivating focal point or statement piece in any room. Whether it’s a large wall hanging, a freestanding sculpture, or an intricately designed mosaic, these artworks demand attention and draw the eye. Positioning sea glass driftwood art as a focal point allows it to take center stage in your interior design, becoming the highlight of the room. By selecting a piece that matches the size and style of your space, you can make a bold statement and showcase your artistic taste.

Natural and Sustainable Elements

Sea glass driftwood art seamlessly integrates natural and sustainable elements into your interior design. The use of authentic sea glass and naturally weathered driftwood not only adds visual interest but also reminds us of the inherent beauty in the natural world. By incorporating these materials in your home decor, you celebrate the sustainable and eco-friendly qualities of sea glass driftwood art, creating a space that is in harmony with nature.

Appreciating the Craftsmanship

Sea glass driftwood art is a testament to the skill and craftsmanship of the artists who create these unique pieces. The intricate designs, meticulous arrangements, and attention to detail showcase the dedication and passion of the artist. By displaying sea glass driftwood art in your home, you support and appreciate the artistic journey and creative effort that goes into each artwork. Taking the time to admire and reflect upon the craftsmanship of sea glass driftwood art adds to the enjoyment and value of these unique creations.

Embracing the Beauty of Nature

Sea glass driftwood art allows us to embrace and celebrate the beauty of nature. From the frosted sea glass that tells stories of its oceanic journey to the weathered driftwood that reflects the power of the tides, these artworks bring the raw and natural elements of the seashore into our lives. By displaying sea glass driftwood art in our homes, we create a connection to nature, reminding us of the vastness and inherent wonder that lies beyond the confines of our daily lives.

Exploring Creativity with Sea Glass Driftwood Art

Sea glass driftwood art provides a platform for exploring creativity and self-expression. The combination of sea glass and driftwood offers endless possibilities in terms of design, form, and function. Whether you are an experienced artist or a beginner, sea glass driftwood art encourages you to experiment with colors, textures, and compositions, allowing your imagination to run wild. The process of creating sea glass driftwood art becomes a personal journey of discovery, exploration, and growth.

In conclusion, sea glass driftwood art is a captivating and environmentally conscious form of artistic expression. By combining the natural beauty of sea glass and driftwood, artists and enthusiasts create stunning pieces that celebrate the wonders of the ocean. Whether you choose to create mosaics, wind chimes, mobiles, or sculptures, sea glass driftwood art allows you to embrace nature’s beauty, explore your creativity, and bring a touch of the ocean into your life. So, start collecting your sea glass and driftwood, unleash your imagination, and create your own masterpiece of sea glass driftwood art.

Filed Under: Driftwood Ideas Tagged With: Art, Driftwood, Sea Glass

  • « Previous Page
  • Page 1
  • …
  • Page 5
  • Page 6
  • Page 7
  • Page 8
  • Page 9
  • …
  • Page 11
  • Next Page »

Primary Sidebar

Driftwood4us.com, is a participant in the Amazon Services LLC Associates Program, an affiliate advertising program designed to provide a means for sites to earn advertising fees by advertising and linking to amazon.com.