• Skip to main content
  • Skip to primary sidebar
  • Terms and Conditions
  • Privacy Policy
  • Contact

Driftwood 4 Us

Just About Driftwood

attaching

How To Attach Driftwood Together?

February 21, 2024 by admin

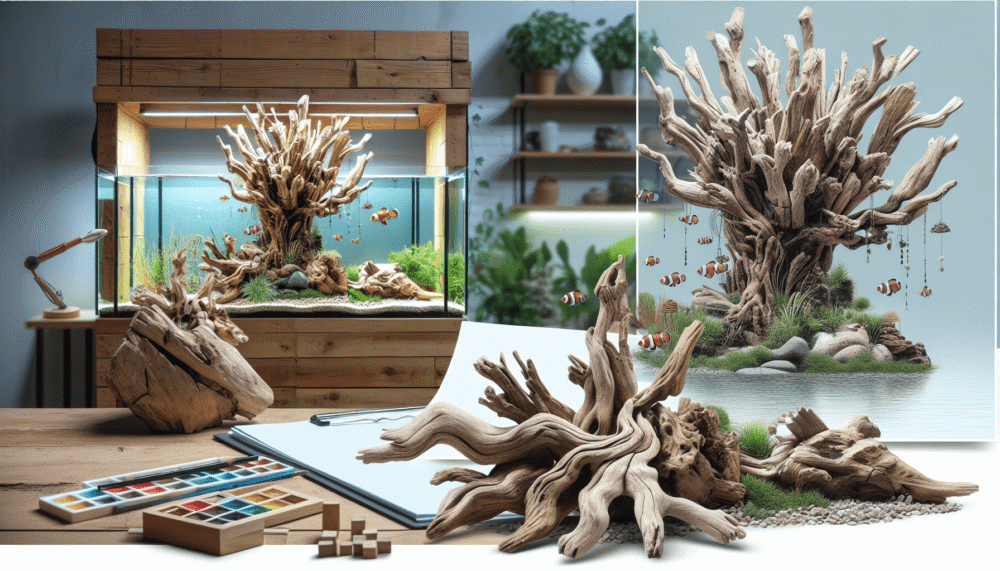
Have you ever come across a beautiful piece of driftwood and wondered how to attach it together? Whether you’re looking to create a unique piece of home decor or incorporate driftwood into a craft project, attaching driftwood together can be a fun and creative way to bring nature’s beauty into your design. In this article, we will explore various techniques and materials that you can use to securely attach driftwood together, allowing you to unleash your creativity and create stunning pieces that showcase the natural charm of driftwood.

Types of Driftwood

Natural Driftwood

Natural driftwood refers to pieces of wood that have been washed up on shores or riverbanks. It is characterized by its weathered appearance and unique shapes, which are formed through the natural processes of erosion and exposure to water. Natural driftwood is often favored for its authenticity and rustic charm, making it a popular choice for various artistic and decorative purposes.

Processed Driftwood

Processed driftwood, on the other hand, is wood that has undergone some form of treatment or modification to enhance its durability and appearance. This can include processes such as kiln-drying, bleaching, or sanding. Processed driftwood is often more uniform in shape and texture, allowing for easier attachment and manipulation. It is commonly used in crafts, furniture making, and landscaping projects.

Preparation for Attaching Driftwood

Gather necessary materials

Before you begin attaching driftwood together, it’s important to gather the necessary materials. This may include screws, nails, adhesive, wire, rope or twine, a measuring tape, a drill, sandpaper, and a suitable adhesive for the type of driftwood you are working with.

Inspect and clean the driftwood

Inspect the driftwood for any signs of damage or decay. If you come across any soft or rotten areas, it’s best to avoid using those sections for attachment. Clean the driftwood by gently brushing off any dirt or debris using a soft-bristled brush or a cloth.

Determine the design or structure

Before attaching the driftwood, take some time to visualize and plan the design or structure you want to create. This will help you determine the placement and positioning of the driftwood pieces, as well as the most suitable attachment method.

How To Attach Driftwood Together?

Choosing the Right Attachment Method

Using Screws and Nails

Screws and nails are a popular and secure method for attaching driftwood together. When using screws or nails, it’s important to ensure that you choose the appropriate size and type for the job. Stainless steel or galvanized hardware is recommended to prevent rusting in outdoor applications.

Using Adhesive

Adhesives can provide a strong bond when attaching driftwood. However, it’s crucial to select an adhesive that is suitable for the specific type of driftwood you are working with. Epoxy, wood glue, or marine adhesive are often recommended choices for their strong bonding properties.

Using Wire

Wire can be used to create a versatile and flexible attachment method for driftwood. Choose a wire that is strong enough to support the weight of the driftwood, such as stainless steel or copper wire. Wrapping and securing the wire around the driftwood pieces will provide a secure connection.

Using Rope or Twine

Rope or twine can add a rustic and natural look to your driftwood attachment. Opt for a sturdy and durable rope or twine, such as hemp or jute, to ensure a secure hold. Creating knots to secure the driftwood pieces together will provide a simple yet effective attachment method.

Attaching Driftwood with Screws and Nails

Measure and mark the attachment points

Before attaching the driftwood with screws or nails, measure and mark the desired attachment points on the wood. You can use a measuring tape and a pencil to ensure accuracy.

Predrill holes

To prevent the wood from splitting, it’s important to predrill holes before inserting screws or nails. Use a drill bit that is slightly smaller than the diameter of the hardware to create pilot holes.

Attach the driftwood

Position the driftwood pieces according to your design or structure plan and align the predrilled holes. Securely attach the pieces together by driving screws or nails into the prepared holes using a screwdriver or hammer. Be careful not to overtighten, as this may damage the wood.

How To Attach Driftwood Together?

Attaching Driftwood with Adhesive

Select a suitable adhesive

When attaching driftwood with adhesive, it’s crucial to choose an appropriate adhesive that will provide a strong and durable bond. Depending on the type of driftwood and the intended use, options such as epoxy, wood glue, or marine adhesive can be ideal choices.

Apply the adhesive

Follow the instructions on the adhesive packaging to ensure proper application. Apply the adhesive to the surfaces of the driftwood that will be joined together. Be generous with the amount of adhesive, but avoid excess that may squeeze out and create a messy appearance.

Join the driftwood pieces

Press the adhesive-coated surfaces of the driftwood together firmly, making sure they align according to your design or structure plan. Apply clamps or use heavy objects to help hold the pieces in place while the adhesive cures. Allow sufficient drying time before handling or further manipulating the attached driftwood.

Attaching Driftwood with Wire

Choose the right wire

When using wire to attach driftwood, it’s important to select a wire that is strong enough to support the weight of the pieces. Stainless steel or copper wire are commonly used due to their strength and resistance to rust. Choose a gauge of wire that matches the thickness and size of the driftwood.

Wrap and secure the wire around the driftwood

Start by wrapping the wire around the driftwood pieces, making sure to cross it over itself for added strength. Twist the wire tightly to secure it in place, leaving enough excess to create additional wraps or twists if necessary. Continue wrapping and securing the wire until the driftwood pieces are firmly attached.

Attaching Driftwood with Rope or Twine

Select sturdy and durable rope or twine

When attaching driftwood with rope or twine, it’s important to choose a material that is sturdy and durable. Hemp or jute rope, or thick twine, are popular choices as they provide a natural and rustic aesthetic while offering a secure hold.

Create knots to secure the driftwood

To attach driftwood with rope or twine, start by tying a strong knot at one end of the material. Position the driftwood pieces according to your design or structure plan and loop the rope or twine around the pieces to hold them together. Tie secure knots at each connection point, ensuring the pieces are tightly held in place.

Strengthening the Attachment

Using additional support

For larger or heavier driftwood pieces or structures, additional support may be necessary. This can be achieved by adding additional screws, nails, or adhesive at strategic points to reinforce the attachment.

Reinforcing with brackets or corner pieces

Brackets or corner pieces can be used to provide additional support and stability to attached driftwood. Position the brackets or corner pieces at key connection points and secure them to the driftwood using screws or nails.

Using epoxy or wood filler

If you notice any gaps or areas that require additional reinforcement, epoxy or wood filler can be used. Fill the gaps with the chosen material and allow it to dry or cure according to the manufacturer’s instructions. This will strengthen the attachment and provide a seamless finish.

Finishing and Enhancing the Look

Sanding the driftwood

After the driftwood pieces are securely attached, consider sanding the surfaces to create a smoother and more polished appearance. Use sandpaper with a medium grit and lightly sand in the direction of the wood grain. Be cautious not to over-sand and lose the natural texture and character of the driftwood.

Staining or painting the driftwood

To enhance the color and protect the driftwood, staining or painting can be applied. Choose a stain or paint that is suitable for the type of wood and desired outcome. Apply the stain or paint evenly across the driftwood surface, following the manufacturer’s instructions. Allow sufficient drying time before handling or displaying the attached driftwood.

Sealing the driftwood

To prolong the lifespan of the attached driftwood and protect it from moisture, sealing is recommended. Apply a clear wood sealer or varnish to all exposed surfaces, ensuring thorough coverage. This will provide an added layer of protection against the elements and maintain the integrity of the attachment.

Displaying and Using Attached Driftwood

Choosing a suitable location

When displaying attached driftwood, consider the environment and purpose of the piece. Ensure that the location provides sufficient support and stability for the attached driftwood, especially if it is a larger or heavier structure.

Creating a driftwood sculpture

Attached driftwood pieces can be arranged and manipulated to create stunning sculptures. Explore different shapes and forms by interlocking and overlapping the attached driftwood. Experiment with various attachment methods to achieve the desired look and balance.

Making functional driftwood furniture

Attached driftwood can also be used to create unique and functional furniture pieces. From coffee tables to shelves, the natural and organic look of driftwood adds a touch of character to any space. Ensure that the attachment method used provides a sturdy and secure structure for the furniture piece.

By following these steps and experimenting with different attachment methods, you can successfully attach driftwood together and create beautiful and unique pieces for various artistic, decorative, or functional purposes. Let your imagination and creativity flow as you explore the endless possibilities that driftwood has to offer. Enjoy the process and have fun with your driftwood projects!
Filed Under: Driftwood Tagged With: attaching, Driftwood, Woodworking

How To Attach Driftwood?

February 20, 2024 by admin

So you’ve found a beautiful piece of driftwood that you want to incorporate into your home decor or use as a centerpiece in your aquarium, but you’re not exactly sure how to securely attach it. Don’t worry, we’ve got you covered. In this article, we’ll walk you through some simple and effective methods for attaching driftwood so you can confidently showcase its natural beauty in your space. Whether you’re a DIY enthusiast or a nature lover, we have solutions that will ensure your driftwood stays in place and becomes a stunning focal point.

Methods for Attaching Driftwood

Driftwood can make a beautiful addition to your home decor, whether you’re incorporating it into a gallery wall, creating a unique centerpiece, or even using it as a functional coatrack. But how exactly do you attach driftwood securely and safely? In this article, we will explore several methods for attaching driftwood, each with its own unique advantages and considerations.

How To Attach Driftwood?

Drilling and Screwing

One of the most reliable ways to attach driftwood is by drilling and screwing. This method provides a sturdy and long-lasting attachment, ensuring that your driftwood will stay securely in place. Here’s a step-by-step guide on how to use this method:

  1. Select the appropriate drill bit: Choose a drill bit that is slightly smaller in diameter than your screws to ensure a snug fit.
  2. Pre-drill holes into the driftwood: Mark the locations where you want to attach the driftwood, then carefully pre-drill holes using the selected drill bit.
  3. Position the driftwood in place: Hold the driftwood against the desired surface and mark the corresponding locations for the screws.
  4. Attach screws through the pre-drilled holes: Insert screws through the pre-drilled holes in the driftwood and drive them into the surface until they are fully secured.
  5. Tighten the screws securely: To ensure a strong attachment, tighten the screws fully using a screwdriver or drill.

This method is particularly useful when attaching heavy or large pieces of driftwood that require extra support.

Using Wire or Fishing Line

If you prefer more flexibility in the positioning of your driftwood or want a more discreet attachment method, using wire or fishing line is a great option. This method offers a minimalist look, allowing the driftwood to appear as if it is effortlessly suspended. Here’s how you can attach driftwood using wire or fishing line:

  1. Choose a sturdy wire or fishing line: Opt for wire or fishing line that is strong enough to support the weight of your driftwood.
  2. Wrap the wire or line securely around the driftwood: Start at one end of the driftwood and wrap the wire or line tightly around it several times, ensuring a secure hold.
  3. Create loops or knots to hang the driftwood: Depending on your desired hanging method, create loops or knots in the wire or line at both ends of the driftwood.
  4. Attach the other end to a hook or nail on the wall: Securely fasten the loops or knots to hooks or nails on the wall, adjusting the positioning as needed.
  5. Adjust the positioning and tighten as needed: Once the driftwood is attached, make any necessary adjustments to ensure it hangs straight, and tighten the wire or line as desired.

This method is ideal for creating a floating effect and works well for smaller driftwood pieces or when you want to achieve a more ethereal look.

Hot Gluing

Hot gluing is a quick and easy method for attaching driftwood that requires minimal tools and provides a strong hold. It is particularly useful when attaching lightweight driftwood pieces or when you want to avoid drilling holes. Follow these steps to attach driftwood using hot glue:

  1. Select a high-quality adhesive hot glue gun: Choose a hot glue gun that provides a strong and durable bond, suitable for the weight and size of your driftwood.
  2. Apply hot glue to the desired area on the driftwood: Using the hot glue gun, apply a generous amount of hot glue to the spot where you want to attach the driftwood.
  3. Press the driftwood firmly onto the desired surface: Immediately press the driftwood onto the desired surface, ensuring that it adheres to the hot glue.
  4. Hold it in place until the glue is completely dry and secure: Maintain gentle pressure on the driftwood until the hot glue is fully cooled and set, ensuring a secure attachment.
  5. Ensure the glued area can support the weight of the driftwood: Before hanging or displaying your driftwood, ensure that the hot glue attachment can support the weight of the driftwood to avoid any accidents or damage.

While hot gluing offers a convenient way to attach driftwood, it is important to consider the weight of your driftwood and the type of surface you are attaching it to. Hot glue may not provide sufficient support for heavy driftwood pieces or certain surfaces.

Using Epoxy Resin

Epoxy resin provides a strong and durable bond that is especially beneficial when attaching driftwood to smooth or non-porous surfaces. This method not only securely attaches the driftwood but also enhances its natural beauty. Follow these steps to attach driftwood using epoxy resin:

  1. Prepare the epoxy resin according to the manufacturer’s instructions: Read and follow the manufacturer’s instructions carefully for preparing the epoxy resin. This may involve mixing specific ratios of resin and hardener to activate the bonding properties.
  2. Apply the epoxy to both the driftwood and the desired surface: Using a brush or spatula, apply an even layer of epoxy resin to both the area on the driftwood where you want to attach it and the corresponding area on the desired surface.
  3. Press the driftwood onto the surface firmly: Immediately press the driftwood onto the desired surface, ensuring that it makes full contact with the layer of epoxy resin.
  4. Hold it in place until the epoxy cures completely: To achieve a strong bond, hold the driftwood in place until the epoxy resin cures completely. Follow the manufacturer’s instructions regarding cure time.
  5. Follow any additional instructions from the epoxy resin manufacturer: Some epoxy resins may require additional steps or precautions, such as applying a topcoat or allowing for post-cure, to ensure the best results. Be sure to read and follow any additional instructions provided by the manufacturer.

Epoxy resin offers a durable attachment method that is ideal for securing driftwood to surfaces such as glass, metal, or ceramic, where other methods may not adhere as effectively.

How To Attach Driftwood?

Nailing or Stapling

If you prefer a more traditional approach to attaching driftwood, nailing or stapling can provide a reliable and visually appealing attachment. This method works well when attaching driftwood to wooden surfaces or where a rustic aesthetic is desired. Follow these steps to attach driftwood using nails or staples:

  1. Choose appropriate nails or staples for the project: Select nails or staples that are long enough to penetrate both the driftwood and the desired surface without causing any damage or splitting.
  2. Position the driftwood in place: Hold the driftwood against the desired surface, ensuring it is aligned and positioned as desired.
  3. Drive nails or staples through the driftwood and into the desired surface: Use a hammer or staple gun to drive nails or staples through the driftwood and into the desired surface, ensuring a firm and secure attachment.
  4. Ensure the nails or staples are secure and provide sufficient support: Double-check that the nails or staples are fully inserted and provide adequate support for the weight of the driftwood. Consider using wood glue in conjunction with nails or staples for added stability.

Nailing or stapling is a classic method that complements the natural aesthetic of driftwood, especially when attaching it to wooden surfaces or incorporating it into DIY furniture projects.

Using Rope or Twine

For a coastal or bohemian vibe, attaching driftwood with rope or twine can add an organic and rustic touch to your decor. This method allows for easy adjustment and customization, making it an excellent choice for showcasing multiple driftwood pieces. Follow these steps to attach driftwood using rope or twine:

  1. Select a strong and durable rope or twine: Choose a rope or twine that can comfortably support the weight of your driftwood while offering an aesthetically pleasing appearance.
  2. Measure and cut the desired length of rope or twine: Determine the length you want your driftwood to hang from the wall or support, then cut the rope or twine accordingly.
  3. Create loops or knots around the driftwood: Securely tie loops or knots around the driftwood, allowing for sufficient support and adjustment as needed.
  4. Attach the other ends of the rope or twine to hooks or nails on the wall: Securely fasten the other ends of the rope or twine to hooks or nails on the wall, adjusting the positioning to achieve your desired arrangement.
  5. Adjust the positioning and tighten as needed: Once the driftwood is hung, you can easily adjust the positioning and tighten the rope or twine as desired to achieve the desired display.

Rope or twine offers a versatile and visually appealing attachment method, adding an organic and natural look to your driftwood arrangements.

Zip Ties or Cable Ties

For a quick and hassle-free attachment, zip ties or cable ties can be an excellent choice. This method is particularly suitable for larger or heavier driftwood pieces that require a secure and stable connection. Follow these steps to attach driftwood using zip ties or cable ties:

  1. Choose appropriate zip ties or cable ties for the project: Select zip ties or cable ties of suitable length and strength to handle the weight and size of your driftwood.
  2. Wrap the zip ties or cable ties tightly around the driftwood and desired surface: Start by wrapping the zip ties or cable ties tightly around the driftwood, ensuring a firm hold. Extend the ties to the desired surface and wrap them tightly around it as well.
  3. Pull the ties securely until the driftwood is firmly attached: Pull the zip ties or cable ties as tight as possible to securely fasten the driftwood to the desired surface.
  4. Trim off any excess length from the ties: Use scissors or a cutting tool to trim off any excess length from the zip ties or cable ties, ensuring a neat and tidy appearance.
  5. Ensure the ties are tightly secured and provide adequate support: Double-check that the zip ties or cable ties are tightly secured and provide sufficient support for the weight of the driftwood.

Zip ties or cable ties offer a practical and efficient method for attaching driftwood, especially when dealing with large or heavy pieces that require a strong and reliable connection.

Attaching with Brackets

When attaching larger or more intricate driftwood pieces, brackets can provide the necessary support and stability. This method ensures that your driftwood remains securely attached, even in high-traffic areas. Follow these steps to attach driftwood using brackets:

  1. Obtain suitable brackets for attaching the driftwood: Choose brackets that are appropriate for the size and weight of your driftwood, ensuring that they provide sufficient support.
  2. Position the brackets on the desired surface and driftwood: Place the brackets against the desired surface and the driftwood, aligning them for maximum stability and support.
  3. Secure the brackets in place using screws, nails, or bolts: Depending on the type of brackets used, securely attach them to the desired surface and the driftwood using suitable screws, nails, or bolts.
  4. Ensure the brackets are properly aligned for maximum stability: Double-check that the brackets are properly aligned and provide a sturdy platform for the driftwood. Adjust the positioning if necessary.
  5. Check the attachment for any wobbling or instability: Once the brackets are securely attached, test the stability of the attached driftwood. Make sure it doesn’t wobble or feel unstable.

Using brackets can be especially useful when attaching driftwood to walls or creating unique shelving units. They provide added security and ensure that your driftwood is displayed safely.

Using Adhesive Hooks

For a non-permanent attachment method that doesn’t require drilling, adhesive hooks can be a practical solution. This method is particularly useful when you want to attach smaller driftwood pieces or if you’re renting and need a removable option. Follow these steps to attach driftwood using adhesive hooks:

  1. Choose adhesive hooks suitable for the weight of the driftwood: Select adhesive hooks that can support the weight of your driftwood while adhering securely to the desired surface.
  2. Clean the desired surface: Thoroughly clean the area where you intend to place the adhesive hooks, removing any dust, dirt, or debris. This ensures a strong bond between the hooks and the surface.
  3. Peel off the backing of the adhesive hooks: Carefully remove the backing from the adhesive hooks, exposing the adhesive portion. Be cautious not to touch or contaminate the adhesive.
  4. Press the adhesive hooks firmly onto the desired surface: Apply gentle pressure to firmly press the adhesive hooks onto the desired surface, ensuring they make full contact.
  5. Hang the driftwood on the hooks: Hang or suspend the driftwood on the attached adhesive hooks, adjusting the positioning as desired.

Adhesive hooks offer a convenient and temporary attachment method for displaying driftwood, providing a secure hold without the need for tools or permanent alterations to the surface.

Wire Wrapping

For an artistic and visually appealing way to attach driftwood, consider wire wrapping. This method allows you to showcase driftwood while creating intricate patterns and designs. Here’s a step-by-step guide on how to attach driftwood using wire wrapping:

  1. Choose a pliable and durable wire for wrapping: Select wire that is easy to manipulate and can securely hold the weight of the driftwood. Copper, aluminum, or craft wire are ideal options.
  2. Wrap the wire tightly and securely around the driftwood: Begin by wrapping the wire tightly around the driftwood, starting at one end and working your way to the other, ensuring a secure hold.
  3. Weave the wire through the driftwood and create loops or knots: As you wrap the wire, weave it through the driftwood to create additional loops or knots for added stability and aesthetic appeal.
  4. Shape the wire to create a hanging or mounting mechanism: Manipulate the wire to form hooks, loops, or other shapes that will allow you to hang or mount the driftwood securely.
  5. Attach the wire to hooks or nails on the desired surface: Once you have shaped the wire and created a hanging or mounting mechanism, attach it securely to hooks or nails on the wall or desired surface.

Wire wrapping enables you to personalize your driftwood attachment, creating unique and eye-catching displays while ensuring a strong and secure connection.

By using these various methods for attaching driftwood, you can unleash your creativity and bring the beauty of nature into your home decor. Whether you opt for the traditional approach of drilling and screwing, the delicate beauty of wire wrapping, or the simplicity of adhesive hooks, the possibilities are endless. So go ahead, gather your driftwood collection, and start creating stunning and unique pieces that will surely mesmerize all who enter your space. Happy decorating!

Filed Under: Driftwood Tagged With: attaching, Driftwood, home decor

Primary Sidebar

Driftwood4us.com, is a participant in the Amazon Services LLC Associates Program, an affiliate advertising program designed to provide a means for sites to earn advertising fees by advertising and linking to amazon.com.