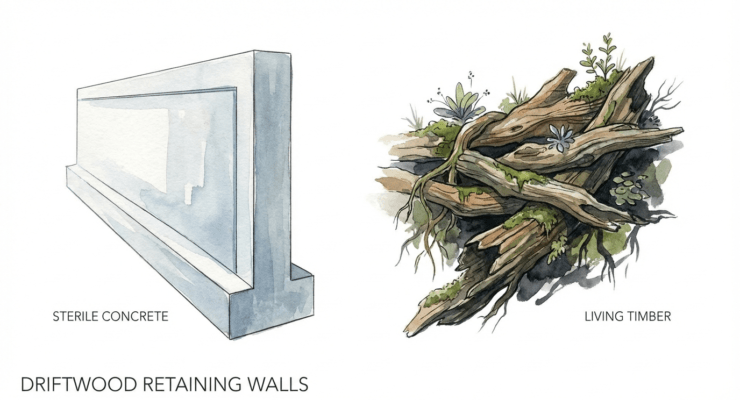
Your garden walls shouldn’t just hold the dirt; they should be the engine that feeds it. Concrete walls are a biological dead end. They leach lime into your soil and provide zero habitat. Driftwood terracing, however, creates a ‘living skin’ for your garden. As the wood slowly breaks down over decades, it acts as a slow-release sponge for moisture and a sanctuary for the beneficial fungi that protect your plants. It’s the difference between a prison and a playground for your soil.
Choosing timber over stone isn’t just about the rugged, sea-weathered aesthetic. It is a commitment to the long-term health of your land. While modern landscaping often prioritizes permanence at the expense of biology, the pioneer method of using raw, unrefined logs works in tandem with the natural cycles of decay and rebirth. This guide explores the grit and the glory of building driftwood retaining walls—structures that don’t just stand against the earth but eventually become a part of it.
Driftwood Retaining Walls
Driftwood retaining walls are functional barriers built from salt-scoured or river-washed timber to manage slopes, prevent erosion, and create terraced planting spaces. Unlike standard landscape timbers that are milled into uniform squares, driftwood retains its natural, irregular silhouette. This irregularity is its greatest strength, allowing the wall to interlock with the terrain in a way that feels ancient and inevitable.
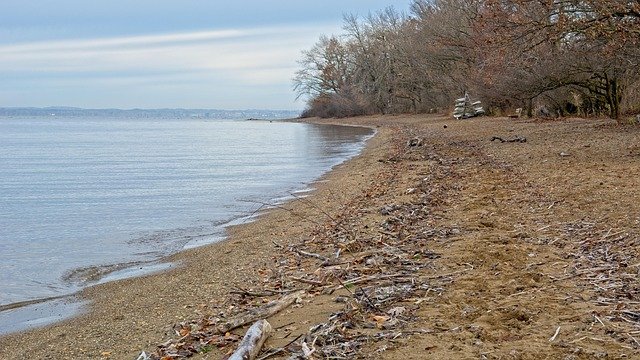
These structures are common in coastal regions and riverside homesteads where the raw materials are readily available. They serve as a primary defense against the slow crawl of gravity on a hillside. In the real world, a well-built driftwood wall transforms a “useless” slope into a series of flat, fertile benches. Think of it as a skeletal system for your garden; the wood provides the structure while the soil and roots provide the flesh.
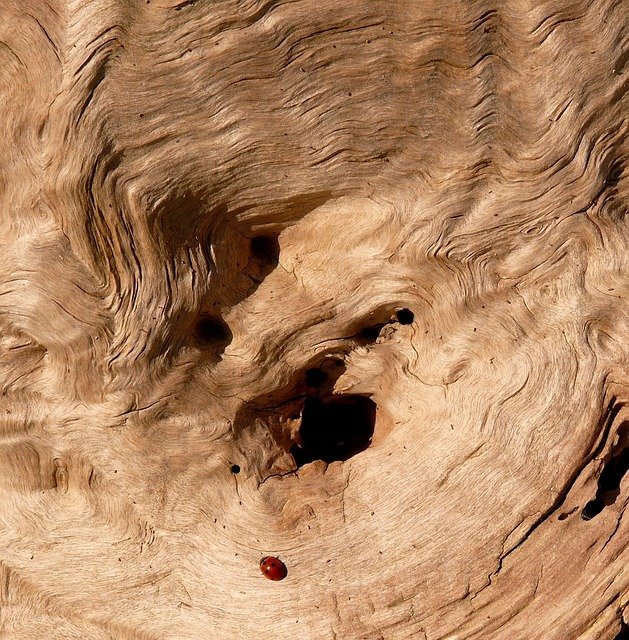
Every piece of driftwood has a story of survival. It has been battered by waves, bleached by the sun, and stripped of its softest tissues, leaving behind the dense, rot-resistant heartwood. When you bring these pieces together to form a terrace, you are recycling a resource that nature has already “cured.” It is an honest approach to landscaping that favors resourcefulness over the sterile, high-carbon footprint of pre-cast concrete blocks.
The Mechanics: How to Build with the Tide
Building with irregular logs requires more patience than working with store-bought lumber. You cannot simply stack them and hope for the best. Success depends on understanding the forces of weight and water.
Sourcing and Legalities
Before you set out with a truck and a winch, know the law of the land.  . Collecting driftwood is not a free-for-all in every jurisdiction. Federal and state parks often classify driftwood as part of the ecosystem, providing essential habitat for shorebirds and insects. Removing it can result in heavy fines. In the UK, for instance, the Coast Protection Act protects certain beach materials to prevent coastal erosion. Always seek permission from private landowners or check with local authorities to ensure your sourcing is legal and ethical.
The Foundation: Trenching and Leveling
A wall is only as sturdy as the ground it sits on. Start by digging a trench that is at least twice as wide as your thickest log. This trench should be deep enough to bury at least one-third of the base log’s height. If your wall is intended to be four feet tall, your first course of logs must be anchored deep in the earth to prevent the entire structure from “kicking out” at the bottom.
Pack the bottom of the trench with 3 to 4 inches of crushed gravel. This provides a stable “hedgehog” base that prevents the wood from sitting in stagnant water, which would accelerate rot. Use a long level to ensure the gravel bed is flat. While the logs themselves are crooked, the foundation they rest upon must be true.
Stacking and Notching
Stacking driftwood is a game of “best fit.” Place your largest, heaviest logs at the base. As you move upward, nestle each new log into the contours of the one below it. This is where the pioneer skill of scribing comes into play. Use a log scribe or a simple compass to trace the shape of the bottom log onto the underside of the top log. Use a chainsaw or a sharp adze to notch out a “saddle” that allows the two pieces to interlock tightly.
Stagger the joints between logs so they do not line up vertically. This “running bond” pattern distributes the weight across the entire wall rather than creating weak vertical seams. If you encounter a gap due to a curve in the wood, do not fill it with soil. Use a wooden shim or a smaller branch, inserted from the back, to maintain the structural line.
Pinning and Anchoring (Deadmen)
To prevent the wall from bowing outward under the pressure of wet soil, you must pin the logs. Drill vertical holes through the courses and drive 1/2-inch or 5/8-inch rebar stakes at least 3 feet into the ground. A common mistake is to drill after the logs are in the trench; instead, drill your holes on a flat surface to avoid dulling your bits in the dirt.
For walls higher than two feet, you must install “deadmen.” These are anchor logs placed perpendicular to the wall face, extending back into the hillside. The weight of the soil sitting on top of these deadmen acts as a counterweight, pulling the wall back into the slope. Space these anchors every 6 to 8 feet horizontally and stagger them in every other course.
The Biological Engine: Soil Health
The true value of a driftwood wall lies in what happens behind it. As the wood slowly ages, it undergoes a transformation from structural timber to a biological sponge. This process mimics the natural “nurse logs” found in old-growth forests.
Decaying wood hosts a massive colony of saprotrophic fungi. these organisms break down the lignin and cellulose, releasing essential nutrients like nitrogen, phosphorus, and potassium back into the soil. More importantly, these walls encourage the growth of mycorrhizal fungi, which form symbiotic relationships with your garden plants. These fungal threads extend the reach of your plants’ roots, helping them find water and minerals that would otherwise be inaccessible.
During heavy rains, the porous wood fibers of the driftwood absorb excess moisture. In times of drought, the wood slowly releases this stored water back into the adjacent soil. This “wicking” effect creates a microclimate that is more resilient to extreme weather. While a concrete wall reflects heat and dries out the soil, a timber wall stays cool and keeps the “living skin” of your garden hydrated.
Benefits of Living Timber
Choosing driftwood over conventional materials offers measurable advantages for the ecosystem and the homesteader’s wallet.
- Moisture Management: Decomposing logs act as a massive battery for water, reducing the need for manual irrigation once the wall begins to soften.
- Nutrient Cycling: The slow decay of wood provides a 20-to-30-year supply of organic matter and minerals, feeding the soil from the inside out.
- Habitat Creation: The nooks and crannies of weathered driftwood provide “beetle hotels” for beneficial predatory insects like ground beetles, which hunt garden pests.
- Cost Efficiency: If you have access to a legal source, the raw materials are free. Even if purchased, the cost is often half that of masonry or poured concrete.
- Aesthetic Harmony: Driftwood blends into the landscape, looking like a natural geological feature rather than an industrial intrusion.
Challenges and Common Mistakes
Working with raw nature is never without its hurdles. Understanding why walls fail is the first step toward building one that lasts.
Hydrostatic Pressure: This is the silent killer of retaining walls. When rain saturates the soil behind the wall, the weight increases dramatically. If there is no way for that water to escape, the pressure will eventually snap your rebar or push the logs out of alignment. Always use a perforated drainage pipe (French drain) wrapped in filter fabric at the base of the wall, and backfill with at least 12 inches of clean gravel.
Salt Toxicity: If you are sourcing wood directly from the ocean, it is saturated with salt. While driftwood is aesthetically pleasing, high salt concentrations can kill sensitive garden plants. Before installing, soak your logs in fresh water or leave them exposed to several heavy rain cycles to leach out the chlorides.
Initial Nitrogen Drawdown: In the first year or two of decomposition, the fungi breaking down the wood may “steal” nitrogen from the surrounding soil. To counter this, plant nitrogen-fixing cover crops like clover or legumes near the wall, or add a layer of aged manure or compost behind the logs during the initial backfill.
Limitations: When Wood is Not the Answer
Driftwood terracing is a specialized tool, not a universal solution. There are situations where the laws of physics demand something more rigid.
If your wall needs to exceed 4 feet in height, you are moving into the realm of structural engineering. High-pressure slopes or walls supporting heavy loads like driveways or building foundations require the sheer mass and predictable strength of reinforced concrete or large-scale masonry. Wood is a flexible, biological material that will settle and shift over time.
In extremely arid climates, the wood may dry out and become brittle before it has a chance to develop a beneficial fungal colony. Conversely, in swampy areas with poor drainage, the wood may rot too quickly, leading to structural failure within a decade. Driftwood is best suited for temperate or coastal environments where the moisture cycle allows for a slow, healthy decay.
Living Timber vs.  .
.  . Sterile Concrete
 .
. Comparing these two approaches reveals a fundamental difference in philosophy regarding land management.
| Feature | Driftwood (Living Timber) | Concrete (Sterile Masonry) |
|---|---|---|
| Initial Cost | Low (often free) | High |
| Longevity | 20–40 Years | 50–100 Years |
| Soil Impact | Feeds soil, adds fungi | Leaches lime, raises pH |
| Drainage | Naturally porous/absorbent | Requires intensive pipe systems |
| Skill Level | Moderate (Pioneer grit) | High (Professional masonry) |
Practical Tips and Best Practices
Apply these techniques to ensure your wall stands the test of time and provides the maximum benefit to your soil.
- Bark Removal: If your logs still have bark, consider peeling it off. Bark can trap moisture and harbor wood-boring insects like termites. Removing it reveals the beautiful grain and allows the heartwood to “breath.”
- End-Grain Sealing: The ends of logs are the most vulnerable to rapid rot. Apply a non-toxic, copper-based wood preservative to the cut ends to extend the life of the timber.
- Integrated Planting: Don’t leave the gaps between logs empty. Tuck small succulents, ferns, or alpine plants into the crevices. Their roots will help bind the structure together as they grow.
- Backfill Strategy: Use a layer of landscape fabric between the gravel backfill and the garden soil. This prevents fine soil particles from clogging your drainage field, ensuring the wall remains free-draining for decades.
Advanced Considerations: The Scribe and Notch
For the serious practitioner, mastering the “Butt and Pass” or the “Saddle Notch” is essential. The Butt and Pass method involves alternating the ends of the logs at the corners, which creates a very stable interlock without the need for complex carving. Each log “butts” against the side of the perpendicular log, and the next course “passes” over it.
If you are dealing with very large, heavy logs, the Saddle Notch is superior. This involves cutting a semi-circular groove in the bottom of the upper log so it sits flush over the curve of the lower log. This maximizes surface contact, reducing the “rolling” force of the logs and creating a wall that feels like a solid piece of timber.
Example Scenario: The Coastal Garden
Imagine a hillside on the Pacific Northwest coast, plagued by winter rains and sliding topsoil. A homesteader collects weathered cedar logs from a nearby estuary (with permits in hand). They dig a 10-inch deep trench on the contour of the hill and fill it with 4 inches of crushed basalt.
They place the first row of logs—heavy, 12-inch thick cedar—and pin them with 4-foot rebar. Behind the wall, they lay a perforated pipe and fill the space with a foot of gravel. As they stack the second and third courses, they install three “deadmen” that reach 4 feet back into the hillside.
They backfill the terrace with a mix of native soil, leaf mold, and compost. Five years later, the cedar logs have begun to silver and soften. Mushrooms sprout from the base after a rain, and the vegetable garden on the terrace stays lush even during a dry July because the logs are still holding onto the winter’s moisture. The wall isn’t just a barrier; it’s the heart of the garden’s fertility.
Final Thoughts
Building a driftwood retaining wall is an act of stewardship. It requires you to step away from the “buy it and forget it” mentality of modern construction and engage with the biology of your land. These walls are not permanent in the way a mountain is permanent, but they are lasting in the way a forest is lasting. They live, they serve, and eventually, they return to the earth as the very soil that supports the next generation of growth.
Embrace the irregular curves and the sun-bleached textures of the wood. Understand that the decay you see is not a failure of the material, but the engine of your garden’s health. By choosing timber over concrete, you are building a legacy of fertile soil and resilient landscapes. Start with one small terrace, learn the grit of the scribe and the notch, and watch as your garden transforms into a playground for the life beneath your feet.
Sources
1 ca.gov (https://www.parks.ca.gov/pages/1324/files/Chapter%2013%20-%20Retaining%20Structures.FINAL.03.06.19.pdf) | 2 familyhandyman.com (https://www.familyhandyman.com/project/how-to-build-a-retaining-wall/) | 3 homedepot.com (https://www.homedepot.com/c/ah/how-to-build-retaining-wall/9ba683603be9fa5395fab90d68eac94) | 4 youtube.com (https://www.youtube.com/watch?v=lDpbCfbuaVY) | 5 diyretainingwall.com (https://diyretainingwall.com/how-to-build-a-timber-wall-with-deadman-anchors/) | 6 rogueengineer.com (https://rogueengineer.com/how-to-build-landscape-timber-retaining-wall/) | 7 youtube.com (https://www.youtube.com/watch?v=l6Q33csD0qM) | 8 youtube.com (https://www.youtube.com/watch?v=RC-UQMM_CtY) | 9 logcabinhub.com (https://logcabinhub.com/log-cabin-notches/) | 10 backyardboss.net (https://vertexaisearch.cloud.google.com/grounding-api-redirect/AUZIYQF6wCb3Uvf4Xn79WULx4E6VL0HfIpPxPbAGnEepA7Fkicrzz0hfPg9G8Iud7dofOe8nQ1X3Y6Us-7RQaWV8cLoPLtqLSatKgOF9a0nX5H96Zs3O_SirFcArG9_N9p2mKsY9kdnuExw_xtgCzc-MI66kLPK5hDUvuBObduFRNdNwoiYIFg==) | 11 usda.gov (https://www.fs.usda.gov/t-d/pubs/pdfpubs/pdf15232802/Part12-Appendix_E-Pages-259-278.pdf) | 12 doc.govt.nz (https://dxcprod.doc.govt.nz/globalassets/documents/science-and-technical/casn165.pdf)

 . Moving or replacing an official surveyor’s pin with a driftwood log can lead to legal disputes or even misdemeanor charges in some states (FindLaw, 2025).
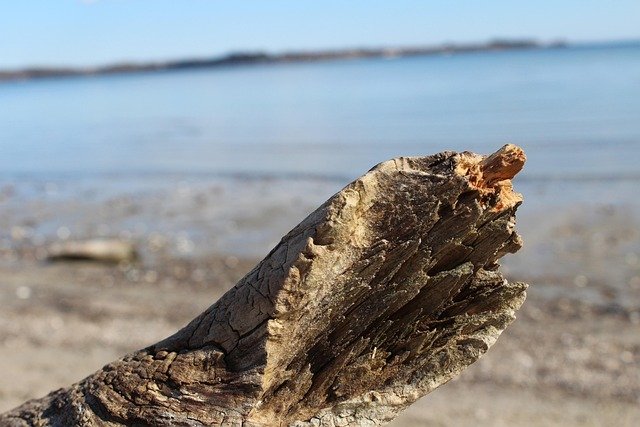 . In the early days of American surveying, “witness trees” were notched and recorded in deeds to help find boundary stones (Wikipedia, 2024). Planting a long-lived species like an oak or a yew ten feet behind your driftwood monolith creates a “two-stage” marker that will last for centuries.
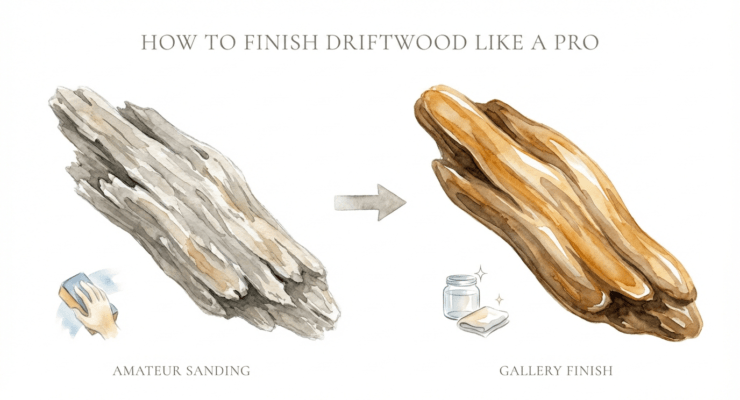
 .
.  . Instead of using sandpaper to cut the fibers, you use a hard, smooth object like a polished stone, a deer antler, or a piece of bone to rub the wood. This creates a natural, deep luster that looks like it’s coming from inside the wood rather than sitting on top of it. Heat generated by the friction helps melt the natural lignins in the wood, effectively “glazing” the surface with its own resins.
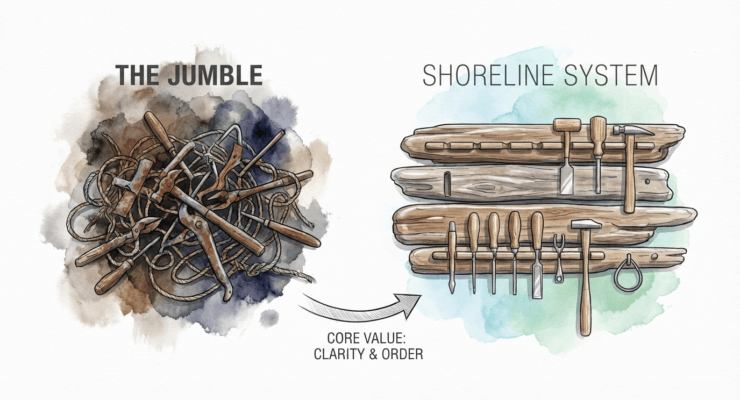
 . Unlike uniform pegboards or industrial metal racking, driftwood offers organic hooks and notches that perfectly cradle the irregular shapes of hand tools. Every curve in a branch or knot in a log can serve as a natural resting place for a mallet, a pair of pliers, or a set of chisels.
 . However, if you are building a tool rack that will also serve as a mounting point for a vise or anvil, you must account for this 10% upper-bound reduction in structural integrity.
 . This “engineered organic” approach allows you to build structures that are both beautiful and industrially capable.