Why let your driftwood just sit there when it could be the engine that keeps your garden alive? Most driftwood art is static, but with basic mechanical knowledge, these salt-hardened limbs become the perfect durable components for a wind-vane pump. Unlike plastic or thin metal, the density of ocean-cured timber provides the torque needed to move water during the afternoon sea breeze. It’s functional art that works while you sleep.
Homesteaders and coastal gardeners often look for ways to marry form and function. A driftwood wind-pump represents a peak of pioneer-grit engineering, turning salvaged beach timber into a self-regulating irrigation system. This machine does more than look pretty on a fence post. It harnesses the kinetic energy of the coast to lift water from rain barrels or shallow wells, ensuring your plants stay hydrated without a single watt of grid power.
Building one requires a shift in perspective. 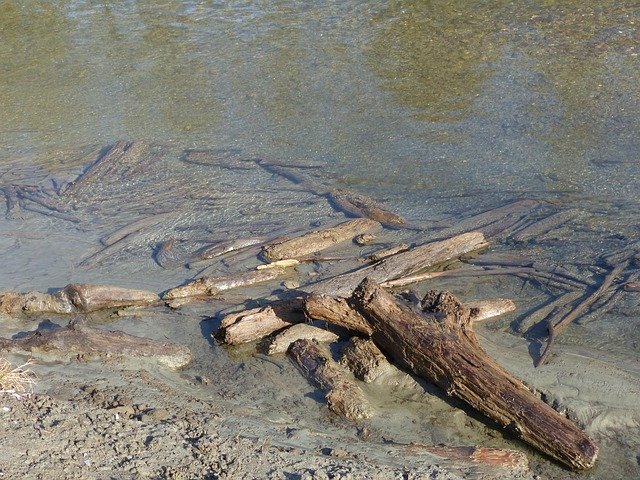 . You aren’t just carving a sculpture; you are balancing a rotor and timing a piston. Ocean-cured wood offers a unique advantage here because the salt has already worked into the fibers, creating a rot-resistant material that stands up to the very wind that drives it. This guide will walk you through the transformation of raw beach salvage into a working mechanical pump.
Driftwood Wind-pump For Garden Watering
A driftwood wind-pump is a mechanical device built primarily from salvaged timber that uses wind energy to drive a reciprocating water pump. These systems are common in coastal regions or off-grid homesteads where reliable electricity is scarce but wind is abundant. The concept relies on the “American Farm Windmill” architecture but substitutes industrial steel for the dense, weather-beaten limbs found along the shoreline.
Historically, wind-driven pumps have been the backbone of agricultural expansion. Pioneers used them to pull water from deep aquifers to sustain livestock. In the context of a modern garden, a driftwood version scales this technology down. It typically consists of a multi-blade rotor made of carved driftwood, a crankshaft that converts rotation into vertical motion, and a simple piston pump housed at the base.
This machine exists because it solves a specific problem: consistent irrigation in remote areas. It provides a low-cost, low-maintenance way to move water. Because the wood has been naturally seasoned by the sea, it possesses a structural integrity that store-bought pine lacks. This makes it ideal for a machine that must survive the high-torque environment of a coastal gale.
How the Mechanics of a Driftwood Pump Work
The heart of the system is the rotor. Wind flows over the carved driftwood blades, creating a pressure differential that forces the assembly to spin. Because driftwood is irregular, each blade must be carefully pitched to catch the air. Most successful designs use a multi-blade “high-solidity” approach. This means more wood surface area, which translates to high starting torque—essential for overcoming the initial weight of a water column in the pipes.
Once the rotor is spinning, the rotation travels through a horizontal shaft to a crank or eccentric wheel. This part is the mechanical translator. . It takes the circular movement of the wind and turns it into an up-and-down “stroke.” A connecting rod, often made of a straight piece of cured hardwood or a salvaged metal pipe, links this crank to the pump piston below. Each rotation of the blades results in one full pump cycle.
The pumping action happens at the bottom of the tower. A simple piston pump consists of a cylinder and two one-way check valves. On the upstroke, the piston creates a vacuum that pulls water into the cylinder through the bottom valve. On the downstroke, the bottom valve closes, and the water is forced through a valve in the piston itself or out through a discharge pipe. This cycle repeats indefinitely as long as the wind keeps the driftwood blades turning.
Benefits of Using Ocean-Cured Timber
Durability stands as the primary advantage of driftwood over standard lumber. Timber that has spent months or years in the ocean undergoes a natural modification process. The salt replaces some of the moisture in the wood cells, effectively “pickling” the timber. This makes it far less likely to rot when exposed to the humid, spray-heavy environment of a coastal garden.
The density of this wood provides the necessary mass for torque. Small, lightweight plastic turbines often spin fast but lack the “oomph” to lift significant amounts of water. Driftwood limbs are heavy and solid. Once they catch a breeze, their momentum helps keep the pump moving through inconsistent gusts. You get a steady, rhythmic pumping action that light-duty materials cannot replicate.
Aesthetic value is another measurable benefit. A well-constructed driftwood pump looks like it grew out of the landscape. It avoids the industrial “stagnant decor” look of a metal windmill. Instead, it becomes a conversation piece that actively serves the environment. It requires no fuel, creates no noise pollution, and uses 100% renewable materials for its structural frame.
Challenges and Common Pitfalls
Imbalance is the most frequent failure point for DIY wind-pumps. Unlike a factory-made metal blade, two pieces of driftwood will never weigh exactly the same. An imbalanced rotor creates severe vibrations. Over time, these vibrations will shake the bearings apart and eventually snap the main shaft. You must spend significant time weighing your blades and shaving off small amounts of wood to find the center of gravity.
Mechanical wear at the pivot points can also cause early failure. Many beginners forget that a wind-pump is a machine that runs 24 hours a day. Friction is a constant enemy. If you use wood-on-wood joints for the crankshaft, they will eventually smoke and seize. Using sealed ball bearings or sintered bronze bushings is essential for a pump that you want to last more than one season.
Ignoring the “cut-in” speed is another common error. This is the minimum wind speed required to start the pump moving. If your driftwood rotor is too heavy or your pump cylinder is too large, the machine might never start spinning until a dangerous storm hits. You need to match the diameter of the rotor to the size of the pump. A large rotor with many blades is better for low-wind areas because it generates the torque needed to overcome the “break-out” friction of the piston seals.
Limitations and Environmental Constraints
Wind reliability is a hard constraint. If your garden is shielded by tall buildings or dense forest, a driftwood pump will struggle to find “clean” air. Turbulence makes the turbine hunt for the wind, causing the tail vane to whip back and forth. This puts lateral stress on the tower that can lead to structural collapse. A minimum height of 10 to 15 feet is usually required to clear local obstructions and reach steady laminar flow.
Depth limits also apply to simple mechanical pumps. A small driftwood setup is perfect for pulling water from a rain barrel or a shallow well (up to 15 feet). However, if your water table is 100 feet down, a simple direct-drive system won’t have enough mechanical advantage. Deep-well pumping requires complex gearing systems to reduce the load on the rotor, which moves beyond the scope of most simple driftwood projects.
Maintenance cannot be ignored. While driftwood is rot-resistant, the mechanical components like bolts, chains, and valves are still subject to salt corrosion. You must climb the tower at least twice a year to grease the bearings and check the tension on the linkage. Without this routine care, even the sturdiest sea-cured timber won’t save the machine from a mechanical seizure.
Comparison: Driftwood vs. Commercial Metal Pumps
| Factor | Driftwood (DIY) | Commercial (Steel/Aluminum) |
|---|---|---|
| Initial Cost | Low (Mostly salvaged materials) | High ($500 – $3,000+) |
| Durability (Salt Air) | Excellent (Natural resistance) | Moderate (Prone to oxidation) |
| Ease of Repair | Easy (Standard tools) | Difficult (Requires specific parts) |
| Startup Torque | High (Due to blade mass) | Variable (Depends on design) |
| Aesthetic Appeal | Organic/Artistic | Industrial/Functional |
While a commercial pump offers predictable performance, the driftwood pump excels in the “pioneer-grit” category. It thrives in coastal environments where salt spray eats through galvanized steel over time. The DIY approach also allows for “on-the-fly” modifications. If you find your pump is too slow, you can simply carve a larger tail vane or add another blade to the rotor using materials found on your next beach walk.
Practical Tips for Success
Start by selecting the right wood.  . Look for pieces that are “bone-dry” and have been stripped of bark by the waves. Cedar, oak, and larch driftwood are the gold standards. These species have tight grains that hold screws well even after years of exposure. Avoid “punky” or soft wood that feels spongy when you press a fingernail into it; this wood will disintegrate under the centrifugal forces of the turbine.
Balance your rotor using the “static balance” method. Mount your finished rotor on a temporary horizontal shaft and let it spin freely. The heavy side will always rotate to the bottom. Drill small holes in the “light” blades and fill them with lead fishing weights or epoxy, or simply shave wood off the heavy side until the rotor stays in any position you move it to. A balanced rotor is the difference between a whisper-quiet pump and a vibrating wreck.
Lubrication is your best friend. Use marine-grade grease for all metal-to-metal contacts. If you are using wooden bushings, soak the wood in hot linseed oil for several days before assembly. This saturates the fibers and creates a self-lubricating surface that resists water penetration. This small step can double the life of your mechanical linkage.
Advanced Considerations for High Performance
For those looking to push the efficiency of their driftwood pump, consider the “pitch” of your blades. A blade that is flat against the wind has high torque but very low speed. By angling the blades at roughly 15 to 20 degrees relative to the plane of rotation, you allow the air to “slide” off the surface, creating lift. This allows the turbine to spin much faster, which increases the frequency of the pump strokes.
Implementing a “furling” mechanism is an advanced but vital upgrade for high-wind areas. Furling is a safety feature that turns the rotor out of the wind during a storm. You can achieve this by mounting the tail vane on a spring-loaded hinge. When the wind pressure exceeds a certain limit, the tail folds, pulling the main rotor sideways so it isn’t destroyed by excessive RPMs.
You might also experiment with gear ratios. If you find that your rotor spins fast but can’t lift the water, you can use a chain-drive or belt-drive system to reduce the output speed. A 2:1 reduction means the rotor turns twice for every one stroke of the pump. This effectively doubles your lifting power, allowing you to use a larger pump cylinder or pull from a deeper source.
Scenario: The 5-Foot Coastal Garden Setup
Imagine a small raised-bed garden located 50 yards from the high-tide line. The gardener has a 500-gallon cistern that collects rainwater from a shed roof. To get this water into the irrigation lines, they build a 10-foot tripod tower made of 4×4 cedar posts. On top sits a 4-foot diameter driftwood rotor consisting of 8 hand-carved blades.
Every afternoon, as the sea breeze kicks up to 10 mph, the driftwood rotor begins its rhythmic churn. The crankshaft moves a 1/2-inch PVC push-rod up and down. At the base, a 2-inch diameter piston pump pulls water from the cistern and pushes it through a filter into a drip irrigation manifold. In a single afternoon, the system moves 150 gallons of water—enough to deeply soak the garden without the owner lifting a finger.
The only cost involved was a set of stainless steel bolts, two pillow block bearings, and the leather used for the pump seals. The rest was scrounged from the shoreline. This setup demonstrates how a “kinetic pump” outperforms “stagnant decor.” It isn’t just a statue; it’s a living part of the garden’s ecosystem.
Final Thoughts
Building a driftwood wind-pump is a rewarding challenge that blends artistic expression with rugged engineering. It forces you to understand the wind and the water on a visceral level. By choosing to work with ocean-cured timber, you are opting for a material that has already survived the harshest conditions the planet has to offer. This makes your pump a legacy piece, capable of standing guard over your garden for decades.
The value of this project lies in its independence. You are no longer reliant on the power grid or expensive plastic hardware that degrades in the sun. You have created a machine that is as resilient as the coastline itself. It serves as a reminder that the best solutions are often lying right at our feet, waiting to be picked up and put to work.
Take the time to experiment with your designs. Start with a small rotor and a simple pump, then scale up as you learn the quirks of your local wind patterns. Every piece of driftwood has a story; giving it a job as the heart of your garden is the best way to continue that narrative. Harness the breeze, trust the timber, and watch your garden thrive on the power of the sea.
Sources
1 wikipedia.org (https://en.wikipedia.org/wiki/Windpump) | 2 historyofwindmills.com (https://www.historyofwindmills.com/windmill-history/windmill-water-pump/) | 3 instructables.com (https://www.instructables.com/DIY-Wind-Powered-Water-Pump/) | 4 lowimpact.org (https://www.lowimpact.org/categories/utilities/wind-pumps/) | 5 sika.com (https://industry.sika.com/en/home/renewable-energies/wind-energy/trends-and-challenges/restoring-equilibrium.html) | 6 alternative-energy-tutorials.com (https://www.alternative-energy-tutorials.com/wind-energy/wind-water-pumping.html) | 7 lowimpact.org (https://www.lowimpact.org/wp-content/uploads/0-9549171-2-Xtxt.pdf)
 . Professional artisans know that the difference between a cluttered workshop and a high-end studio lies in how the raw material is managed.
 . It changes the way you look at a shoreline, shifting your focus from “that looks cool” to “that fits my structural needs.” This guide will help you transition from the chaotic state of a Beach Jumble to the refined discipline of a Timber Library.
 . Collecting driftwood is not a free-for-all in every jurisdiction. Federal and state parks often classify driftwood as part of the ecosystem, providing essential habitat for shorebirds and insects. Removing it can result in heavy fines. In the UK, for instance, the Coast Protection Act protects certain beach materials to prevent coastal erosion. Always seek permission from private landowners or check with local authorities to ensure your sourcing is legal and ethical.
 .
.  . You need four primary pieces: two vertical “side struts” and two horizontal “beams.” Ensure the beams are relatively straight to make measuring your warp notches easier.
 . Higher tension leads to a more professional, tighter weave in your finished textiles.
 . Unlike uniform pegboards or industrial metal racking, driftwood offers organic hooks and notches that perfectly cradle the irregular shapes of hand tools. Every curve in a branch or knot in a log can serve as a natural resting place for a mallet, a pair of pliers, or a set of chisels.
 . However, if you are building a tool rack that will also serve as a mounting point for a vise or anvil, you must account for this 10% upper-bound reduction in structural integrity.
 . This “engineered organic” approach allows you to build structures that are both beautiful and industrially capable.