Turn your property line into a work of art that feels like an extension of the beach. Solid fences act like sails, catching the wind and eventually blowing over. The ‘Wild Barrier’ approach uses the natural curves of driftwood to create a screen that breaks the wind’s force while maintaining total privacy. It doesn’t scream ‘Keep Out’—it whispers ‘Peace.’ Best of all? No two panels are ever the same, and the material cost is exactly zero.
There is a specific kind of satisfaction that comes from building something with your own hands using materials provided by the earth. In an age of mass-produced vinyl and pressure-treated pine, a driftwood fence stands as a testament to patience and a keen eye. You aren’t just putting up a barrier; you are curateing a gallery of history, where every silvered branch and salt-worn knot tells a story of the deep sea.
This guide is for the person who isn’t afraid to get a little sand in their boots. We are going to look at the “Wild Barrier” method, a technique that prioritizes structural integrity through natural airflow. Instead of fighting the elements, we are going to work with them. By the time we’re done, you’ll have a fence that can stand up to a gale while making your neighbors stop and stare in envy.
Driftwood Privacy Fence Diy
A Driftwood Privacy Fence is a perimeter structure built primarily from wood that has been washed ashore by tides, winds, or waves. Unlike standard fencing, which relies on uniform, milled lumber, this DIY approach uses the organic, irregular shapes of “sea-timber.” It exists at the intersection of landscape architecture and salvage art, offering a functional solution for those living in coastal environments or anyone wanting to bring a rugged, nautical aesthetic to their backyard.
In the real world, these fences are more than just pretty faces. They are highly functional windbreaks. Because driftwood is naturally “pre-weathered,” having survived months or years in saltwater and sun, it is exceptionally resilient. It has already done its shrinking and warping. What you are left with is the heartwood—the toughest part of the tree—honed by the elements into a material that is as strong as it is beautiful.
Imagine the difference between a solid wall and a thicket of trees. When a storm rolls in, the solid wall takes the full force of the wind, creating a high-pressure zone that can rip posts right out of the ground. A driftwood fence, with its gaps and overlapping curves, acts more like that thicket. It allows 25-50% of the air to pass through, diffusing the wind’s energy and preventing the “sail effect” that destroys traditional privacy fences.
The Hunt: How to Source Your Timber
Before you pick up a hammer, you have to find your wood. This is the most time-consuming part of the process, but also the most rewarding. You aren’t just shopping at a big-box store; you are scouting for the perfect pieces. However, you must be aware of the legalities. Driftwood collection is governed by a patchwork of federal, state, and local laws designed to protect coastal ecosystems.
In states like Oregon and California, small amounts of driftwood can often be taken for personal use, but using mechanized equipment like trucks or winches on the beach is strictly prohibited. In Hawaii, the law generally views driftwood as the property of the finder. Always check with your local Department of Natural Resources (DNR) or park headquarters. Avoid taking wood that is deeply embedded in dunes, as these pieces are essential for preventing shoreline erosion.
Look for “structural” pieces first—thick, relatively straight logs that can serve as secondary posts or horizontal rails. Then, look for the “character” pieces—twisted roots, sun-bleached branches, and weathered planks. The best time to hunt is right after a major storm when the tide is heading out, leaving a fresh “wrack line” of debris on the sand.
The Prep Work: Cleaning and Preserving
Once you’ve hauled your treasure home, you can’t just nail it up. Freshly found driftwood is often home to salt, sand, and hitchhiking pests. To ensure your fence lasts for decades, you need to prep the wood properly. Start by dry-brushing every piece with a stiff-bristled brush to knock off loose bark and dried mud. If you have an air compressor, use it to blow out the deep crevices where spiders and beetles like to hide.
The “Golden Rule” of driftwood preservation is the bleach soak.  . For smaller pieces, submerge them in a 1-part bleach to 9-parts water solution for at least 6 to 24 hours. This kills bacteria and prevents the wood from rotting once it’s out of the saltwater environment. For larger logs that won’t fit in a tub, use a garden pump sprayer to saturate them with the same solution. Let the wood dry in the sun for at least a week until it turns that iconic, bone-white silver.
The Build: Step-By-Step Construction
The Wild Barrier is built on a “hybrid” framework. While the infill is wild driftwood, the skeleton should be rock-solid. For longevity, I recommend using 4×4 pressure-treated posts or 2-3/8″ galvanized steel posts. If you want a 100% natural look, you can use large, straight driftwood logs as posts, but they must be “Class A” rot-resistant species like Cedar, Redwood, or Black Locust.
1. Setting the Foundation
Follow the “One-Third Rule”: at least one-third of your post’s total height should be underground. If you want a 6-foot fence, you need an 8-foot or 9-foot post buried 2 to 3 feet deep. 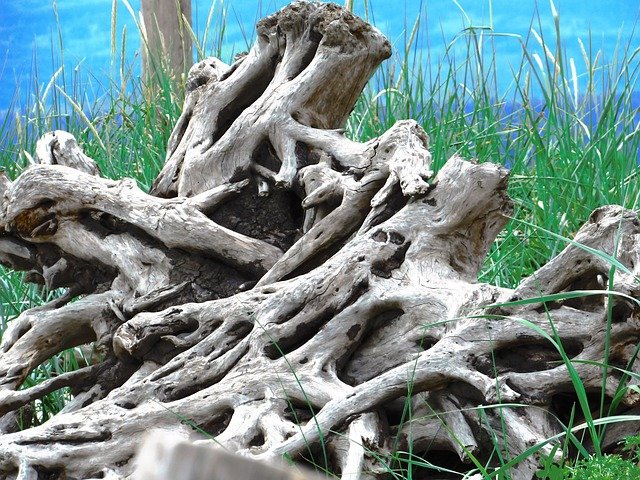 . Dig your holes, drop in 6 inches of gravel for drainage, and set your posts in concrete. Slope the top of the concrete away from the post to prevent water from pooling at the base—this is where most fences fail.
2. Installing the Rails
Once your concrete has cured for 48 hours, it’s time for the horizontal “skeleton.” Use 2×4 pressure-treated rails or thick, straight driftwood logs. You’ll want three rails for a standard 6-foot fence: one 6 inches from the ground, one in the middle, and one 6 inches from the top. Secure these using 3-inch stainless steel screws. . Never use standard nails; the salt trapped in driftwood will corrode them in months, leaving ugly black streaks.
3. Weaving the Barrier
This is where the art happens. Start at one end and begin attaching your driftwood vertically. Don’t worry about making them perfectly straight. Overlap the curves. If a piece of wood bows out to the left, find a piece that bows to the right to nestle against it. This creates a “breathable” screen that provides 100% visual privacy but allows the wind to whisper through the gaps. Aim for a 1/8-inch to 1/4-inch gap between pieces for expansion and airflow.
Benefits of the Wild Barrier Approach
The primary advantage is cost. If you live near a coastline or a large river, the main component of your fence is free. While a professional cedar privacy fence can cost between $15 and $45 per linear foot, a driftwood fence only requires the cost of posts, concrete, and fasteners. It is the ultimate “upcycled” project.
Beyond the price tag, you have the benefit of superior wind resistance. Traditional solid fences create a vacuum on the leeward side during high winds, which causes turbulence and eventually snaps the posts. Because the Wild Barrier is naturally porous, it breaks the wind’s velocity without fighting it. It’s the difference between a sail and a net.
Finally, there is the aesthetic value. A driftwood fence is a living sculpture. It changes color with the rain, turning dark and moody, then bleaching back to silver in the afternoon sun. It blends perfectly into coastal, desert, or rustic landscapes, acting as a soft transition between the man-made and the wild.
Challenges and Common Mistakes
The most common mistake is failing to account for the weight. Driftwood can be deceptively heavy, especially if it’s still holding moisture. If you don’t anchor your posts deep enough or use enough concrete (aim for 60-80 lbs per post), the fence will eventually lean. Always err on the side of over-engineering your foundation.
Another pitfall is using the wrong fasteners. Many DIYers reach for “exterior” deck nails. These are fine for pine, but driftwood is a different beast. The high mineral and salt content in sea-timber acts as an electrolyte. When moisture hits, it triggers a galvanic reaction that eats through cheap coatings. Always use 304 or 316-grade stainless steel. It’s more expensive, but it won’t fail when the salt air rolls in.
Legal trouble is also a real risk. I’ve seen people lose their trucks because they drove onto a protected beach to load up logs. You must respect the “Hand-Carry Only” rules in most jurisdictions. If you can’t carry it back to your vehicle by hand, leave it for the ecosystem. This keeps you on the right side of the law and ensures you aren’t stripping the beach of vital habitat.
Limitations and Constraints
A driftwood fence is not ideal for high-security areas. Because of the irregular shapes, it’s easier to climb than a flat-panel fence. It also isn’t a great choice if you have tiny pets that might squeeze through the organic gaps. While it blocks the “view,” it doesn’t provide the same airtight seal as a tongue-and-groove vinyl fence.
Environmental factors also play a role. If you live in an area with high termite activity and no history of salt-weathered wood, you must be hyper-vigilant about treating the wood. Driftwood that has spent years in the ocean is somewhat naturally resistant, but it’s not invincible. If your property is prone to dampness without much sun, the wood may eventually host moss or rot faster than it would in a dry, coastal environment.
Practical Comparison: Wild Barrier vs. Chainlink
When most people think of “budget” fencing, they think of chainlink. Let’s see how the Wild Barrier stacks up in a head-to-head comparison for a 100-foot run.
| Feature | Wild Barrier (Driftwood) | Chainlink Fence |
|---|---|---|
| Material Cost | $0 (Free Sourcing) | $800 – $1,500 |
| Privacy Level | High (Visual Block) | Low (Transparent) |
| Wind Resistance | Excellent (Porous) | Excellent (Open Mesh) |
| Estimated Lifespan | 15 – 25 Years | 20 – 30 Years |
| Aesthetic Appeal | Artistic / Natural | Utilitarian / Industrial |
Practical Tips for Success
To get the best result, don’t rush the “puzzle.” When you are attaching the vertical driftwood pieces, step back every five feet and look at the fence as a whole. You want a balanced mix of thick and thin pieces. If one section looks too heavy, break it up with some thinner, spindly branches.
- Use a spacer: Even though the wood is irregular, try to keep the bottom of the fence at least 2 inches off the ground. This prevents “ground-wicking,” where moisture travels from the soil up into the wood, causing premature rot.
- Pilot holes are your friend: Driftwood is often very dry and brittle. If you try to drive a screw directly into a thin piece, it will likely split. Always drill a pilot hole slightly smaller than your screw diameter.
- The “Shadow Line”: If you want absolute privacy, use a “Board-on-Board” style. Attach one layer of driftwood with 2-inch gaps, then go back and cover those gaps with a second layer of driftwood on the other side of the rails.
Advanced Considerations for Serious Builders
For those looking to take the Wild Barrier to the next level, consider “Living Integration.” This involves planting climbing vines like Star Jasmine or Honeysuckle at the base of the driftwood. The irregular texture of the wood provides the perfect “ladder” for vines to grab onto. Over time, the silver wood and green leaves will weave together, creating a literal wall of nature that smells as good as it looks.
You can also experiment with lighting. Because driftwood has so many natural hollows and interesting shadows, it is the perfect candidate for low-voltage LED uplighting. Placing a small warm-white spotlight at the base of a particularly twisted root section can turn your fence into a dramatic focal point at night.
Scenario: The Storm-Proof Shoreline Barrier
Let’s look at a practical application. A homeowner on the Outer Banks of North Carolina has a property that faces the sound. Every hurricane season, the wind gusts reach 80 mph. A traditional 6-foot dog-ear fence would be flat on the ground within an hour. By building a Wild Barrier with 50% porosity in the top two feet, the wind passes through the “screen” rather than pushing against it.
The homeowner uses 4-foot deep footings and 4×4 cedar posts. They weave the driftwood tightly at the bottom 3 feet for pet containment and keep the top 3 feet “airy” and artistic. After a Category 1 storm, the fence remains standing, while the neighbor’s solid pine fence requires a $2,000 replacement. This is the power of working with the wind instead of against it.
Final Thoughts
Building a driftwood privacy fence is a labor of love that rewards you with a structure as unique as a thumbprint. It requires a different mindset than standard carpentry—you have to listen to the wood, find where the curves want to fit, and accept that perfection lies in the imperfections. It is a slow, methodical process that connects you to the rhythm of the tides and the history of the forest.
Whether you are looking to save money, solve a wind-resistance problem, or simply create something beautiful, the Wild Barrier approach is a proven method for success. It’s a way to reclaim what the ocean has discarded and turn it into a legacy for your home. Grab your boots, head to the shoreline, and start your hunt. The perfect piece of your future fence is likely waiting for you on the next high tide.
Sources
1 diydriftwood.com (https://diydriftwood.com/driftwood-refinishing-techniques/) | 2 cardinalfenceinc.com (https://cardinalfenceinc.com/what-kind-of-fence-is-best-for-a-windy-area-5/) | 3 dksstores.com (https://vertexaisearch.cloud.google.com/grounding-api-redirect/AUZIYQHIRSvKgg6_lZWTFsn7u2EhRhn08n5jQ1Vi6SfVJEEmrH76lrWLDQETLHNwythN9671zErJocgV4X5l8qf5NK6gvXyBRwntCcysZ-IHYOAIet-kMlZ4-_IyEXVa) | 4 justia.com (https://vertexaisearch.cloud.google.com/grounding-api-redirect/AUZIYQGDAzYxZoXbdXpqbaxU_0smvf6nSTANen90xSU9YPsSChQ6_-cdNWtOUogM4ZUx-OyHRuqMPu-oN12Dh3EqT2iS1tH9GrJZSujOLeOrxY4J0nQkm-q_zjIBZx5U4zwsAB5m4cmdzWHWwRqd5DdMZfE2Xs1hywf0iQuk7aTb) | 5 lowes.com (https://www.lowes.com/n/how-to/install-a-wood-fence) | 6 wikihow.com (https://www.wikihow.com/Preserve-Driftwood) | 7 extremehowto.com (https://extremehowto.com/diy-privacy-fence/) | 8 staytuff.com (https://staytuff.com/blog/wind-resistant-fence-design/) | 9 acostafence.com (https://acostafence.com/what-are-the-wind-resistance-properties-of-the-different-types-of-fences/) | 10 veteransfences.com (https://www.veteransfences.com/knowledge-library/best-wood-for-fence-posts/) | 11 securityfenceminneapolis.com (https://securityfenceminneapolis.com/what-type-of-wood-fence-lasts-the-longest/) | 12 angi.com (https://www.angi.com/articles/chain-link-fence-vs-wood.htm) | 13 slaglefence.com (https://slaglefence.com/is-chainlink-fence-cheaper-than-wood-a-cost-comparison-guide/)