• Skip to main content
  • Skip to primary sidebar
  • Terms and Conditions
  • Privacy Policy
  • Contact

Driftwood 4 Us

Just About Driftwood

home decor

Driftwood Finish Diy

May 4, 2024 by admin

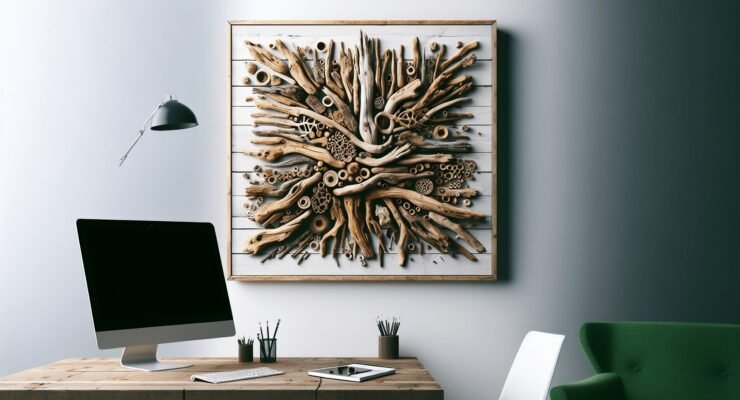
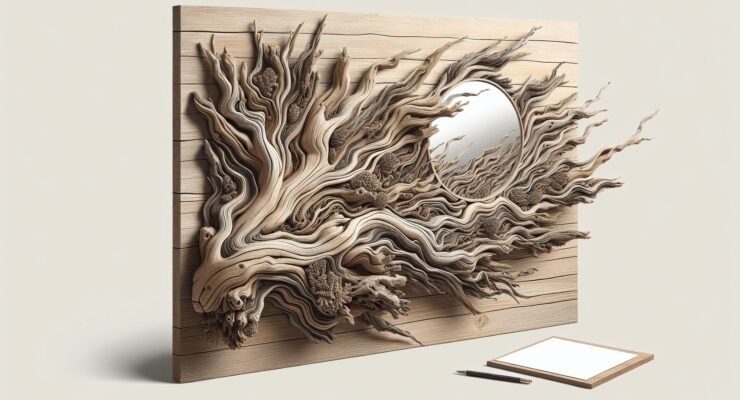
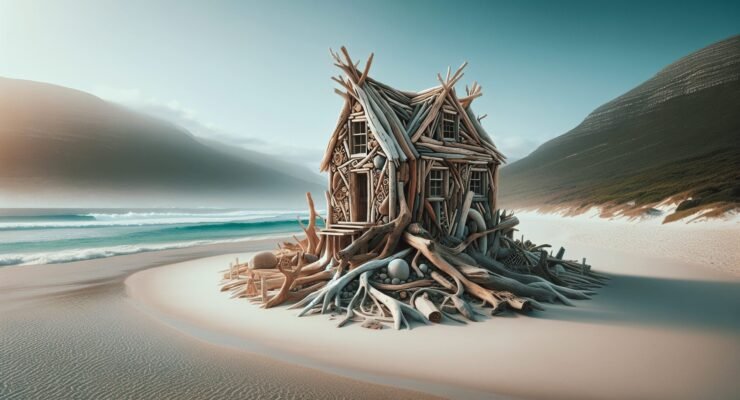
Imagine transforming your plain wooden furniture into a stunning piece of art with a captivating driftwood finish. With this unique DIY technique, you can bring a touch of coastal charm and rustic elegance to your home decor. By incorporating the natural beauty of driftwood, you can create a weathered, sun-bleached effect that adds character and warmth to any piece of wood. This simple yet creative process allows you to unleash your inner artist and breathe new life into old furniture. Let’s explore the step-by-step process of achieving the mesmerizing driftwood finish DIY and unveil the secrets behind this popular trend. Get ready to embark on a delightful journey of creativity and craftsmanship.

Driftwood Finish Diy

Materials Needed

To start your driftwood finishing project, you will need the following materials:

Sanding block or sandpaper

To prepare the driftwood, you will need a sanding block or sandpaper to smooth out any rough edges and create a clean surface for the finish.
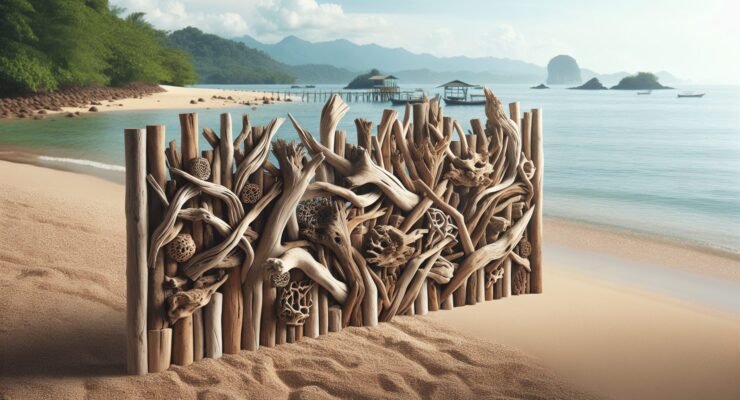
Driftwood pieces

Collect or purchase driftwood pieces of various sizes and shapes that you would like to finish. The unique patterns and textures of driftwood make for beautiful and rustic home decor pieces.

Varnish or paint

Choose between varnish or paint as your finish for the driftwood. Varnish will enhance the natural colors and textures of the wood, while paint allows you to introduce a pop of color or match it with your existing decor.

Brushes

Select a set of brushes suitable for applying varnish or paint. Different brush sizes will come in handy for covering both large and small areas of the driftwood.

Protective coating

To protect the finish and preserve the beauty of your driftwood, you will need a protective coating such as polyurethane. This will help prevent moisture damage and ensure longevity.

Tarp or drop cloth

To protect your work surface, lay down a tarp or drop cloth. This will catch any drips or spills during the finishing process and make clean-up easier.

Optional: wood stain or whitewash paint

If you want to experiment with different finishes and add more character to your driftwood, you can consider using wood stain or whitewash paint. These optional materials can give your driftwood a weathered or aged appearance.

Preparing the Driftwood

Before you can apply the finish to your driftwood, it’s important to prepare it properly. Follow these steps to get your driftwood ready for the finishing process:

Clean the driftwood

Start by cleaning the driftwood to remove any loose dirt or debris. You can use a soft-bristle brush or a cloth to gently scrub the surface. This will ensure that your finish adheres to the wood properly.

Remove any loose dirt or debris

Inspect your driftwood pieces and remove any loose dirt, moss, or other debris. You can use a small brush or compressed air to carefully clean the nooks and crannies of the driftwood.

Sand the driftwood

To achieve a smooth and polished finish, it’s important to sand the driftwood. Use a sanding block or sandpaper to gently sand the surface, concentrating on any rough edges or areas that need smoothing. Sand in the direction of the wood grain for best results.

Smooth out rough edges

If you come across any rough edges or splinters on the driftwood, use sandpaper or a sanding block to carefully smooth them out. This will not only improve the appearance of the finished piece but also make it safer to handle.

Wipe off excess dust

Once you have finished sanding, use a clean cloth or brush to wipe off any excess dust from the driftwood. This will ensure that the finish adheres smoothly and evenly to the surface.
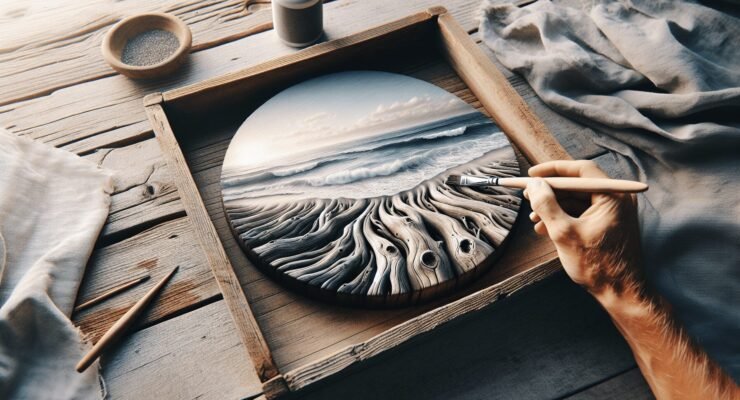
Applying the Finish

Now that your driftwood is prepared, it’s time to apply the finish of your choice. Follow these steps to achieve the desired look for your driftwood:

Choosing the finish

First, decide whether you want to use varnish or paint as your finish. Consider the overall aesthetic you want to achieve and whether you prefer a natural or colored look for your driftwood.

Varnish or paint

If you want to showcase the natural beauty of the driftwood, varnish is a great option. It will enhance the wood’s natural colors and textures while providing a protective coating. On the other hand, if you want to add a pop of color or match the driftwood with your existing decor, consider using paint.

Decide if you want a natural or colored look

Consider the overall look you want to achieve. If you prefer a natural appearance, opt for a clear varnish. For a colored look, choose paint in your desired hue.

Apply the finish

Using a brush or paint applicator, apply the chosen varnish or paint to the driftwood. Make sure to cover all sides and edges for a consistent finish. Apply multiple thin coats rather than one thick coat to avoid drips and uneven drying.

Brush or paint the varnish/color onto the driftwood

For varnish, brush it onto the driftwood in smooth, even strokes, following the direction of the wood grain. If using paint, apply it using a brush or applicator, ensuring full coverage and an even finish.

Allow it to dry between coats

Allow each coat of varnish or paint to dry completely before applying the next. Follow the manufacturer’s instructions for drying times, and be patient to ensure a professional-looking finish.

Optional: Staining or Whitewashing

If you want to add more character and depth to your driftwood, you can consider staining or whitewashing it. These techniques can create unique and eye-catching finishes. Here’s how you can do it:

Staining the driftwood

Choose a wood stain color that complements your decor or desired look. Apply the stain using a brush or cloth, making sure to cover the entire surface of the driftwood. Allow the stain to penetrate the wood for a few minutes before wiping off any excess with a clean cloth. This will create a rich, stained finish that highlights the natural grain patterns of the driftwood.

Choose a wood stain color

When selecting a wood stain color, consider the overall color scheme and style of your space. Darker stains can create a more dramatic and rustic look, while lighter stains can enhance a beachy or coastal vibe. Test the stain color on a small section of the driftwood to ensure it matches your vision.

Apply the stain with a brush or cloth

Using a brush or cloth, apply the wood stain onto the driftwood, making sure to cover all areas evenly. Work in small sections and follow the wood grain for a natural and uniform finish.

Wipe off excess stain

After applying the stain, use a clean cloth to wipe off any excess stain. This will prevent the driftwood from becoming too dark or uneven. Allow the stain to dry according to the manufacturer’s instructions before proceeding to the next steps.

Whitewashing the driftwood

If you prefer a more washed-out or weathered look for your driftwood, whitewashing is a great option. Here’s how you can achieve this effect:

Mix equal parts of water and white paint

Create a whitewash mixture by combining equal parts of water and white paint. Stir well until the mixture is smooth and consistent.

Brush or sponge the mixture onto the wood

Using a brush or sponge, apply the whitewash mixture onto the driftwood. Work in small sections, ensuring full coverage. The mixture will settle into the nooks and crannies of the driftwood, creating a beautiful, weathered appearance.

Wipe off excess whitewash

After applying the whitewash, use a clean cloth to wipe off any excess from the driftwood. This will allow the natural wood grain and texture to show through, adding depth and character to the finished piece.

Driftwood Finish Diy

Protecting the Finish

To ensure the longevity of your driftwood and protect the finish, it’s important to apply a protective coating. Follow these steps to keep your driftwood looking beautiful for years to come:

Applying a protective coating

Choose a protective coating such as polyurethane that is suitable for the type of finish you have applied to the driftwood. Polyurethane will provide a durable and water-resistant seal.

Choose a protective coating such as polyurethane

Research and select a protective coating that is specifically designed for the type of finish you have applied to the driftwood. For varnished driftwood, choose a polyurethane varnish. For painted driftwood, choose a protective coating suitable for painted surfaces.

Brush or spray on a thin layer

Using a brush or spray applicator, apply a thin layer of the protective coating onto the driftwood. Make sure to cover all surfaces and edges for comprehensive protection.

Allow it to dry completely

After applying the protective coating, allow it to dry completely according to the manufacturer’s instructions. Avoid touching or moving the driftwood until it is fully cured to prevent any damage to the finish.

Display and Use

Now that your driftwood is finished and protected, it’s time to decide where and how to display it. Consider these suggestions to showcase and utilize your driftwood:

Choosing where to display

Decide whether you want to display your driftwood indoors or outdoors. Consider the style and theme of the room or space where you plan to showcase it.

Indoor or outdoor

Driftwood can be a great addition to various indoor spaces, such as living rooms, bedrooms, or even bathrooms. It can also add a natural and coastal touch to outdoor areas like patios or gardens. Choose a location that enhances the overall aesthetic and ambiance you want to create.

Consider the style and theme of the room or space

Think about the existing style and theme of the room or space where you will display the driftwood. It should complement and enhance the overall decor and create a cohesive look. For example, a piece of driftwood with a natural finish can add a rustic touch to a farmhouse-style room, while a brightly painted driftwood can be a statement piece in a vibrant and modern space.

Using the driftwood

Apart from displaying the driftwood as standalone decor, you can also use it in various creative ways:

Decorate with other items

Arrange the driftwood along with other decorative items such as seashells, candles, or framed photos. This can create a visually appealing and personalized display.

Create a centerpiece

Place a group of driftwood pieces in the center of a dining table or coffee table to create a unique centerpiece. You can add additional elements like flowers or small trinkets to enhance the visual impact.
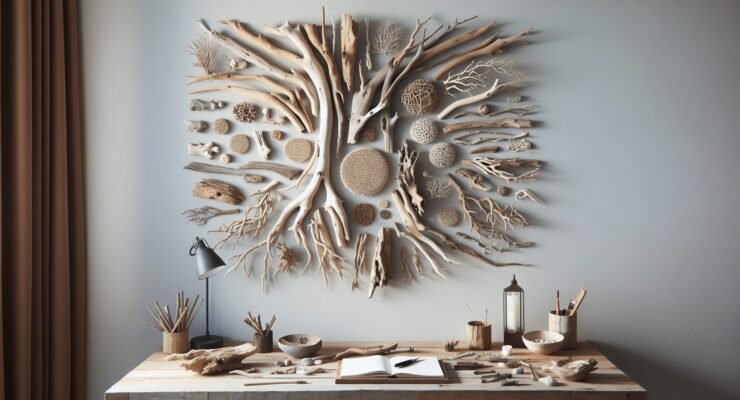
Make a wall hanging

Attach a string or wire to the driftwood and hang it on a wall. This can serve as a stylish and eye-catching piece of wall art. You can even hang smaller driftwood pieces together to create a larger statement piece.

Maintenance

To keep your driftwood looking its best and maintain its finish, you need to follow proper maintenance practices. Consider these tips:

Dust regularly

Dust the driftwood regularly using a soft cloth or duster to prevent the buildup of dirt and debris. This will help maintain its appearance and prevent any damage to the finish.

Wipe with a damp cloth

If you notice any stains or spills on the driftwood, wipe them off immediately with a damp cloth. Avoid using harsh chemicals or abrasive cleaners, as they can damage the finish or the wood itself.

Touch up the finish if needed

Over time, the finish on the driftwood may wear off or become dull. If you notice any areas that need touching up, lightly sand the affected area and reapply the appropriate finish, following the same steps as before.

Reapply protective coating if necessary

Depending on the exposure to sunlight, humidity, and other environmental factors, the protective coating on the driftwood may wear off. If you notice any signs of wear, lightly sand the surface, remove any dust, and apply a fresh coat of protective coating.

Safety Precautions

When working on your driftwood finishing project, it’s essential to prioritize safety. Follow these precautions to ensure a safe and enjoyable DIY experience:

Work in a well-ventilated area

To avoid inhaling fumes from the varnish or paint, make sure to work in a well-ventilated area. Open windows or use a fan to improve air circulation.

Wear protective gloves and goggles

Protect your hands and eyes by wearing gloves and goggles. This will prevent any accidental injuries from splinters, sharp edges, or any chemicals used during the finishing process.

Avoid breathing in fumes from varnish or paint

As you work with varnish or paint, be mindful of the fumes they emit. Avoid breathing in these fumes by ensuring proper ventilation and wearing a mask if needed.

Dispose of any waste materials properly

Dispose of any waste materials, such as used brushes, sanding dust, or empty containers, properly. Follow local regulations for the disposal of these materials to minimize environmental impact.

Tips and Tricks

To further enhance your driftwood finishing project, consider these tips and tricks:

Experiment with different finishes

Don’t be afraid to experiment with different finishes and techniques. Try mixing varnish and stain for a unique look or combine multiple layers of whitewash for a weathered effect. The beauty of DIY projects is the opportunity to explore and create your own unique style.

Combine varnish and stain for a unique look

If you want to add depth and character to your driftwood, consider combining varnish and stain. Apply a layer of varnish to enhance the natural colors and textures of the wood, and then apply a wood stain in a complementary color on top. This will create a unique and eye-catching finish.

Use multiple layers of whitewash for a weathered effect

To achieve a weathered or aged look, apply multiple layers of whitewash. Allow each layer to dry before applying the next, and vary the intensity of the whitewash to create depth and dimension. This technique can give your driftwood a beautifully worn and coastal appearance.

Try different techniques for distressing the driftwood

If you want to create a more rustic or distressed look for your driftwood, try different distressing techniques. You can use sandpaper or a wire brush to create dents, scratches, or rough patches on the surface. This will add texture and a sense of history to your finished piece.

Conclusion

Driftwood finishing is a versatile DIY project that allows you to transform natural materials into unique works of art. By following the steps outlined in this article, you can create beautiful and rustic home decor pieces that reflect your personal style. From choosing the right materials and finishes to displaying and maintaining your driftwood, each step contributes to the overall aesthetic and longevity of your finished pieces. So, unleash your creativity and enjoy the rewarding process of turning ordinary driftwood into extraordinary decor.

Filed Under: Driftwood Ideas Tagged With: Driftwood, finish, furniture, home decor

Wall Art Using Driftwood

May 3, 2024 by admin

Have you ever wondered how to add a touch of nature to your home decor? Look no further than the captivating world of wall art using driftwood. This unique and creative technique allows you to transform ordinary pieces of driftwood into stunning masterpieces that will enhance any room in your house. With its rustic charm and natural beauty, driftwood wall art offers a truly striking and eco-friendly way to showcase your personal style while bringing a piece of nature indoors. Explore the endless possibilities and let your creativity run wild as you embark on this delightful journey of creating one-of-a-kind wall art using driftwood.

Wall Art Using Driftwood

What is driftwood?

Definition

Driftwood refers to pieces of wood that have been washed or floated onto the shore of a beach, river, or other bodies of water. These pieces are often worn by the elements, resulting in a weathered appearance that adds to their charm and character.

Characteristics

Driftwood is known for its unique and irregular shapes, smooth texture, and beautiful natural colors. It can be found in a variety of sizes, ranging from small fragments to large logs. The wood may have been shaped and carved by the water and sand, giving it a distinct and artistic appearance.

Where it comes from

Driftwood is sourced from various places, namely beaches, rivers, and lakes, where it is carried by the current and eventually deposited on the shore. It can come from a variety of tree species, including pine, oak, cedar, and more. The origin of each piece of driftwood can often be a mystery, as it may have traveled long distances before ending up on the beach.

Why use driftwood for wall art?

Unique and natural look

One of the main reasons to choose driftwood for wall art is its distinct and natural appearance. Each piece of driftwood is one-of-a-kind, with its own shape, texture, and color variations. This uniqueness adds a touch of authenticity and originality to any space.

Eco-friendly

Using driftwood for wall art is an eco-friendly choice. By repurposing wood that has washed ashore, you are participating in sustainable practices and reducing waste. It’s a way to bring nature into your home without harming the environment.

Versatile and customizable

Driftwood is incredibly versatile, making it suitable for a wide range of wall art projects. It can be used to create sculptures, macrame wall hangings, mirror frames, photo displays, dream catchers, and more. Additionally, driftwood can be easily cut, shaped, and arranged to fit your specific design preferences.

Symbolic and meaningful

Driftwood carries symbolism and meaning due to its journey through water. It represents resilience, adaptability, and strength. By incorporating driftwood into your wall art, you not only enhance the aesthetics of your space but also infuse it with a deeper sense of connection to nature and the elements.

Types of wall art using driftwood

Driftwood sculptures

Driftwood sculptures are a popular choice for incorporating this natural material into wall art. Artists and craftspeople use their creativity and skills to assemble and arrange the driftwood pieces into unique and intricate sculptures. These sculptures can range from abstract designs to lifelike representations of animals, plants, and more.

Driftwood macrame wall hangings

Macrame wall hangings have gained popularity in recent years, and driftwood provides an excellent base for creating these intricate and decorative pieces. The driftwood serves as a sturdy hanger, while macrame cords or yarn are used to create various knotting patterns and designs. The combination of driftwood and macrame brings a bohemian and coastal vibe to any wall.

Driftwood mirror frames

By incorporating driftwood into mirror frames, you can add a rustic and natural touch to your wall decor. Simply attach small or large pieces of driftwood around the edges of a mirror, creating a frame that enhances the reflection while adding a unique and organic element to the space.

Driftwood photo displays

Driftwood photo displays offer a creative and eye-catching way to showcase your favorite memories. Arrange a series of driftwood pieces horizontally or vertically, creating a backdrop where you can hang your photos using clips or strings. This style of wall art adds a personal touch to your home while incorporating the beauty of driftwood.

Driftwood dream catchers

Dream catchers are often associated with Native American culture and are believed to trap bad dreams and allow good dreams to pass through. By using driftwood as the base of a dream catcher, you can create a coastal-inspired version of this traditional object. Add feathers, beads, and strings to the driftwood, constructing a unique and meaningful wall decor piece.

Materials and tools needed

Driftwood pieces

Collect a variety of driftwood pieces in different shapes and sizes to use in your wall art projects. Look for pieces that are sturdy and well-preserved, as they will make for better construction and longevity.

Adhesive or glue

Depending on the type of wall art project you choose, you may need adhesive or glue to secure the driftwood pieces together. Choose a strong and durable adhesive that is suitable for wood and can withstand the elements if the artwork will be displayed outdoors.

Nails or screws

For sculptures or larger pieces of wall art, nails or screws may be necessary to firmly attach the driftwood pieces together. Ensure that you have the right size and type of nails or screws for your specific project.

Macrame cord or yarn (for macrame wall hangings)

If you plan to create macrame wall hangings using driftwood, you will need macrame cord or yarn in various colors and thicknesses. Choose high-quality materials that can withstand tension and add visual interest to your design.

Mirrors or picture frames (for mirror frames/photo displays)

To create mirror frames or photo displays using driftwood, you will need mirrors or picture frames of various sizes. It’s important to choose frames that are compatible with the driftwood pieces and can be securely attached.

Feathers, beads, and strings (for dream catchers)

For dream catchers made with driftwood, gather feathers, beads, and strings in different colors and textures. These decorative elements will add a whimsical and bohemian touch to your wall art.

Additional decorative elements (optional)

Depending on your personal style and preferences, you may want to include additional decorative elements, such as shells, crystals, or small figurines, to enhance your driftwood wall art. These can be sourced from craft stores or collected during beach walks.

Wall Art Using Driftwood

Preparation and cleaning of driftwood

Collecting driftwood safely

When collecting driftwood, it’s essential to respect the environment and follow local regulations. Avoid taking pieces from protected areas or removing live trees and plants. Instead, focus on gathering driftwood that has already been washed ashore.

Removing dirt, sand, and debris

Before using driftwood for wall art, you’ll need to clean it to remove any dirt, sand, or debris that may be stuck to the wood. Use a brush or soft cloth to gently scrub the surface, ensuring that the natural texture and color of the driftwood are preserved.

Disinfecting and treating the wood

To ensure that the driftwood is free from any pests or bacteria, it’s important to disinfect and treat the wood. One method is to soak the driftwood in a solution of water and bleach, using a ratio of one part bleach to ten parts water. This will help eliminate any potential odors and sanitize the wood.

Drying and curing the driftwood

After cleaning and disinfecting, allow the driftwood to dry completely. Place the pieces in a well-ventilated area, preferably outdoors, and let them air dry for a few days or until there is no moisture left. Curing the driftwood will help prevent mold, warping, and other issues that could affect the quality of your wall art.

Techniques for assembling driftwood wall art

Using adhesive or glue

When creating driftwood sculptures or intricate wall art, adhesive or glue can be used to secure the pieces together. Apply a small amount of the adhesive to the contact points between the driftwood, holding them in place until the glue dries and forms a strong bond.

Nailing or screwing pieces together

For larger or heavier driftwood art installations, nails or screws can provide additional stability. Pre-drill holes into the wood to prevent splitting, then attach the driftwood pieces by driving the nails or screws through them. This method is commonly used for driftwood mirror frames or sculptures that require a more secure attachment.

Knotting and weaving (for macrame wall hangings)

Creating macrame wall hangings using driftwood involves intricate knotting and weaving techniques. Follow tutorials and patterns specific to macrame to create beautiful designs. Attach the macrame cords to the driftwood by tying knots or weaving them through the openings in the wood.

Attaching mirrors or picture frames

To attach mirrors or picture frames to driftwood, use nails, screws, or a strong adhesive. Position the mirror or frame onto the driftwood, then secure it firmly using the chosen method. Be mindful of balance and ensure that the attachment is sturdy and safe.

Incorporating feathers, beads, and strings (for dream catchers)

If you’re creating driftwood dream catchers, start by attaching strings to the ends of the driftwood. Tie or wrap feathers, beads, and additional decorative elements onto the strings, creating a visually appealing and meaningful composition. Be mindful of spacing and balance to achieve an aesthetically pleasing result.

Design tips and inspiration

Consider the size and shape of the wall

Before starting your driftwood wall art project, consider the size and shape of the wall where it will be displayed. Choose a design and dimensions that complement the space and do not overwhelm or overcrowd it. Strive for a harmonious balance between the artwork and the surrounding environment.

Balance and composition

Achieving balance and composition is crucial for creating visually pleasing driftwood wall art. Consider the distribution of size, color, and texture throughout the piece. Experiment with different arrangements and layouts before finalizing the design.

Mixing driftwood with other natural materials

To add depth and interest to your wall art, consider mixing driftwood with other natural materials, such as seashells, pebbles, or sea glass. These elements can enhance the coastal theme and create a more dynamic and textured composition.

Adding pops of color or texture

While driftwood itself has a natural and muted color palette, you can add pops of color or texture to your wall art by incorporating painted driftwood pieces, colorful beads, or vibrant feathers. These accents can serve as focal points or visual highlights within the overall composition.

Drawing inspiration from nature or coastal themes

Nature and coastal themes can serve as a rich source of inspiration for your driftwood wall art. Look to the ocean, forests, or other natural landscapes for ideas on shapes, patterns, and color palettes. Incorporating elements like seashells, starfish, or coral can further enhance the connection to nature.

Hanging and displaying driftwood wall art

Choosing the right hanging hardware

When it comes to hanging your driftwood wall art, it’s important to choose the appropriate hardware. Consider the weight and size of the artwork and use hooks, brackets, or picture hanging kits specifically designed for the given weight and dimensions.

Securing the wall art safely

Ensure that your wall art is securely attached to the wall to prevent any accidents or damage. Use anchors or wall plugs if needed, especially for larger pieces or if you are hanging the art on a wall with minimal structural support.

Positioning and spacing the pieces

When arranging multiple pieces of driftwood wall art, consider their positioning and spacing. Create a visually pleasing arrangement by leaving enough space between each piece, allowing them to stand out individually while still forming a cohesive composition.

Adding lighting or spotlighting

To highlight your driftwood wall art, consider incorporating lighting or spotlighting. Install wall sconces, string lights, or spotlights near the artwork to create visual interest and accentuate the textures and shadows of the driftwood. Experiment with different lighting angles and intensities to achieve the desired effect.

Caring for driftwood wall art

Regular dusting or cleaning

To keep your driftwood wall art looking its best, regular dusting or cleaning is necessary. Use a soft cloth or brush to gently remove any dust or debris that may accumulate on the surface. Avoid using harsh chemicals or abrasive materials that could damage the wood.

Avoiding direct sunlight or excessive moisture

While driftwood is resilient, it is important to protect it from excessive exposure to sunlight or moisture. Direct sunlight can fade the natural colors of the wood, while excessive moisture can lead to rot or mold. Avoid placing driftwood wall art in areas with high humidity or prolonged exposure to sunlight.

Repairing any loose or damaged pieces

Over time, you may notice that some driftwood pieces become loose or damaged. To maintain the integrity of your wall art, promptly repair any loose or broken elements. Use adhesive or additional screws to reinforce the attachment points and ensure the longevity of your driftwood creation.

Where to find and purchase driftwood

Beaches and coastlines

The most authentic and cost-effective way to find driftwood is to visit beaches and coastlines. Take walks along the shoreline, exploring the nooks and crannies where driftwood is often found. Ensure that you are allowed to collect driftwood in the area and are respectful of the environment.

Online marketplaces

If you’re unable to find suitable driftwood locally, online marketplaces such as Etsy or eBay offer a wide selection of driftwood pieces for purchase. Be sure to read customer reviews and check the product descriptions to ensure the quality and authenticity of the driftwood.

Local craft stores

Visit local craft stores or home improvement stores that specialize in natural materials. These establishments often carry driftwood or can point you in the right direction for sourcing it. Additionally, they may offer tools, adhesives, and other supplies needed for your driftwood wall art projects.

Artisan or handmade markets

Support local artisans and craftspeople by visiting artisan or handmade markets. Many talented artists create driftwood wall art and other decor items, showcasing their unique creations. Engaging with the creators can also give you insights into their processes and inspire your own driftwood projects.

In conclusion, driftwood is a versatile and visually appealing material that makes for stunning wall art. Whether you choose to create driftwood sculptures, macrame wall hangings, mirror frames, photo displays, or dream catchers, the unique and natural look of driftwood adds a touch of charm and character to any space. With the right materials, tools, and design inspiration, you can create beautiful and meaningful driftwood wall art that showcases your creativity and love for nature.

Filed Under: Driftwood Ideas Tagged With: Driftwood, home decor, Wall Art

How To Make Driftwood Wall Art

May 2, 2024 by admin

If you’ve ever found yourself captivated by the natural beauty of driftwood, you may be eager to learn how to incorporate it into your home decor. Creating your own driftwood wall art is a simple yet effective way to bring a touch of coastal charm to any space. In this article, we’ll share step-by-step instructions on how to make driftwood wall art, from sourcing the perfect pieces to assembling and hanging your finished masterpiece. So grab your tools and let’s get started on this creative adventure!

Gathering Driftwood

Research suitable locations

Before you begin your driftwood hunting adventure, it’s essential to research suitable locations where you can find driftwood. Coastal areas, including beaches, riversides, and lakeshores, are prime spots for driftwood. Look for areas that are less populated and away from tourist attractions, as they tend to have a higher chance of abundant driftwood.

Check for any local regulations or permits

Some areas may have regulations or permits regarding the collection of driftwood, so it’s crucial to check before you start gathering. Contact local authorities or visit their websites to ensure that you are complying with any rules or restrictions. Respecting the environment and local regulations is vital to preserve the natural beauty of the area.

Choose driftwood that is weathered and dried

When selecting driftwood, opt for pieces that have been naturally weathered and dried by the elements. This will ensure that the wood is sturdy, durable, and less likely to break or decay over time. Look for surfaces that have a smooth and aged appearance, as this indicates the wood has been exposed to the elements for a significant amount of time.

Select a variety of shapes and sizes

To add visual interest and create a dynamic composition, it’s important to choose driftwood in a variety of shapes and sizes. Mix larger pieces with smaller ones to achieve balance and contrast. Having a diverse selection of driftwood will allow you to experiment with different arrangements and create unique designs for your wall art.

Cleaning and Preparing Driftwood

Remove any attached debris

Start the cleaning process by removing any attached debris from the driftwood. This can include seaweed, shells, or other organic matter. Use a brush or gentle scrubbing tool to loosen and remove the debris. Be cautious not to scrub too hard, as you don’t want to damage the wood’s natural texture or shape.

Inspect for signs of pests or insects

Before using the driftwood for your wall art, thoroughly inspect it for any signs of pests or insects. Look for holes, tunnels, or sawdust-like residue, as these can indicate the presence of wood-boring insects. If you notice any signs of infestation, it’s best to choose a different piece of driftwood to prevent the spread of pests.

Soak the driftwood in bleach solution

To ensure your driftwood is thoroughly sanitized, soak it in a bleach solution. Mix one part bleach with ten parts water in a container large enough to accommodate the pieces you plan to clean. Submerge the driftwood completely in the solution and let it soak for 24-48 hours. This will help kill any remaining bacteria or organisms that may be present.

Rinse thoroughly and allow it to dry

After soaking, rinse the driftwood thoroughly with clean water to remove any traces of bleach. Make sure to wash away all the bleach residue to prevent damage to the wood or any negative effects on the environment. Once rinsed, allow the driftwood to air dry completely before moving on to the next steps. This may take a few days, depending on the size and thickness of the pieces.

How To Make Driftwood Wall Art

Designing Your Wall Art

Decide on the overall design or concept

Before you start arranging the driftwood, take some time to decide on the overall design or concept for your wall art. Consider the theme or mood you want to convey and think about the style of your space. Whether you prefer a more organic and free-flowing design or a structured and geometric pattern, having a clear idea will guide your creative process.

Consider the dimensions and layout

Take into account the dimensions and layout of the space where you plan to hang the driftwood wall art. Measure the wall and consider the available space for your design. This will help you determine the appropriate size and shape of your artwork, ensuring that it complements the room and doesn’t overwhelm the space.

Sketch a rough plan or template

To bring your design to life, it can be helpful to sketch a rough plan or template. This will serve as a visual guide and allow you to experiment with different arrangements before committing to a final design. Play with the positioning and orientation of the driftwood pieces on paper to see which arrangement appeals to you the most.

Experiment with different arrangements

Once you have a sketch or template, don’t be afraid to experiment with different arrangements of the driftwood pieces. Lay them out on a flat surface and move them around to find the most aesthetically pleasing composition. Play with different angles, overlaps, and variations in spacing to create a visually captivating and balanced design.

Preparation and Tools

Prepare a suitable work area

Before you begin assembling your driftwood wall art, make sure you have a suitable work area set up. Choose a well-ventilated space with adequate lighting, preferably near a window. Lay down a protective covering, such as a drop cloth or newspaper, to prevent any damage to your work surface.

Gather necessary tools and materials

To assemble your driftwood wall art, gather the necessary tools and materials beforehand. You may need a hot glue gun or wood glue, depending on your preferred method of attachment. Additionally, have a hammer, nails, safety goggles, and gloves on hand to ensure your safety while working with the driftwood and other materials.

Ensure you have appropriate safety equipment

Safety should always be a top priority when working on any DIY project. When working with driftwood, make sure you have appropriate safety equipment. Wear safety goggles to protect your eyes from flying debris and gloves to prevent splinters. If you plan to use power tools, such as a drill, follow the manufacturer’s instructions and take necessary precautions.

Protect your work surface from scratches

To avoid scratching your driftwood or the surface you’re working on, place a soft cloth or felt pads underneath the wood as you assemble your wall art. This will prevent any accidental scratches or damage to the driftwood and ensure a smooth and professional-looking finish.

How To Make Driftwood Wall Art

Assembling the Driftwood

Lay out the driftwood pieces according to your design

Once you’ve prepared your work area, start assembling the driftwood according to your chosen design or template. Lay out the pieces in the same arrangement you envisioned during the design phase. This will help you keep track of the placement and ensure that all the elements fit together harmoniously.

Arrange them in an aesthetically pleasing manner

As you begin to attach the pieces, focus on arranging them in an aesthetically pleasing manner. Pay attention to the shape, color, and texture of the driftwood to create a visually engaging composition. Experiment with different angles and orientations to find the arrangement that best highlights the unique characteristics of each piece.

Use glue or nails to secure the driftwood

Depending on your preferred method, use glue or nails to secure the driftwood pieces together. If using a hot glue gun, apply a generous amount of glue to the contact points and press the pieces together firmly. Alternatively, you can use nails to attach the driftwood. Pre-drill small holes to prevent the wood from splitting, and carefully hammer the nails into place.

Consider adding additional reinforcement if needed

If you feel that your driftwood wall art requires additional reinforcement, consider adding extra support. This can be accomplished by attaching small brackets or braces to the back of the structure. Reinforcing your artwork will ensure its longevity and prevent any potential damage or instability over time.

Adding Finishing Touches

Sand down any rough edges or surfaces

To achieve a polished and professional finish, sand down any rough edges or surfaces on your driftwood wall art. Use fine-grit sandpaper to smooth out any imperfections, ensuring a safe and comfortable final piece. Be gentle while sanding, as you don’t want to lose the distinctive texture and character of the driftwood.

Apply a protective finish or sealant

To protect your driftwood wall art from environmental factors, apply a protective finish or sealant. Choose a clear, water-based sealant or varnish that is suitable for wood surfaces. Apply multiple thin coats, allowing each coat to dry completely before applying the next. This will provide a protective layer and enhance the natural colors and textures of the driftwood.

Consider adding embellishments or decorations

If you want to add a personal touch or further enhance your driftwood wall art, consider adding embellishments or decorations. This could include small seashells, sea glass, or even decorative beads. Be mindful of not overpowering the natural beauty of the driftwood and aim for a balanced and cohesive design.

Ensure the wall art is securely mounted

Once your driftwood wall art is complete, ensure it is securely mounted on the wall. Use appropriate wall-mounting hardware, such as picture hooks or anchors, depending on the weight and size of the artwork. Follow the manufacturer’s instructions on how to properly install the mounting hardware, and double-check that your art is level before stepping back and admiring your creation.

Displaying and Caring for Your Driftwood Wall Art

Choose an appropriate location to hang the artwork

Choose an appropriate location to hang your driftwood wall art that showcases its beauty and complements the surrounding decor. Consider the overall aesthetics of the room, the lighting conditions, and the chosen design of your wall art. Remember to hang it at an appropriate height, allowing it to be easily admired without overpowering the space.

Consider the lighting and ambiance of the space

To maximize the impact of your driftwood wall art, consider the lighting and ambiance of the space. Natural light can beautifully accentuate the textures and colors of the driftwood, while soft ambient lighting can create a warm and inviting atmosphere. Experiment with different lighting options to find the one that enhances the unique characteristics of your artwork.

Regularly dust and clean the driftwood

To maintain the beauty of your driftwood wall art, make sure to regularly dust and clean the driftwood. Use a soft, dry cloth or a gentle brush to remove any dust or debris that may accumulate over time. Avoid using harsh chemicals or abrasive cleaning agents, as they can damage the natural finish of the driftwood.

Avoid placing the artwork in direct sunlight or damp areas

To preserve the integrity of your driftwood wall art, avoid placing it in direct sunlight or damp areas. Prolonged exposure to direct sunlight can cause the wood to fade and deteriorate over time. Similarly, excessive moisture can lead to warping or mold growth. Choose a suitable location that protects your artwork from these damaging elements.

Exploring Different Styles and Techniques

Experiment with different types of driftwood

Expand your creativity by experimenting with different types of driftwood. Seek out various species of wood, each with its unique colors, textures, and shapes. Incorporating different types of driftwood into your wall art can add depth, contrast, and a sense of intrigue to your designs.

Try out various arrangements and patterns

Let your imagination run wild by trying out various arrangements and patterns with your driftwood. Play with different placements, angles, and orientations to create captivating designs. Consider alternating thick and thin pieces, or incorporating diagonals and curves to create visually dynamic compositions.

Explore different painting or staining techniques

While driftwood often boasts captivating natural colors, you can explore different painting or staining techniques to enhance and transform its appearance. Consider using wood stains or paints to add a pop of color or create an artistic effect. You can experiment with ombre gradients, distressing techniques, or even intricate patterns.

Incorporate other materials or components

Get adventurous and incorporate other materials or components into your driftwood wall art. Whether it’s adding metal accents, glass details, or even repurposing seashells or fishing nets, experimenting with additional elements can take your artwork to the next level. Be mindful of maintaining a harmonious balance and ensuring that any additional materials complement the driftwood’s natural beauty.

Seeking Inspiration and Ideas

Browse online platforms and social media

When in need of inspiration and ideas, browse through online platforms and social media dedicated to driftwood art. Explore websites, blogs, and social media accounts of skilled artists and enthusiasts. This wealth of inspiration can spark your creativity and help you discover new techniques or design concepts to incorporate into your own driftwood wall art.

Visit art galleries or local exhibitions

Take a trip to art galleries or visit local exhibitions that feature driftwood art. Seeing these pieces in person can provide a deeper appreciation for the intricate craftsmanship and diverse styles of driftwood artwork. Engage with the artists and ask questions to gain insights into their creative process and techniques.

Join driftwood art communities or forums

Connect with like-minded individuals by joining driftwood art communities or forums. These platforms offer a space to share your work, seek advice, and learn from fellow artists. Engaging in conversations and sharing experiences with others who are passionate about driftwood art can ignite new ideas and provide valuable support along your creative journey.

Attend workshops or classes

Consider attending workshops or classes focused on driftwood art. Many artists and organizations offer hands-on experiences where you can learn new techniques and gain practical skills. Workshops also provide an opportunity to connect with experienced artists who can guide you in refining your craft and exploring new possibilities.

Sharing Your Driftwood Artwork

Document your creative process and final piece

Throughout your driftwood art journey, document your creative process and the final piece. Capture photographs of each step, from gathering the driftwood to the finished artwork, to create a visual record and reflect on your progress. This documentation can also serve as a reference for future projects or inspire others in their own art endeavors.

Share your artwork on social media platforms

Nowadays, social media platforms offer an excellent opportunity to share your driftwood artwork with a wide audience. Create an online presence by posting your creations on platforms such as Instagram, Facebook, or Pinterest. Share the story behind each piece and engage with followers who appreciate your talent. Don’t forget to use relevant hashtags to attract driftwood art enthusiasts and increase your visibility.

Gift or sell your driftwood art

Consider gifting or selling your driftwood art to friends, family, or art enthusiasts who appreciate unique, handcrafted creations. Share the beauty and tranquility of driftwood art with others and let your creations brighten up their living spaces. You can also explore local markets, galleries, or online platforms to sell your artwork and connect with potential buyers.

Inspire others by offering tutorials or workshops

As you gain experience and confidence in your driftwood art, consider inspiring others by offering tutorials or workshops. Share your knowledge, techniques, and tips with aspiring artists. By teaching others, you not only contribute to the driftwood art community but also foster collaboration, growth, and creativity within the artistic community as a whole.

Filed Under: Driftwood Ideas Tagged With: Driftwood, home decor, Wall Art

Driftwood Fencing

April 27, 2024 by admin

Imagine walking along a picturesque beach, feeling the soft sand beneath your toes and listening to the rhythmic sound of crashing waves. As you stroll, you can’t help but notice the intricate, rustic beauty of the driftwood scattered along the shoreline. Now picture that same allure and texture gracefully incorporated into a unique form of fencing. Driftwood fencing, with its natural charm and environmentally friendly appeal, has become a popular choice for homeowners and landscapers alike. In this article, we will explore the versatility, durability, and enchanting aesthetics of driftwood fencing, and discover why it has become the go-to choice for those seeking a touch of coastal elegance in their outdoor spaces.

Driftwood Fencing

Benefits of Driftwood Fencing

If you’re in the market for a new fence, consider the many benefits of driftwood fencing. Not only is it an environmentally-friendly option, but it also offers a unique and natural appearance that can truly enhance the aesthetic of your outdoor space. Furthermore, driftwood fencing is durable and long-lasting, making it a wise investment for both residential and commercial properties.

Environmentally-friendly option

When it comes to choosing a fence, it’s important to consider the environmental impact of the materials you use. Driftwood fencing is an excellent choice in this regard, as it is made from reclaimed or salvaged wood that has been washed ashore or found along riverbanks. By using driftwood, you’re effectively reducing the demand for newly harvested timber, minimizing deforestation, and preventing wood waste from ending up in landfills.

Unique and natural appearance

One of the most appealing aspects of driftwood fencing is its natural and rustic appearance. Each piece of driftwood is unique in size, shape, and texture, giving your fence a one-of-a-kind charm. The weathering and aging process that occurs naturally in driftwood adds to its visual appeal, creating a fence that blends effortlessly into its surroundings and complements the natural beauty of your landscape.

Durable and long-lasting

Driftwood may have washed up on shores or riverbanks, but that doesn’t mean it’s weak or fragile. In fact, the constant exposure to elements like water, sun, and wind actually strengthens the wood over time. As a result, driftwood fencing is highly durable and built to withstand the test of time. When properly maintained, it can last for many years, making it a wise investment for homeowners and property owners looking for a long-term fencing solution.

Types of Driftwood Fencing

When it comes to driftwood fencing, there are different types to choose from, each with its own unique features and benefits. Here are the main types of driftwood fencing:

Raw or unfinished driftwood

If you’re looking for a completely natural and rustic look, raw or unfinished driftwood is the way to go. This type of driftwood is left untouched, allowing its original texture, color, and weathering to shine through. Raw driftwood fencing has a more organic and unrefined appearance, perfect for those who appreciate the beauty of nature in its most authentic form.

Stained or painted driftwood

For a more polished and customized appearance, consider stained or painted driftwood fencing. This allows you to add a pop of color or match the fence to your existing outdoor decor. Stains can enhance the natural wood grain and provide protection against the elements, while paint offers endless possibilities for creativity and personalization. By opting for stained or painted driftwood, you have the flexibility to coordinate your fence with your overall design aesthetic.

Treated driftwood

To ensure the longevity of your driftwood fence, you may choose to treat the wood with preservatives. These treatments help protect the wood from rot, decay, and insect infestations. Treated driftwood fencing is ideal for areas with high moisture levels or termite-prone regions, as it adds an extra layer of defense against potential damage. However, it’s important to select environmentally-friendly treatment options that align with your commitment to sustainability.

Choosing the Right Driftwood

When selecting driftwood for your fence, it’s essential to choose pieces that are in good condition and suitable for construction. Here are some key factors to consider:

Inspect for rot and decay

Before incorporating driftwood into your fencing project, carefully inspect each piece for signs of rot or decay. Look for soft spots, cracks, or indications of insect infestation. It’s crucial to choose driftwood that is structurally sound and free from any major damage, as this will ensure the longevity and stability of your fence.

Consider size and shape

Driftwood comes in various sizes and shapes, so it’s important to consider how these characteristics will fit into your fencing design. If you prefer a more uniform look, opt for driftwood pieces that are similar in size and shape. On the other hand, if you want a more eclectic and organic feel, embrace the natural diversity of driftwood by incorporating different sizes and shapes throughout your fence.

Check for strength and integrity

Since driftwood has been exposed to harsh natural elements, it’s necessary to check its strength and integrity. Ensure that the wood is still sturdy and capable of supporting the weight of the fence. Avoid using pieces that are too brittle or fragile, as they may not be able to withstand the pressures and stresses that a fence endures over time.

Preparing Driftwood for Fencing

Before installing your driftwood fence, it’s important to properly prepare the wood. Here are the necessary steps to ensure your driftwood is ready for construction:

Cleaning the driftwood

Driftwood may have accumulated dirt, sand, and debris during its time in the water. To clean it, rinse each piece thoroughly with water to remove any loose dirt or particles. If necessary, you can also gently scrub the wood with a soft brush to remove stubborn grime. Once cleaned, allow the driftwood to dry completely before moving on to the next step.

Sanding and smoothing

To achieve a polished and even surface, sanding is essential. Start by using coarse-grit sandpaper to remove any rough edges, splinters, or uneven surfaces. Then, gradually work your way up to finer-grit sandpaper for a smoother finish. By sanding the driftwood, you’ll not only enhance its appearance but also minimize the risk of splinters or injuries when handling the wood.

Treating for insects and pests

Since driftwood is an organic material, it’s important to take precautions against insects and pests. To prevent infestations, consider applying a natural wood preservative or insect repellent to the driftwood. This will help protect the wood from future damage and ensure that your driftwood fence remains strong and durable for years to come.

Driftwood Fencing

Installation Process

With your prepared driftwood in hand, it’s time to begin the installation process. Here is a step-by-step guide to installing your driftwood fence:

Designing the layout

Before digging any post holes, spend some time designing and planning the layout of your driftwood fence. Consider the desired height, spacing between each piece of driftwood, and the overall shape of the fence. By visualizing the final result, you can ensure that your fence will not only be aesthetically pleasing but also functional in terms of privacy and security.

Digging post holes

Using a post hole digger or an auger, dig holes at regular intervals along the fence line. The depth and diameter of the holes will depend on the height and weight of your driftwood pieces, as well as the type of soil in your area. It’s important to ensure that the post holes are deep enough to provide adequate support for the driftwood, keeping the fence stable and secure.

Securing the driftwood

Once the post holes are prepared, it’s time to install the driftwood. Place each piece into the respective holes, making sure they are positioned securely and aligned with the desired orientation. Fill the holes with concrete or gravel to provide stability and prevent the driftwood from shifting or leaning over time. Allow the concrete or gravel to fully dry and set before moving on to the next step.

Maintenance and Care

To keep your driftwood fence looking its best and ensure its longevity, regular maintenance and care are necessary. Here are some important tasks to include in your driftwood fence maintenance routine:

Regular cleaning and washing

As with any outdoor structure, regular cleaning is essential to remove dirt, algae, and other debris that can accumulate on the driftwood. Use a soft brush and mild detergent to gently scrub away any buildup. Rinse thoroughly with water and allow the driftwood to dry before applying any protective coatings.

Reapplication of protective coatings

To protect the driftwood from the elements and preserve its natural beauty, consider applying protective coatings such as wood sealants, stains, or exterior paints. These coatings help prevent moisture absorption, UV damage, and decay. Follow the manufacturer’s instructions for application and reapply as needed to maintain the integrity of the driftwood.

Replacing damaged or weakened driftwood

Over time, some pieces of driftwood may become damaged, weakened, or show signs of decay. Regularly inspect your fence for any such issues and promptly replace any affected driftwood. This proactive approach will prevent further deterioration and ensure the overall strength and stability of your driftwood fence.

Cost and Accessibility

When considering driftwood fencing, it’s important to factor in the cost and accessibility of the materials. Here are some key points to keep in mind:

Comparing costs with other fencing materials

Driftwood fencing can be a cost-effective alternative to traditional fencing materials such as wood, metal, or vinyl. However, the overall cost will depend on factors such as the size of your fence, the availability of driftwood in your area, and any customization or treatments you choose. It’s advisable to compare pricing with other options to determine the best fit for your budget.

Availability of driftwood

The availability of driftwood may vary depending on your location. Coastal regions and areas near rivers or lakes may offer more readily available driftwood due to the proximity to water sources. Research local sources, such as salvage yards, beachfront communities, or online retailers, to find driftwood suitable for your fencing project.

Finding sources for driftwood

There are several avenues for sourcing driftwood. Start by checking your local beach or riverbank, where driftwood may have washed ashore naturally. Additionally, some landscaping or salvage companies specialize in reclaimed wood and may have driftwood available. Online marketplaces and social media communities for DIY enthusiasts are also great places to find driftwood sellers or individuals willing to trade or give away their surplus driftwood.

Safety Considerations

While driftwood fencing can be a beautiful and sustainable choice, it’s important to prioritize safety during and after installation. Here are some safety considerations to keep in mind:

Ensuring stability and sturdiness

To minimize the risk of accidents or damage to your property, it’s crucial to ensure that your driftwood fence is installed securely and remains stable. Regularly check the posts and driftwood pieces for any signs of movement or instability. Promptly address any issues to maintain a safe and secure fence.

Avoiding splinters and sharp edges

Before installing your driftwood fence, make sure to sand down any rough edges or splintered areas. This will reduce the risk of injuries when handling the wood or when people come into contact with the fence. It’s also essential to educate children and pets about the potential hazards of splinters and sharp edges, ensuring they exercise caution around the fence.

Preventing accidental injuries

Since driftwood is a natural material, it may have inherent defects or weaknesses that could pose a safety risk. Regularly inspect your fence for any loose or protruding pieces that could cause injury. Additionally, make sure to use appropriate safety gear such as gloves and eye protection when installing, maintaining, or making repairs to your driftwood fence.

Creative Driftwood Fence Designs

Beyond the practical benefits, driftwood fencing allows for creative design possibilities. Here are some ideas to inspire your driftwood fence:

Vertical or horizontal installation

Driftwood can be arranged in either vertical or horizontal orientations, depending on your desired aesthetic and practical needs. Vertical driftwood fences can provide more privacy and make a statement, while horizontal installations may create a more visually open and contemporary look. Experiment with different arrangements to find the style that best suits your taste and preferences.

Combining driftwood with other materials

Driftwood can be creatively combined with other materials to add texture, contrast, or functionality to your fence. Consider incorporating metal accents, glass panels, or even plants in between the driftwood pieces to create a unique and visually appealing design. The combination of different elements can elevate the overall look of your fence and add a touch of individuality to your outdoor space.

Incorporating embellishments and decorations

Let your creativity shine by embellishing your driftwood fence with various decorations. Hang lanterns, wind chimes, or outdoor artwork directly onto the driftwood for an eye-catching display. You can also weave decorative elements like colorful ribbons, fairy lights, or climbing plants throughout the fence to add whimsy and charm. These personal touches will transform your driftwood fence into a true work of art.

Environmental Impact

Finally, it’s important to consider the environmental impact of driftwood fencing. Here are some key points to keep in mind:

Sustainable sourcing of driftwood

When selecting driftwood for your fence, choose sustainable and ethical sources. Opt for driftwood that is collected responsibly, such as wood that has naturally washed ashore or been salvaged from environmentally-conscious projects. By doing so, you’re helping to preserve the delicate balance of coastal ecosystems and minimize the exploitation of natural resources.

Reducing waste and landfill use

By repurposing driftwood for fencing, you’re contributing to waste reduction efforts and diverting wood waste from landfills. This sustainable approach helps alleviate the pressure on our already strained waste management systems and reduces the need for new materials to be produced. Choosing driftwood fencing is a small but significant step towards a more circular and sustainable economy.

Preserving coastal ecosystems

Coastal ecosystems are fragile habitats that play a crucial role in maintaining biodiversity and protecting against climate change impacts. By using driftwood in your fencing project, you’re helping to preserve the integrity of these ecosystems. By not cutting down trees or using virgin timber, you’re reducing the demand for timber production and safeguarding the habitats of countless marine species.

In conclusion, driftwood fencing offers a wealth of benefits, from its environmentally-friendly nature to its unique appearance and durability. By carefully selecting the right driftwood, preparing it properly, and following the installation and maintenance guidelines, you can enjoy a beautiful, sustainable, and long-lasting fence that harmonizes with your outdoor space. Whether you opt for a raw and rustic look or a customized design, driftwood fencing is sure to add a touch of natural beauty to your property while minimizing your ecological footprint.

Filed Under: Driftwood Ideas Tagged With: Driftwood, fencing, home decor

Driftwood Name Art

April 19, 2024 by admin

Imagine walking along the beach, the soft sand beneath your feet and the gentle sound of waves crashing in the distance. As you wander, your eyes catch a glimpse of something unique and captivating, nestled among the scattered seashells and sea glass. It’s driftwood, weathered by time and the ocean’s touch, but upon closer inspection, you realize it’s more than just ordinary driftwood. It’s Driftwood Name Art, a beautifully crafted creation that combines the raw beauty of nature with the personalized touch of your own name. Each piece is carefully handcrafted, ensuring that no two are alike, making it a truly one-of-a-kind treasure that tells your story.

Driftwood Name Art

What is Driftwood Name Art?

Definition

Driftwood name art is a unique form of artistic expression that involves using pieces of driftwood to create customized names or words. This art form combines the natural beauty of driftwood with personalization to create stunning and meaningful pieces of art. Each driftwood name art piece is handcrafted and one-of-a-kind, making it a truly special addition to any space.

Materials

The main material used in driftwood name art is, of course, driftwood. Driftwood refers to pieces of wood that have been washed ashore by the ocean or other bodies of water. These pieces are often weathered, sun-bleached, and worn, giving them a rustic and natural appeal. In addition to driftwood, other materials used in driftwood name art include adhesive, wire or rope for assembly, and optional decorative elements such as seashells or colorful beads.

Techniques

Driftwood name art involves several techniques to create visually appealing and structurally sound pieces. These techniques include gathering, cleaning, and treating the driftwood pieces, as well as arranging and assembling them to form names or words. The choice of adhesive used is also important in ensuring that the driftwood pieces adhere securely to each other. Artists may also incorporate additional techniques such as painting or staining the driftwood for added visual interest.

Choosing a Name

Meaning

When choosing a name for your driftwood art piece, consider the meaning behind the name. Whether it’s your own name, a loved one’s name, or a word that holds special significance to you, the meaning adds a personal touch to the artwork. Think about how the chosen name aligns with your values, aspirations, or the overall theme of the room where the art will be displayed. The meaning behind the name will further enhance the sentimental value of the driftwood art.

Personalization

Driftwood name art offers a wonderful opportunity for personalization. Consider incorporating initials, nicknames, or even specific dates into the design. This personal touch adds uniqueness to the artwork and makes it even more meaningful. Whether you’re creating the driftwood name art for yourself or as a gift, personalization allows you to capture the essence of the individual or occasion it represents.

Length

The length of the desired name or word is an important consideration when creating driftwood name art. Longer names or words may require larger pieces of driftwood or more delicate arrangement to ensure visual balance and structural stability. On the other hand, shorter names or words can be more versatile in terms of design options and can be easily accommodated on a smaller display area. Consider the available space and your desired aesthetic when deciding on the length of the name or word.

Design Ideas

Simple and Minimalistic

A simple and minimalistic design for driftwood name art focuses on the natural beauty of the driftwood itself. Choose driftwood pieces with interesting shapes and textures, and arrange them in a straightforward manner to form the desired name or word. The simplicity of this design allows the individual pieces of driftwood to be the focal point, adding a rustic and organic touch to any space.

Curved and Ornate

For a more intricate and ornamental design, consider incorporating curves and decorative elements into your driftwood name art. Arrange the driftwood in curved patterns, forming elegant swirls or loops. Enhance the design further by adding other decorative elements such as seashells, beads, or even small pieces of colored glass. This design style adds a touch of elegance and visual interest to the artwork.

Nature-Inspired

Driftwood name art can also be inspired by nature, incorporating natural elements and themes into the design. Select driftwood pieces that resemble branches or tree limbs to create a nature-inspired look. Combine the driftwood with other natural elements such as moss, dried flowers, or feathers to add a whimsical and organic feel to the artwork. This design style brings the beauty of the outdoors indoors.

Creating Driftwood Name Art

Gathering Driftwood

The first step in creating driftwood name art is gathering the necessary driftwood pieces. Explore beaches, riverbanks, or any coastal areas where driftwood is commonly found. Look for pieces that are in good condition, with interesting shapes and textures. Collect more driftwood than you actually need, as you can choose the best pieces during the assembly process. Ensure that the driftwood you collect is legal to gather and has been properly dried and cured.

Cleaning and Treating

Before using the driftwood pieces in your art, they need to be cleaned and treated. Start by removing any debris, such as sand, shells, or barnacles, from the surface of the driftwood. Use a brush or scraper to gently clean the wood, being careful not to damage the natural texture and patina. If desired, you can also give the driftwood a light sanding to smooth out any rough edges. Once the driftwood is clean and dry, apply a protective treatment such as a clear varnish or wood sealer to preserve its natural beauty and increase its longevity.

Arranging and Assembling

With the cleaned and treated driftwood pieces, it’s time to arrange and assemble them to create your desired name or word. Lay out the driftwood pieces on a flat surface and experiment with different arrangements until you find the most aesthetically pleasing design. Consider the size and shape of each piece, as well as their natural curves and textures. Once you’re happy with the arrangement, use adhesive, wire, or rope to securely attach the pieces together. Take your time during this process to ensure precision and stability.

Driftwood Name Art

Tools and Materials

Driftwood Pieces

The main material needed for driftwood name art is, of course, the driftwood itself. Gather a variety of driftwood pieces in different shapes, sizes, and textures to add visual interest to your artwork. Look for pieces that complement each other and fit well within your overall design. It’s always a good idea to collect more driftwood than needed, as this gives you more options to choose from during the assembly process.

Adhesive

A strong adhesive is essential in holding the driftwood pieces together in your artwork. Depending on your preference and the specific requirements of your design, you can use a variety of adhesives such as wood glue, epoxy resin, or a strong craft adhesive. Choose an adhesive that bonds well with wood and provides a secure attachment, ensuring that your driftwood name art remains intact.

Wire or Rope

In addition to adhesive, wire or rope can be used to provide additional stability and support to your driftwood name art. These materials can be used to tie or wrap around certain sections of the artwork, adding an extra layer of security. Wire or rope can also be used creatively to incorporate hanging or mounting options into the design. Select wire or rope that complements the overall aesthetic of your artwork.

Optional Decorative Elements

To personalize and enhance your driftwood name art, consider incorporating optional decorative elements. Seashells, beads, colored glass, or small pieces of driftwood can be used to add pops of color and texture to the overall design. Experiment with different combinations of decorative elements to create a unique and visually appealing artwork that reflects your personal style and taste.

Displaying Driftwood Name Art

Wall Mounting

One of the most common ways to display driftwood name art is by wall mounting. This involves securely attaching the artwork to a wall using various hanging techniques. Depending on the size and weight of your artwork, you can use picture hanging hooks, adhesive strips, or screws and brackets to mount it. Consider the overall aesthetic and theme of the room when determining the best location to display your driftwood name art.

Freestanding

If you prefer a more versatile display option, freestanding driftwood name art can be a great choice. To create a freestanding display, attach the driftwood pieces to a sturdy base such as a wooden plaque or a thick piece of driftwood. This allows the artwork to stand upright on a shelf, mantelpiece, or any flat surface. Freestanding driftwood name art can easily be moved and repositioned, making it a flexible choice for displaying in different spaces or during special occasions.

Hanging

For a unique and whimsical display, consider hanging your driftwood name art. This can be achieved by attaching a loop of wire or rope to the back of the artwork, allowing it to hang from a hook or nail on the wall. The hanging option adds a dynamic element to the artwork, allowing it to sway gently and catch the light. This display method works particularly well for smaller driftwood name art pieces or when you want to create a focal point in a specific area.

Maintenance and Care

Cleaning

To keep your driftwood name art looking its best, regular cleaning is necessary. Use a soft brush or cloth to gently remove dust and debris from the surface of the driftwood. Avoid using harsh cleaning chemicals or abrasive materials that can damage the natural patina and texture of the wood. If needed, you can lightly dampen the cloth with water or a mild soap solution to remove stubborn dirt or stains. Dry the driftwood thoroughly after cleaning to prevent moisture damage.

Protective Coating

To preserve the natural beauty and longevity of your driftwood name art, consider applying a protective coating. This can be done by using a clear varnish or wood sealer specifically designed for use on driftwood. Apply the coating according to the product instructions, ensuring that each driftwood piece is adequately covered. The protective coating will help prevent drying, cracking, or fading of the wood, allowing your artwork to withstand the test of time.

Regular Inspection

Regularly inspect your driftwood name art for any signs of damage or deterioration. Check for loose driftwood pieces, cracks, or discoloration that may indicate the need for repair or maintenance. Promptly address any issues by reattaching loose pieces, filling cracks, or refinishing the driftwood as necessary. By regularly inspecting and maintaining your driftwood name art, you can ensure that it remains in excellent condition and continues to be a cherished piece of art.

Gift Ideas and Occasions

Weddings and Anniversaries

Driftwood name art makes a thoughtful and unique gift for weddings and anniversaries. Create a custom piece featuring the names of the couple or their initials. Consider incorporating decorative elements such as seashells or beads in wedding colors to add a personalized touch. This gift serves as a beautiful memento of their special day and can be cherished for years to come.

Birthdays and Celebrations

Driftwood name art also makes a fantastic gift for birthdays and other celebratory occasions. Customize the artwork with the recipient’s name or a word that holds significance to them. Choose colors and decorative elements that reflect their personality or interests. This personalized gift shows that you’ve put thought and effort into creating something truly special for them.

New Home or Office

When someone moves into a new home or office, driftwood name art can be a wonderful housewarming gift. Create a custom piece featuring the recipient’s last name or a word that represents the new space, such as “home” or “office.” This gift not only adds a personal touch to their new environment but also serves as a unique piece of decor that sparks conversation and admiration.

Driftwood Name Art for Kids

Nursery Decor

Driftwood name art can be an enchanting addition to a baby’s nursery. Create a beautiful and whimsical display by spelling out the baby’s name or initials using driftwood pieces. Incorporate soft colors, such as pastels or neutrals, to create a soothing and calming atmosphere. This customized artwork adds a unique touch to the nursery and can be cherished as the child grows.

Kids’ Rooms

Driftwood name art can also be a fun and playful addition to a child’s bedroom or playroom. Incorporate vibrant colors, playful shapes, and decorative elements that reflect the child’s interests and personality. Spell out their name or a word that inspires them, such as “dream” or “imagine.” This artwork becomes a focal point in their space and inspires their imagination.

Educational Purpose

Driftwood name art can be used as an educational tool for young children. Spell out the letters of the alphabet using driftwood pieces and display them in a classroom or homeschooling environment. This visually engaging and tactile learning tool helps children learn the alphabet and letter recognition in a creative and interactive way.

DIY Driftwood Name Art

Step-by-Step Guide

Creating your own driftwood name art can be a rewarding and enjoyable DIY project. First, gather the necessary driftwood pieces, ensuring they are clean and treated. Lay out the driftwood pieces, experimenting with different arrangements until you find the most visually appealing design. Once you’re satisfied with the arrangement, use adhesive, wire, or rope to securely attach the pieces together. Take your time during each step, ensuring precision and stability.

Customizing Options

Customize your driftwood name art by incorporating decorative elements such as seashells, beads, or colored glass. Choose colors and textures that complement your overall design and the intended recipient’s taste. Experiment with different decorative elements and placements to create a truly unique and personalized piece of art.

Tips and Tricks

  • When gathering driftwood, make sure it is thoroughly dried and cured to prevent mold or deterioration.
  • Consider the weight and size of the driftwood pieces when planning your design to ensure structural stability.
  • Apply adhesive evenly and sparingly, avoiding excess glue that may ooze out between the driftwood pieces.
  • Allow the adhesive to cure fully before handling or displaying the driftwood name art.
  • Experiment with different hanging or mounting options to find the best way to showcase your artwork.

By following these tips and tricks, you can create stunning driftwood name art pieces that reflect your creativity and personal style.

In conclusion, driftwood name art is a unique and meaningful form of artistic expression. By utilizing driftwood pieces, personalization, and creative design techniques, you can create stunning pieces that add a touch of nature and personalization to any space. Whether it’s a gift for a special occasion, a decorative piece for your home, or an educational tool for children, driftwood name art offers endless possibilities. Embrace your creativity, gather some driftwood, and start crafting your own one-of-a-kind masterpiece today.

Filed Under: Driftwood Ideas Tagged With: Driftwood, home decor, name art

Driftwood Art Mirror

April 16, 2024 by admin

Imagine stepping into a room and being instantly captivated by the unique and enchanting Driftwood Art Mirror adorning the wall. Crafted from carefully selected pieces of driftwood, this mirror is truly a work of art. With its organic textures, warm tones, and intricate patterns, it effortlessly brings a touch of nature’s beauty into any space. The Driftwood Art Mirror is not only a functional piece but also a conversation starter, as it showcases the incredible artistry of nature. Whether placed in a cozy living room or a modern bathroom, this mirror is sure to add a touch of rustic elegance to your home decor.

Introduction

What is driftwood art?

Driftwood art refers to the creation of decorative mirrors using pieces of driftwood. Driftwood is any wood that has been washed ashore by the sea or other bodies of water. It often has a weathered and worn appearance, which adds to its charm and appeal as a natural and rustic art medium. Driftwood art mirrors combine the raw beauty of driftwood with the functionality of a mirror, resulting in unique and captivating pieces of home decor.

The concept of driftwood art mirrors

The concept behind driftwood art mirrors is to merge the organic beauty of nature with the functionality of a mirror. By using driftwood as the main material, these mirrors become one-of-a-kind pieces, showcasing the individuality and character of each piece of wood. Driftwood art mirrors not only serve as functional mirrors, but they also make a statement as beautiful and artistic focal points in any space.

Driftwood Art Mirror Design

Various shapes and sizes

Driftwood art mirrors come in various shapes and sizes, catering to different aesthetic preferences and spatial requirements. From rectangular and round mirrors to more unique shapes like sunburst or asymmetrical designs, there is a driftwood art mirror to suit every style and space.

Natural and rustic appeal

One of the main attractions of driftwood art mirrors is their natural and rustic appeal. The weathered texture and unique grain patterns of driftwood create a sense of authenticity and charm, adding a touch of nature to any room. The natural hues ranging from pale whites to deep browns also complement a wide range of interior design styles, from coastal and beach-themed to earthy and bohemian.

Creative arrangements and patterns

Driftwood art mirrors showcase the creativity and artistry of the designer. The arrangement of the driftwood pieces can vary widely, from more fluid and organic layouts to precise and geometric patterns. Some mirrors feature a random assortment of driftwood pieces, while others may be meticulously arranged to form intricate designs. This allows for a wide range of creative expression and customization possibilities.

Incorporation of other elements

In addition to driftwood, many driftwood art mirrors incorporate other elements to enhance their beauty and visual interest. These can include seashells, pebbles, colored glass, or even small pieces of coral. These additional elements help to create a more dynamic and visually captivating piece of art, elevating the overall aesthetic value of the mirror.

Driftwood Art Mirror

Finding and Preparing Driftwood

Beachcombing for driftwood

To embark on the journey of creating a driftwood art mirror, the first step is to find suitable pieces of driftwood. Beachcombing is a popular method of sourcing driftwood, as it allows you to discover pieces that have been naturally smoothed and shaped by the ocean. Explore beaches after storms or high tides, as these events often wash up a new supply of driftwood.

Cleaning and treating the driftwood

Once you have collected your driftwood, it is essential to clean and treat it before using it for your mirror. Start by removing any loose debris or sand by gently brushing or shaking the wood. Then, soak the driftwood in a mixture of water and mild detergent to remove any dirt or organic matter that may be present. After soaking, rinse the wood thoroughly and allow it to dry completely.

To further enhance the appearance and durability of the driftwood, you can consider applying a wood conditioner or sealant. This helps to protect the wood from potential decay and also brings out the natural beauty of the grain and texture.

Finding the right pieces for mirror framing

When selecting driftwood pieces for framing your mirror, look for ones that have interesting shapes, textures, and sizes. You may want to choose pieces that have natural curves or knots, as they can add visual interest to the overall design. It is also important to ensure that the pieces have a flat side that can be used to secure them to the mirror frame.

Tools and Materials

Basic tools required

To create a driftwood art mirror, you will need a set of basic tools, including a saw, drill, hammer, nails, screws, and a measuring tape. These tools will be used for cutting and shaping the driftwood, attaching it to the frame, and hanging the mirror.

Additional materials for enhancing the mirror

In addition to the basic tools, you may also consider using various materials to enhance the aesthetic appeal of your driftwood art mirror. This can include adhesive glue for attaching additional elements such as seashells or glass, sandpaper for smoothing the surfaces of the driftwood, and varnish or wood stain for adding a protective and finishing touch.

As every driftwood art mirror is unique, the specific tools and materials needed may vary depending on your design and personal preferences.

Driftwood Art Mirror

Constructing the Driftwood Art Mirror

Choosing a suitable mirror

Before starting the construction process, it is important to choose a suitable mirror that fits your desired size and style. Consider the shape and dimensions of the mirror that will complement your driftwood pieces and the overall aesthetic you are aiming to achieve.

Creating the frame

To create a frame for your driftwood art mirror, measure and cut the desired length of the driftwood pieces using a saw. Arrange the pieces in the desired pattern, ensuring that they fit snugly around the mirror. Once you are satisfied with the arrangement, mark the positions for attaching the driftwood pieces to the mirror frame.

Arranging the driftwood pieces

After creating the frame, you can start arranging the driftwood pieces around the mirror. Play around with different layouts and orientations to find a pattern that is visually appealing. Keep in mind the natural curves and shapes of the driftwood, and consider balancing the sizes and colors of the pieces for a harmonious arrangement.

Attaching the driftwood securely

To attach the driftwood pieces to the frame, use a drill and screws or nails. Pre-drill holes in the driftwood pieces to prevent splitting, then secure them to the frame. Take care to ensure that the pieces are firmly attached, as this will contribute to the stability and longevity of the mirror.

Enhancing the mirror with other decorative elements

To add a personal touch to your driftwood art mirror, consider incorporating additional decorative elements. These can include seashells, colored glass, or even small pieces of driftwood. Adhere these elements to the driftwood frame using adhesive glue or other suitable methods. The additional elements will enhance the overall visual appeal and create a more unique and personalized mirror.

Finishing Touches

Sanding and varnishing the driftwood

To achieve smooth and uniform surfaces on the driftwood, sanding is crucial. Sandpaper with various grits can be used to remove any rough edges or splinters and create a polished finish. Start with a coarse grit sandpaper and gradually move to finer grits for a smooth and even result.

After sanding, you may choose to apply a layer of varnish to further enhance and protect the driftwood. Varnish helps to bring out the natural colors and grain patterns while providing a protective layer against moisture and other environmental factors.

Adding a protective layer to the mirror

To protect the mirrored surface, consider applying a protective layer to prevent scratches or damage. This can be done by using a glass cleaner or a specialized mirror spray. Gently wipe the mirror with a clean cloth, ensuring that it is completely dry before proceeding.

Cleaning and ensuring durability

Once your driftwood art mirror is complete, it is important to clean and maintain it regularly to ensure its longevity. Dust the driftwood frame and mirror surface regularly to prevent the buildup of dirt and debris. Avoid using harsh cleaners or abrasive materials that may damage the driftwood or mirror.

Displaying and Hanging the Mirror

Choosing the right location

When deciding where to display your driftwood art mirror, consider the overall design and aesthetic of the space. The mirror can serve as a focal point in any room, so choose a location that allows it to stand out and be appreciated. Consider factors such as lighting, wall color, and existing decor to create a visually pleasing arrangement.

Methods for hanging the mirror

There are several methods for hanging a driftwood art mirror, depending on its size and weight. For smaller mirrors, you can use adhesive hooks or picture hangers directly on the wall. For larger and heavier mirrors, it is recommended to use wall anchors or brackets for added stability and support. Ensure that the mirror is securely fastened to the wall to prevent accidents or damage.

Considering the weight and size

Keep in mind the weight and size of your driftwood art mirror when choosing a location and hanging method. Larger mirrors may require additional support or assistance during installation to ensure they are properly secured. If unsure about the weight or hanging requirements, consult with a professional or seek guidance from experienced DIY enthusiasts.

Care and Maintenance

Regular dusting and cleaning

To maintain the beauty of your driftwood art mirror, regular dusting and cleaning are essential. Use a soft cloth or feather duster to gently remove any dust or debris from the driftwood frame and mirror surface. Avoid using water or harsh cleaners directly on the driftwood, as it may damage or warp the wood.

Avoiding direct sunlight exposure

Excessive exposure to direct sunlight can cause the driftwood to fade and lose its natural color. To preserve the beauty of your driftwood art mirror, avoid placing it in areas where it is directly exposed to sunlight for prolonged periods. Consider using curtains or blinds to regulate the amount of sunlight it receives.

Repairing and refreshing the mirror over time

Over time, your driftwood art mirror may require repairs or refreshing to maintain its integrity and appearance. This can include replacing damaged or loose driftwood pieces, reapplying varnish or protective coatings, or adding new decorative elements. Regularly inspect your mirror for any signs of wear or damage, and address any issues promptly to ensure its long-term enjoyment.

DIY Driftwood Art Mirror Ideas

Nautical-themed driftwood mirror

Create a nautical-themed driftwood art mirror by incorporating seashells, starfish, and other maritime elements into the design. Arrange the driftwood in a wave-like pattern or create a border with seashells for a truly coastal-inspired mirror.

Bohemian-inspired driftwood mirror

For a bohemian-inspired driftwood art mirror, use driftwood pieces with natural curves and irregular shapes. Integrate macrame or woven elements into the frame and add feathers or beads for a touch of boho flair. This mirror will bring an eclectic and free-spirited vibe to any space.

Coastal and beach-themed driftwood mirror

Embrace the essence of the coast with a beach-themed driftwood art mirror. Incorporate colors such as blues, whites, and sandy neutrals into the driftwood arrangement. Add small pieces of colored sea glass or faux coral to evoke the feeling of a beachside escape.

Nature-inspired driftwood mirror

Bring the beauty of nature indoors with a nature-inspired driftwood art mirror. Include small branches, leaves, or dried flowers in the design to create an organic and earthy feel. This mirror will infuse any room with a soothing and calming ambiance.

Purchasing Driftwood Art Mirrors

Finding unique handmade pieces

If you prefer to purchase a driftwood art mirror rather than create one yourself, there are many artisans and craftsmen who specialize in creating unique handmade pieces. Look for local artists or visit galleries and craft fairs to find one-of-a-kind driftwood art mirrors that suit your style and preference.

Online platforms and local artists

Online platforms such as Etsy or artisan websites often have a wide selection of driftwood art mirrors available for purchase. These platforms allow you to browse through various designs, styles, and sizes, and often provide detailed descriptions and images to help you make an informed choice. Additionally, local artists and craftspeople may have their own websites or social media pages where they showcase their driftwood art mirrors for sale.

Customization options and price range

When purchasing a driftwood art mirror, consider the customization options available. Some artists offer the option to customize the size, shape, and color scheme of the mirror to suit your specific requirements. The price range for driftwood art mirrors can vary depending on the size, complexity of design, and the artist’s reputation. It is important to establish your budget and research multiple options to find a piece that fits both your aesthetic preferences and financial constraints.

In conclusion, driftwood art mirrors combine the raw beauty of driftwood with the functionality of a mirror, resulting in unique and captivating pieces of home decor. Whether you choose to create your own driftwood art mirror or purchase one from a local artist, these mirrors add a touch of nature and artistry to any space. From various shapes and sizes to creative arrangements and patterns, driftwood art mirrors offer endless possibilities for customization and personalization. With proper care and maintenance, these mirrors can be enjoyed for years to come, serving as both functional mirrors and stunning works of art. So why not bring the coastal charm and natural beauty of driftwood into your home with a driftwood art mirror?

Filed Under: Driftwood Ideas Tagged With: Driftwood, home decor, Mirror

Driftwood Art Houses

March 29, 2024 by admin

Imagine strolling along a serene beach and stumbling upon enchanting creations that blend seamlessly with nature’s wonders. Introducing Driftwood Art Houses, where the beauty of driftwood is transformed into stunning artworks that redefine the concept of coastal decor. These unique structures, meticulously crafted from weathered driftwood, harmoniously combine artistic brilliance with eco-consciousness. Each driftwood art house tells a story, inviting you to explore its intricate details and inviting interiors. Step into a world where nature and art gracefully intertwine, and let the driftwood enchantment capture your heart.

History of Driftwood Art Houses

Origins of Driftwood Art Houses

Driftwood art houses, also known as driftwood cottages or driftwood sculptures, have a rich history that can be traced back to the earliest civilizations. The use of driftwood as a medium for creating art and functional structures was born out of necessity. People living in coastal communities often found themselves with an abundance of driftwood washed ashore after storms or high tides. They quickly realized the potential of this natural resource and began to collect and repurpose the driftwood into various structures.

Early Examples of Driftwood Art Houses

The earliest examples of driftwood art houses can be found in ancient civilizations such as the Egyptians, Greeks, and Vikings. These cultures utilized driftwood to construct small huts and shelters along the coastlines. These structures were not only functional but also served as a way to honor the sea and its offerings. They were built to withstand the harsh coastal elements and were often adorned with intricate carvings and decorations made from other found materials.

Evolution of Driftwood Art Houses

Over time, driftwood art houses evolved from simple shelters to elaborate works of art. In the 19th and 20th centuries, artists and craftsmen began to explore the artistic possibilities of driftwood, incorporating it into their sculptures and designs. With the rise of the Arts and Crafts movement and the increasing popularity of coastal décor, driftwood art houses gained prominence as unique pieces of art. Today, driftwood art houses can be found in galleries and homes around the world, showcasing the creativity and craftsmanship of their creators.

Materials Used in Driftwood Art Houses

Various Types of Driftwood

Driftwood comes in a variety of shapes, sizes, and textures, each with its own unique qualities. Some common types of driftwood used in the construction of art houses include weathered logs, twisted branches, and smooth planks. The choice of driftwood depends on the desired aesthetic and structural requirements of the art house. The natural erosion and weathering of the wood give it a distinct character and charm that cannot be replicated.

Additional Materials and Tools

In addition to driftwood, artists and craftsmen use a variety of additional materials and tools to enhance their driftwood art houses. These may include nails, screws, ropes, glue, and paints. Tools such as saws, drills, and sanders are also commonly used to cut, shape, and smooth the driftwood. The combination of these materials and tools allows artists to transform driftwood into intricate and unique art pieces.

Different Styles of Driftwood Art Houses

Beach Cottages

Beach cottages are one of the most popular styles of driftwood art houses. They evoke a sense of coastal charm and relaxation, recreating the look and feel of a beachfront retreat. These cottages often feature sloped roofs, painted shutters, and cozy interiors. The use of light-colored driftwood and beach-inspired decorations further enhances the coastal ambiance.

Driftwood Art Houses

Treehouses

Driftwood treehouses provide a whimsical and enchanting escape into the treetops. Constructed using sturdy branches and trunks, these art houses offer a unique vantage point and blend seamlessly with the natural surroundings. Treehouses often feature multiple levels, intricate detailing, and imaginative design elements that spark the imagination and transport you to a magical world.

Modern and Contemporary Designs

For those seeking a more modern aesthetic, driftwood art houses can be designed with sleek lines, minimalist interiors, and contemporary finishes. These designs embrace simplicity while still showcasing the raw beauty and textures of the driftwood. Some modern driftwood art houses also incorporate elements of sustainability, utilizing reclaimed or salvaged materials for an eco-friendly approach.

Creating Driftwood Art Houses

Finding and Collecting Driftwood

The first step in creating a driftwood art house is to collect driftwood from beaches, rivers, or lakes. It is important to choose driftwood that is well-aged and properly weathered, as this will ensure its durability and enhance its rustic appearance. When collecting driftwood, be mindful of local regulations and environmental concerns, and always seek permission if necessary.

Preparing and Treating Driftwood

Before using driftwood in an art house, it is essential to properly prepare and treat it. This involves cleaning the wood to remove debris and insects, as well as treating it to prevent further decay or infestation. Some artists choose to bleach or sand the driftwood to achieve a lighter color or smoother texture. Properly treating the driftwood will not only enhance its aesthetic appeal but also prolong its lifespan.

Construction Techniques and Tips

Constructing a driftwood art house requires careful planning and the use of appropriate construction techniques. Depending on the desired design and size of the art house, various methods such as nailing, screwing, or lashing can be employed to secure the driftwood together. It is important to ensure structural stability and durability while maintaining the natural character of the driftwood. Experimenting with different construction techniques and consulting experienced driftwood artists can provide valuable insights and inspiration.

Decorating Driftwood Art Houses

Painting and Staining Techniques

Painting and staining driftwood art houses offer endless possibilities for adding color and enhancing the overall aesthetic. Artists can choose to paint the entire structure or selectively apply paint to highlight certain features. Staining the driftwood can also bring out its natural grain and texture. Careful consideration should be given to choosing paint or stain that is suitable for outdoor use and can withstand the elements.

Driftwood Art Houses

Adding Miniature Furniture and Accessories

To bring the driftwood art house to life, miniature furniture and accessories can be incorporated. These small-scale additions help create a sense of realism and allow for personalization. Miniature chairs, tables, and even tiny plants can be placed strategically inside or outside the art house to mimic a livable space. The choice of accessories depends on the desired theme and style of the art house.

Creating Landscaping and Outdoor Elements

To complete the overall look of a driftwood art house, landscaping and outdoor elements can be added. Miniature gardens, pathways, and fences can be constructed using natural materials such as moss, rocks, and shells. This attention to detail helps create a captivating scene that immerses viewers in the world of the art house. Landscaping can also complement the style and design of the art house, whether it be a beachfront retreat or a rustic cottage nestled in the woods.

Tips for Displaying Driftwood Art Houses

Indoor Display Ideas

Driftwood art houses can be displayed indoors as standalone pieces or as part of a larger decorative arrangement. Placing them on shelves, mantels, or side tables allows for easy viewing and adds a touch of whimsy to any room. Grouping multiple driftwood art houses together can create a captivating focal point, particularly when displayed against a contrasting background or incorporated into a gallery wall.

Outdoor Display Ideas

Driftwood art houses are ideally suited for outdoor display, where they can fully embrace their natural surroundings. Gardens, patios, and porches provide the perfect backdrop for showcasing these unique structures. Placing the art houses under shaded areas or near trees can create a sense of shelter and integration with nature. Sturdy bases or supports may be necessary to ensure stability and longevity, especially in areas prone to strong winds or inclement weather.

Creating Themed Displays

For a more immersive experience, creating themed displays with driftwood art houses can be a delightful endeavor. Whether it’s a seaside theme with shells and seaglass or a woodland theme with miniature animals and plants, themed displays can transport viewers to a fantasy world. Consider integrating lighting or other decorative elements to further enhance the ambiance and captivate the imagination.

Driftwood Art House Artists to Follow

Renowned Driftwood Art House Artists

There are several renowned driftwood art house artists who have made significant contributions to the field. Their innovative designs, attention to detail, and impeccable craftsmanship have garnered international recognition. Some notable artists include John Rowlands, Heather Jansch, and James Doran-Webb. Exploring their work can provide inspiration and appreciation for the artistry of driftwood.

Upcoming and Emerging Artists to Watch

In addition to established artists, there is a growing community of emerging driftwood art house artists who are pushing the boundaries of creativity and design. These artists bring fresh perspectives and introduce new techniques and styles to the art form. Keeping an eye on emerging talent can lead to exciting discoveries and the opportunity to support and encourage the next generation of driftwood artists.

Driftwood Art Houses as Home Decor

Incorporating Driftwood Art Houses into Interior Design

Driftwood art houses offer a unique and captivating addition to interior design. Their organic textures and natural colors provide a warm and inviting atmosphere. Placing a driftwood art house as a centerpiece on a coffee table or using it to anchor a shelving arrangement can add a touch of rustic elegance to any room. Incorporating driftwood art houses into interior design allows for personal expression and a connection to nature.

Creating a Coastal or Beach-Themed Ambiance

One popular way to incorporate driftwood art houses into home decor is by creating a coastal or beach-themed ambiance. The natural beauty and coastal charm of driftwood align perfectly with a nautical or beach-inspired design scheme. Pairing the art houses with seashells, anchors, and beach-inspired colors such as blues and whites can transport you to a breezy seaside retreat. Whether you live by the coast or in a landlocked location, driftwood art houses can infuse your home with a coastal vibe.

Driftwood Art Houses as Gifts

Unique Gift Idea for Beach and Nature Lovers

Driftwood art houses make exceptional gifts for those who have a fondness for the beach and a love of nature. The craftsmanship and attention to detail that goes into creating these art houses make them truly special and unique. Whether it’s a birthday, housewarming, or holiday gift, a driftwood art house is sure to bring joy and a sense of connection to the recipient.

Personalizing Driftwood Art Houses as Gifts

To make a driftwood art house even more meaningful, consider personalizing it. Adding a custom plaque or engraving with a meaningful message, the recipient’s name, or a special date can create a one-of-a-kind gift that will be cherished for years to come. Personalization allows for a deeper connection between the gift-giver and the recipient and adds an extra layer of sentimentality.

Conclusion

Driftwood art houses have a fascinating history and a wide range of styles and designs to suit any taste. From beach cottages to modern sculptures, these unique creations showcase the beauty of nature and the creativity of artists. Whether displayed as part of home décor or given as a thoughtful gift, driftwood art houses captivate the imagination and provide a tangible connection to the natural world. So, next time you stumble upon a piece of driftwood on the shore, consider the endless possibilities it holds in creating your own driftwood art house.

Filed Under: Driftwood Ideas Tagged With: Driftwood, home decor, houses, nature, Sculpture

Driftwood Art Frame

March 25, 2024 by admin

Imagine adding a touch of nature’s charm to your home with the captivating beauty of a Driftwood Art Frame. Crafted from carefully selected pieces of driftwood, this unique frame effortlessly blends rustic elegance with coastal allure. Each frame is meticulously handcrafted, ensuring that no two are alike, making it a stunning and one-of-a-kind piece of art in itself. Whether you want to showcase cherished memories or display your favorite artwork, the Driftwood Art Frame is sure to become the focal point of any room, evoking a sense of tranquility and serenity.

What is Driftwood Art Frame?

Definition and Explanation

A driftwood art frame is a unique and visually stunning way to display photographs, artwork, or other cherished items. It is created using pieces of driftwood that have been collected from shorelines or riverbanks. The driftwood is carefully selected, cleaned, and prepared before being assembled into a frame. The natural organic shapes and textures of the driftwood create a beautiful and rustic frame that adds a touch of nature to any space.

Origin and History

The origins of driftwood art frames can be traced back to coastal communities where driftwood is abundant. People have been utilizing driftwood for various purposes for centuries, but the art of creating frames from driftwood gained popularity in recent years. The trend of incorporating natural elements into home decor has led to a renewed interest in driftwood art frames. Artists and craft enthusiasts have embraced the beauty and uniqueness of driftwood, transforming it into stunning frames that capture the essence of the natural world.

Characteristics and Materials

Driftwood art frames are known for their distinct characteristics that set them apart from traditional frames. The most notable feature is the use of driftwood, which gives each frame a one-of-a-kind appearance. Driftwood comes in various shapes, sizes, and colors, allowing for endless possibilities in frame design. The natural weathering and erosion process that the wood undergoes while floating in the water give it a unique texture and patina. Additionally, driftwood art frames often incorporate other materials such as shells, sea glass, or rope, further enhancing their coastal aesthetic.

Types of Driftwood Art Frames

Single-Panel Frames

Single-panel driftwood art frames are the most common and straightforward type. They consist of a single piece of driftwood that forms the outline of the frame. The driftwood is carefully selected to have the desired shape and size, ensuring it fits perfectly around the artwork or photograph. Single-panel frames are ideal for showcasing a focal point and provide a minimalist and elegant display option.

Multi-Panel Frames

Multi-panel driftwood art frames involve the use of multiple pieces of driftwood to create a more intricate and visually interesting frame. Several shorter pieces of driftwood are arranged in a collage-like manner to form a frame with varying dimensions and angles. This type of frame is perfect for displaying a series of photographs or creating a unique gallery wall.

Collage Frames

Collage driftwood art frames take creativity to the next level. Rather than using only driftwood, these frames incorporate other materials to create a mixed media collage effect. Shells, sea glass, and other found objects are used alongside driftwood to create a captivating and visually dynamic frame. Collage frames allow for endless customization possibilities and can be tailored to match any decor style.

Shadow Box Frames

Shadow box driftwood art frames combine the beauty of driftwood with the functionality of a shadow box display. This type of frame consists of a deep box-like structure made of driftwood, with a glass or acrylic front panel to protect and showcase the contents. Shadow box frames are perfect for displaying three-dimensional objects, such as seashells, small sculptures, or sentimental keepsakes.

Driftwood Art Frame

This image is property of images.unsplash.com.

Choosing the Right Driftwood

Size and Shape

When choosing driftwood for your art frame, consider the size and shape that will best complement your artwork or photograph. Larger pieces of driftwood make a bold statement and work well for larger pieces of art, while smaller pieces create a more delicate and intricate frame. The shape of the driftwood is also crucial, as it should frame the artwork without overpowering it. Experiment with different sizes and shapes to find the perfect fit.

Texture and Color

The texture and color of the driftwood play a significant role in the overall aesthetic of the frame. The texture of the wood can range from smooth to rough, and the color can vary from bleached white to deep brown. Consider the desired look and feel of your frame, and choose driftwood that aligns with that vision. Experiment with different textures and colors to create a unique and personalized frame.

Condition and Durability

Before using driftwood for your art frame, examine its condition and ensure it is sturdy and durable. Look for wood that is free from rot, cracks, or insect damage. Avoid using driftwood that is overly brittle or fragile, as it may not hold up well in the framing process. It is essential to choose driftwood that is structurally sound to ensure the longevity of your art frame.

Preparing the Driftwood

Cleaning and Sanitizing

Before using driftwood in your art frame, it is crucial to clean and sanitize it properly. Start by rinsing the driftwood in fresh water to remove any loose debris. Then, soak the wood in a solution of water and mild soap to remove any dirt or bacteria. Scrub the driftwood gently with a soft brush to eliminate any stubborn grime. Rinse thoroughly to ensure all soap residue is removed.

Drying and Stabilizing

After cleaning, allow the driftwood to dry completely before using it in your frame. Place the driftwood in a well-ventilated area and let it air dry for several days. Avoid using artificial heat sources, as they can cause the wood to dry too quickly and potentially crack. Once the driftwood is fully dry, check for any signs of instability or warping. If necessary, use wood glue or other adhesives to stabilize any weak areas.

Treatment and Preservation

To ensure the longevity of your driftwood art frame, it is advisable to treat and preserve the wood. Applying a wood sealer or preservative can help protect the driftwood from moisture damage, pests, and decay. Choose a product specifically designed for use on driftwood or other natural materials. Follow the manufacturer’s instructions carefully to apply the treatment and allow it to fully dry before proceeding with the framing process.

Driftwood Art Frame

This image is property of images.unsplash.com.

Designing the Driftwood Art Frame

Planning and Sketching

Before assembling your driftwood art frame, take the time to plan and sketch out your design. Consider the dimensions of your artwork or photograph and visualize how the driftwood will frame it. Experiment with different arrangements and compositions, keeping in mind the shape, size, and color of the driftwood pieces. Use a pencil or colored pencils to sketch out your ideas and make any necessary adjustments.

Arranging and Composition

Once you have a design in mind, it’s time to start arranging the driftwood pieces. Lay them out on a flat surface and experiment with different arrangements until you find the one that best complements your artwork. Pay attention to the shape and size of the pieces, and how they fit together to form a cohesive frame. Use your sketches as a guide to ensure you are staying true to your original vision.

Incorporating Other Materials

If desired, consider incorporating other materials into your driftwood art frame to add visual interest. Shells, sea glass, beads, or small pieces of driftwood can be strategically placed along the frame to enhance its aesthetic appeal. Experiment with different combinations and placements to create a unique and personalized frame that reflects your style and creativity.

Assembling the Driftwood Art Frame

Tools and Materials

To assemble your driftwood art frame, you will need a few essential tools and materials. These may include a hot glue gun or wood glue, depending on your preference and the size of the driftwood pieces. Additionally, you may need clamps or rubber bands to hold the pieces in place while the adhesive dries. Gather all your tools and materials before starting the assembly process to ensure a smooth and efficient workflow.

Adhesive and Joinery

When assembling your driftwood art frame, choose an adhesive that provides a strong and durable bond. Hot glue is a popular choice due to its quick drying time and ease of use. Apply a generous amount of hot glue to the ends of the driftwood pieces and press them firmly together. Alternatively, wood glue can be used for a more permanent and seamless bond. Apply the wood glue according to the manufacturer’s instructions and use clamps or rubber bands to hold the pieces in place while the glue dries.

Securing and Reinforcing

Depending on the size and weight of your artwork or photograph, you may need to secure and reinforce the frame to ensure it can support the weight. Consider using small screws or nails to anchor the frame to the artwork or photograph. Alternatively, additional pieces of driftwood can be strategically placed along the corners or edges of the frame to provide extra support. Reinforcing the frame will help prevent any sagging or warping over time.

Driftwood Art Frame

This image is property of images.unsplash.com.

Finishing and Enhancing the Driftwood Art Frame

Sanding and Smoothing

After the assembly is complete, take the time to sand and smooth the driftwood art frame. Use fine-grit sandpaper to gently sand away any rough edges or splinters. Pay attention to the corners and joints, ensuring they are smooth and seamless. Sanding the frame not only improves its overall appearance but also prevents any potential injuries when handling the finished piece.

Staining and Painting

If desired, you can enhance the natural beauty of the driftwood by staining or painting the frame. Consider using a wood stain that matches the desired color palette or opt for a clear stain to maintain the natural look of the driftwood. Apply the stain evenly, following the manufacturer’s instructions, and allow it to dry completely. Alternatively, if you prefer a more vibrant and colorful frame, choose a paint color that complements your artwork or photograph. Apply several coats of paint, allowing each coat to dry before applying the next.

Sealing and Varnishing

To protect the driftwood art frame and give it a finished look, it is essential to seal and varnish the wood. Choose a clear wood sealant or varnish that is suitable for use on driftwood. Apply multiple coats evenly, allowing each coat to dry thoroughly before applying the next. The sealant or varnish will not only protect the wood from moisture and UV damage but also enhance the natural colors and texture of the driftwood.

Displaying and Hanging the Driftwood Art Frame

Wall Mounting

One of the most common ways to display a driftwood art frame is by wall mounting it. Depending on the size and weight of the frame, choose appropriate hanging hardware such as D-rings, picture wire, or sawtooth hangers. Measure and mark the desired placement on the wall, ensuring it is level and at eye level for optimal viewing. Install the hanging hardware according to the manufacturer’s instructions, and hang the frame securely on the wall.

Free-Standing

Smaller driftwood art frames can also be displayed freestanding on a shelf, mantel, or tabletop. Ensure the surface is stable and level to prevent the frame from tipping over. Consider adding small felt pads or rubber bumpers to the bottom of the frame to protect the surface and provide extra stability. Freestanding driftwood art frames make for a versatile display option and can be easily moved and rearranged as needed.

Decorative Accessories

To further enhance the display of your driftwood art frame, consider incorporating decorative accessories. Seashells, small driftwood pieces, or coastal-themed ornaments can be placed strategically around the frame to create a cohesive and visually appealing vignette. Experiment with different accessories and arrangements to find the perfect combination that complements your driftwood art frame and reflects your personal style.

Driftwood Art Frame

Driftwood Art Frame as a DIY Project

Step-by-Step Guide

Creating a driftwood art frame can be a rewarding and enjoyable DIY project. Start by gathering all the necessary tools and materials, including driftwood, adhesive, and any additional materials you wish to incorporate. Clean and sanitize the driftwood, allowing it to dry completely. Sketch out your desired design and arrange the pieces of driftwood accordingly. Secure the pieces together using adhesive and allow it to dry. Sand and smooth the frame, then apply your chosen finish, such as stain or paint. Seal and varnish the frame to give it a finished look. Finally, display your driftwood art frame either by wall mounting, freestanding, or using decorative accessories.

Tips and Tricks

  • When collecting driftwood, be mindful of any regulations or permits required in your area. Ensure that it is legal to collect driftwood from the shorelines or riverbanks.
  • Consider visiting local beaches or rivers during low tide or after storms to increase your chances of finding interesting and unique pieces of driftwood.
  • Experiment with different shapes and sizes of driftwood to create a visually dynamic and textured frame.
  • Incorporate shells, sea glass, or other found objects into your driftwood art frame to add additional visual interest and personalize your design.
  • Take your time when assembling the frame to ensure a secure and stable bond between the driftwood pieces.
  • Be cautious when using adhesive and follow the manufacturer’s instructions to ensure proper drying and bonding.
  • Consider using protective equipment when sanding or applying finishes to avoid inhaling dust or fumes.

Inspiration and Ideas

Looking for inspiration for your driftwood art frame project? Browse online platforms such as Pinterest or Instagram for a plethora of ideas and design inspiration. From simple and minimalist frames to elaborate and intricate designs, you are sure to find a style that resonates with you. Explore different color palettes, arrangements, and combinations of materials to fuel your creativity and create a truly unique and personalized driftwood art frame.

Driftwood Art Frame as a Gift

Personalized Touch

A driftwood art frame makes a thoughtful and personalized gift for any occasion. By incorporating the recipient’s favorite colors, materials, or themes, you can create a frame that reflects their personality and style. Consider adding a personal message or a small photograph to make the gift even more special. A personalized driftwood art frame is sure to be cherished and treasured for years to come.

Meaning and Symbolism

Driftwood holds deep symbolic meaning and can be associated with various themes such as resilience, connection to nature, and the passage of time. By gifting a driftwood art frame, you are not only presenting a beautiful piece of art but also conveying a meaningful message. The recipient can appreciate the beauty of the frame while also reflecting on its symbolic significance.

Suitable Occasions

A driftwood art frame is suitable for a wide range of occasions and celebrations. It can be a heartfelt wedding or anniversary gift, capturing cherished memories and symbolizing the couple’s strength and enduring love. Additionally, it can be a unique housewarming gift, bringing a touch of natural beauty to a new home. Other occasions such as birthdays, Mother’s Day, or Father’s Day are also perfect opportunities to gift a driftwood art frame, showing your thoughtfulness and creativity.

Driftwood Art Frame

Filed Under: Driftwood Ideas Tagged With: Driftwood, Frame, home decor

Driftwood Art For Sale

March 25, 2024 by admin

If you’re on the lookout for unique and captivating pieces of art, look no further than “Driftwood Art For Sale.” This collection showcases stunning and intricate artworks made entirely out of driftwood. From beautifully crafted sculptures to intricate wall hangings, each piece tells a story and adds a touch of rustic charm to any space. Whether you’re a nature lover or simply appreciate the beauty of reclaimed materials, these driftwood artworks are sure to catch your eye. Discover the beauty of driftwood art and find the perfect piece to complement your style and personality.

Driftwood Art For Sale

This image is property of images.pexels.com.

Types of Driftwood Art

Sculptures

Driftwood sculptures are a popular form of art that brings out the natural beauty and unique shapes of the wood. Artists skillfully carve, shape, and manipulate driftwood pieces to create stunning three-dimensional sculptures. These sculptures can range from realistic animal figures to abstract shapes that evoke emotions and a sense of wonder.

Wall Art

Driftwood wall art is a fantastic way to add a touch of nature and rustic charm to your home decor. Artists create intricate and visually appealing compositions by arranging different driftwood pieces on a sturdy backing. These art pieces can range from simple and minimalist designs to elaborate and large-scale installations, adding texture and character to any wall.

Home Decor

Driftwood art is not only limited to sculptures and wall art but can also serve as unique home decor pieces. From driftwood lamps and chandeliers to driftwood mirrors and picture frames, artists transform weathered wood into functional and aesthetically pleasing objects. These creations blend the beauty of nature with the practicality of everyday use, providing a distinctive touch to your living space.

Functional Art

Driftwood can also be repurposed into functional art pieces that serve a practical purpose while captivating the eye. Artists incorporate driftwood into furniture designs such as coffee tables, chairs, and shelves, creating one-of-a-kind pieces that bring the outdoors inside. Each functional art piece showcases the organic shapes and textures of the driftwood, making it both pleasing to look at and functional in its purpose.

Jewelry

If you’re looking for a unique and environmentally conscious way to accessorize, driftwood jewelry is an excellent choice. Artists carefully select small, intricate driftwood pieces and transform them into stunning necklaces, bracelets, earrings, and rings. The natural beauty of the wood combined with the craftsmanship of the artist results in wearable pieces of art that are sure to make a statement.

Materials and Techniques

Driftwood

The primary material used in driftwood art is, of course, driftwood itself. These pieces have been carried by rivers or washed up on shores and have undergone a natural weathering process. Driftwood’s weathered appearance, worn textures, and unique shapes make it an ideal medium for artists to work with, allowing them to create pieces that showcase the raw beauty of nature.

Mixed Media

Many driftwood artists incorporate other materials into their artwork to create mixed media pieces. By combining driftwood with elements such as glass, metal, fabric, or found objects, artists can add depth, contrast, and unexpected elements to their creations. This blending of materials leads to intriguing and dynamic artworks that capture the imagination.

Woodworking

Woodworking techniques are often employed by driftwood artists to shape and manipulate the driftwood into desired forms. Using tools such as saws, chisels, and sanders, artists can carve, smooth, and refine the driftwood to bring out its hidden potential. Woodworking skills are essential in creating intricate sculptures, functional furniture, and precise details in the artwork.

Painting

Painting is another technique used in driftwood art to enhance and customize the pieces. Artists may choose to add a pop of color, create realistic textures, or even completely transform the appearance of the driftwood. Whether subtle or bold, painting allows artists to add their personal touch and create truly unique and eye-catching artworks.

Assemblage

Driftwood assemblage refers to the technique of assembling various pieces of driftwood together to create a cohesive artwork. Artists carefully select and arrange driftwood pieces, considering their shapes, sizes, and textures to create a harmonious composition. This technique often highlights the natural beauty and organic shapes of the driftwood, resulting in visually captivating and thought-provoking artworks.

Styles and Themes

Coastal

Coastal-themed driftwood art captures the essence of the beach and ocean, bringing a sense of tranquility and relaxation into your space. These artworks often incorporate seashells, starfish, or other maritime elements, evoking the serenity of coastal living and creating a soothing ambiance.

Natural

Natural-themed driftwood art celebrates the beauty of nature itself. Artists may focus on highlighting the organic shapes and textures of the driftwood, allowing its raw beauty to speak for itself. These artworks often evoke a sense of grounding and connection to the natural world.

Abstract

Abstract driftwood art pushes the boundaries of traditional representation, emphasizing shapes, colors, and textures rather than specific subjects. These artworks provoke thought, spark imagination, and invite viewers to interpret and connect with the artwork in their own unique ways.

Nautical

Nautical-themed driftwood art pays homage to the maritime world, incorporating elements such as anchors, boats, or lighthouses. These artworks create a sense of adventure and embrace the seafaring spirit, making them perfect for beach houses or anyone with a love for the ocean.

Rustic

Rustic-themed driftwood art embraces the weathered, worn quality of the driftwood itself. These artworks often have a more rugged and earthy feel, emphasizing the natural imperfections of the wood. Rustic driftwood art adds warmth and character to any home decor style.

Size and Dimensions

Small

Small driftwood art pieces are perfect for adding a subtle touch of nature and creativity to your decor. These pieces can range from delicate sculptures that fit in the palm of your hand to petite wall hangings that can be displayed in a small corner or nook.

Medium

Medium-sized driftwood art pieces make a statement while still being relatively easy to incorporate into your space. These artworks can serve as focal points on a wall or as eye-catching centerpieces on a table or shelf.

Large

Large driftwood art pieces command attention and create a bold presence in any room. These artworks become the focal point of the space, allowing the natural beauty of the driftwood to take center stage and immerse the viewer in its grandeur.

Custom-made

For those who have specific size requirements or visions in mind, many driftwood artists offer custom-made pieces. This allows you to collaborate with the artist to create a truly unique and personalized artwork that fits your space perfectly.

Driftwood Art For Sale

This image is property of images.pexels.com.

Price Range

Affordable

Driftwood art comes in a wide range of price points, making it accessible to various budgets. Affordable pieces often include small sculptures, wall hangings, or jewelry, allowing you to enjoy the beauty of driftwood art without breaking the bank.

Mid-range

Mid-range driftwood art includes larger sculptures, wall art installations, and home decor pieces that require more time and effort by the artist. These artworks often have more intricate details and can be a worthwhile investment for those looking to make a statement in their space.

High-end

High-end driftwood art pieces are the pinnacle of craftsmanship and can be viewed as collectors’ items. These artworks are typically larger and more complex, showcasing the artist’s immense skill and creativity. Investing in a high-end driftwood art piece ensures not only a stunning artwork but also a valuable and potentially appreciating asset.

Custom Pricing

Custom driftwood art pieces often come with personalized pricing, depending on the size, complexity, and level of customization required. Collaborating with an artist to create a one-of-a-kind piece ensures that you will have an artwork that perfectly fits your vision and budget.

Eco-Friendly Art

Sustainable Materials

One of the exceptional aspects of driftwood art is its commitment to using sustainable materials. With driftwood being sourced from rivers, beaches, or reclaimed from old structures, it is a perfect example of upcycling. By repurposing these natural materials, artists contribute to a more sustainable and environmentally conscious art form.

Recycled Wood

Artists who create driftwood art often use recycled wood, salvaging material that would have otherwise been discarded or sent to landfills. This practice reduces waste and minimizes the environmental impact associated with traditional woodworking or logging.

Ethically Sourced

Ethical sourcing is crucial in the creation of driftwood art. Artists prioritize obtaining driftwood through legal and environmentally friendly means, ensuring that no harm is done to the environment or the habitats it supports.

Eco-conscious Artists

Driftwood artists have a deep appreciation for nature and understand the importance of creating art with minimal impact on the environment. Many artists actively seek ways to reduce their carbon footprint, such as using eco-friendly paints and materials, implementing sustainable studio practices, or supporting environmental organizations through their art sales.

Driftwood Art For Sale

This image is property of images.pexels.com.

Online Marketplaces

Etsy

Etsy is a leading online marketplace known for its wide selection of handmade and vintage items, including driftwood art. With thousands of artists selling their unique creations on the platform, Etsy provides a convenient and accessible way to discover and purchase driftwood art from artists all around the world.

eBay

eBay is another online marketplace that offers a vast array of driftwood art pieces. From sculptures to wall art, eBay allows you to browse and bid on both new and pre-owned driftwood art, giving you the opportunity to find the perfect piece at a competitive price.

Amazon Handmade

Amazon Handmade is a platform dedicated to supporting independent artists and artisans. Here, you can find an assortment of high-quality driftwood art pieces created by talented artists. Amazon Handmade provides a trusted and reliable place to shop for driftwood art online.

Artfinder

Artfinder is an online marketplace specifically curated for art lovers and collectors. This platform showcases a diverse range of driftwood art created by established and emerging artists. Artfinder offers a unique and personalized shopping experience, allowing you to connect directly with the artists and learn more about their work.

Social Media Platforms

Social media platforms such as Instagram and Facebook have become increasingly popular for artists to showcase and sell their artwork, including driftwood art. Many artists have their own accounts or online shops, making it easy for you to discover and connect with them directly. These platforms offer a more personal and interactive experience, allowing you to engage with artists and explore their creative journey.

Physical Stores and Galleries

Art Galleries

Art galleries often feature a selection of driftwood art as part of their exhibits. Visiting an art gallery provides an immersive experience where you can view and appreciate the artworks up close. Galleries may also offer the opportunity to meet and discuss the art with the artists themselves, allowing you to gain insight into their creative process.

Boutiques

Boutiques that specialize in home decor or artisanal crafts frequently carry a curated selection of driftwood art. These small, independent shops offer a more intimate shopping experience, enabling you to discover unique and hand-selected pieces that align with your personal style.

Beach Shops

Given the coastal inspiration behind driftwood art, beach shops are a great place to find a variety of driftwood art pieces. These shops often curate collections that celebrate the beauty of the ocean and nature, offering you the opportunity to bring a piece of the beach into your own home.

Home Decor Stores

Large home decor stores may carry a selection of driftwood art, allowing you to incorporate these pieces seamlessly into your overall interior design. These stores often offer a range of sizes, styles, and price points, making it easier for you to find the perfect driftwood art to complement your home.

Driftwood Art For Sale

Custom Orders

Personalized Designs

Many driftwood artists are open to creating personalized designs based on your specific preferences. Whether you have a particular concept in mind or want a piece that reflects your individual style, collaborating with the artist on a personalized design ensures that you will have a driftwood art piece that is truly one-of-a-kind.

Commissioned Pieces

Commissioning a piece from a driftwood artist allows you to have a custom artwork tailored to your desired specifications. This can be especially beneficial if you have a specific space or theme in mind and want a piece that fits perfectly into your vision.

Collaborative Projects

Some driftwood artists are open to collaborative projects where they work closely with clients to create a unique piece of art. This can be a rewarding experience as you actively participate in the creative process, providing input and ideas while working together with the artist to bring your vision to life.

Finding the Perfect Driftwood Art

Consider Your Space

When searching for the perfect driftwood art, consider the space where you intend to display the artwork. Take into account the size of the area, the existing decor, and the overall ambiance you want to create. This will help you select a piece that harmonizes with your surroundings.

Match Your Style

Driftwood art comes in various styles and themes, so it’s crucial to choose a piece that matches your personal style and aesthetic preferences. Whether you prefer a coastal, natural, abstract, or rustic look, selecting an artwork that resonates with your taste ensures a harmonious and cohesive design.

Connect with the Artist

Engaging with the artist behind the driftwood art you’re interested in adds a personal touch to the experience. Reach out to the artist via their website, social media page, or online marketplace platform to ask questions, learn more about their creative process, and gain insight into their inspiration. Building a connection with the artist can enhance your appreciation for the artwork.

Read Reviews

If purchasing online, take the time to read reviews from previous customers. Reviews can provide valuable insights into the quality of the artwork, the artist’s professionalism, and the overall purchasing experience. Learning from others’ experiences can help you make an informed decision and ensure a smooth transaction.

Ask for More Photos

If you need a closer look or want to examine specific details of the driftwood art before purchasing, don’t hesitate to ask the artist for additional photos. Artists are often more than willing to provide more visuals to help you make a confident choice.

Ask About Packaging and Shipping

Before making your final decision, inquire about the artist’s packaging and shipping processes. Ensure that the driftwood art will be carefully packaged to prevent any damage during transit. Additionally, discuss shipping options, tracking information, and any associated costs to ensure a smooth delivery process.

By following these tips and exploring the diverse world of driftwood art, you are sure to find the perfect piece that brings nature’s beauty into your home while supporting talented artists and eco-conscious practices.

Driftwood Art For Sale

Filed Under: Driftwood Ideas Tagged With: Driftwood, For Sale, home decor, wood

Driftwood For Sale Etsy

March 8, 2024 by admin

Looking to add a touch of natural beauty to your home decor? Look no further than Driftwood For Sale Etsy! This unique online marketplace offers a wide selection of stunning driftwood pieces that are sure to enhance any space. From intricate sculptures to rustic wall hangings, there’s something for everyone’s taste. Whether you’re seeking a coastal-inspired vibe or simply appreciate the organic charm of driftwood, Etsy has got you covered. Transform your living space into a serene sanctuary with these eye-catching driftwood creations. Explore the collection today and bring nature’s beauty into your home.

Driftwood For Sale Etsy

This image is property of images.pexels.com.

Types of Driftwood

Ocean Driftwood

Ocean driftwood refers to pieces of wood that have been washed up onto the shores of oceans and seas. These driftwood pieces have been carried by ocean currents, tides, and waves, resulting in their distinctive weathered appearance. Due to their exposure to saltwater, ocean driftwood often has a unique patina and may even have shells, barnacles, or other marine life attached to them. They come in various sizes and shapes, making them versatile for both decorative and functional purposes.

River Driftwood

River driftwood, as the name suggests, comes from rivers and streams. This type of driftwood is typically lighter in color and smoother in texture compared to ocean driftwood. River currents and water flow shape and polish the driftwood as it journeys downstream. River driftwood often has a cleaner and more polished appearance due to its exposure to freshwater. These pieces can vary in size and shape, with some having interesting contours and curves.

Lake Driftwood

Similar to river driftwood, lake driftwood is found near the shores of lakes and freshwater bodies. The gentle movements of lake water give the driftwood a smooth texture and can create unique shapes and patterns. Lake driftwood often has a lighter color compared to ocean driftwood, as it is not exposed to the saltwater environment. It can be used in various artistic and functional projects, adding a touch of nature’s beauty to any space.

Sizes and Shapes

Small and Medium-sized Driftwood Pieces

Small and medium-sized driftwood pieces are perfect for adding a rustic touch to home decor or crafting projects. With their compact size, they can be easily incorporated into various designs, such as crafting miniature driftwood sculptures or creating unique jewelry pieces. These smaller driftwood pieces often have intricate shapes, making them ideal for adding detail and visual interest to any project.

Large Driftwood Logs

Large driftwood logs are impressive natural elements that make a statement in any setting. These logs can range in size from a few feet to several meters in length. Due to their size, they are commonly used for creating driftwood furniture, such as coffee tables, dining tables, or benches. The weathered appearance and varied textures of large driftwood logs add a touch of natural sophistication to any interior or outdoor space.

Curved and Twisted Driftwood

Curved and twisted driftwood pieces bring a sense of organic beauty to any artistic or design project. Their unique shapes and forms can be used to create eye-catching sculptures or incorporated into larger furniture pieces. The elegant curves and intricate twists found in these driftwood pieces add a touch of whimsy and creativity to any space, inviting an element of nature’s artistry indoors.

Straight and Smooth Driftwood

Straight and smooth driftwood pieces offer a more refined and contemporary aesthetic. These pieces are often chosen for their clean lines and simplicity, making them suitable for modern or minimalist design styles. Straight and smooth driftwood can be used to create sleek furniture pieces, such as coffee tables or shelves, or as decorative elements in wall art or lamp bases. Their simplicity allows them to seamlessly blend into various decor themes while still showcasing the beauty of natural wood.

Decorative Driftwood

Driftwood Wall Art

Driftwood wall art is a popular way to bring the beauty of driftwood into your home. Whether it’s a large statement piece or a collection of smaller driftwood elements, wall art made from driftwood adds texture, dimension, and a coastal vibe to any space. The organic shapes and weathered appearance of driftwood lend themselves perfectly to creating unique and visually captivating wall art pieces.

Driftwood Sculptures

Driftwood sculptures are a wonderful way to highlight the natural beauty and artistic potential of driftwood. From abstract forms to realistic wildlife representations, driftwood sculptures can be created in various styles to suit different artistic preferences. The versatility of driftwood allows artists to explore their creativity, using the natural curves and shapes of the wood to bring their visions to life.

Driftwood Candle Holders

Driftwood candle holders provide a cozy and charming ambiance to any room. Whether small tea light holders or larger candlesticks, these unique creations add a touch of warmth and natural beauty to your space. The nooks and crevices of the driftwood create interesting and intricate patterns of light and shadow when illuminated by candles. Driftwood candle holders can be standalone pieces or incorporated into larger decor arrangements.

Driftwood Picture Frames

Driftwood picture frames offer a creative and rustic way to showcase treasured memories or artwork. The natural tones and textures of driftwood complement a wide range of photographs and artwork, adding a touch of organic elegance to any display. Whether it’s a single photo or a collage, driftwood frames provide a unique and personalized touch to your home decor.

Functional Driftwood

Driftwood Shelves

Driftwood shelves combine functionality with aesthetic appeal, offering a natural and rustic alternative to traditional wall shelving. The weathered wood and unique shapes of driftwood create shelves that are not only useful for storage but also serve as eye-catching focal points in any room. Whether used in the kitchen, bathroom, or living room, driftwood shelves provide a charming and practical solution to display books, plants, or decorative items.

Driftwood Coat Racks

Driftwood coat racks are a stylish and unique way to organize outerwear in your entryway or hallway. The irregular shapes and sizes of driftwood pieces create a visually interesting and functional piece of furniture. Each driftwood coat rack is one-of-a-kind, making it a conversation starter in your home. These rustic and coastal-inspired pieces add a touch of nature to your everyday routine.

Driftwood Key Holders

Keep your keys easily accessible and organized with driftwood key holders. Designed with hooks or small knobs, these key holders provide a practical and decorative solution to prevent misplacing your keys. The natural texture and beauty of driftwood make each key holder a work of art, enhancing the aesthetics of your space while keeping your keys within reach.

Driftwood For Sale Etsy

This image is property of images.pexels.com.

DIY Driftwood Projects

Driftwood Mobiles

Create mesmerizing and soothing driftwood mobiles using various driftwood pieces suspended from strings or wires. The gentle movement of the mobiles and the interplay of light and shadow against the weathered wood adds a calming and natural element to any room. These DIY driftwood mobiles can be customized according to your preferences, making them a unique and personal addition to your home decor.

Driftwood Jewelry

Unleash your creativity and craft one-of-a-kind jewelry pieces using driftwood as the main material. From necklaces and bracelets to earrings and brooches, driftwood jewelry offers a unique and nature-inspired aesthetic. The smooth texture and distinct patterns of driftwood make each piece truly special, reflecting the beauty of the natural world in wearable art.

Driftwood Wind Chimes

Create soothing melodies with DIY driftwood wind chimes. Use driftwood pieces of different shapes and sizes, string them together with beads or shells, and hang them in your garden or near an open window. The gentle tinkling sound created by the driftwood pieces as they sway with the wind adds a relaxing and harmonious ambience to your outdoor spaces.

Unique Driftwood Gifts

Driftwood Terrariums

Driftwood terrariums combine the beauty of driftwood with the allure of mini ecosystems. With the driftwood acting as a base, you can fill glass enclosures with soil, rocks, moss, and small plants to create a self-contained, low-maintenance garden. These miniature worlds provide a captivating and unique gift for nature enthusiasts or anyone looking for an element of natural beauty in their space.

Driftwood Planters

Driftwood planters offer a creative and eco-friendly way to display your favorite plants. Hollowed-out sections of driftwood can be used as charming containers for small succulents or air plants, adding a touch of greenery to your home or office. The texture and visual interest provided by the driftwood make these planters stand out, allowing your plants to become unique focal points.

Driftwood Aquarium Decor

Enhance your aquarium’s aesthetic appeal and create a natural underwater landscape with driftwood aquarium decor. Driftwood pieces carefully selected for their shape and texture can be added to aquariums to create hiding spots for fish or a natural backdrop for aquatic plants. The tannins present in driftwood can also help replicate the natural habitats of certain fish species, promoting their overall well-being in the aquarium.

Driftwood Birdhouses

Create a cozy abode for your feathered friends with driftwood birdhouses. The weathered and textured appearance of driftwood blends harmoniously with natural surroundings, offering a charming and rustic dwelling for birds. These unique birdhouses not only provide shelter but also add a decorative element to your backyard or garden, bringing a touch of nature closer to your home.

Driftwood For Sale Etsy

This image is property of images.pexels.com.

Driftwood Furniture

Driftwood Coffee Table

A driftwood coffee table serves as a stunning centerpiece in any living room. The natural beauty of driftwood, combined with a glass or wooden tabletop, creates a unique and eye-catching furniture piece. The intricate shapes and textures of driftwood legs or bases make each coffee table an individual work of art, adding a touch of coastal elegance to your living space.

Driftwood Dining Table

Impress your guests with a driftwood dining table that combines functionality with natural beauty. The organic lines and textures of driftwood create a captivating and rustic dining experience. Whether it’s a smaller round table or a large rectangular one, a driftwood dining table adds character and charm to any dining room, providing a unique and inviting atmosphere for shared meals and gatherings.

Driftwood Bench

A driftwood bench offers a stylish and relaxed seating option for indoor or outdoor spaces. From entryways and gardens to balconies and patios, a driftwood bench enhances the aesthetics of any area while providing a comfortable place to sit and unwind. The intertwined driftwood pieces in the backrest and the weathered seat add a touch of nature’s artistry to your seating arrangement.

Driftwood Home Decor

Driftwood Mirrors

Driftwood mirrors infuse natural beauty and rustic charm into any room. Whether it’s a full-length mirror or a smaller decorative mirror, the addition of driftwood frames adds a unique and organic touch. The irregular shapes and textures of driftwood complement the reflection of light, creating an intriguing interplay between the mirror and its surroundings.

Driftwood Lamp Bases

Driftwood lamp bases provide a distinctive and earthy aesthetic to any room. These unique lamp bases create a warm and inviting atmosphere, as the light filters through the gaps and contours of the driftwood. Whether used as bedside table lamps or floor lamps, driftwood lamp bases add a touch of coastal elegance and natural beauty to your lighting fixtures.

Driftwood Curtain Tiebacks

Enhance the visual appeal of your curtains with driftwood tiebacks. These functional and decorative accessories hold back your curtains, allowing natural light to flood your space while adding a rustic and beach-inspired touch. The weathered and organic shapes of driftwood tiebacks provide a unique and charming detail, adding character to your window treatments.

Driftwood For Sale Etsy

Driftwood Wedding Decor

Driftwood Centerpieces

Create stunning and unique centerpieces for your wedding or special event with driftwood. Surround candle holders, flower vases, or other decorative elements with carefully curated driftwood pieces to create a focal point on your tables. The natural beauty of driftwood adds a touch of rustic elegance and coastal charm to your wedding decor, making a lasting impression on your guests.

Driftwood Place Card Holders

Guide your guests to their seats in style with driftwood place card holders. Utilize small and medium-sized driftwood pieces to create unique holders for your name cards or table numbers. The distinct shapes and textures of driftwood complement a wide range of wedding styles, from beach-themed to bohemian, adding a natural and personalized touch to your table settings.

Driftwood Table Numbers

Make a statement with driftwood table numbers that showcase both creativity and functionality. Whether it’s handwritten or engraved, the numbers elegantly displayed on carefully selected driftwood pieces provide a charming and distinctive touch to your table arrangements. Driftwood table numbers add a natural and rustic element to your wedding decor, creating a memorable visual experience for your guests.

Sustainable and Eco-Friendly

Benefits of Using Driftwood

Using driftwood in various projects offers several benefits. Firstly, driftwood is a sustainable resource, as it is derived from nature without requiring the cutting down of live trees. By repurposing driftwood, you are contributing to the reduction of deforestation. Additionally, utilizing driftwood promotes environmentally friendly practices by reusing a material that would otherwise end up as waste. Lastly, driftwood’s natural beauty and unique characteristics bring a touch of the outdoors into your home or space, creating a connection with nature and reminding us of the importance of preserving our environment.

Environmentally Friendly Driftwood Harvesting

When sourcing driftwood, it is essential to practice environmentally friendly harvesting methods. Picking up driftwood pieces from the shores of rivers, lakes, or oceans is generally the most sustainable approach. It is crucial to avoid damaging or disturbing natural habitats and ecosystems while collecting driftwood. Additionally, ensuring that any marine life or organisms attached to the driftwood are gently and safely removed, minimizing any potential harm. By being mindful of sustainable harvesting practices, you can enjoy the beauty of driftwood while preserving the natural environment for future generations to appreciate.

In conclusion, driftwood is a versatile and environmentally friendly material that offers endless possibilities for both decorative and functional purposes. Whether it’s creating stunning wall art, crafting unique furniture pieces, or adding a touch of nature to your wedding decor, there are endless ways to incorporate driftwood into your home or special projects. By taking advantage of the various types, shapes, and sizes of driftwood available, you can unleash your creativity and bring the beauty of the natural world into your living spaces. Additionally, by practicing sustainable harvesting methods and appreciating the unique qualities of driftwood, you can contribute to a more eco-friendly and connected world.

Driftwood For Sale Etsy

Filed Under: Driftwood Ideas Tagged With: Driftwood, home decor, natural materials

  • « Previous Page
  • Page 1
  • …
  • Page 24
  • Page 25
  • Page 26
  • Page 27
  • Page 28
  • …
  • Page 30
  • Next Page »

Primary Sidebar

Driftwood4us.com, is a participant in the Amazon Services LLC Associates Program, an affiliate advertising program designed to provide a means for sites to earn advertising fees by advertising and linking to amazon.com.