• Skip to main content
  • Skip to primary sidebar
  • Terms and Conditions
  • Privacy Policy
  • Contact

Driftwood 4 Us

Just About Driftwood

home decor

How To Attach Driftwood?

February 20, 2024 by admin

So you’ve found a beautiful piece of driftwood that you want to incorporate into your home decor or use as a centerpiece in your aquarium, but you’re not exactly sure how to securely attach it. Don’t worry, we’ve got you covered. In this article, we’ll walk you through some simple and effective methods for attaching driftwood so you can confidently showcase its natural beauty in your space. Whether you’re a DIY enthusiast or a nature lover, we have solutions that will ensure your driftwood stays in place and becomes a stunning focal point.

Methods for Attaching Driftwood

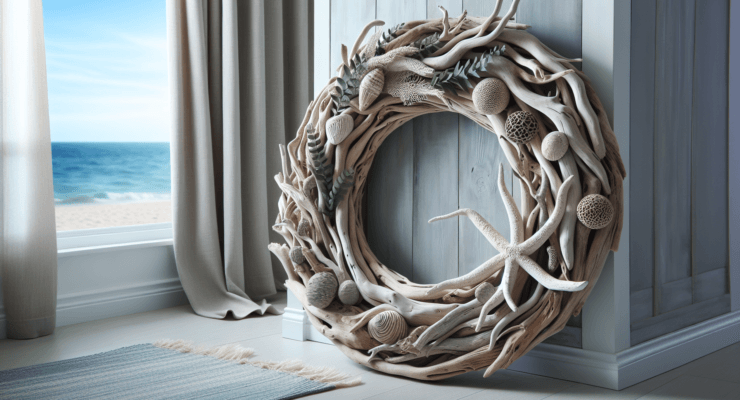
Driftwood can make a beautiful addition to your home decor, whether you’re incorporating it into a gallery wall, creating a unique centerpiece, or even using it as a functional coatrack. But how exactly do you attach driftwood securely and safely? In this article, we will explore several methods for attaching driftwood, each with its own unique advantages and considerations.

How To Attach Driftwood?

Drilling and Screwing

One of the most reliable ways to attach driftwood is by drilling and screwing. This method provides a sturdy and long-lasting attachment, ensuring that your driftwood will stay securely in place. Here’s a step-by-step guide on how to use this method:

  1. Select the appropriate drill bit: Choose a drill bit that is slightly smaller in diameter than your screws to ensure a snug fit.
  2. Pre-drill holes into the driftwood: Mark the locations where you want to attach the driftwood, then carefully pre-drill holes using the selected drill bit.
  3. Position the driftwood in place: Hold the driftwood against the desired surface and mark the corresponding locations for the screws.
  4. Attach screws through the pre-drilled holes: Insert screws through the pre-drilled holes in the driftwood and drive them into the surface until they are fully secured.
  5. Tighten the screws securely: To ensure a strong attachment, tighten the screws fully using a screwdriver or drill.

This method is particularly useful when attaching heavy or large pieces of driftwood that require extra support.

Using Wire or Fishing Line

If you prefer more flexibility in the positioning of your driftwood or want a more discreet attachment method, using wire or fishing line is a great option. This method offers a minimalist look, allowing the driftwood to appear as if it is effortlessly suspended. Here’s how you can attach driftwood using wire or fishing line:

  1. Choose a sturdy wire or fishing line: Opt for wire or fishing line that is strong enough to support the weight of your driftwood.
  2. Wrap the wire or line securely around the driftwood: Start at one end of the driftwood and wrap the wire or line tightly around it several times, ensuring a secure hold.
  3. Create loops or knots to hang the driftwood: Depending on your desired hanging method, create loops or knots in the wire or line at both ends of the driftwood.
  4. Attach the other end to a hook or nail on the wall: Securely fasten the loops or knots to hooks or nails on the wall, adjusting the positioning as needed.
  5. Adjust the positioning and tighten as needed: Once the driftwood is attached, make any necessary adjustments to ensure it hangs straight, and tighten the wire or line as desired.

This method is ideal for creating a floating effect and works well for smaller driftwood pieces or when you want to achieve a more ethereal look.

Hot Gluing

Hot gluing is a quick and easy method for attaching driftwood that requires minimal tools and provides a strong hold. It is particularly useful when attaching lightweight driftwood pieces or when you want to avoid drilling holes. Follow these steps to attach driftwood using hot glue:

  1. Select a high-quality adhesive hot glue gun: Choose a hot glue gun that provides a strong and durable bond, suitable for the weight and size of your driftwood.
  2. Apply hot glue to the desired area on the driftwood: Using the hot glue gun, apply a generous amount of hot glue to the spot where you want to attach the driftwood.
  3. Press the driftwood firmly onto the desired surface: Immediately press the driftwood onto the desired surface, ensuring that it adheres to the hot glue.
  4. Hold it in place until the glue is completely dry and secure: Maintain gentle pressure on the driftwood until the hot glue is fully cooled and set, ensuring a secure attachment.
  5. Ensure the glued area can support the weight of the driftwood: Before hanging or displaying your driftwood, ensure that the hot glue attachment can support the weight of the driftwood to avoid any accidents or damage.

While hot gluing offers a convenient way to attach driftwood, it is important to consider the weight of your driftwood and the type of surface you are attaching it to. Hot glue may not provide sufficient support for heavy driftwood pieces or certain surfaces.

Using Epoxy Resin

Epoxy resin provides a strong and durable bond that is especially beneficial when attaching driftwood to smooth or non-porous surfaces. This method not only securely attaches the driftwood but also enhances its natural beauty. Follow these steps to attach driftwood using epoxy resin:

  1. Prepare the epoxy resin according to the manufacturer’s instructions: Read and follow the manufacturer’s instructions carefully for preparing the epoxy resin. This may involve mixing specific ratios of resin and hardener to activate the bonding properties.
  2. Apply the epoxy to both the driftwood and the desired surface: Using a brush or spatula, apply an even layer of epoxy resin to both the area on the driftwood where you want to attach it and the corresponding area on the desired surface.
  3. Press the driftwood onto the surface firmly: Immediately press the driftwood onto the desired surface, ensuring that it makes full contact with the layer of epoxy resin.
  4. Hold it in place until the epoxy cures completely: To achieve a strong bond, hold the driftwood in place until the epoxy resin cures completely. Follow the manufacturer’s instructions regarding cure time.
  5. Follow any additional instructions from the epoxy resin manufacturer: Some epoxy resins may require additional steps or precautions, such as applying a topcoat or allowing for post-cure, to ensure the best results. Be sure to read and follow any additional instructions provided by the manufacturer.

Epoxy resin offers a durable attachment method that is ideal for securing driftwood to surfaces such as glass, metal, or ceramic, where other methods may not adhere as effectively.

How To Attach Driftwood?

Nailing or Stapling

If you prefer a more traditional approach to attaching driftwood, nailing or stapling can provide a reliable and visually appealing attachment. This method works well when attaching driftwood to wooden surfaces or where a rustic aesthetic is desired. Follow these steps to attach driftwood using nails or staples:

  1. Choose appropriate nails or staples for the project: Select nails or staples that are long enough to penetrate both the driftwood and the desired surface without causing any damage or splitting.
  2. Position the driftwood in place: Hold the driftwood against the desired surface, ensuring it is aligned and positioned as desired.
  3. Drive nails or staples through the driftwood and into the desired surface: Use a hammer or staple gun to drive nails or staples through the driftwood and into the desired surface, ensuring a firm and secure attachment.
  4. Ensure the nails or staples are secure and provide sufficient support: Double-check that the nails or staples are fully inserted and provide adequate support for the weight of the driftwood. Consider using wood glue in conjunction with nails or staples for added stability.

Nailing or stapling is a classic method that complements the natural aesthetic of driftwood, especially when attaching it to wooden surfaces or incorporating it into DIY furniture projects.

Using Rope or Twine

For a coastal or bohemian vibe, attaching driftwood with rope or twine can add an organic and rustic touch to your decor. This method allows for easy adjustment and customization, making it an excellent choice for showcasing multiple driftwood pieces. Follow these steps to attach driftwood using rope or twine:

  1. Select a strong and durable rope or twine: Choose a rope or twine that can comfortably support the weight of your driftwood while offering an aesthetically pleasing appearance.
  2. Measure and cut the desired length of rope or twine: Determine the length you want your driftwood to hang from the wall or support, then cut the rope or twine accordingly.
  3. Create loops or knots around the driftwood: Securely tie loops or knots around the driftwood, allowing for sufficient support and adjustment as needed.
  4. Attach the other ends of the rope or twine to hooks or nails on the wall: Securely fasten the other ends of the rope or twine to hooks or nails on the wall, adjusting the positioning to achieve your desired arrangement.
  5. Adjust the positioning and tighten as needed: Once the driftwood is hung, you can easily adjust the positioning and tighten the rope or twine as desired to achieve the desired display.

Rope or twine offers a versatile and visually appealing attachment method, adding an organic and natural look to your driftwood arrangements.

Zip Ties or Cable Ties

For a quick and hassle-free attachment, zip ties or cable ties can be an excellent choice. This method is particularly suitable for larger or heavier driftwood pieces that require a secure and stable connection. Follow these steps to attach driftwood using zip ties or cable ties:

  1. Choose appropriate zip ties or cable ties for the project: Select zip ties or cable ties of suitable length and strength to handle the weight and size of your driftwood.
  2. Wrap the zip ties or cable ties tightly around the driftwood and desired surface: Start by wrapping the zip ties or cable ties tightly around the driftwood, ensuring a firm hold. Extend the ties to the desired surface and wrap them tightly around it as well.
  3. Pull the ties securely until the driftwood is firmly attached: Pull the zip ties or cable ties as tight as possible to securely fasten the driftwood to the desired surface.
  4. Trim off any excess length from the ties: Use scissors or a cutting tool to trim off any excess length from the zip ties or cable ties, ensuring a neat and tidy appearance.
  5. Ensure the ties are tightly secured and provide adequate support: Double-check that the zip ties or cable ties are tightly secured and provide sufficient support for the weight of the driftwood.

Zip ties or cable ties offer a practical and efficient method for attaching driftwood, especially when dealing with large or heavy pieces that require a strong and reliable connection.

Attaching with Brackets

When attaching larger or more intricate driftwood pieces, brackets can provide the necessary support and stability. This method ensures that your driftwood remains securely attached, even in high-traffic areas. Follow these steps to attach driftwood using brackets:

  1. Obtain suitable brackets for attaching the driftwood: Choose brackets that are appropriate for the size and weight of your driftwood, ensuring that they provide sufficient support.
  2. Position the brackets on the desired surface and driftwood: Place the brackets against the desired surface and the driftwood, aligning them for maximum stability and support.
  3. Secure the brackets in place using screws, nails, or bolts: Depending on the type of brackets used, securely attach them to the desired surface and the driftwood using suitable screws, nails, or bolts.
  4. Ensure the brackets are properly aligned for maximum stability: Double-check that the brackets are properly aligned and provide a sturdy platform for the driftwood. Adjust the positioning if necessary.
  5. Check the attachment for any wobbling or instability: Once the brackets are securely attached, test the stability of the attached driftwood. Make sure it doesn’t wobble or feel unstable.

Using brackets can be especially useful when attaching driftwood to walls or creating unique shelving units. They provide added security and ensure that your driftwood is displayed safely.

Using Adhesive Hooks

For a non-permanent attachment method that doesn’t require drilling, adhesive hooks can be a practical solution. This method is particularly useful when you want to attach smaller driftwood pieces or if you’re renting and need a removable option. Follow these steps to attach driftwood using adhesive hooks:

  1. Choose adhesive hooks suitable for the weight of the driftwood: Select adhesive hooks that can support the weight of your driftwood while adhering securely to the desired surface.
  2. Clean the desired surface: Thoroughly clean the area where you intend to place the adhesive hooks, removing any dust, dirt, or debris. This ensures a strong bond between the hooks and the surface.
  3. Peel off the backing of the adhesive hooks: Carefully remove the backing from the adhesive hooks, exposing the adhesive portion. Be cautious not to touch or contaminate the adhesive.
  4. Press the adhesive hooks firmly onto the desired surface: Apply gentle pressure to firmly press the adhesive hooks onto the desired surface, ensuring they make full contact.
  5. Hang the driftwood on the hooks: Hang or suspend the driftwood on the attached adhesive hooks, adjusting the positioning as desired.

Adhesive hooks offer a convenient and temporary attachment method for displaying driftwood, providing a secure hold without the need for tools or permanent alterations to the surface.

Wire Wrapping

For an artistic and visually appealing way to attach driftwood, consider wire wrapping. This method allows you to showcase driftwood while creating intricate patterns and designs. Here’s a step-by-step guide on how to attach driftwood using wire wrapping:

  1. Choose a pliable and durable wire for wrapping: Select wire that is easy to manipulate and can securely hold the weight of the driftwood. Copper, aluminum, or craft wire are ideal options.
  2. Wrap the wire tightly and securely around the driftwood: Begin by wrapping the wire tightly around the driftwood, starting at one end and working your way to the other, ensuring a secure hold.
  3. Weave the wire through the driftwood and create loops or knots: As you wrap the wire, weave it through the driftwood to create additional loops or knots for added stability and aesthetic appeal.
  4. Shape the wire to create a hanging or mounting mechanism: Manipulate the wire to form hooks, loops, or other shapes that will allow you to hang or mount the driftwood securely.
  5. Attach the wire to hooks or nails on the desired surface: Once you have shaped the wire and created a hanging or mounting mechanism, attach it securely to hooks or nails on the wall or desired surface.

Wire wrapping enables you to personalize your driftwood attachment, creating unique and eye-catching displays while ensuring a strong and secure connection.

By using these various methods for attaching driftwood, you can unleash your creativity and bring the beauty of nature into your home decor. Whether you opt for the traditional approach of drilling and screwing, the delicate beauty of wire wrapping, or the simplicity of adhesive hooks, the possibilities are endless. So go ahead, gather your driftwood collection, and start creating stunning and unique pieces that will surely mesmerize all who enter your space. Happy decorating!

Filed Under: Driftwood Tagged With: attaching, Driftwood, home decor

Driftwood Houses How To Make?

February 15, 2024 by admin

If you’ve ever strolled along a tranquil beach, mesmerized by the intricate beauty of driftwood, you may have found yourself wondering how those weathered branches could be transformed into charming little houses. Well, wonder no more! In this article, you’ll discover the secrets to creating your very own driftwood houses, bringing a touch of coastal enchantment into your home decor. So gather your collection of driftwood treasures, prepare to unleash your creativity, and let’s embark on a delightful journey into the world of handmade driftwood houses.

Materials Needed

To create your own driftwood house, you’ll need a few essential materials. Here’s a list of what you’ll need to gather before getting started:

Driftwood

The main ingredient for your driftwood house is, of course, driftwood! Look for pieces that are sturdy and have interesting shapes. You can find driftwood on beaches or purchase it from craft stores or online suppliers.

Saw

A saw will be necessary to cut your driftwood to the desired lengths. Choose a saw that is appropriate for the size of your project and comfortable for you to use.

Sandpaper

Sandpaper will help smooth out rough edges and surfaces of the driftwood pieces. Choose different grits depending on the level of smoothness you want to achieve.

Glue

A strong adhesive is essential for constructing your driftwood house. Look for a glue that works well with wood and can withstand any potential outdoor exposure.

Paint

Adding a splash of color to your driftwood house can make it truly stand out. Choose paint that is designed for outdoor use and is compatible with the type of wood you are using.

Brushes

You’ll need a variety of brushes for applying paint to your driftwood house. Consider using both larger brushes for broad strokes and smaller brushes for detailed work.

Sealer

To protect your driftwood house from the elements, you’ll want to apply a sealer. Look for a sealer that is appropriate for outdoor use and is compatible with both the paint and wood you are using.

Scissors

Scissors will come in handy for cutting any additional materials such as fabric or string for decorative purposes.

Measuring tape

For precision and accuracy in your driftwood house construction, a measuring tape will be useful in ensuring correct dimensions and proportions.

Optional decorations

To add personal touches and make your driftwood house truly unique, consider gathering optional decorations such as shells, stones, miniature furniture, or anything else that inspires you.

Now that you have all the materials ready, let’s dive into the process of making your own driftwood house!

Choosing and Preparing Driftwood

Before you can start building your driftwood house, you’ll need to select and prepare the driftwood pieces. Here are the steps to follow:

Collecting Driftwood

Start by collecting driftwood pieces that catch your eye. Look for different shapes, sizes, and textures to create an interesting visual effect in your final piece. Remember to only collect driftwood from sustainable sources and avoid removing it from protected areas.

Cleaning Driftwood

Driftwood can accumulate dirt, grime, and saltwater residue, so it’s essential to clean it thoroughly. Start by rinsing the pieces with fresh water to remove any loose debris. If necessary, use a brush and mild detergent to scrub away any stubborn dirt or stains. Rinse again to ensure all soap residue is removed.

Drying Driftwood

After cleaning, allow the driftwood to dry completely before proceeding with the construction. This will help prevent any moisture-related issues later on. Place the driftwood in a well-ventilated area, preferably outdoors, and let it dry naturally. This process may take several days or even weeks, depending on the size and thickness of the pieces.

Once your driftwood is clean and dry, you’re ready to move on to the next steps in creating your driftwood house!

Driftwood Houses How To Make?

Designing the House

Now that you have prepared your driftwood pieces, it’s time to plan and design your dream driftwood house. Consider the following steps to bring your vision to life:

Decide on House Size

Think about the size of the driftwood house you want to create. Consider where you plan to display it and how much space you have available. This will help you determine the scale of your project and the size of driftwood pieces you’ll need.

Sketching the Design

Before cutting any driftwood, sketch out your desired house design on paper. This will serve as a blueprint for your project and help guide you during construction. Consider the shape of the house, the number of rooms, and any additional features you want to incorporate.

Cutting Driftwood Pieces

Using your saw, carefully cut the driftwood pieces according to your sketch. Take your time and make precise cuts to ensure the pieces fit together properly. Consider using different lengths and angles to create unique architectural details.

Once you have all the necessary driftwood pieces cut, you’re ready to start assembling your driftwood house!

Assembling the House

With your driftwood pieces prepared, it’s time to start building your driftwood house. Follow these steps to assemble the structure:

Building the Base

Begin by constructing the base of your driftwood house. Arrange the longest driftwood pieces in a square or rectangular shape, depending on your design. Use glue to secure the pieces together at the corners, ensuring they are aligned and level.

Attaching Walls and Roof

Once the base is secure, attach the walls and roof to the structure. Arrange the driftwood pieces according to your design, using glue to hold them in place. Consider overlapping the pieces for added stability and visual interest. Take your time to make sure everything is aligned and securely attached.

Creating Windows and Doors

To add charm and character to your driftwood house, create windows and doors. Use your saw to carefully cut out openings in the walls, making sure they are proportionate to the overall design. Sand the edges of the openings with sandpaper for a smooth finish.

Congratulations! Your driftwood house is taking shape. Now it’s time to move on to the next steps to enhance its appearance.

Driftwood Houses How To Make?

Sanding and Painting

Sanding and painting your driftwood house will give it a polished and finished look. Follow these steps to bring out its true beauty:

Sanding the Driftwood

Before painting, sand the driftwood surfaces to smooth out any rough spots or splinters. Start with a medium-grit sandpaper and gradually work your way to a finer grit for a smooth finish. Pay attention to details and hard-to-reach areas to ensure a consistent appearance.

Choosing Paint Colors

Select paint colors that complement your design and personal taste. Consider natural tones to enhance the rustic charm of the driftwood or opt for vibrant colors to make a bold statement. Test the colors on a small area of the driftwood to see how they look before committing to the entire project.

Applying Base Coat

Start by applying a base coat of paint to your driftwood house. This will create a foundation and help the subsequent layers adhere better. Use a brush to evenly apply the paint, making sure to cover all the surfaces. Allow the base coat to dry completely before moving on to the next step.

Adding Details and Texture

Once the base coat is dry, it’s time to add details and texture to your driftwood house. Use different brushes and techniques to create interesting patterns, simulate wood grain, or add decorative elements. Have fun with this step and let your creativity shine!

Your driftwood house is now taking on its final form. But before you can proudly display it, there’s one more important step to protect and preserve your creation.

Applying Sealer

To ensure your driftwood house withstands the test of time and weather, it’s crucial to apply a sealer. Follow these steps to finish and protect your masterpiece:

Sealing the Driftwood

Using a brush, apply a layer of sealer to all the painted and unpainted surfaces of your driftwood house. The sealer will help protect the wood from moisture and sun damage, prolonging its lifespan. Ensure even coverage and pay extra attention to joints and crevices.

Protecting the Paint and Wood

Allow the sealer to dry completely according to the product’s instructions. Depending on the sealer used, you may need to apply multiple coats for optimal protection. Once dry, your driftwood house is now ready to face the elements.

Optional Decorations

To make your driftwood house truly one-of-a-kind, consider adding optional decorations. Here are some ideas to inspire you:

Adding Shells and Stones

Decorate the exterior of your driftwood house with small seashells or colorful stones. Use glue to secure them in place, creating a whimsical and beachy feel.

Using Miniature Furniture

For added realism and playfulness, include miniature furniture inside your driftwood house. You can purchase or make tiny chairs, tables, beds, or any other furniture pieces that suit your design.

Creating a Driftwood Garden

Surround your driftwood house with a miniature garden by incorporating tiny plants, pebbles, and moss. This will enhance the natural and enchanting atmosphere of your creation.

Let your imagination run wild and add any other decorations that speak to your creative vision.

Displaying and Caring for Driftwood Houses

Once your driftwood house is complete, you’ll want to find the perfect spot to display it. Consider the following tips:

Choosing a Display Location

Find a location that showcases your driftwood house and fits well with its surroundings. It could be a mantelpiece, a shelf, a window sill, or even a spot in your garden. Experiment with different settings until you find the perfect place to showcase your creation.

Cleaning and Dusting

Regularly clean and dust your driftwood house to keep it looking its best. Use a soft cloth or a duster to gently remove any dirt or dust that may accumulate over time. Avoid using harsh chemicals or abrasive materials that could damage the wood or paint.

Repairing Damages

If your driftwood house experiences any damage, such as loose pieces or chipped paint, make repairs as soon as possible. Use glue to reattach any driftwood pieces and touch up any areas where the paint has chipped. Regular maintenance will keep your driftwood house in top shape for years to come.

Alternative Methods and Styles

Driftwood houses offer endless possibilities for creativity and innovation. Here are some alternative methods and styles you can explore:

Using Driftwood Sticks

Instead of assembling driftwood pieces into a house-like structure, consider using driftwood sticks to create a more abstract and sculpture-like piece. You can experiment with different shapes and angles to achieve unique and eye-catching designs.

Creating Treehouse Designs

Take your driftwood house to new heights by designing and constructing a treehouse-inspired structure. Incorporate branches or tree trunks to mimic the look and feel of a real treehouse. This style adds an element of fantasy and adventure to your driftwood creation.

Making Fairy Driftwood Houses

Create whimsical and magical driftwood houses fit for fairies. Use delicate driftwood pieces and add sparkles, fairy lights, and other enchanted elements to evoke a sense of wonder. These small-scale houses are perfect for indoor displays or outdoor fairy gardens.

Feel free to experiment and combine different styles to create your own unique driftwood masterpiece.

Driftwood House Inspiration

If you’re looking for further inspiration, numerous artists, social media accounts, and publications can provide ideas and guidance:

Driftwood House Artists

Look for renowned artists who specialize in creating driftwood houses. Their work can offer inspiration and ideas for your own projects. Research their techniques, study their designs, and adapt those concepts into your own unique driftwood creations.

Pinterest and Instagram Accounts

Social media platforms like Pinterest and Instagram are treasure troves of inspiration. Search for “driftwood houses” or related keywords and explore the countless images, tutorials, and ideas shared by artists and enthusiasts. Create a collection of your favorite designs and use them as a starting point for your own creations.

Books and Magazines

Explore books and magazines dedicated to driftwood art and crafts. These publications often feature beautiful photographs, step-by-step tutorials, and expert tips for creating stunning driftwood houses. Visit your local library or bookstore, or search online for titles that capture your interest.

Remember, while drawing inspiration from others is encouraged, always strive to put your unique spin on your driftwood house creations.

Now that you have a comprehensive guide on how to make driftwood houses, it’s time to gather your materials, start collecting driftwood, and let your creativity shine! Enjoy the process and create your own enchanting mini world with the timeless beauty of driftwood.

Filed Under: Driftwood Tagged With: Driftwood, home decor, houses

How Make Driftwood Wreath?

February 6, 2024 by admin

You’re in for a treat! We’re going to show you the steps to create a stunning driftwood wreath that will surely become the centerpiece of your home decor. With just a few materials and a little creativity, you can transform ordinary pieces of driftwood into a unique and eye-catching wreath. So gather your supplies and let’s get started on this fun and rewarding DIY project.

Collecting the Driftwood

Choose the right kind of driftwood

When collecting driftwood for your wreath, it is important to choose pieces that are sturdy and in good condition. Look for driftwood that is weathered and has smooth surfaces. Avoid wood that appears too brittle or damaged, as it may not hold up well in the wreath-making process.

Search for driftwood on the beach

The beach is the perfect place to find driftwood for your wreath. Take a leisurely stroll along the shoreline, keeping an eye out for interesting pieces that catch your eye. Be sure to check both high and low tide areas, as driftwood can be found in various locations depending on the current and waves.

Clean the driftwood

Before using the driftwood in your wreath, it is essential to clean it thoroughly. Start by rinsing the wood with fresh water to remove any sand or debris. You can also use a brush to gently scrub away any stubborn dirt. Allow the driftwood to dry completely before moving on to the next step.

Preparing the Wreath Base

Select a wreath base

Choosing the right wreath base is crucial for the success of your driftwood wreath. Some popular options include foam wreath forms, grapevine wreaths, and wire wreath frames. Each type of base offers its own unique benefits, so consider your personal preference and the overall look you want to achieve.

Measure and cut the base material

Once you have selected your wreath base, measure and cut the base material accordingly. This material will act as the foundation for attaching the driftwood. If using foam or wire frames, you can simply cut a long strip of fabric or burlap to wrap around the frame. For grapevine wreaths, you may need to trim any excess vines to create a neater appearance.

Secure the ends together

To ensure your wreath base remains intact throughout the wreath-making process, secure the ends together. For foam or wire frames, you can use hot glue or floral wire to secure the fabric or burlap. Grapevine wreaths can be secured by weaving the ends of the material through the natural gaps in the vines. Make sure the base is tightly secured to prevent any shifting or unraveling later on.

How Make Driftwood Wreath?

Arranging the Driftwood

Sort the driftwood pieces

Before arranging the driftwood on the base, it is helpful to sort the pieces by size and shape. This will make it easier to plan the design and ensure a balanced look. Lay the driftwood pieces out on a flat surface and group them accordingly. You can also consider organizing them by color or texture for added visual interest.

Arrange the driftwood on the base

Once you have sorted the driftwood, it’s time to start arranging them on the wreath base. Begin by placing larger pieces evenly around the base to establish the overall shape and structure. Then, fill in the gaps with smaller pieces, ensuring a cohesive and visually pleasing arrangement. Play around with different placements until you are satisfied with the design.

Attach the driftwood to the base

To secure the driftwood to the base, you can use hot glue or floral wire. Apply a small amount of hot glue to the back of each piece and press it firmly onto the base. If using floral wire, wrap it around the driftwood and the base, twisting it tightly to secure. Be careful when handling the driftwood to avoid getting glue on your fingers or scratching the wood’s surface.

Adding Decorative Elements

Select additional decorative elements

To add a touch of creativity and personalization to your driftwood wreath, consider incorporating additional decorative elements. Some popular choices include seashells, starfish, beach glass, or even faux flowers. These elements can enhance the coastal theme and bring out the beauty of the driftwood.

Choose a focal point for the wreath

To create a visually appealing wreath, it is helpful to choose a focal point that draws attention. This could be a particularly unique piece of driftwood, a larger shell, or a cluster of beach treasures. Placing the focal point slightly off-center can create a more dynamic and interesting composition.

Attach the decorative elements

Once you have selected your decorative elements and chosen a focal point, it’s time to attach them to the wreath. Similar to attaching the driftwood, you can use hot glue or floral wire to secure the decorative elements. Apply glue or wrap wire around the base of each element and carefully position it where desired. Make sure the elements are securely attached to prevent them from falling off.

How Make Driftwood Wreath?

Finishing Touches

Trim any excess or uneven driftwood

After attaching the driftwood and decorative elements, take a step back and assess the overall appearance of your wreath. If you notice any pieces that are sticking out too far or appear uneven, carefully trim them with a pair of scissors or wire cutters. This final touch will give your wreath a polished and professional look.

Secure any loose pieces

To ensure the longevity of your driftwood wreath, check for any loose pieces and secure them tightly. Apply additional hot glue or wrap floral wire around any areas that feel unstable. By doing so, you can prevent any driftwood or decorative elements from coming loose or falling off in the future.

Add a hanging mechanism

To proudly display your driftwood wreath, it is important to add a hanging mechanism. This can be as simple as attaching a loop of ribbon or twine to the back of the wreath. Make sure the hanging mechanism is securely attached to support the weight of the wreath. Consider using a strong adhesive or reinforcing it with additional wire if needed.

Additional Tips and Ideas

Consider painting or staining the driftwood

If you want to add a splash of color or a more polished look to your driftwood wreath, consider painting or staining the driftwood pieces before attaching them to the base. Explore different paint colors or wood stains to complement your decor or match the theme of your wreath.

Incorporate shells or beach treasures

In addition to driftwood, you can enhance the coastal vibe of your wreath by incorporating seashells, beach glass, or other beach treasures you may have collected. These small elements can add texture and visual interest to your wreath, making it truly unique and reflective of the beach.

Experiment with different shapes and sizes of wreath bases

While traditional wreath bases are circular, don’t be afraid to think outside the box and experiment with different shapes and sizes. Consider using a heart-shaped base for a romantic touch or a square base for a more modern look. Mixing and matching different base shapes can create a visually captivating wreath that stands out from the crowd.

By following these steps and incorporating your own creativity, you can create a stunning driftwood wreath that adds a touch of beachy charm to your home decor. Whether you’re a seasoned crafter or new to the world of wreath-making, this friendly guide will help you create a beautiful piece that is uniquely yours. So grab your collection of driftwood and get ready to embark on this fun and rewarding DIY project!

Filed Under: Driftwood Tagged With: Driftwood, home decor, Wreath

How Make Driftwood Art?

February 5, 2024 by admin

If you’ve ever found yourself drawn to the natural beauty of driftwood, you may have wondered how you can turn this unique material into stunning works of art. This article will guide you through the process of creating driftwood art, from finding the perfect pieces to assembling them into a captivating masterpiece. Whether you’re a seasoned artist or simply looking for a new and creative hobby, learning how to make driftwood art will ignite your imagination and allow you to bring the beauty of nature into your home. So, grab your tools and let’s get started on this artistic journey!

How Make Driftwood Art?

Selecting Driftwood

Finding the right type of driftwood is crucial for creating beautiful and unique artwork. When selecting driftwood, you want to look for pieces that have been naturally weathered by the tides and currents. These pieces often have interesting shapes and textures that can add character to your artwork. Avoid selecting driftwood that has been freshly washed ashore, as it may still be too damp and prone to cracking.

Consider the size and shape of the driftwood you choose. Depending on your design concept, you may need long, slender pieces or shorter, thicker ones. Look for driftwood that has interesting twists, bends, or branches, as these can provide a dynamic element to your sculpture.

In addition to the aesthetic considerations, it’s also important to check for stability. Examine the driftwood for any signs of rot or decay. Avoid selecting pieces that are too fragile or weak, as they may not be able to support the weight of your artwork.

Before using the driftwood in your artwork, it’s important to prepare it properly. Start by removing any loose bark or debris from the surface. This can be done using a stiff brush or by gently scraping the wood with a wire brush. Once the driftwood is clean, it’s time to move on to the next step of the process.

Cleaning and Drying

To ensure that your driftwood art lasts and looks its best, it’s important to properly clean and dry the driftwood before using it in your artwork. Begin by removing any dirt or debris that may be clinging to the surface of the wood. This can be done by gently scrubbing the wood with a mixture of water and mild detergent. Be sure to rinse the wood thoroughly to remove any soap residue.

Once the driftwood is clean, it’s important to sanitize it to prevent the growth of mold or other organisms. One way to do this is by soaking the driftwood in a solution of water and bleach. Mix one part bleach with nine parts water and soak the driftwood for about 24 hours. After soaking, rinse the driftwood thoroughly with clean water.

After cleaning and sanitizing, it’s important to allow the driftwood to dry completely. This can take several weeks, depending on the size and thickness of the pieces. Place the driftwood in a well-ventilated area, preferably outdoors, and allow it to air dry. Avoid using heat sources like ovens or heaters, as this can cause the wood to crack.

Designing and Planning

Once you have selected and prepared your driftwood, it’s time to start designing and planning your artwork. Begin by choosing a design concept that suits your style and preferences. Whether you prefer abstract sculptures or intricate wall hangings, there are countless possibilities for using driftwood in your artwork.

To help visualize your design, it can be helpful to sketch the artwork. This will allow you to experiment with different arrangements and compositions before committing to a final design. Take measurements of your driftwood pieces and use them to create accurate sketches of your artwork.

In addition to sketching, it’s important to plan the arrangement of your driftwood. Consider how the pieces will fit together and how they will be attached. Planning ahead will ensure that your artwork is cohesive and well-structured.

Preparing the Artwork

Before assembling your driftwood sculpture, there are a few additional steps to prepare the artwork. First, gather any additional materials you may need, such as screws, adhesives, or wire. Having everything on hand will make the assembly process smoother and more efficient.

Next, measure and cut any additional materials, such as wooden bases or support structures. These pieces can help strengthen your sculpture and provide a stable foundation. Use a saw or other cutting tool to carefully shape the materials to fit your design.

To ensure a polished finish, it’s important to sand and smooth the driftwood before assembling it. Use sandpaper or a sanding block to gently remove any rough edges or splinters. This will not only make the artwork more visually appealing but also help protect your hands from any sharp edges.

How Make Driftwood Art?

Assembling the Sculpture

With your driftwood and additional materials prepared, it’s time to start assembling the sculpture. Depending on your design and the size of the driftwood, you may choose to use adhesives or screws to hold the pieces together. If using adhesives, make sure to choose a strong, waterproof option that is suitable for outdoor use.

As you assemble the sculpture, be mindful of creating a strong structure. Consider the weight distribution and balance of the pieces. It may be necessary to reinforce certain areas with additional supports or braces. Take your time during this step to ensure that the sculpture is stable and secure.

Balancing and aligning the driftwood pieces is another important aspect of the assembly process. Pay attention to the overall composition and make adjustments as needed to create a visually pleasing arrangement. Step back and take a moment to evaluate the sculpture from different angles to ensure that it looks balanced and harmonious.

Enhancing the Artwork

Once your driftwood sculpture is assembled, you can enhance its visual appeal by adding colors or stains. Paint can be used to highlight certain areas or add pops of color to your artwork. Alternatively, you can apply wood stains to enhance the natural beauty of the driftwood and bring out its unique textures and patterns.

To protect the driftwood and prolong its lifespan, it’s important to apply a sealant. This will help prevent moisture from penetrating the wood and causing it to deteriorate. Choose a sealant that is suitable for outdoor use and follow the manufacturer’s instructions for application.

In addition to sealants, you may also choose to use varnishes or oils to further enhance the appearance of your driftwood artwork. These products can add a glossy finish or deepen the natural color of the wood. Experiment with different finishes to find the one that best complements your design.

Finishing Touches

Before displaying your driftwood artwork, take the time to remove any excess glue or debris that may be visible. Use a razor blade or sandpaper to carefully remove any unwanted residue. This will give your artwork a clean and polished look.

To add a final touch of shine, polish and buff the driftwood surface. Use a soft cloth or a specialized wood polishing product to gently bring out the natural luster of the wood. This step will give your artwork a professional and finished appearance.

Lastly, consider signing and documenting your driftwood art. By signing your artwork, you are claiming it as your own and adding a personal touch. Additionally, documenting your process and the inspiration behind your artwork can provide valuable insights for yourself and others who may be interested in your driftwood art.

Display and Maintenance

When it comes to displaying your driftwood art, choose a suitable location that showcases the beauty of the artwork. Consider lighting and background to create an optimal setting. Whether you choose to hang your artwork on a wall, display it on a shelf, or mount it in a garden, make sure it is secure and protected from the elements.

Regular cleaning and maintenance are necessary to preserve the beauty of your driftwood art. Use a soft brush or cloth to gently remove any dust or debris that may accumulate over time. If your artwork is displayed outdoors, periodic inspections and touch-ups may be necessary to ensure its longevity.

Alternative Driftwood Art

In addition to traditional sculptures, there are many other ways to incorporate driftwood into your artwork. Consider incorporating driftwood into existing artwork, such as paintings or mixed media pieces. The natural textures and shapes of driftwood can add depth and interest to these types of artwork.

Driftwood can also be used to create functional pieces, such as tables, lamps, or mirrors. By combining driftwood with other materials, you can create unique and practical items for your home or office.

If you enjoy home decor projects, consider utilizing driftwood in various ways. Create a driftwood wall hanging, a mobile, or even a driftwood-inspired wreath. By exploring different ways to incorporate driftwood into your decor, you can add a touch of nature and coastal charm to your space.

Inspiration and Ideas

If you’re looking for inspiration for your driftwood art, there are many sources to explore. Start by researching different driftwood art styles, such as abstract, realistic, or minimalist. This will give you a sense of the possibilities and help you refine your own artistic vision.

Nature itself can be a great source of inspiration. Take a walk on the beach or visit a nearby coastal area to observe the shapes, colors, and textures of driftwood in its natural environment. Pay attention to how the elements have sculpted the driftwood over time and incorporate these natural patterns into your own artwork.

Lastly, research famous driftwood artists and their work. Learn about their techniques and creative processes. While it’s important to develop your own unique style, studying the work of others can help spark ideas and provide guidance as you explore the world of driftwood art.

In conclusion, creating driftwood art is a rewarding and creative process. By carefully selecting and preparing the driftwood, planning and designing the artwork, and applying the finishing touches, you can transform ordinary pieces of wood into beautiful and unique works of art. Whether you choose to create sculptures, functional pieces, or home decor items, the possibilities with driftwood are endless. Let your imagination run wild and embrace the beauty of nature as you embark on your driftwood art journey.

Filed Under: Driftwood Tagged With: Art, DIY, Driftwood, home decor

How Make Driftwood?

February 4, 2024 by admin

Have you ever wondered how to create your own driftwood? In this article, we will explore the fascinating process of making driftwood. Whether you want to add a rustic touch to your home decor or create unique pieces of art, learning how to make driftwood can be a fun and rewarding experience. By following a few simple steps, you’ll be able to transform ordinary pieces of wood into beautiful, weathered treasures that evoke the tranquility of the sea. So, grab your tools and let’s dive into the world of driftwood crafting!

How Make Driftwood?

Collecting Driftwood

Understanding driftwood

Driftwood refers to wood that has been washed ashore by the water. It is often found on beaches, rivers, and lakes, and it is characterized by its smooth texture and weathered appearance. Driftwood is a popular material for various crafts and home decor projects due to its unique and rustic charm.

Finding driftwood

To start your driftwood collection, you can visit nearby coastlines, lakeshores, or riverbanks. Look for areas where water has a high chance of carrying wood downstream or where tides frequently deposit debris. Additionally, storms or high winds can bring larger pieces of driftwood to the shoreline. Exploring these areas after such events can increase your chances of finding interesting and diverse pieces.

Choosing the right pieces

When selecting driftwood, consider its size, shape, and condition. Look for pieces that are in good condition, free from rot and excessive damage. In terms of size, it’s better to choose pieces that are manageable for your projects. Additionally, pay attention to the shape and texture of the wood, as it can greatly influence its usability and aesthetic appeal.

Preparing Driftwood

Cleaning the driftwood

Before you can use driftwood in your projects, it’s important to clean it thoroughly. Start by removing any loose debris or dirt from the surface. You can use a stiff brush or a toothbrush to gently scrub away any dirt or grime. Be careful not to remove too much of the weathered texture as it adds to the charm of the driftwood.

Removing salt and sand

As driftwood spends a considerable amount of time in water, it often becomes saturated with salt and sand. To remove these contaminants, you can soak the driftwood in a bucket of fresh water for a few hours. Alternatively, you can rinse it under running water, ensuring you target all the nooks and crannies. This step will help prevent any unwanted residue from affecting the final project.

Drying Driftwood

Natural drying methods

After cleaning, it’s essential to let the driftwood dry thoroughly. You can air dry it by placing it in a well-ventilated area, preferably under direct sunlight. This method may take a few weeks, depending on the size and thickness of the wood. To speed up the drying process, you can use a fan or a dehumidifier in combination with natural drying.

Using an oven

If you’re short on time, you can opt to dry your driftwood in an oven. Preheat the oven to a low temperature, around 200°F (93°C), and place the driftwood on a baking sheet. Keep a close eye on it to prevent any scorching or excessive drying. This method should only be used for small pieces of driftwood and not for larger or thicker ones.

Using a microwave

Drying driftwood in a microwave is another quick method, but it can be risky if not done with caution. Start by wrapping the driftwood with a damp paper towel and placing it in the microwave. Set the microwave to a low power level to avoid overheating, and microwave in short intervals, checking the moisture content in between. Always closely monitor the process to prevent any damage or fire hazards.

Bleaching Driftwood

Determining the need for bleaching

Bleaching driftwood is a personal choice and depends on the desired look for your project. If you prefer a lighter or more uniform color, bleaching can be a suitable option. However, if you are fond of the natural weathered appearance, bleaching may not be necessary.

Creating a bleaching solution

To bleach driftwood, you can create a solution by mixing equal parts of water and hydrogen peroxide in a container. Submerge the driftwood in the solution and allow it to soak for several hours or overnight. Remember to protect your work area and wear gloves to prevent skin irritation.

Applying the bleach

Once the driftwood has soaked long enough, carefully remove it from the solution and rinse it thoroughly under running water. Use a soft brush to gently scrub away any excess bleach. After rinsing, let the driftwood dry completely before proceeding to the next steps.

How Make Driftwood?

Stabilizing Driftwood

Protecting against decay

To ensure the longevity of your driftwood projects, it’s important to stabilize the wood. Driftwood is often exposed to various elements, making it susceptible to decay and deterioration. By stabilizing it, you can protect it from insects, fungi, and other harmful factors.

Applying wood stabilizer

Wood stabilizers, such as polyethylene glycol (PEG), are commonly used to treat driftwood. These stabilizers penetrate the wood fibers, preventing further decay and strengthening the wood. Follow the instructions provided with the stabilizer to apply it evenly to the driftwood. Allow sufficient drying time before moving on to the next stage.

Allowing for proper drying

After applying the stabilizer, allow the driftwood to dry completely. Make sure it is placed in a well-ventilated area to ensure proper air circulation. The drying process may take several days, depending on the size and moisture content of the wood. Patience is key to achieve the best possible results.

Sealing Driftwood

Choosing the right sealant

To protect your driftwood projects and maintain their appearance, sealing is essential. There are various sealants available, including polyurethane, epoxy, and varnish. Consider the type of project, the level of gloss or sheen desired, and whether it needs to be waterproof when choosing the appropriate sealant.

Applying the sealant

Apply the chosen sealant to the driftwood using a brush or a sponge, following the manufacturer’s instructions. Ensure even coverage over all surfaces, paying special attention to any cracks or crevices. Allow the first coat to dry completely before applying additional coats if desired.

Multiple coats and drying time

For optimal protection, multiple coats of sealant may be necessary. Apply subsequent coats after the previous one has dried completely. The number of coats required depends on the specific sealant and the desired level of protection. Allow sufficient drying time between coats to ensure a sturdy and long-lasting finish.

Enhancing Driftwood’s Appearance

Sanding the surface

To achieve a smooth and polished finish, sanding the surface of the driftwood is crucial. Use fine-grit sandpaper or a sanding block to gently sand away any rough spots or splinters. Sand in the direction of the wood grain to avoid damaging the natural texture. Be cautious not to remove too much of the weathered patina if you desire that rustic look.

Using wood stain

Wood stain can add depth and enhance the color of your driftwood projects. Choose a stain that complements the overall aesthetic you want to achieve. Before applying the stain, ensure the driftwood is clean and completely dry. Use a brush or a cloth to apply the stain, following the manufacturer’s instructions. Allow it to penetrate the wood for the recommended time before wiping off any excess.

Adding a protective finish

After staining, it’s important to add a protective finish to seal in the color and protect the wood. Choose a clear varnish or polyurethane that enhances the appearance of your driftwood. Apply the protective finish evenly, allowing sufficient drying time between coats. Multiple coats may be necessary for optimal protection, depending on the specific product used.

Decorating with Driftwood

Indoor display ideas

Driftwood can be a versatile and unique addition to your interior decor. Consider creating a driftwood centerpiece for your dining table or a driftwood mirror frame for your living room. You can also use smaller pieces as bookends, candle holders, or wall art. The natural and organic feel of driftwood can bring a touch of coastal charm to any room.

Outdoor display ideas

In outdoor spaces, driftwood can be used to create artistic sculptures, wind chimes, or even outdoor furniture. Build a driftwood fence or a trellis for climbing plants, or incorporate it into your garden as a decorative element. The weathered and natural look of driftwood blends seamlessly with outdoor surroundings, giving your space a beachy and rustic vibe.

Creating functional pieces

Driftwood can also be transformed into functional items such as coat racks, towel holders, or even driftwood lamps. Let your imagination run wild and explore various DIY projects where driftwood can serve a practical purpose. By combining both functionality and aesthetics, you’ll have unique and eye-catching pieces for your home.

Using Driftwood for Crafts

Creating driftwood art

Driftwood provides an excellent medium for creating unique and inspiring art pieces. You can use driftwood as a canvas or a collage base, attaching smaller pieces to form intricate designs. Consider using driftwood to create sculptures, mobiles, or even assemblage art. Let your creativity flow and experiment with different techniques and styles.

Making driftwood furniture

If you’re feeling adventurous and have larger pieces of driftwood, why not try your hand at making driftwood furniture? From coffee tables to chairs and even bed frames, driftwood furniture can add a rustic and coastal touch to your home. Ensure the driftwood pieces are securely fastened and structurally sound to guarantee both functionality and safety.

Crafting with smaller pieces

Smaller pieces of driftwood can be used in various craft projects. Create unique jewelry pieces by drilling holes and stringing them onto necklaces or bracelets. Decorate picture frames, planters, or even create driftwood wind catchers for your garden. The possibilities are endless, and the small size of the driftwood makes it easier to incorporate into different crafts.

Caring for Driftwood

Regular cleaning and dusting

To maintain the beauty of your driftwood projects, regular cleaning and dusting are necessary. Use a soft cloth or a feather duster to remove any accumulated dust or debris. If needed, you can lightly dampen the cloth with water to assist in the cleaning process. Avoid using harsh chemicals or abrasive materials, as they can damage the wood’s surface.

Avoiding excessive moisture

Driftwood is naturally porous, making it susceptible to moisture damage. Avoid placing driftwood items in areas of high humidity or where they can come into direct contact with water for extended periods. Moisture can cause the wood to warp, rot, or develop mold. Taking proper precautions will help preserve your driftwood projects for years to come.

Repairing and resealing

Over time, driftwood may require repairs or resealing to maintain its integrity. If you notice any loose or damaged pieces, use wood glue to secure them back in place. When necessary, sand the affected area and reapply sealant or protective finish to restore the wood’s appearance and protection.

By following these steps, collecting, preparing, and caring for driftwood can become a rewarding and creative endeavor. Whether you choose to make functional pieces, create art, or simply use it as a decorative element, the unique and natural appeal of driftwood is sure to bring a touch of coastal charm to your home. Let your imagination soar and embark on a driftwood journey that reflects your own personal style and creativity.

Filed Under: Driftwood Tagged With: crafting, Driftwood, home decor

How Long To Boil Driftwood?

February 2, 2024 by admin

Have you ever wondered how long it takes to boil driftwood? Well, look no further! In this article, we will explore the fascinating world of boiling driftwood and uncover the answer to this burning question. From the reasons behind boiling driftwood to the benefits it brings, you’ll find all the information you need to embark on your driftwood boiling adventure. So grab a cup of tea and get ready to discover the secrets hidden within the depths of boiling driftwood!

How Long To Boil Driftwood?

Preparing Driftwood for Use

Why Boiling Driftwood is Necessary

Boiling driftwood is a necessary step in preparing it for use in various applications, such as in aquariums or as a decorative piece in your home. There are several reasons why boiling driftwood is important. Firstly, boiling helps to remove any harmful bacteria, parasites, or insects that may be present on the surface of the wood. This ensures that the driftwood is safe and clean for use. Additionally, boiling also helps to remove excess tannins, which are natural compounds found in driftwood that can discolor water in aquariums. By boiling the driftwood, you can minimize the release of tannins and prevent any unwanted water discoloration.

Choosing the Right Driftwood

When selecting driftwood for boiling, it is important to choose the right type of wood that is suitable for your intended use. There are different varieties of driftwood available, including hardwood, softwood, tropical, and aquarium-safe driftwood. Hardwood driftwood is generally more durable and long-lasting, making it suitable for outdoor applications. Softwood driftwood, on the other hand, is softer and may break down more easily over time. Tropical driftwood offers a unique and exotic appearance, but it may require more thorough cleaning and preparation before use. If you plan to use driftwood in an aquarium, it is crucial to select aquarium-safe driftwood that will not release harmful substances into the water.

Removing Excess Debris

Before boiling driftwood, it is important to remove any excess debris or organic matter that may be clinging to the wood. Start by giving the driftwood a thorough visual inspection, checking for any obvious signs of contamination or infestation. Use a soft brush or sponge to scrub away any dirt, algae, or moss on the surface of the wood. If there are any stubborn debris or algae that are difficult to remove, you can soak the driftwood in a mixture of water and bleach for a short period of time. However, make sure to rinse the driftwood thoroughly with clean water afterwards to remove any traces of bleach.

Soaking Driftwood before Boiling

After you have removed any excess debris from the driftwood, it is recommended to soak it in water before boiling. Soaking the driftwood helps to further remove any remaining impurities and helps to ensure a more effective boiling process. Fill a container, such as a bucket or a bathtub, with water and submerge the driftwood completely. Allow the driftwood to soak for a minimum of 24 hours, but it is even better to soak it for a few days. This will help to loosen any dirt or particles that may still be trapped in the wood. After soaking, give the driftwood a final rinse with clean water to remove any loosened debris.

Boiling Driftwood

Equipment Needed

To properly boil driftwood, you will need a few essential pieces of equipment. Firstly, you will need a large pot or container that is big enough to accommodate the size of your driftwood pieces. Make sure the pot or container is clean and free from any chemicals or residues that may contaminate the driftwood. You will also need a heat source, such as a stove or a portable burner, to heat the water. Additionally, a thermometer can be helpful to monitor the temperature of the water and ensure that it reaches the desired boiling temperature.

Steps to Boil Driftwood

Boiling driftwood is a fairly straightforward process. Follow these steps to ensure a successful boiling process:

  1. Fill the pot or container with enough water to fully submerge the driftwood.
  2. Place the pot on the heat source and turn it on to bring the water to a boil.
  3. Once the water is boiling, carefully place the driftwood into the pot, making sure it is fully submerged.
  4. Adjust the heat to maintain a gentle boil and allow the driftwood to boil for the recommended time (more on this later).
  5. Keep an eye on the water level in the pot and add more water if necessary to ensure the driftwood remains fully submerged.
  6. After the recommended boiling time has elapsed, turn off the heat source and let the driftwood cool down in the water.
  7. Once the driftwood has cooled, carefully remove it from the pot and give it a final rinse with clean water.

Determining Boiling Time

The boiling time for driftwood depends on various factors, including the size and thickness of the driftwood pieces, as well as the type of wood. As a general guideline, smaller pieces of driftwood may require around 30 minutes to an hour of boiling, while larger and thicker pieces may need to be boiled for several hours. It is important to note that boiling time is not an exact science and can vary. It is best to periodically check the condition of the driftwood during boiling and adjust the boiling time accordingly. The goal is to ensure that the driftwood is thoroughly sterilized and free from any potential contaminants.

Effects of Boiling on Driftwood

Boiling driftwood has several positive effects on the wood. Firstly, it helps to kill any bacteria, parasites, or insects that may be present on the surface of the wood. This sterilization process ensures that the driftwood is safe for use in various applications. Boiling also helps to remove excess tannins, which are natural compounds found in driftwood that can cause water discoloration in aquariums. By boiling the driftwood, you can significantly reduce the release of tannins and prevent any unwanted water discoloration. Additionally, boiling can help to soften the wood, making it more pliable and easier to shape if desired.

Alternative Methods

While boiling is the most common method for preparing driftwood, there are alternative methods available depending on your preferences and needs.

Baking Driftwood

Baking driftwood in an oven can be an effective alternative to boiling. To bake driftwood, preheat your oven to a low temperature, typically around 200°F (93°C). Place the driftwood on a baking sheet and place it in the oven. Bake the driftwood for several hours, periodically checking its progress. Baking dries out the wood, effectively killing any organisms or bacteria present. However, it is important to note that baking may not be as effective in removing tannins compared to boiling. Additionally, baking can cause the wood to become more brittle and prone to breakage.

Using a Pressure Cooker

Using a pressure cooker is another alternative method for preparing driftwood. The high pressure and temperature in a pressure cooker can effectively sterilize the wood. However, it is important to follow the manufacturer’s instructions for the specific pressure cooker you are using. Place the driftwood in the pressure cooker along with water, following the recommended water-to-wood ratio. Cook the driftwood at the appropriate pressure and temperature for the recommended time. Keep in mind that pressure cooking may not be suitable for all types of driftwood, so it is important to research and ensure compatibility before attempting this method.

Using Chemical Treatments

Chemical treatments can be used as an alternative to boiling for sterilizing driftwood. There are various commercially available products specifically designed for treating driftwood. These treatments typically come in liquid or tablet form and are added to water in which the driftwood is soaked. Follow the instructions provided by the manufacturer for the recommended soaking time and dosage. Chemical treatments can effectively kill bacteria and parasites without the need for boiling. However, it is important to thoroughly rinse the driftwood with clean water after the treatment to remove any residual chemicals.

Considerations and Precautions

Driftwood Preservation

To ensure the longevity and preservation of driftwood, it is important to take certain precautions. Coating the driftwood with a sealant or varnish can help to protect it from moisture damage and prolong its lifespan. Additionally, placing the driftwood in areas with proper airflow can prevent the growth of mold or mildew. Regular cleaning and maintenance of the driftwood, such as removing any accumulated dirt or dust, can also help to keep it in good condition.

Avoiding Toxic Driftwood

Some types of driftwood may contain toxic substances that can be harmful to aquatic life or even humans. It is crucial to research and identify the type of wood you are working with and ensure its safety. Avoid using driftwood from unknown sources or pieces that have been treated with chemicals, as these may pose a risk. Instead, opt for aquarium-safe driftwood or specialty driftwood that is specifically intended for aquarium use. Consult with experts or reputable suppliers to ensure the driftwood you choose is safe for your intended application.

Driftwood Treatment for Aquariums

If you plan to use driftwood in an aquarium, it is essential to treat it properly to prevent any negative effects on the aquatic environment. In addition to sterilizing the driftwood through boiling or alternative methods, it is advisable to pre-soak the driftwood in water to leach out excess tannins. Soaking the driftwood for several days or weeks, changing the water periodically, can help to minimize tannin release. Additionally, monitoring the water quality and making necessary adjustments, such as using activated carbon or frequent water changes, can help to maintain optimal conditions for your aquarium inhabitants.

How Long To Boil Driftwood?

Different Types of Driftwood

Hardwood Driftwood

Hardwood driftwood refers to driftwood that comes from deciduous or broadleaf tree species. This type of driftwood is generally more durable and long-lasting compared to softwood driftwood. Hardwood driftwood is often used in outdoor applications, such as creating garden sculptures or decorative features. Some common examples of hardwood driftwood include oak, walnut, maple, and birch.

Softwood Driftwood

Softwood driftwood comes from evergreen or coniferous tree species. Softwood driftwood is generally softer and may break down more easily over time compared to hardwood driftwood. However, softwood driftwood can still be used in various applications, such as crafting driftwood furniture or creating natural-looking terrarium decorations. Pine, spruce, cedar, and cypress are examples of softwood driftwood.

Tropical Driftwood

Tropical driftwood offers a unique and exotic appearance due to its origins from tropical regions. It is often sought after for its intricate shapes and textures, which can create a visually stunning display. Tropical driftwood may require more thorough cleaning and preparation before use due to the potential presence of insects or parasites. Examples of tropical driftwood include mangrove root, Mopani wood, and Malaysian driftwood.

Aquarium-Safe Driftwood

Aquarium-safe driftwood is specifically selected and treated to be safe for use in aquariums. It is important to choose driftwood that will not release harmful substances or leach toxins into the water, which could be detrimental to aquatic life. Aquarium-safe driftwood goes through rigorous preparation and treatment processes to ensure its safety. Look for driftwood specifically labeled as aquarium-safe or consult with experts in the field to ensure that the driftwood you choose is suitable for your aquarium.

FAQs

Can I skip boiling driftwood?

While boiling driftwood is highly recommended, especially for aquarium use, it is technically possible to skip this step. However, by skipping the boiling process, you may be exposing your driftwood to potential bacteria or parasites that could harm the aquatic environment or pose a risk to other animals or humans. It is always best to err on the side of caution and properly sterilize the driftwood before use.

How often should I boil driftwood?

The frequency of boiling driftwood depends on the specific circumstances and requirements. For example, if you are using driftwood in an aquarium, it is recommended to boil it before initially placing it in the tank. However, over time, as the driftwood becomes colonized by beneficial bacteria and algae, boiling may not be necessary anymore. If you notice any changes in the appearance or condition of the driftwood, such as the growth of harmful organisms or an increase in tannin release, it may be a good idea to boil it again.

Can I boil multiple pieces of driftwood together?

Yes, you can boil multiple pieces of driftwood together, as long as they can fit comfortably in the pot or container and remain fully submerged. Boiling multiple pieces together can save time and energy compared to boiling them individually. Just make sure that each piece receives adequate exposure to the boiling water to ensure proper sterilization.

Can I reuse the water used for boiling?

It is generally recommended not to reuse the water used for boiling driftwood. The water may contain tannins, debris, or other impurities that have been released from the wood during boiling. Reusing this water may reintroduce these substances into your aquarium or other applications, which could cause water discoloration or other negative effects. Therefore, it is best to discard the water and start with clean, fresh water for each boiling session.

Does boiling remove all the tannins from driftwood?

Boiling is an effective method to remove excess tannins from driftwood, but it may not remove all of them completely. The amount of tannins released during boiling depends on various factors, such as the type of wood and the boiling time. To further minimize tannin release, it is recommended to pre-soak the driftwood in water before boiling. Additionally, using activated carbon in the aquarium filtration system or performing frequent water changes can help to reduce the incidence of tannin discoloration in aquariums.

Conclusion

Boiling driftwood is an essential step to prepare it for various applications, ensuring its safety and cleanliness. By boiling driftwood, you can remove harmful bacteria, parasites, and insects that may be present on the wood while minimizing the release of tannins, especially in aquariums. Additionally, alternative methods such as baking or pressure cooking can be used, but they may have different effects and considerations. It is important to choose the right type of driftwood, properly clean and soak it, and follow the recommended boiling time. Considerations and precautions, such as driftwood preservation and avoidance of toxic driftwood, should also be taken into account. By understanding the different types of driftwood and following proper preparation methods, you can enjoy the beauty and benefits of driftwood in your chosen applications.

Filed Under: Driftwood Tagged With: Boiling, Driftwood, home decor

Balacoo Driftwood Stick Fish Tank Decor Review

February 2, 2024 by admin

Looking for a way to spruce up your fish tank or reptile habitat? Look no further than the balacoo Drift Wood 1 Pack Fish Tank Wood Branch Driftwood Sticks! These natural driftwood branches are perfect for all arboreal reptiles and amphibians, providing them with a place to climb and explore. Not only do they add a touch of natural beauty to your aquarium, but they can also be used to create stunning landscape designs. Each branch is unique, varying in width and length due to mother nature, making them ideal for both rainforest and desert terrariums. Plus, the fish tank wood decor is designed to help lower and buffer pH levels, making it a functional addition to any aquatic environment. Don’t miss out on this versatile and visually appealing adornment for your tank or terrarium!

balacoo Drift Wood 1 Pack Fish Tank Wood Branch Driftwood Sticks Fish Tank Decorations Tree Branch Real Driftwood for Aquarium Driftwood Adornment Reptile Ornament Ornaments Animal Log

This image is property of Amazon.com.

Find your new balacoo Drift Wood 1 Pack Fish Tank Wood Branch Driftwood Sticks Fish Tank Decorations Tree Branch Real Driftwood for Aquarium Driftwood Adornment Reptile Ornament Ornaments Animal Log on this page.

Why Consider This Product?

When it comes to creating a beautiful and natural environment for your aquatic pets or reptiles, the balacoo Drift Wood is a must-have. This product offers a plethora of benefits that make it an excellent choice for any fish tank or terrarium.

Not only does the balacoo Drift Wood provide a stunning visual appeal, but it also serves important functional purposes. Scientific research and evidence have shown that natural driftwood branches offer numerous benefits for aquatic organisms and reptiles. These branches provide a perfect climbing surface for reptiles, allowing them to exercise and explore their habitat. Additionally, the branches can be used to create a tree-like structure in your fish tank, enhancing the overall aesthetic appeal.

Adds Aesthetic Appeal to Your Tank

One of the standout features of the balacoo Drift Wood is its natural beauty. The varying widths and lengths of the branches make each piece unique, giving your tank a more organic and authentic look. Whether you have a rainforest or desert-themed terrarium, these natural driftwood branches are perfect for creating a realistic and visually pleasing environment.

Provides a Functional Purpose

Aside from its aesthetic appeal, the balacoo Drift Wood offers functional benefits as well. The sturdy branches act as a climbing surface for reptiles, allowing them to exercise and explore their habitat. Fish tank enthusiasts can also use these branches for landscape design, creating visually appealing and natural-looking underwater sceneries. Furthermore, the branches can be utilized for planting plant buds and anchoring, enhancing the overall functionality of the tank.

Product Quality

The balacoo Drift Wood boasts superior quality, as each branch is sourced from nature itself. As a result, the width and length of the branches may vary, adding to their authentic and unique appearance. These real driftwood pieces are carefully selected to ensure optimal quality, guaranteeing that they are safe for both your pets and your tank environment.

balacoo Drift Wood 1 Pack Fish Tank Wood Branch Driftwood Sticks Fish Tank Decorations Tree Branch Real Driftwood for Aquarium Driftwood Adornment Reptile Ornament Ornaments Animal Log

This image is property of Amazon.com.

Learn more about the balacoo Drift Wood 1 Pack Fish Tank Wood Branch Driftwood Sticks Fish Tank Decorations Tree Branch Real Driftwood for Aquarium Driftwood Adornment Reptile Ornament Ornaments Animal Log here.

What It’s Used For

Enhance Your Terrarium

The balacoo Drift Wood is a versatile product that can be used for various purposes in your terrarium. Reptiles and amphibians love to climb, and these branches act as the perfect climbing surface for them. Whether it’s replicating a natural tree structure or creating a unique landscape, these driftwood branches will transform your terrarium into a visually stunning habitat.

Create a Natural Fish Tank Environment

For fish tank enthusiasts, the balacoo Drift Wood is a game-changer. Not only does it serve as an excellent decorative piece, but it also helps create a natural and comfortable environment for your aquatic pets. Fish can swim through and hide among the branches, mimicking their natural habitat and reducing their stress levels. Additionally, the branches release tannins, which can lower and buffer the pH of your fish tank, supporting a healthier aquatic ecosystem.

Product Specifications

To help you better understand the specifications of the balacoo Drift Wood, here is a breakdown of its key details:

SpecificationDetails
Product TypeDriftwood
CompatibilityAll arboreal reptiles and amphibians
DimensionVaries due to natural branches
MaterialNatural wood
Recommended UseFish tanks, terrariums, aquariums
BenefitsClimbing surface, natural aesthetic
pH Lowering and BufferingYes

balacoo Drift Wood 1 Pack Fish Tank Wood Branch Driftwood Sticks Fish Tank Decorations Tree Branch Real Driftwood for Aquarium Driftwood Adornment Reptile Ornament Ornaments Animal Log

This image is property of Amazon.com.

Who Needs This

Both aquatic pet owners and reptile enthusiasts can greatly benefit from the balacoo Drift Wood. It is suitable for anyone looking to enhance the visual appeal of their tank or provide a natural and comfortable habitat for their pets.

Pros and Cons

Pros

  • Natural and authentic appearance
  • Provides a climbing surface for reptiles
  • Can be used for landscape design
  • Releases tannins to lower and buffer pH

Cons

  • Branch widths and lengths may vary

FAQ’s

  1. Is the balacoo Drift Wood safe for my pets?

    • Yes, the driftwood is carefully selected to ensure it is safe for both your pets and your tank environment.
  2. Can the branches be used for underwater planting?

    • Absolutely! These branches are perfect for planting plant buds and anchoring in your fish tank.
  3. How does the driftwood lower and buffer pH?

    • The branches release tannins, which naturally lower and buffer the pH of your fish tank.

What Customers Are Saying

Customers who have purchased the balacoo Drift Wood highly recommend it for its authenticity and functionality. They praise the natural appearance of the branches and the benefits it provides for their aquatic pets and reptiles. Many highlight how their tanks have been transformed into stunning and realistic habitats thanks to this driftwood.

Overall Value

The balacoo Drift Wood offers exceptional value for both its aesthetic appeal and functional benefits. Its natural beauty and versatility make it a worthwhile investment for anyone looking to create an enchanting and comfortable environment for their aquatic pets or reptiles.

Tips and Tricks For Best Results

  • Before placing the driftwood in your tank, thoroughly rinse it to remove any loose particles.
  • Soak the driftwood in water for a few days to help leach out any excess tannins.
  • Position the branches strategically to provide ample climbing surfaces for your reptiles or hiding spots for your fish.

Final Thoughts

Product Summary

The balacoo Drift Wood is a game-changer for fish tank and terrarium enthusiasts. Its natural and authentic appearance, along with its functional benefits, make it a must-have for anyone looking to create a visually stunning and comfortable habitat for their aquatic pets or reptiles.

Final Recommendation

If you’re aiming to enhance the beauty and functionality of your tank, look no further than the balacoo Drift Wood. With its natural appearance and numerous benefits, this product will transform your aquarium or terrarium into a breathtaking and thriving ecosystem.

Click to view the balacoo Drift Wood 1 Pack Fish Tank Wood Branch Driftwood Sticks Fish Tank Decorations Tree Branch Real Driftwood for Aquarium Driftwood Adornment Reptile Ornament Ornaments Animal Log.

Disclosure: As an Amazon Associate, I earn from qualifying purchases.

Filed Under: Diy Driftwood Projects Tagged With: Driftwood, Fish tank decor, home decor

How Long Does It Take For Driftwood To Dry?

January 30, 2024 by admin

Have you ever wondered how long it takes for driftwood to dry? Well, wonder no more! In this article, we will explore the fascinating process of drying driftwood and discover just how long it takes for nature to work its magic. From the factors that influence drying time to the best methods for speeding up the process, get ready to become an expert on all things driftwood drying. So grab a cup of tea, sit back, and let’s journey into the world of driftwood!

How Long Does It Take For Driftwood To Dry?

Factors Affecting Drying Time

Type and Composition of Driftwood

The type and composition of driftwood play a significant role in determining the drying time. Hardwood and softwood driftwoods have different densities and moisture content, which affect their drying rates. Hardwood driftwood, such as oak or mahogany, tends to have a higher density compared to softwood driftwood, like pine or cedar. Consequently, hardwood driftwood often takes longer to dry due to its denser structure and higher moisture content.

Size and Thickness of Driftwood

The size and thickness of driftwood also impact its drying time. Small and thin pieces of driftwood generally dry faster than larger and thicker pieces. This is because smaller pieces have less surface area and moisture content to evaporate, resulting in a quicker drying process. On the other hand, large and thick driftwood takes longer to dry as it contains more moisture within its fibers and has a larger surface area.

Environmental Conditions

The environmental conditions surrounding the driftwood greatly affect its drying time. Temperature and relative humidity are crucial factors that determine how quickly driftwood dries. Warmer temperatures facilitate faster evaporation of moisture, leading to quicker drying. Similarly, low humidity levels promote faster drying as the air has a higher capacity to absorb moisture. Conversely, colder temperatures and high humidity levels prolong the drying process, causing the driftwood to dry at a slower pace.

Sunlight Exposure

The exposure to sunlight can either expedite or delay the drying time of driftwood. Direct sunlight exposure can speed up the evaporation process and aid in the drying of the wood. The sun’s heat and energy help to evaporate the moisture trapped within the driftwood, reducing the drying time. However, prolonged exposure to direct sunlight may also lead to excessive drying, which could cause the wood to crack or warp. Indirect sunlight, on the other hand, provides a more balanced drying environment, helping to maintain the integrity of the driftwood while still facilitating evaporation.

Air Circulation

Proper air circulation is essential for the drying of driftwood. Natural air flow, such as from breezes or open windows, aids in the evaporation of moisture, allowing the driftwood to dry more efficiently. Additionally, using fans or ventilation systems can enhance air circulation around the wood, promoting faster drying. By ensuring sufficient air movement, the drying process is optimized, and the moisture content in the driftwood is reduced more effectively.

Humidity Levels

The humidity levels in the surroundings significantly impact the drying time of driftwood. High humidity environments impede the evaporation of moisture from the wood, prolonging the drying process. In such conditions, the air is already saturated with water vapor, making it difficult for the driftwood to release its moisture content. Conversely, low humidity environments enhance drying performance as the air has a higher capacity to absorb moisture, enabling the driftwood to dry more quickly.

Wood Density

The density of the driftwood also influences its drying time. Driftwood from different wood species can vary in density, affecting the rate at which moisture is released. Dense wood species, such as teak or ironwood, generally take longer to dry due to their compact structure and higher moisture content. On the other hand, porous wood species like balsa or willow have a lower density, making them dry relatively faster.

Moisture Content

The initial moisture content of the driftwood before drying is another determining factor in the overall drying time. If the wood has a higher moisture content initially, it will take longer to dry as more water needs to evaporate. Driftwood obtained from saltwater environments may have a higher moisture content compared to driftwood found in freshwater. Therefore, saltwater driftwood may require additional time to dry due to its higher moisture levels.

Treatment or Preparation

Any treatment or preparation applied to the driftwood can affect the drying time. If the driftwood has been treated with a sealant or preservative, it may take longer to dry as the coating restricts the moisture inside the wood from evaporating. Similarly, if the driftwood needs to be prepared before drying, such as removing bark or sanding rough edges, this additional process may prolong the overall drying time.

Drying Methods

Air Drying

Air drying is one of the most common and natural methods for drying driftwood. It involves allowing the driftwood to dry naturally in an open or well-ventilated area, exposing it to the surrounding air. Air drying provides a balanced drying environment, allowing moisture to evaporate without causing excessive drying or damage to the wood. The drying time for air drying driftwood varies depending on factors such as the type of wood, size, thickness, humidity levels, and environmental conditions.

Forced Drying

Forced drying is a method that expedites the drying process by introducing external heat sources or forced air circulation. This method involves using electric or gas-powered heaters or blowers to increase the temperature or airflow around the driftwood. Forced drying can significantly reduce the drying time but requires careful monitoring to prevent over-drying or damage to the wood. It is important to adjust the temperature and airflow to avoid excessive heat that could cause the driftwood to crack or warp.

Oven Drying

Oven drying is a controlled drying method that utilizes a conventional oven to remove moisture from driftwood. This method is suitable for smaller pieces of driftwood that can fit inside the oven. By setting the oven at a low temperature and placing the driftwood inside, the heat helps evaporate the moisture from the wood. However, it is crucial to monitor the drying process closely to prevent overheating the wood and damaging it. Oven drying may not be suitable for larger or thicker driftwood pieces due to space limitations and potential risks.

Microwave Drying

Microwave drying is a quick and efficient method suitable for small pieces of driftwood. By placing the driftwood in a microwave-safe container with a small amount of water, the moisture inside the wood is quickly heated and evaporated. It is essential to use caution with this method as the high heat generated in microwaves can cause the wood to catch fire. Careful monitoring and frequent checks are necessary to prevent overheating or burning the wood. Microwave drying is not recommended for larger pieces of driftwood due to size limitations.

Dehumidifying

Dehumidifying is a method that utilizes dehumidifiers to extract moisture from the surrounding air, facilitating the drying process. By reducing the relative humidity levels in the drying area, dehumidifiers create an optimal environment for moisture evaporation from the driftwood. This method is particularly effective in high humidity environments where traditional air drying may be challenging. However, it is important to ensure proper ventilation to prevent a buildup of heat or moisture around the driftwood.

Type and Composition of Driftwood

Hardwood vs. Softwood

The type and composition of driftwood can vary significantly based on whether it is hardwood or softwood. Hardwood driftwood, derived from deciduous trees such as oak or mahogany, is generally denser and has a higher moisture content compared to softwood driftwood. Consequently, hardwood driftwood tends to take longer to dry due to its denser structure and higher moisture levels. Softwood driftwood, obtained from coniferous trees like pine or cedar, has lower density and moisture content, which allows it to dry relatively faster.

Decay and Rot

The presence of decay or rot in driftwood can affect its drying time and overall condition. Driftwood that has started to decay or rot may have a higher moisture content and structural instability, which prolongs the drying process. It is advisable to remove any decaying or rotten portions of driftwood before drying to prevent further damage or moisture retention. By removing decayed sections, the drying time can be significantly reduced, resulting in better-preserved and more usable driftwood.

Saltwater vs. Freshwater Driftwood

The environment in which driftwood is found, either in saltwater or freshwater, can impact its drying time. Saltwater driftwood often has a higher moisture content due to prolonged exposure to water, making it take longer to dry. The salt content in saltwater driftwood can also affect its drying time, as the presence of salt can hinder moisture evaporation. On the other hand, freshwater driftwood typically has a lower moisture content and can dry relatively faster as it has not been exposed to the corrosive effects of salt.

Toxicity and Chemical Composition

The toxicity and chemical composition of driftwood should be considered during the drying process. Some driftwood species may contain toxic substances or chemicals, which can pose health risks if not adequately handled or dried. Researching the specific species of driftwood and its potential toxins is crucial to ensure proper safety precautions are taken. If toxicity is a concern, it is recommended to contact a professional or seek expert advice on the best methods for drying and handling the specific driftwood species.

Size and Thickness of Driftwood

Small and Thin Pieces

Small and thin pieces of driftwood tend to dry faster compared to larger and thicker pieces. Due to their reduced surface area and lower moisture content, small and thin pieces allow for quicker evaporation of moisture. The drying process is more efficient for these pieces as the air can penetrate the wood more effectively, expediting the moisture release. Therefore, if you are looking to dry driftwood in a shorter timeframe, opting for smaller and thinner pieces would be beneficial.

Large and Thick Pieces

Conversely, larger and thicker pieces of driftwood take longer to dry due to their greater surface area and higher moisture content. The dense fibers and concentrated moisture within these pieces slow down the evaporation process, resulting in an extended drying time. It is important to consider the size and thickness of the driftwood when planning the drying process. If drying larger or thicker pieces, additional time and patience will be required to ensure thorough and effective drying.

How Long Does It Take For Driftwood To Dry?

Environmental Conditions

Temperature

The temperature of the surrounding environment significantly influences the drying time of driftwood. Warmer temperatures promote faster evaporation of moisture, accelerating the drying process. The heat increases the energy of water molecules, allowing them to escape from the wood more readily. Lower temperatures, on the other hand, impede the rate of evaporation, extending the drying time. Therefore, maintaining a warmer temperature in the drying area can contribute to reducing the overall drying time of driftwood.

Relative Humidity

Relative humidity, which measures the amount of moisture in the air compared to its maximum capacity, plays a crucial role in the drying of driftwood. Lower relative humidity levels facilitate faster evaporation of moisture from the wood, resulting in quicker drying. In contrast, high relative humidity levels hinder the evaporation process, prolonging the drying time. To expedite the drying process, it is advisable to choose a drying location with lower relative humidity levels or use dehumidifiers to reduce moisture in the air.

Sunlight Exposure

Direct Sunlight

Exposure to direct sunlight can have both positive and negative effects on the drying time of driftwood. Direct sunlight provides heat and energy that accelerate the evaporation process, aiding in the drying of the wood. The sun’s rays penetrate the driftwood, warming the moisture within and facilitating its release. However, prolonged exposure to direct sunlight can lead to excessive drying, causing the wood to crack or warp. It is crucial to monitor the driftwood closely and ensure it is not left exposed to direct sunlight for extended periods.

Indirect Sunlight

Indirect sunlight can provide a more balanced drying environment for driftwood. It still contributes to the evaporation of moisture but with reduced risk of rapid and uneven drying. Indirect sunlight allows the driftwood to dry while maintaining its structural integrity by preventing excessive heat or moisture loss. This method is particularly useful when drying more delicate or vulnerable pieces of driftwood that may be prone to damage from direct sunlight. By placing the driftwood in an area of indirect sunlight, the drying time can be optimized without compromising the wood’s quality.

Shade or Cover

Another option for drying driftwood is placing it in shaded areas or using covers to shield it from direct sunlight. Shade or covers provide protection from excessive heat and sunlight, creating a more controlled drying environment for the driftwood. By preventing direct exposure to the sun’s rays, the risk of accelerated or uneven drying is reduced. This method is especially beneficial for larger or thicker pieces of driftwood that may require longer drying times and are more susceptible to damage from prolonged exposure to direct sunlight.

Air Circulation

Natural Air Flow

Natural air flow, such as from breezes or open windows, is vital for efficient drying of driftwood. The movement of air helps carry away the evaporated moisture, allowing fresh air to come into contact with the driftwood. This exchange of air promotes the continuous evaporation of moisture and enhances the drying process. It is advisable to position the driftwood in an area with sufficient air movement to ensure proper drying and prevent any stagnation of moisture around the wood.

Use of Fans or Ventilation

To optimize air circulation and drying performance, the use of fans or ventilation systems can be beneficial. Fans help increase the airflow around the driftwood, enhancing the evaporation of moisture. When using fans, it is important to position them strategically to ensure even distribution of air across the entire drying area. By utilizing fans or ventilation, the drying time can be shortened, and the effectiveness of the drying process can be enhanced.

Humidity Levels

High Humidity Environments

High humidity environments pose challenges to the drying of driftwood. In such conditions, the air is already saturated with moisture, making it difficult for the driftwood to release its own moisture content. The excess humidity impedes the evaporation process, resulting in a significantly extended drying time. To overcome this, it is recommended to dry driftwood in areas with lower humidity levels or use dehumidifiers to reduce the moisture in the air.

Low Humidity Environments

Conversely, drying driftwood in low humidity environments facilitates faster moisture evaporation and reduced drying time. In areas with lower humidity levels, the air has a higher capacity to absorb moisture, aiding in the drying process. Choosing a drying location with low humidity or using dehumidifiers to regulate the moisture content can help optimize the drying performance and achieve desired results within a shorter timeframe.

Wood Density

Dense Wood Species

Driftwood derived from dense wood species, such as teak or ironwood, generally takes longer to dry due to their compact structure and higher moisture content. The denser the wood, the slower the moisture release, as the water molecules are held more tightly within the wood fibers. Dense wood species require additional time and patience during the drying process to ensure thorough moisture evaporation. Proper consideration of the wood density is crucial when planning the drying time for driftwood.

Porous Wood Species

Porous wood species, like balsa or willow, have a lower density, which allows moisture to evaporate more quickly. The porous structure facilitates the movement of water molecules, enabling faster drying times for driftwood made from these species. The moisture content in these wood types is released more readily due to the larger air spaces within the wood fibers. When working with porous wood species, the drying time can be reduced, allowing for quicker utilization and crafting of the driftwood.

Dehumidifying

Using Dehumidifiers

Dehumidifiers are valuable tools when it comes to drying driftwood, particularly in high humidity environments. Dehumidifiers remove moisture from the surrounding air, creating an optimal drying environment for the wood. By reducing the relative humidity levels, dehumidifiers enhance the evaporation of moisture from the driftwood, expediting the drying process. Placement of the driftwood near or within the range of the dehumidifier further improves the drying efficiency and helps achieve desired results in a shorter timeframe.

Optimal Conditions for Dehumidifying

To achieve the best results when using dehumidifiers for drying driftwood, it is important to establish optimal conditions. The recommended relative humidity range for dehumidifying driftwood is around 40-50%. This level allows for efficient moisture evaporation without causing excessive dryness or damage to the wood. Monitoring the humidity levels and adjusting the dehumidifier settings accordingly will help maintain the optimum drying environment and ensure the desired outcome.

Effectiveness and Timeframe

The effectiveness and timeframe of dehumidifying largely depend on the initial moisture content, environmental conditions, and the size and density of the driftwood. In general, dehumidifying can significantly reduce the drying time compared to traditional air drying methods, especially in high humidity environments. However, it is important to note that larger or denser pieces of driftwood may still require additional time even with dehumidifiers. Regular monitoring and adjustment of settings are essential to achieve the desired moisture levels and prevent over-drying or damage to the wood.

Filed Under: Driftwood Tagged With: Driftwood, Drying Time, home decor

How Long Does Driftwood Last?

January 28, 2024 by admin

Have you ever wondered about the lifespan of driftwood? From beachside bonfires to unique home decor, driftwood has become a popular natural element that adds a touch of rustic charm to our lives. But just how long can we expect our beloved driftwood pieces to last? In this article, we will explore the factors that influence the durability of driftwood and unveil the secrets behind its longevity. So, grab a cup of tea and join us as we dive into the fascinating world of driftwood and its enduring beauty.

Factors Affecting the Lifespan of Driftwood

When it comes to the lifespan of driftwood, several factors come into play. These factors can determine how long the driftwood will endure and remain usable. Understanding these factors is crucial if you want to make the most out of your driftwood. Let’s take a closer look at each factor:

Type of Wood

The type of wood used in driftwood plays a significant role in its lifespan. Different types of wood have varying levels of durability and resistance to environmental factors. One of the primary distinctions in wood types is hardwood versus softwood. Hardwood, such as oak or mahogany, is generally stronger and more long-lasting compared to softwood, such as pine or cedar. Additionally, the specific wood species itself can also affect the durability and longevity of driftwood. Some wood species, like teak or cedar, are naturally more resistant to decay, insect infestation, and the effects of weathering.

How Long Does Driftwood Last?

Environmental Conditions

The environmental conditions in which the driftwood is exposed greatly impact its lifespan. Factors such as climate, temperature, humidity, and the salt content in the air can all affect the driftwood’s longevity. For example, if the driftwood is consistently exposed to high humidity or extreme temperatures, it may deteriorate more rapidly. Similarly, if the salt content in the air is high, as is often the case in coastal areas, the driftwood may be prone to faster decay and erosion.

Exposure to Water

The exposure of driftwood to water is another critical factor influencing its lifespan. Whether it is saltwater or freshwater, the type of water the driftwood comes into contact with can have different effects. Saltwater can accelerate the degradation of driftwood due to its corrosive properties, while freshwater may be less harmful. The depth and duration of submersion also play a role. Driftwood submerged at greater depths and for longer periods may experience increased wear and tear due to water movement and erosion.

How Long Does Driftwood Last?

Exposure to Sunlight

The exposure of driftwood to sunlight can significantly impact its lifespan. UV radiation from the sun can cause degradation and discoloration of the wood over time. The intensity and duration of sunlight exposure should be considered as well. Driftwood exposed to direct sunlight for prolonged periods will likely experience more significant damage compared to driftwood that is shielded or only exposed to indirect sunlight.

Contact with Soil

When driftwood comes into contact with soil, several factors can influence its durability. The mineral content of the soil can affect the rate of decay and decomposition, while microorganisms present in the soil may contribute to the breakdown of the wood. Additionally, chemical reactions between the wood and the soil can occur, potentially speeding up the decomposition process. Therefore, the type of soil and the duration of contact should be considered when determining the lifespan of driftwood.

Pest Infestation

Pests can significantly impact the lifespan of driftwood. Termites, wood-boring insects, and marine borers are common culprits that can cause considerable damage to driftwood. These pests feed on the wood, weakening its structure and making it more susceptible to decay and breakage. Regular inspections and appropriate pest control measures can help mitigate the risk of infestation and prolong the lifespan of driftwood.

Presence of Decay-Causing Fungi

Decay-causing fungi can also contribute to the deterioration of driftwood. Different types of fungi, such as brown rot, white rot, and soft rot, can break down the wood fibers and diminish its strength. These fungi thrive in moist and humid environments, making it essential to keep driftwood dry and well-ventilated to minimize their presence. Regular inspections and prompt treatment can help prevent the spread of decay and extend the lifespan of driftwood.

Size and Density of Driftwood

The size and density of driftwood have an impact on its lifespan as well. Thicker and denser pieces of driftwood tend to be more durable and resistant to decay compared to smaller or less dense ones. This is because thicker wood generally contains more lignin, a natural polymer that provides structural strength and resistance to decay. The weight of the driftwood can also determine its durability, as heavier pieces are less likely to be carried away by strong water currents or winds. Additionally, the porosity of the wood can affect its water retention and susceptibility to decay.

Human Interaction

Human interaction with driftwood can influence its lifespan. Rough handling, excessive weight or pressure, and constant movement can cause physical damage to the wood, making it more susceptible to decay and breakage. Therefore, it is essential to handle driftwood with care and avoid unnecessary stress or strain. Consideration should also be given to the placement of driftwood, ensuring that it is not subjected to constant impacts or disturbances.

Maintenance and Treatment

Proper maintenance and treatment can significantly affect the longevity of driftwood. Regular cleaning, particularly to remove dirt, debris, and algae, can help prevent the buildup of moisture and minimize the risk of decay. Sealing the driftwood with an appropriate sealant can provide an additional layer of protection against water damage and UV radiation. Additionally, the application of wood preservatives can help prevent pest infestation and fungal decay, extending the lifespan of the driftwood.

In conclusion, the lifespan of driftwood is influenced by a variety of factors. From the type of wood and environmental conditions to exposure to water, sunlight, and soil, each factor plays a role in determining how long the driftwood will last. Pest infestation, the presence of decay-causing fungi, and the size and density of the driftwood also contribute to its longevity. Furthermore, human interaction, maintenance, and treatment play crucial roles in extending the lifespan of driftwood. By understanding these factors and taking appropriate measures, you can ensure that your driftwood remains beautiful and usable for an extended period.

Filed Under: Driftwood Tagged With: Driftwood, home decor, natural materials

Dockside Driftwood Flooring

January 10, 2024 by admin

Imagine walking into a space that instantly transports you to the serene and calming ambiance of a beachside getaway. The subtle hues of gray and brown perfectly blend together, mimicking the weathered beauty of driftwood that has been washed ashore. This is the essence of Dockside Driftwood Flooring. With its unique and natural appeal, this flooring option not only adds a touch of rustic elegance to any room but also brings a sense of tranquility and connection to nature. Transform your space into a coastal oasis with Dockside Driftwood Flooring and let the waves of relaxation wash over you.

Dockside Driftwood Flooring

Dockside driftwood flooring is a unique and stylish option for anyone looking to add a touch of coastal charm to their home or business. Made from reclaimed driftwood found along the shores, this type of flooring brings a natural and rustic feel to any space. In this article, we will explore what dockside driftwood flooring is, discuss its advantages, provide tips on choosing the right one for your needs, explain the installation process, offer maintenance tips, consider the environmental impact, compare it to other flooring options, suggest design ideas, and finally, discuss its cost. By the end, you will have a comprehensive understanding of dockside driftwood flooring and be able to make an informed decision on whether it is the right choice for you.

What is Dockside Driftwood Flooring?

Dockside driftwood flooring is a type of flooring that is made from reclaimed driftwood gathered from coastal areas. This driftwood is typically collected from piers, jetties, and beaches, where it has been weathered by the sea and sun. It is then cleaned, treated, and transformed into beautiful flooring boards that showcase the unique textures and colors of the wood. The result is a floor that captures the essence of coastal living and brings a sense of warmth and character to any space.

Advantages of Dockside Driftwood Flooring

One of the main advantages of dockside driftwood flooring is its unique and natural appearance. Each piece of driftwood used in the flooring has its own distinct characteristics, such as knots, grain patterns, and color variations, making every floor truly one-of-a-kind. This flooring option adds a sense of authenticity and individuality to any room, creating a truly special and personalized space.

Another advantage of dockside driftwood flooring is its durability. Driftwood is naturally weather-resistant and has already withstood the elements for an extended period of time. This means that the flooring is less prone to warping, cracking, or splitting, making it a reliable and long-lasting option. With the proper care and maintenance, dockside driftwood flooring can maintain its beauty and functionality for many years to come.

Additionally, dockside driftwood flooring is an eco-friendly choice. By using reclaimed driftwood, this flooring option reduces the demand for new wood and helps prevent deforestation. It also repurposes materials that would otherwise go to waste, making it a sustainable and environmentally responsible choice.

Choosing the Right Dockside Driftwood Flooring

When choosing dockside driftwood flooring, there are several factors to consider. First, think about the overall look and feel you want to achieve in your space. Dockside driftwood flooring comes in a variety of shades, ranging from light grays to rich browns, so take into account the existing color palette and style of your room. Consider whether you want a more rustic and weathered look or a smoother and more refined appearance.

Next, consider the size and shape of the flooring boards. Dockside driftwood flooring is available in different widths and lengths, allowing you to customize the look and layout of your floor. Wide boards can create a more open and spacious feel, while narrow boards can add a sense of coziness and charm. Think about the dimensions of your room and how the different board sizes will impact the overall aesthetics.

Finally, consider the finish of the flooring. Dockside driftwood flooring can be left unfinished for a more natural and rustic look, or it can be sealed with a protective coating to enhance its durability. Think about your lifestyle and the amount of traffic the floor will experience. If you have a busy household or high foot traffic areas, choosing a sealed finish can help prevent scratches and stains.

Installation Process

The installation process for dockside driftwood flooring will depend on whether you choose to install it yourself or hire a professional. If you have experience and the necessary tools, installing it yourself can be a rewarding DIY project. However, if you are unsure or lack the time or expertise, it is recommended to hire a professional flooring installer to ensure a seamless and professional result.

Before starting the installation, it is important to prepare the subfloor. Ensure it is clean, level, and free from any moisture or debris. If necessary, make any necessary repairs or adjustments to ensure a solid foundation for the flooring.

When installing dockside driftwood flooring, it is important to follow the manufacturer’s instructions and guidelines. Typically, the flooring boards are nailed or glued down onto the subfloor. It is important to leave a small gap around the perimeter of the room to allow for expansion and contraction of the wood.

Once the flooring is installed, it is recommended to let it acclimate to the room’s humidity and temperature for a few days before walking on it or placing furniture. This will help prevent any issues with warping or buckling. Finally, apply any desired finish or sealant to protect the wood and enhance its appearance.

Maintenance Tips

To keep your dockside driftwood flooring looking its best, there are several maintenance tips to keep in mind. Regular cleaning is essential to remove dirt, dust, and debris that can scratch the surface of the wood. Sweep or vacuum the floor regularly, and occasionally use a damp mop with a mild cleanser specifically designed for wood floors.

Avoid using harsh cleaning products, abrasive materials, or excessive moisture, as these can damage the wood. Clean up spills immediately to prevent staining or warping. It is also recommended to use furniture pads or felt protectors on the legs of furniture to prevent scratching when moving or rearranging items.

Additionally, it is important to periodically inspect the floor for any signs of wear or damage. If any boards become loose, warped, or damaged, it is best to replace them as soon as possible to maintain the integrity and beauty of the flooring.

Environmental Considerations

Dockside driftwood flooring is a sustainable and environmentally friendly flooring option. By using reclaimed driftwood, it helps reduce the demand for new wood and promotes resource conservation. It also repurposes materials that would otherwise go to waste, minimizing the environmental impact.

Furthermore, the production process for dockside driftwood flooring is typically more energy-efficient compared to traditional wood flooring options. Reclaiming and repurposing driftwood requires less energy and resources compared to harvesting, processing, and manufacturing new wood flooring products.

If environmental sustainability is a priority for you, dockside driftwood flooring is an excellent choice that allows you to enjoy the beauty of natural wood while minimizing your ecological footprint.

Comparison with Other Flooring Options

When considering dockside driftwood flooring, it is helpful to compare it with other flooring options to see how it stacks up. One common alternative is solid hardwood flooring, which offers a similar natural and authentic appearance. However, solid hardwood can be more expensive and may require more maintenance and care to keep it looking its best. It is also less resistant to moisture and may be prone to warping or staining in humid environments.

Another alternative is laminate flooring, which can mimic the look of wood at a lower cost. While laminate flooring is generally more durable and resistant to moisture compared to solid hardwood, it lacks the unique and individual character of dockside driftwood flooring. Laminate flooring also cannot be refinished and may need to be replaced entirely if it becomes damaged.

Engineered hardwood flooring is another option to consider. It consists of a thin layer of real wood on top of multiple layers of plywood or high-density fiberboard. Engineered hardwood is more resistant to moisture compared to solid hardwood and offers a similar look and feel. However, it may lack the rustic charm and character of dockside driftwood flooring.

Ultimately, the choice between dockside driftwood flooring and other options will depend on your personal preferences, budget, and the specific needs of your space.

Design Ideas for Dockside Driftwood Flooring

Dockside driftwood flooring offers endless design possibilities, whether you prefer a coastal-themed room or a more contemporary and eclectic style. Here are a few design ideas to inspire you:

  • Coastal Oasis: Create a serene and beachy vibe by pairing dockside driftwood flooring with light and airy colors. Incorporate other natural elements, such as seashells, woven rugs, and nautical-inspired decor.
  • Rustic Retreat: Embrace the weathered and aged look of the driftwood by pairing it with vintage and distressed furniture. Add warm and cozy textiles, such as faux fur or chunky knit throws, to create a rustic and inviting ambiance.
  • Modern Minimalism: Contrast the natural texture and warmth of the driftwood with sleek and minimalist furniture pieces. Opt for neutral shades and clean lines to create a contemporary and understated look.
  • Bold Accents: Use dockside driftwood flooring as a backdrop for vibrant and bold accents. Add pops of color through furniture, artwork, or accessories to create a dynamic and eye-catching space.

Feel free to get creative and experiment with different design styles and elements to reflect your personal taste and create a truly unique and inviting space.

Cost of Dockside Driftwood Flooring

The cost of dockside driftwood flooring will vary depending on several factors, including the size of the space, the quality of the driftwood, and the location of the supplier. Generally, dockside driftwood flooring can range from $6 to $15 per square foot, including installation. This cost may be higher compared to some other flooring options, such as laminate or vinyl, but it reflects the uniqueness and quality of the material.

It is always recommended to request quotes from multiple suppliers and contractors to compare pricing and ensure you are getting the best value for your investment. Keep in mind that additional costs, such as subfloor preparation, underlayment, and finishing products, may also be involved, so be sure to factor those into your budget as well.

Conclusion

Dockside driftwood flooring offers a beautiful and natural flooring option that adds character and charm to any space. With its unique appearance, durability, and eco-friendliness, it is a choice worth considering for those looking to create a coastal or rustic ambiance. By choosing the right dockside driftwood flooring, following the proper installation and maintenance processes, and incorporating your own design ideas, you can transform your space into a truly special and inviting environment that reflects your personal style. So, dive into the world of dockside driftwood flooring and discover the beauty of reclaimed wood brought to life.

Filed Under: Driftwood Tagged With: Driftwood, flooring, home decor

  • « Previous Page
  • Page 1
  • …
  • Page 26
  • Page 27
  • Page 28
  • Page 29
  • Page 30
  • Next Page »

Primary Sidebar

Driftwood4us.com, is a participant in the Amazon Services LLC Associates Program, an affiliate advertising program designed to provide a means for sites to earn advertising fees by advertising and linking to amazon.com.