Modern markers fade and fray in the sun, but these ocean-hewn monoliths have been marking territories since the Bronze Age. Forget the neon tape and the pressure-treated 4x4s that rot at the ground line. The ancients used the ocean’s own timber to mark their lands. These salt-cured monoliths don’t just mark a boundary; they create a legacy in your landscape.
When you walk the perimeter of a property, you are engaging in one of the oldest human traditions. For thousands of years, defining where one man’s toil ends and another’s begins was a matter of survival and social order. In ancient Greece, these markers were known as horoi, simple stones or posts that held the weight of law and community (Wikipedia, 2024). Today, we often settle for plastic flagging that tears in the first winter gale.
Choosing a natural garden boundary is about more than aesthetics. It is about choosing materials that have already survived the ultimate stress test: decades of tumbling in the surf and baking under a maritime sun. This article guides you through the process of sourcing, placing, and maintaining these ancient-style markers to define your space with grit and grace.
Natural Garden Boundary Ideas
A natural garden boundary is a physical demarcation that uses organic, minimally processed materials to define the limits of a landscape. Unlike a chain-link fence or a brick wall, these boundaries prioritize a “wabi-sabi” aesthetic—finding beauty in the weathered and the imperfect. The most striking of these is the salt-cured monolith, often made from massive pieces of driftwood or reclaimed marine pilings.
These markers serve as “natural columns” that ground a garden’s entrance or define its corners (YouTube, 2025). They act as a bridge between the wild, unkempt world beyond your property and the curated sanctuary within. Because they are shaped by water and wind, no two pieces are identical, ensuring that your boundary is as unique as the soil it protects.
In practical terms, these boundaries are used in coastal estates, rural homesteads, and even urban xeriscapes where the goal is to reduce synthetic materials. They provide a sense of permanence that “plastic survey tape” simply cannot match. While a plastic ribbon yells for attention, a driftwood monolith commands respect through its silent, silvered presence.
The Philosophy of the Monolith
To place a monolith is to think in centuries rather than seasons. Ancient societies from Egypt to China used single blocks of stone or massive timbers to mark everything from village limits to the reach of a flood (Roseanne Chambers, 2023). When you use salt-cured wood, you are using a material where the tannins have already been depleted by the ocean, leaving behind a dense, resilient skeleton of lignin that resists rot better than fresh-cut timber (Reef2Reef, 2025).
How to Install Ocean-Hewn Monoliths
Installing a massive piece of driftwood or a salt-cured log requires more than just a shovel. You are essentially planting a dead tree, and you must ensure it remains upright against the pressures of wind and frost heave.
Sourcing and Selection
Start by finding a piece with “character”—forks, burls, or deep grain patterns. If you are beachcombing, check local regulations, as some areas require permits for removing large driftwood (TNNursery, 2024). Look for hardwoods like oak or cedar that have been “salt-killed.” These pieces will feel significantly heavier than they look because they are saturated with salt and minerals.
Preparation and Cleaning
Once you bring a piece home, wash it thoroughly with a high-pressure hose to remove sand and loose debris. If you plan to grow plants against the marker, some experts suggest soaking the wood in fresh water for several days to leach out excess surface salt that might damage sensitive roots (TNNursery, 2024). However, for a boundary marker, keeping that salt deep in the grain is what provides the preservative “cure.”
The Dig and Set
The rule of thumb for any post is that one-third of its height should be underground. For a six-foot monolith, you need a two-foot hole.
- Drainage: Fill the bottom six inches of the hole with crushed stone or gravel. This prevents water from pooling at the base of the wood.
- Bracing: Use large “anchor stones” at the bottom of the hole to wedge the monolith in place. These stones act as the “mountain peaks” of your underground structure (YouTube, 2026).
- Backfilling: Instead of using concrete, which can trap moisture against the wood and accelerate rot, use a mix of native soil and gravel. Tamp it down every three inches to ensure a solid pack.
Vertical Stacking and Sculptural Ties
If your “monolith” consists of multiple smaller pieces, you can stack them vertically using a rebar spine. Drill a hole through the center of several driftwood chunks and slide them over a rebar stake anchored deep in the ground. This creates a “cairn column” that looks like a single, gnarled pillar (YouTube, 2025).
Benefits of Salt-Cured Timber
Why choose a piece of “trash” from the beach over a brand-new, pressure-treated 4×4 from the lumber yard? The reasons are as much about chemistry as they are about soul.
Chemical Resistance: Salt-cured wood has undergone a process where Sodium Chloride (NaCl) has penetrated the fibers. Over time, this creates a “fuzzy” or “stringy” surface that is actually a sign of chemical stability against biological decay (American Pole & Timber, 2020).
Non-Toxic Longevity: Traditional pressure-treated wood often uses chromated copper arsenate (CCA) or other heavy metals to ward off bugs. These chemicals can leach into your soil, which is a major concern if you are marking the edge of a vegetable garden (Clemson, 2017). Salt-cured wood offers a natural alternative that relies on minerals rather than poisons.
Aesthetic Patina: Fresh wood eventually turns gray, but driftwood starts with a silvered, sun-bleached patina that looks “right” the moment it is installed. It coordinates perfectly with stone, moss, and native grasses, creating a “collected rather than curated” look (YouTube, 2025).
Challenges and Common Mistakes
The biggest mistake is assuming that “salt-cured” means “immortal.” All wood in contact with soil will eventually decay. In warm, moist climates like the Gulf Coast, even treated wood only lasts about 25–35 years; untreated wood might fail in five (American Pole & Timber, 2025).
Another common pitfall is the “tumbleweed” effect. If you don’t bury your monolith deep enough or fail to use enough gravel for drainage, the first spring thaw will leave your marker leaning like a drunk at a garden party.
Legal Standing: It is vital to remember that a DIY marker is for your own reference and aesthetic pleasure. In the eyes of the law, only a licensed surveyor can set a “legal” property boundary (FindLaw, 2025). 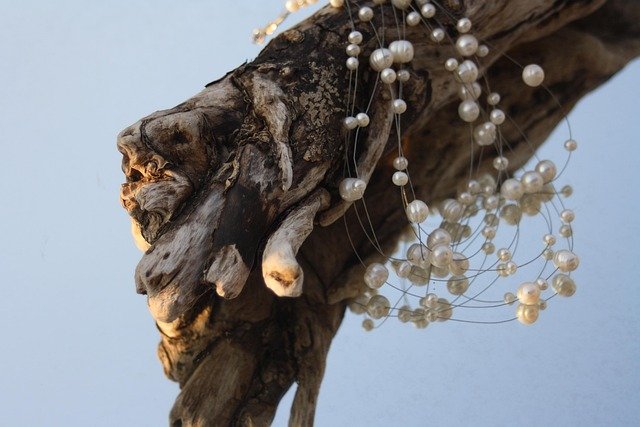 . Moving or replacing an official surveyor’s pin with a driftwood log can lead to legal disputes or even misdemeanor charges in some states (FindLaw, 2025).
Limitations and Environmental Constraints
If you live in a high-density urban area with strict Homeowners Association (HOA) rules, a six-foot gnarled stump might be labeled as “yard debris” rather than “landscaping.” These markers work best in environments that embrace a rugged, naturalistic style—think woodland gardens, coastal dunes, or desert retreats.
Weight is another practical boundary. A water-logged piece of oak the size of a man can weigh several hundred pounds. Without a trailer and a couple of strong backs, you aren’t moving a true monolith. If you can pick it up with one hand, it’s a stick, not a monolith.
Comparison: Plastic Survey Tape vs. Ancient Monolith
| Feature | Plastic Survey Tape | Salt-Cured Monolith |
|---|---|---|
| Longevity | 1–2 seasons before fading/tearing | 15–50 years depending on wood type |
| Visual Impact | High visibility, low aesthetic | Low visibility (blends), high aesthetic |
| Installation Effort | Minimal (tie a knot) | High (digging, bracing, lifting) |
| Environmental Impact | Microplastic shedding | Zero (carbon sequestration) |
| Legal Significance | Temporary marker for surveyors | Personal reference; no legal standing |
| Cost | Pennies per foot | Free (sourcing) to high (shipping) |
Practical Tips and Best Practices
If you want your boundary to look like it has been there since the time of the pioneers, follow these field-tested tips:
- Pair with Stone: Never let the wood stand alone. Anchor the base with large river rocks or “erratics.” This mimics the way nature deposits debris along a riverbank or shoreline (YouTube, 2025).
- Char the Base: For extra rot resistance, use the Shou Sugi Ban technique. Lightly char the bottom portion of the log that will be underground. The carbon layer acts as a natural deterrent to fungi and termites.
- Orient the Grain: Look at the “flow” of the wood. Most driftwood has a direction shaped by the current. Point the “nose” of the wood toward the interior of your property to subconsciously lead the eye into your sanctuary.
- Check for “Salt Kill”: If you are using wood from a marine environment, check for a “fuzzy” texture. This indicates the lignin has been modified by the salt, which is exactly what you want for a long-lasting marker (American Pole & Timber, 2020).
Advanced Considerations for Practitioners
For those who want to take this further, consider the soil chemistry of your boundary. Salt-cured wood will slowly release minerals into the surrounding earth. This can be beneficial for certain coastal plants like sea kale or beach plums, but it may stress salt-sensitive species like maples or azaleas.
If you are working on a large acreage, consider using “boundary trees” in conjunction with your monoliths. 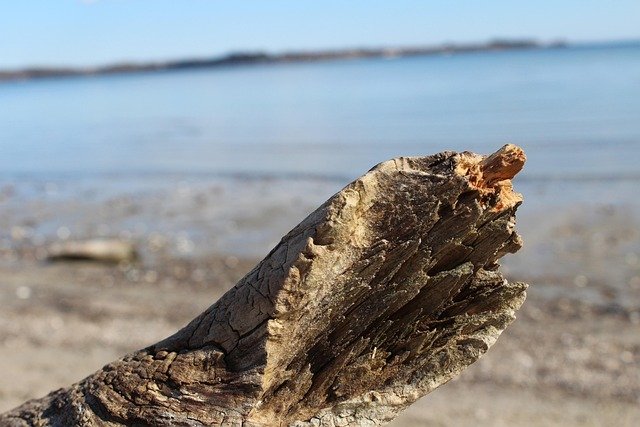 . In the early days of American surveying, “witness trees” were notched and recorded in deeds to help find boundary stones (Wikipedia, 2024). Planting a long-lived species like an oak or a yew ten feet behind your driftwood monolith creates a “two-stage” marker that will last for centuries.
Example Scenario: The Coastal Homestead
Imagine a half-acre property on the edge of a salt marsh. The owner wants to define the transition from the manicured lawn to the protected wetlands without using a plastic fence that would block the view and trap wildlife.
The owner sources three massive pieces of salt-cured cedar, each about eight feet long and twisted like a rope. They are installed at the corners of the property, buried three feet deep in a bed of crushed oyster shells and gravel. Between these monoliths, the owner “stitches” the boundary using a low-growing hedge of native bayberry.
The result is a boundary that looks like it was deposited by a storm fifty years ago. It requires zero maintenance, provides a perch for local hawks, and serves as a clear “no-mow” marker for the landscaping crew. It is a functional piece of art that respects the ecology of the land.
Final Thoughts
Natural garden boundaries are a rejection of the “disposable” culture of modern landscaping. They represent a return to a time when land was marked with materials that had the weight of the earth behind them. By choosing salt-cured monoliths over plastic tape or chemically-laden timber, you are choosing a path of sustainability and historical continuity.
These ocean-hewn markers do more than tell you where your yard ends. They tell a story of resilience, of materials that have survived the crushing power of the sea only to find a new purpose in the quiet of your garden. They develop a silvered patina that only time can grant, becoming more beautiful with every winter storm.
Experiment with your own placement. . Start with a single “cornerstone” monolith and see how it changes the energy of your space. You may find that once you mark your land with the ocean’s own timber, anything less feels like a temporary distraction. Your landscape deserves a legacy; these monoliths are the first step in building it.
Sources
1 youtube.com (https://www.youtube.com/watch?v=Oj1cIrZ-5tc) | 2 youtube.com (https://www.youtube.com/watch?v=bB2FRD6jLhY) | 3 tnnursery.net (https://www.tnnursery.net/blogs/garden-blog/driftwood-has-many-uses) | 4 youtube.com (https://www.youtube.com/watch?v=kTq7OCAzhSY) | 5 youtube.com (https://www.youtube.com/watch?v=JxnFrzg9vx4) | 6 youtube.com (https://www.youtube.com/watch?v=GryLdPJNKQE) | 7 americanpoleandtimber.com (https://www.americanpoleandtimber.com/how-long-do-wood-pilings-last-in-saltwater/)
 .
.  . Instead of using sandpaper to cut the fibers, you use a hard, smooth object like a polished stone, a deer antler, or a piece of bone to rub the wood. This creates a natural, deep luster that looks like it’s coming from inside the wood rather than sitting on top of it. Heat generated by the friction helps melt the natural lignins in the wood, effectively “glazing” the surface with its own resins.