Creating stunning decor for your home can be a fun and fulfilling project, especially when it involves natural elements! In this article, “Preserved Moss And Driftwood Wall Art DIY,” you’ll discover how to craft a beautiful piece of wall art using preserved moss and driftwood. The step-by-step guide walks you through selecting your materials, preparing your base, and arranging your elements to achieve a captivating and unique design. This hands-on project will not only beautify your space but also bring a touch of nature indoors, making your home feel more serene and inviting. Have you ever walked into a room and felt an immediate sense of calm and tranquility, almost as if you’d been transported to the serene forests and coastlines where nature’s gifts converge? Creating a piece of art using preserved moss and driftwood can bring that special touch to your living space. Plus, it’s an incredibly satisfying DIY project. Ready to infuse your home with the serene beauty of nature? Let’s dive right in!
What is Preserved Moss and Driftwood?
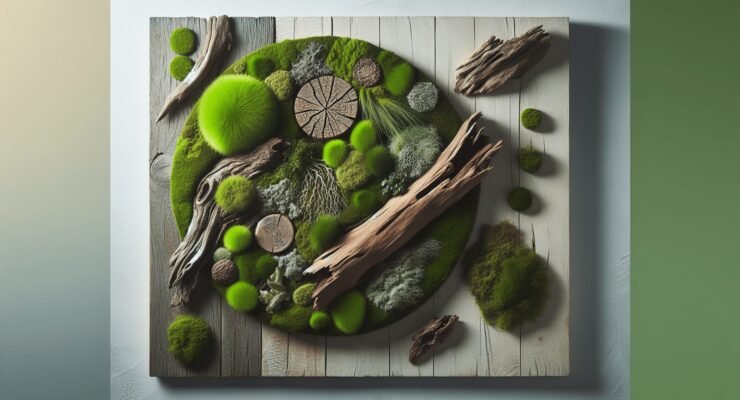
Before you start gathering your materials and tools, it’s important to understand what preserved moss and driftwood are. Preserved moss retains its vibrant color and soft texture through a process that stops its natural growth. This means you get all the aesthetic benefits of moss without the maintenance. Driftwood, on the other hand, is wood that has been naturally eroded by water, giving it a unique texture and appearance that you can’t replicate with manufactured wood.
Benefits of Using Preserved Moss and Driftwood
Preserved moss and driftwood provide several benefits. They are eco-friendly options that bring nature indoors in a sustainable manner. Preserved moss doesn’t require watering, sunlight, or trimming, making it an ideal choice for a low-maintenance art piece. Driftwood, sourced sustainably, repurposes nature’s debris into beautiful decor.
Materials and Tools You’ll Need
If you’re ready to start, the first thing you need is a list of materials and tools. Here is what you will need:
Materials
| Material | Description |
|---|---|
| Preserved Moss | You can find preserved moss in various colors and textures at craft stores or online. |
| Driftwood Pieces | Gather driftwood from a beach, lake, or river. Ensure they’re clean and dry. |
| Wooden Frame | Choose any size or shape that complements your final design. |
| Adhesive | A strong adhesive like E6000 or hot glue is recommended to ensure everything stays securely in place. |
| Backing Board | A sturdy yet lightweight material, like plywood, to serve as the base for your art. |
| Picture Hanging Kit | To mount your masterpiece on the wall once it’s finished. |
Tools
| Tool | Description |
|---|---|
| Scissors | Useful for trimming moss and cutting other materials to the desired size. |
| Pliers | Helpful for manipulating wire or small pieces as needed. |
| Sandpaper | Sometimes, you’ll need to smooth out or refine the edges of your driftwood pieces. |
| Tweezers | Ideal for placing and adjusting small pieces of moss or driftwood. |
| Paintbrush | Helpful for applying adhesive more precisely. |

Step-by-Step Guide to Create Your Artwork
Creating your own DIY preserved moss and driftwood wall art is easier than you might think. Follow these steps, and you’ll soon have a beautiful, nature-inspired piece.
Step 1: Plan Your Design
Begin by envisioning what you want your wall art to look like. It could be an abstract design, a scenic landscape, or a geometric pattern. Sketch your idea on paper. Planning will help you determine how much of each material you’ll need.
Step 2: Prepare Your Frame and Backing
Lay out your backing board and frame. Cut the backing board to fit within the frame if necessary. Secure the backing board to the frame with adhesive or small nails. If you’re adding sides, paint or stain the frame in a color that complements your driftwood and moss.
Step 3: Clean and Arrange Driftwood
Before placing your driftwood, clean it to remove any dirt or debris. You can use soapy water and a brush, then let it dry thoroughly. Arrange the pieces on the backing board based on your design. Don’t glue them immediately; this is just to get a feel for the layout.
Step 4: Attach Driftwood to the Backing
Once you are satisfied with the arrangement, start gluing the driftwood pieces onto the backing board. Use a strong adhesive and press each piece firmly for a few seconds to ensure it’s securely attached.
Step 5: Add Preserved Moss
Now it’s time to add some greenery! Dab a small amount of adhesive onto the back of each piece of preserved moss and place it strategically among the driftwood. Use tweezers for more precision. Try to create depth and variation by layering the mosses and using different colors and textures.
Step 6: Final Touches
Inspect your artwork for any gaps or spaces that need filling. Add smaller pieces of moss or tiny driftwood fragments for intricate details. Let the entire piece dry thoroughly, as per the adhesive’s instructions.
Step 7: Mounting Your Artwork
Attach the picture hanging kit to the back of your frame. Make sure it’s centered and secure to ensure your artwork hangs straight. Finally, proudly display your nature-inspired masterpiece on your wall!
Tips and Tricks for a Stunning Piece
Now that you’ve created your wall art, here are some helpful tips to take your project to the next level.
Choose Diverse Moss and Driftwood
Using a variety of moss types and driftwood shapes will add texture and interest to your artwork. You can mix flat, cushion, and reindeer mosses and look for driftwood in various shapes and sizes.
Add Additional Natural Elements
Consider incorporating other natural elements like small stones, pine cones, or sea glass to enhance your piece. These additional features can provide more depth and interest.
Mind the Adhesive
Be mindful of the type of adhesive you use. A strong, clear-drying adhesive is typically best, as it ensures all elements stay in place without detracting from the natural look.
Lighting Matters
Highlight your artwork with good lighting. Track lighting or an accent light can make a significant difference, making the colors and textures pop.

Maintenance of Preserved Moss and Driftwood Art
One of the best things about preserved moss and driftwood art is its low maintenance. Here’s how to keep it looking fresh:
Dusting
Occasionally dust your artwork with a soft brush or cloth to remove any surface dust. Avoid using water or cleaning products, as they can damage the preserved moss.
Avoid Direct Sunlight
Keep your wall art out of direct sunlight to prevent fading. Although preserved moss is more resilient compared to live plants, prolonged exposure to sunlight can still cause its vibrant color to diminish.
Control Humidity
Preserved moss does well in stable indoor environments. Avoid placing your artwork in areas with high humidity, such as bathrooms, to prevent mold and mildew.
Frequently Asked Questions
Here are some common questions you might have about preserved moss and driftwood art:
How Long Does Preserved Moss Last?
Preserved moss can last for several years if properly cared for. Keeping it out of direct sunlight and away from moisture will help maintain its vibrant appearance.
Can I Create Outdoor Artwork?
While preserved moss and driftwood art is best suited for indoor use, you can create outdoor versions using more durable materials like live moss and treated wood. Ensure that your frame and backing materials are weather-resistant.
Where Can I Find Preserved Moss and Driftwood?
Preserved moss can be purchased at craft stores, garden centers, or online. Driftwood can often be found at beaches, lakes, rivers, or purchased from specialty stores and online retailers.
Advanced Techniques for Enthusiasts
Once you’ve mastered the basics, you might want to explore more advanced techniques to create even more intricate and stunning pieces.
Creating a 3D Landscape
Take your art to the next level by creating a three-dimensional landscape. Use different thicknesses of backing material to create layers and depth in your artwork, adding hills, valleys, or even waterfalls.
Incorporating LED Lighting
Adding subtle LED lighting behind or within your artwork can create a magical glow and highlight specific areas of your piece. Ensure the lighting is battery-operated and safely installed to avoid any damage to the materials.
Using Colored Preserved Moss
Preserved moss comes in many colors beyond green. Incorporate different colors like red, yellow, or blue to create a vibrant piece of art. Use these colors to depict seasons, patterns, or abstract designs.
Conclusion
Creating preserved moss and driftwood wall art is a fulfilling, creative project that allows you to bring a piece of nature into your home. With the right materials, tools, and a bit of imagination, you can craft a stunning artwork that will be a conversation starter for years to come. Not only will it provide aesthetic beauty, but it will also imbue your space with a serene, calming ambiance. Happy crafting!