Have you ever wondered how to bring the natural, earthy charm of the seaside into your home décor? If so, you’re in for a delightful journey into the world of rustic elegance. Achieving that perfect blend of rustic charm and sophisticated elegance can be a bit daunting, but it’s absolutely achievable with the right approach. One of the best-kept secrets to attaining this look is using driftwood gray stain. This article will guide you through everything you need to know to bring out the rustic elegance in your home with driftwood gray stain.
What is Driftwood Gray Stain?
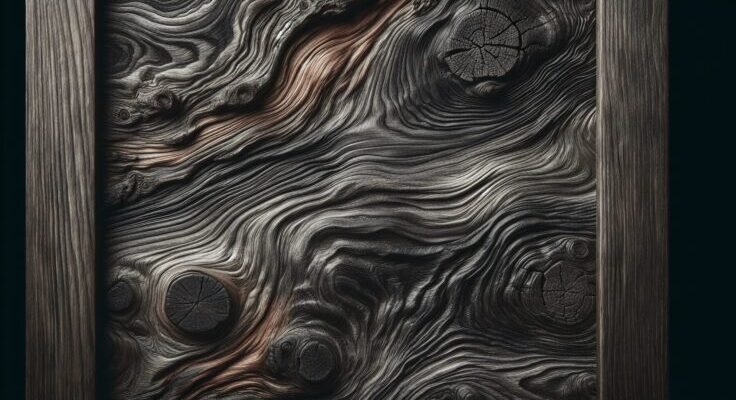
Driftwood gray stain is a wood finish designed to mimic the weathered, natural beauty of driftwood. It’s a blend of gray tones that bring out the rich, rustic texture of the wood while adding a touch of sophistication and modern appeal. Applying this type of stain transforms ordinary wood into a statement piece that embodies both simplicity and elegance.
Why Choose Driftwood Gray Stain?
There are several reasons why you might choose driftwood gray stain over other types of wood stains. Let’s break them down:
| Reason | Explanation |
|---|---|
| Natural Look | Replicates the natural, weathered look of driftwood. |
| Versatility | Complements various interior styles, from coastal to modern rustic. |
| Easy to Apply | Generally simple application process suitable for DIY projects. |
| Elegant Finish | Combines rustic charm with a touch of elegance and sophistication. |
| Durable and Long-Lasting | Offers protective qualities that help maintain the wood’s integrity over time. |
The Science Behind Driftwood Gray Stain
Understanding the science behind driftwood gray stain can help you appreciate its effectiveness. This stain typically includes a mix of pigments and binders, which penetrate the wood fibers, enhancing their natural grain and adding layers of color. The gray tones mimic the weathering process that naturally occurs from exposure to sun and sea, giving the wood a timeless, aged appearance.
Preparing Your Wood for Staining
Before you can achieve the rustic elegance of driftwood gray stain, it’s essential to properly prepare the wood. This stage is crucial for ensuring that the stain adheres well and looks its best.
Cleaning the Wood
Start by cleaning your wood thoroughly. Remove any debris, dirt, or old finishes that might interfere with the new stain. Use a mixture of mild soap and water, or a specialized wood cleaner. Allow the wood to dry completely before moving on to the next step.
Sanding the Wood
Once your wood is clean and dry, sanding is the next crucial step. Use a fine-grit sandpaper (between 120- to 220-grit) to sand the wood surface evenly. Sanding opens up the grain, allowing the stain to penetrate more deeply, which helps achieve a uniform color. Always sand in the direction of the wood grain to avoid scratches that can mar the final look.
| Grit Number | Use |
|---|---|
| 120-150 | Initial sanding for rough surfaces. |
| 180-220 | Final sanding to smooth the surface before staining. |
Testing the Stain
Before applying the stain to your entire project, it’s wise to test it on a small, inconspicuous area or a scrap piece of the same wood. This will give you a good idea of how the stain will look once applied, and you can make any adjustments if the color isn’t exactly what you hoped for.

Applying Driftwood Gray Stain
Now that your wood is prepped and ready, it’s time to apply the driftwood gray stain. This process involves a few steps, and taking your time will pay off in the end with a beautiful finish.
Tools and Materials Needed
Gather all the necessary tools and materials before you begin. Here’s what you’ll need:
| Tool/Material | Purpose |
|---|---|
| Driftwood gray stain | Primary coloring agent. |
| Clean, lint-free cloth or brush | For applying the stain. |
| Protective gloves | To keep your hands clean. |
| Drop cloth or old newspaper | To protect your work area. |
| Sandpaper (in varying grits) | For preparing the wood. |
| Wood conditioner (optional) | Helps wood absorb stain more evenly. |
Applying a Wood Conditioner
Applying a wood conditioner is optional but recommended, especially for softwood or porous wood types that may absorb stain unevenly. The conditioner helps to ensure a more uniform stain application. Apply it according to the manufacturer’s instructions, and let it dry thoroughly before moving on to staining.
Staining Technique
- Start Stirring: Mix your stain thoroughly to ensure even distribution of pigments.
- First Application: Using your cloth or brush, apply the stain in the direction of the wood grain. Start with a thin coat and add more as needed to achieve the desired color.
- Wipe Excess: After letting the stain sit for a few minutes (or as directed by the manufacturer), wipe off any excess with a clean cloth. This prevents the stain from becoming too dark.
- Second Coat: If you want a deeper color, you can apply a second coat after the first one dries, typically after a few hours.
Drying and Curing
Allow the stained wood to dry completely. This usually takes 24 to 48 hours, depending on the humidity and temperature of your work area. It’s important not to rush this step to ensure the best possible finish.
Enhancing the Rustic Elegance
Once your driftwood gray stain has fully dried, you might want to add additional elements to enhance that rustic elegance. Consider these finishing touches to take your project to the next level.
Adding a Protective Finish
A protective finish not only seals the stain but also enhances its durability. Options include polyurethane, wax, or an oil finish. Choose one that suits your needs:
| Finish Type | Characteristics |
|---|---|
| Polyurethane | Provides a strong, durable finish, suitable for high-traffic items. |
| Wax | Offers a softer, more natural finish but may need regular reapplication. |
| Oil | Enhances the grain and depth of the wood, with a warm, natural feel. |
Distressing Techniques
Distressing is an optional technique but can add to the rustic charm of your piece. Use tools like a wire brush, sandpaper, or even chains to create intentional imperfections that give the wood an aged, weathered look. Lightly sand the edges and corners to reveal a bit of the natural wood underneath.
Choosing Complementary Decor
Plan your décor around your newly stained wood to enhance its rustic elegance. Here are some ideas:
- Natural Textiles: Use linens, wool, or burlap fabrics.
- Vintage Accessories: Incorporate antiques or vintage-inspired items.
- Neutral Colors: Stick to neutral and earthy tones to keep the focus on the wood.
Maintaining Your Driftwood Gray-Stained Wood
To keep your wood looking its best, regular maintenance is key. Let’s explore some maintenance tips:
Routine Cleaning
Dust and clean your stained wood regularly using a soft, damp cloth. Avoid using harsh chemicals or abrasive cleaners, as they can damage the finish.
Reapplying Finish
Depending on the type of finish you applied, you may need to reapply it periodically. For wax finishes, this could be once a year, while polyurethane may last several years before needing a touch-up.
Protection from Elements
If your driftwood gray-stained wood is outdoors, protect it from the elements by using covers or placing it in a sheltered area. Regularly inspect for signs of wear and address any issues promptly.
Repairing Minor Damages
Minor scratches or dents can be repaired using touch-up markers or stain-matching crayons available at most hardware stores. For larger damages, lightly sand the area and reapply the stain and finish.
Successful Projects with Driftwood Gray Stain
The possibilities for using driftwood gray stain are vast. Here are some project ideas to inspire you:
Furniture Makeovers
Transform old or outdated furniture into statement pieces that fit seamlessly into a modern rustic theme. Tables, chairs, and cabinets all benefit greatly from a fresh coat of driftwood gray stain.
Accent Walls
Create a stunning accent wall in your living room or bedroom using wood planks stained with driftwood gray. This can add texture and depth to an otherwise plain wall.
Home Accessories
Smaller items like picture frames, shelves, or wooden trays can also be given the driftwood gray treatment. These accents tie together your décor and enhance the overall rustic elegance of your space.
Exterior Applications
Cedar fences, wooden decks, and garden furniture can all benefit from the weathered look of driftwood gray stain. Just be sure to use a stain and finish designed for exterior use to withstand the elements.
Conclusion
Achieving rustic elegance with driftwood gray stain is a rewarding project that brings natural beauty and sophistication into your home. Whether you’re updating furniture, creating accent walls, or enhancing home accessories, this versatile stain offers endless possibilities. Proper preparation, application, and maintenance are key to ensuring that your wood looks its best for years to come.
By following the steps and tips outlined in this article, you’ll be well on your way to creating a space that resonates with the serene, timeless beauty of driftwood. Now, it’s time for you to gather your materials, roll up your sleeves, and bring a touch of rustic elegance into your home. Happy staining!