Imagine the joy of being able to go to the beach and collect driftwood for a fascinating project. That’s exactly what Susie Frazier gets to do as she designs driftwood wall art for a wellness-inspired dining room. In this video, Susie takes us through the process of turning ordinary pieces of driftwood into a captivating feature that resembles a giant floating tree along the dining room wall. With its unique curves and intricate joinery, this project promises to be really exciting and transformative.
Through this video, Susie will guide you on how to design driftwood wall art that not only adds beauty to your space but also promotes a sense of wellness. Get ready to be inspired as she demonstrates the art of transforming driftwood into an enchanting piece of decor. Join Susie Frazier on this creative journey and discover how you can bring nature indoors with the perfect blend of design and craftsmanship.
Designing Driftwood Wall Art for a Wellness-Inspired Dining Room
Driftwood wall art can be a stunning addition to a dining room, especially when aiming to create a wellness-inspired atmosphere. The organic and natural elements of driftwood can help bring a sense of tranquility and relaxation to the space. In this article, we will guide you through the process of designing and creating your own driftwood wall art, ensuring you select the right pieces, prepare them properly, plan the composition, assemble the art, install it in your dining room, enhance the wellness vibes, maintain it for longevity, showcase it effectively, and combine it with wellness concepts.
1. Selecting the Right Driftwood Pieces
When it comes to designing driftwood wall art, selecting the right pieces is crucial. Here are a few key factors to consider when choosing your driftwood:
a. Considering Size and Shape
The size and shape of the driftwood pieces you select will determine the overall look and feel of your wall art. Consider the dimensions of your dining room wall and choose driftwood that fits proportionally. Varying sizes and shapes can add visual interest and depth to the composition.
b. Examining the Curves and Textures
Driftwood often has unique curves and textures that can add character to your wall art. Look for pieces with interesting twists, turns, or knots that will create visual intrigue. The textures should be well-defined but not overly weathered to ensure the driftwood remains structurally sound.
c. Assessing the Quality and Condition
Before finalizing your selection, take a close look at the quality and condition of the driftwood. Make sure it is sturdy and free of rot or damage that may affect its overall durability. Well-aged driftwood with a silver or weathered patina can bring a rustic charm to your art.
2. Preparing the Driftwood
Once you have chosen the right driftwood pieces, it is essential to prepare them properly before creating your wall art. Here are some steps to follow for effective preparation:
a. Cleaning and Removing Debris
Begin by thoroughly cleaning the driftwood to remove any debris, sand, or dirt that may have accumulated. Use a soft brush to gently scrub the surface, paying close attention to crevices and knots. Rinse the driftwood with water and allow it to dry completely before proceeding.
b. Sanding and Smoothing the Surface
To achieve a polished and smooth finish, it is important to sand the driftwood. Use a medium-grit sandpaper to sand away any rough edges and uneven surfaces. Be careful not to sand excessively, as the natural texture and character of the driftwood should still be preserved.
c. Treating for Termites or Insects
As a precautionary measure, treating the driftwood for termites or insects is recommended. You can use a wood treatment solution or contact a professional exterminator to ensure that your driftwood remains pest-free.

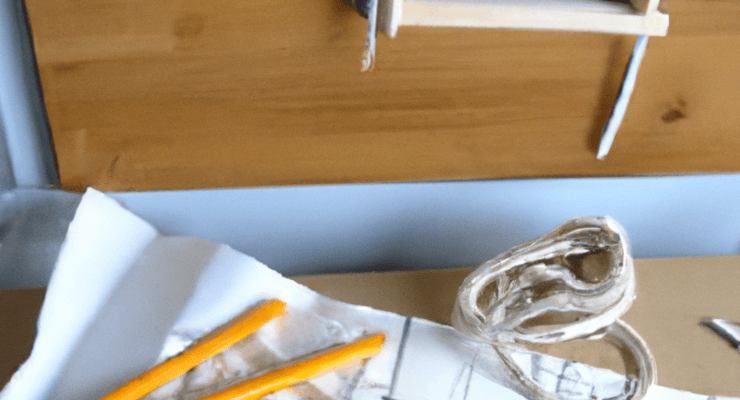
This image is property of i.ytimg.com.
3. Planning the Composition
Designing the composition of your driftwood wall art is a crucial step in creating a visually appealing and balanced piece. Consider the following factors when planning your composition:
a. Determining the Placement
Decide where you want to place your driftwood wall art within your dining room. Whether it will be the centerpiece or a complementary element, understanding its location will help guide the overall design process.
i. Focusing on the Centerpiece
If you want your driftwood art to be the focal point of the dining room, focus on creating a visually striking centerpiece. Choose larger, more prominent pieces of driftwood to be the main attraction and build the composition around them.
ii. Balancing the Size and Distribution
For a more subtle approach, aim to balance the size and distribution of the driftwood pieces throughout the composition. Avoid overcrowding or overloading one area, as this can create visual imbalance and detract from the overall aesthetic appeal.
b. Sketching the Design on Paper
Before assembling your driftwood pieces, consider sketching the design on paper to better visualize your composition and explore different layouts. This will help you experiment with various arrangements and achieve the desired look.
i. Exploring Different Layouts
Sketch out different arrangements to see how the driftwood pieces can fit together harmoniously. Play around with different angles and variations to determine the most visually appealing option.
ii. Considering Symmetry and Asymmetry
Decide whether you prefer a symmetrical or asymmetrical composition. Symmetry creates a more formal and balanced look, while asymmetry can add a sense of dynamic movement and interest to your driftwood wall art.
4. Assembling the Driftwood Art
Once you have determined the composition, it is time to assemble the driftwood pieces together. Here are the steps to follow for a successful assembly:
a. Collecting the Necessary Tools and Supplies
Gather all the necessary tools and supplies before you start assembling your driftwood art. These may include nails, screws, wood glue, a drill, measuring tape, and a level. Make sure you have everything on hand to ensure a smooth assembly process.
b. Attaching the Driftwood Pieces Together
To securely attach the driftwood pieces, you can choose to use nails, screws, or wood glue, depending on the size and weight of the pieces. Carefully measure and mark the positions where the driftwood will be connected, ensuring they fit together seamlessly.
i. Using Nails, Screws, or Wood Glue
If you opt to use nails or screws, pre-drill small holes to prevent the driftwood from splitting. Alternatively, wood glue can provide a more seamless and concealed connection between the pieces.
ii. Ensuring Stability and Durability
During the assembly process, prioritize stability and durability. Reinforce any weak areas with additional support, and ensure that the driftwood pieces are securely fastened together to withstand the test of time.
c. Creating Floating and Standoff Effects
To achieve the desired floating or standoff effect with your driftwood wall art, use standoffs or spacers when attaching it to the wall. This will create dimension and depth, enhancing the visual impact of the artwork.

5. Installing the Artwork in the Dining Room
Now that you have assembled your driftwood wall art, it is time to install it in your dining room. Follow these steps to ensure a successful installation:
a. Determining the Wall Location
Choose a suitable location on the dining room wall where your driftwood art will be installed. Consider the lighting, visibility, and overall aesthetics of the room to find the perfect spot.
b. Using Proper Hanging Techniques
To hang your driftwood art securely and avoid any potential damage to the wall, use proper hanging techniques. Take the following steps into consideration:
i. Choosing the Right Hardware
Select appropriate hanging hardware based on the weight of your driftwood art and the type of wall surface. Wall anchors, screws, or picture hanging hooks can provide the necessary support.
ii. Avoiding Damage to the Wall
Before drilling or hammering, ensure that you are not damaging any electrical wires or plumbing behind the wall. Use a stud finder to locate the studs or consult a professional if needed.
6. Enhancing the Wellness Vibes
To truly embrace the wellness-inspired concept in your dining room, consider enhancing the overall atmosphere by incorporating additional elements that complement your driftwood wall art:
a. Incorporating Natural Elements
Integrate other natural elements such as stones, seashells, or pieces of coral to further enhance the organic and calming ambiance. These elements can be positioned strategically around the driftwood art or displayed separately.
b. Adding Plants and Greenery
Plants and greenery can bring life and vibrancy to the dining room. Consider placing potted plants near the driftwood art or hanging a living plant installation nearby to create a harmonious connection with nature.
c. Choosing Calming and Earthy Colors
Select colors for your dining room decor that promote relaxation and tranquility. Earthy tones, such as greens, browns, or blues, can complement the organic look of driftwood and contribute to the overall wellness-inspired atmosphere.

7. Maintaining the Driftwood Wall Art
To ensure the longevity and preservation of your driftwood wall art, regular maintenance is necessary. Follow these steps to keep it in great condition:
a. Regular Dusting and Cleaning
Driftwood can accumulate dust and dirt over time. Regularly dust the surface of your wall art using a soft cloth or a duster to prevent the buildup of debris. For deeper cleaning, use a mild soap and water solution, being careful not to saturate the driftwood.
b. Treating for Longevity and Preservation
To preserve the beauty and integrity of the driftwood, consider applying a clear coat or wood preservative. These treatments can help protect against UV damage, moisture, and insect infestation, extending the lifespan of your wall art.
8. Showcasing the Artwork in the Dining Room
To truly showcase your driftwood wall art and make it the focal point of your dining room, pay attention to the following aspects:
a. Proper Lighting and Illumination
Highlight your driftwood art with appropriate lighting. Consider installing spotlights or track lighting to accentuate the textures and curves of the driftwood, creating a captivating display.
b. Creating a Focal Point
Arrange the furniture in your dining room in a way that directs attention towards the driftwood art. Ensure that the seating arrangement allows for a clear line of sight to the artwork, making it a central focus when entering the room.
c. Styling the Surrounding Decor
Carefully select and arrange the complementary decor items around your driftwood art. Simple and minimalist pieces, such as neutral-colored ceramics or natural fiber textiles, can create a cohesive and harmonious aesthetic.
9. Combining Driftwood Art with Wellness Concepts
Driftwood art can go hand-in-hand with various wellness concepts, enriching the overall dining room experience. Consider the following ideas:
a. Understanding the Connection
Driftwood, with its organic and weathered appearance, can evoke feelings of being close to nature. This connection to the natural world is often associated with wellness and can contribute to a serene and peaceful dining environment.
b. Using Art to Promote Relaxation and Tranquility
Integrating driftwood art into your dining room can serve as a visual reminder to slow down and embrace relaxation. The natural textures and earthy tones can evoke a sense of calm, encouraging a tranquil dining experience.
c. Incorporating Nature-Inspired Themes
Complement your driftwood art by incorporating nature-inspired themes throughout your dining room. This can include using organic materials, such as bamboo or rattan, or displaying artwork or photographs that depict serene natural landscapes.
10. Conclusion
Designing driftwood wall art for a wellness-inspired dining room can be a creative and fulfilling endeavor. By carefully selecting the right driftwood pieces, preparing them properly, planning the composition, assembling the art, installing it thoughtfully, enhancing the wellness vibes, maintaining it for longevity, showcasing it effectively, and combining it with wellness concepts, you can create a visually stunning and serene atmosphere in your dining space. Enjoy the process of creating your driftwood wall art and embrace the natural beauty it brings to your home.