Traditional Joinery Balcony Furniture Diy
Will your balcony furniture survive the season, or will it survive the decade? Modern furniture is designed to be replaced, not repaired. Looking back at how our grandfathers built for the elements allows us to create small-space pieces that outlast the apartment itself. No screws to rust, no plastic to crack—just the raw power of traditional joinery.
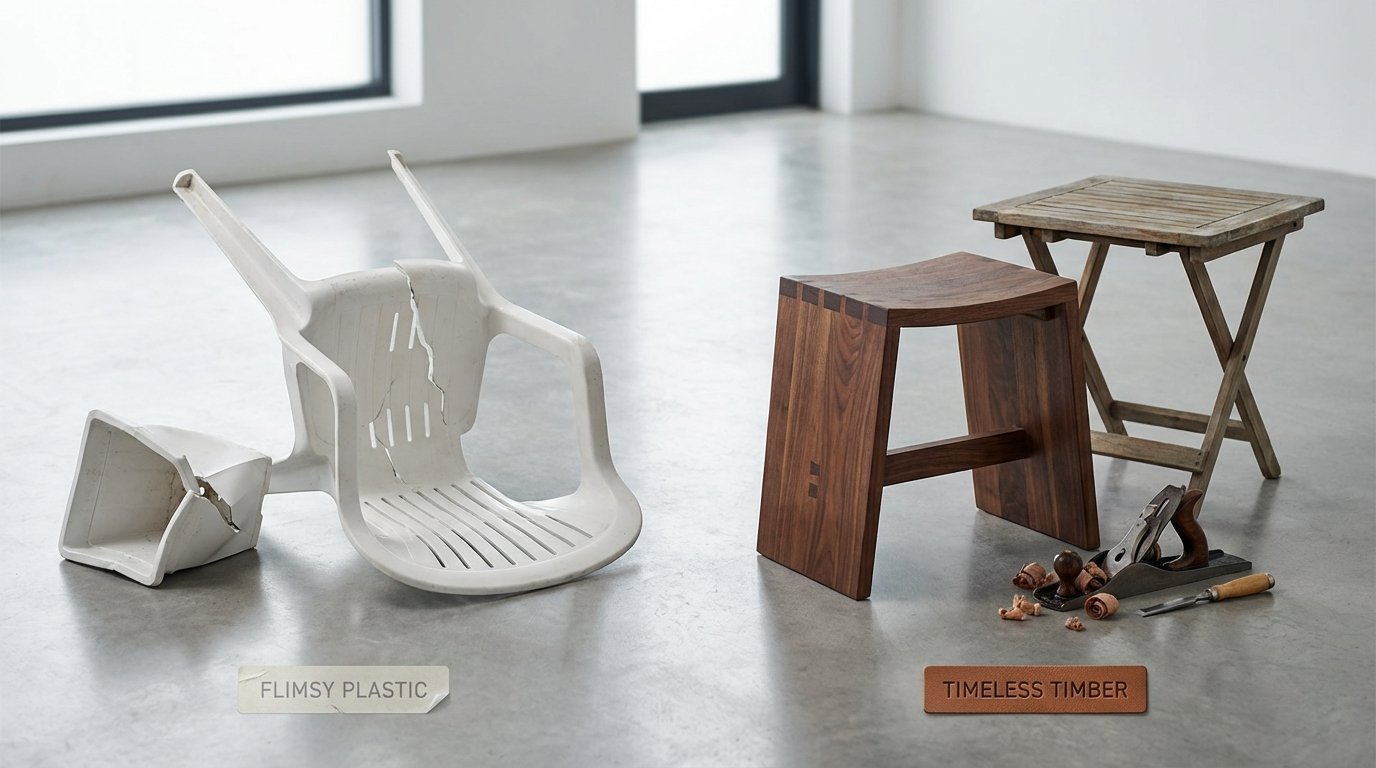
Most balcony sets you find today are built for convenience, not longevity. You see them every spring in big-box stores: thin metal slats or flimsy plastic weaves that lose their structural integrity after one harsh winter. These mass-produced items rely on cheap fasteners that inevitably fail as the wood expands and contracts with the changing seasons.
Traditional joinery offers a different path. It is a system of connecting wood using only the material itself, creating a bond that actually grows stronger as the environment changes. This guide will walk you through the process of building your own balcony furniture using these time-tested methods, ensuring your outdoor oasis remains solid for a lifetime.
Traditional Joinery Balcony Furniture Diy
Traditional joinery is the art of connecting two or more pieces of wood without the use of metal fasteners like nails or screws. This technique relies on the physical geometry of the wood—think of it like a puzzle where the pieces lock together through friction and mechanical advantage. In the context of balcony furniture, this often involves specific cuts like the mortise and tenon, the dovetail, or the lap joint [1.3, 1.11].
This approach exists because wood is a living, breathing material. Unlike metal or plastic, wood constantly reacts to the humidity and temperature of its environment. Traditional joints accommodate this movement, whereas metal screws often fight against it, leading to split grain or loose connections over time [1.13, 1.23].
You find these techniques in high-end artisanal furniture and historical structures that have stood for centuries. On a small balcony, where space is tight and the elements are harsh, these joints provide the structural rigidity needed for compact designs without the bulk of heavy hardware. Utilizing these methods allows you to build a folding chair or a sleek bench that feels as solid as a piece of built-in architecture.
The Anatomy of an Outdoor Joint
Every traditional joint consists of two parts: the “male” projection and the “female” cavity. In a mortise and tenon joint, the tenon is the projection that fits snugly into the mortise hole [1.10]. The fit must be precise—often measured to the thousandth of an inch—to ensure the wood fibers interlock effectively.
Small-space designs often benefit from the “bridle joint,” which is essentially a tenon that spans the entire width of the adjoining piece. This provides a massive surface area for glue and mechanical support, making it ideal for the slim frames required for balcony chairs. High-quality outdoor builds often use these joints because they distribute weight across the wood itself rather than concentrating it on a single metal point [1.16].
How Traditional Joinery Works for the Elements
Building for a balcony means preparing for extreme temperature swings and moisture exposure. Traditional joinery works by using the wood’s natural tendency to swell and shrink to your advantage. A well-designed joint can actually tighten when it rains, preventing the structural “wobble” common in cheap patio sets.
Selecting the right wood is the first and most critical step. Hardwoods like teak, ipe, and white oak are the gold standard for outdoor joinery because they contain natural oils and tannins that repel water and resist rot [1.1, 1.2]. Teak, in particular, is legendary for its ability to last 50 years or more with minimal maintenance due to its unique internal chemistry [1.1, 1.6].
The process starts with precision layout. Woodworkers use marking gauges and squares to trace the joint geometry onto the lumber. Cutting the joints requires sharp hand tools—like a backsaw and a chisel—to remove the waste material. Once the fit is tested, a waterproof adhesive like Titebond III is applied to the mating surfaces to provide a chemical bond that complements the mechanical one [1.15, 1.19].
Mechanical Advantage Through Pegging
One of the most powerful techniques in traditional woodworking is “draw boring.” This involves drilling a hole through the mortise and tenon, but offsetting the hole in the tenon slightly toward the shoulder. When you drive a wooden peg through these holes, it pulls the tenon deep into the mortise, creating a connection that is virtually impossible to pull apart without destroying the wood itself [1.21].
This method removes the need for clamps during the gluing process and ensures the joint remains tight even if the glue eventually fails decades down the road. It is the ultimate insurance policy for furniture that will spend its life outside in the rain and sun. Because the peg is made of wood, it expands and contracts at the same rate as the rest of the piece, preventing the “thermal fatigue” that causes screws to work themselves loose [1.13, 1.23].
Benefits of Choosing Joinery over Fasteners
Choosing traditional joinery over modern screws offers significant practical and aesthetic advantages. The most obvious benefit is the total elimination of rust. Even “rust-resistant” screws can eventually corrode when exposed to the acidic tannins found in many outdoor woods, leaving unsightly black stains on your beautiful furniture [1.24].
Durability is the second major advantage. Traditional joints distribute stress across a wide surface area of wood fibers. A screw, by comparison, concentrates all the load on a tiny thread path. Over time, the movement of the wood and the weight of the user can “strip” these threads inside the wood, leading to a permanent loss of strength [1.3, 1.23].
- Long-term Repairability: Joints can be disassembled and rebuilt if necessary, unlike wood that has been shredded by multiple screw applications [1.3].
- Structural Integrity: The mechanical interlock provides superior resistance to “racking” (the side-to-side swaying of a chair) [1.10].
- Natural Aesthetic: All-wood construction creates a clean, premium look that blends perfectly with the natural environment of a balcony [1.8, 1.23].
- Environmental Impact: Using only wood and bio-based glues makes your furniture fully biodegradable and sustainable [1.8, 1.23].
The weight-to-strength ratio of joinery-based furniture is also superior. Because the joints are inherently strong, you can use thinner, more elegant pieces of lumber to achieve the same structural stability. This is perfect for a small balcony where you want furniture that feels light and airy rather than bulky and over-engineered.
Challenges and Common DIY Mistakes
The biggest hurdle for beginners is the requirement for extreme precision. A gap of even 1/32 of an inch in a mortise and tenon joint can compromise its strength and allow water to seep into the end grain, leading to internal rot [1.12, 1.22]. Most beginners fail because they rush the layout phase or use dull tools that “crush” rather than “cut” the wood fibers.
Ignoring grain orientation is another frequent error. For maximum strength, your tenons should cross as many growth rings as possible. Orienting the grain incorrectly can cause the tenon to shear off under load, a mistake that often happens when woodworkers treat lumber like a uniform material rather than a bundle of fibers [1.16].
Over-tightening the joints during assembly can also be a silent killer. If a joint is too tight, it can split the mortise piece as the wood absorbs moisture and expands. Professionals aim for a “piston fit”—a joint that slides together with firm hand pressure but doesn’t fall out under its own weight [1.16, 1.22].
Avoiding the “Glue Trap”
Relying solely on glue to hold a poorly cut joint is a recipe for disaster. While modern waterproof glues are incredibly strong, they are not designed to bridge large gaps. If your joint is loose, the glue will eventually crack and fail under the stress of wood movement. Always prioritize the mechanical fit before reaching for the adhesive bottle [1.21, 1.22].
Limitations of Traditional Joinery
Traditional joinery is not always the best choice for every project or every person. The primary limitation is time. Cutting a dozen mortise and tenon joints by hand can take days, whereas driving a box of pocket screws can be done in an hour. If you are on a tight deadline, the slow, meditative pace of traditional work might feel frustrating [1.3, 1.8].
Skill acquisition is another barrier. There is a steep learning curve to mastering the chisel and saw.  . Your first few joints will likely be ugly and potentially weak. This approach requires a commitment to the craft that goes beyond a simple weekend DIY project [1.10].
Environmental constraints also play a role. In extremely humid climates, even the best joinery can struggle if the wood species isn’t perfectly matched to the technique. Certain softwoods, like pine, are generally too weak for complex joinery in high-stress outdoor applications; they tend to compress and lose their grip over time [1.1, 1.4].
Traditional Joinery vs. Modern Fasteners
When deciding how to build your balcony furniture, it helps to compare these two philosophies directly. The table below highlights the key differences between the “Grandfather Method” and “The Big Box Method.”
| Factor | Traditional Joinery | Modern Fasteners (Screws/Bolts) |
|---|---|---|
| Lifespan | 50+ Years (with right wood) | 5–15 Years (due to fastener failure) |
| Cost | Higher (Labor + Premium Wood) | Lower (Hardware + Common Lumber) |
| Maintenance | Low (Natural aging or light oil) | High (Tightening/Replacing hardware) |
| Aesthetics | Seamless, handcrafted look | Visible hardware or plastic plugs |
| Movement | Accommodates seasonal change | Resists movement, causing cracks |
Traditional joinery wins on durability and style, while modern fasteners win on speed and initial cost. For a temporary apartment, screws might make sense. For a home you plan to stay in, joinery is the clear winner.
Practical Tips for Best Results
Starting with small projects, like a balcony plant stand or a simple side table, allows you to practice your cuts before moving on to load-bearing chairs or benches. Use a sharp marking knife instead of a pencil for your layout; the knife line creates a physical “trench” for your saw and chisel to follow, ensuring millimetric accuracy [1.22].
Keep your chisels sharp enough to shave hair. A dull chisel will wander and tear the wood, making it impossible to get the flat, square surfaces required for a strong joint. Investing in a basic sharpening stone will improve your results more than any other tool purchase.
- Seal the End Grain: The ends of your boards are like straws that suck up moisture. Always apply extra sealer or glue to the end-grain portions of your joints to prevent rot [1.12].
- Use Spacers: When building seats or table tops, use small wooden spacers to ensure even gaps between slats. This allows for airflow and prevents water from pooling [1.15, 1.17].
- Orient Growth Rings: Look at the end of your boards and try to alternate the direction of the growth rings. This prevents the entire surface from “cupping” or warping in one direction.
Advanced Considerations for Serious Builders
Once you master the basics, you can explore “tusk tenons” or “keyed mortises.” These are joints where a removable wedge holds everything together. This is an incredible feature for balcony furniture because it allows you to “knock down” the furniture for storage or moving without needing a single tool [1.13].
Considering the “micro-climate” of your balcony is also vital. A balcony on the 20th floor experiences higher wind loads and more intense UV exposure than a ground-floor patio. For these high-stress environments, consider using “through-tenons”—where the tenon goes all the way through the adjoining piece and is visible on the other side. . This provides the maximum possible glue surface and mechanical strength.
Testing your joints with a “dry fit” before applying glue is non-negotiable. Assemble the entire piece without adhesive to check for squareness and tight fits. If something is off, it’s much easier to fix it now than when the glue is drying and the clock is ticking [1.22].
Real-World Example: The Mortise-and-Tenon Balcony Bench
Imagine building a 4-foot bench for a narrow balcony. Using 2×2 teak stock for the legs and 1×3 slats for the seat, you decide to use blind mortise and tenon joints for the main frame. You cut tenons that are 1.5 inches long and 0.5 inches thick. . This provides enough depth to keep the bench from wobbling without weakening the legs.
Following the “draw bore” method, you drill a 1/4-inch hole through the leg and the tenon, offsetting the tenon hole by 1/16 of an inch. As you drive a tapered white oak peg through the hole, the shoulder of the tenon is pulled tight against the leg with hundreds of pounds of force. The result is a bench that feels like a single solid piece of wood. Even after five years of rain, sun, and snow, the bench remains as rock-solid as the day it was built [1.21].
Final Thoughts
Building balcony furniture with traditional joinery is a commitment to quality that transcends modern “fast furniture” culture. It transforms a simple DIY project into an heirloom-quality piece that respects the nature of the materials and the environment it inhabits. By removing metal from the equation, you create something that is inherently more durable, beautiful, and sustainable [1.3, 1.8].
The journey from a curious beginner to a skilled practitioner takes time, but the rewards are visible in every solid connection and every smooth surface. Your balcony will no longer be a place for temporary plastic; it will be a showcase for craftsmanship that will survive the decade and beyond. Start small, keep your tools sharp, and let the wood do the work.
Sources
1 bayandbent.com (https://www.bayandbent.com/wood-joinery) | 2 shopatzing.com (https://shopatzing.com/blog/metal-vs-wood-navigating-the-choices-for-patio-furniture/) | 3 instructables.com (https://www.instructables.com/Woodworking-Making-wood-projects-without-using-na/) | 4 factorydirectsupply.com (https://factorydirectsupply.com/blogs/news/5-wood-joinery-methods-without-using-nails-or-screws) | 5 andersonwoodwork.net (https://andersonwoodwork.net/2024/09/14/a-comparative-analysis-of-modern-and-historical-joinery-techniques-in-furniture-making/?v=92a31fc033f7) | 6 knappconnectors.com (https://knappconnectors.com/blog/how-to-resources/what-are-the-strongest-types-of-wood-joints/) | 7 youtube.com (https://www.youtube.com/watch?v=fFHdIpThJ0E) | 8 woodgears.ca (https://woodgears.ca/joint_strength/) | 9 woodkingdomwest.com (https://woodkingdomwest.com/blogs/10-best-types-of-wood-for-outdoor-furniture/) | 10 birchcutlery.com (https://www.birchcutlery.com/news/wood-pins-vs-metal-fasteners-which-is-better-85353635.html)