Is your kitchen organization one humid day away from a total collapse? Most small-space hacks rely on cheap adhesives and flimsy plastic that fail the moment things get heavy. This driftwood herb tower is a structural powerhouse that brings the resilience of the coastline into your culinary workspace.
Modern kitchen storage has become a race to the bottom, filled with mass-produced organizers that buckle under the weight of a few damp pots. We have traded the steadfast reliability of raw materials for the convenience of brittle polymers. A driftwood herb tower rejects this compromise, offering a vertical gardening solution that is as much a piece of structural art as it is a functional spice rack.
Building this tower is an exercise in pioneer-grit. It requires you to look at a weathered piece of timber not as debris, but as a load-bearing spine capable of supporting a thriving ecosystem. By utilizing vertical space, you reclaim your countertops from the clutter of half-dead supermarket basil plants and replace them with a towering monument to self-sufficiency.
In the following guide, we will break down the engineering, the biology, and the grit required to install a driftwood core garden in your kitchen. This isn’t just about decor; it is about building something that lasts longer than the lease on your apartment.
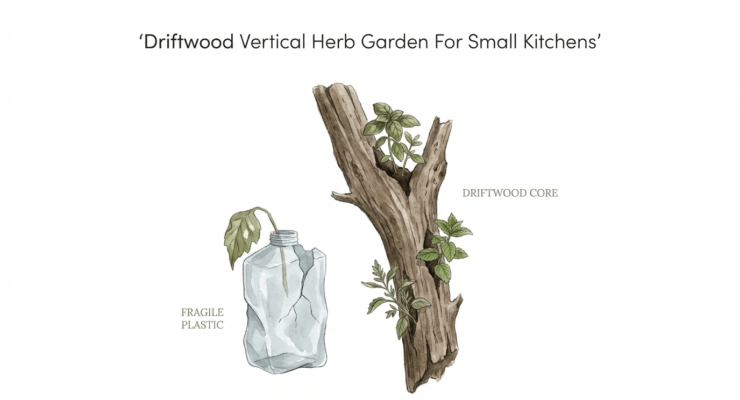
Driftwood Vertical Herb Garden For Small Kitchens
A driftwood vertical herb garden is a space-saving horticultural system that uses a central column of reclaimed, water-aged timber to support multiple tiers of living herbs. Unlike horizontal gardens that consume valuable “real estate” on your counters, this tower exploits the unused height of your kitchen walls or corners. It is the architectural answer to the “urban squeeze,” where every square inch of workspace must be defended.
The core of the system is the driftwood itself. Having survived years of salt-spray, sun-bleaching, and hydraulic pressure, driftwood possesses a density and a unique aesthetic that no kiln-dried pine from a big-box store can match. It acts as a rugged anchor for pots, hooks, and irrigation lines. In a real-world kitchen, this means you can have rosemary, thyme, and mint within arm’s reach of the stove without sacrificing space for your cutting board.
This garden exists because of a simple truth: plants grow better when they aren’t being knocked over by a rogue toaster. By elevating your herbs, you provide them with better airflow and, often, better access to light from high-set kitchen windows. It is a vertical retreat for your greens, protected by a weathered shield of ancient wood.
How to Build Your Coastal Herb Tower
Building a structural powerhouse requires more than just a hammer and a dream. You must treat the wood, calculate the load, and secure the foundation. Follow these steps to move from a pile of beach-combed timber to a culinary landmark.
Step 1: Sourcing and Curing the Core
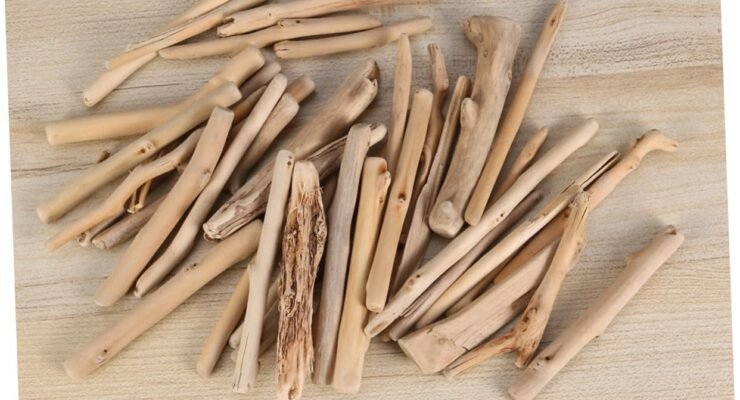
Not all wood found on the shore is fit for service. You are looking for “hard” driftwood—pieces that feel heavy for their size and don’t crumble when poked with a screwdriver. Avoid “punky” wood that has begun to rot from the inside. Saltwater driftwood is often the most resilient, as the salt acts as a natural preservative, though it requires thorough cleaning to ensure the salt doesn’t leach into your herb soil.
Once you find your spine, you must sanitize it.  . Natural wood can house hitchhikers like wood-boring beetles or fungal spores. Submerge the wood in a large trough of distilled water for at least two weeks, changing the water whenever it turns the color of dark tea. . For a faster “pioneer” method, you can boil the wood for two hours to kill any pathogens. Finally, let the wood sun-cure for 15 to 30 days until it is bone-dry and lightweight again.
Step 2: Structural Mounting
A vertical garden is heavy. Once you add soil, water-saturated pots, and the weight of the plants themselves, a five-foot driftwood tower can easily exceed 40 pounds. You cannot rely on “command strips” or cheap drywall anchors. You must find the studs in your kitchen wall.
Use heavy-duty lag bolts or structural screws to secure the driftwood to the wall at a minimum of three points: the base, the midpoint, and the crown. If you are building a free-standing tower, you must bolt the driftwood into a weighted base—ideally a heavy wooden box filled with stones or a concrete-poured planter—to ensure the center of gravity remains low.
Step 3: Attaching the Vessel Holders
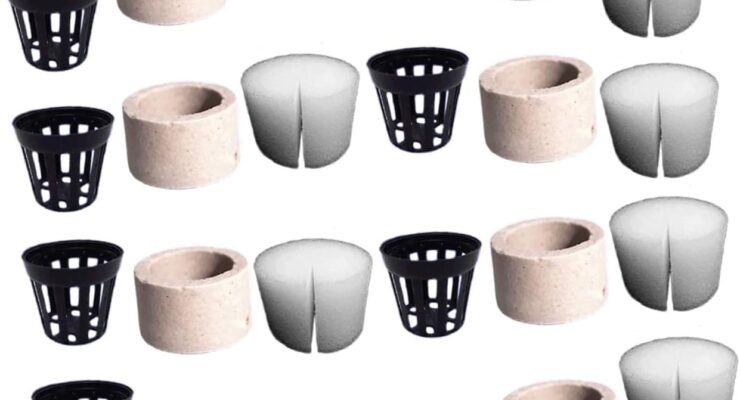
The “fragile plastic” approach would have you glue the pots to the wood. We don’t do that here. To create a system that withstands the test of time, use metal hose clamps or forged iron hooks. Stainless steel hose clamps can be screwed directly into the driftwood; they allow you to “cinch” your pots (terracotta or tin) tightly against the wood core, ensuring they don’t wiggle or slip when you reach for a handful of cilantro.
Step 4: Potting and Drainage
Driftwood and standing water are natural enemies. To prevent the wood from rotting, ensure your pots have superior drainage. Line the bottom of each pot with an inch of coarse pebbles before adding a high-quality potting mix. If your tower is indoors, you must use pots with saucers or a “catch-all” tray at the bottom of the driftwood spine to prevent water from damaging your kitchen floor.
Benefits of a Driftwood Core Garden
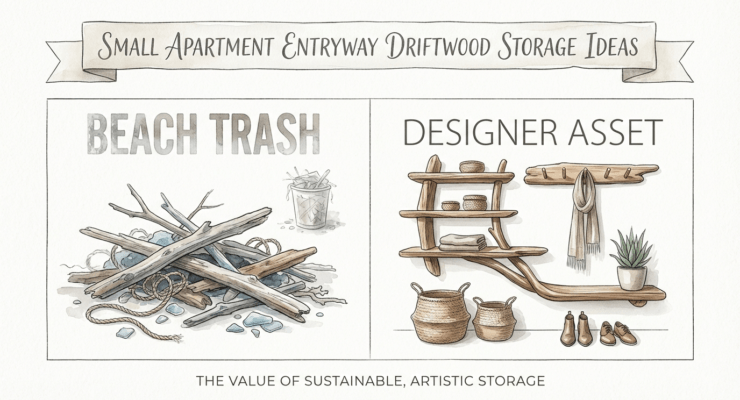
The primary advantage of this approach is durability. While a plastic herb kit will eventually yellow, crack, and snap under the UV stress of a sunny window, driftwood has already been “stress-tested” by the ocean. It is a structural material that only looks better as it ages, gaining a patina from the kitchen’s steam and oils.
Beyond the physical strength, there is the benefit of micro-climate control. Wood is a natural insulator. It helps regulate the temperature of the pots attached to it, protecting delicate herb roots from the sharp temperature spikes common in kitchens (such as when the oven is preheating). Furthermore, the vertical orientation encourages “gravity-assisted drainage,” which helps prevent the root rot that plagues many beginner herb gardens.
Finally, there is the culinary efficiency. Having fresh herbs in a vertical tower means you are harvesting from the top down. This promotes “bushy” growth in herbs like basil and mint, ensuring the plant remains productive rather than becoming “leggy” and weak. It turns your kitchen into a living pantry, reducing your reliance on wilted, plastic-wrapped herbs from the grocery store.
Challenges and Common Mistakes
The most frequent error is underestimating the weight. Many builders assume that because the driftwood felt light when they found it on the beach, it will remain light. However, wood is a sponge. When you water your herbs, the wood can absorb ambient moisture, and the pots themselves can double in weight. Failing to use structural fasteners into a wall stud is the fastest way to end up with a pile of broken terracotta and wet soil on your floor.
Another challenge is improper wood treatment. If you skip the curing process, the tannins in the wood can leach out, staining your kitchen walls a permanent rusty brown. Worse, if the wood wasn’t properly sanitized, you might find a colony of gnats or mold blooming behind the garden within a month. Always prioritize the “prep phase” over the “planting phase.”
A third mistake is poor plant pairing. Not all herbs play well together on a vertical plane. For example, placing a water-hungry mint plant directly above a drought-tolerant rosemary plant can lead to disaster. As the mint is watered, the runoff may over-saturate the rosemary below. You must plan your “herb stack” according to their biological needs.
Limitations of the Driftwood Tower
This system is not ideal for windowless kitchens. Most culinary herbs—basil, thyme, and oregano specifically—require at least 6 to 8 hours of direct sunlight. If your kitchen is a dark cave, a driftwood tower will simply become a very beautiful place for your plants to slowly die. While you can supplement with LED grow lights, this adds complexity and wiring that can clutter the “natural” look of the driftwood.
Environmental constraints also include extreme humidity. In a poorly ventilated kitchen with constant boiling water, the back of the driftwood (where it touches the wall) can trap moisture. This creates a risk for wall-rot or mold. To mitigate this, practitioners often install a “spacer” (like a small wooden block) between the driftwood and the wall to allow for 360-degree airflow.
Lastly, there is the source limitation. Finding a single, structurally sound piece of driftwood that is the right size for a kitchen is a matter of luck and geography. While you can buy driftwood online, it often lacks the unique “pioneer-grit” character of a piece you’ve found and prepared yourself.
Fragile Plastic vs. Driftwood Core
In the world of organization, there is a fundamental divide between materials that are “disposable” and those that are “generational.” The following table highlights why the driftwood core is the superior choice for a serious practitioner.
| Feature | Fragile Plastic Systems | Driftwood Core Tower |
|---|---|---|
| Load Capacity | Low; sags under heavy wet soil. | High; structural-grade support. |
| Longevity | 3-5 years before UV brittleness set in. | Decades; gets stronger with age. |
| Repairability | Non-existent; must be replaced. | Easy; sand, reseal, or re-drill. |
| Environmental Impact | High; petroleum-based waste. | Zero; carbon-neutral reclaimed wood. |
| Aesthetic | Generic; “office-supply” look. | Custom; artisanal and nostalgic. |
Practical Tips and Best Practices
To maximize the life of your tower, rotate your pots monthly. In a kitchen, light often comes from one side. If you don’t rotate the pots, your herbs will grow “towards the light,” becoming lopsided and potentially unbalancing the tower’s center of gravity. A simple quarter-turn every few weeks keeps the growth symmetrical and strong.
Use companion planting principles on your tower. Group “Mediterranean” herbs like rosemary, sage, and thyme on the upper, sunnier tiers where they can enjoy slightly drier soil. Place “leafy” herbs like parsley, cilantro, and chives on the lower tiers where they are slightly more shaded and can benefit from the higher humidity near the base.
- Seal the back: Apply a clear, food-safe polyurethane only to the side of the driftwood that touches the wall. This creates a moisture barrier without ruining the natural look of the front.
- Check your screws: Every six months, give the mounting screws a quick turn. Wood expands and contracts with the seasons, and a “settled” screw can sometimes become loose.
- Prune aggressively: Don’t be afraid to harvest. The more you snip the tips of your herbs, the more they will branch out, creating a “wall of green” that hides the pots and showcases the wood.
Advanced Considerations for Serious Practitioners
For those who want to take their driftwood tower to the next level, consider integrated drip irrigation. By drilling a small channel down the back of the driftwood, you can hide a thin 1/4-inch poly-tube. This allows you to water the entire tower from a single point at the top, with gravity distributing the moisture to each pot. It transforms the garden from a manual chore into an automated system.
Another advanced technique involves epoxy-reinforcement. If you find a piece of driftwood that is beautiful but has a few “soft” spots, you can stabilize it by injecting clear epoxy resin into the cracks. This preserves the weathered look while giving the timber the internal strength of a solid beam. It is the ultimate fusion of coastal aesthetics and modern chemistry.
Scaling is also a factor. A single tower is great for a beginner, but a “driftwood wall”—consisting of three or four staggered spines—can provide enough fresh produce to support a family of four.  . When scaling, ensure your floor joists can handle the concentrated weight, especially in older “pioneer-era” homes where floors may have more “give.”
Scenario: The Urban Pioneer’s Solution
Imagine a small apartment in a bustling city. The kitchen is exactly four feet wide. There is no room for a garden, and the store-bought herbs die within three days on the windowsill. The resident finds a four-foot piece of cedar driftwood on a weekend trip to the coast. After curing and cleaning it, they mount it vertically next to the window.
They attach five small terracotta pots using stainless steel hose clamps. In the top two pots, they plant sun-loving Rosemary and Thyme. In the middle, a bushy Sweet Basil. At the bottom, where it is slightly cooler, they plant Mint and Chives. Within a month, the “dead space” of the kitchen wall has become a vertical forest. The resident no longer buys dried spices; they snip what they need while the pasta boils. The tower doesn’t wobble, doesn’t leak, and hasn’t faded. It is a structural success.
Final Thoughts
The driftwood herb tower is more than a DIY project; it is a rejection of the “fragile plastic” culture that dominates modern life. It requires you to work with your hands, to understand the physics of your home, and to respect the biological needs of the plants that feed you. It is a steadfast companion in the kitchen that rewards patience with flavor.
By choosing a driftwood core, you are investing in a system that values resilience over convenience. Whether you are a beginner looking to save a single basil plant or a serious practitioner building a vertical homestead, the principles of the coastline—strength, age, and endurance—will serve you well. Build it once, build it right, and let the garden grow.
As you move forward, remember that your tower is a living thing. Experiment with different herb varieties, adjust your lighting, and keep your fasteners tight. The transition from a cluttered kitchen to a coastal-inspired workspace begins with a single piece of wood and the grit to make it stand tall.
 . You must respect the wood and the environment it came from. The process begins with a responsible harvest and ends with a piece of timber that is sanitary and structurally sound for indoor use.
 . Always verify the rules for the specific beach or park you intend to visit.
 . Driving a lag bolt directly into a stud provides the “pioneer-grit” stability needed for long-term use.


")
")
 Natural, Handcrafted Fish Tank Decoration | Helps Balance Water pH Levels, Stabilizes Environments | Easy to Install")
 Natural, Handcrafted Fish Tank Decoration | Helps Balance Water pH Levels, Stabilizes Environments | Easy to Install")
 Natural, Handcrafted Fish Tank Decoration | Helps Balance Water pH Levels, Stabilizes Environments | Easy to Install")