• Skip to main content
  • Skip to primary sidebar
  • Terms and Conditions
  • Privacy Policy
  • Contact

Driftwood 4 Us

Just About Driftwood

DriftWood Art

Driftwood Sculpture: Art of Wood

October 13, 2023 by admin

In this article, “Driftwood Sculpture: Art of Wood,” we will explore the fascinating world of driftwood craft and sculpture. With over 50 ideas showcased, you will be inspired and amazed by the creativity that can be achieved with this beautiful natural material. The video, created by Easy Paper Art, will take you on a visual journey, showcasing stunning driftwood creations that range from intricate sculptures to functional pieces of art. Whether you are an artist looking for new inspiration or simply appreciate the beauty of handmade crafts, this article is sure to ignite your creative spirit and leave you eager to try your hand at driftwood art. Get ready to be captivated by the endless possibilities of driftwood craftsmanship!

Driftwood Sculpture: Art of Wood

This image is property of i.ytimg.com.

Introduction

Welcome to the wonderful world of driftwood sculpture! In this comprehensive article, we will explore the fascinating art of creating sculptures using driftwood. From understanding the definition and history of driftwood sculpture to learning the techniques, tools, and materials involved, we will cover everything you need to know to embark on your own driftwood sculpting journey. Additionally, we will delve into different types of driftwood sculptures, provide inspiration and ideas for your creations, discuss displaying and caring for your sculptures, and even touch upon their commercial value and collecting as a hobby. So, let’s dive in and discover the beauty and creativity that can be unlocked through driftwood sculpture!

Understanding Driftwood Sculpture

Definition of Driftwood Sculpture

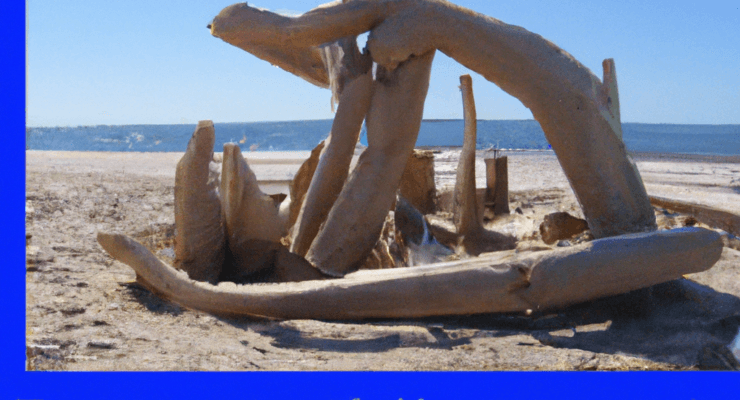
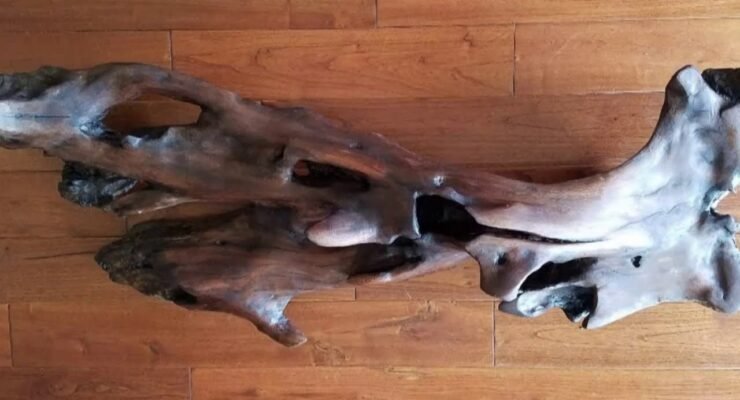
Driftwood sculpture refers to the art of creating sculptures using pieces of wood that have been washed ashore and weathered through natural processes. These pieces of wood, known as driftwood, are often found on beaches, riverbanks, or lakeshores. The artist takes these weathered and aged driftwood pieces and transforms them into unique and visually stunning sculptures. The art of driftwood sculpture involves creativity, craftsmanship, and a deep appreciation for the natural beauty of wood.

History of Driftwood Sculpture

The history of driftwood sculpture can be traced back to ancient times, where civilizations around the world would use driftwood to create functional tools and objects. However, the true artistic use of driftwood as a sculpting medium gained prominence in the 20th century. Artists began to recognize the unique qualities and textures of driftwood, and they started incorporating it into their sculptures. This art form quickly gained popularity as it offered a way to create beautiful, organic-looking sculptures that showcased the innate beauty of natural materials.

Characteristics of Driftwood Sculpture

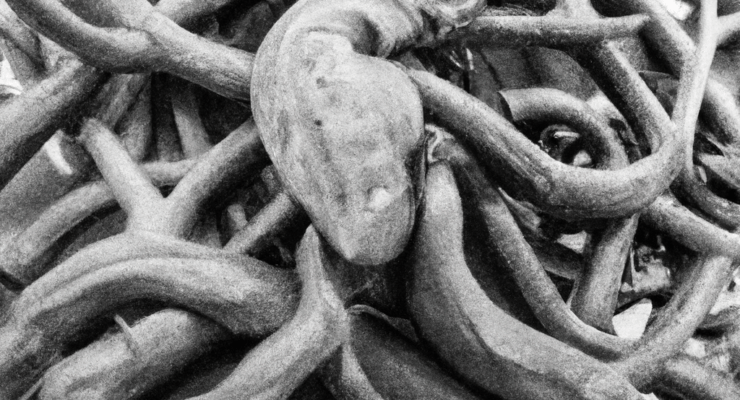
Driftwood sculpture possesses several unique characteristics that set it apart from other sculpting mediums. One of the most prominent features of driftwood sculptures is the distinct shape and texture of the wood. Driftwood pieces often have naturally sculpted forms, with twists, knots, and curves that add a sense of movement and interest to the artwork. Additionally, the weathering and exposure to the elements enhance the natural beauty of the wood, granting each piece a soulful and aged appearance. These characteristics make driftwood sculptures truly one-of-a-kind, as each piece of wood brings its own story and history to the artwork.

Driftwood Sculpture: Art of Wood

Collecting and Preparing Driftwood

Finding Driftwood

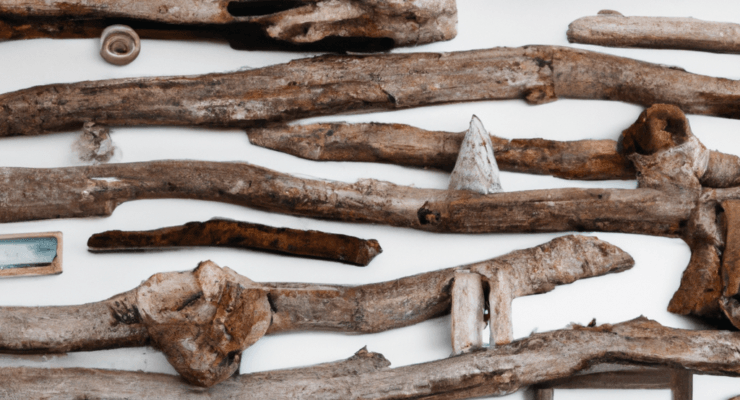
Before you can start sculpting with driftwood, you will need to find suitable pieces to work with. Driftwood can be found in various coastal areas, such as beaches, estuaries, and coves. It can also be found near rivers, lakes, and even in your local park after a heavy rainfall. Keep an eye out for weathered logs, branches, and wood fragments that have been washed up or deposited by water bodies.

When collecting driftwood, it is important to be mindful of the environment and follow any regulations or guidelines set by local authorities. Respect the natural ecosystem and only collect driftwood that is already detached or fallen, ensuring that you do not harm living trees or disrupt the natural balance of the area.

Cleaning and Drying Driftwood

Once you have collected your driftwood, it is essential to clean and dry it thoroughly before using it for sculpting. Cleaning the driftwood helps remove any dirt, debris, or potential pests that may be present on the wood surface.

Begin by rinsing the driftwood with fresh water to remove loose dirt and salt residue. Use a soft brush or sponge to gently scrub the wood, paying close attention to crevices and hard-to-reach areas. Avoid using harsh detergents or chemicals, as they can damage or bleach the wood.

After cleaning, allow the driftwood to dry naturally in a well-ventilated area. Placing the wood in direct sunlight or using artificial heat sources may cause the wood to warp or crack. Depending on the size and thickness of the driftwood, drying can take anywhere from a few days to several weeks. Be patient and ensure the wood is completely dry before moving on to the next step.

Preserving Driftwood

To prolong the lifespan and maintain the natural beauty of your driftwood sculptures, it is important to preserve the wood. This can be done using several techniques, such as sealing, treating, or applying a protective coat.

One common method is applying a wood sealer or preservative to the driftwood surface. This helps protect the wood from insect infestation, fungal growth, and rot. Be sure to choose a sealer that is safe for indoor or outdoor use, depending on where you plan to display your sculpture. Apply the sealer according to the manufacturer’s instructions, ensuring complete coverage of the wood.

Another preservation technique is treating the driftwood with a wood stabilizer. This process involves

[Continued…]

Driftwood Sculpture: Art of Wood

Filed Under: DriftWood Art Tagged With: Art, Driftwood, Sculpture, wood

From Driftwood to Masterpieces: The Art of Plum Island

October 12, 2023 by admin

Have you ever wondered what happens to all the driftwood that washes up on the shores of Plum Island? Well, Erik, a local artist, has made it his mission to collect and transform this driftwood into stunning aquatic art. With an eye for finding unique pieces that already possess shape and form, Erik brings these treasures back to his garage studio where he works his magic. From whales to mermaids, each piece is different and Erik aims to reveal the hidden beauty within. But there’s more to Erik’s passion than just art – he has a deep connection to the ocean and its offerings, having spent his teenage years collecting driftwood. And now, he even finds wood from century-old shipwrecks on Plum Island. Recently, he had an extraordinary encounter with the owner of a barn nearby who wanted to salvage old boards and timbers. This led Erik to create a brand new collection of whales, all made from the same two-century-old wood. The response to his work has been tremendous, with his pieces nearly sold out at the Blockhouse Gallery in Newburyport. By giving new life to old wood and resurrecting the story of its provenance, Erik’s art reminds us that not all that drifts is lost.

No links were added to this response as per the instructions.

From Driftwood to Masterpieces: The Art of Plum Island

This image is property of i.ytimg.com.

The Artist’s Process

Collecting Driftwood

When it comes to collecting driftwood, the artist has a discerning eye. He seeks out pieces that resemble found art, ones that have a shape, form, or an interesting characteristic that speaks to him. The artist looks for driftwood that already has something living inside it, crafted by the forces of the ocean and sand. Each piece of driftwood he selects is unique and serves as a starting point for his artistic process.

Finding Inspiration

Once the artist has collected the perfect pieces of driftwood, he searches for inspiration within them. For his primary subject matter – whales – he begins by looking for the eye in the wood. Whether it’s a knot or an imperfection in the grain, he focuses on the right spot to bring out the essence of the whale. When it comes to mermaids, he often finds that it is the tail of the driftwood that directs the direction the art piece is going. By finding inspiration in the shapes and forms of the driftwood, the artist can breathe new life into each unique creation.

Transforming Driftwood into Art

In his garage studio, the artist works diligently to transform the pieces of driftwood into stunning works of art. With years of experience and a passion for craftsmanship, he uses his expertise to reveal the hidden beauty within each piece. Through the use of various tools and techniques, the artist carefully sculpts and shapes the driftwood into remarkable aquatic scenes. The transformation process is an intricate and often time-consuming endeavor that requires attention to detail and a deep understanding of the medium. As each piece is completed, the artist witnesses the magic unfold as the driftwood is reborn as stunning works of art.

The History of Plum Island

Early Windmills on Plum Island

In the early 1800s, Plum Island was home to windmills that played a crucial role in the salt works industry. Similar to windmills found on Cape Cod, these structures were used to draw seawater into trenches, where it would evaporate and leave behind salt. The windmills were an integral part of the salt production process on Plum Island, harnessing the power of the wind to aid in the creation of salt.

Destruction and Salvage of the Windmills

Unfortunately, these windmills met their demise during a devastating storm. The destructive forces of nature ravaged the windmills, leaving them in ruins. However, a local farmer at the time saw value in salvaging the remains of the windmills. He took the boards and timbers from the windmills and brought them back to his farm, where they were stored in a barn. These salvaged pieces became a tangible connection to the history and story of the windmills that once stood proudly on Plum Island.

Discovery and Resurrection of the Wood

In a serendipitous turn of events, the artist had a chance encounter with the current owner of the barn where the windmill remains were stored. Wanting to preserve the history and legacy of the wood, the owner reached out to the artist, asking him to salvage the pieces. This presented the artist with an exciting opportunity to resurrect the wood and honor the story of the windmills.

Motivated by the history and significance of these boards, the artist created a brand new pod of whales using the wood from these century-old windmills. Each whale, carved with precision and care, tells a story of resilience and rebirth. The response to these pieces has been overwhelming, with the artwork on display at the Blockhouse Gallery and near sell-out sales in Newburyport. The wood that lay dormant for 200 years has been given a new lease on life, with its provenance and history beautifully restored.

The Masterpieces

A Brand New Pod of Whales

Using the wood from the salvaged windmills, the artist created a stunning collection of whales. Each whale is meticulously crafted to capture the essence and spirit of these majestic creatures. Through his skillful use of the driftwood medium, the artist breathes life into each piece, allowing the wood to tell its own story. The whales, born from the same family of two-century-old wood, serve as a reminder of the power of art to transcend time and connect us to our history.

Display at the Blockhouse Gallery

The masterpieces created by the artist using the salvaged wood from Plum Island’s windmills are now on display at the Blockhouse Gallery. This esteemed gallery provides a platform for local artists to showcase their work and connect with art enthusiasts. The exhibition showcases the artist’s talent and creativity, as well as the rich history and significance of the medium he chose. Visitors to the gallery are captivated by the unique beauty of the driftwood art, and the response has been overwhelming.

Tremendous Response and Sales

The response to the artist’s work has been nothing short of tremendous. The combination of his skillful craftsmanship, the historical significance of the wood, and the captivating beauty of the art has resonated with audiences. Art enthusiasts and collectors have flocked to the Blockhouse Gallery, eager to acquire a piece of this extraordinary collection. The sales have been brisk, with many pieces nearly sold out. The artist’s ability to transform driftwood into stunning works of art has captivated the hearts of many, further solidifying his status as a master of his craft.

The Power of Serendipity

The Universe Waiting for the Pieces to Fall into Place

The story of how the windmill wood found its way into the artist’s life is a testament to the power of serendipity. The pieces of driftwood lay dormant in the barn for generations, waiting patiently for the artist to be born, learn how to use power tools, and develop a passion for creating whales. It was a chance encounter with the current owner of the barn that brought the wood to the forefront of the artist’s creativity. The convergence of events and the alignment of the universe allowed this remarkable story to unfold.

The Significance of the Driftwood

The driftwood, aside from its physical beauty, carries with it a profound significance. It represents a connection to the ocean, nature, and the passage of time. Each piece tells a story of resilience, transformation, and rebirth. Through the artist’s hands, the driftwood is given new purpose and life, carrying the energy and history of the windmills that once stood proudly on Plum Island. The significance of the driftwood serves as a reminder of the power of art to breathe life into forgotten stories and elevate the ordinary into the extraordinary.

From Driftwood to Masterpieces: The Art of Plum Island

Conclusion

The story of the artist who collects driftwood and transforms it into aquatic art serves as a testament to the incredible power of creativity and the interconnectedness of life. The artist’s process of collecting, finding inspiration, and transforming driftwood into stunning art showcases his talent, dedication, and passion for his craft. The historical significance of the windmill wood adds another layer of depth to his work, breathing new life into a forgotten story. The masterpieces created from this wood have garnered a tremendous response, reinforcing the artist’s ability to capture the essence of the ocean and its inhabitants. Through serendipity and a deep connection to his medium, the artist has created a body of work that resonates with audiences and honors the beauty and history of Plum Island.

Filed Under: DriftWood Art Tagged With: Driftwood, Masterpieces, Plum Island

Create an Incredible Standalone Fine Art Sculpture from Driftwood – Step-by-Step Guide

October 11, 2023 by admin

Hey there! I’ve been working on this incredible piece of driftwood for a driftwood art project, and I could really use your help. I’ve spent a ton of time sanding, grinding, and smoothing the wood, and now I’m at a loss on how to finish it. I want to turn it into an amazing standalone fine art sculpture, but I need some ideas. I’ve considered hollowing out the center for lights or even using it as a base for something else, but I’m just not sure. So, if you have any suggestions, I would really appreciate it! Let me know what you think in the comments below. Thanks in advance for your help!

Take a look at this stunning piece of wood I found. It’s absolutely beautiful, and I can’t wait to turn it into something amazing. I’ve been working tirelessly on this project, but I’ve hit a roadblock and don’t know how to finish it. That’s where you come in! I need your ideas and tips on how to transform this driftwood into a remarkable standalone fine art sculpture. I’ve already put in so much effort, and I don’t want this piece to end up in the fire pit like some of my other projects. So please, share your thoughts in the comments and help me bring this artwork to life. I really appreciate it!

Introduction

Hey there! Have you ever come across a stunning piece of driftwood and wondered how you can turn it into a work of art? Well, you’ve come to the right place! In this comprehensive guide, we’ll walk you through the steps of creating an incredible sculpture from driftwood. Whether you’re a seasoned artist or a beginner looking to explore your creative side, this article will provide you with all the guidance you need. So grab your tools and let’s get started!

Step 1: Assessing the Driftwood Piece

The first step in any artistic endeavor is to assess the piece you’re working with. Take a close look at the driftwood, examining its shape, size, and unique features. Consider its natural curves, knots, and textures. These characteristics will play an important role in determining the overall design of your sculpture. Of course, every piece of driftwood is different, so trust your instincts and let the wood guide you in the creative process.

Create an Incredible Standalone Fine Art Sculpture from Driftwood - Step-by-Step Guide

This image is property of i.ytimg.com.

Step 2: Planning the Design

Once you’ve assessed your driftwood piece, it’s time to plan the design of your sculpture. Begin by visualizing the end result – what do you want your sculpture to look like? Will it be abstract or representational? Think about the emotions and messages you want your art to convey. Sketch out different ideas and explore various compositions. Play with different angles and perspectives to find the design that resonates with you the most. Remember, this is your chance to bring your artistic vision to life!

Step 3: Preparing the Driftwood

Before you can start working on your sculpture, it’s important to prepare the driftwood. Begin by cleaning the wood to remove any dirt, debris, or algae that may have accumulated. Use a stiff brush to gently scrub the surface, taking care not to damage the natural textures and patina of the driftwood. You can also rinse it with water and let it dry completely before proceeding to the next step.

Create an Incredible Standalone Fine Art Sculpture from Driftwood - Step-by-Step Guide

Step 4: Filling Holes and Cracks

While driftwood can have its own unique charm, it’s common to find holes and cracks in it. To ensure a smooth and polished finish, fill these imperfections. Choose a wood filler that matches the color of the driftwood and carefully fill in the gaps. Allow the filler to dry completely before moving on to the next step. Don’t worry if the filled areas look a bit rough at this stage – we’ll be sanding them later to create a seamless surface.

Step 5: Sanding and Smoothing the Surface

One of the most important steps in creating a driftwood sculpture is sanding. Start with a coarse-grit sandpaper to remove any remaining rough edges and to smooth out the surface. Gradually work your way up to finer grits, creating a polished finish. Pay attention to the details and curves of the wood, ensuring that every surface is smooth and even. Be patient during this process, as it will significantly enhance the overall look of your sculpture.

Create an Incredible Standalone Fine Art Sculpture from Driftwood - Step-by-Step Guide

Step 6: Shaping and Bevelling the Edges

To add more depth and dimension to your driftwood sculpture, consider shaping and bevelling the edges. Using a saw or carving tools, carefully trim and round the edges of the driftwood. This will give it a more refined and professional look. Experiment with different shapes and angles to create a unique aesthetic. Don’t be afraid to get creative – the possibilities are endless!

Step 7: Creating a Standalone Base

While many driftwood sculptures are displayed on a base or stand, you mentioned that you want your piece to be a standalone art sculpture. To achieve this, you can flatten the bottom of the driftwood to make it stable on its own. Carefully measure and mark the area you want to flatten, then use a saw or sandpaper to create a level surface. Take your time with this step to ensure that your sculpture will stand securely once completed.

Step 8: Adding Finishing Touches

Now it’s time to add those finishing touches that will truly bring your driftwood sculpture to life. This is where your creativity can shine! Consider incorporating other materials such as shells, pebbles, or glass beads to complement the natural beauty of the driftwood. You can also paint or stain the wood to add color or enhance its grain. Remember to stay true to your original design and let your intuition guide you as you add these final details.

Step 9: Sealing and Protecting the Sculpture

To preserve your driftwood sculpture and protect it from the elements, it’s essential to seal it properly. Choose a sealant or varnish that is specifically designed for wood and apply it according to the manufacturer’s instructions. This will not only enhance the appearance of your sculpture but also ensure its longevity. Consider applying multiple coats for a more durable finish. Once the sealant has dried, step back and admire your masterpiece!

Conclusion

Congratulations on completing your driftwood sculpture! By following these step-by-step guidelines, you’ve transformed a simple piece of driftwood into an incredible work of art. Your creativity and dedication have paid off, and the finished sculpture is a testament to your artistic vision. Remember, each piece of driftwood is unique, and there are endless possibilities for creating stunning sculptures. So, keep exploring, experimenting, and let your imagination run wild. Happy sculpting!

Filed Under: DriftWood Art Tagged With: Driftwood, fine art, Sculpture, step-by-step guide

Driftwood Art Sculpture Tutorial #1: Beginner’s Guide to Creating Beautiful Artwork from Driftwood

October 10, 2023 by admin

In this beginner’s guide to creating beautiful artwork from driftwood, you’ll embark on an artistic journey with WOODSYDOC, as they take you through a step-by-step tutorial. This video by TREEDY’S TRAVELS & ADVENTURES will teach you everything you need to know, from choosing the right tools for beginners to applying a natural beeswax sealer for that perfect finish. Dr. Teresa Van Woy, the talented artist behind this tutorial, invites you to join her on her channel, where she showcases not only her driftwood art sculptures but also shares travel and cute pet videos. So, get ready to unlock your creativity and bring dead wood back to life in the form of stunning artwork.

In addition to the captivating driftwood art tutorial, Dr. Teresa Van Woy shares her inspirational story of overcoming hardships, homelessness, and abuse to achieve her dreams. Her memoir, “Wildflower: A Tale of Transcendence,” takes readers on a journey from her childhood in the slums of San Francisco to becoming a successful physician. Driven by her unwavering commitment and the power of goals, Dr. Van Woy offers valuable insights into unlocking your own potential. So, don’t miss out on this incredible tutorial and story of triumph.

Introduction

Welcome to Driftwood Art Sculpture Tutorial #1! In this beginner’s guide, we will take you through the step-by-step process of creating a beautiful driftwood sculpture from start to finish. Driftwood art allows you to bring dead wood back to life and transform it into a stunning piece of artwork. We will cover everything from the materials and tools you’ll need, to the preparation, cleaning and shaping, and applying the final finish using an all-natural beeswax sealer. So let’s dive in and get creative!

Materials and Tools

Before we begin, let’s gather all the necessary materials and tools for this project. Here’s what you’ll need:

Driftwood

The star of this project is, of course, the driftwood. You can source driftwood from beaches, riverbanks, or even purchase it online. Look for pieces that have interesting shapes and textures, as these will add character and uniqueness to your sculpture.

Beginner’s Woodworking Tools

As a beginner, it’s important to start with the right tools. Here are the essential woodworking tools you’ll need for this project:

  • Sandpaper (60, 80, 120, and 240 grit)
  • Chisel
  • Dremel or sander
  • Hairdryer
  • Beeswax
  • Turpentine
  • Double boiler

These tools will help you shape and smooth the driftwood, clean up cracks and edges, and apply the finish to your sculpture.

Driftwood Art Sculpture Tutorial #1: Beginners Guide to Creating Beautiful Artwork from Driftwood

This image is property of i.ytimg.com.

Preparation

Now that we have gathered our materials and tools, it’s time to prepare the driftwood for the sculpting process. The first step is sanding.

Sanding

Begin by using a coarse sandpaper, either 60 or 80 grit, to remove any rough or uneven surfaces. This will help you get rid of any debris or dirt on the wood as well. Sand in the direction of the grain, using even and consistent strokes.

As you progress with sanding, switch to finer sandpapers like 120 and 240 grit to smoothen the surface further. The finer sandpapers will remove the remaining sawdust and reveal the quality of the wood underneath.

Identifying When Sanding is Complete

To know if you’re done sanding a particular area, look for a smooth and flawless surface. However, keep in mind that sanding is not just about tactile smoothness. It’s about removing soft wood and reaching the harder, solid parts. If you encounter dark, soft dust during sanding, it means there is still wet wood underneath. Keep sanding until no soft powder is left and the wood looks dry and smooth.

Cleaning and Shaping

Once you have finished sanding the driftwood, it’s time to clean it and shape it according to your artistic vision.

Using a Chisel to Remove Soft Wood

Inspect the driftwood for any areas that still have soft wood. Gently use a chisel to remove the soft parts, taking care not to dig too deep and create gouges. By removing the soft wood, you are ensuring that your sculpture is sturdy and will withstand the test of time.

Cleaning up Cracks and Edges

Next, clean up any cracks or uneven edges on the driftwood. Use a chisel or sandpaper to smooth out these areas, creating a more polished look. If there are burnt or damaged sections, take extra care in removing them while preserving the natural beauty of the wood.

Driftwood Art Sculpture Tutorial #1: Beginners Guide to Creating Beautiful Artwork from Driftwood

Applying Finish

Now that your driftwood sculpture is clean and shaped, it’s time to apply the final finish. We will be using an all-natural beeswax sealer for a beautiful and eco-friendly result.

Beeswax Mixture

Start by melting beeswax in a double boiler. Fill a jar with the beeswax almost to the top, leaving some room for turpentine. Once the wax has melted, add turpentine to the jar, filling it almost to the brim. Stir the two ingredients together until they are fully blended.

Rubbing Beeswax onto the Wood

With the beeswax mixture ready, take a small amount and begin rubbing it onto the driftwood. Apply the beeswax in the direction of the grain, using a cloth or your fingers. The beeswax will penetrate the wood, enhancing its natural color and providing protection against moisture.

To seal the beeswax into the wood, use a hairdryer on a hot setting to melt the wax. This will ensure that it gets into all the nooks and crannies of the sculpture. Once the wax has cooled and hardened, your driftwood sculpture is complete!

Conclusion

Congratulations on completing your first driftwood sculpture! We hope this beginner’s guide has helped you unleash your creativity and transform a simple piece of driftwood into a stunning work of art. Remember to use the right tools, sand carefully, clean and shape the wood, and apply the all-natural beeswax finish for a truly beautiful and long-lasting sculpture. The possibilities are endless with driftwood art, so keep exploring and creating!

Driftwood Art Sculpture Tutorial #1: Beginners Guide to Creating Beautiful Artwork from Driftwood

Filed Under: DriftWood Art Tagged With: Artwork, Beginner's Guide, Driftwood, Sculpture, tutorial

Compilation of Driftwood Art by Woodsydoc

October 9, 2023 by admin

Hey there! I want to introduce you to a fascinating compilation called “Compilation of Driftwood Art by Woodsydoc.” In this video, created by TREEDY’S TRAVELS & ADVENTURES, you’ll get to witness the amazing woodworking skills of Dr. Teresa Van Woy, also known as Woodsydoc. She takes dead wood and transforms it into stunning pieces of art, breathing new life into them. You’ll also see how she incorporates stones and lights into her sculptures, giving them an extra touch of beauty. If you’re looking for ideas on what to do with driftwood pieces you find or simply want to appreciate the artistry involved, this video is definitely worth checking out!

Moving on to another topic, let me tell you about Dr. Teresa Van Woy’s incredible journey. She specializes in diabetic wound care, sports medicine, pediatrics, trauma, and general podiatry. However, what makes her story truly inspiring is her own background. Like many successful individuals, she faced numerous challenges, including being a homeless child with a mentally unstable and abusive mother. Despite these hardships, Dr. Van Woy never gave up on her dreams and worked hard to become a physician. Her story is a testament to the power of goals and determination. So, make sure to watch the video till the end and share your thoughts in the comments. And if you enjoy it, don’t forget to subscribe and show some love by liking, commenting, and sharing. Stay safe and keep spreading the love! 😍😘

Compilation of Driftwood Art by Woodsydoc

Introduction to Driftwood Art

Driftwood art refers to the creation of artistic pieces using pieces of wood that have been washed ashore by the sea. These pieces of wood, known as driftwood, are transformed into beautiful sculptures and centerpieces that showcase the natural beauty and uniqueness of each piece. Driftwood art has a long history and has gained popularity for its rustic and organic aesthetic. In this article, we will explore the definition, history, and popularity of driftwood art.

Definition of Driftwood Art

Driftwood art is the process of utilizing pieces of wood that have been carried by the current and washed ashore by the sea, often through the action of tides or rivers. These pieces of wood, known as driftwood, are collected and used as the primary material for creating various forms of artwork. Driftwood art allows artists to work with the natural shapes, textures, and colors of the wood to create unique and visually appealing sculptures.

History of Driftwood Art

The use of driftwood in art can be traced back to ancient times. Throughout history, people living near bodies of water, such as rivers and oceans, have discovered and utilized driftwood as a resource for artistic expression. In many coastal communities, driftwood was commonly used to create functional objects, such as furniture and tools. However, it was not until the mid-20th century that driftwood art emerged as a distinct form of artistic expression, with artists intentionally seeking out driftwood to create sculptures and other artworks.

Popularity and Uses of Driftwood in Art

Driftwood art has gained popularity for its unique and organic aesthetic. The natural shapes and textures of the driftwood provide artists with endless possibilities for creating sculptures and other artworks. Driftwood can be used to create a wide range of art pieces, including sculptures, wall hangings, furniture, and centerpieces. Additionally, driftwood can be combined with other materials, such as stones and lights, to enhance the visual impact of the artwork.

Driftwood Sculptures

Driftwood sculptures are one of the most popular forms of driftwood art. These sculptures showcase the natural beauty and unique characteristics of the driftwood. Creating driftwood sculptures requires specific materials and techniques.

Materials Needed for Driftwood Sculptures

To create driftwood sculptures, you will need the following materials:

  1. Driftwood pieces in various shapes and sizes
  2. Wood glue or epoxy adhesive
  3. Sandpaper or a sander for smoothing the wood
  4. Optional: Wire, nails, or screws for additional support

Techniques for Creating Driftwood Sculptures

Creating driftwood sculptures involves the following techniques:

  1. Planning: Sketch out your design or have a clear idea of the sculpture you want to create.
  2. Preparation: Clean the driftwood by removing any dirt, debris, or loose bark.
  3. Assembly: Use wood glue or epoxy adhesive to join the different pieces of driftwood together, following your design.
  4. Finishing: Sand the surface of the sculpture to create a smooth finish and enhance the natural textures of the wood.
  5. Optional: Use wire, nails, or screws to provide additional support and stability to the sculpture.

Examples of Driftwood Sculptures by Woodsydoc

Woodsydoc, an experienced driftwood artist, has created numerous stunning driftwood sculptures. Some of his notable works include:

  • “Ocean’s Serenity”: A large driftwood sculpture resembling a wave crashing on the shore, created using a combination of curved and twisted driftwood pieces.
  • “Majestic Seahorse”: A life-size seahorse sculpture made entirely from small, intricately arranged driftwood pieces, showcasing the artist’s attention to detail.
  • “Whimsical Forest”: A whimsical forest scene created using multiple driftwood pieces arranged to resemble trees, with added stones and lights for a magical touch.

Compilation of Driftwood Art by Woodsydoc

This image is property of i.ytimg.com.

Adding Stones to Driftwood Art

Stones are often added to driftwood art to enhance its natural beauty and provide contrast to the wood. The incorporation of stones adds depth and texture to the artwork.

Importance of Stones in Driftwood Art

Stones play a crucial role in driftwood art by complementing the natural aesthetic of the wood. The combination of organic materials, such as driftwood and stones, creates a visually appealing contrast and adds a sense of balance and harmony to the artwork. Stones can also symbolize stability and strength, further enhancing the overall message conveyed by the artwork.

Different Types of Stones Used in Driftwood Art

Various types of stones can be used in driftwood art, depending on the artist’s preference and the desired aesthetic. Common types of stones used include:

  • River rocks: Smooth and rounded stones often found in rivers or streams.
  • Beach pebbles: Small, colorful stones found on beaches, known for their smooth and polished surfaces.
  • Geodes: Hollow rocks with a crystalline interior, adding a unique and sparkling element to the artwork.
  • Crystals: Transparent or translucent stones that reflect light and create an ethereal effect.

Techniques for Adding Stones to Driftwood Sculptures

To add stones to driftwood sculptures, artists can use the following techniques:

  1. Adhesive: Apply a strong adhesive, such as epoxy or construction adhesive, to attach the stones securely to the driftwood.
  2. Drilling: Drill holes into the driftwood and insert wires or pins to hold the stones in place.
  3. Wire wrapping: Wrap wire around the stones and attach them to the driftwood, creating a more organic and flexible design.
  4. Embedding: Carve or create grooves in the driftwood and fit the stones into the recessed areas, ensuring a snug fit.

Using Lights in Driftwood Art

The use of lights in driftwood art adds an enchanting and ethereal quality to the artwork, creating a captivating display of shadows and highlights.

Benefits of Using Lights in Driftwood Art

Using lights in driftwood art offers several benefits:

  1. Enhances the natural beauty: Lights can highlight the unique textures and shapes of the driftwood, drawing attention to its organic character.
  2. Creates ambiance: The soft glow of lights adds warmth and coziness to the artwork, transforming it into a focal point in any space.
  3. Adds a magical touch: Lights can create an otherworldly atmosphere, evoking a sense of wonder and enchantment.
  4. Extends viewing experience: Installing lights allows the artwork to be admired during the day and night, showcasing its beauty at all times.

Types of Lights Used in Driftwood Art

There are various types of lights that can be used in driftwood art, depending on the desired effect and practical considerations. Common types of lights include:

  1. Fairy lights or string lights: Small LED lights attached to a string, which can be easily woven through the driftwood to create a twinkling effect.
  2. Spotlights: Directional lights that can be strategically positioned to highlight specific areas or features of the driftwood sculpture.
  3. Battery-operated candles: Flameless candles that provide a soft, flickering light, adding a cozy and romantic ambiance to the artwork.
  4. LED strips: Flexible strips of LED lights that can be cut and attached to the back or side of the driftwood sculpture, illuminating it from within.

Tips for Incorporating Lights into Driftwood Sculptures

When incorporating lights into driftwood sculptures, consider the following tips:

  1. Plan the lighting design: Determine the areas of the driftwood sculpture that you want to highlight and choose the appropriate type and placement of lights.
  2. Conceal the wiring: Hide the wires or cords by threading them through the driftwood or using camouflage techniques, such as covering them with moss or twine.
  3. Ensure safety: If using electrical lights, make sure to follow proper safety precautions, such as using outdoor-rated or waterproof lights and keeping them away from flammable materials.
  4. Experiment with different lighting effects: Test different lighting positions and intensities to achieve the desired aesthetic and mood for the artwork.
  5. Consider remote control options: Using remote control lights can make it easier to turn the lights on and off or adjust the brightness without having to physically access the artwork.

Compilation of Driftwood Art by Woodsydoc

Redwood Sculptures

In addition to driftwood sculptures, redwood sculptures are another form of wood art that celebrates the unique qualities of a specific type of wood: redwood.

Introduction to Redwood Sculptures

Redwood sculptures are artworks created from the distinct and beautiful wood of the redwood tree. Redwood is a type of tree known for its impressive height, durability, and reddish-brown color. The wood from redwood trees is highly sought after for its natural resistance to decay and its ability to withstand the elements, making it an excellent choice for outdoor sculptures.

Unique Characteristics of Redwood for Sculptures

Redwood possesses several unique characteristics that make it ideal for sculpting:

  1. Durability: Redwood is resistant to rot, decay, and insect damage, allowing sculptures made from this wood to withstand the test of time.
  2. Stability: Redwood has excellent dimensional stability, meaning it doesn’t shrink or warp significantly, ensuring the integrity of the sculpted piece.
  3. Grain and color variation: Redwood exhibits a prominent grain pattern and a range of reddish-brown hues, adding visual interest and natural beauty to the sculptures.
  4. Carving properties: Redwood is relatively soft and easy to carve, allowing artists to create intricate details and achieve smooth finishes.

Examples of Redwood Sculptures

Redwood sculptures can take various forms, ranging from abstract to realistic. Some notable examples of redwood sculptures include:

  • “Tall and Majestic”: A towering redwood sculpture depicting the strength and grandeur of the redwood tree itself, with intricate carvings highlighting the texture and grain of the wood.
  • “Nature’s Embrace”: A lifelike sculpture of two intertwining redwood trees, symbolizing the interconnectedness of nature and celebrating the beauty of the redwood ecosystem.
  • “Flight of the Eagle”: A dynamic redwood sculpture capturing the grace and power of an eagle in flight, showcasing the artist’s ability to bring life to the wood through intricate carving and attention to detail.

Grapevine Centerpieces

In addition to driftwood and redwood sculptures, grapevine centerpieces are another unique form of natural artwork that combines organic materials with artistic design.

Overview of Grapevine Centerpieces

Grapevine centerpieces are decorative arrangements created from the twisted branches and vines of the grapevine plant. These centerpieces offer a rustic and natural aesthetic and can be adapted to various themes and occasions. Grapevine centerpieces are particularly popular for weddings, outdoor events, and country-style home decor.

Steps to Create Grapevine Centerpieces

To create grapevine centerpieces, follow these steps:

  1. Gather grapevine branches and vines: Collect grapevine branches or purchase them from a garden center or online supplier.
  2. Soak the grapevine: Place the grapevine branches in a large container or tub filled with water and let them soak for several hours or overnight to make them more pliable.
  3. Shape the centerpiece: Bend and twist the grapevine branches to create the desired shape and structure for the centerpiece. Consider incorporating loops, spirals, or arches.
  4. Secure the grapevine: Use floral wire or twine to secure the grapevine branches together, ensuring that the centerpiece remains stable and holds its shape.
  5. Add decorative elements: Enhance the centerpiece by adding flowers, foliage, or other decorative elements. You can use fresh or dried flowers, greenery, ribbons, or ornaments, depending on the occasion or theme.
  6. Place the centerpiece: Display the grapevine centerpiece on a table, mantel, or any desired location. You can further enhance the presentation by adding candles, lanterns, or small LED lights for additional ambiance.

Ideas for Decorating Grapevine Centerpieces

There are numerous ways to decorate grapevine centerpieces, depending on the occasion or personal style. Here are some ideas:

  1. Rustic wedding: Use a mix of wildflowers, baby’s breath, and lace ribbons to create a romantic and rustic wedding centerpiece.
  2. Fall harvest theme: Incorporate autumn-colored leaves, mini pumpkins, and pine cones to create a centerpiece that celebrates the beauty of the season.
  3. Holiday centerpiece: Use evergreen branches, ornaments, and fairy lights to create a festive centerpiece for Christmas or other winter holidays.
  4. Spring garden party: Adorn the grapevine centerpiece with fresh flowers, herbs, and colorful butterflies to create a vibrant and whimsical centerpiece for a garden-inspired event.

Compilation of Driftwood Art by Woodsydoc

Tips for Finding Driftwood

Finding driftwood for your art projects can be an exciting and rewarding experience. Here are some tips for locating driftwood:

Best Locations to Find Driftwood

  1. Beaches: Coastal areas are prime locations for finding driftwood. Look for beaches where driftwood tends to accumulate due to strong currents or nearby rivers.
  2. Riverbanks: Rivers that flow into the ocean often carry driftwood downstream, where it accumulates along the riverbanks.
  3. Lakes and ponds: Bodies of water that are prone to fluctuating water levels can result in driftwood washing ashore.
  4. Forests: Inland forests near rivers or streams may have driftwood that has been carried from upstream.

Safety Considerations When Collecting Driftwood

When collecting driftwood, keep the following safety considerations in mind:

  1. Watch for hazards: Be cautious of sharp objects, debris, or potential dangers hidden beneath or within the driftwood.
  2. Be aware of tides and currents: Avoid collecting driftwood during high tide or in areas with strong currents that may pose risks to your safety.
  3. Respect local rules and regulations: Some areas may have restrictions or regulations on collecting driftwood. Ensure that you are aware of and comply with any regulations in place.

Cleaning and Preparing Driftwood for Art

Once you have collected driftwood, it is important to clean and prepare it before using it in your art projects. Here’s a step-by-step guide:

  1. Remove debris: Brush off any dirt, sand, or loose bark from the driftwood using a stiff brush or a toothbrush.
  2. Soak the driftwood: Submerge the driftwood in a large container or bathtub filled with water. Let it soak for several hours or overnight to remove any remaining dirt and salt.
  3. Scrub the driftwood: Use a soft brush to gently scrub the driftwood, removing any stubborn dirt or algae.
  4. Rinse and dry: Rinse the driftwood thoroughly to remove any residue, then allow it to air dry completely before using it in your art projects.

Preserving and Maintaining Driftwood Art

To ensure that your driftwood art remains in good condition and retains its beauty over time, proper preservation and maintenance are crucial.

Methods for Preserving Driftwood

Preserving driftwood involves preventing decay and protecting it from environmental factors. Here are some preservation methods:

  1. Sealing: Apply a wood sealer or varnish to protect the driftwood from moisture and UV damage. Choose a product suitable for outdoor use if displaying the art piece outdoors.
  2. Bleaching: If desired, you can bleach the driftwood to enhance its color or achieve a weathered look. Use a mixture of water and hydrogen peroxide or chlorine bleach, following safety instructions and guidelines.
  3. Insect treatment: To prevent infestation and damage by insects, consider treating the driftwood with a wood preservative or insecticide.
  4. Maintenance intervals: Reapply the wood sealer or varnish periodically, following the manufacturer’s recommendations. Inspect the driftwood regularly for signs of damage or decay.

Cleaning and Caring for Driftwood Art

Regular cleaning and proper care are essential for maintaining the appearance of driftwood art. Here’s how to clean and care for your driftwood artwork:

  1. Dusting: Use a soft brush or cloth to gently remove any dust or debris that may settle on the surface of the driftwood.
  2. Spot cleaning: If necessary, use a damp cloth or sponge to gently clean specific areas of the driftwood. Avoid using harsh chemicals or abrasive cleaners, as they may damage the wood.
  3. Avoid direct sunlight: Display your driftwood art away from direct sunlight to prevent fading or discoloration over time.
  4. Indoor vs. outdoor display: Consider the intended location and environment when choosing whether to display your driftwood art indoors or outdoors. If displaying outdoors, ensure that the artwork is protected from excessive moisture, extreme temperatures, and direct sunlight.

Protecting Driftwood Art from Environmental Factors

Environmental factors can impact the longevity and appearance of driftwood art. Here’s how to protect your artwork:

  1. Display location: Choose a suitable location for your driftwood art, considering factors such as humidity, temperature fluctuations, and exposure to direct sunlight.
  2. Outdoor protection: If displaying driftwood art outdoors, consider using protective coatings, such as UV-resistant varnish or marine-grade sealants, to safeguard the artwork from moisture, sunlight, and potential damage caused by insects or wildlife.
  3. Sheltered display: If possible, place the driftwood art in a covered or sheltered area to minimize exposure to rain, hail, or snow.
  4. Regular inspection: Regularly inspect your driftwood art for signs of damage, such as cracks, splitting, or insect infestations. Promptly address any issues to prevent further deterioration.

Conclusion

Driftwood art is a captivating form of artistic expression that utilizes the beauty of nature to create unique and visually stunning artworks. From driftwood sculptures to incorporating stones and lights, there are endless possibilities for creating extraordinary pieces. Redwood sculptures and grapevine centerpieces offer additional opportunities to explore the natural world and create art that reflects its inherent beauty. By following proper techniques for finding, cleaning, and maintaining driftwood, artists can unlock the full potential of this versatile material. So, immerse yourself in the world of driftwood art and let your creative spirit flow!

Filed Under: DriftWood Art Tagged With: Art, compilation, Driftwood, woodsydoc

Creating Unique Driftwood Art: The Majestic Orca Whale

October 8, 2023 by admin

“Creating Unique Driftwood Art: The Majestic Orca Whale” tells the story of how driftwood can be transformed into a captivating work of art. In this video by lifeofluke, you’ll discover the process of turning pieces of driftwood found in the river into a stunning orca whale sculpture, inspired by the beauty of the West Coast of British Columbia. The artist, Luke Gibson, showcases the beauty of the wood’s dark grain and curves, demonstrating how each piece of art is unique due to the individual characteristics of the driftwood. If you’re interested in purchasing a one-of-a-kind driftwood art piece, make sure to reach out to Luke via email.

Throughout the video, Luke takes the time to explain his inspiration behind this piece, how he cut the outline of the orca, and the challenges he faced in arranging the driftwood to create the desired shape. The result is a truly beautiful and distinctive artwork that stands out with its rugged, worn appearance, and three-dimensional relief. Luke’s passion for woodworking and the incredible beauty of nature shines through, making this video a must-watch for anyone interested in the art of driftwood sculptures. So, grab a cup of coffee and enjoy the journey of creating unique driftwood art!

Creating Unique Driftwood Art: The Majestic Orca Whale

Introduction to Driftwood Art

Driftwood art is a captivating form of woodworking that involves transforming ordinary pieces of wood into beautiful works of art. It allows artists to showcase their creativity and bring out the natural beauty of the wood. In this article, we will explore the process of creating a unique driftwood art piece inspired by the wild west coast of British Columbia, specifically focusing on the majestic Orca whale.

The Inspiration from the Wild West Coast of British Columbia

The west coast of British Columbia is known for its awe-inspiring natural beauty, with its rugged shorelines, towering forests, and diverse marine life. One of the most enchanting creatures found in these waters is the Orca whale. The elegance, power, and grace of these magnificent creatures have long been a source of inspiration for artists, including driftwood artists. By capturing the essence of these whales in their artwork, artists can pay homage to the natural wonders of the west coast and create a connection between art and nature.

Creating Unique Driftwood Art: The Majestic Orca Whale

This image is property of i.ytimg.com.

The Process of Making an Orca Whale Driftwood Art

Creating a driftwood art piece requires careful planning and craftsmanship. The process begins with collecting driftwood from rivers, beaches, or other natural sources. The artist then selects the perfect pieces of driftwood based on their size, shape, grain, and texture. Once the right pieces are chosen, they are cleaned, sanded, and treated to remove any pests or decay while preserving their natural look and texture.

To create the outline of the Orca, a sturdy piece of plywood is used as a base. The artist carefully traces and cuts the shape of the Orca on the plywood, ensuring accuracy and proportions. This outline will serve as the foundation for attaching the driftwood pieces.

Choosing the Right Driftwood Pieces

When selecting driftwood pieces for an Orca whale art piece, several factors must be considered. The size and shape of the driftwood should align with the desired dimensions of the final artwork. The grain and texture of the driftwood play a significant role in enhancing the overall aesthetic appeal of the piece. The artist carefully examines the driftwood pieces to ensure that they have stable structures and durability.

Creating Unique Driftwood Art: The Majestic Orca Whale

Preparing the Driftwood Pieces

Before attaching the driftwood pieces to the plywood, they need to be cleaned and sanded to remove any dirt, debris, or rough edges. The artist may also treat the driftwood to prevent pests or decay from compromising the integrity of the artwork. It is crucial to strike a balance between preserving the natural look and texture of the driftwood while ensuring its longevity as part of the artwork.

Creating the Outline of the Orca with Plywood

Using the previously cut plywood outline as a guide, the artist attaches it securely to a sturdy surface. This serves as the base onto which the driftwood pieces will be arranged. The thickness and size of the plywood are chosen carefully to provide ample support for the weight and structure of the driftwood.

Creating Unique Driftwood Art: The Majestic Orca Whale

Arranging and Fitting the Driftwood Pieces

The most challenging part of creating a driftwood art piece is arranging the driftwood pieces to form the desired shape of the Orca. This process requires patience, creativity, and meticulous attention to detail. The artist experiments with different placements, fine-tuning the pieces to achieve a harmonious composition. It may take time and multiple adjustments to ensure a seamless fit and balance among the various driftwood pieces.

Securing the Driftwood to the Plywood

Once the arrangement of the driftwood pieces is finalized, the artist secures them to the plywood using adhesives and fasteners. It is essential to ensure that the driftwood is firmly attached to the base, providing stability and longevity to the artwork. Care must be taken not to compromise the natural flexibility of the driftwood, as it contributes to the overall aesthetic appeal of the piece.

Adding Finishing Touches to the Orca Whale Art

To further enhance the beauty and character of the Orca whale driftwood art, the artist may add finishing touches. These can include additional carved details, paint accents, or other decorative elements. The objective is to showcase the unique qualities of the driftwood while adding subtle enhancements that bring out the essence of the Orca.

The Beauty of Imperfections in Driftwood Art

One of the most appealing aspects of driftwood art is its imperfections. The cracks, irregular shapes, and weathered appearance of the driftwood add charm and character to the artwork. These imperfections reflect the journey that the wood has taken, exposed to various elements in nature. By embracing the beauty of imperfections, driftwood artists can create art pieces that are truly one-of-a-kind.

The Uniqueness of Each Driftwood Art Piece

No two driftwood art pieces are the same. Each piece of driftwood has its own distinct characteristics, making every artwork unique and special. The wood’s grain, texture, color variations, and natural shapes contribute to the individuality of each artwork. Collectors and enthusiasts of driftwood art appreciate the exclusivity that comes with owning a one-of-a-kind piece.

Selling and Future Plans

Driftwood artists often sell their artwork to individuals who appreciate the beauty and craftsmanship of these unique pieces. Each sale represents not only a transaction but also a connection between the artist, the artwork, and its new owner. As for the future, driftwood artists continually explore new ideas, experiment with different subjects, refine their techniques, and push the boundaries of their art form. The journey of creating driftwood art is ever-evolving, offering endless possibilities for creativity and self-expression.

Conclusion

Driftwood art, particularly the creation of an Orca whale, is a labor of love that requires patience, skill, and a deep appreciation for the natural beauty found in wood. Artists draw inspiration from the wild west coast of British Columbia, capturing the essence of the Orca whale’s elegance and power in their artwork. Through the careful selection and arrangement of driftwood pieces, artists transform ordinary wood into unique, three-dimensional sculptures. The imperfections of the driftwood only add to the appeal of the final piece, making each artwork a testament to the artist’s creativity and the wonders of nature. The journey of creating driftwood art is a rewarding and timeless endeavor, one that brings joy to both the artist and those who have the privilege to own their beautiful creations.

Filed Under: DriftWood Art Tagged With: Driftwood, Orca Whale, Unique

Rustic Driftwood DIY Home Decor Ideas

October 7, 2023 by admin

Have you ever wanted to add a touch of rustic charm to your home? Well, look no further! In this article, we will be sharing some creative, easy, and cheap DIY home decor ideas using driftwood. With its natural and unique textures, driftwood can effortlessly bring a rustic vibe to any room. Whether you’re a seasoned DIY enthusiast or just starting out, these ideas are perfect for anyone looking to spruce up their living space. So grab your tools and let’s get started on some fun and inspiring projects!

From wall hangings to picture frames to candle holders, there’s no shortage of possibilities when it comes to working with driftwood. Not only is it a budget-friendly option, but it also adds a touch of nature-inspired beauty to your home decor. So, get ready to unleash your creativity, as we delve into a world of Rustic Driftwood DIY home decor ideas. Get inspired with our step-by-step instructions and start making your own unique pieces today. Get ready to transform your living space and make it truly one-of-a-kind!

Rustic Driftwood DIY Home Decor Ideas

This image is property of i.ytimg.com.

Furniture

Driftwood Coffee Table

Looking to add a touch of rustic charm to your living room? A driftwood coffee table might just be the perfect addition! Crafted from natural driftwood, these coffee tables offer a unique and organic look that will instantly elevate your space. Not only are they visually stunning, but they also provide a sturdy surface for holding your drinks, snacks, and other essentials. Whether your style is coastal, farmhouse, or bohemian, a driftwood coffee table is sure to be a conversation starter in your home.

Driftwood Shelf

If you’re in need of some extra storage space, a driftwood shelf is a stylish and practical solution. These shelves are crafted from reclaimed driftwood, giving them a one-of-a-kind look that adds character to any room. Whether you want to display your favorite books, plants, or decorative items, a driftwood shelf offers a unique way to showcase your belongings while adding a natural touch to your home decor.

Driftwood Bench

Add a touch of coastal charm to your entryway or backyard with a driftwood bench. These benches are made from salvaged driftwood, which means each piece has its own unique shape and texture. Not only do they provide a comfortable seating option, but they also serve as a stunning focal point in any space. Whether you need extra seating for guests or a quiet spot to relax outdoors, a driftwood bench is a versatile and eye-catching choice.

Driftwood Headboard

Transform your bedroom into a tranquil oasis with a driftwood headboard. Made from reclaimed driftwood, these headboards offer a rustic and natural look that instantly adds warmth and texture to your space. Whether your bedroom is a cozy retreat or a modern sanctuary, a driftwood headboard can be customized to fit your style. From simple, minimalist designs to intricate patterns, there’s a driftwood headboard out there that’s perfect for you.

Driftwood Side Table

Complete your living room or bedroom setup with a driftwood side table. These versatile pieces of furniture offer a convenient surface for holding lamps, books, and other essentials, while also adding a touch of rustic elegance to your space. Whether you prefer sleek and modern or vintage-inspired designs, there’s a driftwood side table that will complement your existing decor. Plus, the natural imperfections and unique shapes of the driftwood make each table truly one-of-a-kind.

Wall Decor

Driftwood Mirror

Bring a touch of coastal charm to your walls with a driftwood mirror. These mirrors are crafted from salvaged driftwood, creating a stunning and organic frame that adds dimension and texture to any room. Whether you hang it in your entryway, bathroom, or bedroom, a driftwood mirror will instantly elevate your space and give it a beachy vibes. Perfect for both coastal and bohemian-inspired decor, a driftwood mirror is a must-have piece for any beach lover.

Driftwood Wall Art

Looking to add some natural beauty to your walls? Look no further than driftwood wall art. These unique pieces of art are crafted from carefully arranged pieces of driftwood, creating beautiful and intricate patterns that will instantly catch the eye. Whether you prefer abstract designs or nature-inspired motifs, driftwood wall art offers a wide range of options to suit your style. Hang them in your living room, bedroom, or even outside on your porch or patio for a stunning focal point.

Driftwood Coat Rack

Say goodbye to cluttered entryways with a driftwood coat rack. These functional and stylish pieces are made from reclaimed driftwood, providing a natural and rustic look that’s perfect for any home. Hang your coats, hats, and scarves on the sturdy driftwood branches, while also adding a touch of coastal charm to your entryway. Whether your decor style is farmhouse, bohemian, or beachy, a driftwood coat rack is a practical and decorative solution for keeping your space organized.

Driftwood Key Holder

Never lose your keys again with a driftwood key holder. These clever and decorative pieces are made from salvaged driftwood, featuring hooks for holding your keys in a stylish and organized way. Hang them by your front door or in your hallway for easy access, while also adding a rustic and coastal touch to your space. With different sizes and designs available, you can find a driftwood key holder that suits your needs and complements your home decor effortlessly.

Driftwood Wall Clock

Add a unique and rustic touch to your walls with a driftwood wall clock. Made from reclaimed driftwood, these clocks feature an organic and weathered look that adds character to any room. Not only do they help you keep track of time, but they also serve as a decorative piece of wall art. Whether you prefer a minimalist design or something more intricate, a driftwood wall clock is a functional and stylish addition to your home.

Lighting

Driftwood Chandelier

Make a statement in your dining room or entryway with a driftwood chandelier. These stunning lighting fixtures are crafted from salvaged driftwood, creating a dramatic and organic look that instantly becomes the focal point of any space. Whether you prefer a more rustic or modern design, a driftwood chandelier offers a unique and eye-catching lighting option.

Driftwood Table Lamp

Add a touch of coastal charm to your bedside table or desk with a driftwood table lamp. These lamps are crafted from reclaimed driftwood, giving them a natural and rustic look that complements a wide range of decor styles. Plus, the unique shape and texture of the driftwood make each lamp a one-of-a-kind piece. Whether you’re reading a book or working on a project, a driftwood table lamp provides both functionality and style to your space.

Driftwood Candle Holder

Create a cozy and inviting ambiance in your home with a driftwood candle holder. These holders are made from salvaged driftwood, which means each piece has its own unique shape and texture. Whether you prefer pillar candles or tea lights, a driftwood candle holder offers a rustic and natural way to display your favorite candles. Place them on your dining table, coffee table, or even in your bathroom for a relaxing and beachy atmosphere.

Driftwood Pendant Light

Looking for a unique and stylish lighting option for your kitchen or dining area? Consider a driftwood pendant light. These lights are crafted from reclaimed driftwood, creating a stunning and organic look that brings a touch of nature indoors. Whether you prefer a single pendant or a cluster of lights, a driftwood pendant light adds a rustic and coastal charm to any space.

Driftwood Floor Lamp

Illuminate your living room or bedroom with a driftwood floor lamp. These lamps offer both functionality and style, casting a warm and ambient glow in your space. Made from salvaged driftwood, each lamp has its own unique shape and texture, adding a natural and rustic touch to your home decor. Whether you’re reading a book or hosting a movie night, a driftwood floor lamp provides the perfect amount of lighting for any occasion.

Home Accessories

Driftwood Picture Frame

Display your favorite memories in a unique and rustic way with a driftwood picture frame. These frames are made from reclaimed driftwood, featuring an organic and weathered look that adds character to any photo. Whether you prefer a simple and minimalist design or something more intricate, a driftwood picture frame is a charming and personal addition to your home decor.

Driftwood Vase

Bring the beauty of nature indoors with a driftwood vase. These vases are made from salvaged driftwood, providing a natural and rustic look that perfectly showcases your favorite flowers and greenery. Whether you prefer a small bud vase or a larger centerpiece, a driftwood vase adds a touch of coastal charm to any room. Fill it with fresh flowers or dried arrangements to create a stunning and unique focal point.

Driftwood Jewelry Organizer

Keep your jewelry organized and tangle-free with a driftwood jewelry organizer. These organizers are made from reclaimed driftwood, featuring hooks and holders for your necklaces, bracelets, earrings, and more. Hang them on your wall or place them on your vanity for easy access and a stylish display. With a driftwood jewelry organizer, you can add a touch of rustic elegance to your jewelry storage.

Driftwood Wine Rack

Showcase your wine collection in a unique and rustic way with a driftwood wine rack. These racks are made from carefully arranged pieces of driftwood, providing a natural and organic look that adds character to any room. Whether you’re a wine connoisseur or just enjoy an occasional glass, a driftwood wine rack is a stylish and functional addition to your home decor.

Driftwood Coasters

Protect your surfaces and add a rustic touch to your home with driftwood coasters. These coasters are made from reclaimed driftwood, featuring a natural and weathered look that adds character to any table. Whether you’re enjoying a coffee in the morning or hosting a dinner party, driftwood coasters provide a stylish and practical way to keep your surfaces clean and scratch-free.

Rustic Driftwood DIY Home Decor Ideas

Outdoor Decor

Driftwood Planters

Add a touch of coastal charm to your garden or patio with driftwood planters. These unique planters are made from salvaged driftwood, offering a natural and rustic look that complements your outdoor space. Whether you prefer small succulents or larger plants, a driftwood planter provides a unique and eye-catching home for your greenery.

Driftwood Garden Fence

Enhance your garden or backyard with a driftwood garden fence. These fences are made from reclaimed driftwood, featuring a rustic and natural look that adds privacy and style to your outdoor space. Whether you have a large garden or a small patio, a driftwood garden fence offers a unique and eco-friendly way to define your outdoor area.

Driftwood Wind Chimes

Create a soothing and melodic atmosphere in your garden with driftwood wind chimes. These chimes are made from salvaged driftwood, producing a gentle and calming sound as the wind passes through them. Hang them from your trees, patio, or porch for a serene outdoor experience. With different sizes and designs available, driftwood wind chimes offer a personalized and decorative touch to your outdoor decor.

Driftwood Birdhouse

Attract feathered friends to your garden with a driftwood birdhouse. These birdhouses are crafted from reclaimed driftwood, featuring a natural and rustic look that blends seamlessly with your outdoor environment. Hang them from your trees or fence to provide a cozy and safe nesting space for birds. With a driftwood birdhouse, you can enjoy the beauty and joy of birdwatching in your own backyard.

Driftwood Patio Table

Create an outdoor dining area that’s both functional and stylish with a driftwood patio table. These tables are made from salvaged driftwood, offering a natural and rustic look that complements your outdoor space. Whether you’re hosting a summer barbecue or enjoying a quiet meal al fresco, a driftwood patio table provides a unique and eye-catching centerpiece.

Conclusion

Driftwood DIY home decor ideas offer a creative, easy, and cheap way to add a rustic and natural touch to your living space. From furniture and wall decor to lighting and outdoor accessories, driftwood pieces bring a unique and organic beauty to any room. Whether you prefer a coastal, farmhouse, or bohemian style, there’s a driftwood option out there that’s perfect for you. So why not embrace the beauty of nature and incorporate some driftwood into your home decor? Get crafty and let your creativity shine with these amazing driftwood DIY projects!

Rustic Driftwood DIY Home Decor Ideas

Filed Under: DriftWood Art Tagged With: DIY, Driftwood, ideas, Rustic

Designing Driftwood Wall Art for a Wellness-Inspired Dining Room

October 6, 2023 by admin

Imagine the joy of being able to go to the beach and collect driftwood for a fascinating project. That’s exactly what Susie Frazier gets to do as she designs driftwood wall art for a wellness-inspired dining room. In this video, Susie takes us through the process of turning ordinary pieces of driftwood into a captivating feature that resembles a giant floating tree along the dining room wall. With its unique curves and intricate joinery, this project promises to be really exciting and transformative.

Through this video, Susie will guide you on how to design driftwood wall art that not only adds beauty to your space but also promotes a sense of wellness. Get ready to be inspired as she demonstrates the art of transforming driftwood into an enchanting piece of decor. Join Susie Frazier on this creative journey and discover how you can bring nature indoors with the perfect blend of design and craftsmanship.

Designing Driftwood Wall Art for a Wellness-Inspired Dining Room

Driftwood wall art can be a stunning addition to a dining room, especially when aiming to create a wellness-inspired atmosphere. The organic and natural elements of driftwood can help bring a sense of tranquility and relaxation to the space. In this article, we will guide you through the process of designing and creating your own driftwood wall art, ensuring you select the right pieces, prepare them properly, plan the composition, assemble the art, install it in your dining room, enhance the wellness vibes, maintain it for longevity, showcase it effectively, and combine it with wellness concepts.

1. Selecting the Right Driftwood Pieces

When it comes to designing driftwood wall art, selecting the right pieces is crucial. Here are a few key factors to consider when choosing your driftwood:

a. Considering Size and Shape

The size and shape of the driftwood pieces you select will determine the overall look and feel of your wall art. Consider the dimensions of your dining room wall and choose driftwood that fits proportionally. Varying sizes and shapes can add visual interest and depth to the composition.

b. Examining the Curves and Textures

Driftwood often has unique curves and textures that can add character to your wall art. Look for pieces with interesting twists, turns, or knots that will create visual intrigue. The textures should be well-defined but not overly weathered to ensure the driftwood remains structurally sound.

c. Assessing the Quality and Condition

Before finalizing your selection, take a close look at the quality and condition of the driftwood. Make sure it is sturdy and free of rot or damage that may affect its overall durability. Well-aged driftwood with a silver or weathered patina can bring a rustic charm to your art.

2. Preparing the Driftwood

Once you have chosen the right driftwood pieces, it is essential to prepare them properly before creating your wall art. Here are some steps to follow for effective preparation:

a. Cleaning and Removing Debris

Begin by thoroughly cleaning the driftwood to remove any debris, sand, or dirt that may have accumulated. Use a soft brush to gently scrub the surface, paying close attention to crevices and knots. Rinse the driftwood with water and allow it to dry completely before proceeding.

b. Sanding and Smoothing the Surface

To achieve a polished and smooth finish, it is important to sand the driftwood. Use a medium-grit sandpaper to sand away any rough edges and uneven surfaces. Be careful not to sand excessively, as the natural texture and character of the driftwood should still be preserved.

c. Treating for Termites or Insects

As a precautionary measure, treating the driftwood for termites or insects is recommended. You can use a wood treatment solution or contact a professional exterminator to ensure that your driftwood remains pest-free.

Designing Driftwood Wall Art for a Wellness-Inspired Dining Room

This image is property of i.ytimg.com.

3. Planning the Composition

Designing the composition of your driftwood wall art is a crucial step in creating a visually appealing and balanced piece. Consider the following factors when planning your composition:

a. Determining the Placement

Decide where you want to place your driftwood wall art within your dining room. Whether it will be the centerpiece or a complementary element, understanding its location will help guide the overall design process.

i. Focusing on the Centerpiece

If you want your driftwood art to be the focal point of the dining room, focus on creating a visually striking centerpiece. Choose larger, more prominent pieces of driftwood to be the main attraction and build the composition around them.

ii. Balancing the Size and Distribution

For a more subtle approach, aim to balance the size and distribution of the driftwood pieces throughout the composition. Avoid overcrowding or overloading one area, as this can create visual imbalance and detract from the overall aesthetic appeal.

b. Sketching the Design on Paper

Before assembling your driftwood pieces, consider sketching the design on paper to better visualize your composition and explore different layouts. This will help you experiment with various arrangements and achieve the desired look.

i. Exploring Different Layouts

Sketch out different arrangements to see how the driftwood pieces can fit together harmoniously. Play around with different angles and variations to determine the most visually appealing option.

ii. Considering Symmetry and Asymmetry

Decide whether you prefer a symmetrical or asymmetrical composition. Symmetry creates a more formal and balanced look, while asymmetry can add a sense of dynamic movement and interest to your driftwood wall art.

4. Assembling the Driftwood Art

Once you have determined the composition, it is time to assemble the driftwood pieces together. Here are the steps to follow for a successful assembly:

a. Collecting the Necessary Tools and Supplies

Gather all the necessary tools and supplies before you start assembling your driftwood art. These may include nails, screws, wood glue, a drill, measuring tape, and a level. Make sure you have everything on hand to ensure a smooth assembly process.

b. Attaching the Driftwood Pieces Together

To securely attach the driftwood pieces, you can choose to use nails, screws, or wood glue, depending on the size and weight of the pieces. Carefully measure and mark the positions where the driftwood will be connected, ensuring they fit together seamlessly.

i. Using Nails, Screws, or Wood Glue

If you opt to use nails or screws, pre-drill small holes to prevent the driftwood from splitting. Alternatively, wood glue can provide a more seamless and concealed connection between the pieces.

ii. Ensuring Stability and Durability

During the assembly process, prioritize stability and durability. Reinforce any weak areas with additional support, and ensure that the driftwood pieces are securely fastened together to withstand the test of time.

c. Creating Floating and Standoff Effects

To achieve the desired floating or standoff effect with your driftwood wall art, use standoffs or spacers when attaching it to the wall. This will create dimension and depth, enhancing the visual impact of the artwork.

Designing Driftwood Wall Art for a Wellness-Inspired Dining Room

5. Installing the Artwork in the Dining Room

Now that you have assembled your driftwood wall art, it is time to install it in your dining room. Follow these steps to ensure a successful installation:

a. Determining the Wall Location

Choose a suitable location on the dining room wall where your driftwood art will be installed. Consider the lighting, visibility, and overall aesthetics of the room to find the perfect spot.

b. Using Proper Hanging Techniques

To hang your driftwood art securely and avoid any potential damage to the wall, use proper hanging techniques. Take the following steps into consideration:

i. Choosing the Right Hardware

Select appropriate hanging hardware based on the weight of your driftwood art and the type of wall surface. Wall anchors, screws, or picture hanging hooks can provide the necessary support.

ii. Avoiding Damage to the Wall

Before drilling or hammering, ensure that you are not damaging any electrical wires or plumbing behind the wall. Use a stud finder to locate the studs or consult a professional if needed.

6. Enhancing the Wellness Vibes

To truly embrace the wellness-inspired concept in your dining room, consider enhancing the overall atmosphere by incorporating additional elements that complement your driftwood wall art:

a. Incorporating Natural Elements

Integrate other natural elements such as stones, seashells, or pieces of coral to further enhance the organic and calming ambiance. These elements can be positioned strategically around the driftwood art or displayed separately.

b. Adding Plants and Greenery

Plants and greenery can bring life and vibrancy to the dining room. Consider placing potted plants near the driftwood art or hanging a living plant installation nearby to create a harmonious connection with nature.

c. Choosing Calming and Earthy Colors

Select colors for your dining room decor that promote relaxation and tranquility. Earthy tones, such as greens, browns, or blues, can complement the organic look of driftwood and contribute to the overall wellness-inspired atmosphere.

Designing Driftwood Wall Art for a Wellness-Inspired Dining Room

7. Maintaining the Driftwood Wall Art

To ensure the longevity and preservation of your driftwood wall art, regular maintenance is necessary. Follow these steps to keep it in great condition:

a. Regular Dusting and Cleaning

Driftwood can accumulate dust and dirt over time. Regularly dust the surface of your wall art using a soft cloth or a duster to prevent the buildup of debris. For deeper cleaning, use a mild soap and water solution, being careful not to saturate the driftwood.

b. Treating for Longevity and Preservation

To preserve the beauty and integrity of the driftwood, consider applying a clear coat or wood preservative. These treatments can help protect against UV damage, moisture, and insect infestation, extending the lifespan of your wall art.

8. Showcasing the Artwork in the Dining Room

To truly showcase your driftwood wall art and make it the focal point of your dining room, pay attention to the following aspects:

a. Proper Lighting and Illumination

Highlight your driftwood art with appropriate lighting. Consider installing spotlights or track lighting to accentuate the textures and curves of the driftwood, creating a captivating display.

b. Creating a Focal Point

Arrange the furniture in your dining room in a way that directs attention towards the driftwood art. Ensure that the seating arrangement allows for a clear line of sight to the artwork, making it a central focus when entering the room.

c. Styling the Surrounding Decor

Carefully select and arrange the complementary decor items around your driftwood art. Simple and minimalist pieces, such as neutral-colored ceramics or natural fiber textiles, can create a cohesive and harmonious aesthetic.

9. Combining Driftwood Art with Wellness Concepts

Driftwood art can go hand-in-hand with various wellness concepts, enriching the overall dining room experience. Consider the following ideas:

a. Understanding the Connection

Driftwood, with its organic and weathered appearance, can evoke feelings of being close to nature. This connection to the natural world is often associated with wellness and can contribute to a serene and peaceful dining environment.

b. Using Art to Promote Relaxation and Tranquility

Integrating driftwood art into your dining room can serve as a visual reminder to slow down and embrace relaxation. The natural textures and earthy tones can evoke a sense of calm, encouraging a tranquil dining experience.

c. Incorporating Nature-Inspired Themes

Complement your driftwood art by incorporating nature-inspired themes throughout your dining room. This can include using organic materials, such as bamboo or rattan, or displaying artwork or photographs that depict serene natural landscapes.

10. Conclusion

Designing driftwood wall art for a wellness-inspired dining room can be a creative and fulfilling endeavor. By carefully selecting the right driftwood pieces, preparing them properly, planning the composition, assembling the art, installing it thoughtfully, enhancing the wellness vibes, maintaining it for longevity, showcasing it effectively, and combining it with wellness concepts, you can create a visually stunning and serene atmosphere in your dining space. Enjoy the process of creating your driftwood wall art and embrace the natural beauty it brings to your home.

Filed Under: DriftWood Art Tagged With: Dining Room, Driftwood, Wall Art, Wellness

How to Clean and Decorate Driftwood Tutorial

October 5, 2023 by admin

Hey there! If you’re a fan of amazing driftwood and have been wondering how to clean and decorate it, then you’re in luck! In this tutorial by Cement Plus, you’ll learn all the tips and tricks to make your driftwood shine ✨. From the cleaning process to the final decorative touches, this video has got you covered. So grab a cup of tea, sit back, and get ready to transform your driftwood into a stunning piece of art!

Thanks for watching and for your support. Don’t forget to subscribe, comment, like, and share this video if you found it helpful. Let’s spread the love for amazing driftwood together!

How to Clean and Decorate Driftwood Tutorial

This image is property of i.ytimg.com.

H2: Introduction

Welcome to the world of driftwood! If you’re a nature lover or someone who appreciates unique and natural home decor, then you’re in for a treat. Driftwood has become increasingly popular in recent years, thanks to its rustic and coastal charm. It can be used in a variety of ways to add a touch of nature and elegance to your living space. In this article, we will guide you through the process of gathering, cleaning, preparing, and decorating with driftwood. Whether you’re a beginner or a seasoned DIY enthusiast, we’ve got you covered. So let’s dive in and discover the wonders of driftwood together!

H2: Gathering Driftwood

H3: Where to Find Driftwood

The first step in working with driftwood is, of course, finding it. Luckily, you don’t necessarily have to live by the ocean to get your hands on this natural treasure. Driftwood can be found near rivers, lakes, and even in forests after heavy rainfall. Look for areas where water meets land, such as riverbanks or shorelines, as these are prime spots for driftwood accumulation. Additionally, keep an eye out for fallen trees or branches during your outdoor adventures. They can be excellent sources of driftwood for your projects.

H3: Choosing the Right Pieces

When it comes to choosing the right pieces of driftwood, there are a few things to consider. First, opt for driftwood that is sturdy and in good condition. Avoid pieces that are rotten or too fragile, as they may not hold up well over time. Also, consider the size and shape of the driftwood in relation to your project. If you’re planning to create a small centerpiece, for example, look for smaller, more intricate pieces. Larger pieces are better suited for larger-scale projects like sculptures or garden accents. Lastly, take note of the color and texture of the driftwood. Some pieces may have unique markings or a weathered look that adds to their charm.

H2: Cleaning Driftwood

H3: Removing Dirt and Debris

Before you begin any decorative or practical work with driftwood, it’s important to clean it thoroughly. Start by rinsing off any visible dirt and debris using plain water. A gentle scrub with a soft brush can be helpful for removing stubborn grime. If there are any attached materials like seaweed or shells, gently remove them using tweezers or a small tool. Be careful not to apply too much pressure, as you don’t want to damage the natural integrity of the driftwood.

H3: Sanitizing the Driftwood

To ensure that the driftwood is free from bacteria or pests, it’s essential to sanitize it. Soak the cleaned driftwood in a mixture of water and bleach for about 24 hours. The ratio of water to bleach should be approximately 10 parts water to 1 part bleach. This solution will help kill any bacteria or pests that might be present on the driftwood. After the soaking process, rinse the driftwood thoroughly with fresh water to remove any traces of bleach.

H3: Dealing with Mold and Mildew

If you come across driftwood that has mold or mildew on it, don’t panic! This is a common occurrence, especially with pieces that have been in contact with water for a long time. To remove mold or mildew, create a solution of equal parts water and vinegar. Gently scrub the affected areas using a soft brush or cloth soaked in the solution. This will help eliminate the mold and mildew while also neutralizing any unpleasant odors. Rinse the driftwood thoroughly with water afterward, and allow it to dry completely before moving on to the next step.

H2: Preparing Driftwood for Decoration

H3: Sanding and Smoothing

Once the driftwood is clean and dry, it’s time to prepare it for decoration. Start by sanding the surface of the driftwood to remove any rough spots or splinters. Use a fine-grit sandpaper and work in the direction of the grain to achieve a smooth finish. Sanding not only helps create a polished look but also prepares the driftwood for further treatment, such as staining or painting. Be sure to wear protective gloves and a dust mask during this process to avoid any potential injuries or inhalation of dust particles.

H3: Bleaching and Staining

If you desire a lighter or more uniform color for your driftwood, bleaching and staining can be the next steps. To bleach the driftwood, mix equal parts water and hydrogen peroxide in a container large enough to submerge the pieces. Leave the driftwood in the solution for a few hours or until the desired level of lightness is achieved. Once bleached, rinse the driftwood thoroughly with water and allow it to dry completely. If you prefer a darker or richer color, you can apply wood stain using a brush or cloth. Follow the instructions on the stain product for the best results.

H3: Drying the Driftwood

Properly drying the driftwood is crucial to prevent any future issues such as mold or warping. After rinsing or treating the driftwood, allow it to air dry completely in a well-ventilated area. Avoid placing it in direct sunlight, as this can cause discoloration or excessive drying. Depending on the size and thickness of the driftwood, the drying process may take several days or even weeks. Patience is key here, as you want to ensure that the driftwood is completely dry before moving on to the next steps.

How to Clean and Decorate Driftwood Tutorial

H2: Decorating with Driftwood

H3: Driftwood Wall Art

One of the most popular ways to decorate with driftwood is by creating wall art. The organic shapes and textures of driftwood lend themselves beautifully to this type of decor. You can arrange the driftwood pieces in various patterns, such as a sunburst, chevron, or abstract design, and attach them to a wooden board or canvas using strong adhesive or small nails. This creates a stunning and unique piece of art that adds a touch of nature to your walls.

H3: Driftwood Centerpieces

If you’re looking to create a centerpiece that stands out, driftwood can be a perfect choice. Simply gather a variety of driftwood pieces of different lengths and shapes. Arrange them in a container, such as a glass vase or a wooden tray, and add elements like candles, flowers, or seashells for an extra touch of beauty. The natural and rustic elements of the driftwood will bring a sense of tranquility and elegance to your table.

H3: Driftwood Sculptures

For those with a flair for the artistic, sculpting with driftwood can be a truly rewarding experience. Let your creativity flow as you combine and shape the driftwood pieces into unique sculptures. You can create anything from abstract figures to animals or even functional items like lamps or hangers. The possibilities are endless, and the end result will be a conversation-starter in any room.

H2: Driftwood in Aquariums

H3: Preparing Driftwood for Aquarium Use

Driftwood is a popular addition to aquariums, as it not only provides a natural and appealing aesthetic but also offers hiding places and surfaces for beneficial bacteria to grow. However, before adding driftwood to your aquarium, it’s important to properly prepare it. Start by soaking the driftwood in a bucket or basin of water for several weeks, changing the water every few days. This process helps to remove tannins and reduce the chances of the driftwood leaching harmful substances into the water.

H3: Placing Driftwood in the Aquarium

Once the driftwood is properly soaked and free from tannins, it’s time to place it in your aquarium. Consider the layout of your tank and decide where you want to position the driftwood. Avoid placing it too close to the filter intake or anywhere it may obstruct the flow of water. Secure the driftwood in place using aquarium-safe rocks or adhesive if necessary. Take note of the positioning of the driftwood and rearrange if needed to create an aesthetically pleasing display.

H3: Maintaining Driftwood in Aquariums

Driftwood in aquariums requires some maintenance to ensure its longevity and optimal conditions for aquatic life. Regularly inspect the driftwood for signs of decay or buildup of algae. If you notice any soft or decaying areas, remove those pieces and replace them to prevent contamination of the water. Additionally, you may need to lightly brush or scrub the driftwood to remove any algae or residue. It’s important to balance the water parameters and regularly monitor the water quality to ensure the health of your aquarium community.

How to Clean and Decorate Driftwood Tutorial

H2: Driftwood as Home Decor

H3: Driftwood Mirrors

If you’re looking to add a touch of coastal charm to your living space, a driftwood mirror can be the perfect addition. Start with a plain mirror of your desired size and shape. Measure and cut the driftwood pieces to fit around the edge of the mirror frame. Attach the driftwood using a strong adhesive or small nails, making sure they are securely attached. Hang the finished driftwood mirror on a wall, and watch as it effortlessly transforms the room into a coastal oasis.

H3: Driftwood Picture Frames

For a more subtle yet equally stylish decor option, consider creating driftwood picture frames. Gather small driftwood pieces and measure them against the size of your desired picture. Glue the driftwood pieces around the edges of the picture frame to create a unique and rustic border. Allow the adhesive to dry completely before inserting your favorite photo and displaying it proudly on a shelf or wall.

H3: Driftwood Shelving

Driftwood shelves are not only functional but also serve as eye-catching statement pieces. Begin by finding a sturdy piece of driftwood that can act as the base for your shelf. Measure and cut wooden planks or boards to create the shelving surfaces. Attach the planks to the driftwood using screws or brackets, ensuring they are securely fastened. Hang your driftwood shelf on the wall using appropriate hardware and enjoy the natural beauty it brings to your space.

H2: Driftwood in Landscaping

H3: Driftwood Pathways

Create a whimsical and charming pathway in your garden or backyard by using driftwood. Lay the driftwood pieces in a desired pattern, spacing them evenly apart and aligning them to create a smooth walking surface. To ensure stability, bury the driftwood ends slightly in the ground or secure them with small stakes. This unique and natural pathway will add texture and visual interest to your outdoor space.

H3: Driftwood Planters

Driftwood planters offer a creative and sustainable way to showcase your favorite plants and flowers. Find a sturdy and hollow driftwood piece that can act as the base for your planter. Using a drill, create holes in the driftwood for drainage and place a liner or plastic insert inside to prevent soil from falling through. Fill the planter with potting soil and plant your chosen greenery. Whether placed indoors or outdoors, the driftwood planter will bring a touch of nature and elegance to any setting.

H3: Driftwood Garden Accents

Enhance the beauty of your garden by incorporating driftwood accents. Large driftwood pieces can be used as standalone sculptures, while smaller ones can be arranged in clusters around plants or flower beds. They can also serve as natural stakes or supports for climbing plants. Get creative and experiment with different placements to find the perfect balance between the organic forms of driftwood and the lushness of your garden.

H2: Maintaining Driftwood Over Time

H3: Cleaning and Dusting

To keep your driftwood looking its best, regular cleaning and dusting are important. Use a soft brush or cloth to gently remove any dust from the surface of the driftwood. Be careful not to use any harsh chemicals or abrasive materials, as these can damage the natural texture or finish of the wood. If necessary, lightly dampen the cloth or brush with water to aid in the cleaning process. Regular maintenance will help preserve the beauty and integrity of your driftwood pieces.

H3: Avoiding Direct Sunlight

Driftwood, like any other natural material, can be affected by prolonged exposure to direct sunlight. Over time, the sun’s rays can cause fading or discoloration of the driftwood. To prevent this, avoid placing driftwood in areas where it will be directly exposed to sunlight for extended periods. Instead, opt for indoor or shaded outdoor locations where the driftwood can be admired without the risk of sun damage.

H3: Treating with Oils or Wax

Applying natural oils or wax to your driftwood can help maintain its moisture and enhance its natural beauty. Choose food-safe oils such as mineral oil or coconut oil, and apply a thin layer using a soft cloth or brush. This will not only protect the driftwood from drying out but also give it a subtle sheen. Be sure to wipe off any excess oil or wax to prevent a greasy residue. Repeat this process every few months or as needed to keep your driftwood well-nourished and looking its best.

H2: Conclusion

Congratulations on completing your journey into the world of driftwood! We hope this comprehensive guide has inspired you to explore the countless possibilities of this natural and versatile material. Whether you choose to decorate your home, create stunning artworks, or enhance your outdoor space, driftwood will infuse a touch of rustic elegance and coastal charm into your life. Remember to gather your driftwood responsibly, clean it thoroughly, and let your creativity run wild. Embrace the beauty of nature and enjoy the unique and enchanting wonders of driftwood!

Filed Under: DriftWood Art Tagged With: cleaning, decorating, Driftwood, tutorial

Finding Minnesota: Driftwood Art

October 4, 2023 by admin

In this week’s “Finding Minnesota” segment by WCCO – CBS Minnesota, we discover the fascinating world of driftwood art. Jennifer Zerback, an artist from Moose Lake, has transformed pieces of driftwood from Lake Superior into stunning works of art. With her sculptures resembling various animals, Zerback’s creativity and imagination are on full display. She stumbled upon this unique art form about 15 years ago when she found a piece of driftwood that looked like a moose while walking on a beach. Since then, she has created approximately 140 driftwood pieces featuring animals like bears, ducks, and eagles, using hundreds of pieces of driftwood to bring them to life. This treasure hunting-like process of finding the right pieces of driftwood and putting them together like a puzzle is what makes working with driftwood so much fun for Zerback. Her artwork has gained recognition and can now be found in galleries, homes, and restaurants across the country.

Section 1: Introduction

Have you ever walked along a beach and stumbled upon a piece of driftwood? Most of us would simply kick it to the side, dismissing it as a mere piece of debris. But for Jennifer Zerback from Moose Lake, Minnesota, that same piece of wood holds tremendous potential. In this article, we will take a closer look at Jennifer’s fascinating journey into the world of driftwood art and how she transforms ordinary pieces of driftwood into stunning works of art.

Section 2: Jennifer Zerback’s Journey to Driftwood Art

2.1 Jennifer’s inspiration for driftwood art

Jennifer Zerback’s love for driftwood art was ignited about 15 years ago when she and her husband, Kevin, took a trip away from their kids. While walking along Wisconsin Point, Jennifer came across a piece of wood that resembled a moose. Intrigued by the natural shape and texture, she decided to create a sculptural representation of a moose using the driftwood. Little did she know that this small act would set her on an artistic journey that would change her life forever.

2.2 Discovering her passion for sculpting

Although Jennifer had been painting in a “van Goghish” style, it was the process of sculpting driftwood that captured her heart. Growing up without a television and having the freedom to explore the countryside allowed Jennifer to cultivate a vivid imagination. Sculpting provided her with an outlet for her creativity and a medium through which she could bring her imaginations to life.

2.3 Finding the perfect driftwood piece

One of the remarkable aspects of Jennifer’s artistry is her ability to identify the perfect piece of driftwood to bring her vision to life. While Kevin, her husband, may not always have the same eye for it, Jennifer has developed an instinct for recognizing the potential in each piece of driftwood. The knots and unique shapes found in the driftwood serve as inspiration for her sculptures, guiding her in the journey of creating breathtaking and realistic pieces.

Finding Minnesota: Driftwood Art

This image is property of i.ytimg.com.

Section 3: The Process of Creating Driftwood Art

3.1 Jennifer’s creative process

Jennifer’s creative process starts with a vision or an idea for a particular animal or object she wants to sculpt. Armed with this vision, she begins the process of selecting the most suitable driftwood pieces. Each piece is carefully examined and evaluated based on its shape, texture, and overall fit with the intended design.

3.2 Selecting and preparing the driftwood

The selection process is crucial to Jennifer’s artistry. She looks for pieces that mimic the natural curves and contours of the animal she plans to sculpt. Driftwood with knots and unique shapes are particularly valuable as they can be utilized to create eyes or other important features of the sculpture.

Once the driftwood pieces are chosen, Jennifer cleans and prepares them, removing any debris or loose bark. This step is essential to ensure that the final sculpture has a clean and polished appearance.

3.3 Assembling the pieces

With the cleaned and prepared driftwood pieces in hand, Jennifer begins the process of assembling them to create her desired sculpture. Like a puzzle, each piece is carefully fitted together, considering the natural curves and features of the animal she is sculpting.

Jennifer’s hands and eyes never cease moving during this process, constantly evaluating and adjusting the position of each driftwood piece to achieve the desired result. It is through this meticulous assembly of driftwood that the sculptures begin to take shape and come to life.

3.4 The role of glue and screws in the artwork

To ensure the durability and stability of her sculptures, Jennifer uses a variety of glues and screws. These help to hold the driftwood pieces together, ensuring that the artwork remains intact and can withstand the test of time. The careful application of glue and strategic placement of screws are essential in preserving the delicate balance and intricate details of her creations.

Section 4: The Magic of Driftwood

4.1 Exploring the unique characteristics of driftwood

One of the enchanting aspects of driftwood art is the inherent beauty and uniqueness found in each piece of driftwood. No two pieces are alike, and each carries its own story, shaped by the tides and weathering of the water. The natural weathering process gives driftwood its distinct texture, color, and character, which Jennifer skillfully incorporates into her sculptures.

4.2 The joy of treasure hunting for new pieces

For Jennifer, the process of creating driftwood art is not only about craftsmanship but also about the joy of treasure hunting. Walking along the beach, scouring the shorelines, and exploring hidden coves in search of the perfect driftwood pieces is an exciting and rewarding experience. Each new piece discovered holds the promise of endless possibilities and sparks Jennifer’s imagination for future projects.

4.3 The endless possibilities of driftwood art

Driftwood art allows for limitless creativity. The organic shapes and contours of the driftwood lend themselves to a wide range of artistic interpretations. From majestic wildlife sculptures to intricate and delicate designs, the unique characteristics of driftwood provide artists like Jennifer with endless inspiration and possibilities.

Finding Minnesota: Driftwood Art

Section 5: Jennifer Zerback’s Impact and Success

5.1 Showcasing Jennifer’s art in galleries

Jennifer Zerback’s talent and passion for driftwood art have garnered attention and recognition from art enthusiasts and collectors. Her beautiful sculptures have found their way into galleries, where they have been showcased and admired by a wide audience. Jennifer’s ability to infuse life into driftwood has captivated many, leaving a lasting impression and sparking a renewed appreciation for nature’s artistry.

5.2 Displaying her art in homes and restaurants

Beyond galleries, Jennifer’s art has found its place in homes and restaurants across the country. The unique and stunning appeal of driftwood art allows it to seamlessly blend with various interior design styles, adding a touch of natural elegance to any space. By displaying her art in these venues, Jennifer brings joy and inspiration to individuals in their everyday lives.

5.3 Recognition of Jennifer’s talent

Jennifer Zerback has gained recognition and acclaim for her incredible talent and contributions to the world of driftwood art. Her dedication to her craft, meticulous attention to detail, and unwavering passion have set her apart in the artistic community. Jennifer’s success serves as an inspiration to aspiring artists and showcases the power of following one’s passion.

Section 6: Conclusion

Jennifer Zerback’s journey to driftwood art is a testament to the transformative power of following one’s true calling and the beauty that can be found in unexpected places. Through her incredible creativity and skill, she has turned ordinary pieces of driftwood into stunning works of art that inspire and captivate. As we have explored her process and the magic of driftwood, we have gained a deeper appreciation for the art form and the endless possibilities it holds. Jennifer’s impact and success serve as a reminder to embrace our passions and never underestimate the potential in the world around us.

Finding Minnesota: Driftwood Art

Filed Under: DriftWood Art Tagged With: Art, Driftwood, Minnesota, travel

  • « Previous Page
  • Page 1
  • Page 2
  • Page 3
  • Page 4
  • Page 5
  • …
  • Page 59
  • Next Page »

Primary Sidebar

Driftwood4us.com, is a participant in the Amazon Services LLC Associates Program, an affiliate advertising program designed to provide a means for sites to earn advertising fees by advertising and linking to amazon.com.