Coastal Driftwood Wall Art
Imagine transforming your living space with a touch of seaside magic. Coastal Driftwood Wall Art embodies the serene beauty of the shore, bringing the natural charm of driftwood into your home. You’ll explore how artists gather these unique pieces of wood, weathered by the ocean waves, and craft them into stunning wall decor. From minimalist designs to intricate arrangements, this article will guide you through the various styles and ideas for incorporating this unique art form into your décor, evoking memories of the beach and a sense of coastal tranquility. Have you ever found yourself collecting driftwood along the shoreline during a relaxing coastal walk? Turning these treasures into beautiful, personalized pieces of wall art can be both fulfilling and delightful. Let’s dive into the world of coastal driftwood wall art and discover how you can create your own masterpiece.


What is Coastal Driftwood Wall Art?
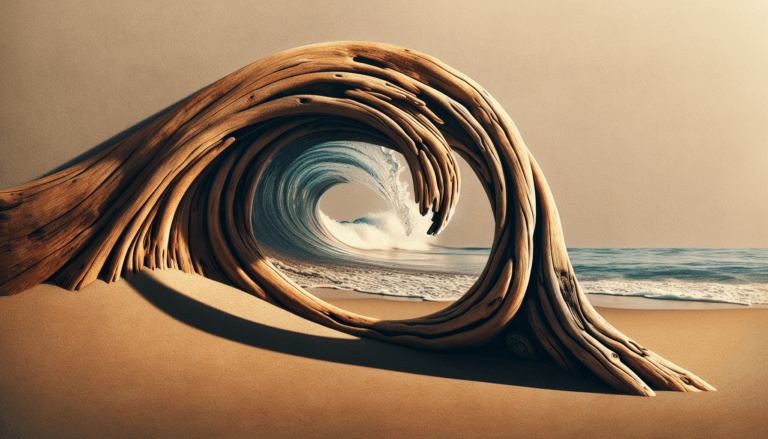
Coastal driftwood wall art is a form of artwork made from pieces of driftwood found along shorelines. This natural wood, reshaped and smoothed by water and weather, carries a unique aesthetic that embodies the beauty and tranquility of coastal living. Incorporating driftwood in your home decor can bring a touch of nature and a hint of seaside serenity to your space.
The Allure of Driftwood
Driftwood is not just ordinary wood. It is naturally sculpted by water currents, waves, and weather conditions. Each piece tells a story and carries with it the spirit of the sea. Its varied shapes, textures, and colors add an organic and rustic charm to your artwork.
Why Create Driftwood Wall Art?
Creating driftwood wall art is more than just a crafting project; it’s a way to connect with nature, express creativity, and bring the serene beauty of the coast into your home. Additionally, working with driftwood is a sustainable practice, as it utilizes natural and reclaimed materials.
Tools and Materials You’ll Need
Before you start crafting, gather the necessary tools and materials. Here’s a handy table to help you get organized:
| Item | Purpose |
|---|---|
| Driftwood | Main material for the artwork |
| Sandpaper | Smoothing rough edges |
| Saw (if needed) | Cutting larger pieces down to size |
| Wood Glue / Nails | Assembling the artwork |
| Backboard | Base to mount your driftwood art |
| Hanging Hardware | Securing the finished piece to the wall |
| Paint/Stain (optional) | Adding color or finish to the driftwood |
| Brushes (optional) | Applying paint or stain |
Finding the Perfect Driftwood
The best driftwood can be found along the coastlines, especially after high tides or storms. Look for pieces that are smooth, free from cracks or rot, and have interesting shapes. The key is to collect a variety of sizes and shapes to give you more creative flexibility when designing your art piece.
Preparing the Driftwood
Once you’ve gathered your driftwood, it’s essential to clean and prepare it before starting your project. Use sandpaper to smooth any rough edges, and if necessary, wash the pieces with mild soap and water to remove any dirt or debris. Allow the driftwood to dry completely before using it in your artwork.
Designing Your Driftwood Wall Art
The design phase is where your creativity truly shines. Take some time to envision how you want your final piece to look, considering aspects such as size, shape, and complexity.
Choosing a Theme or Concept
Themes can help you create a cohesive and visually pleasing piece of art. Here are a few ideas to inspire you:
- Natural and Minimalist: Emphasize the raw beauty of driftwood by arranging pieces in a simple yet striking composition.
- Marine Life: Incorporate shapes and motifs inspired by sea creatures, such as fish, shells, or starfish.
- Abstract: Play with different shapes and arrangements to create an abstract art piece.
- Geometric Patterns: Formulate geometric patterns for a modern twist on coastal decor.
Sketching Your Design
Creating a rough sketch of your design can help guide you during the assembly process. It doesn’t have to be perfect; just a simple layout to visualize how the pieces will fit together.
Assembling Your Driftwood Wall Art
Now that you have your design in mind and your materials ready, it’s time to start assembling your artwork.
Arranging Your Driftwood
Start by laying out your pieces on a flat surface according to your design sketch. Play around with the arrangement until you’re satisfied with the composition. Don’t be afraid to make adjustments as you go.
Securing the Pieces
Depending on your design, you can use wood glue or nails to secure the driftwood pieces together. If using wood glue, apply it to the edges of the driftwood and press them together firmly. Clamp the pieces in place until the glue dries completely. For added stability, especially for larger pieces, nails can be used in conjunction with glue.
Mounting on a Backboard
Once your driftwood design is assembled, mount it on a backboard for added support. Choose a backboard that complements your driftwood in terms of size and color. Secure the driftwood to the backboard using wood glue, nails, or screws.
Adding Hanging Hardware
The final step in the assembly process is to attach hanging hardware to the backboard. Use sturdy screws and picture wire to ensure your art is securely mounted on the wall. Make sure to place the hanging hardware evenly so that the artwork hangs straight.

Finishing Touches
While your driftwood wall art might already look fantastic as it is, there are a few optional finishing touches that can enhance its appearance.
Painting or Staining
If you prefer a specific color theme or finish, you can paint or stain your driftwood. Choose a paint or stain that complements your overall home decor. Use a brush to apply the paint or stain evenly, and allow it to dry completely before mounting.
Adding Decorative Elements
Enhance your driftwood wall art by incorporating additional decorative elements, such as seashells, beads, or small marine-themed trinkets. Use hot glue to attach these elements securely to your driftwood.
Displaying Your Driftwood Wall Art
Once your artwork is complete, it’s time to display it proudly. Choose a location where it can be the focal point of the room and where its beauty can be appreciated.
Ideal Places for Display
Here are some ideal spaces to showcase your coastal driftwood wall art:
- Living Room: Above the sofa or fireplace mantel.
- Bedroom: Above the bed or on a feature wall.
- Bathroom: Adding a coastal theme to your bathroom decor.
- Entryway: Creating a welcoming vibe in your hallway or entrance.
Lighting Considerations
Proper lighting can enhance the natural beauty of your driftwood wall art. Use ambient lighting or dedicated spotlights to highlight the textures and shapes of the driftwood. Avoid placing your art in direct sunlight, as prolonged exposure can cause the wood to fade over time.
Caring for Your Driftwood Wall Art
To ensure your driftwood wall art remains beautiful for years to come, regular maintenance and care are essential.
Protection from Moisture
Although driftwood has been naturally weathered, it’s still crucial to protect it from excessive moisture. Avoid placing your artwork in damp or humid areas, and consider applying a clear protective sealant if you anticipate exposure to moisture.
Dusting and Cleaning
Dust your driftwood wall art regularly using a soft cloth or a feather duster. For deeper cleaning, use a slightly damp cloth to gently wipe away any dirt or grime. Avoid using harsh chemicals or abrasive cleaners, as they can damage the wood.
Customizing Your Driftwood Wall Art
One of the greatest joys of creating driftwood wall art is the ability to personalize it to suit your taste and style. Here are a few ways to customize your artwork:
Incorporating Personal Elements
Add personal touches to your driftwood art by incorporating objects that hold sentimental value, such as small keepsakes, family photos, or mementos from beach vacations.
Experimenting with Mixed Media
Combine driftwood with other materials like metal, glass, or fabric to create a mixed media piece. This approach can add depth and interest to your artwork.
Seasonal and Theme Variations
Customize your driftwood wall art to reflect different seasons or themes. For example, you can add festive decorations for the holidays, or create a coastal-themed piece with summery accents.
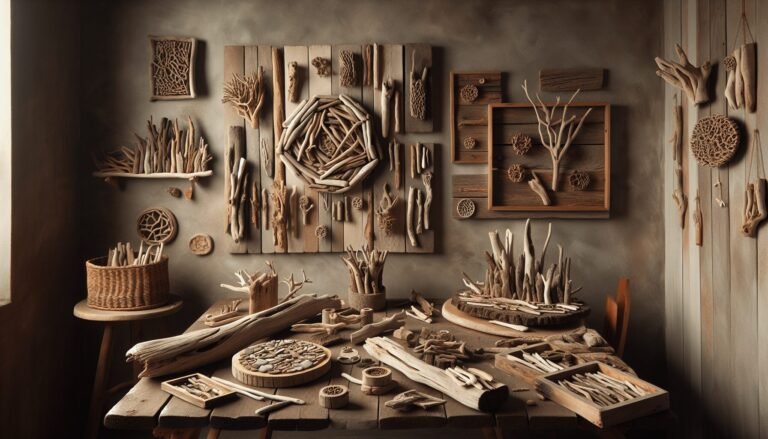
Inspiration and Ideas
If you’re looking for inspiration, here are some creative ideas to spark your imagination:
- Driftwood Wreath: Arrange smaller pieces of driftwood into a circular wreath shape and add shells and other coastal elements.
- Driftwood Mirror Frame: Use driftwood to frame a mirror, creating a stunning coastal statement piece.
- Driftwood Sculptures: Create three-dimensional sculptures from driftwood, such as abstract forms or representations of sea creatures.
- Driftwood Collage: Combine driftwood with other natural materials like sea glass, shells, and pebbles to create a textured collage.
Showcasing Artists
If you’re interested in seeing how other artists use driftwood in their work, consider researching well-known driftwood artists. Follow their social media profiles or visit their websites for inspiration and tips.
Frequently Asked Questions (FAQs)
To help you navigate the world of coastal driftwood wall art, here are answers to some common questions:
Can I Use Any Type of Driftwood?
While most driftwood is suitable for crafting, it’s best to choose pieces that are solid, free of rot or damage, and have been thoroughly cleaned and dried.
How Do I Remove Bacteria and Pests from Driftwood?
Soak your driftwood in a mixture of water and bleach (1:10 ratio) for several hours. Rinse thoroughly and let it dry completely before using it in your artwork.
What If My Driftwood Art Becomes Damaged?
Repair minor damages by gluing broken pieces back together with wood glue. For significant damage, you might need to replace the affected piece of driftwood.
Do I Need Any Special Skills to Create Driftwood Art?
No special skills are required, just creativity and patience. Follow the steps outlined in this guide, and don’t be afraid to experiment and have fun.
Conclusion
Coastal driftwood wall art is a wonderful way to bring the natural beauty of the beach into your home. By understanding the basics, planning your design, and assembling your artwork with care, you can create a stunning piece that reflects your personal style and love for the coast. So, the next time you find yourself on a sandy shore, gather some driftwood and let your creativity flow. Happy crafting!