Cost Of Driftwood Garlands: Store Bought Vs Diy
Why are you paying a month’s rent for something the Atlantic delivers to your feet every morning for free? Big-box retailers are charging a premium for the ‘coastal vibe’ while the tide is giving away the authentic version every single day. Stop paying for the middleman and start harvesting the legacy the ocean carved just for you.
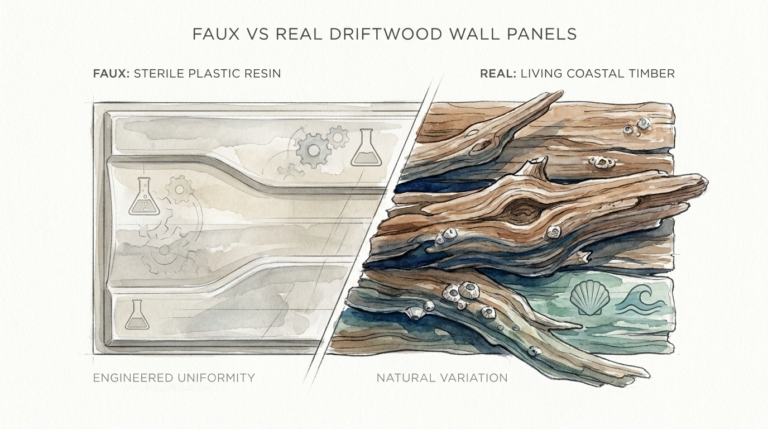
[affiai]Bringing the coast into your home should not feel like a corporate transaction. It should feel like an extension of a morning walk where the air was thick with salt and the sand was cold between your toes. Driftwood garlands have become the darling of high-end interior design catalogs, often appearing in glossy spreads draped over mahogany mantels or suspended in sun-drenched breakfast nooks. Yet, there is a profound disconnect between a factory-assembled string of wood and a piece of decor you gathered, cured, and crafted yourself.
The ocean has already done the hard work. It has tumbled these branches for years, stripping away the bark, smoothing the jagged edges, and bleaching the fibers to a perfect, weathered grey. This article will guide you through the transition from consumer to creator, helping you understand the mechanics of driftwood and the satisfying process of turning seaside detritus into a piece of heirloom-quality decor.
Cost Of Driftwood Garlands: Store Bought Vs Diy
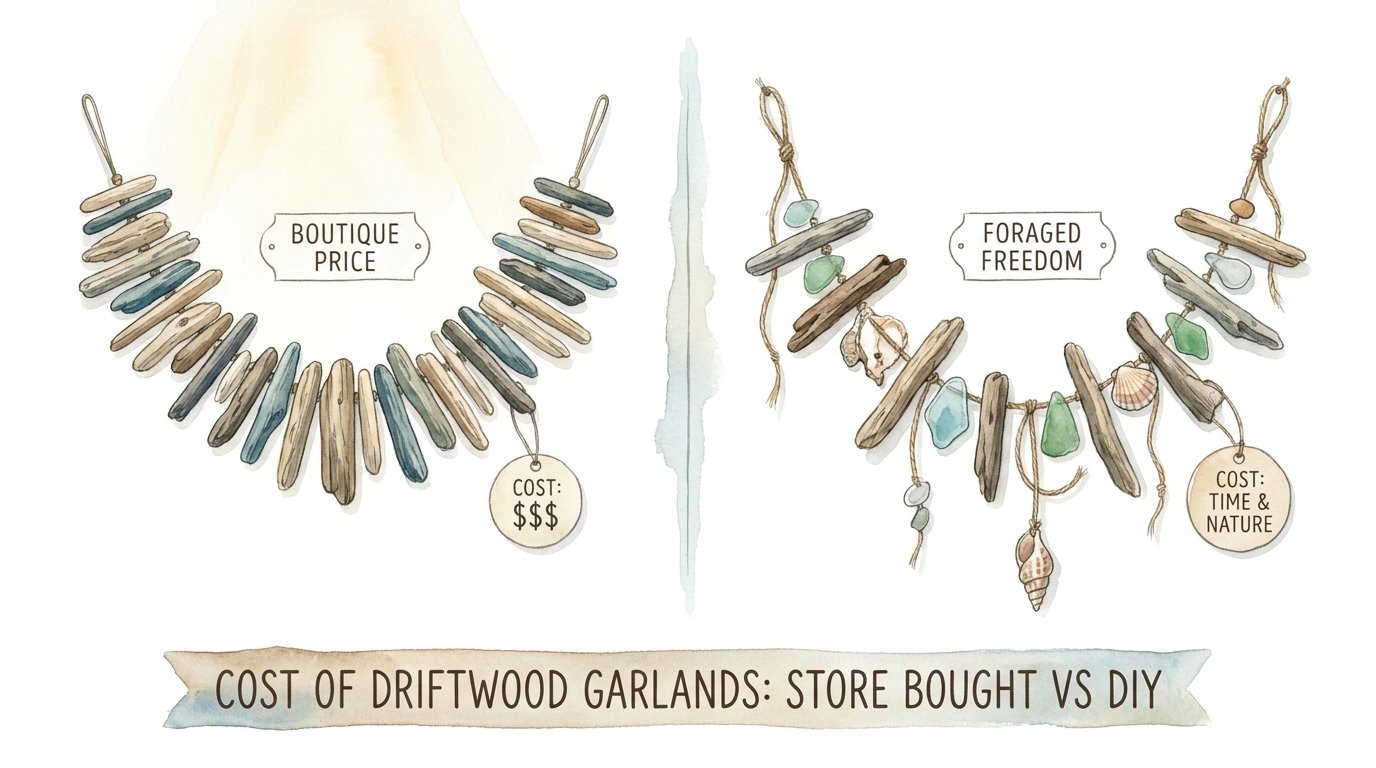
Retailers understand that consumers crave the “authentic coastal” look, and they price it accordingly. A quick scan of boutique home decor sites shows driftwood garlands ranging from $45 for a simple three-foot strand to over $150 for oversized, multi-textured versions featuring mouth-blown glass or hand-tied tassels. These products often use mass-produced “driftwood” that has been chemically treated or tumbled in industrial machines to mimic the natural aging process. You are paying for the brand, the shipping, and the labor of a factory worker miles away from any coastline.
Creating your own garland shifts the investment from financial to experiential. The primary materials—the driftwood itself—cost exactly nothing if you have access to a beach, riverbank, or lakefront. Your actual expenditures are limited to a spool of high-quality jute or cotton twine, a single drill bit, and perhaps a few accent beads if you choose to include them. Most practitioners find that a six-foot custom garland can be constructed for less than $10 in raw materials.
Beyond the raw numbers, the “foraged freedom” approach offers a value that a store-bought item cannot match. Every piece of wood in a DIY garland has a story. You remember the specific storm that washed up that knotted cedar root or the quiet afternoon you spent scouting the shoreline. This emotional equity transforms a simple decorative object into a focal point of personal history. When guests ask where you bought it, you can honestly say that the ocean delivered it and you simply gave it a string.
Scavenging the Shore: Where to Find the Best Pieces
Successful foraging requires a blend of timing, location, and legal awareness. The best time to head to the water is immediately after a high tide or a significant storm. High-energy waves deposit fresh piles of debris further up the beach, often uncovering unique pieces that have been buried for months. Look for areas where geography creates a natural “trap,” such as the windward side of a jetty or the inner curve of a bay.
Legal considerations are the most important part of the collection process. Regulations vary wildly depending on your location. California state parks, for instance, typically allow individuals to collect up to 50 pounds or one piece of driftwood per day for personal use. However, Michigan state law often prohibits the removal of any woody debris from state-owned land to protect local ecosystems. National Parks and Wildlife Refuges almost universally prohibit the removal of any natural materials. Always check with local DNR or park authorities before you start filling your bags.
Identifying the right wood is a skill that develops with practice. For garlands, you want “bone-dry” pieces that feel lightweight for their size. If a piece feels heavy or waterlogged, it may still have a high moisture content in its core, which can lead to rot or mold later. Seek out hardwoods like oak or mahogany for durability, though softwoods like cedar and pine are much easier to drill and offer a classic, light-colored aesthetic.
The Preparation Phase: Cleaning and Curing Your Driftwood
Scavenged wood is rarely ready for the living room immediately. It often carries hitchhikers like sand gnats, microscopic organisms, or residual salt that can attract moisture and lead to decay. A thorough cleaning process is mandatory to ensure your garland is safe for indoor use.
The first step is a vigorous rinse with fresh water to remove loose sand and debris. Using a soft-bristled brush, scrub into the crevices and knots where dirt hides. For pieces found in salt water, a long soak is necessary. Submerge the wood in a large bucket of fresh water for 24 to 48 hours, changing the water once or twice to leach out the salt.
Sanitization follows the initial rinse. Create a solution of one part bleach to ten parts water and soak the driftwood for at least 30 minutes. This kills bacteria and prevents any latent insect eggs from hatching inside your home. If you prefer a chemical-free approach, a strong vinegar solution can be used, though it may not be as effective against certain stubborn pests.
Drying the wood is the final stage of preparation. Air drying in a well-ventilated, sunny area is the most natural method, though it can take several days or even weeks depending on the thickness of the wood. For those who want to speed up the process, a low-temperature oven (around 200°F or 93°C) can act as a DIY kiln. Place the wood on a baking sheet and “bake” it for two to four hours, checking frequently to ensure it does not scorch. This heat treatment also ensures that any remaining wood-boring insects are neutralized.
Tools of the Trade: What You Actually Need
Crafting a professional-looking garland requires a few specific tools, but nothing that isn’t already in a basic homeowner’s kit. The most important tool is a reliable power drill. While a cordless drill offers portability, a corded drill provides consistent torque for tougher hardwoods.
Selecting the right drill bit is crucial. For most driftwood, a standard twist bit works fine. However, if you are working with thicker “nuggets” of wood, a brad-point bit is superior because it has a sharp tip that prevents the bit from “walking” or slipping on the smooth, weathered surface of the wood. The diameter of the bit should be slightly larger than the thickness of your twine to allow for easy threading.
Twine selection dictates the “vibe” of the finished piece. Jute or sisal twine offers a rugged, nautical look that complements the raw texture of the wood. Cotton macramé cord provides a softer, more bohemian feel and is easier on the hands during the knotting process. If you want a more modern or industrial look, consider using a thin leather cord or even a coated wire, though these require different fastening techniques.
Step-by-Step Guide: Crafting Your First Garland
Once your wood is clean and your tools are ready, the assembly process can begin. Lay your pieces out on a flat surface to plan the sequence. Grouping pieces by size—perhaps starting with larger chunks in the middle and tapering to smaller twigs at the ends—creates a balanced visual weight.
Step 1: Drilling the Bore Holes
Secure a piece of driftwood in a vice or hold it firmly against a sacrificial piece of scrap wood. Aim for the center of the wood’s mass to ensure it hangs straight. Drill slowly, letting the bit do the work. Pushing too hard can cause the weathered wood to split, especially if it is thin or particularly dry.
Step 2: Preparing the Cord
Cut a length of twine that is at least two feet longer than your desired finished garland. This extra length accounts for the knots you will tie between each piece of wood. To make threading easier, wrap a small piece of transparent tape around the end of the twine to create a stiff “needle.”
Step 3: The First Anchor
Tie a large, decorative knot or a loop at one end of the twine. This serves as your hanging point and prevents the wood from sliding off. A simple figure-eight knot or a bulky fisherman’s knot works well here.
Step 4: Stringing and Spacing
Slide your first piece of wood onto the twine. After it is in place, tie a knot immediately after it. This “locking knot” ensures that each piece of driftwood stays exactly where you want it and doesn’t clump together at the bottom when the garland is hung vertically. Continue this pattern—wood, knot, wood, knot—until you reach your desired length.
Step 5: The Finishing Touch
Complete the garland with another loop or a decorative element like a large seashell, a piece of sea glass, or a tassel made from the remaining twine. This gives the piece a polished, intentional look.
Benefits of Hand-Foraged Decor
Choosing to forage and build your own decor offers benefits that extend beyond the aesthetic. Environmentally, you are engaging in a form of creative recycling. You are removing debris from shorelines and repurposing it into something beautiful, rather than relying on the carbon-heavy supply chain of global retail.
There is also a significant cognitive benefit to the process. The “pioneer-grit” approach to home decor encourages problem-solving and manual dexterity. Learning how a drill bit interacts with different wood densities or how to tie a knot that holds under the weight of several pounds of timber builds a sense of self-reliance. This is the “Foraged Freedom” that defines a true maker’s home.
Finally, the customization options are limitless. Retailers offer a “one-size-fits-all” product. When you build it yourself, you can adjust the length to fit a specific window frame, choose wood colors that match your existing furniture, or incorporate personal treasures like stones found on a honeymoon or shells from a family vacation.
Challenges and Common Mistakes
The most common frustration for beginners is wood splitting during the drilling process. This usually happens because the drill bit is dull or the pressure applied is too high. If you encounter a particularly fragile piece of wood, try drilling a small pilot hole with a very thin bit first before moving up to your final size.
Another pitfall is failing to dry the wood completely before assembly. If the core of the wood is still damp, it will shrink as it dries inside your home. This can cause your knots to loosen or, in the worst-case scenario, lead to mold growth on the twine. Always err on the side of caution and give your wood an extra day of drying time.
Symmetry is often the enemy of natural decor. Many beginners try too hard to find identical pieces of wood, resulting in a garland that looks stiff and artificial. Embrace the “wabi-sabi” philosophy—the beauty of imperfection. Mix thick, gnarled roots with smooth, straight branches. The variation in texture is what makes the garland feel like it truly came from the wild.
Limitations: When This May Not Be Ideal
While foraged garlands are wonderful, there are situations where this method may not be practical. If you live in a landlocked area, the cost of shipping raw driftwood to your home can sometimes exceed the cost of simply buying a finished garland. In these cases, look for local river wood, which often has a similar weathered appearance to sea driftwood.
Time is another constraint. Between foraging, cleaning, soaking, drying, and assembly, a single garland can represent several days of effort. If you need a decorative solution for a dinner party tomorrow night, the DIY route is likely not your best option. This is a slow craft that rewards patience.
Finally, consider the weight. Large, chunky driftwood garlands can be surprisingly heavy. If you are renting and cannot put sturdy anchors into your walls, a massive foraged piece might be too much for simple adhesive hooks. Always weigh your finished garland before deciding where to hang it.
Design Variations: Beyond the Basics
Once you master the basic stringing technique, you can begin to experiment with more complex designs. The “Boutique Price” versions often incorporate secondary materials that you can easily add yourself for a fraction of the cost.
| Style | Primary Material | Accents | Vibe |
|---|---|---|---|
| Minimalist Strand | Thin, bleached twigs | None (Clean twine) | Modern / Scandi |
| Boho Coastal | Medium nuggets | Raw wood beads / Tassels | Eclectic / Relaxed |
| Jeweled Tide | Smooth grey wood | Sea glass / Copper wire | Artistic / High-End |
| Rustic Nautical | Thick, gnarled roots | Heavy jute rope | Traditional / Rugged |
For a “Jeweled Tide” look, use a thin copper or silver wire to wrap pieces of frosted sea glass and link them between the driftwood segments. This adds a hint of color and shimmer that catches the light beautifully when hung near a window.
Practical Tips for Longevity
To keep your garland looking its best for years, consider the environment where it will live. If the wood looks particularly dull or “thirsty,” you can apply a light coat of linseed oil or even a spray of matte polyurethane. This deepens the color slightly and prevents the fibers from becoming brittle and splintering over time.
Dusting is the main maintenance task. Because of the irregular surfaces and deep crevices of the wood, a standard duster may not be effective. Using a can of compressed air or a soft vacuum brush attachment once every few months will keep the garland clean without damaging the delicate twine.
If you are hanging the garland outdoors, such as on a porch or deck, use a synthetic cord like nylon or a treated sash cord. Natural fibers like jute will rot if they are constantly exposed to moisture and sun. Even with treated cord, expect the wood to continue to bleach and grey over time, which only adds to its character.
Advanced Considerations: Scaling and Commercial Potential
For those who find themselves with an abundance of driftwood and a talent for assembly, there is a legitimate market for these items. Platforms like Etsy are filled with “hand-foraged” decor, and interior designers are often looking for unique, one-of-a-kind installations for coastal properties.
Scaling up means thinking about “Statement Pieces.” Instead of a single strand, consider creating a driftwood “curtain” or a large-scale wall hanging where dozens of strands are suspended from a single, large branch. These pieces require more advanced structural planning, often involving hidden wire supports to manage the weight.
If you decide to sell your work, transparency is your best marketing tool. Document your foraging process and share the “cleaning story” of your wood. Buyers are willing to pay a premium when they know the item was ethically sourced and professionally sanitized. This is where you can reclaim the “Boutique Price” for yourself, backed by the integrity of your own labor.
Examples of Practical Application
Imagine a fireplace mantel in a home during the transition from summer to autumn. A traditional evergreen garland feels too heavy, but a naked mantel feels cold. A six-foot foraged driftwood garland, draped loosely across the top with a few white pillar candles nestled behind it, creates an immediate sense of warmth and texture. The natural greys of the wood complement almost any color palette.
In a bathroom, a vertical driftwood garland hanging from a corner hook can break up the hard lines of tile and porcelain. It brings an organic, spa-like element to the space. Because driftwood is naturally resistant to rot (having spent years in the water), it handles the humidity of a bathroom much better than many other natural materials.
Final Thoughts
The journey from a salt-crusted beach to a finished piece of home decor is one of the most rewarding paths a DIY enthusiast can take. It forces you to slow down, to look at the ground beneath your feet, and to appreciate the slow, patient work of the elements. You are not just making a garland; you are preserving a piece of the earth’s history.
Stop looking at the catalogs that try to sell you a sterilized version of the wilderness. The Atlantic, the Pacific, and every Great Lake in between are giving away their treasures for free. All they ask is that you have the tenacity to find them and the vision to see what they could become.
Take your drill, find your twine, and head to the shore. The tide is coming in, and it’s bringing your next masterpiece with it. Experiment with different woods, play with knots, and don’t be afraid to let the wood dictate the design. The ocean never makes the same thing twice, and now, neither will you.
Sources
1 99wfmk.com (https://99wfmk.com/michigan-driftwood-collection-rules/) | 2 southerncharmwreaths.com (https://southerncharmwreaths.com/how-to-price-wreaths-to-sell/) | 3 designertrapped.com (https://designertrapped.com/realistic-faux-garlands/) | 4 mymumthedreamer.com (https://mymumthedreamer.com/how-to-clean-driftwood-for-crafting/) | 5 homify.com.my (https://www.homify.com.my/diy/52765/preserve-driftwood-with-5-things-and-make-a-decorative-object-out-of-it) | 6 parklanejewelry.com (https://www2.parklanejewelry.com/how-to-wash-driftwood/) | 7 dksstores.com (https://dksstores.com/blog-post6) | 8 hawk-hill.com (https://www.hawk-hill.com/how-to-clean-driftwood/) | 9 injaf.org (https://injaf.org/articles-guides/general-guides/guide-to-aquarium-wood/) | 10 housebeautiful.com (https://www.housebeautiful.com/shopping/home-accessories/g62886656/best-faux-garland-2024/) | 11 thriftydecorchick.com (https://www.thriftydecorchick.com/2025/11/comparing-six-faux-cedar-christmas-garlands.html) | 12 Source (https://www.google.com/search?q=time+in+United+States+of+America) | 13 etsy.com (https://www.etsy.com/market/driftwood_and_sea_glass_garland) | 14 cornell.edu (https://www.law.cornell.edu/regulations/california/14-CCR-4306) | 15 Source (https://www.google.com/search?q=time+in+Salt+Lake+City,+UT,+US) | 16 theshrimpfarm.com (https://www.theshrimpfarm.com/posts/transform-your-tank-choosing-the-best-aquarium-driftwood-for-a-natural-aquascape/) | 17 ariumology.com (https://ariumology.com/2025/12/18/paludarium-driftwood-guide-how-to-choose-wood-by-color-shape-plant-compatibility/) | 18 sos.state.or.us (https://vertexaisearch.cloud.google.com/grounding-api-redirect/AUZIYQFnvdHYDAmmOb-PeG3KPLmFPq0N08FW8x1yKs3sd9eYLr9BkLx07R6AleHT9n_HDeHmUVDkw-PEbzUmilgFQvJr6Tgxr3yEvosFzYAk45ellrIX9LK6EYoSJg0wVrbV80TBWTt7rSiJV0Z4HevW89mCh1ywp5N3O8QRVrpWr4e9Cy799kdK_DWsTPHnRScPhNc=) | 19 thepaintedhinge.com (https://www.thepaintedhinge.com/sea-glass-garland/)