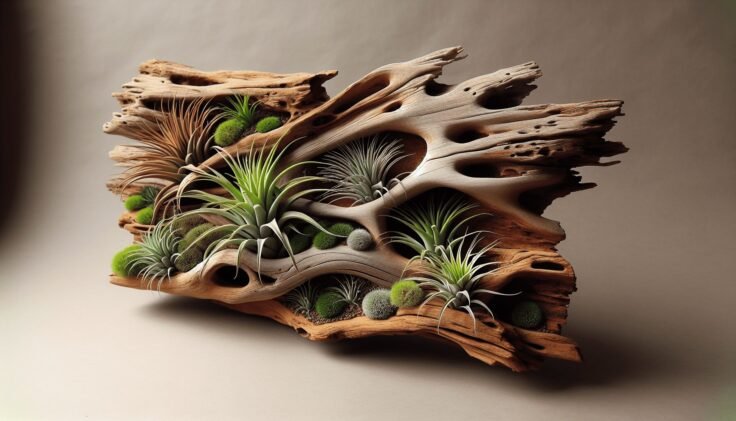
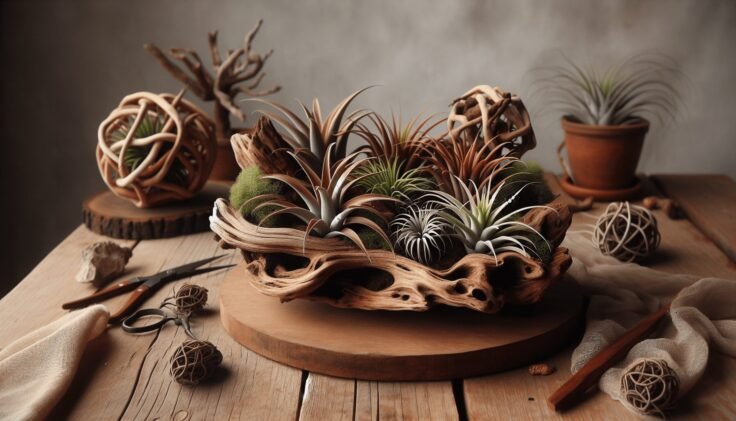
Have you ever come across a piece of driftwood and wondered how you could incorporate it into your home décor? Driftwood, with its unique and organic shapes, combined with air plants, can make for a striking piece of natural art in your home. Driftwood air plant designs are not only visually stunning but also easy to maintain, making them a great choice for gardeners and non-gardeners alike. Let’s walk you through the process of creating your own driftwood air plant masterpiece, step by step.
Understanding Driftwood and Air Plants
Before diving into the nitty-gritty of the project, it’s important to understand the raw materials you’ll be working with—driftwood and air plants. Each one comes with its own charm and considerations.
What is Driftwood?
Driftwood refers to pieces of wood that have been washed onto the shore by tides, winds, or waves. The journey across water and exposure to the elements gives it a weathered appearance and a smooth texture. This natural process results in driftwood’s unique aesthetic, which is loved by artists and decorators. When selecting driftwood for your air plant project, look for pieces that are interesting in shape and have plenty of grooves or holes where plants can nestle.
A Closer Look at Air Plants
Air plants, or Tillandsias, are a variety of epiphytes that do not require soil to grow. They absorb moisture and nutrients through their leaves directly from the air. Air plants are relatively easy to care for, require minimal watering, and can thrive in various lighting conditions. Their adaptability makes them ideal companions for driftwood in creating a sustainable art piece.
Materials You’ll Need
Now that you’re acquainted with driftwood and air plants, let’s gather the materials needed for your DIY project. Having everything at your fingertips will make the creation process smooth and enjoyable.
Essential Materials
- Driftwood: Choose a piece that fits the space you have in mind, and ensure it’s dry and free of pests.
- Air Plants: Select a variety of air plants in different sizes and shapes for visual interest.
- Adhesive: A non-toxic glue or adhesive putty suitable for securing plants to wood.
- Wire/Cord: For those who prefer not to use glue, wire or natural cord can be used to secure the plants.
- Scissors/Craft Knife: Handy for cutting cord or trimming plants if necessary.
Optional Enhancements
- Decorative Stones or Moss: To add extra character and cover adhesive sites.
- Spray Bottle: Use for gently misting the plants with water.
- Varnish or Sealant: Apply to driftwood if you want to enhance its color and durability.

Preparing Your Driftwood
Once you have your materials, the next step is preparation. Proper preparation ensures your final piece is sturdy and visually appealing.
Cleaning and Drying the Driftwood
First, ensure your driftwood is clean. If you’ve collected it from a beach, rinse off any sand and debris. You may need to soak larger pieces in fresh water to remove salt. After cleaning, let it dry thoroughly to prevent anything from contaminating your air plants.
Treating and Sealing
For a more finished look and to prolong the life of your driftwood, consider applying a wood sealant. This will enhance its color and protect it from moisture damage. Use a paintbrush to apply a thin layer of sealant, and allow it to dry completely before proceeding.
Selecting and Preparing Air Plants
Choosing the right air plants can transform your driftwood into an eye-catching display. Here’s how to get it right.
Identifying the Best Air Plants
Pick air plants that are vibrant and healthy. A few popular choices for driftwood displays include Tillandsia ionantha, Tillandsia xerographica, and Tillandsia caput-medusae. Their diverse textures and shapes can add various dimensions to your piece.
Preparing Your Plants
Before you start attaching the plants, give them a good soak. Submerge them in water for about 20 to 30 minutes to ensure they are well-hydrated as soon as they’re placed. Shake off excess water gently, and allow them to dry for a few hours.

Assembling Your Driftwood and Air Plant Design
Now comes the exciting part! Assembling your driftwood air plant piece requires creativity and patience.
Arranging Your Materials
Lay your driftwood on a flat surface and experiment with placement of your air plants. Consider the natural flow and angles of the wood to enhance the overall look. Place larger plants in prominent positions and smaller plants in clusters for variety.
Attaching Air Plants
Use small dots of adhesive to secure the plants to the driftwood lightly. If you prefer not to use glue, gently tie the plants using a thin wire or natural cord to keep them in place. Make sure not to damage the plants while securing them.
Caring for Your Driftwood Air Plant Display
Maintaining your driftwood air plant display is quite simple, but it requires regular care to keep it looking vibrant.
Watering and Light Requirements
- Watering: Lightly mist your air plants 2-3 times a week, or more often if you live in a dry climate. Ensure water does not pool in the base as it might rot the plant.
- Light: Place your display in bright but indirect sunlight. Air plants enjoy filtered light similar to their natural habitat under tree canopies.
Routine Checks
Regularly check your plants for signs of distress like browning tips or wilting. Remove dead leaves to keep plants looking fresh. Monitor the driftwood for any signs of mold or pest activity and address them promptly.
Additional Styling Tips
To elevate the appeal of your DIY project, incorporate a few styling techniques.
Using Natural Elements
Enhance your driftwood piece by adding natural elements like small stones, pieces of bark, or shells to complement the look. These can be glued or placed strategically around the air plants.
Create a Stunning Display
Consider hanging your driftwood air plant piece using fishing line or clear hooks. This gives the illusion that it’s floating, adding a whimsical touch to your décor. Alternatively, set it on a mantel or shelf where it can be a focal point.
Potential Challenges and Solutions
Every DIY project can come with its set of challenges. Here’s how to troubleshoot common issues.
Securing Difficult Plants
Some air plants are stubborn and refuse to stay in place. In such cases, try using a slightly different approach with looped wire, which can provide better support.
Driftwood Stability
If your driftwood doesn’t naturally sit well, create a base using small wooden blocks or heavy stones to support it and prevent tipping.
Benefits of Driftwood Air Plant Displays
Finally, let’s explore why creating and displaying driftwood air plants can be a delightful addition to your home.
Eco-Friendly Art
Using natural materials like driftwood and air plants is environmentally friendly, as it repurposes natural resources without introducing harmful substances.
A Unique Decor Element
Each piece of driftwood is different, ensuring that your creation is one-of-a-kind. The rugged beauty of driftwood combined with the exotic appearance of air plants creates a conversation starter.
Low Maintenance
Driftwood air plant displays require minimal upkeep, making them perfect for busy lifestyles or for people who might not have the greenest of thumbs.
Creating a driftwood air plant design is a fun and rewarding project that brings a touch of nature into your living space. With a little creativity and some basic care, your living artwork will flourish and become a point of pride in your home. The marriage of weathered wood with lively air plants captures nature’s beauty in a unique way, perfect for those who embrace a rustic yet sophisticated aesthetic.