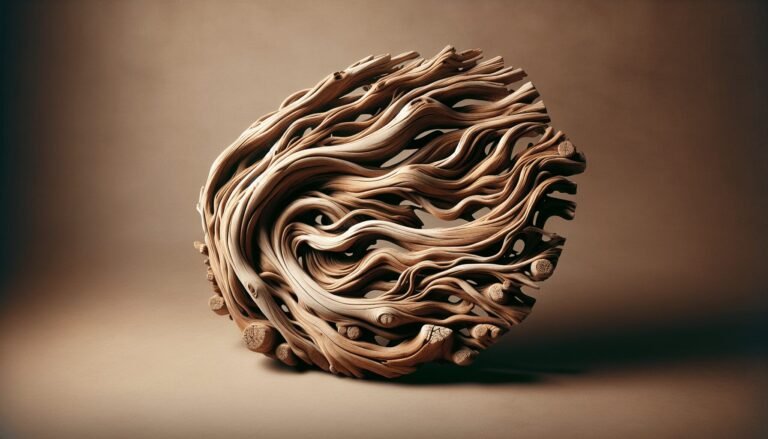
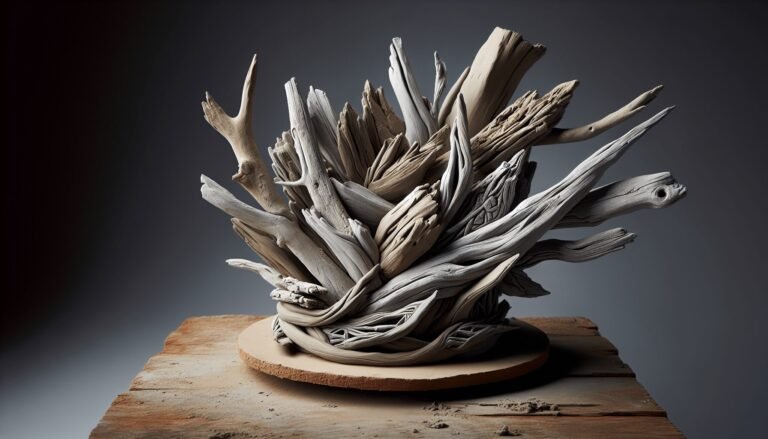
• Skip to main content
  • Skip to primary sidebar
  • Terms and Conditions
  • Privacy Policy
  • Contact

Driftwood 4 Us

Just About Driftwood

Art

Driftwood Art Diy Simple

March 22, 2024 by admin

Imagine transforming old pieces of driftwood into beautiful works of art with just a few simple steps. In this article, we will explore the world of driftwood art in a DIY approach that is both easy and accessible. Whether you’re a seasoned artist or just looking for a creative project, driftwood art offers endless possibilities for adding a touch of natural beauty to your home. Get ready to discover the simplicity and charm of driftwood art with our step-by-step guide.

Choosing the Right Driftwood

When it comes to choosing the right driftwood for your art projects, there are a few factors to consider. First and foremost, you want to make sure that the driftwood you select is safe to use. Avoid driftwood that has been treated with chemicals or paint, as these can be harmful to both you and the environment.

In terms of the aesthetic qualities of the driftwood, look for pieces that have interesting shapes and textures. Driftwood that has been weathered by the ocean will often have unique twists and turns, which can add visual interest to your artwork. Additionally, consider the size of the driftwood. Depending on the project you have in mind, you may need larger, more substantial pieces or smaller, more delicate ones.

When gathering driftwood, it’s important to do so responsibly. Always obtain driftwood from sustainable and legal sources, such as beaches where it has naturally washed up. Avoid taking driftwood from protected areas or private property without permission. By being mindful of where you collect your driftwood, you can help preserve the natural beauty of coastal ecosystems for future generations to enjoy.

Preparing the Driftwood for Use

Before you begin working with your driftwood, it’s essential to properly prepare it. Start by giving the driftwood a thorough cleaning. Scrub off any dirt, sand, or debris using a stiff brush and warm water. If the driftwood is particularly dirty, you can soak it in a mixture of water and mild dish soap before scrubbing.

After cleaning the driftwood, you may need to remove any loose or flaky bark. Use sandpaper or a wire brush to gently remove any loose material, being careful not to damage the wood underneath. Once the driftwood is clean and the loose bark has been removed, allow it to dry completely before using it in your art projects.

If you notice any signs of pests or infestation in the driftwood, such as wood-eating insects or mold, it’s crucial to treat it before using it in your projects. Consult with a professional or do thorough research to determine the best method for treating and preventing any potential issues.

Driftwood Art Diy Simple

This image is property of images.unsplash.com.

Essential Tools for Driftwood Art

To create stunning driftwood art, you’ll need a few essential tools. These tools will help you manipulate and shape the driftwood to bring your artistic vision to life. Here are some tools that every driftwood artist should have in their toolkit:

  1. Woodworking clamps – These clamps will come in handy when assembling larger driftwood sculptures or securing pieces together.

  2. Wire cutters and pliers – These tools are useful for cutting and manipulating wire to secure driftwood pieces together.

  3. Drill with various drill bits – A drill will help you create holes in the driftwood for securing components or adding decorative elements.

  4. Sanding block or sandpaper – Sanding is an essential step in preparing the driftwood for art projects. Having a sanding block or sandpaper in different grits will allow you to achieve smooth surfaces and remove any rough edges.

  5. Hot glue gun – A hot glue gun is ideal for quickly and securely attaching smaller pieces of driftwood together.

These tools will form the foundation of your driftwood art toolkit. As you become more experienced and explore different techniques, you may find additional tools that suit your specific needs.

Additional Materials to Enhance the Artwork

In addition to essential tools, there are various materials you can use to enhance your driftwood artwork. These materials can add depth, color, and texture to your creations. Some common materials used in driftwood art include:

  1. Paint – Acrylic paints can be used to add color and depth to your driftwood sculptures or wall hangings. Consider using neutral tones to complement the natural beauty of the wood or experiment with bold, vibrant colors for a more eclectic look.

  2. Seashells and sea glass – These natural treasures can be glued onto driftwood sculptures or incorporated into wall hangings to enhance the coastal theme.

  3. Decorative accents – Consider adding decorative accents such as beads, feathers, or small trinkets to your driftwood art. These can be attached using wire, glue, or by drilling small holes in the wood.

  4. Macrame or twine – For a boho-chic touch, use macrame or twine to wrap and secure driftwood pieces together. This technique can create interesting patterns and give your artwork a unique, textured look.

When selecting additional materials, be mindful of the overall design and aesthetic you want to achieve. Experiment with different combinations to find what works best for your personal style and the specific artwork you are creating.

Driftwood Art Diy Simple

This image is property of images.unsplash.com.

Creating Driftwood Sculptures

Driftwood sculptures are a popular choice for showcasing the natural beauty and intricate shapes of the wood. When creating driftwood sculptures, it’s important to plan your design and take the time to ensure each piece is assembled securely.

Planning the Design

Before you start assembling your driftwood sculpture, take some time to plan out your design. Sketch out your vision on paper or use a digital design program to get a clear idea of how the finished piece will look. Consider the size and shape of the driftwood pieces you have available and how they can fit together to achieve your desired design.

Assembling the Driftwood Pieces

Once you’ve planned your design, it’s time to start assembling the driftwood pieces. Use woodworking clamps or hot glue to secure larger pieces together, making sure to create a stable base for your sculpture. For smaller pieces, wire can be wrapped and twisted around the driftwood to hold them in place.

As you assemble the sculpture, periodically step back and assess the overall balance and stability. Make any necessary adjustments to ensure that the sculpture is structurally sound and visually appealing.

Securing the Sculpture

To ensure that your driftwood sculpture is secure and stable, consider attaching it to a base or mounting it on a sturdy platform. You can use a wooden or metal base and attach the driftwood using screws, nails, or strong adhesive.

If you prefer a floating effect, consider suspending the sculpture from the ceiling or walls using wire or transparent fishing line. This can create an eye-catching display and allow the sculpture to gracefully move with air currents.

Adding Finishing Touches

Once your driftwood sculpture is assembled and secured, it’s time to add the finishing touches. This is where you can let your creativity shine by incorporating additional materials or adding decorative details. Consider painting certain sections of the sculpture to highlight specific features or using natural materials like seashells or sea glass to enhance the coastal theme.

Take your time and experiment with different options until you achieve the desired overall aesthetic for your driftwood sculpture. Remember, the beauty of driftwood art lies in its organic and natural appeal, so embrace its imperfections and unique qualities.

Driftwood Wall Hangings

Driftwood wall hangings provide a unique way to incorporate the rustic charm of driftwood into your home decor. Whether you prefer a simple, minimalist design or a more elaborate and intricate piece, there are plenty of design ideas to consider.

Design Ideas for Driftwood Wall Hangings

When designing a driftwood wall hanging, consider the overall style or theme you want to achieve. Here are a few design ideas to get you started:

  1. Geometric Patterns – Arrange driftwood pieces in geometric patterns such as squares, triangles, or hexagons. This modern and minimalist design can add a contemporary touch to any space.

  2. Woven or Macrame Accents – Integrate macrame or woven elements into your wall hanging to give it a bohemian or coastal vibe. This technique allows you to combine different textures with the driftwood for a visually striking effect.

  3. Nature-Inspired Motifs – Use driftwood pieces to create shapes inspired by nature, such as leaves, flowers, or waves. This design approach can evoke a sense of tranquility and connect your space to the natural world.

Attaching the Driftwood to a Backing

To create a sturdy and secure wall hanging, you’ll need to attach the driftwood pieces to a backing material. Consider using a piece of plywood, a wooden plaque, or even a fabric-covered canvas as your backing.

One way to attach the driftwood is by using a strong adhesive, such as epoxy or wood glue. Apply a generous amount of adhesive to both the driftwood and the backing material, press them together firmly, and allow the adhesive to dry completely. Another option is to use screws or nails to secure the driftwood to the backing if it’s thick enough to support them.

Decorating the Wall Hanging

Once the driftwood is securely attached to the backing, you can further enhance your wall hanging by adding decorative elements. Consider attaching seashells, sea glass, or even small LED lights to create a captivating focal point. You can also opt to paint certain sections of the driftwood or the backing material to add pops of color or create a cohesive color scheme with your existing decor.

When it comes to hanging your driftwood wall hanging, use appropriate hardware for the size and weight of the piece. A sturdy picture hanger or wall hook should be sufficient to support most wall hangings. Make sure to follow the manufacturer’s instructions and ensure that the hanging hardware is securely attached to the wall.

Creating driftwood wall hangings allows you to bring the beauty of the ocean into your home while adding a touch of natural elegance to your decor.

Driftwood Art Diy Simple

This image is property of images.unsplash.com.

Driftwood Mobiles

Driftwood mobiles offer a whimsical and ethereal way to display and appreciate the beauty of driftwood. Whether you hang them indoors or outdoors, they can create a sense of movement and tranquility. Here’s how you can create your own unique driftwood mobile.

Choosing Lightweight Driftwood Pieces

When selecting driftwood for a mobile, it’s important to choose lightweight pieces that will be easy to suspend and allow for gentle movement. Look for driftwood with interesting shapes and textures, keeping in mind that asymmetrical pieces can add visual interest and enhance the mobile’s dynamic nature.

Consider collecting smaller and thinner pieces of driftwood that can be easily tied or strung together. You can even source driftwood branches that naturally have multiple offshoots or branches, as these can create a more intricate and captivating mobile design.

Creating a Balanced Mobile Design

Achieving balance is crucial when creating a mobile, as it ensures that the driftwood pieces are evenly distributed and that the mobile can move freely without tipping over. Begin by selecting a central piece of driftwood that will serve as the focal point of the mobile. From there, add additional pieces of driftwood, alternating between different lengths and shapes to create visual interest.

To test the balance of your mobile, tie or string the driftwood pieces together and gently hold them up by the central piece. Adjust the placement and distribution of the other pieces until the mobile hangs evenly and does not tilt to one side. This may require some trial and error, so be patient and make adjustments as needed.

Stringing and Suspending the Driftwood

Once you have achieved the desired balance, it’s time to string and suspend the driftwood pieces. Depending on the size and weight of the pieces, you can use nylon fishing line, twine, or decorative thread to tie them together. Ensure that the strings or threads are securely fastened, but also give the driftwood enough freedom to move and sway.

To hang the mobile, consider using a small metal ring or wooden hoop as the attachment point. Tie the strings or threads to the ring or hoop, ensuring that the mobile is evenly spaced and level. You can then suspend the mobile from the ceiling or a hook, making sure to secure it properly to prevent any accidents or damage.

To add an extra touch of elegance, consider attaching small decorative items, such as beads or feathers, to the strings or threads. These accents can further enhance the visual appeal and movement of the driftwood mobile.

Creating a driftwood mobile allows you to bring a sense of tranquility and the beauty of nature into any space. Whether you hang it in your living room, bedroom, or outdoor patio, it will surely capture your attention and evoke a sense of peace and serenity.

Driftwood Picture Frames

Adding a touch of natural charm to your cherished photographs or art prints, driftwood picture frames are a beautiful and unique way to display your favorite memories. Creating a driftwood picture frame is a straightforward process that allows you to customize the frame to suit your personal style and decor.

Preparing the Picture Frame

To create a driftwood picture frame, start with a basic wooden frame in the desired size. You can find unfinished wooden frames at craft stores or repurpose an old frame by removing any existing backing or glass. Sand the wooden frame lightly to smooth out any rough edges or imperfections.

Before proceeding, decide if you want to leave the wood in its natural state or add any stains or finishes. Leaving the wood natural can give the frame a more rustic and organic feel, while applying a stain or finish can enhance the wood’s natural color and protect it from wear and tear.

Attaching Driftwood to the Frame

Now comes the fun part – attaching the driftwood to the frame. Start by gathering driftwood pieces that are roughly the same length as the sides of the frame. You can choose to have the driftwood pieces overlap slightly or fit them together flush for a more uniform look.

Apply a thin line of strong adhesive, such as wood glue or epoxy, along one side of the frame. Press the driftwood pieces onto the adhesive, ensuring that they are securely attached and aligning with the edges of the frame. Continue this process for all sides of the frame, making sure that the driftwood is aligned and forms a cohesive design.

Allow the adhesive to dry completely before handling the frame. This will ensure that the driftwood is firmly attached and won’t come loose with everyday use.

Adding Personal Touches

To make your driftwood picture frame truly unique, consider adding personal touches and decorative elements. You can incorporate seashells, sea glass, or small trinkets that hold sentimental value to give the frame a personalized touch. Play around with different combinations until you achieve a design that resonates with you.

If you prefer a more minimalist look, you can leave the frame as-is or add subtle details such as small beads or single-color accents. The beauty of driftwood picture frames lies in their versatility, so feel free to experiment and adapt the design to suit your preferences.

Once your driftwood picture frame is complete, select a favorite photograph or art print to showcase inside. The natural and rustic charm of the driftwood frame will beautifully complement your chosen piece and add a unique touch to your home decor.

Driftwood Art Diy Simple

Driftwood Jewelry

If you’re looking to create wearable pieces of art, driftwood jewelry is a fantastic choice. The natural beauty and unique patterns of driftwood can be transformed into stunning pendants and charms that will make a statement. Here’s how you can create your own driftwood jewelry.

Selecting Small, Lightweight Driftwood

When creating driftwood jewelry, it’s crucial to choose small, lightweight pieces that won’t feel heavy when worn. Look for driftwood pieces with interesting textures and shapes that can serve as the focal point of your jewelry. You can often find small, unique pieces that are perfect for pendants or charms.

Consider collecting driftwood from different locations to create a diverse selection of jewelry pieces. Each piece will have its own story and distinct character, making your jewelry truly one-of-a-kind.

Creating Pendants or Charms

To create driftwood pendants or charms, start by selecting a driftwood piece that has a desired shape or outline. Use a saw or rotary tool to carefully shape and refine the edges, creating the desired look for your pendant or charm. Sand the driftwood using fine-grit sandpaper to achieve a smooth surface, paying close attention to any cut or touched areas.

Once you are satisfied with the shape and smoothness of the driftwood, drill a small hole near the top or a suitable spot for attaching jump rings or chains. Take your time during this process to ensure that the hole is centered and doesn’t compromise the structural integrity of the driftwood.

Adding Jump Rings and Chains

With the hole drilled, it’s time to add jump rings and chains to your driftwood pendant or charm. Jump rings are small metal rings that you can open and close easily to attach other components. Slide a jump ring through the hole in the driftwood, and using pliers, gently close the ring to secure it in place.

Once the jump ring is in place, attach a chain of your choice to complete the necklace. You can opt for a delicate silver or gold chain, or get creative with colored cords, ribbons, or leather strands to achieve a more bohemian or casual look. Take care to select a chain or cord that complements the overall aesthetic of your driftwood pendant or charm.

Finishing the Jewelry Pieces

To give your driftwood jewelry pieces a polished finish, consider applying a protective sealant or varnish. This will help protect the wood from moisture, dirt, and everyday wear. Choose a sealant that is safe for jewelry and follow the manufacturer’s instructions for application.

Once the sealant has dried, your driftwood jewelry is ready to be worn or gifted. Consider creating matching sets, such as earrings and necklaces, or mix and match different pendants or charms to create a unique jewelry collection.

Driftwood jewelry allows you to carry a piece of nature’s artistry with you wherever you go. With your own handmade creations, you can make a fashion statement while showcasing the beauty and organic charm of driftwood.

Driftwood Candle Holders

Creating driftwood candle holders is a wonderful way to add a warm and rustic ambiance to your home. Whether you’re hosting a dinner party or simply enjoying a quiet evening, these candle holders will create a cozy and inviting atmosphere. Here’s how to make your own driftwood candle holders.

Choosing a Suitable Base for the Candle Holder

To create a stable and secure driftwood candle holder, you’ll need a suitable base. Look for a piece of driftwood that is flat and wide enough to safely hold a candle. Ideally, the driftwood should have a natural indentation or groove that will accommodate the candle.

If you can’t find driftwood with a ready-made indentation, you can create one by using a drill with a spade or hole saw attachment. Measure the diameter of your candle and select a drill bit accordingly. Carefully drill a hole into the driftwood, ensuring that it is deep enough to hold the candle securely.

Fitting and Securing the Driftwood Pieces

Once you have the base prepared, it’s time to select and fit the additional driftwood pieces that will surround and support the candle holder. Choose pieces that complement the base and have interesting shapes and textures. Play around with different arrangements until you find a design that you’re happy with.

To secure the additional driftwood pieces to the base, you can use strong adhesive, wood glue, or a hot glue gun. Apply a generous amount of adhesive to both the base and the additional driftwood piece, press them together firmly, and allow the adhesive to dry completely. Take care to ensure that the driftwood pieces are evenly spaced and securely attached to prevent any accidents or damage.

Adding Embellishments and Finishes

To add extra visual interest and personalization to your driftwood candle holder, consider adding embellishments and finishes. Driftwood pairs beautifully with natural accents, such as seashells, sea glass, or small pebbles. Adhere these embellishments to the driftwood using a strong adhesive, arranging them in a way that complements the overall design.

If you prefer a more refined look, consider staining or painting the driftwood. This can help highlight the natural patterns and textures while adding a touch of color or enhancing the rustic feel. Choose a stain or paint color that complements your existing decor and follow the manufacturer’s instructions for application.

Before placing a candle in your driftwood candle holder, ensure that the driftwood is completely dry and any finishes or paints have cured. Always use caution when burning candles, and never leave them unattended or near flammable materials. Enjoy the warm glow and cozy ambiance that your driftwood candle holders bring to your space.

Driftwood Art Diy Simple

Driftwood Table Decor

Driftwood can add a unique touch to your table decor, whether you’re hosting a dinner party or simply want to elevate your everyday dining experience. From centerpiece elements to table runners and placemats, driftwood can be incorporated into various aspects of your table decor.

Using Driftwood as Centerpiece Elements

A driftwood centerpiece can be a captivating focal point for your table. Start by selecting a large and interesting piece of driftwood as the centerpiece. Arrange it in the center of your table, ensuring that it is stable and won’t obstruct conversation or take up too much space.

To enhance the centerpiece, consider incorporating additional elements such as candles, flowers, or decorative accents. Place votive candles or tea lights around the base of the driftwood to create a warm and inviting glow. Fresh flowers or a small potted plant can add a touch of nature and color. Play around with different combinations until you achieve a centerpiece that reflects your personal style.

Creating Table Runners or Placemats

To create a cohesive look on your table, consider using driftwood to create table runners or placemats. Cut driftwood pieces into similar lengths and arrange them side by side to create a rustic and natural table runner. This can add texture and visual interest to the table while protecting the surface from heat or spills.

If you prefer individual placemats, you can cut driftwood pieces into smaller sections and attach them to a fabric or felt backing using strong adhesive or a hot glue gun. This will create a stable surface for each place setting while adding a unique and organic touch to your table decor.

Decorating Glassware with Driftwood Accents

Another way to incorporate driftwood into your table decor is by adding accents to your glassware. Start by wrapping thin driftwood pieces around the base of wine glasses or stemware to create an elegant and rustic touch. Secure the driftwood with twine or thin wire, ensuring that it is firmly attached but does not interfere with the functionality of the glass.

For a more casual look, consider adding driftwood charms to the stems of your glassware. Drill small holes near the top of the driftwood pieces and string them onto jute twine or thin ribbon. Tie the twine or ribbon around the stem of each glass, creating a charming and personalized detail.

Driftwood table decor allows you to infuse natural beauty and rustic charm into your dining experiences. Experiment with different arrangements and combinations to create a table setting that reflects your personal style and enhances your meals.

Driftwood Coasters

Driftwood coasters not only provide a practical way to protect your surfaces from heat or moisture, but they also create a charming and rustic look for your home decor. Follow these steps to create your own driftwood coasters:

Sanding and Preparing the Driftwood

Start by selecting small driftwood pieces that have interesting shapes and textures. Remove any loose bark or debris by gently sanding the driftwood using fine-grit sandpaper. This will create a smooth surface and prevent any splinters.

Once the driftwood is free from loose debris, wipe it clean with a damp cloth to remove any leftover sawdust or sanding residue. Allow the driftwood to dry completely before moving on to the next step.

Applying Protective Finishes

To protect the driftwood coasters from moisture or heat damage, it’s essential to apply a protective finish. Natural finishes such as mineral oil or beeswax are ideal choices, as they enhance the wood’s natural beauty while providing a barrier against liquids or heat.

Apply the chosen finish according to the manufacturer’s instructions, making sure to coat all sides of the driftwood evenly. Allow the finish to dry and cure completely before using the coasters. This will ensure that the driftwood is properly sealed and ready for use.

Adding Non-Slip Backing Materials

To prevent the coasters from sliding or scratching your surfaces, consider adding non-slip backing materials. Cut small squares or circles from adhesive-backed felt or silicone pads, and attach them to the bottom of each coaster. This will provide added grip and protect your furniture from potential damage.

Once the non-slip backing materials are securely attached, your driftwood coasters are ready to use. Whether you’re enjoying a hot cup of tea or entertaining guests with refreshing beverages, these coasters will add a touch of natural elegance to your table setting.

Creating driftwood art allows you to unleash your creativity while celebrating the beauty of nature. Whether you choose to make driftwood sculptures, wall hangings, or jewelry, each piece will embody the unique qualities and timeless allure of driftwood. So gather your tools, select your driftwood, and let your imagination guide you as you embark on your driftwood art journey.

Filed Under: Driftwood Ideas Tagged With: Art, DIY, Driftwood, Simple

Driftwood Cross Art

March 22, 2024 by admin

Imagine strolling along the pristine shores of a secluded beach, the salty scent of the ocean filling the air. As your eyes wander, they fall upon a mesmerizing sight: intricate sculptures crafted from weathered driftwood, forming delicate crosses that seem to hold stories of their own. Driftwood Cross Art, a unique form of expression that marries nature’s discarded treasures with artistic vision, invites you to embark on a journey of reflection and appreciation for the beauty that can be found in the simplest of materials.

What is Driftwood Cross Art?

Driftwood Cross Art is a unique and creative form of artistic expression that combines the natural beauty of driftwood with the symbolic representation of a cross. It involves assembling and arranging pieces of driftwood to create stunning and meaningful artworks that can add a touch of rustic charm to any space. This art form allows you to create personalized and one-of-a-kind pieces that reflect your own style and creativity.

Definition of Driftwood Cross Art

Driftwood Cross Art refers to the process of using driftwood, which is wood that has been washed ashore by a body of water, typically the ocean, to create a cross-shaped art piece. It involves selecting, preparing, and assembling the driftwood pieces to form the desired shape of the cross. The finished artwork can be left in its natural state or decorated with paint, patterns, or other materials to enhance its beauty and meaning.

Origin of Driftwood Cross Art

The origin of Driftwood Cross Art can be traced back to coastal areas where people have long been collecting driftwood for various uses. The idea of using driftwood to create cross-shaped artworks likely emerged as a way to combine the artistic potential of the wood with the religious symbolism of the cross. Over time, this art form has gained popularity and has become a beloved craft among artists, collectors, and beachcombers alike.

Materials Used in Driftwood Cross Art

To create a driftwood cross artwork, you will need a few essential materials. These include:

  • Driftwood Pieces: The main material for this art form is, of course, driftwood. Look for driftwood pieces in various sizes and shapes, depending on your desired final artwork.
  • Wood Glue: This adhesive is crucial for securing the driftwood pieces together. Choose a strong and durable wood glue that dries clear for a seamless finish.
  • Saw: A saw will come in handy for cutting and trimming the driftwood pieces to the desired lengths and shapes.
  • Sandpaper: Sandpaper is essential for smoothing rough edges, creating texture, and preparing the driftwood for painting or varnishing.
  • Acrylic Paint and Brushes: If you wish to add color to your driftwood cross, acrylic paint and brushes are perfect for this purpose. Choose colors that complement your desired aesthetic.
  • Optional: Sealer or Varnish: Applying a sealer or varnish can protect the driftwood cross from moisture and extend its lifespan. It can also enhance the natural beauty of the wood and give it a polished look.

Tools and Supplies Needed

Before diving into your driftwood cross art project, it’s important to gather all the necessary tools and supplies. Here’s a list of what you’ll need:

Driftwood Pieces

Begin by collecting a variety of driftwood pieces. Look for different shapes, sizes, and textures that will add visual interest and dimension to your driftwood cross. You can find driftwood along the beach or purchase it from local craft stores.

Wood Glue

Choose a high-quality wood glue that is strong and dries clear. This adhesive will be used to secure the driftwood pieces together, ensuring that your driftwood cross remains intact.

Saw

A saw will be useful for cutting and trimming the driftwood pieces to the desired lengths and shapes. Ensure that you have a saw that is appropriate for cutting through wood.

Sandpaper

To create a smooth and polished look, sandpaper is essential. Use different grades of sandpaper to smooth out rough edges, create texture, and prepare the driftwood for painting or varnishing.

Acrylic Paint and Brushes

If you desire to add color to your driftwood cross, acrylic paint is a great choice. Select a variety of colors that align with your artistic vision. Additionally, make sure to have a selection of brushes in different sizes to accommodate various painting techniques and designs.

Optional: Sealer or Varnish

To protect the driftwood cross from moisture and give it a finished appearance, consider applying a sealer or varnish. This optional step will help preserve the natural beauty of the wood while adding a protective layer.

Driftwood Cross Art

This image is property of images.unsplash.com.

Choosing and Preparing Driftwood

Selecting Suitable Driftwood Pieces

When selecting driftwood pieces for your project, look for ones that are sturdy and in good condition. Avoid pieces that are rotten, moldy, or too brittle. The size and shape of the driftwood will depend on your desired final artwork. Consider the overall aesthetic you want to achieve and choose driftwood pieces that align with that vision.

Cleaning and Drying Driftwood

Before working with the driftwood, it’s important to clean and dry it properly. Rinse the pieces with fresh water to remove any salt, sand, or debris. You can also soak the driftwood in a bucket of water for a short period to further remove impurities. Once cleaned, pat the driftwood pieces dry using a clean towel or let them air dry completely.

Removing Loose Bark or Debris

After cleaning and drying the driftwood pieces, inspect them for any loose bark or debris. Gently remove any loose bark using a soft brush or your fingers. Be careful not to damage the surface of the driftwood while doing so. Removing loose debris will ensure that the finished driftwood cross looks clean and polished.

Designing Your Driftwood Cross

Planning the Size and Shape

Before starting the construction of your driftwood cross, take some time to plan the size and shape of the artwork. Consider the space where you intend to display it and envision how the driftwood cross will fit in that area. Determine whether you want a simple or elaborate design, as this will guide you in selecting the appropriate driftwood pieces.

Sketching the Design on Paper

Once you have a clear idea of the size and shape, sketch the design of your driftwood cross on paper. This will help you visualize the final artwork and provide a reference while assembling the driftwood pieces. Play around with different arrangements and combinations until you find a design that you’re satisfied with.

Adjusting and Finalizing the Design

After sketching the initial design, take a moment to review and adjust any aspects that may need tweaking. Consider the overall balance, symmetry, and aesthetic appeal of the design. Make any necessary revisions or modifications until you are fully satisfied with the final design. This step ensures that you have a clear vision for creating your driftwood cross.

Driftwood Cross Art

This image is property of images.unsplash.com.

Creating the Driftwood Cross

Cutting and Trimming Driftwood Pieces

With your design finalized, it’s time to start creating the actual driftwood cross. Begin by measuring and marking the driftwood pieces according to your desired lengths and shapes. Using a saw, carefully cut the pieces to the specified dimensions. Take your time and exercise caution to ensure accurate cuts and a precise fit for the cross shape.

Assembling the Cross Shape

Once you have cut the driftwood pieces, begin assembling them to form the cross shape. Lay out the cut pieces on a flat surface, referring to your sketch as a guide. Experiment with different arrangements until you find the configuration that you find most visually appealing. Take note of how the pieces fit together and make any necessary adjustments to ensure a tight and secure fit.

Applying Wood Glue and Securing the Pieces

After determining the ideal arrangement, it’s time to secure the driftwood pieces together using wood glue. Apply a thin, even layer of wood glue to the areas where the pieces will come into contact with each other. Press the pieces firmly against each other to ensure a strong bond. Wipe off any excess glue that seeps out. Allow the glue to dry thoroughly according to the manufacturer’s instructions.

Allowing the Glue to Dry

Patience is key when allowing the wood glue to dry. Follow the recommended drying time provided by the manufacturer to ensure a secure and durable bond. It’s important to resist the temptation to handle the driftwood cross while the glue is still drying, as this may compromise the integrity of the construction.

Sanding and Shaping

Smoothing Rough Edges

After the wood glue has fully dried, it’s time to sand the driftwood cross to achieve a polished and cohesive look. Use sandpaper to smooth out any rough edges or imperfections. Start with a coarser grade sandpaper to remove any larger bumps or rough surfaces, gradually moving to a finer grade for a smoother finish. Pay attention to every angle and curve of the driftwood cross to ensure a consistent texture.

Creating Texture and Dimension

To add visual interest and dimension to your driftwood cross, consider creating texture in certain areas. You can achieve this by using sandpaper or a carving tool to etch lines or grooves into the driftwood. This technique adds depth and creates a more dynamic appearance. Experiment with different textures and patterns to find the one that best complements your design.

Removing Splinters

As you work with the driftwood, you may encounter splinters or rough spots that could potentially cause injury. Take the time to carefully remove any splinters using sandpaper or a sanding block. Pay close attention to the areas where the driftwood may come into contact with skin or other surfaces. By ensuring a smooth and splinter-free surface, you enhance both the safety and aesthetic appeal of your driftwood cross.

Driftwood Cross Art

This image is property of images.unsplash.com.

Painting and Decorating

Choosing Paint Colors and Techniques

Once the driftwood cross is sanded to your satisfaction, you may choose to add a splash of color to enhance its visual appeal. Acrylic paint is an excellent choice for this purpose as it adheres well to wood surfaces. Select paint colors that align with your desired aesthetic or consider using a color palette that complements the space where you plan to display the artwork. Experiment with different painting techniques, such as dry brushing or blending, to create unique effects and textures.

Adding Patterns, Designs, or Symbols

To further personalize your driftwood cross, consider adding patterns, designs, or symbols. This is an opportunity for you to incorporate elements that hold personal meaning or align with your artistic style. You can hand-paint intricate designs, stencils, or even use decals to create patterns. Let your creativity shine through as you embellish your driftwood cross with meaningful and visually captivating elements.

Creating a Weathered or Distressed Look

If you prefer a more weathered or distressed look for your driftwood cross, there are various techniques you can employ. Tackle this effect by applying a base coat of paint and then lightly sanding certain areas to expose the natural wood underneath. You can also use techniques such as dry brushing or applying a wash of diluted paint to create an aged appearance. Experiment with different approaches until you achieve the desired weathered effect.

Optional Finishing Touches

Applying a Sealer or Varnish

Adding a sealer or varnish to your driftwood cross is an optional step but can significantly enhance its longevity and appearance. Choose a sealer or varnish specifically formulated for wood surfaces and apply it according to the manufacturer’s instructions. The sealer or varnish will protect the driftwood from potential moisture damage and provide a lustrous finish, further highlighting the natural beauty of the wood.

Adding Decorative Elements (e.g., shells, beads)

To add extra charm and character to your driftwood cross, consider incorporating decorative elements. Shells, beads, or other small trinkets can be attached to the driftwood using a strong adhesive or by drilling small holes for stringing materials. These added embellishments can enhance the coastal or organic theme of your driftwood cross, making it a truly unique and eye-catching piece of artwork.

Attaching a Hanger or Stand

To display your driftwood cross, you may need to attach a hanger or stand. If you plan on hanging it on a wall, attach a hanger to the back of the cross using screws or strong adhesive. If you prefer a tabletop or shelf display, find or create a stand that will support the weight and size of your driftwood cross. Ensure that the hanger or stand is securely attached to prevent any accidents or damage to the artwork.

Driftwood Cross Art

Display and Care

Choosing the Right Display Location

When deciding where to display your driftwood cross, consider both aesthetic and practical factors. Choose a location that allows the artwork to be appreciated visually and harmonizes with the overall theme and style of the space. Ensure that the driftwood cross is positioned securely and is not at risk of being knocked over or damaged by accidental contact.

Avoiding Direct Sunlight or Moisture

To preserve the integrity and beauty of your driftwood cross, it’s important to avoid prolonged exposure to direct sunlight or moisture. Direct sunlight can cause fading and discoloration over time, while moisture can lead to rot or decay. Choose a display location that protects the artwork from these potentially damaging elements and periodically inspect it for any signs of deterioration.

Cleaning and Dusting the Driftwood Cross

Regular maintenance is important to keep your driftwood cross looking its best. While driftwood is relatively low-maintenance, it still requires occasional cleaning and dusting. Gently dust the surface of the driftwood using a clean, soft cloth or a feather duster. If more thorough cleaning is needed, use a damp cloth or sponge and mild soap to wipe away any dirt or grime. Avoid using harsh chemicals or abrasives that could damage the driftwood or paintwork.

Ideas and Inspiration

Different Cross Shapes and Sizes

Embrace your creativity by exploring different cross shapes and sizes for your driftwood cross art. From traditional crosses to abstract or contemporary designs, the possibilities are endless. Experiment with variations in length, width, and overall structure to create a unique and captivating centerpiece for your space.

Incorporating Other Natural Materials

Don’t limit yourself to using only driftwood in your creations. Expand your artistic horizons by incorporating other natural materials such as seashells, sea glass, or even feathers. By combining different elements, you can create visually stunning driftwood crosses that showcase the beauty of nature in all its forms.

Themed or Seasonal Driftwood Crosses

For special occasions or to celebrate different seasons, consider designing themed or seasonal driftwood crosses. Incorporate colors, symbols, or motifs that correspond to the specific theme or season. For example, you could create a driftwood cross adorned with flowers and pastel colors for spring or one with warm autumn hues and leaf patterns for fall. Let your imagination run wild and infuse your driftwood crosses with the spirit of any occasion or time of the year.

In conclusion, driftwood cross art is a wonderful and fulfilling way to express your creativity and love for nature. By carefully selecting, preparing, and assembling driftwood pieces, you can create unique and meaningful artworks that bring a touch of natural beauty to any space. Whether you choose to leave the driftwood cross in its natural state or add your personal artistic touch with paint and decorations, the end result will be a stunning piece that reflects your individual style. Remember to experiment, explore different techniques and designs, and most importantly, enjoy the process of creating your very own driftwood cross art.

Driftwood Cross Art

Filed Under: Driftwood Ideas Tagged With: Art, cross, Driftwood

Driftwood Art Diy Creative

March 21, 2024 by admin

Imagine transforming ordinary pieces of driftwood into stunning works of art. With Driftwood Art Diy Creative, you can unleash your creative side and turn nature’s treasures into unique and captivating pieces. From sculptures to wall decor, this innovative DIY project allows you to breathe new life into forgotten driftwood and create masterpieces that reflect your personal style. Get ready to embrace the beauty of nature and let your creativity run wild with Driftwood Art Diy Creative.

Introduction

What is driftwood art?

Driftwood art is the creative practice of using natural pieces of wood that have been washed up on beaches or riversides to create beautiful and unique sculptures, wall art, furniture, and home decor pieces. These driftwood pieces are often weathered, worn, and have a distinct rustic charm that adds character to any space.

Why choose DIY driftwood art?

Choosing to engage in DIY driftwood art can be a rewarding and fulfilling experience. Not only does it allow you to tap into your creative side, but it also provides a sense of accomplishment when you see the finished result of your own craftsmanship. DIY driftwood art also gives you the freedom to personalize your creations and tailor them to match your specific taste and style.

Benefits of driftwood art

Driftwood art offers a range of benefits, both aesthetically and practically. From a visual standpoint, driftwood pieces bring a touch of nature indoors and can create a soothing and calming ambiance in any space. The natural textures and unique shapes of driftwood add a rustic and organic element to your decor. Additionally, driftwood art is an eco-friendly way to repurpose and utilize materials found in nature, reducing waste and promoting sustainability. By engaging in driftwood art, you can also develop new skills and enhance your creativity, all while enjoying a fun and fulfilling hobby.

Finding and Preparing Driftwood

Searching for driftwood

Finding driftwood to use in your art projects can be an exciting and adventurous task. The best places to search for driftwood are beaches, riverbanks, and lakeshores, where the wood has been naturally weathered and worn by the water over time. Keep an eye out for interesting shapes, unique textures, and pieces that are free from rot and decay. Remember to always respect local regulations and guidelines when collecting driftwood and ensure that you are not disturbing any protected areas or ecosystems.

Cleaning and treating driftwood

Before using driftwood in your art projects, it is essential to clean and treat the wood to ensure its longevity and cleanliness. Start by removing any loose debris, sand, or dirt by brushing or rinsing the pieces with water. For a deeper clean, soak the driftwood in a solution of water and white vinegar to remove any bacteria or algae buildup. After cleaning, let the driftwood dry completely before proceeding to the next step.

Preparing the surface

To prepare the surface of the driftwood for painting or other decorative techniques, gently sand the wood using fine-grit sandpaper. This will help smooth out rough edges and create a clean canvas for your artistic endeavors. Once the surface is sanded, wipe away any dust with a damp cloth before adding your desired finish or treatment.

Driftwood Art Diy Creative

This image is property of images.pexels.com.

Basic Tools and Materials

Essential tools for driftwood art

To get started with driftwood art, there are a few essential tools you will need. These include:

  • Sandpaper: Used for smoothing rough edges and preparing the surface.
  • Jigsaw or handsaw: A saw is necessary for cutting the driftwood into desired shapes and sizes.
  • Drill: Helpful for creating holes or adding details to the driftwood.
  • Clamps: Used to hold pieces of driftwood together while assembling sculptures or structures.
  • Paintbrushes: Needed for applying paint or other finishes to the driftwood.
  • Glue gun or wood glue: Used to secure pieces together in sculptures or wall art.

Recommended materials

In addition to the tools mentioned above, there are several materials that can enhance your driftwood art pieces:

  • Acrylic paints: Provide vibrant colors and can be used to add unique designs or patterns to the driftwood.
  • Varnish or sealant: Helps protect the driftwood from moisture and adds a glossy or matte finish.
  • Decorative elements: Consider adding shells, beads, or other small items to embellish your driftwood creations.

Safety precautions

When engaging in any DIY activity, it’s important to prioritize safety. Here are a few safety precautions to keep in mind while working on driftwood art:

  • Wear protective goggles and gloves to protect your eyes and hands from debris or splinters.
  • Work in a well-ventilated area or wear a mask to avoid inhaling any dust or fumes.
  • Use caution when handling sharp tools, such as saws or drills. Follow proper tool usage guidelines and keep them out of reach of children.

Driftwood Sculptures

Creating a driftwood sculpture

Driftwood sculptures are a popular form of driftwood art, allowing you to transform natural pieces of wood into unique and eye-catching masterpieces. To create a driftwood sculpture, start by brainstorming ideas or sketches of the design you envision. Consider the shape and size of the driftwood pieces you have and how they can fit together harmoniously. Using a jigsaw or handsaw, carefully cut the driftwood into the desired shapes. Remember to always exercise caution and use protective equipment when handling sharp tools. Once the pieces are cut, use a drill or glue gun to secure them together, building up the structure of your sculpture. Finally, add any additional embellishments or decorative elements to complete the piece.

Choosing the right design

When choosing a design for your driftwood sculpture, the sky is the limit. You can opt for abstract and modern designs, animal or nature-inspired sculptures, or even human forms. Consider the overall aesthetic of your space and choose a design that complements it. Additionally, think about the size and scale of the sculpture in relation to the room in which it will be displayed. A larger sculpture might make a bold statement as a centerpiece, while smaller sculptures can be grouped together for a visually appealing arrangement.

Assembling the pieces

Assembling driftwood pieces in a sculpture requires careful planning and consideration. Start by arranging the pieces on a flat surface to get an idea of how they will fit together. Experiment with different layouts until you find a composition that you are satisfied with. Once you have your desired arrangement, use a drill or glue gun to secure the pieces together. Apply the adhesive sparingly to ensure a strong bond without overwhelming the natural beauty of the driftwood. Allow the sculpture to dry or cure completely before moving or displaying it.

Driftwood Art Diy Creative

This image is property of images.pexels.com.

Driftwood Wall Art

Creating driftwood wall art

Driftwood wall art is a wonderful way to add a natural and rustic element to your walls. To create driftwood wall art, start by selecting a large, sturdy piece of driftwood as the base of your artwork. This will serve as the foundation for the other smaller driftwood pieces. Once you have your base, gather other interesting and visually appealing driftwood pieces to arrange on top. Play with different shapes and sizes until you achieve a composition that you love. Use a drill or glue gun to attach the smaller pieces to the base securely.

Design ideas and inspiration

The design possibilities for driftwood wall art are endless. You can create abstract patterns and arrangements, nature-inspired scenes, or even incorporate other materials such as shells or rope for added texture. Consider the color scheme of your space and choose driftwood pieces that complement it. You can also play with different orientations, such as arranging the driftwood vertically or in a diagonal pattern. Look for inspiration in nature, art, and design magazines or explore online platforms dedicated to driftwood art for ideas and guidance.

Adding embellishments

To take your driftwood wall art to the next level, consider adding embellishments or decorative elements. Shells, beads, or small pieces of colored glass can be glued onto the driftwood to add visual interest and further enhance the natural beauty of the piece. You can also incorporate other materials, such as rope or wire, to create unique textures or three-dimensional effects. Experiment with different combinations and techniques, always keeping in mind the overall aesthetic and style you wish to achieve.

Functional Driftwood Crafts

Making driftwood furniture

Creating driftwood furniture pieces can be a rewarding way to showcase your craftsmanship and add functionality to your space. Start by choosing a sturdy and solid piece of driftwood as the main component of your furniture piece. This could be a large, flat piece for a tabletop or a thick, substantial piece for a bench or stool. Once you have your base, gather additional driftwood pieces to use as legs or supports. Cut the driftwood pieces to the desired length using a saw and secure them to the base using a drill or strong adhesive. Finish off the piece by sanding the surfaces and adding a protective sealant for durability.

Creating driftwood jewelry hangers

Driftwood jewelry hangers are not only practical but also serve as unique and decorative pieces for organizing and displaying your jewelry collection. To create a driftwood jewelry hanger, start by finding a long and slender piece of driftwood. Sand the surface to create a smooth finish and remove any rough edges. Attach small hooks or nails to the driftwood at regular intervals using a drill or glue gun. These hooks or nails will serve as hangers for your necklaces, bracelets, and earrings. Consider the spacing and arrangement of the hooks to accommodate different types of jewelry. Hang your finished jewelry hanger on a wall or from a ceiling using string or screws.

Driftwood candle holders

Driftwood candle holders add a cozy and natural touch to any space. To create a driftwood candle holder, start by choosing a thick and sturdy piece of driftwood. Using a drill bit that matches the diameter of your candles, carefully drill holes into the driftwood, leaving enough space between each hole for safe and proper candle burning. Make sure the holes are deep enough to securely hold the candles upright. Sand the surface of the driftwood and wipe away any debris. You can choose to leave the driftwood in its natural state or stain and seal it to enhance its appearance. Place your favorite candles into the drilled holes and enjoy the warm glow they provide.

Driftwood Art Diy Creative

This image is property of images.pexels.com.

Driftwood Mobiles and Wind Chimes

Crafting a driftwood mobile

Driftwood mobiles are a captivating and whimsical addition to any space. To create a driftwood mobile, gather several small to medium-sized pieces of driftwood with interesting shapes and textures. Attach a string or fishing line to each driftwood piece, making sure they are securely tied. Attach the other end of the string to a central ring or branch, creating a balanced and visually appealing arrangement. Consider incorporating other elements into your mobile, such as shells, feathers, or small decorative objects, to add variety and movement. Hang your driftwood mobile from the ceiling or a tree branch, where it can catch the breeze and spin gently.

Designing a driftwood wind chime

Driftwood wind chimes not only create beautiful sounds but also serve as decorative elements in outdoor spaces. To design a driftwood wind chime, select several small to medium-sized pieces of driftwood that vary in length. Attach a string or fishing line to each piece, ensuring they are securely tied. Attach the other end of the string to a central ring or rod, spacing each driftwood piece at different intervals to create a visually interesting arrangement. For added musicality, attach small bells or shells to the ends of the strings, creating soothing sounds when the wind blows. Hang your driftwood wind chime in a location where it will catch the breeze and delight your senses.

Adding decorative elements

To truly enhance the visual appeal of your driftwood mobile or wind chime, consider adding decorative elements. This could include small shells, colorful beads, feathers, or other nature-inspired items. These embellishments can add pops of color, texture, and movement to your creations, making them even more eye-catching and unique. Experiment with different combinations and arrangements to create a personalized and visually appealing piece that reflects your style and creativity.

Driftwood Frames and Mirrors

Making a driftwood picture frame

Driftwood picture frames are a charming way to display your favorite photographs or artwork. To make a driftwood picture frame, gather several smaller driftwood pieces that are relatively straight and similar in size. Lay them out in the shape of a rectangle or square, ensuring that the corners align correctly. Use a glue gun or strong adhesive to secure the driftwood pieces together at the corners. After the glue has dried, measure the exact dimensions of your photo or artwork and carefully cut out an opening in the back of the frame using a jigsaw or handsaw. Sand the edges of the opening to create a smooth and clean finish. Insert your photo or artwork into the frame and secure it in place with tape or a small piece of cardboard.

Creating a driftwood mirror

Driftwood mirrors can add a touch of rustic elegance to any room. To create a driftwood mirror, start with a circular or rectangular mirror, preferably one without a frame. Select driftwood pieces that are long enough to frame the mirror adequately. Lay the driftwood pieces around the mirror, experimenting with different arrangements until you find one that you like. Use a glue gun or strong adhesive to attach the driftwood pieces to the edges of the mirror. Apply adhesive sparingly, ensuring it does not seep onto the reflective surface. Once the driftwood is securely in place, inspect the mirror for any loose pieces or gaps, and reinforce as needed. Hang your driftwood mirror on the wall, and enjoy the unique and natural reflection it provides.

Decorating the frame

To further personalize your driftwood frames and mirrors, consider adding additional decorative elements. You can attach small shells, beads, or other embellishments to the driftwood using a glue gun or strong adhesive. These decorative touches can complement the overall design or add pops of color and texture. Additionally, you can choose to stain or paint the driftwood to enhance its appearance or match it to your existing decor. Experiment with different techniques and styles to create a frame or mirror that truly reflects your taste and personality.

Driftwood Art Diy Creative

Driftwood Home Decor

Designing driftwood centerpieces

Driftwood centerpieces are a versatile and visually striking addition to any tabletop or surface. To design a driftwood centerpiece, choose a large and interesting piece of driftwood as the focal point. Place it in the center of a tray or shallow dish, ensuring that it is sturdy and stable. Around the centerpiece, arrange other decorative elements such as candles, small plants, or sea-inspired objects. Keep in mind the overall theme and style you wish to achieve, whether it be nautical, rustic, or contemporary. Experiment with different heights, textures, and colors to create a visually appealing and cohesive centerpiece that complements your space.

Crafting driftwood lamps

Driftwood lamps can create a warm and inviting atmosphere in any room. To craft a driftwood lamp, start with a sturdy piece of driftwood that can serve as the base of the lamp. If needed, sand the surface of the driftwood to create a smooth and clean finish. Attach a lamp kit to the top of the driftwood, following the manufacturer’s instructions. This will involve wiring the lamp socket, attaching the harp and shade, and installing a bulb. Be sure to use proper safety precautions when working with electrical components and consult a professional if needed. Once the lamp kit is installed, place a lampshade of your choice on the harp and plug in the lamp. Enjoy the warm and natural glow that the driftwood lamp provides.

Creating driftwood wall shelves

Driftwood wall shelves are not only functional but also add a touch of nature and rustic charm to your walls. To create a driftwood wall shelf, find a long and sturdy piece of driftwood that can serve as the shelf itself. Using a saw or jigsaw, carefully cut the driftwood to the desired length. While deciding where to place the shelf on your wall, mark the mounting points on the driftwood and install wall brackets or sturdy hooks accordingly. Once the brackets are securely mounted on the wall, position the driftwood shelf onto them. Ensure that the shelf is level and can hold the desired weight before placing any items on it. Use the driftwood shelf to display favorite books, small plants, and other decorative items to further enhance the natural beauty.

Tips and Tricks for Stunning Driftwood Art

Enhancing the natural beauty of driftwood

To enhance the natural beauty of driftwood, consider leaving it in its raw, weathered state instead of painting or staining it. Highlight the unique textures and grains of the wood by gently sanding the surface and adding a clear sealant or oil for protection. This will allow the natural colors and patterns of the driftwood to shine through and add a touch of authenticity to your art pieces.

Adding color and texture

If you prefer to add color to your driftwood art, consider using acrylic paints or stains. Experiment with different techniques, such as dry brushing or layering, to create interesting textures and patterns on the driftwood surface. You can also choose to paint the entire piece or add accents and details for a more subtle touch of color.

Sealing and preserving driftwood

To ensure the longevity of your driftwood art, it’s important to seal and preserve the wood properly. Apply a clear varnish or sealant to the surface of the driftwood to protect it from moisture, dust, and other environmental factors. This will help maintain the integrity and beauty of the wood for years to come. Additionally, if using the driftwood outdoors, opt for a sealant that is weather-resistant and offers UV protection to prevent fading and damage from the sun.

Driftwood art is a wonderful way to express your creativity and bring the beauty of nature into your home. From sculptures and wall art to functional crafts and home decor, the possibilities are endless. By following these tips, utilizing the right tools and materials, and letting your imagination soar, you can create stunning driftwood art pieces that will captivate and inspire. So go ahead, gather some driftwood, unleash your creativity, and embark on this exciting DIY journey.

Driftwood Art Diy Creative

Filed Under: Driftwood Ideas Tagged With: Art, Creative, DIY, Driftwood

Driftwood And Ceramic Art

March 21, 2024 by admin

Imagine a world where nature and creativity converge in beautiful harmony. Driftwood and ceramic art effortlessly blend together, forming unique and captivating pieces that capture the essence of both materials. From delicate sculptures to intricate wall hangings, this art form weaves together two unlikely mediums, creating stunning masterpieces that evoke a sense of wonder and intrigue. Delve into the world of driftwood and ceramic art, where the natural and the man-made come together to create something truly extraordinary.

Driftwood And Ceramic Art

This image is property of images.unsplash.com.

Introduction to Driftwood and Ceramic Art

Welcome to the world of driftwood and ceramic art! These two artistic mediums possess a unique charm and appeal that have captivated artisans and art enthusiasts alike. In this article, we will delve into the intricacies and beauty of driftwood and ceramic art, exploring their definitions, characteristics, techniques, notable artists, and their symbolic significance.

Driftwood Art

Definition and characteristics of driftwood art

Driftwood art harnesses the natural beauty of weathered and worn wood pieces found along shorelines and rivers. It involves the creation of sculptures, installations, and other art forms using these unique organic materials. What sets driftwood art apart is its ability to showcase the inherent character and texture of each piece, which has been shaped by the rhythm of water and the passage of time.

Types of driftwood used in art

Various types of driftwood can be used in art, depending on the artist’s preference and the desired outcome. Common types include pine, cedar, oak, and maple. Each variety possesses distinct grain patterns, colors, and textures, allowing artists to explore and express their creativity in diverse ways.

Techniques and tools for creating driftwood art

Creating driftwood art requires a combination of artistic vision and skilled craftsmanship. Artists may employ techniques such as carving, sanding, and sculpting to transform raw driftwood into stunning works of art. Tools such as chisels, saws, sandpaper, and wood sealants are commonly utilized throughout the artistic process, enabling artists to shape driftwood into intricate forms while preserving its natural beauty.

Famous artists known for their driftwood creations

The art world is adorned with numerous talented artists who have made their mark creating awe-inspiring driftwood art. One notable artist is Heather Jansch, renowned for her life-sized driftwood horse sculptures that exude a sense of power and grace. Jeffro Uitto is another prominent driftwood artist, known for his intricate and fantastical driftwood sculptures. These artists, among others, have pushed the boundaries of what driftwood art can achieve, captivating audiences worldwide.

Ceramic Art

Definition and characteristics of ceramic art

Ceramic art is a timeless artistic discipline characterized by the use of clay and other ceramic materials in the creation of pottery, sculptures, and decorative objects. The versatility of ceramics allows for diverse artistic expressions, ranging from delicate and refined porcelain pieces to bold and earthy stoneware forms. Ceramic art harnesses the transformative power of heat and kiln firing, resulting in durable and often exquisite artworks.

Types of ceramics used in art

Ceramic art encompasses a wide array of materials, each with its unique properties and artistic possibilities. Clay varieties such as porcelain, earthenware, stoneware, and terracotta offer different levels of plasticity, firing temperatures, and surface finishes. Additionally, artists may incorporate glazes, oxides, and other pigments to enhance the visual appeal of their creations and create stunning effects.

Techniques and tools for creating ceramic art

The creation of ceramic art involves several techniques that have been refined over centuries. Artists use hand-building techniques like pinching, coiling, and slab construction to shape the clay into desired forms. Another popular technique is wheel-throwing, where the potter uses a spinning wheel to shape the clay. Tools like pottery wheels, clay cutters, modeling tools, and kilns are indispensable in the ceramic art process, enabling artists to mold, sculpt, and fire their creations.

Famous ceramic artists and their notable works

Countless ceramic artists have left an indelible mark on the art world with their skill and creativity. Pablo Picasso, celebrated for his contributions to various art forms, also created remarkable ceramic pieces featuring bold colors and imaginative designs. Beatrice Wood, known as the “Mama of Dada,” is treasured for her elegant and whimsical ceramic vessels. The renowned Japanese artist, Jun Kaneko, is celebrated for his monumental ceramic sculptures that merge tradition and innovation. These artists have played a pivotal role in elevating ceramic art to new heights, inspiring generations of artists to explore the potential of clay as a medium of artistic expression.

Combining Driftwood and Ceramics in Art

Explanation of the artistic process of combining driftwood and ceramics

The convergence of driftwood and ceramics in art yields a mesmerizing fusion of organic and earthy elements. When combined, these materials create a harmony that enhances the visual and tactile experience of the artwork. The process involves securely anchoring ceramic pieces onto carefully selected driftwood, either through adhesives or integrated sculpting techniques. This intricate process demands a thoughtful balance between the fragility of ceramics and the strength and stability of driftwood, resulting in truly captivating artistic compositions.

Examples of artworks that incorporate driftwood and ceramics

Numerous artists have explored the dynamic relationship between driftwood and ceramics, crafting breathtaking artworks that celebrate the beauty of both mediums. For example, artist Michelle Spaw adorned a driftwood branch with delicate porcelain flowers, resulting in an ethereal and romantic sculpture. Another remarkable example is the work of Jason Gamrath, who combines blown glass and driftwood to create stunning botanical installations that blur the boundaries between nature and art. These artworks showcase the transformative power of combining materials, creating unique and thought-provoking pieces that evoke a sense of wonder.

Unique challenges and benefits of using both mediums

Combining driftwood and ceramics presents artists with a set of challenges and rewards. One challenge lies in the delicate nature of ceramics, which require careful handling and attachment to the driftwood base. Additionally, the natural irregularities and contours of driftwood may pose difficulties in achieving a seamless fusion with ceramic elements. However, the use of both mediums opens up a realm of possibilities, enabling artists to explore contrasting textures, colors, and forms. The combination of rigid ceramics and the fluidity of driftwood creates a captivating juxtaposition that enhances the overall aesthetic impact of the artwork.

Symbolism and meaning behind driftwood and ceramic art

Driftwood and ceramic art carry profound symbolism and meaning, connecting with both the natural world and human experiences. Driftwood, weathered by the forces of nature and shaped by time, represents resilience, adaptability, and a connection to the cycles of life. Ceramics, with their enduring qualities and ability to withstand the test of time, symbolize craftsmanship, permanence, and the transmutation of raw materials into objects of beauty. Through the fusion of driftwood and ceramics, artists imbue their creations with a rich tapestry of symbolism that invites viewers to reflect on the interplay between nature, creativity, and the human spirit.

Driftwood And Ceramic Art

This image is property of images.unsplash.com.

Environmental and Sustainability Aspects

Discussion on the ecological impact of driftwood collection

The collection of driftwood must be approached with environmental consciousness. While driftwood naturally occurs in rivers, lakes, and along shorelines, excessive collection can disrupt the ecosystem and damage sensitive habitats. It is crucial for collectors to prioritize responsible and sustainable practices to mitigate any negative impacts on the environment.

Sustainable practices in driftwood art

Artists who work with driftwood can adopt sustainable practices to minimize their ecological footprint. Collecting driftwood from sustainable sources, such as naturally fallen trees or driftwood salvaged from areas where it doesn’t negatively impact the ecosystem, is an ethical approach. Additionally, repurposing or upcycling driftwood that would otherwise be discarded helps reduce waste and environmental impact.

Environmental considerations in ceramic art

Ceramic art also presents unique environmental considerations in its creation. The mining of clay and other raw materials can have significant ecological consequences, including habitat destruction and soil degradation. To mitigate these impacts, artists can choose to work with sustainably-sourced clay and invest in glazes that are free from harmful chemicals. Furthermore, utilizing energy-efficient kilns and implementing recycling and waste reduction practices can further minimize the environmental impact of ceramic art.

Exploration of how driftwood and ceramics contribute to environmental awareness

Driftwood and ceramics, when utilized in art, contribute to environmental awareness by highlighting the beauty and fragility of the natural world. Through their art, artists can raise awareness about environmental issues and inspire viewers to adopt sustainable practices. By using reclaimed materials and promoting responsible collection methods, artists convey the importance of conservation and the need to protect our planet’s resources.

Functional Driftwood and Ceramic Art

Overview of functional art using driftwood and ceramics

Functional art combines aesthetics and utility, transforming everyday objects into extraordinary pieces of art. Driftwood and ceramics offer endless possibilities for functional art, as their unique qualities can be harnessed to create one-of-a-kind items for everyday use. From driftwood furniture and lighting fixtures to ceramic tableware and vases, functional art showcases the fusion of artistic expression and practicality.

Common functional items created with driftwood and ceramics

Artisans have crafted an array of functional items using driftwood and ceramics, infusing them with an artistic flair. Examples include driftwood coffee tables adorned with ceramic tiles, driftwood coat racks with ceramic hooks, and ceramic dishes set onto intricately shaped driftwood bases. These functional art pieces not only serve a practical purpose but also bring a touch of natural beauty and artistic elegance into everyday life.

Utility and aesthetics in functional art

Functional art seamlessly integrates utility and aesthetics, blending practicality and artistic expression. While functional items prioritize usability, the incorporation of driftwood and ceramics elevates their design to new heights. The intricate textures and shapes of driftwood and the sculptural possibilities of ceramics transform functional objects into captivating works of art. As such, functional driftwood and ceramic art imbue daily routines with creativity and beauty, enhancing the perceived value and enjoyment of everyday objects.

Exploration of contemporary functional art trends

Contemporary functional art trends witness a growing appreciation for the unique and handmade. Artists are experimenting with unconventional designs and materials, pushing the boundaries of functionality and aesthetics. Combining driftwood and ceramics in functional art aligns with this trend, offering an organic and earthy sensibility that resonates with individuals seeking distinctive and sustainable pieces for their homes. This trend embraces the imperfections and irregularities inherent in natural materials, celebrating their beauty and authenticity.

Driftwood And Ceramic Art

This image is property of images.unsplash.com.

Driftwood and Ceramic Art as Home Décor

How driftwood and ceramics enhance interior design

Driftwood and ceramics infuse interior design with natural elements and organic textures, making them versatile and visually compelling choices for home décor. Driftwood brings a rustic and coastal charm, showcasing the transformative power of nature, while ceramics offer a broad range of colors, textures, and forms that can be tailored to complement any aesthetic. The combination of driftwood and ceramics creates a harmonious balance between rugged and refined, creating a unique and captivating ambiance.

Tips for incorporating driftwood and ceramic art in different spaces

Incorporating driftwood and ceramic art into different spaces requires thoughtful consideration of the available space, color scheme, and existing décor. Large driftwood sculptures can serve as striking focal points in living rooms or entryways, while smaller driftwood and ceramic installations can add a touch of charm to bathrooms or kitchens. Mixing and matching different sizes, shapes, and styles of driftwood and ceramics within a space creates visual interest and a sense of curated design.

Examples of artistic home decor pieces

Artistic home décor pieces crafted from driftwood and ceramics can transform any living space into a gallery of creativity. Ceramic vases adorned with delicate seashells sit atop intricately shaped driftwood pedestals, providing a captivating centerpiece for a dining room table. Driftwood-framed mirrors with ceramic mosaic inlays add a touch of bohemian elegance to a bedroom or hallway. These unique and handcrafted art pieces invite conversation and inspire a connection to nature within the comfort of one’s own home.

Effects of driftwood and ceramics on atmosphere and ambiance

Driftwood and ceramics have a profound impact on the atmosphere and ambiance of a space. The organic textures of driftwood, combined with the tactile qualities and visually captivating nature of ceramics, impart a sense of warmth, serenity, and a connection to nature. The natural imperfections and irregularities of driftwood and the intricate details of ceramics add depth and character to a room, creating spaces that are not only aesthetically pleasing but also invite a sense of tranquility and contemplation.

Driftwood and Ceramic Art in Commercial Spaces

Application of driftwood and ceramic art in commercial settings

Driftwood and ceramic art find purpose and appeal in commercial settings, enhancing the visual appeal and ambiance of businesses and public spaces. Restaurants, hotels, and retail establishments often incorporate driftwood and ceramic art to create a unique and memorable experience for their customers. From driftwood-adorned walls and sculptures to ceramic installations and tableware, these artistic elements add personality and a touch of artistry to commercial spaces.

Benefits of using this art in businesses and public spaces

Integrating driftwood and ceramic art into commercial spaces offers numerous benefits. These art forms create a distinct and memorable visual identity, setting a business apart from competitors. They also provide a sense of authenticity, evoking a connection to nature and craftsmanship that can resonate profoundly with customers. Furthermore, driftwood and ceramic art foster a sense of tranquility and a positive atmosphere, encouraging customers to linger and engage with the space, ultimately leading to increased customer satisfaction and loyalty.

Case studies of successful commercial projects

Several successful commercial projects have integrated driftwood and ceramic art, demonstrating their transformative power in creating captivating spaces. For example, a seaside restaurant incorporated driftwood elements into its interior design, evoking a coastal ambiance that perfectly complemented its location. A boutique hotel used ceramic art installations to infuse elegance and a sense of artistry into its lobby, inviting guests to immerse themselves in the creative atmosphere. These case studies illustrate how driftwood and ceramics can be harnessed to create immersive and memorable experiences in commercial settings.

Impacts on branding and customer experience

Driftwood and ceramic art within commercial spaces contribute to branding efforts by evoking specific emotions and associations. Whether it be a laid-back coastal vibe or an atmosphere of refined elegance, the presence of artistic elements aligns with a business’s desired brand image. Moreover, the integration of driftwood and ceramic art creates a visually stimulating and immersive environment that enhances the overall customer experience, leaving a lasting impression and fostering a connection between the customer and the business.

Collecting Driftwood and Ceramic Art

Guide on starting a collection of driftwood and ceramic art

Starting a collection of driftwood and ceramic art can be an exciting and rewarding endeavor. Begin by exploring galleries, art shows, and online platforms that feature artists working with these materials. Research and learn about different artists, their techniques, and their artistic philosophies to develop a deep appreciation for their creations. Gradually acquire pieces that resonate with your personal aesthetic and reflect your artistic journey.

Factors to consider when purchasing or collecting

When purchasing or collecting driftwood and ceramic art, several factors should be considered. Take into account the authenticity of the artist’s work by ensuring they have a reputable background and a unique artistic style. Consider the quality of craftsmanship, durability, and longevity of the artwork. Additionally, assess the compatibility of the piece with your personal taste, existing collection, and the space in which it will be displayed.

Maintaining and caring for driftwood and ceramic artworks

Proper care and maintenance are essential to preserving the beauty and integrity of driftwood and ceramic artworks. Dusting driftwood regularly with a soft brush or cloth helps remove debris and prevents accumulation. Ceramic art should be handled with care to avoid accidental breakage. Dusting and occasional cleaning using mild soap and water, specific to the type of ceramic, can help maintain the brilliance and color of the artwork. Displaying these artworks away from direct sunlight and in a stable environment helps protect them from excessive heat, moisture, and temperature fluctuations.

Resale value and investment aspects of collecting

Collecting driftwood and ceramic art can also hold investment value. As artists gain recognition and their bodies of work evolve and mature, the value of their art can appreciate over time. Carefully chosen and well-maintained pieces can become coveted and valuable, both artistically and monetarily. However, the primary value lies in the joy and personal connection one derives from owning and experiencing these unique and meaningful art forms.

Conclusion

Driftwood and ceramic art offer a captivating fusion of nature, craftsmanship, and artistic expression. Whether displayed in homes, commercial spaces, or incorporated into functional items, these art forms enhance our environments and invite us to contemplate our relationship with the natural world. By embracing the beauty of driftwood’s worn textures and the versatility of ceramics, we not only celebrate the artistic endeavors of talented individuals but also deepen our understanding of the profound connections between art, nature, and the human spirit. As we explore and appreciate driftwood and ceramic art, we glimpse the future of these art forms, where creativity continues to intertwine with sustainability, cultural heritage, and the timeless beauty found both in nature and the artist’s imagination.

Filed Under: Driftwood Ideas Tagged With: Art, ceramic, Driftwood

Driftwood And Clay Art

March 21, 2024 by admin

Imagine walking along a picturesque beach, the gentle sea breeze caressing your face as you stumble upon a breathtaking display of creativity. Driftwood and clay art, a unique collaboration of nature and human ingenuity, captivates your senses. This enchanting form of artistic expression combines the delicate beauty of clay with the weathered elegance of driftwood, resulting in intricate and mesmerizing works of art. Each piece tells its own story, inviting you to unravel its secrets and embark on a journey of imagination and wonder. Prepare to be enthralled by the timeless allure of driftwood and clay art.

Driftwood And Clay Art

This image is property of images.pexels.com.

Driftwood Art

Introduction to driftwood art

Driftwood art is a fascinating and unique form of artistic expression that involves creating beautiful sculptures, furniture, and decorative pieces from pieces of wood that have been washed up on shore. The natural, weathered look of driftwood gives it a distinct charm that can add a rustic and organic touch to any space. Whether you’re a seasoned artist or a novice looking to explore your creativity, driftwood art offers endless possibilities for creating stunning and one-of-a-kind pieces.

Choosing driftwood for art projects

When it comes to driftwood art, the first step is to find the perfect piece of wood to work with. A stroll along the beach can be a treasure hunt as you search for unique and interesting shapes and textures. Look for wood that has been naturally weathered by the elements, as this adds character and enhances the overall aesthetic of the finished piece. Pay attention to the texture, color, and size of the driftwood, as these factors will play a significant role in the design and composition of your artwork.

Preparing the driftwood for art

Before you start working with driftwood, it’s important to properly prepare it to ensure that it is clean, stable, and ready for artistic transformation. Begin by scrubbing the wood with a stiff brush to remove any dirt, debris, or loose bark. This will not only enhance the appearance of the wood but also prevent any unwanted pests or mold from thriving. If the driftwood is too large or uneven, you may need to trim or sand it down to achieve the desired shape and smoothness. Finally, consider sealing the wood with a clear wood sealer or varnish to protect it from further weathering and to enhance its natural colors.

Techniques for creating driftwood art

Now that you have your driftwood prepared, it’s time to bring your artistic vision to life. There are various techniques you can employ when creating driftwood art, depending on your style and desired outcome. One popular technique is the assemblage method, which involves combining different pieces of driftwood to create a larger sculpture or wall hanging. Another technique is the carving method, where you can carve intricate designs or patterns directly into the wood. Additionally, you can incorporate other materials such as glass, shells, or metal to add further visual interest and dimension to your artwork. Let your imagination run wild as you experiment with different techniques and styles to create your own unique driftwood masterpiece.

Tips for preserving and maintaining driftwood art

Once you’ve completed your driftwood art piece, it’s essential to take proper care to ensure its longevity and preserve its beauty. Firstly, avoid placing your artwork in direct sunlight or in areas exposed to excessive moisture, as this can cause the wood to fade or deteriorate over time. Regular dusting with a soft cloth or brush will help prevent the accumulation of dirt and grime. If your driftwood art is displayed outdoors, consider reapplying a protective sealant every few years to safeguard it from the elements. Lastly, be mindful of temperature changes, as extreme heat or cold can cause the wood to expand or contract, potentially affecting its structural integrity.

Clay Art

Introduction to clay art

Clay art is an age-old form of artistic expression that involves working with clay to create various sculptures, pottery, and decorative pieces. Clay, with its versatility and pliability, provides a medium that allows artists to explore their creativity and bring their visions to life. From simple hand-molded creations to more intricate and detailed designs, clay art offers endless opportunities to create unique and captivating works of art.

Types of clay used in art

There are several types of clay used in art, each with its own unique properties and characteristics. Earthenware clay is a common choice for beginners as it is easy to work with and tends to be more forgiving. Stoneware clay, on the other hand, is known for its durability and is often used for functional pottery such as cups and bowls. Porcelain clay, with its white and smooth texture, is favored by many artists for its ability to capture delicate details. Each type of clay has different firing and glazing requirements, so it’s important to choose the type that best suits your artistic goals and preferences.

Tools and materials for clay art

To work with clay successfully, you’ll need a range of tools and materials to assist you in the sculpting and molding process. Basic tools include clay modeling tools, a rolling pin or slab roller to flatten the clay, and a pottery wheel for more advanced techniques. Additionally, you’ll need glazes, kilns or ovens for firing the clay, and a variety of brushes and sponges for applying glaze and adding texture. It’s also helpful to have a clean and well-organized workspace where you can comfortably work with the clay and store your materials.

Basic techniques for working with clay

Working with clay requires patience, practice, and an understanding of basic techniques. One common technique is hand-building, which involves using your hands and simple tools to shape and mold the clay. Coiling is another technique where you roll out long, snake-like strands of clay and stack them to create various forms. For those using a pottery wheel, throwing is a technique that involves shaping the clay by hand while it spins on the wheel. Take your time to experiment with these techniques, and don’t be afraid to make mistakes. Remember, clay is a forgiving medium that allows you to easily reshape and modify your creations.

Advanced clay art techniques

As you gain more experience and confidence in working with clay, you can explore advanced techniques to further enhance your artistry. One such technique is sgraffito, where you carve designs or patterns into the clay surface to create texture and visual interest. Another technique is slip casting, which involves pouring liquid clay into plaster molds to create precise and intricate shapes. Additionally, you can experiment with various glazing techniques, such as layering different glazes, using resist methods, or incorporating underglazes for unique color effects. Continually challenge yourself to try new techniques and push the boundaries of your artistic abilities.

In conclusion, both driftwood art and clay art offer unique and fulfilling avenues for artistic expression. Whether you’re drawn to the organic beauty of driftwood or the versatility of clay, these art forms allow you to tap into your creativity and create visually stunning pieces. With careful selection, preparation, and technique, you can embark on a journey of self-expression and create works of art that will captivate and inspire others. So let your imagination soar, gather some driftwood or clay, and start creating your own masterpiece today!

Driftwood And Clay Art

This image is property of images.pexels.com.

Filed Under: Driftwood Ideas Tagged With: Art, Clay, Driftwood

Driftwood Art Cake

March 20, 2024 by admin

Imagine sinking your teeth into a delectable cake that not only satisfies your taste buds but also captivates your eyes with its stunning visual appeal. Enter the enchanting world of Driftwood Art Cake, where edible masterpieces are crafted with meticulous attention to detail. Each creation is inspired by the beauty and distinctive texture of driftwood, bringing a touch of nature’s splendor to your dessert table. The harmonious marriage of artistic craftsmanship and irresistible flavors will leave you indulging in a truly extraordinary culinary experience. Get ready to embark on a journey where art and cake merge seamlessly, creating a feast for both your senses and your soul.

Overview of Driftwood Art Cake

Driftwood art cake is an innovative and creative style of cake decorating that incorporates the use of real driftwood to create stunning and unique cake designs. This form of edible art has gained popularity in recent years, as it combines the beauty of nature with the deliciousness of cake. Driftwood art cake is the perfect option for those looking to add a touch of rustic charm and natural elegance to their special occasions.

Definition of Driftwood Art Cake

Driftwood art cake refers to the technique of using real driftwood as a decorative element on a cake. The driftwood is carefully selected, prepared, and cleaned before being incorporated into the cake design. It adds a unique and organic touch to the cake, making it stand out from traditional cake decorations.

Purpose of Driftwood Art Cake

The purpose of driftwood art cake is to create visually stunning and nature-inspired cake designs. It offers a one-of-a-kind aesthetic that allows individuals to bring the beauty of the outdoors indoors, making any occasion feel more special and memorable. Driftwood art cake is often used for weddings, birthdays, and anniversaries, but it can be customized for any special event or celebration.

History of Driftwood Art Cake

The history of driftwood art cake can be traced back to the growing trend of incorporating natural elements in cake decorating. With the rise of rustic and bohemian-themed weddings and events, cake designers began experimenting with unconventional materials to create unique cake designs. Driftwood, with its weathered texture and organic shapes, quickly became a popular choice among cake artists who sought to bring a touch of natural beauty to their creations. Over time, driftwood art cake has evolved into a distinct style of cake decorating that continues to captivate and delight cake enthusiasts worldwide.

Creation Process

Creating a driftwood art cake requires several steps, from the selection and preparation of driftwood to the actual baking and decoration of the cake.

Selection of Driftwood

The first step in the creation process is to carefully select the right pieces of driftwood. It is important to choose driftwood that is sturdy and durable, as it will be supporting the weight of the cake. Look for pieces with interesting textures and shapes that will add visual interest to the design. It is also essential to ensure that the driftwood is clean and free from any potential contaminants that could pose a risk to food safety.

Preparation of Driftwood

Before incorporating the driftwood into the cake, it must be properly prepared. This involves cleaning the driftwood thoroughly to remove any dirt, debris, or potential sources of contamination. Additionally, the driftwood may need to be treated to remove any lingering odors or insects. Some cake artists choose to preserve the natural look of the driftwood, while others opt to paint or seal the wood with edible products to enhance its appearance and ensure food safety.

Cake Baking and Decoration

Once the driftwood is prepared, it is time to bake the cake. The cake can be any flavor and size, depending on personal preference and the requirements of the occasion. After the cake is baked and cooled, it is time to apply the frosting and decorate the cake. The driftwood pieces should be strategically placed on top, around the sides, or even cascading down the cake to create a visually stunning effect. Additional decorations such as flowers, seashells, or edible glitter can also be added to complement the driftwood and enhance the overall design.

Driftwood Art Cake

This image is property of images.unsplash.com.

Inspiration and Design

When it comes to designing a driftwood art cake, there are various themes and inspirations to choose from. Here are some popular ideas to get your creative juices flowing:

Natural Themes

Designing a driftwood art cake with a natural theme allows you to showcase the raw beauty of the driftwood. Incorporate elements such as flowers, foliage, or even small figurines to create a harmonious and earthy aesthetic. This theme is perfect for outdoor weddings or nature-inspired events.

Beach and Coastal Themes

Capture the essence of the beach and coastal vibes by designing a driftwood art cake that embodies the serenity of the ocean. Use driftwood pieces alongside seashells, edible coral, or even edible goldfish to create a whimsical and nautical-inspired cake design.

Forest and Nature Themes

For those who adore the enchantment of the forest, creating a driftwood art cake with forest and nature themes will bring the magic to life. Add edible moss, animal figurines, or even sugar flowers to create a fairy tale-like atmosphere that is sure to captivate your guests.

Types of Driftwood Used

When it comes to driftwood art cake, there are various types of driftwood that can be used to achieve different looks and aesthetics.

Different Wood Species

The choice of wood species for driftwood art cake will greatly impact the overall appearance of the cake. Common types of wood used include cedar, cypress, and oak, each with its own distinctive texture and color. Experiment with different wood species to find the perfect match for your desired cake design.

Aged vs. Fresh Driftwood

The choice between using aged or fresh driftwood is largely based on personal preference and the desired aesthetic. Aged driftwood tends to have a more weathered and worn appearance, adding a rustic and vintage feel to the cake design. Fresh driftwood, on the other hand, offers a cleaner and brighter look, perfect for contemporary or minimalist cake designs.

Size and Shape Variations

Driftwood comes in a variety of sizes and shapes, allowing for endless possibilities in cake design. From small, delicate twigs to larger, more dramatic pieces, there is driftwood available to suit every design idea. Consider the size and shape of the cake when selecting the driftwood to ensure a balanced and visually pleasing composition.

Driftwood Art Cake

This image is property of images.unsplash.com.

Tools and Materials

To successfully create a driftwood art cake, it is essential to have the right tools and materials at your disposal.

Driftwood Selection Tools

When selecting driftwood, it is helpful to have tools such as tweezers, tongs, or small pliers to handle and examine the pieces. These tools will allow you to assess the texture, stability, and cleanliness of the driftwood more effectively.

Cleaning and Treating Materials

To clean and prepare the driftwood, you will need materials such as a soft brush or cloth, mild detergent, and water. These items will help you remove any dirt or impurities from the wood surface, ensuring it is safe to use on the cake.

Cake Baking and Decorating Tools

Of course, a successful driftwood art cake also requires the usual cake baking and decorating tools. These may include mixing bowls, measuring cups, spatulas, piping bags, and various cake decorating tips. Having a well-stocked kitchen with the necessary equipment will make the cake creation process easier and more enjoyable.

Tips for Beginners

If you are new to driftwood art cake, here are some helpful tips to get you started:

Start with Small Projects

Begin by working on smaller cakes or even cupcakes to practice your driftwood art cake skills. This will allow you to become familiar with handling and incorporating driftwood into the design without feeling overwhelmed.

Choose Suitable Driftwood

When starting out, opt for driftwood pieces that are more uniform in size and shape. This will make it easier to create a balanced and visually appealing cake design. As you gain more experience, you can experiment with larger or more unconventional driftwood pieces.

Experiment with Different Techniques

Driftwood art cake allows for endless creativity and experimentation. Try different techniques such as painting the driftwood with edible colors, incorporating other natural elements like flowers or succulents, or even adding small LED lights to create a mesmerizing effect. The more you explore different techniques, the more unique and personalized your driftwood art cakes will become.

Driftwood Art Cake

This image is property of images.unsplash.com.

Precautions and Safety

While driftwood art cake can be a beautiful addition to any celebration, it is important to keep safety considerations in mind.

Handling Driftwood Safely

When handling driftwood, it is crucial to wear protective gloves to avoid splinters or injuries. Be cautious of sharp edges or protruding nails that may be present in the wood. Additionally, ensure that the driftwood is properly cleaned and treated to avoid any potential health hazards.

Ensuring Food Safety

Food safety is of utmost importance when creating driftwood art cake. Ensure that the driftwood used is food-safe and free from any harmful chemicals. It is also essential to clean and sanitize any tools or surfaces that come into contact with the cake to prevent contamination.

Avoiding Harmful Chemicals

When treating or painting the driftwood, be mindful of the materials used. Use edible food coloring or paints that are specifically designed for cake decorating. Avoid using any harmful chemicals or substances that may compromise the safety of the cake.

Challenges and Prevalent Issues

While creating driftwood art cakes can be a rewarding experience, there are a few challenges and prevalent issues that may arise.

Wood Fragments on Cake

One common issue when using driftwood on cakes is the potential for wood fragments or splinters to fall onto the cake. To prevent this, ensure that the driftwood is securely attached to the cake using edible glue or frosting. Additionally, avoid using driftwood pieces with loose bark or splinter-prone surfaces.

Stability and Balance

Due to the weight and texture of the driftwood, ensuring stability and balance in the cake design can be challenging. It is important to strategically place the driftwood pieces in areas that provide support and balance to the overall structure. Consider using dowels or other support systems for larger or more elaborate cake designs.

Preserving the Driftwood Art

Over time, driftwood may naturally deteriorate or become damaged. To preserve the beauty of the driftwood art cake, it is recommended to store the cake in a cool, dry place and avoid exposing it to direct sunlight or excessive moisture. This will help maintain the integrity of the driftwood and prolong the lifespan of the edible art.

Driftwood Art Cake

Popular Driftwood Art Cake Themes

Driftwood art cakes offer endless possibilities for themed designs. Here are a few popular themes that you can explore:

Tropical Paradise

Transport your guests to a tropical paradise with a driftwood art cake inspired by lush foliage, vibrant flowers, and exotic fruits. This theme is perfect for summer parties, beach weddings, or any occasion that calls for a touch of the tropics.

Underwater Wonderland

Bring the enchantment of the ocean to life with an underwater wonderland driftwood art cake. Incorporate edible seashells, coral, and colorful marine creatures to create a mesmerizing cake design that will make a splash at any event.

Mystical Forest

Create an ethereal and enchanting atmosphere with a driftwood art cake inspired by mystical forests. Use edible moss, sugar flowers, and delicate fairy figurines to evoke a sense of wonder and magic. This theme is perfect for whimsical weddings or fantasy-themed celebrations.

Special Occasions

Driftwood art cakes are not limited to specific events or celebrations. They can be customized to suit various special occasions:

Weddings

Driftwood art cakes are particularly popular for rustic, beach, or bohemian-style weddings. They add a touch of natural beauty and elegance to the wedding reception, becoming a focal point and conversation starter among guests.

Birthdays

Celebrate birthdays in style with a unique driftwood art cake. Whether it’s a milestone birthday or a simple gathering of loved ones, a themed driftwood cake will make the occasion extra special and memorable.

Anniversaries

Commemorate a special anniversary with a driftwood art cake that reflects the couple’s journey. Incorporate elements such as initials, dates, or symbols that hold sentimental value, making the cake a meaningful centerpiece for the celebration.

In conclusion, driftwood art cake offers a delightful and creative way to elevate any special occasion. With its unique blend of natural beauty and edible artistry, driftwood art cake is sure to captivate and impress guests. Embrace your creativity, explore different themes and techniques, and discover the joy of creating stunning and delicious driftwood art cakes.

Driftwood Art Cake

Filed Under: Driftwood Ideas Tagged With: Art, cake, Driftwood

Driftwood Art Crafts

March 20, 2024 by admin

Imagine a world where nature and creativity seamlessly merge to create breathtaking pieces of art. Driftwood Art Crafts embodies this imagination, crafting mesmerizing pieces that capture the essence of the natural world. Through the skilled hands of talented artists, driftwood is transformed into unique sculptures, dazzling wall hangings, and captivating home decor. With a focus on sustainability and a passion for bringing the outdoors inside, Driftwood Art Crafts brings a touch of rustic beauty into any space. Prepare to be enchanted by the allure of driftwood art crafts as you embark on a journey through their awe-inspiring creations.

Driftwood Art Crafts

This image is property of images.unsplash.com.

What is Driftwood?

Driftwood refers to pieces of wood that have been washed up on shore by the tide or current, typically found along coastlines, rivers, and lakes. It is characterized by its smooth texture and weathered appearance, having been exposed to the elements for an extended period of time. Driftwood can come from a variety of sources, such as fallen trees, branches, and even man-made structures like docks and boats. Due to its unique qualities, driftwood has become a popular material for artists and crafters to create beautiful and unique pieces of art.

Definition of Driftwood

Driftwood is defined as wood that has been washed up on shore by water and has been shaped and smoothed by the natural action of the elements. It is usually found in coastal areas but can also be found along riverbanks and shores of lakes. Driftwood can vary in size, ranging from small twigs to large logs, and can be found in a variety of shapes and colors depending on its origin and exposure to different conditions.

How is it formed?

Driftwood is formed when trees or branches fall into bodies of water, such as rivers or oceans, and are then carried downstream by the current or tide. The wood is then subjected to various natural forces like wind, waves, and erosion, which gradually shape and smooth its surface. Over time, the bark and outer layers of the wood may be worn away, leaving behind a polished and weathered appearance. Driftwood can take years or even decades to reach the shore, depending on factors such as the size of the water body and the strength of the currents.

Common Sources of Driftwood

Driftwood can come from a variety of sources, both natural and man-made. Fallen trees and branches are one of the most common sources of driftwood. These can be trees that have been uprooted by strong winds or have fallen due to natural decay. Logs and timber from logging operations may also end up in rivers or lakes, eventually becoming driftwood. In addition, man-made structures like docks, piers, and boats can contribute to the formation of driftwood if they become damaged or abandoned and are left to deteriorate in the water.

Introduction to Driftwood Art Crafts

Driftwood art crafts involve using pieces of driftwood as the primary material to create various artistic and decorative items. Over the years, driftwood has gained popularity as a medium for artistic expression due to its unique textures, shapes, and colors. From sculptures to wall art, driftwood crafts offer a captivating combination of nature and creativity.

History of Driftwood Art Crafts

The history of driftwood art crafts can be traced back to ancient civilizations that lived near bodies of water. In coastal communities, where driftwood was abundant, people discovered the aesthetics and practicality of using driftwood for artistic purposes. They began to shape and carve driftwood into sculptures and everyday objects, showcasing the beauty of the natural material. In modern times, driftwood art crafts have evolved into a popular form of expression, with artists pushing the boundaries of creativity by incorporating driftwood into various art forms.

Why is it Popular?

Driftwood art crafts have gained popularity for several reasons. Firstly, the weathered appearance of driftwood gives it a unique and rustic charm that cannot be replicated with other materials. Each piece of driftwood has its own story to tell, showcasing the power of nature and the passage of time. Secondly, working with driftwood allows artists to connect with nature and incorporate its beauty into their creations. Finally, driftwood is a sustainable and eco-friendly material since it is sourced from natural sources and repurposed instead of being discarded.

Various Forms of Driftwood Art Crafts

Driftwood can be used to create a wide range of art and crafts. Some popular forms of driftwood art crafts include sculptures, wall art, mobiles, jewelry, and home decor items. The versatility of driftwood allows artists to explore their creativity and create unique and visually appealing pieces that capture the essence of nature. Each form of driftwood art craft offers a different way to showcase the natural beauty of driftwood and transform it into stunning works of art.

Finding and Preparing Driftwood

Before starting any driftwood art craft project, it is important to find and prepare the right pieces of wood. Here are some tips for finding and preparing driftwood:

Where to Find Driftwood

Driftwood can be found in a variety of locations, depending on your geographical area. Coastal areas are known for their abundance of driftwood, with beaches and shorelines being prime locations for finding driftwood. Inland, rivers, lakes, and even streams can also yield driftwood. Public parks and nature reserves are good places to start your search for driftwood, as they often have designated areas where driftwood accumulates.

Choosing the Right Driftwood

When selecting driftwood for your art craft project, consider the size, shape, and condition of the pieces. Look for wood that is sturdy and free from rot or insect damage. Consider the overall shape of the wood and how it might fit into your desired project. Driftwood with interesting textures, knots, and curves can add character and visual interest to your art craft. It’s also important to ensure that the driftwood has been thoroughly dried to prevent mold or decay.

Cleaning and Preparing Driftwood

Before using driftwood in your art craft, it is essential to clean and prepare it properly. Start by removing any loose debris, such as sand, shells, or seaweed, using a soft brush or cloth. If the driftwood appears dirty or dull, you can gently rinse it with water and a mild detergent. Avoid using harsh chemicals or bleach, as they can damage the wood. Once clean, allow the driftwood to dry completely before using it in your art craft project.

Popular Driftwood Art Crafts

Driftwood offers endless possibilities for creative expression. Here are some popular forms of driftwood art crafts:

Driftwood Sculptures

Driftwood sculptures involve creating three-dimensional forms by assembling and shaping pieces of driftwood. Artists can let the natural shapes and curves of the wood guide their design or use carving techniques to further manipulate the wood. Driftwood sculptures can range from abstract shapes to realistic animal or human figures, showcasing the versatility and beauty of driftwood as an artistic medium.

Driftwood Wall Art

Driftwood wall art involves arranging pieces of driftwood on a wall to create visually appealing and decorative displays. The natural textures and colors of the wood can add a rustic and organic touch to any space. Driftwood can be arranged in various patterns or shapes, such as a mosaic or a collage, to create unique and eye-catching wall art.

Driftwood Mobiles

Driftwood mobiles are suspended sculptures made by hanging pieces of driftwood from a framework. The driftwood pieces can be balanced and arranged to create a harmonious and dynamic mobile that moves with the slightest breeze. Driftwood mobiles can be simple and elegant or intricate and complex, depending on the artist’s vision and the size and shape of the driftwood pieces used.

Driftwood Jewelry

Driftwood can also be transformed into unique and stylish pieces of jewelry. Small pieces of driftwood can be shaped, sanded, and polished to create pendants, earrings, bracelets, and other accessories. The natural textures and colors of the wood add a touch of nature and sophistication to the jewelry, making each piece one-of-a-kind.

Driftwood Home Decor

Driftwood can be incorporated into a variety of home decor items, such as lamps, candle holders, and mirrors. By combining driftwood with other materials such as glass or metal, artists can create functional and visually appealing decor pieces that bring the beauty of nature into the home. Driftwood home decor can add a touch of rustic charm and a sense of connection to the natural world.

Driftwood Art Crafts

This image is property of images.unsplash.com.

Techniques for Creating Driftwood Art Crafts

Creating driftwood art crafts involves various techniques to shape, enhance, and transform the wood. Here are some common techniques used in driftwood art crafts:

Carving

Carving is a technique used to shape driftwood by removing excess material with sharp tools such as knives or chisels. Carving allows artists to create intricate details, textures, and patterns on the surface of the wood. It can be used to refine the natural shape of the driftwood or create specific forms and designs.

Sanding and Polishing

Sanding and polishing are techniques used to smooth the surface of the driftwood and enhance its natural texture and color. Artists can use sandpaper or sanding blocks to remove any rough or uneven areas and achieve a smooth finish. Polishing can be done using natural oils or varnishes to bring out the beauty of the wood and protect it from moisture and wear.

Painting and Staining

Painting and staining are techniques used to add color and visual interest to driftwood art crafts. Artists can use acrylic paints or wood stains to enhance the natural colors of the wood or create vibrant and unique designs. By painting or staining specific areas of the driftwood, artists can create contrast and add depth to their creations.

Assembling and Gluing

Assembling and gluing are techniques used to combine multiple pieces of driftwood into larger and more complex structures. Artists can use strong adhesives such as wood glue or epoxy to securely attach the pieces together. This technique allows for the creation of larger driftwood sculptures or the construction of functional items like furniture or shelving units.

DIY Driftwood Art Craft Ideas

If you’re interested in creating your own driftwood art crafts, here are some DIY ideas to get you started:

Driftwood Wind Chimes

Create a beautiful and soothing wind chime by attaching pieces of driftwood to strings or metal rods. Hang the driftwood chimes outside your window or in your garden and enjoy the calming sound of the wind gently playing with the wood.

Driftwood Christmas Tree

Give your holiday decor a unique twist by creating a driftwood Christmas tree. Arrange pieces of driftwood in a triangular shape, with the longest pieces at the bottom and the shortest at the top. Decorate the tree with lights, ornaments, and a tree topper for a rustic and coastal touch to your festive decorations.

Driftwood Candle Holder

Transform a piece of driftwood into a stunning candle holder by carving hollows or grooves to hold tea lights or pillar candles. Place the driftwood candle holder on a table or mantel for a warm and natural centerpiece that adds a touch of nature to any room.

Driftwood Photo Frame

Add a personal touch to your memories by creating a driftwood photo frame. Cut a piece of driftwood into the desired size and shape, then attach a clear glass or acrylic panel to create a frame. Place your favorite photo behind the panel and display it on a table or mount it on a wall for a unique and rustic photo display.

Driftwood Mirror

Transform a plain mirror into a stunning focal point by framing it with driftwood. Arrange pieces of driftwood around the edges of the mirror, gluing them in place. The various shapes, sizes, and colors of the driftwood pieces will create a captivating frame that adds a touch of nature to any space.

Driftwood Art Crafts

This image is property of images.unsplash.com.

Tips and Tricks for Driftwood Art Crafts

Here are some tips and tricks to enhance your driftwood art crafts:

Maintaining the Natural Look of Driftwood

If you prefer to maintain the natural look of driftwood, avoid excessive sanding, polishing, or painting. Embrace the unique textures and colors of the wood and let them shine in your art craft projects. Minimal interventions will preserve the organic beauty of the driftwood.

Adding Finishing Touches

Consider adding other natural elements to your driftwood art crafts to enhance their visual appeal. Seashells, pebbles, or dried flowers can be incorporated into your designs, adding a touch of whimsy and further connecting your art to nature.

Enhancing Durability

To ensure the longevity of your driftwood art crafts, consider applying a protective finish, such as a clear varnish or sealant. This will help protect the wood from moisture, UV rays, and wear, preserving its beauty for years to come.

Incorporating Other Materials

Don’t be afraid to experiment and combine driftwood with other materials such as glass, metal, or fabric. Mixing materials can add depth, contrast, and visual interest to your art craft projects, allowing you to create unique and striking pieces.

Selling and Displaying Driftwood Art Crafts

If you have a collection of driftwood art crafts and would like to sell or display them, here are some options to consider:

Online Marketplaces and Websites

Online marketplaces and websites such as Etsy, eBay, or your own personal website are great platforms to showcase and sell your driftwood art crafts. Take high-quality photographs of your pieces and provide detailed descriptions to attract potential buyers.

Local Craft Fairs and Art Exhibitions

Participating in local craft fairs or art exhibitions can give you the opportunity to showcase your driftwood art crafts to a wider audience. Rent a booth or display space and create an attractive and eye-catching booth design that highlights the uniqueness of your pieces.

Creating an Attractive Display

When displaying your driftwood art crafts, consider creating an appealing arrangement that showcases the artistry and beauty of each piece. Use a neutral backdrop or display surface that complements the natural colors and textures of the driftwood. Arrange the pieces in a visually pleasing manner, providing enough space for each piece to be admired individually.

Pricing your Driftwood Art Crafts

When setting prices for your driftwood art crafts, consider factors such as the size, complexity, and uniqueness of each piece. Research the market and compare prices of similar items to ensure that your pricing is competitive. Take into account the cost of materials, time invested, and the level of craftsmanship in determining a fair price for your creations.

Driftwood Art Crafts

Inspiration from Famous Driftwood Artists

If you’re looking for inspiration or want to learn more about driftwood art crafts, here are some famous driftwood artists to follow:

Heather Jansch

Heather Jansch is a renowned British sculptor known for her larger-than-life driftwood horse sculptures. Her realistic and highly detailed pieces capture the spirit and beauty of horses using the raw and natural qualities of driftwood.

Jeff Uitto

Jeff Uitto is an American artist who creates intricate and imaginative driftwood sculptures. His work often features animals, birds, and fantastical creatures, showcasing the versatility and artistic potential of driftwood.

Deborah Butterfield

Deborah Butterfield is an American sculptor who primarily works with driftwood to create life-size horse sculptures. Her distinctive style of assembling and arranging pieces of driftwood captures the grace and elegance of horses in a unique and captivating way.

Xandi Kreuzeder

Xandi Kreuzeder is a German driftwood artist who combines driftwood with other materials to create visually striking and thought-provoking sculptures. His work often incorporates elements of surrealism, challenging the viewer’s perception and creating a sense of wonder.

Conclusion

Driftwood art crafts offer a unique and creative way to connect with nature and showcase its beauty. From sculptures to wall art and home decor, driftwood can be transformed into stunning and one-of-a-kind pieces. By finding and preparing the right pieces of driftwood, employing different techniques, and utilizing your creativity, you can create your own masterpieces using this beautiful and versatile material. So dive into the world of driftwood art crafts and let your imagination sail with the tides of creativity.

Driftwood Art Crafts

Filed Under: Driftwood Ideas Tagged With: Art, crafts, Driftwood

Driftwood Branch Art

March 19, 2024 by admin

Imagine transforming driftwood branches found on the beach into captivating pieces of art that will add a unique touch to any space. Driftwood Branch Art is a stunning form of creativity that combines the beauty of nature with artistic expression. These intricately designed pieces utilize the natural curves and textures of driftwood to create eye-catching sculptures and wall hangings that are both rustic and elegant. Whether you are looking to add a statement piece to your living room or a whimsical touch to your garden, Driftwood Branch Art provides a timeless and eco-friendly way to adorn your surroundings with nature’s own artwork.

Introduction

Welcome to the wonderful world of driftwood branch art! If you’re looking to add a touch of nature and creativity to your home, this is the perfect craft for you. Driftwood branch art allows you to take pieces of nature and transform them into beautiful sculptures, wall hangings, mobiles, decorative vases, and table centerpieces. In this comprehensive article, we will explore the various types of driftwood branch art and the materials you will need to get started. We will also guide you through the process of finding and preparing driftwood, as well as the step-by-step instructions for creating each type of art. So grab a saw and some wood glue, and let’s dive into the world of driftwood branch art!

Types of Driftwood Branch Art

Sculptures

Driftwood sculptures are a fantastic way to bring the beauty of nature into your home. From abstract designs to intricate animal figures, the possibilities are endless when it comes to sculpting with driftwood branches. With the right tools and a bit of creativity, you can create stunning three-dimensional pieces of art that will become the focal point of any room.

Wall Hangings

Driftwood wall hangings are a popular choice for those who want to add a touch of rustic charm to their walls. By carefully selecting and arranging driftwood branches, you can create unique and visually appealing pieces of art that will give your home a warm and cozy atmosphere. Whether you prefer a simple and elegant design or a more complex and eye-catching arrangement, driftwood wall hangings are sure to add a natural and artistic element to your living space.

Mobiles

If you’re looking for a whimsical and captivating piece of art, driftwood mobiles are the way to go. These hanging sculptures allow the driftwood branches to gracefully sway and dance with the breeze, creating a sense of movement and tranquility. By choosing branches of various lengths and sizes and carefully balancing them, you can create a mobile that is both visually stunning and soothing to the soul.

Decorative Vases

Driftwood decorative vases are a unique and creative way to display your favorite flowers and greenery. By attaching driftwood branches to a glass vase, you can create a one-of-a-kind centerpiece that will add a touch of natural beauty to any room. Whether you prefer a minimalist design or something more elaborate, driftwood vases are sure to add a touch of elegance and charm to your home decor.

Table Centerpieces

If you’re preparing for a special dinner or event, a driftwood table centerpiece can be a stunning addition to your tablescape. By selecting driftwood branches that complement your theme or color scheme, you can create a centerpiece that is both visually striking and conversation-starting. Whether you choose to incorporate candles, flowers, or other natural elements, a driftwood table centerpiece is sure to impress your guests and create a memorable dining experience.

Driftwood Branch Art

This image is property of images.pexels.com.

Materials Required

Before embarking on your driftwood branch art journey, it’s important to gather the necessary materials. Here’s a list of the items you’ll need to get started:

Driftwood branches

The most essential part of any driftwood branch art project is, of course, the driftwood branches themselves. You can find these beautiful pieces of wood along beaches, riverbanks, or even in lakes. Look for branches that have interesting shapes and textures, as they will add character to your art.

Saw or pruners

To cut and shape your driftwood branches, you’ll need a saw or pruners. Choose a saw or pruners that are appropriate for the size and thickness of the branches you’ll be working with.

Sandpaper

Sandpaper will be necessary to smooth out any rough edges or surfaces on your driftwood branches. Depending on the condition of the branches you find, you may need both coarse and fine-grit sandpaper.

Wood glue

Wood glue will be used to secure your driftwood branches together. Choose a strong adhesive that is suitable for outdoor use, as it will help ensure the longevity of your artwork.

Wire or fishing line

Wire or fishing line will come in handy when assembling your driftwood branches for sculptures, wall hangings, and mobiles. These will be used to secure the branches together and create the desired form or pattern.

Paint or varnish

If you wish to add color or protect your driftwood art, you may choose to use paint or varnish. This step is optional and will depend on your personal preference and the overall look you’re aiming to achieve.

Now that you have the necessary materials, let’s move on to the process of finding and preparing your driftwood.

Finding and Preparing Driftwood

Beachcombing for Driftwood

One of the most exciting parts of working with driftwood is the thrill of the hunt. To find suitable driftwood branches, head to a beach near you. Keep an eye out for branches that have been washed up by the waves or are lodged in the sand. Look for pieces that have interesting shapes, textures, and colors. Remember to respect the environment and only collect driftwood that is allowed to be removed from the beach.

Cleaning and Sanitizing

Before using your collected driftwood, it’s important to clean and sanitize it to remove any dirt, debris, or potential odors. Start by rinsing the branches with clean water to remove loose dirt and sand. Then, soak them in a mixture of water and mild detergent for a few hours. Scrub the branches gently with a soft brush to remove any stubborn grime. Rinse thoroughly and pat dry with a clean towel.

Drying and Curing

After cleaning, allow your driftwood branches to air dry completely in a well-ventilated area. This process may take several days or even weeks, depending on the thickness and moisture content of the wood. Avoid using heat sources to speed up the drying process, as this can cause the wood to crack or warp. Once your driftwood is dry, it’s time to unleash your creativity and start creating your masterpiece.

Driftwood Branch Art

This image is property of images.pexels.com.

Creating Driftwood Sculptures

Designing a Concept

Before you begin assembling your driftwood branches, it’s helpful to have a clear concept or design in mind. Sketch out your ideas or create a mood board to explore different possibilities. This will serve as a guide and help you create a sculpture that is cohesive and aesthetically pleasing.

Assembling the Branches

Start by selecting the main branch or branches that will form the foundation of your sculpture. Arrange the rest of the branches around it, experimenting with different angles and positions until you achieve the desired look. Once you’re satisfied with the arrangement, mark the positions of the branches with a pencil or tape to help you remember their placement.

Securing Branches with Glue or Wire

To ensure that your driftwood sculpture remains intact, it’s important to secure the branches together. Depending on the size and weight of the branches, you can use wood glue or wire to hold them in place. Apply a small amount of wood glue to the joints where the branches meet, then press them together firmly. Alternatively, you can use wire to wrap around the joints and twist it tight to keep the branches securely attached.

Finishing and Sealing

Once your driftwood sculpture is assembled, you may choose to leave it in its natural state or apply a protective finish. If you decide to add a finish, use a paintbrush to apply a clear varnish or sealer to the entire piece. This will help protect the wood from environmental damage and add a beautiful sheen to the sculpture.

Making Driftwood Wall Hangings

Selecting the Branches

When creating a driftwood wall hanging, it’s important to select branches that have interesting shapes and sizes. Look for pieces that will complement each other when arranged vertically or horizontally on the wall.

Arranging the Branches

Before attaching the branches, lay them out on a flat surface to experiment with different arrangements. Play around with the spacing, angles, and heights to create a visually appealing composition. Once you’re satisfied with the design, take a photo or make a sketch to help guide you during the attachment process.

Attaching the Branches

To attach the branches, apply wood glue to the back of each piece and press it firmly against the wall. Start with the larger, more stable branches and work your way towards the smaller, more delicate ones. Be sure to leave enough space between the branches to maintain your desired design. If additional support is needed, you can also secure the branches with wire or fishing line.

Adding Decorative Elements

To enhance the visual appeal of your driftwood wall hanging, consider adding decorative elements such as seashells, beads, or feathers. Attach these additional elements using hot glue or wire, being mindful of their weight and balance. The goal is to create a piece that is visually stunning and uniquely yours.

Driftwood Branch Art

This image is property of images.pexels.com.

Constructing Driftwood Mobiles

Choosing the Branches

When it comes to driftwood mobiles, you’ll want to select branches that vary in length, thickness, and shape. This will create a visually interesting and balanced composition. Look for branches with natural bends or curves that will add movement to the mobile.

Stringing the Branches

To create the mobile, choose a sturdy piece of wire or fishing line and cut it to the desired length. Tie a loop at one end to hang the mobile from a hook or ceiling. Attach the branches to the wire or fishing line at various intervals, using knots or small pieces of wire to secure them. As you attach the branches, step back and assess the balance and movement of the mobile, making adjustments as needed.

Balancing the Mobile

Achieving balance is crucial when creating a driftwood mobile. Test the mobile by gently blowing on it or giving it a light tap to see if it sways evenly. Adjust the position of the branches or add additional weights as necessary to achieve a fluid and balanced movement.

Adding Decorative Elements

To add an extra touch of charm to your driftwood mobile, consider incorporating decorative elements such as feathers, beads, or hanging crystals. Attach the decorative elements to the bottom tips of the branches using small pieces of wire or fishing line. Ensure that the weight of the decorations does not disrupt the overall balance of the mobile.

Designing Driftwood Decorative Vases

Selecting a Glass Vase

When choosing a glass vase for your driftwood decoration, consider the size, shape, and color that will best complement your driftwood branches. Opt for a clear or lightly tinted vase to allow the natural beauty of the driftwood to shine through.

Attaching Driftwood Branches

To attach the driftwood branches to the vase, apply wood glue to the areas where the branches will come into contact with the glass. Press the branches onto the glass, holding them in place for a few moments to ensure proper adhesion. Arrange the branches in a visually pleasing manner, either horizontally or vertically, depending on the design you envision.

Customizing with Additional Elements

To enhance the decorative appeal of your driftwood vase, consider adding additional elements such as twine, sea glass, or shells. Wrap twine around the neck of the vase in a spiral pattern or glue sea glass and shells directly onto the driftwood branches. These extras will add a charming and personalized touch to your home decor.

Driftwood Branch Art

Creating Driftwood Table Centerpieces

Choosing the Base

The base of your driftwood table centerpiece can be a simple wooden tray, a beautiful ceramic dish, or anything else that fits your desired theme or aesthetic. Take into consideration the size and shape of the base to ensure it can hold the weight and accommodate the placement of the driftwood branches.

Arranging the Branches

Start by arranging your driftwood branches on the base in a way that is visually pleasing. Experiment with different heights, angles, and groupings to create an interesting and balanced composition. Take a step back and evaluate the arrangement from different angles to ensure it looks appealing from all sides.

Adding Other Natural Elements

To enhance the natural appeal of your driftwood centerpiece, consider adding other elements such as rocks, moss, or fresh flowers. These additional natural elements will create a harmonious and cohesive look that will captivate your guests.

Final Touches

Once you’re satisfied with the arrangement of the driftwood branches and other natural elements, take a moment to make any final adjustments. Ensure that the centerpiece is stable and secure on the base, and that all elements are properly attached. Step back and admire your creation before placing it in the center of your table, ready to impress your guests.

Conclusion

Congratulations on completing your journey into the world of driftwood branch art! From sculptures to wall hangings, mobiles to decorative vases, and table centerpieces, you have learned the techniques and steps needed to create beautiful and unique pieces of art using driftwood branches. Remember to let your creativity flow, experiment with different designs, and embrace the natural beauty of the driftwood. Whether you’re a seasoned artist or a beginner, driftwood branch art is a fantastic way to express your creativity and bring a touch of nature into your home. So gather your materials, head to the beach, and let the artistry begin. Happy crafting!

Driftwood Branch Art

Filed Under: Driftwood Ideas Tagged With: Art, Branch, Driftwood

Driftwood Burn Art

March 18, 2024 by admin

Imagine walking along a secluded beach, the soft sand beneath your feet and the gentle sound of crashing waves filling your ears. As you make your way, you stumble upon an extraordinary sight – intricately designed patterns etched onto pieces of driftwood, transforming them into captivating works of art. This is the beauty of driftwood burn art, where skilled artists use the natural patterns and textures of driftwood to create unique and stunning pieces that capture the essence of nature’s beauty.

Driftwood Burn Art

This image is property of images.pexels.com.

What is driftwood burn art?

Driftwood burn art is a unique and captivating form of artistic expression that involves creating intricate designs and patterns on pieces of driftwood using a wood burning tool. This technique allows artists to incorporate the natural beauty of the driftwood with their creative designs, resulting in stunning and one-of-a-kind pieces of art. Whether you’re a seasoned artist or just starting out, driftwood burn art offers endless possibilities for creativity and self-expression.

Definition

Driftwood burn art is the process of using a wood burning tool to create designs, patterns, and textures on pieces of driftwood. This technique, also known as pyrography, involves using heat to burn the wood and create unique artistic effects. By carefully controlling the temperature and pressure of the wood burning tool, artists can create intricate details, shading, and textures that bring the driftwood to life.

Origin

The art of wood burning has been practiced for centuries, dating back to ancient civilizations. However, driftwood burn art specifically emerged as a popular form of artistic expression in recent years. It is believed to have originated as a way to repurpose driftwood found on beaches and shorelines, transforming it into stunning works of art. Today, driftwood burn art has gained popularity worldwide, with artists of all skill levels embracing this unique art form.

Techniques

Driftwood burn art encompasses a variety of techniques that allow artists to create different effects and styles. Some common techniques include basic shading, creating textures, and layering techniques. Basic shading involves using different temperatures and pressures to create areas of light and dark on the wood, adding depth and dimension to the design. Creating textures involves using the wood burning tool to create patterns and textures that mimic the appearance of wood grains or other natural elements. Layering techniques involve building up multiple layers of burned areas to create depth and complexity in the design. Experimenting with these techniques and exploring new ones can help artists develop their own unique style and bring their driftwood burn art to life.

Choosing the right driftwood

When starting a driftwood burn art project, it’s important to choose the right pieces of driftwood. Here are some factors to consider when selecting your materials:

Material

Choose driftwood that is made of a durable and sturdy wood species, such as oak or cedar. These types of wood are less likely to break or splinter during the burning process, making them ideal for creating intricate designs. Avoid using soft or decaying driftwood, as it may not hold up well under the heat of the wood burning tool.

Size and shape

Select driftwood pieces that are a suitable size and shape for your desired artwork. Consider whether you want a larger canvas to work on or if smaller, more manageable pieces will be easier for you. Additionally, think about the shape of the driftwood and how it will enhance your design. Look for interesting twists, curves, or knots that can add visual interest to your artwork.

Quality

Inspect the quality of the driftwood before starting your project. Look for pieces that are free from cracks, rot, or other signs of damage. This will ensure that your artwork remains sturdy and long-lasting. Additionally, check for any signs of pests or wildlife that may have taken up residence in the driftwood. Taking the time to choose high-quality driftwood will greatly contribute to the overall success of your driftwood burn art.

Preparing the driftwood

Before you start working on your driftwood burn art, it’s important to properly prepare the wood to ensure optimal results. Here are the essential steps for preparing your driftwood:

Cleaning

Begin by thoroughly cleaning the driftwood to remove any dirt, debris, or unwanted substances. Use a soft brush or cloth to gently scrub the surface and crevices of the wood. If necessary, you can also rinse the driftwood with water, but make sure to let it dry completely before proceeding to the next step.

Drying

After cleaning, allow the driftwood to air dry completely. This is important to prevent any moisture from being trapped in the wood, as it can affect the burning process and potentially damage your artwork. Make sure the wood is completely dry to the touch before moving on to the next step.

Sanding

To ensure a smooth and even surface for your driftwood burn art, lightly sand the wood using fine-grit sandpaper. This will help remove any rough patches or splinters, allowing the wood burning tool to glide smoothly across the surface. Be sure to sand gently and evenly to maintain the natural shape and character of the driftwood.

Tools and materials needed

To get started with driftwood burn art, there are a few essential tools and materials you’ll need. Here’s a list of what you’ll require:

Wood burning tool

The most important tool for driftwood burn art is a wood burning tool, also known as a pyrography pen. This tool allows you to control the temperature and pressure of the heat, allowing for precise and detailed burning. Choose a wood burning tool with adjustable settings and different tips for creating a variety of effects and textures.

Protective equipment

When working with a wood burning tool, it’s important to prioritize safety. Wear protective gloves and goggles to protect your hands and eyes from heat and potential wood chips. Additionally, consider working in a well-ventilated area or wearing a mask to avoid inhaling any fumes or particles.

Finishing materials

To add the finishing touches to your driftwood burn art, you’ll need some materials to protect and enhance the wood. Depending on your preference, you can use clear varnish, wood stain, or wax to seal and preserve the artwork. These materials bring out the natural beauty of the wood and protect it from damage caused by moisture or sunlight.

Driftwood Burn Art

This image is property of images.pexels.com.

Designing your driftwood burn art

Designing your driftwood burn art is an exciting and creative process. Here are some steps to help you plan and execute your design:

Plan your design

Before you start burning the driftwood, take some time to plan your design. Consider the shape and size of the driftwood, as well as any unique features it may have. Think about what you want your artwork to depict and the overall style or mood you want to convey. Sketch out your ideas on paper to visualize the design and make any necessary adjustments.

Sketching

Once you have a clear idea of your design, use a pencil to lightly sketch the outlines onto the driftwood. This will serve as a guide for the wood burning process and help you maintain the desired proportions and composition. Take your time during this step to ensure accuracy and precision.

Adding details

With the basic outline in place, you can begin adding details and shading to your driftwood burn art. Start by using the wood burning tool to burn along the pencil lines and create the main shapes and forms. Gradually build up the shading and textures to add depth and dimension to your artwork. Work in small sections and take breaks as needed to avoid fatigue.

Wood burning techniques

To create a wide range of effects and styles in your driftwood burn art, it’s helpful to learn and practice different wood burning techniques. Here are some key techniques to familiarize yourself with:

Basic shading

Basic shading involves using different temperatures and pressures to create areas of light and dark on the wood. This technique adds depth and dimension to your artwork, making it appear more realistic. Experiment with varying the pressure and speed of your wood burning tool to achieve different levels of shading.

Creating textures

Creating textures allows you to mimic the appearance of wood grains, fur, feathers, or other natural elements in your driftwood burn art. Use the wood burning tool to carefully burn lines, dots, or curves to create the desired texture. Practice different patterns and techniques to find the ones that work best for your design.

Layering techniques

Layering techniques involve building up multiple layers of burned areas to create depth and complexity in your driftwood burn art. Start with lighter burns and gradually add darker tones and details to achieve a sense of depth and realism. This technique requires patience and precision, but the results can be truly stunning.

Driftwood Burn Art

This image is property of images.pexels.com.

Safety precautions

When working with a wood burning tool, it’s crucial to prioritize safety. Here are some important safety precautions to keep in mind:

Proper ventilation

Working with a wood burning tool can produce fumes and smoke that may be harmful if inhaled. Always work in a well-ventilated area, such as near an open window or with the assistance of a fan. If necessary, wear a mask to protect yourself from any potential hazards.

Protecting your work surface

To prevent accidental burns or damage to your work surface, place a heat-resistant mat or metal sheet underneath your driftwood. This will provide a protective barrier and prevent any heat transfer to the surface below.

Handling hot tools

Wood burning tools can become extremely hot during use, so it’s important to handle them with caution. Always use heat-resistant gloves or pliers to protect your hands when changing tips or adjusting the temperature. Allow the tool to cool down completely before storing it.

Finishing and preserving your driftwood burn art

Once you have completed your driftwood burn art, it’s important to properly finish and preserve the artwork to ensure its longevity. Here are some steps to follow:

Applying protective finishes

To protect your driftwood burn art from moisture, sunlight, and general wear and tear, apply a protective finish. Clear varnish, wood stain, or wax can all be used to seal and preserve the artwork. Follow the manufacturer’s instructions and apply the finish evenly, allowing sufficient drying time between coats.

Choosing the right finish

The choice of finish depends on your desired outcome and personal preference. Clear varnish provides a glossy finish and enhances the natural color and grain of the wood. Wood stain can add depth and richness to the driftwood, emphasizing the burned design. Wax provides a subtle sheen and a smooth, tactile finish. Consider experimenting with different finishes to find the one that best suits your driftwood burn art.

Displaying and storing

Finally, consider how you will display and store your driftwood burn art. Frame the piece in a shadow box or on a display stand to protect and showcase the artwork. Avoid placing the artwork in direct sunlight or in areas with high humidity, as these conditions can cause fading or warping. Store the artwork in a cool, dry place to ensure its longevity.

Driftwood Burn Art

Exploring driftwood burn art styles

Driftwood burn art can be created in various styles, allowing artists to explore and experiment with different aesthetics. Here are a few popular styles to consider:

Realism

Realism in driftwood burn art focuses on capturing intricate details and textures to create artwork that closely resembles the subject. Artists who specialize in realism aim to create pieces that are highly accurate and lifelike, often using the wood burning tool to create subtle nuances and shading.

Abstract

Abstract driftwood burn art allows for more freedom and interpretation. Artists in this style prioritize shapes, colors, and textures to create artwork that is open to individual interpretation. Abstract driftwood burn art can be bold, vibrant, and visually striking.

Landscape

Landscape driftwood burn art focuses on creating scenes that depict natural environments, such as forests, mountains, or seascapes. Artists use the wood burning tool to create depth, texture, and atmosphere, transporting the viewer to a serene and captivating setting.

Inspiration and ideas for driftwood burn art

If you’re looking for inspiration for your driftwood burn art, here are a few ideas and motifs to consider:

Natural motifs

Take inspiration from nature’s beauty by incorporating natural motifs into your driftwood burn art. Explore themes such as leaves, flowers, trees, or animals to create artwork that celebrates the wonders of the natural world.

Wildlife

Capture the essence of wildlife in your driftwood burn art by focusing on animals, birds, or marine life. From intricate feathers to detailed fur patterns, wildlife-inspired driftwood burn art can be both visually striking and emotionally captivating.

Ocean themes

Embrace the calming and mystical qualities of the ocean by creating driftwood burn art with ocean themes. Think about incorporating elements such as waves, seashells, or marine creatures to evoke a sense of tranquility and wonder.

In conclusion, driftwood burn art offers a unique and captivating outlet for artistic expression. By harnessing the beauty of the natural driftwood and combining it with the skill of wood burning, artists can create stunning and intricate designs that showcase their creativity and imagination. Whether you’re a beginner or seasoned artist, exploring the world of driftwood burn art can be a rewarding and fulfilling journey. Remember to choose the right driftwood, properly prepare it, practice different techniques, and prioritize safety throughout the artistic process. With a little bit of inspiration and a lot of passion, your driftwood burn art can become a true masterpiece that will be admired for years to come. So go ahead, grab your wood burning tool and let your creativity drift away on the waves of this unique art form!

Driftwood Burn Art

Filed Under: Driftwood Ideas Tagged With: Art, Burn, Driftwood

Beach Glass And Driftwood Art

March 17, 2024 by admin

Imagine strolling along a serene coastline, the salty breeze filling your lungs and the warm sand beneath your feet. As you walk, your eyes catch a glimpse of something sparkling amidst the pebbles. It’s beach glass, shimmering in an array of colors, waiting to be transformed into a work of art. And just a few steps away lies driftwood, weathered by the waves and time. In this article, we will explore the captivating world of beach glass and driftwood art, where these humble treasures find new life as exquisite creations that capture the essence of nature’s beauty.

Introduction

Beach glass and driftwood art are unique and beautiful forms of creative expression that harness the natural beauty of the coastal environment. These art forms involve using beach glass, which is glass that has been weathered and polished by the ocean over time, and driftwood, which is wood that has been washed ashore by the waves. By repurposing these natural materials, artists create stunning pieces that evoke a sense of tranquility and connection with nature.

What is beach glass art?

Beach glass art refers to the practice of using beach glass to create various art pieces, such as jewelry, mosaics, and sculptures. Beach glass is the result of broken glass that has been polished and shaped by the ocean, giving it a smooth, frosted appearance. It is often found in different colors, typically shades of green, blue, and brown, but can also be transparent or rare colors like red or purple. Beach glass art allows artists to showcase the beauty of these unique glass fragments and transform them into captivating works of art.

What is driftwood art?

Driftwood art involves using pieces of driftwood to create sculptures, wall hangings, and other decorative items. Driftwood is wood that has been carried by rivers or the ocean, becoming smooth and weathered from exposure to water, sand, and sun. Its distinct texture and shape make it a versatile and captivating material for artists. Driftwood art embraces the natural curves and imperfections of the wood, resulting in organic and visually appealing creations.

Beach Glass Art

Understanding beach glass

Beach glass is created from glass that has been discarded and then tumbled by the waves, sand, and rocks along the shoreline. This process can take years, sometimes even decades, for the sharp edges of broken glass to be transformed into smooth, rounded gems. Each piece of beach glass has a unique history and origin, which adds to its charm and allure. By understanding the characteristics and colors of beach glass, artists can create art that showcases the various shades and textures of these glass treasures.

Collecting beach glass

Collecting beach glass can be an exciting and rewarding activity, but it requires patience and keen observation. Beaches with a history of glass manufacturing or past dumping sites are often the best places to find an abundance of beach glass. Low tide or after a storm are ideal times for beachcombing as they reveal a plethora of glass fragments washed ashore. It is essential to respect the environment and only collect beach glass from public areas, ensuring that ecosystems and marine life are not harmed in the process.

Cleaning and preparing beach glass

Before using beach glass in art projects, it is crucial to clean and prepare the glass to enhance its beauty and remove any remnants of dirt or salt. Cleaning techniques can vary, but commonly involve soaking the glass in a mixture of warm water, vinegar, and mild dish soap, followed by gentle scrubbing with a soft brush or toothbrush. After cleaning, the beach glass should be rinsed thoroughly and dried before use.

Different beach glass art techniques

Beach glass art allows for a wide range of artistic techniques and styles. Some popular techniques include jewelry making, where beach glass is transformed into necklaces, earrings, and bracelets using wire wrapping or metal bezels. Mosaic art is also a common technique, with artists arranging beach glass pieces to create intricate patterns and designs. Other artists may sculpt beach glass into unique shapes or incorporate it into mixed media artwork. The possibilities are truly endless, limited only by the artist’s imagination.

Beach Glass And Driftwood Art

This image is property of images.unsplash.com.

Driftwood Art

What is driftwood?

Driftwood is wood that has been washed ashore by bodies of water, usually the ocean or rivers. The wood collects and drifts with the current until it reaches the shore, where it is deposited by the waves. Driftwood can be derived from various tree species and can range in size from small twigs to large logs. Its exposure to water, sand, and other elements gives it a distinct appearance, with a smooth texture, weathered surface, and often unique shapes resulting from erosion and natural forces.

Finding and collecting driftwood

Finding driftwood can be a scavenger hunt along the shoreline. Popular areas for collecting driftwood include beaches, riverbanks, and coastal areas. Look for spots where driftwood is likely to accumulate, such as near river mouths, jetties, or after storms. It is important to seek permission and respect any regulations on the collection of driftwood in protected areas. Selecting driftwood that is structurally sound and visually appealing is essential for creating quality artwork.

Preparation and treatment of driftwood

Once collected, driftwood needs to be prepared and treated before it can be used in art projects. This involves removing any dirt, sand, or organisms attached to the wood. A gentle scrub with a soft brush and water can suffice for cleaning. To ensure the durability and preservation of the driftwood, it may be necessary to treat it with a wood sealant or preservative. This step helps prevent further erosion and extends the lifespan of the driftwood art piece.

Popular driftwood art styles

Driftwood art offers a wide range of artistic possibilities, from small sculptures to large-scale installations. Popular styles in driftwood art include animal figurines, where artists carve or assemble pieces of driftwood to resemble birds, fish, or other animals. Wall hangings and mobiles made from driftwood are also common, often featuring various sizes and shapes of wood suspended by string or wire. Some artists create functional pieces like driftwood furniture or incorporate driftwood into mixed media artwork, combining it with other materials such as metal or glass.

Combining Beach Glass and Driftwood

Choosing suitable pieces

When combining beach glass and driftwood, it is important to consider the size, shape, and color of the materials to create a cohesive and visually appealing composition. Selecting beach glass pieces that harmonize with the tones of the driftwood can enhance the overall aesthetic. The shape and size of the driftwood can influence the design and placement of the beach glass, creating balance and harmony in the finished artwork.

Designing beach glass and driftwood art

Designing beach glass and driftwood art involves envisioning how the two materials will interact and complement each other. Sketching or creating a mockup can help artists visualize the final composition and make any necessary adjustments before starting the actual artwork. Experimenting with different layout options and arrangements of beach glass and driftwood is essential to achieve the desired effect and ensure a well-designed piece.

Joining beach glass and driftwood

Joining beach glass and driftwood can be done using various techniques, depending on the desired outcome and the materials being used. Wire wrapping is a common method for attaching beach glass to driftwood. Artists can use thin-gauge wire to secure the glass pieces to the wood, allowing for flexibility in positioning. Glue or adhesive can also be used, but artists should ensure they choose one suitable for both the beach glass and driftwood to maintain longevity and durability.

Finishing touches

Adding finishing touches to beach glass and driftwood art can enhance the overall appearance and protect the artwork. Sanding the driftwood to smooth any rough edges and applying a sealant or varnish can help preserve the wood and highlight its natural beauty. For beach glass, artists may choose to enhance the frosted appearance by lightly sanding the surfaces or applying a clear finish. Additionally, accentuating the piece with other elements like shells, beads, or metal accents can further enhance the artistic vision.

Beach Glass And Driftwood Art

This image is property of images.unsplash.com.

Tools and Materials

Essential tools for beach glass and driftwood art

Creating beach glass and driftwood art requires a few essential tools. These may include wire cutters or pliers for manipulating wire, small brushes for cleaning and applying sealant, sandpaper for smoothing rough edges, and a drill for drilling holes in driftwood or beach glass. Additional tools such as saws, carving knives, or files may be necessary for more intricate projects or sculptures. It is important to have a well-equipped toolbox to ensure smooth workflow and ease of creation.

Recommended materials

The materials needed for beach glass and driftwood art primarily include beach glass, driftwood, and wire for securing the glass to the wood. It is advisable to have a collection of various sizes, shapes, and colors of beach glass to provide versatility and options for creating different art pieces. Different lengths and thicknesses of wire, such as copper or silver wire, allow for various attachment techniques. Artists may also choose to incorporate other materials like metal accents, gemstones, or beads to add complexity and contrast to their artwork.

Safety precautions

Working with beach glass and driftwood art involves some potential safety hazards. It is essential to wear personal protective equipment, such as gloves and safety goggles, especially when handling or manipulating wood or glass. Dust created during sanding or drilling can pose respiratory risks, so it is advisable to work in a well-ventilated area or use a dust mask. Additionally, artists should exercise caution when using sharp tools and follow proper ergonomic practices to prevent accidents or injuries.

Techniques and Inspirations

Creating mosaic patterns with beach glass

One popular technique in beach glass art is creating mosaic patterns. Artists arrange beach glass pieces of varying sizes, shapes, and colors to form intricate designs on a flat surface or as part of a larger artwork. Mosaic patterns can be abstract or depict recognizable images like waves, flowers, or landscapes. By manipulating the placement of beach glass, artists can achieve different textures and shading effects, resulting in visually captivating and unique pieces.

Driftwood sculptures and structures

Another technique in driftwood art involves creating sculptures and structures using pieces of driftwood. Artists can assemble driftwood fragments to form various shapes and forms, ranging from abstract sculptures to realistic animal or human figures. Driftwood can be used individually or combined with other materials like metal, stone, or glass to add structural support or enhance the overall aesthetics. Sculpting with driftwood allows artists to explore the natural curves and textures of the wood, giving life to their imagination.

Incorporating beach glass in wall hangings

Wall hangings provide a versatile canvas for combining beach glass and driftwood. Artists can create stunning pieces by arranging beach glass and small driftwood fragments on a background surface like canvas, wood, or mesh. By incorporating various sizes, shapes, and colors of beach glass, artists can achieve depth and visual interest in their wall hangings. Adding driftwood elements can further enhance the composition and provide a natural framework for the beach glass.

Inspiration from nature and coastal themes

The coastal environment and nature serve as abundant sources of inspiration for beach glass and driftwood art. Artists can draw inspiration from the ocean, marine life, shells, plants, or coastal landscapes to create their artwork. By incorporating elements like beach grass, seashells, or coral, artists can infuse a sense of authenticity and evoke the serenity of the beach in their creations. Nature-inspired beach glass and driftwood art can transport viewers to the calming sights and sounds of the coast, promoting a deeper connection with the environment.

Beach Glass And Driftwood Art

This image is property of images.unsplash.com.

Tips and Tricks

Working with different sizes and shapes of beach glass and driftwood

When working with various sizes and shapes of beach glass and driftwood, it is important to consider their visual impact and how they fit together. Mixing different sizes can create contrast and balance in the artwork. Large pieces of driftwood can serve as focal points, while smaller pieces can add detail or texture. Similarly, beach glass of different sizes can be used strategically to create patterns or emphasize specific elements. By experimenting with combinations, artists can achieve dynamic and visually appealing compositions.

Adding other elements to enhance the artwork

To enhance the beauty and complexity of beach glass and driftwood art, artists can incorporate additional elements into their creations. This may include using metal accents, gemstones, shells, or beads. These elements can add pops of color, texture, or sparkle to the artwork, elevating its visual appeal. However, it is crucial to exercise restraint and ensure that these elements do not overwhelm or detract from the natural beauty of the beach glass and driftwood.

Creating a balanced composition

Creating a balanced composition is essential in beach glass and driftwood art to achieve visual harmony. Balancing colors, sizes, and textures throughout the piece helps guide the viewer’s eye and create a sense of cohesion. The placement of beach glass and driftwood should be carefully considered, ensuring that there is an even distribution of visual weight. Artists can achieve balance through symmetry, asymmetry, or by following the principles of design such as repetition, contrast, or focal points.

Sealing and protecting the artwork

To ensure the longevity and preservation of beach glass and driftwood art, it is important to seal and protect the finished pieces. Applying a clear sealant or varnish helps protect the materials from moisture, UV damage, and other environmental factors. It also enhances the colors and texture of the beach glass and driftwood. Proper sealing and protection will ensure that the artwork can be enjoyed for years to come, whether displayed indoors or outdoors.

Displaying and Selling Beach Glass and Driftwood Art

Choosing the right display options

Displaying beach glass and driftwood art is an important consideration to showcase the artwork effectively. Depending on the size and style of the piece, options like picture frames, shadow boxes, glass display cases, or floating frames can be used. Wall-mounted displays are popular choices, allowing the artwork to take center stage. For sculptures or three-dimensional pieces, pedestals or stands can be utilized. Finding the right display option that complements the artwork’s aesthetic is crucial to engaging viewers and attracting potential buyers.

Mounting options for wall art

Mounting beach glass and driftwood art on walls requires careful consideration of the artwork’s weight, dimensions, and structural integrity. Strong adhesives, brackets, or hardware like hooks or wires can be used to securely mount the art on the wall. The mounting method should be chosen based on the stability and durability required for the piece. It is advisable to consult a professional or seek guidance from experienced artists when mounting larger or complex artworks.

Packaging and shipping considerations

When selling or shipping beach glass and driftwood art, proper packaging is crucial to ensure its safe arrival. Protective layers like bubble wrap or foam should be used to shield the artwork from impacts and vibrations during transit. Securing the art within a sturdy box with additional padding will prevent shifting or damage. Including care instructions and handling precautions for the new owner is also essential to help them maintain the artwork’s condition and beauty.

Pricing and marketing strategies

Determining the price of beach glass and driftwood art can be challenging, as it depends on factors like size, complexity, materials used, and the artist’s reputation. Researching similar artworks, consulting other artists, and considering the time and effort invested in the creation are valuable in determining a fair and competitive price. Developing a marketing strategy, such as promoting the artwork on social media platforms, local art galleries, or participating in art fairs, can help reach potential buyers and increase the visibility and demand for the artist’s work.

Beach Glass And Driftwood Art

Benefits and Rewards of Beach Glass and Driftwood Art

Therapeutic and relaxing hobby

Creating beach glass and driftwood art offers a therapeutic and relaxing experience for artists. The process of collecting beach glass and driftwood, engaging with the natural environment, and transforming these materials into unique works of art can be a soothing and meditative practice. The repetitive motions of arranging, wire wrapping, or carving promote a sense of calmness and mindfulness, offering valuable respite from the stresses of daily life.

Connection with nature and the environment

Beach glass and driftwood art allow artists to forge a deeper connection with nature and the environment. By using materials sourced from the beach or riverside, artists engage with the natural elements and appreciate the beauty and resilience of these natural resources. Creating art that celebrates the coastal environment encourages awareness and appreciation for the fragile ecosystems that are vital for the survival of marine life.

Creating unique and personalized gifts

Beach glass and driftwood art provides a unique and personalized gift-giving option. Handcrafted pieces of art carry a special meaning and sense of thoughtfulness that cannot be replicated by mass-produced items. By creating personalized beach glass and driftwood art, artists offer recipients a one-of-a-kind piece that resonates with their individual tastes and preferences. These artworks make memorable gifts for birthdays, anniversaries, weddings, or housewarming occasions, fostering a deeper connection between the giver and recipient.

Opportunities for selling and showcasing artwork

Beach glass and driftwood art offer opportunities for artists to showcase and sell their creations. Local art galleries, craft markets, and online platforms provide platforms for artists to exhibit and sell their artwork to a wide audience. The unique and nature-inspired qualities of beach glass and driftwood art make it attractive to art collectors, interior designers, and individuals seeking distinctive pieces for their homes or businesses. Selling beach glass and driftwood art allows artists to share their creativity and passion with others while generating income from their craft.

Conclusion

Beach glass and driftwood art celebrate the beauty and wonder of the coastal environment while offering artists a creative outlet to express themselves. These art forms, whether individually or combined, allow for endless artistic possibilities. Creating beach glass and driftwood art not only provides opportunities for personal growth and relaxation but also enables artists to connect with nature, share their unique creations, and add a touch of coastal beauty to the world. So why not embark on your own beach glass and driftwood art journey and let your creativity flow? The possibilities await!

Filed Under: Driftwood Ideas Tagged With: Art, Beach Glass, Driftwood

  • « Previous Page
  • Page 1
  • …
  • Page 7
  • Page 8
  • Page 9
  • Page 10
  • Page 11
  • Next Page »

Primary Sidebar

Driftwood4us.com, is a participant in the Amazon Services LLC Associates Program, an affiliate advertising program designed to provide a means for sites to earn advertising fees by advertising and linking to amazon.com.