• Skip to main content
  • Skip to primary sidebar
  • Terms and Conditions
  • Privacy Policy
  • Contact

Driftwood 4 Us

Just About Driftwood

Chalk Paint

Driftwood Look With Chalk Paint

May 13, 2025 by admin

Have you ever stumbled upon a piece of furniture and thought about giving it a fresh, coastal-inspired look? Imagine turning your ordinary pieces into charming, driftwood-like treasures with the magic of chalk paint. Chalk paint has rapidly gained popularity due to its versatility and ease of use, providing an effortless way to transform your furniture without the need for extensive sanding or priming. If you’re aiming for that breezy, beachy vibe in your home, adopting a driftwood look can be an excellent choice. Let’s explore how you can achieve this stunning effect.

Driftwood Look With Chalk Paint

Understanding the Driftwood Aesthetic

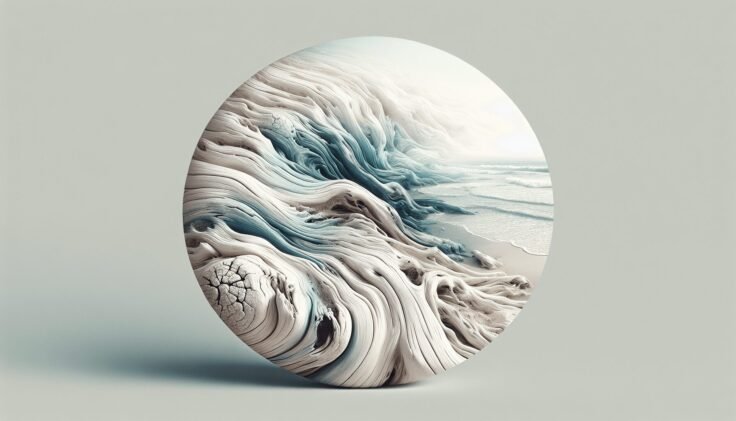
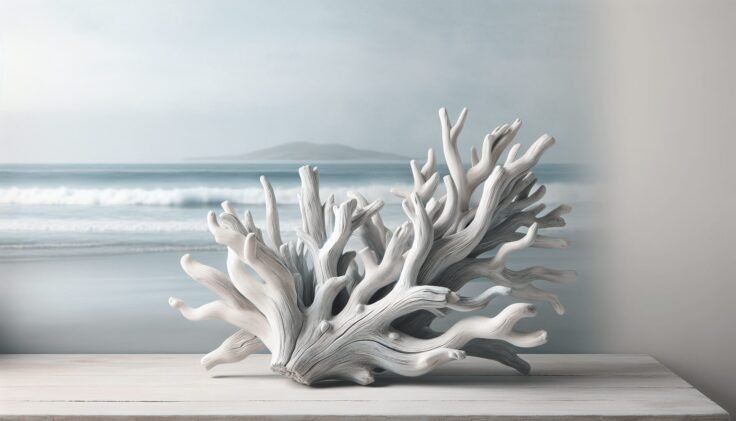
Before diving into the technique itself, it’s helpful to understand the aesthetic we’re aiming for. Driftwood is known for its weathered, sun-bleached appearance, often sporting shades of gray, brown, and white. It’s loved for its natural texture and the subtle blending of colors that give it an aged, rustic charm.

What is Driftwood?

Driftwood is wood that has been washed onto a shore or beach of a sea or river by the action of winds, tides, or waves. Its appearance is characterized by a smooth surface, muted colors, and an almost sculptural form, gained from enduring the elements over time. The appeal lies in its uniquely rustic and natural look, making it a favored choice for coastal or shabby-chic interior designs.

Why Use Chalk Paint for a Driftwood Look?

Chalk paint is superb for creating a driftwood impression because of its matte, chalky finish and its ease in distressing to mimic vintage wear-and-tear effortlessly. The paint adheres well without primer and creates textures that can easily be sanded or layered for depth and character.

Choosing the Right Supplies

Getting the right supplies is the first step in any successful furniture makeover.

Essential Materials

To recreate a driftwood look with chalk paint, here’s what you’ll need:

MaterialPurpose
Chalk PaintUse multiple shades (white, gray, beige, etc.) to layer and achieve a weathered effect.
Paint BrushesOpt for both regular and finer-bristled brushes for detailing.
SandpaperHelps with distressing and achieving that aged appearance.
Wax or Matte SealerTo protect the finish and add durability.
Lint-Free ClothsPerfect for wiping excess paint or wax.
Drop ClothTo protect your working area from paint spills.

Choosing Your Colors

For an authentic driftwood look, you’ll want a palette that includes muted, earthy tones. Shades of gray, beige, off-white, or even soft blues can layer effectively to mimic the natural variations seen in weathered wood.

Preparing Your Furniture

Preparation is key to achieving a long-lasting and professional-looking finish.

Cleaning and Repairing

Start by thoroughly cleaning your piece of furniture. Remove any dust, grime, or residue using a damp cloth and mild detergent. If needed, repair any deep scratches or dents with wood filler. Remember, even though chalk paint is forgiving when it comes to imperfections, a smoother starting point tends to result in a more polished outcome.

Sanding (Optional)

One of the benefits of using chalk paint is that sanding is typically optional. However, lightly sanding the surface can help remove leftover finish or stubborn dirt and ensure that the paint adheres better.

Applying Chalk Paint

Once your furniture is prepared, you’re ready to start painting. This is where the transformation begins!

Base Coat Application

Begin with your base color. Typically, this would be the lightest shade you wish to incorporate, often a light gray or beige, which will act as a foundation for other colors to layer over.

  • Apply Thin Layers: Use a wide, flat brush to apply the base coat in thin layers, ensuring even coverage.
  • Dry Time: Allow the paint to dry completely before proceeding, which can take about 1-2 hours depending on humidity and temperature.

Creating a Weathered Look with Layers

This step involves building up layers with different colors to mimic the multifaceted appeal of driftwood.

Wash Technique

A wash is a technique where paint is diluted with water to create a semi-transparent finish.

  1. Mix and Apply: Mix water with your chosen color (typically white or a slightly darker gray with 50% paint and 50% water), then apply it over the base coat with a brush.
  2. Wipe Away Excess: Using a lint-free cloth, wipe off the excess wash to allow the underlying paint to peek through delicately.

Dry Brushing

Dry brushing gives your project a rustic, textured look:

  1. Minimal Paint on Brush: Dip your brush lightly in paint and remove excess on a cloth.
  2. Light Strokes: Lightly drag the brush across the surface, allowing the paint to deposit unevenly.

Blending with Additional Colors

Introduce additional colors to add depth:

  1. Select Colors: Choose a couple of complementary shades to add variety to your project.
  2. Layer and Blend: Apply using the dry brush or wash technique. Blending multiple colors will enhance the wood-like texture and natural hues typically seen in driftwood.

Driftwood Look With Chalk Paint

Distressing for Authenticity

Once the layers are applied and dry, you can distress parts of the furniture to add an authentic aged look.

Sandpaper Technique

Focus on areas that would naturally experience wear over time, such as edges or corners.

  • Gently Sand: Take a medium-grit sandpaper and distress these areas, being gentle to avoid overdoing it.
  • Target Specific Areas: For example, drawer pulls or the tops of table legs can be excellent spots to highlight through distressing.

Steel Wool or Scraper

For a more detailed distressing effect, using steel wool or a scraper can add fine lines or worn spots that enhance the overall appearance.

Finishing Touches

After achieving the perfect look, it’s important to seal and protect your work.

Applying Wax or Sealer

Finish the project by sealing the paint:

  • Wax or Matte Sealer: Choose health-safe wax or a matte polyurethane sealer to preserve the paint’s appearance and provide protection.
  • Application: Use a cloth to apply wax in small sections, buffing gently as you go. If using a sealer, a brush can apply the product evenly.

Final Buffing for Sheen

If using wax, after setting for 24 hours, buff the surface with a clean lint-free cloth to enhance the subtle glow of the finish.

Styling Your Driftwood Piece

Once your furniture boasts its new look, it’s time to integrate it into your decor.

Setting the Scene

Here are some ways to enhance your newly transformed piece:

  • Pair with Soft Textures: Soft textiles like cotton or linen complement the rustic visuals and provide comfortable style.
  • Natural Elements: Incorporate plants, woven baskets, and pottery to enhance the natural look.
  • Neutral and Coastal Accessories: Use decorations that match the beach-inspired aesthetic, like shells or muted color palettes.

Complementing with Other Furniture

Balance your room by coordinating with other driftwood-toned furniture or keeping a consistent color palette throughout the space.

Troubleshooting and Tips

Every DIY project comes with its quirks. Let’s cover a few common issues and how to resolve them.

Uneven Paint

If you notice any patchiness once your paint dries, try adding another layer using the wash or dry brush technique to even it out.

Overly Distressed

If you feel you’ve distressed too much, simply apply another layer of paint over the sanded area and start again lightly.

Sticky Wax

In the case of leftover wax stickiness, polish over these areas with a clean cloth to remove excess wax or gently reapply more wax to even it out.

Fast Fixes for Mistakes

Remember, with chalk paint, mistakes are usually easy to fix. Additional layers or light sanding can often resolve most issues.

Conclusion

Transforming a piece of furniture with the driftwood look using chalk paint is a satisfying project that rewards you with a unique, personalized addition to your home. Whether you’re aiming to bring in a touch of the beach or simply love the rustic, weathered style, this DIY project offers endless possibilities for creativity and personalization. Embrace the process, and enjoy the charming atmosphere your new driftwood-inspired piece will bring to your home.
Filed Under: Driftwood Ideas Tagged With: Chalk Paint, DIY, Interior Design, Painting techniques

Driftwood Effect Chalk Paint

March 9, 2025 by admin

Have you ever admired the muted, weathered charm of driftwood and wished you could capture that rustic elegance in your home decor? The driftwood effect using chalk paint is a fantastic way to do just that. This technique can transform the simplest piece of furniture into a stunning centerpiece, boasting the natural beauty and subtle sophistication of driftwood. By using chalk paint, known for its versatility and lovely matte finish, you can achieve this look with ease. In this guide, you’ll explore how to create that driftwood effect using chalk paint, discuss its nuances, and get inspired to apply it to your own projects.

What is Driftwood Effect in Chalk Paint?

The driftwood effect in chalk paint refers to a painting technique designed to mimic the natural, aged appearance of driftwood. This look can add a touch of rustic elegance to any room. Achieving this effect means using a series of painting and distressing techniques to get that naturally weathered look.

Why Use Chalk Paint?

Chalk paint is a popular choice for achieving the driftwood effect because it’s easy to use and requires minimal preparation. It adheres to almost any surface without needing primer or sanding. Chalk paint’s matte finish and ability to layer and blend colors make it ideal for creating the nuanced textures seen in driftwood.

Materials You’ll Need

Before you start your driftwood effect project, gather the following materials:

  1. Chalk Paint: Choose at least two complementary colors. A light base color and a darker ‘driftwood’ hue work well.
  2. Brushes: A good quality paintbrush or two for application, and a smaller one for details.
  3. Sandpaper: Medium and fine grit for distressing.
  4. Wax or Sealant: To protect your finished piece.
  5. Cloth: For blending and removing excess paint.

Choosing the Right Colors

The colors you choose can make or break the driftwood effect. Generally, shades of gray, taupe, and white work best. You can mix these colors to create a gradient effect simulating the various tones found in natural driftwood.

Light Base ColorDarker “Driftwood” ColorSuggested Combination
Soft WhiteLight GraySubtle and airy
Light BeigeMedium GrayRustic and elegant
Pale GrayDark TaupeBold and striking

By selecting harmonious shades, you’ll be better able to mimic the natural variations in real driftwood.

Driftwood Effect Chalk Paint

Steps to Create Driftwood Effect

Let’s get into the step-by-step process of creating the driftwood effect with chalk paint.

Step 1: Prepare Your Surface

Begin by wiping down your furniture piece to ensure it’s clean and free of dust. Chalk paint adheres better on a clean surface, so a quick cleaning can make a substantial difference.

Step 2: Apply the Base Coat

Start with the lighter color as your base. Apply this coat evenly across your piece. Since chalk paint often dries quickly, work efficiently to cover the entire surface without leaving streaks.

Step 3: Layer on the ‘Driftwood’ Color

Once your base coat is dry, it’s time to add the darker ‘driftwood’ color. Use a dabbing technique with a brush or cloth to apply this color. The key is to apply it unevenly, allowing the base color to show through in some areas, creating depth and dimension.

Step 4: Blend the Colors

With a damp cloth, gently blend the painted layers to soften the transition between colors. This helps in replicating the gradual color shifts seen in real driftwood.

Step 5: Distressing

For a more authentic look, distress your furniture by lightly sanding areas where natural wear might happen, such as edges and corners. Use the medium grit sandpaper first, then smooth out with fine grit.

Step 6: Seal Your Work

Finally, protect your masterpiece with a layer of wax or sealant. This not only adds durability but also enhances the colors and texture of the finish.

Tips for Achieving a Believable Driftwood Look

  • Work with Grains: Follow the natural wood grain of your piece to ensure the finish looks organic.

  • Don’t Overthink: The beauty of the driftwood effect lies in its randomness. Don’t strive for perfection—imperfection is where the character shines.

  • Practice Makes Perfect: If you’re unsure, try the technique on a test piece or an inconspicuous area before starting your main project.

Driftwood Effect Chalk Paint

Common Mistakes to Avoid

While drifting towards greatness, it’s easy to trip up along the way. Here are a few common mistakes to steer clear of:

  • Skipping Preparation: Even though chalk paint is forgiving, a dirty or greasy surface can thwart your efforts.

  • Going Too Heavy on the Dark Tones: Excessive application of the ‘driftwood’ color can overshadow the base color and diminish the effect.

  • Rushing the Process: Each layer should be thoroughly dry before moving on to the next step to prevent smudging and to maintain clarity.

Creative Uses for Driftwood Effect Chalk Paint

The driftwood effect with chalk paint isn’t limited to just wooden furniture. You can apply this technique onto a variety of surfaces.

Upcycled Items

Turn old or unwanted items into stunning decor. An old picture frame or a bland wooden tray can become an eye-catching centerpiece when adorned with the driftwood look.

Kitchens and Bathrooms

Add a rustic vibe to frequently used spaces. Cabinets, shelves, or even mirror frames in kitchens and bathrooms can benefit from the breath of character imparted by this technique.

Outdoor Decor

Create an outdoor oasis by sprucing up garden furniture or planters. The driftwood effect is particularly stunning in a natural, bountiful garden where the artistry of wood meets lush greenery.

Enhancing the Driftwood Paint Effect

After mastering the basic technique, consider these advanced tips to further your driftwood paint effect:

Using Multiple Colors

Adding additional layers of different hues can increase the visual interest of your project. Try incorporating a touch of blue or green to your usual gray tones to mimic the sea-aged appearance of driftwood.

Incorporating Textured Techniques

Introduce texture by using a stiff brush to create striations resembling grain patterns of weathered wood. This makes the piece not only visually engaging but also texturally dynamic.

Adding Finishing Touches

Experiment with additional finishes like copper or silver highlights to imply sun glinting off aged wood. These embellishments can take your project from rustic to elevated art.

Understanding Care and Maintenance

Once you’ve completed your driftwood effect project, knowing how to maintain it ensures its longevity and continued beauty.

Routine Cleaning

Keep your piece clean by regularly dusting it with a soft cloth. Avoid abrasive cleaners that could damage the wax or sealant layer.

Reapplying Protective Finishes

Over time, the sealant may wear thin, especially in high-use areas. Regularly inspect your piece, and apply a fresh coat of wax or sealant as needed to protect against damage and wear.

Handling Chips and Cracks

For any chips or cracks that develop, gently sand the area and apply a matching coat of chalk paint. This touch-up will blend seamlessly with the existing finish.

Bring Driftwood Charm Into Your Space

The ability to transform ordinary objects into extraordinary ones with the driftwood effect can breathe new life into your home decor. With a blend of creativity and the right techniques, you can create pieces that evoke the serene and rustic beauty of natural driftwood. Whether it’s a statement piece in your living room or a subtle touch in your study, this versatile technique in chalk paint allows you to embrace imperfection and create art that resonates with personal and aesthetic appeal.

By mastering the driftwood effect with chalk paint, you’re not just reinventing your furniture, but also adding a personal touch to your space that captures an essence of coastal charm. Are you ready to get started and see where your creativity can take you? Embrace the transformative power of driftwood effect chalk paint and bring a touch of seaside serenity home!

Filed Under: Driftwood Ideas Tagged With: Chalk Paint, DIY, Driftwood Effect, Furniture makeover, Interior Design

Retique It Driftwood

January 22, 2025 by admin

Have you ever found yourself standing in front of a piece of furniture, paintbrush in hand, dreaming of giving it a new life with a rustic, weathered look but unsure where to begin? If you have, you’re not alone. There’s something undeniably charming about furniture that carries a driftwood finish. It evokes feelings of relaxation, nature, and timeless beauty. Today, we’re going to explore the wonderful world of giving your furniture a driftwood finish using Retique It Driftwood—a hassle-free solution for transforming your home décor.

Retique It Driftwood

What is Retique It Driftwood?

Retique It Driftwood is a uniquely formulated paint product that empowers you to achieve the much-coveted driftwood look without the need to scour the beaches for the perfect piece or undergo intensive stripping and sanding. Retique It products are water-based, non-toxic, and safe for indoor use, making them a perfect choice for DIY enthusiasts looking to embrace a creative project.

The Driftwood Aesthetic

Driftwood aesthetics bring about a sense of tranquility and a touch of nature into living spaces. These finishes are characterized by their weathered, grayish hues and textured appearance. They mimic wood that has been smoothed by the oceans and wind—an ideal fit for those aiming to create a coastal or farmhouse ambiance in their homes.

Why Choose Retique It?

There are myriad reasons to choose Retique It Driftwood over other methods or products:

  • Simplicity: Retique It is designed to be easy to use, even if you’re relatively new to the DIY scene.
  • Versatility: It works on various surfaces including wood, metal, and even laminate without the need for extensive preparatory work.
  • Eco-friendly: Retique It prides itself on being environmentally safe, which means you can work safely indoors without breathing in harmful chemicals.

Preparing Your Project

Before you begin painting, proper preparation will ensure your final product looks professional and lasts for years to come. Here, we’ll guide you through the necessary steps to set you up for success.

Selecting Your Furniture Piece

First things first, identify the piece you wish to transform. Whether it’s a tired wooden bench, a set of chairs, or an outdated dresser, Retique It Driftwood can rejuvenate its appearance. Consider the furniture’s structure and sturdiness, as your efforts will be best spent on pieces that are worth the makeover.

Gathering Supplies

Once you have your project piece in mind, gather the following supplies:

  • Retique It Driftwood kit
  • Paintbrushes (various sizes)
  • Sandpaper or sanding block
  • Damp cloth
  • Drop cloth or newspapers
  • Painter’s tape

Having all your supplies at the ready will make the process enjoyable and seamless.

Preparing the Surface

Start by cleaning the surface of your furniture. Remove any dust, dirt, or grease using a damp cloth. If the piece has a high gloss finish, lightly sand it to help the paint adhere better and to create a more porous surface. Wipe away any dust with a clean cloth after sanding.

Applying the Driftwood Finish

Here comes the exciting part! Applying Retique It Driftwood is straightforward, and with a few tips, you’ll become a pro in no time.

Step-by-Step Application

  1. Priming (Optional): If your furniture is extremely dark or stained, you might want to apply a base coat or primer to ensure the Driftwood color stands out. Retique It’s Ultra White color can serve well as a primer.

  2. Painting: Using your paintbrush, begin applying the Retique It Driftwood in even strokes. Start at one end of your piece and work your way across, ensuring smooth, consistent coverage.

  3. First Coat Drying: Allow the first coat to dry. This process can take 30 minutes to an hour, depending on weather conditions and humidity.

  4. Second Coat (If Needed): Assess whether you need a second coat to achieve your desired opacity and depth. Apply it using the same technique as the first.

  5. Adding Texture: To enhance the driftwood effect, you may lightly sand certain areas or use a brush to create wood grain textures before the paint fully cures.

Final Sealing

Once you are satisfied with the look and have allowed the paint to dry completely, consider applying a sealant to protect your retique and ensure longevity. A water-based polyurethane will lock in color and enhance durability without compromising the finish.

Decorating with Driftwood-Touched Pieces

Showcasing your newly refreshed piece is all about celebrating the natural, calming vibes that driftwood elements bring into your space. Here are a few tips for integrating your creation into your décor.

Ideal Settings for Driftwood Accents

  • Coastal Theme: Embrace other soft blues, whites, and sea life décor elements for an easy coastal vibe.
  • Farmhouse Chic: Pair with shiplap, sparse greenery, and simple textiles like burlap or linen for that modern farmhouse feel.
  • Minimalistic Paradise: Allow your driftwood piece to be the focal point in a minimalist room devoid of clutter.

Complementary Color Schemes

Driftwood tones naturally complement neutral palettes. Shades of gray, cream, and pastel hues can further highlight the finish’s unique characteristics. Textiles such as cozy throws or pillows can add layers of texture without overpowering your piece.

Retique It Driftwood

Caring for Your Driftwood Finish

Ensuring your project retains its charm involves taking simple steps to maintain and protect the finish.

Cleaning

Regularly dust your piece with a soft, dry cloth. Avoid using harsh chemicals or cleansers that could strip or dull the paint.

Repair

Driftwood finishes thoroughly disguise minor imperfections, but if significant wear occurs, touch-up paint can be applied sparingly to affected areas.

Seasonal Care

Wood tends to expand and contract with changes in humidity. Consider using a humidifier during dry months and protecting your piece from direct sunlight to preserve the paint.

FAQs and Troubleshooting

Let’s address some common questions and potential hiccups you might encounter on your journey to driftwood mastery.

Can I Use Retique It Driftwood on Outdoor Furniture?

While Retique It Driftwood is versatile, it’s primarily formulated for indoor use. If you want to use it on outdoor furniture, ensure you apply a robust, outdoor-grade sealant to protect against weather conditions.

What if My Paint Peels?

Peeling may occur if the surface wasn’t adequately prepared. Always ensure your piece is clean and slightly sanded before applying the paint. You can also revisit sections that peel by lightly sanding the area and repainting.

How Long Should I Wait Before Using Sealed Pieces?

Allow the sealant to cure for at least 24 hours before using your furniture. This helps to harden the surface and prevent scratches or marks.

Embrace the Transformation

Working with Retique It Driftwood can redefine the way you think about furniture and interior décor. No longer do old, outdated pieces need to end up in the dumpster. By investing a bit of time and creativity, you can bring new life into your home with beautiful, enigmatic furniture that tells a story of timeless, driftwood elegance. Now, imagine the new conversations that will spark when guests admire your handiwork.

Your journey into the world of home transformation starts here—with a brush, a little vision, and the incredible versatility of Retique It Driftwood. Remember, each piece is unique; as you uncover the best techniques and styles, let your personality and creativity shine through each stroke and finished project.

Filed Under: Driftwood Ideas Tagged With: Chalk Paint, DIY, Driftwood, Furniture Paint, Retique It

Primary Sidebar

Driftwood4us.com, is a participant in the Amazon Services LLC Associates Program, an affiliate advertising program designed to provide a means for sites to earn advertising fees by advertising and linking to amazon.com.