• Skip to main content
  • Skip to primary sidebar
  • Terms and Conditions
  • Privacy Policy
  • Contact

Driftwood 4 Us

Just About Driftwood

cleaning

How To Clean Driftwood For Indoor Use?

February 28, 2024 by admin

Have you ever stumbled upon a beautiful piece of driftwood during a beach walk and thought it would make a perfect addition to your indoor decor? If so, you may be wondering how to clean that piece of driftwood properly before bringing it inside your home. Rest assured, the process is simple and can be done with just a few materials. In this article, we’ll guide you on how to clean driftwood for indoor use, ensuring that your newfound treasure is ready to be showcased in your home.

Gathering Driftwood

When it comes to gathering driftwood, the first thing you need to do is find a suitable location. Coastal areas, riversides, and lakeshores are often great places to start your search. Keep in mind that you should always check and follow any local regulations regarding collecting driftwood, as some areas may have restrictions.

Finding Driftwood

Once you’ve chosen your gathering spot, take a leisurely stroll along the shoreline or riverbank. Keep your eyes peeled for pieces of driftwood that catch your interest. Look for unique shapes, interesting textures, and sturdy pieces that are in good condition. Remember, the best driftwood is often weathered and worn, with a smooth patina that adds to its charm.

Choosing the Right Driftwood

When selecting driftwood, there are a few key things to consider. First, make sure the piece is free from any signs of rot or decay. You want to choose driftwood that is still solid and structurally sound. Additionally, think about the size and shape of the driftwood in relation to your intended use. If you’re looking for a statement piece, you might opt for larger, more dramatic driftwood. For smaller accents, choose pieces that are more petite and delicate.

Preparing Driftwood for Cleaning

Before you can start the cleaning process, it’s important to prepare the driftwood by removing any loose debris and soaking it to soften stubborn dirt and grime.

Removing Loose Debris

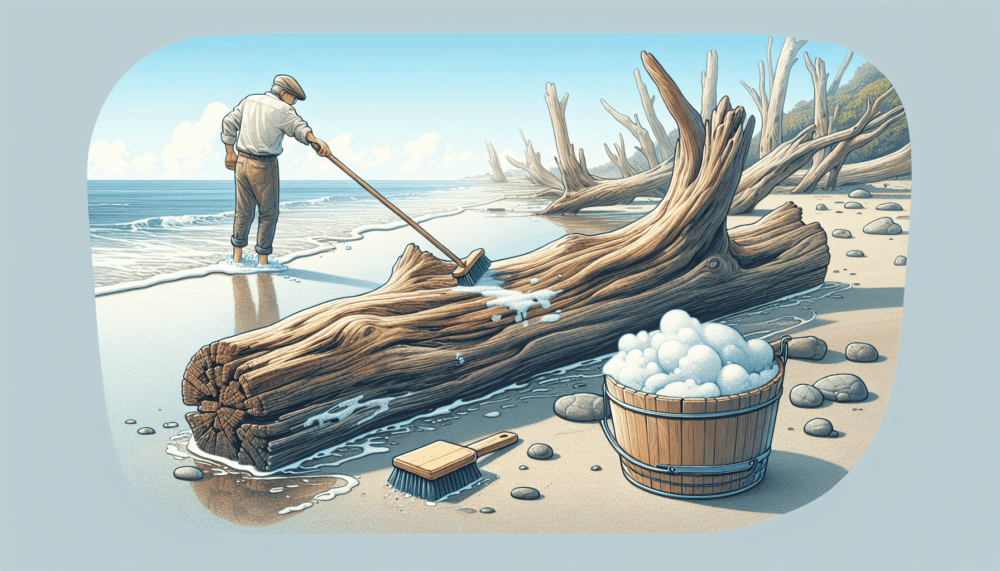
Begin by using a stiff brush or your hands to remove any loose debris from the surface of the driftwood. This includes things like sand, leaves, or smaller pieces of wood that may have become lodged in crevices. Gently brush or shake the driftwood to dislodge these materials, taking care not to damage the wood in the process.

Soaking Driftwood

Next, fill a large container, such as a bathtub or a basin, with warm water. Place the driftwood in the water, making sure it is fully submerged. Allow the driftwood to soak for several hours or overnight. This soaking process will help to loosen and soften any remaining dirt or debris, making it easier to clean later on.
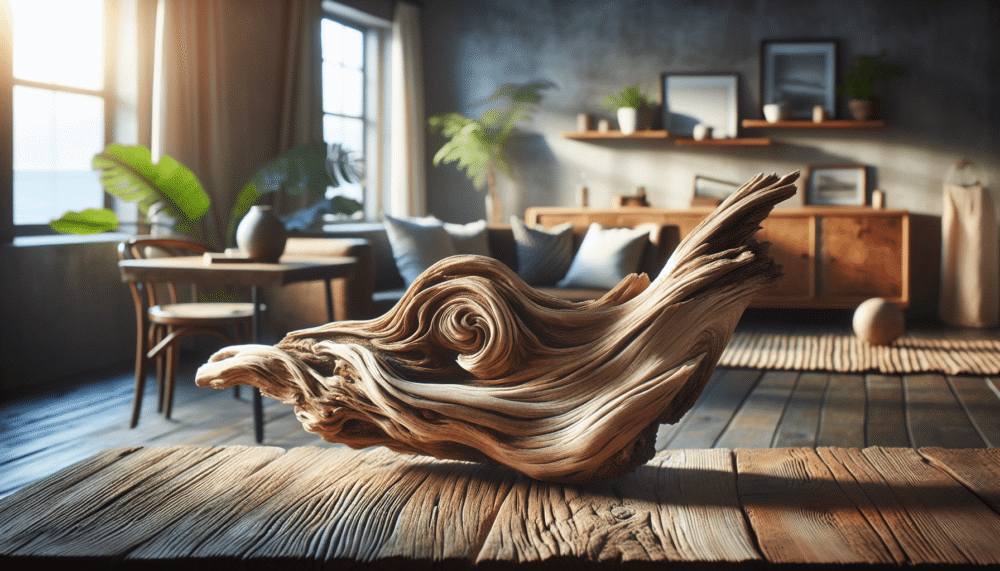
How To Clean Driftwood For Indoor Use?

Scrubbing Driftwood

Once the driftwood has been properly prepared, it’s time to start scrubbing away any remaining dirt and grime. This step will ensure that your driftwood is not only clean but also free from any potential odor.

Using a Brush

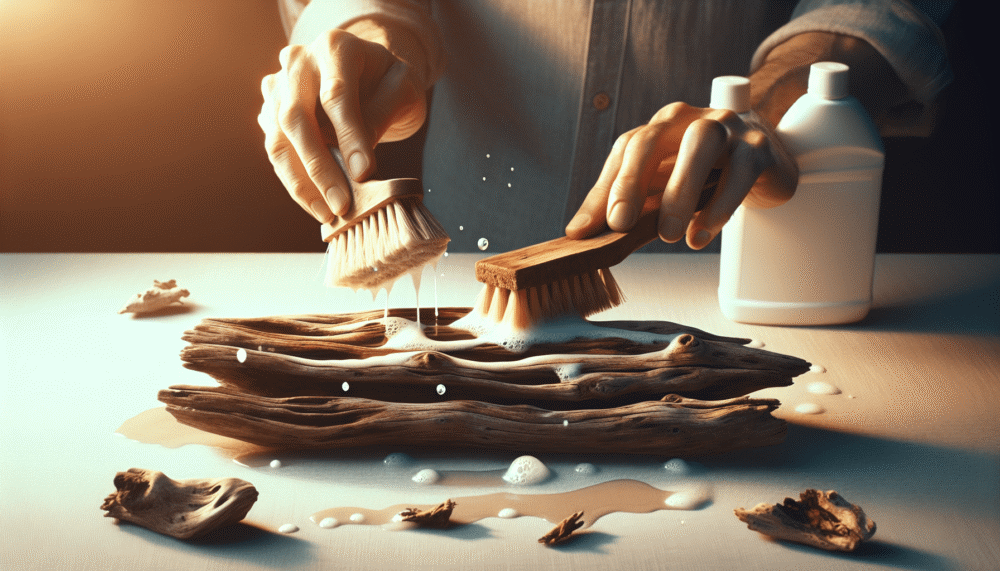
Using a brush with stiff bristles, gently scrub the surface of the driftwood. Work in a circular motion, paying extra attention to any particularly dirty or stained areas. The brush will help to dislodge dirt and grime from the wood’s textured surface. Rinse the brush frequently to remove any debris that may accumulate.

Cleaning Hard-to-Reach Areas

For hard-to-reach areas or intricate designs, you may need to use a smaller brush or a toothbrush. These tools allow you to get into all the nooks and crannies of the driftwood and ensure a thorough cleaning. Take your time and be gentle to avoid damaging the wood during this process.

Removing Stains and Odor

After scrubbing, you may still notice some stubborn stains or lingering odors. Don’t worry – there are effective ways to tackle these issues and restore your driftwood to its full glory.

Using a Vinegar Solution

To remove stains and neutralize odors, create a solution of equal parts white vinegar and water. Dip a clean cloth or sponge into the solution and gently wipe down the surface of the driftwood. The acidity of the vinegar helps to break up tough stains and eliminate any unwanted odors. Allow the driftwood to air dry after using the vinegar solution.

Bleaching Driftwood

If the stains on your driftwood are especially stubborn or if you prefer a brighter, more uniform look, you can consider bleaching the wood. Mix a solution of one part bleach to ten parts water and apply it to the driftwood using a brush or sponge. Be sure to wear gloves and work in a well-ventilated area when using bleach. Allow the solution to sit on the driftwood for a few minutes before rinsing thoroughly with water. This process may lighten the color of the wood and remove some of its natural patina.
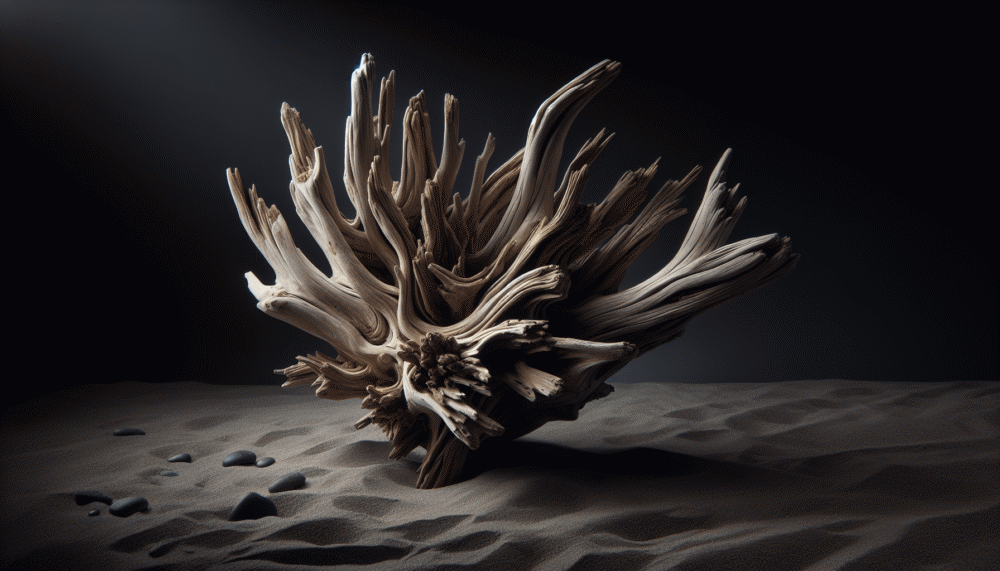
How To Clean Driftwood For Indoor Use?

Drying Driftwood

Once the cleaning process is complete, it’s important to ensure that your driftwood is thoroughly dried before moving on to the next steps. Proper drying helps to prevent mold and decay.

Air Drying

The simplest method of drying driftwood is to let it air dry naturally. Place the cleaned driftwood in a well-ventilated area, preferably outdoors or near an open window. Allow the wood to dry completely, which may take several days or longer depending on the size and thickness of the driftwood. It’s important to note that air drying may result in some slight warping or cracking of the wood, especially if it’s exposed to direct sunlight or extreme temperatures.

Baking in the Oven

If you prefer a faster drying method or want to minimize the risk of warping, you can use your oven to dry the driftwood. Preheat the oven to a low temperature, around 200°F (90°C). Place the driftwood on a baking sheet lined with aluminum foil to catch any drips. Bake the driftwood in the oven for several hours, checking periodically to ensure that it’s drying evenly and not becoming too hot. Remove the driftwood from the oven once it’s completely dry and allow it to cool before handling.

Sanding Driftwood

To achieve a smooth and polished finish, sanding is a crucial step in the driftwood cleaning process. Sanding not only removes any rough patches but also helps to reveal the beautiful grain and texture of the wood.

Using Sandpaper

Start by selecting a coarse-grit sandpaper, such as 80 or 100-grit, to remove any remaining roughness on the driftwood’s surface. Sand in the direction of the wood grain using smooth, even strokes. Once the surface feels smooth and any imperfections have been eliminated, switch to a finer-grit sandpaper, such as 220-grit, to achieve a polished finish. Again, sand in the direction of the wood grain, applying light pressure.

Smoothing Rough Edges

In addition to sanding the surface, pay special attention to any rough or jagged edges of the driftwood. Use sandpaper or a sanding block to carefully smooth out these areas, ensuring they blend seamlessly with the rest of the wood. Be patient and take your time to achieve the desired results.

Sealing Driftwood

To protect your cleaned and sanded driftwood and enhance its natural beauty, applying a sealer is highly recommended. A sealer helps to seal the pores of the wood, preventing moisture absorption and reducing the risk of decay.

Choosing a Sealer

When selecting a sealer for your driftwood, opt for a clear, waterproof sealant that is suitable for outdoor use. Look for products specifically designed for wood and choose one that provides UV protection to prevent fading. Test the sealer on a small, inconspicuous area of the driftwood first to ensure it achieves the desired effect.

Applying the Sealer

Before applying the sealer, make sure the driftwood is completely dry and free from any dust or debris. Follow the manufacturer’s instructions for the specific sealer you’re using. Generally, you can use a brush, sponge, or spray bottle to apply an even coat of sealer to the entire surface of the driftwood. Allow the sealer to dry thoroughly before handling or displaying the driftwood.

Displaying Driftwood

Now that your driftwood is clean, dry, and sealed, it’s time to find the perfect spot to display it and incorporate it into your decor.

Choosing a Display Location

Consider the size and shape of your driftwood when choosing a display location. Larger pieces could become a focal point in a living room or entryway, while smaller pieces can be showcased on shelves, mantels, or incorporated into table centerpieces. Take into account the overall theme and style of your space to ensure that the driftwood complements and enhances the existing decor.

Incorporating Driftwood into Decor

Driftwood can be integrated into your decor in various ways. You can use it as a standalone sculpture, hang it on the wall as a unique art piece, or even repurpose it into functional items like candle holders or picture frames. Get creative and experiment with different placements and arrangements to find the perfect way to showcase your driftwood.

Maintaining Driftwood

To keep your driftwood looking its best and ensure its longevity, regular maintenance is key.

Regular Dusting

Dust can accumulate on the surface of driftwood, detracting from its natural beauty. To keep your driftwood clean and dust-free, regularly dust it using a soft cloth or a feather duster. Be gentle to avoid scratching or damaging the wood during this process.

Periodic Re-Sealing

Over time, the protective sealant on your driftwood may wear off or become compromised. To maintain its durability, periodically reapply a new coat of sealer. Follow the same instructions as when initially applying the sealer, making sure the driftwood is clean and dry before proceeding.

Safety Precautions

While cleaning, sanding, and sealing driftwood, it’s important to prioritize your safety and take necessary precautions.

Wearing Gloves

When handling driftwood during the cleaning and sanding processes, it’s advisable to wear gloves. This will help protect your hands from any potential splinters or rough edges, as well as from any chemicals you may be using.

Working in a Well-Ventilated Area

When using cleaning solutions, bleach, or sealers, it’s essential to work in a well-ventilated area. Open windows or doors to ensure proper airflow and minimize exposure to any chemical fumes. If possible, consider wearing a mask to further protect yourself from potentially harmful particles.

By following these comprehensive steps and taking the necessary precautions, you can effectively clean, prepare, and maintain driftwood for indoor use. Embrace the unique beauty of driftwood and let it bring a touch of the coast into your home decor. Enjoy the process of collecting, cleaning, and transforming this natural treasure into a captivating element in your living space.

Filed Under: Driftwood Tagged With: cleaning, Driftwood, Indoor Use

How To Clean Driftwood For Aquarium?

February 28, 2024 by admin

So you’ve decided to add some driftwood to your aquarium to enhance its natural look, but now you’re wondering how to clean it before placing it in the tank. Cleaning driftwood for your aquarium is essential to remove any dirt, debris, or potential contaminants that could harm your aquatic ecosystem. In this article, we’ll guide you through simple and effective methods to ensure your driftwood is thoroughly cleaned and safe for your fish and plants to enjoy. Don’t worry, it’s easier than you might think!

How To Clean Driftwood For Aquarium?

Why cleaning driftwood is important

Driftwood is a beautiful addition to any aquarium or home decor, but it is important to clean it properly before using it. Cleaning driftwood serves several purposes: it removes harmful substances, prevents decay, and enhances the overall aesthetics of the wood.

Removing harmful substances

When driftwood is collected from natural sources such as rivers or beaches, it may come into contact with various substances that can be harmful to aquatic life. These substances include oils, pollutants, and even parasites. By thoroughly cleaning the driftwood, you can ensure the removal of these potentially harmful substances, creating a safe environment for your aquarium inhabitants.

Preventing decay

Driftwood is naturally porous, making it prone to decay over time. If not properly cleaned, decay can set in and cause the wood to deteriorate, potentially releasing harmful substances into the water. By cleaning the driftwood, you remove any decaying matter, preventing the wood from rotting and prolonging its lifespan.

Enhancing aesthetics

Cleaning driftwood not only ensures its cleanliness and safety but also enhances its appearance. Driftwood can often become discolored or stained due to exposure to water, sunlight, or other external factors. By following the proper cleaning methods, you can restore the natural beauty of the wood, allowing it to become a striking focal point in your aquarium or home.

Gather necessary supplies

Before you begin the cleaning process, it is essential to gather all the necessary supplies. Here is a list of items you will need:

  • Driftwood: Choose a piece that suits your aesthetic preferences and the size of your aquarium or home decor.
  • Bucket: You will need a container to hold water for rinsing and soaking the driftwood.
  • Soft brush: To scrub away any debris, stains, or loose bark from the wood surface.
  • Water source: A readily available water source, such as a sink or hose, is needed for rinsing the driftwood.
  • Boiling pot (optional): If you choose to use the boiling method, you will need a large pot to boil the water and driftwood.
  • Bleach (optional): Bleach can be used for additional disinfection and color restoration purposes, but it is not mandatory.

With these supplies ready, you can proceed to prepare the driftwood for cleaning.

Preparing driftwood

Before immersing your driftwood in water or applying any cleaning methods, it is crucial to inspect it for any signs of decay or damage. Look for soft spots, crumbling areas, or any visible mold or fungus growth. If you detect these signs, it is best to discard the driftwood, as it may not be suitable for use.

Next, remove any loose bark or debris that may be clinging to the wood surface. Use a soft brush or your hands to gently scrape away these unwanted materials. This step is essential to ensure a clean and smooth surface for the subsequent cleaning processes.

Once the loose debris has been removed, rinse the driftwood thoroughly with water. This step helps to eliminate any remaining dirt or particles and prepares the wood for the tannin removal process.

Removing tannins from driftwood

Tannins are natural substances found in many types of wood, including driftwood. When these tannins leach into the water, they may cause discoloration, giving the water a tea-like appearance. While this may not be harmful to aquarium inhabitants, it may affect the overall aesthetics of the aquarium. There are two common methods for removing tannins from driftwood: the boiling method and the soaking method.

How To Clean Driftwood For Aquarium?

Boiling method

To use the boiling method, follow these steps:

  1. Boil water in a large pot, ensuring there is enough water to fully submerge the driftwood.
  2. Carefully add the driftwood to the boiling water, ensuring it is fully immersed.
  3. Allow the driftwood to boil for 1-2 hours. This prolonged heating helps to release and remove tannins effectively.
  4. After boiling, allow the water to cool completely.
  5. Once the water has cooled, remove the driftwood from the pot and rinse it thoroughly under running water. This step ensures complete removal of any residual tannins and prepares the wood for further cleaning.

Soaking method

Alternatively, you can use the soaking method to remove tannins from driftwood:

  1. Place the driftwood in a bucket or container large enough to fully submerge it.
  2. Fill the bucket with water, ensuring the driftwood is completely covered.
  3. Let the driftwood soak in the water for several days. It is recommended to change the water daily to facilitate the tannin removal process.
  4. During the soaking period, test the water by checking for any discoloration. Once the water remains clear, it indicates that most of the tannins have been removed.
  5. After the soaking process, rinse the driftwood thoroughly with fresh water to remove any remaining tannins or debris.

Using either method will significantly reduce the tannin content in the driftwood, ensuring a cleaner and clearer aquarium environment.

Using bleach to clean driftwood

While the previous methods are effective for tannin removal and general cleaning, using bleach can provide additional disinfection and color restoration benefits. If you choose to use bleach, it is crucial to take appropriate precautions to ensure the safety of your aquatic life.

To clean driftwood with bleach, follow these steps:

  1. Prepare a bleach solution by mixing 1 part bleach with 9 parts water. Ensure the bleach you are using does not contain any additives or scents.
  2. Submerge the driftwood in the bleach solution, making sure it is completely covered.
  3. Leave the driftwood in the solution for a few hours, depending on the desired level of disinfection and color restoration.
  4. After the designated soaking time, remove the driftwood from the bleach solution.
  5. Rinse the driftwood thoroughly with fresh water, ensuring complete removal of any bleach residue.
  6. It is essential to be thorough with rinsing to prevent any residual bleach from harming your aquarium inhabitants.

Scrubbing and brushing

To further enhance the cleanliness and appearance of the driftwood, you can use a soft brush or sponge to scrub away any remaining stains, dirt, or algae. Gently scrub the surface of the driftwood, paying attention to any intricate details or crevices. This step helps to restore the natural beauty of the wood and leaves it looking clean and vibrant.

After scrubbing, rinse the driftwood once again with water to remove any loosened debris or cleaning residue. This final rinse ensures that the driftwood is ready for the drying process.

Drying the driftwood

Drying the driftwood is a crucial step in the cleaning process to prevent the growth of mold or bacteria. Choose a well-ventilated area where the driftwood can air dry completely. It is important to avoid placing the driftwood in direct sunlight, as this can cause discoloration or cracking.

Allow the driftwood to dry fully, ensuring that no moisture remains. Depending on the size and density of the wood, this drying process can take several days to weeks. Once the wood feels dry to the touch and is significantly lighter in weight, it is ready to be used in your aquarium or home decor.

Preparing driftwood for aquarium use

If you intend to use the driftwood in an aquarium, an additional step of preparation is necessary to ensure optimal water quality and the health of your aquatic life.

Before placing the driftwood in the aquarium, it is recommended to soak it in dechlorinated water. This step further removes any residual chemicals or contaminants that may affect the water parameters. Soak the driftwood for a day or two, periodically changing the water to facilitate complete dechlorination.

During the soaking period, closely monitor the water parameters, such as pH and hardness, to ensure they remain stable and suitable for your aquarium inhabitants. Once the driftwood has been properly soaked and the water parameters are within an acceptable range, you can safely place the driftwood in your aquarium.

Regular monitoring of the water quality is essential after introducing driftwood, as it may slightly affect the pH and hardness over time. However, with proper preparation and maintenance, driftwood can provide a natural and visually appealing environment for your aquatic pets.

By following these steps and methods, you can effectively clean and prepare driftwood for aquarium use or incorporate it into your home decor. Taking the time to clean driftwood ensures a safe and attractive addition to your aquarium while promoting the well-being of your aquatic life. Enjoy the beauty and natural charm that driftwood can bring to your aquatic habitat or living space.

Filed Under: Driftwood Tagged With: aquarium, cleaning, Driftwood

How To Clean Driftwood Bleach?

February 27, 2024 by admin

Driftwood can be a beautiful addition to any home decor or craft project, but it often comes with its fair share of dirt and grime. If you’re wondering how to clean driftwood and remove those stubborn stains, look no further than this article. We’ll show you an easy and effective method using bleach that will have your driftwood looking fresh and pristine in no time. Say goodbye to dull and dirty driftwood, and hello to a beautifully restored natural piece for your home. Let’s get started on rejuvenating your driftwood with the power of bleach!

How To Clean Driftwood Bleach?

Preparing the Driftwood

Choosing the right driftwood

When selecting driftwood for various decorative projects, it’s important to choose pieces that are sturdy and have an interesting shape. Look for driftwood with unique twists and knots, as these characteristics can add a touch of charm and character to your final creation. Keep in mind the size and scale of the project you have in mind, as larger pieces may be better suited for outdoor furniture or sculptures, while smaller pieces can be used for more delicate crafts or home decor accents.

Removing any attached items

Before cleaning the driftwood, it’s essential to remove any attached items such as shells, rocks, or other organic matter. Not only can these items harbor bacteria or pests, but they can also prevent the driftwood from fully absorbing the bleach solution during the cleaning process. Carefully inspect the driftwood for any loose debris and gently remove them using a soft brush or your hands.

Inspecting for bugs or pests

One potential drawback of using driftwood in crafts or home decor is that it may contain bugs or pests. Inspecting the driftwood for any signs of infestation is crucial to prevent introducing unwanted critters into your home. Look for tiny holes, sawdust-like residue, or any live bugs crawling on the surface of the wood. If you notice any signs of pests, it’s best to discard the driftwood and find a different piece to work with.

Soaking the driftwood

Before beginning the actual cleaning process, it’s recommended to soak the driftwood in water. This will help to remove any dirt, debris, or salt water residue from the surface and make the subsequent cleaning more effective. Fill a large bucket or container with clean water and place the driftwood inside, ensuring it is fully submerged. Allow the wood to soak for at least 24 hours, or longer if the pieces are particularly dirty or encrusted with salt.

Gathering the Materials

Bleach

Bleach is a key ingredient in cleaning and disinfecting driftwood. Make sure to choose a bleach that does not contain any fragrances or additional additives, as these can alter the color of the wood or interfere with the cleaning process. Plain chlorine bleach is typically the most effective for this task.

Bucket

To mix the bleach solution and soak the driftwood, you will need a large bucket or container. Choose a container that is large enough to comfortably fit the pieces of driftwood you are working with without overcrowding them.

Water

Water is an essential component in creating the bleach solution and rinsing the driftwood. Ensure you have access to clean, fresh water for both steps of the cleaning process.

Protective gloves

When working with bleach, it’s important to protect your hands from potential irritation or chemical burns. Wear a pair of protective gloves, preferably made of rubber or other waterproof material, to shield your skin from the bleach solution.

Scrub brush

A scrub brush with firm bristles will come in handy when cleaning the driftwood. The brush will help remove stubborn stains, algae, or other buildup on the surface of the wood. Choose a brush that is suitable for the size of the driftwood pieces you are cleaning.

Safety goggles

As an extra safety measure, wear safety goggles to protect your eyes from any splashes or accidental contact with the bleach solution. Safety goggles will provide a barrier and prevent any potential harm to your eyes during the cleaning process.

Creating the Bleach Solution

Choosing the right bleach

Selecting the appropriate bleach for cleaning driftwood is essential. Ensure you are using a plain chlorine bleach without any added scents or detergents. These additional ingredients can affect the final appearance of the driftwood or interfere with the cleaning process itself. Read the label carefully before purchasing to ensure you are selecting the right type of bleach.

Determining the bleach to water ratio

The bleach solution should be properly diluted to avoid damaging the driftwood or generating harmful fumes. The recommended bleach to water ratio is one part bleach to ten parts water. However, for more delicate or fragile pieces of driftwood, you may want to use a more diluted solution, such as one part bleach to twenty parts water. Adjust the ratio accordingly based on the condition and needs of your driftwood pieces.

Mixing the bleach solution

In a well-ventilated area, combine the bleach and water according to the determined ratio. Stir the mixture gently with a spoon or stir stick to ensure thorough mixing. Do not use your hands to mix the solution, as bleach can be harmful to the skin. After preparing the bleach solution, it is now ready for use in the cleaning process.

Safety Precautions

Working in a well-ventilated area

When working with bleach, it’s crucial to ensure proper ventilation to avoid inhaling fumes or experiencing respiratory irritation. Open windows or doors to create a cross breeze or turn on fans to improve air circulation. If possible, work outdoors to have access to fresh air throughout the cleaning process.

Wearing protective gear

Before starting the cleaning process, put on the appropriate protective gear. Wear gloves to protect your hands from irritation or burns caused by the bleach solution. Safety goggles should be worn to shield your eyes from any potential splashes or accidental contact with the bleach.

Avoiding contact with eyes and skin

Bleach can be harmful if it comes into contact with your eyes or skin. Take caution to protect yourself and avoid any direct contact. If bleach does get on your skin or in your eyes, immediately rinse with water and consult medical advice if necessary.

Keeping bleach away from children and pets

Bleach is a toxic substance and should be stored safely out of reach of children and pets. Ensure the cleaning area is secure and inaccessible to curious little ones or animals who may accidentally ingest or come into contact with the bleach.

How To Clean Driftwood Bleach?

Cleaning the Driftwood

Submerging the driftwood in the bleach solution

Take the soaked driftwood pieces and immerse them in the prepared bleach solution. Ensure each piece is fully submerged and that the solution reaches all areas of the wood. The bleach will help kill any remaining bacteria, mold, or pests on the driftwood’s surface.

Gently scrubbing the driftwood

Using a scrub brush, gently scrub the driftwood to remove any dirt, stains, or algae. Work in a circular motion and apply gentle pressure to avoid damaging the wood. Pay attention to any areas that may require additional effort to remove stubborn stains or buildup.

Removing stubborn stains or algae

For particularly stubborn stains or algae, you may need to let the driftwood soak in the bleach solution for an extended period of time. Alternatively, you can try focusing the scrub brush on the affected areas, applying a bit more pressure to loosen and remove the stubborn residue.

Rinsing the driftwood thoroughly

After completing the scrubbing process, carefully remove each piece of driftwood from the bleach solution and rinse them thoroughly with clean water. Rinse off any residual bleach, ensuring no traces of the solution remain on the wood. Proper rinsing is essential to prevent any bleach residue from damaging the driftwood or interfering with its natural appearance.

Drying the Driftwood

Choosing the right drying method

Selecting the appropriate drying method is crucial to ensure the driftwood dries evenly and thoroughly. There are two main options: air drying and using an oven to speed up the process.

Air drying the driftwood

To air dry the driftwood, place the clean pieces on a clean towel or rack in a well-ventilated area. Ensure the driftwood is not in direct contact with surfaces that may be affected by moisture, such as wooden tables or countertops. Allow the wood to dry naturally, which may take a few weeks depending on humidity levels.

Using an oven to speed up drying

For individuals who wish to expedite the drying process, using an oven is an option. Preheat the oven to a low temperature, around 200°F (93°C). Place the driftwood on a baking sheet lined with aluminum foil and leave it in the oven for several hours, checking regularly to prevent overheating or any damage. It’s crucial to monitor the process closely to ensure the driftwood does not become too hot and potentially catch fire. Always prioritize safety when using this method.

Avoiding direct sunlight

Whether air drying or using an oven, it’s important to avoid placing the driftwood in direct sunlight. Sunlight can cause the wood to warp, crack, or fade, potentially diminishing its natural beauty. Find a shaded spot or a well-ventilated indoor area to allow the driftwood to dry without being exposed to direct sunlight.

Post-Cleaning Treatment

Neutralizing the bleach residue

After the driftwood has dried, it’s essential to neutralize any remaining bleach residue. Mix a solution of water and white vinegar in a 1:1 ratio. Submerge the driftwood in this solution and allow it to soak for approximately 30 minutes. This step will help counteract any residual bleach and restore the pH balance of the wood.

Applying wood treatment or sealant

To protect the driftwood and enhance its natural beauty, consider applying a wood treatment or sealant. There are various products available specifically designed for driftwood or general wood preservation. Follow the manufacturer’s instructions carefully when applying the treatment, ensuring even coverage and allowing the product to dry completely before further handling or displaying the driftwood.

Enhancing the color with stain or oil

If you desire to enhance the color of your driftwood, consider using a wood stain or oil. Select a stain or oil that highlights the natural tones of the wood and brings out its unique patterns. Apply the stain or oil according to the product instructions, allowing sufficient drying time between coats. A few layers may be necessary to achieve the desired depth of color.

Maintaining Driftwood

Regularly dusting the driftwood

To keep your driftwood looking its best, it’s important to incorporate regular maintenance into your routine. Simply dust the driftwood regularly using a soft cloth or feather duster to remove any accumulated dirt or debris. This will help preserve the natural appearance and prevent any buildup from dulling the wood’s beauty.

Avoiding exposure to extreme temperatures

Driftwood is a natural material that can be sensitive to extreme temperatures. Avoid placing driftwood in areas that experience extreme heat or cold, such as near heating vents, open flames, or windows with direct sunlight. Sudden or prolonged exposure to extreme temperatures can cause the wood to warp, crack, or deteriorate over time.

Keeping away from high humidity

High humidity levels can affect the condition of driftwood, potentially leading to mold growth or decay. To prevent these issues, avoid placing driftwood in areas with high humidity, such as bathrooms or near humidifiers. Opt for well-ventilated spaces or use dehumidifiers if necessary to maintain a suitable environment.

Monitoring for signs of decay or pests

Even with proper cleaning and maintenance, driftwood can still be susceptible to decay or pest infestations over time. Regularly inspect your driftwood for any signs of deterioration, such as soft spots, mold growth, or an unpleasant odor. Additionally, keep an eye out for any signs of pests, such as small holes or sawdust-like residue. Taking prompt action at the first sign of decay or pests is crucial to prevent further damage and preserve the integrity of the driftwood.

Alternative Cleaning Methods

Using vinegar instead of bleach

If you prefer to avoid using bleach, vinegar can be an effective alternative for cleaning driftwood. Create a solution of equal parts water and white vinegar and soak the driftwood for approximately 24 to 48 hours. Vinegar possesses natural cleaning properties that can help remove stains and kill bacteria. After the soaking period, rinse the driftwood thoroughly with clean water and proceed with the drying and post-cleaning treatment steps outlined previously.

Using hydrogen peroxide

Hydrogen peroxide is another alternative to bleach for cleaning driftwood. Dilute hydrogen peroxide with an equal amount of water, and soak the driftwood for approximately 24 hours. This method can help remove stains and kill bacteria while being less harsh than bleach. Always ensure proper ventilation when working with hydrogen peroxide, and rinse the driftwood thoroughly afterward to remove any residue.

Trying a baking soda paste

For smaller projects or localized stains, a baking soda paste can be an effective cleaning solution. Mix baking soda with a small amount of water to create a paste with a consistency similar to toothpaste. Apply the paste to the stained areas of the driftwood, gently scrubbing with a soft brush. Allow the paste to sit for a few minutes, then rinse off with clean water. This method is gentle yet effective for spot cleaning and can be repeated as necessary.

Decorative Ideas for Driftwood

Creating a driftwood centerpiece

Driftwood makes a stunning centerpiece for any dining table or living room display. Arrange a selection of driftwood pieces in a vase or create a unique sculpture by gluing the driftwood together in an artistic arrangement. Add other natural elements such as seashells, succulents, or candles to complete the centerpiece.

Making a driftwood wall art

Transform your walls into a gallery of nature-inspired art by creating a driftwood wall hanging. Arrange driftwood pieces in various sizes and shapes on a wooden board or canvas, securing them with strong adhesive or nails. This wall art will add texture and interest to any room, showcasing the natural beauty of the driftwood.

Designing a driftwood mobile

Bring movement and tranquility into your space with a driftwood mobile. Select several pieces of driftwood, preferably in different lengths, and attach them to a wooden or metal ring using fishing line or sturdy string. Add small seashells or other lightweight decorations for an extra touch of charm. Hang the mobile near a window or in a corner that catches the breeze, allowing the driftwood to gently sway.

Building a driftwood shelf

If you’re looking for a practical yet eye-catching piece of furniture, consider building a driftwood shelf. Utilize larger, sturdier pieces of driftwood as the brackets or supports for the shelf, attaching them securely to the wall. Place a sturdy, flat piece of wood on top of the driftwood brackets to create the shelf surface. This unique shelf will not only provide storage but also serve as a captivating focal point in any room.

With these comprehensive guidelines and ideas, you can confidently prepare, clean, and maintain driftwood for a variety of decorative projects. Whether crafting a centerpiece, creating wall art, or designing unique furniture, driftwood offers endless possibilities to enhance your home with its natural beauty. Embrace the charm and character of these weathered wood pieces and let your creativity shine.

Filed Under: Driftwood Tagged With: bleach, cleaning, Driftwood

How To Clean Driftwood?

February 27, 2024 by admin

So, you’ve stumbled upon a beautiful piece of driftwood and you’re wondering how to bring out its true beauty? Well, look no further because we’ve got all the answers for you. In this article, we’ll guide you through the step-by-step process of cleaning driftwood, ensuring that you not only remove any dirt or debris but also preserve its natural charm. Whether you’re a seasoned DIY enthusiast or a newbie looking for a fun project, we’ve got you covered. Get ready to discover the secrets of turning your newfound driftwood into a stunning centerpiece for your home!

How To Clean Driftwood?

Gather necessary supplies

To clean driftwood effectively, you will need a few supplies. First, make sure you have protective gloves to keep your hands safe throughout the process. An old toothbrush or scrub brush will come in handy for scrubbing away dirt and grime. Remember to have a bucket or basin to hold water for cleaning. You’ll also need water itself, which is essential for rinsing the driftwood. Depending on the type of driftwood you’re cleaning, you may need either bleach or hydrogen peroxide. Lastly, white vinegar will be required for cleaning darker driftwood. Don’t forget to have a soft cloth or rag for drying and wiping down the driftwood once it’s clean.

Preparation

Before you start the cleaning process, there are a few steps you need to take to prepare the driftwood. First, choose a well-ventilated area to work in. This will help in ensuring the fumes from the cleaning solutions don’t become overpowering. Put on your protective gloves to protect your hands from any potential hazards. Next, inspect the driftwood for any loose debris such as leaves or twigs. Remove any attached hardware or nails carefully to prevent any injuries. Finally, rinse the driftwood with water to remove any excess dirt that may hinder the cleaning process.

Cleaning with bleach (for lighter driftwood)

If you have lighter-colored driftwood that needs cleaning, using bleach can be an effective method. To start, prepare a bleach solution by diluting bleach with water. Submerge the driftwood in the bleach solution, ensuring it is fully covered. Leave the driftwood to soak for 24 to 48 hours, allowing the bleach to work its magic in removing stains and discoloration. After the soaking period, use a toothbrush or scrub brush to scrub the driftwood gently, removing any remaining dirt or debris. Once you’re satisfied with the cleaning, rinse the driftwood thoroughly to remove any traces of bleach. Finally, allow the driftwood to dry completely before moving on to the next steps.

Cleaning with hydrogen peroxide (for lighter driftwood)

For lighter-colored driftwood, hydrogen peroxide can be used instead of bleach. Create a hydrogen peroxide solution by mixing hydrogen peroxide with water. Submerge the driftwood in the solution, ensuring it is fully covered. Let the driftwood soak for 24 to 48 hours, allowing the hydrogen peroxide to work its magic in cleaning and brightening the driftwood. After the soaking period, gently scrub the driftwood with a toothbrush or scrub brush to remove any remaining dirt or debris. Rinse the driftwood well to remove any traces of hydrogen peroxide. Allow the driftwood to dry completely before proceeding to the next steps.

How To Clean Driftwood?

Cleaning with vinegar (for darker driftwood)

If you’re dealing with darker-colored driftwood, vinegar is an excellent cleaning agent. Begin by creating a vinegar solution by mixing white vinegar with water. Submerge the driftwood in the solution, ensuring it is fully covered. Leave the driftwood to soak for 24 to 48 hours, allowing the vinegar to work its magic in breaking down dirt and grime. Gently scrub the driftwood with a toothbrush or scrub brush to remove any remaining debris. Rinse the driftwood thoroughly to get rid of any vinegar residue. Make sure to allow the driftwood to dry completely before moving on to the next steps.

Removing stains or discoloration

If your driftwood has stubborn stains or discoloration, creating a paste using baking soda and water can help tackle the issue. Start by mixing baking soda and water to form a thick paste. Apply the paste to the stained areas of the driftwood, ensuring it is evenly distributed. Leave the paste on for several hours or even overnight to allow it to work on removing the stubborn stains. After the waiting period, gently scrub the area with a toothbrush or scrub brush, focusing on the stained areas. Rinse the driftwood well to remove any residue from the paste. Allow the driftwood to dry completely before proceeding further.

Neutralizing odors

Driftwood can sometimes have unpleasant odors, but there’s a simple solution to neutralize them. Prepare a mixture of water and an odor-neutralizing spray, such as Febreze or an equivalent product. Spray the solution onto the driftwood, making sure to cover all surfaces. Allow the driftwood to dry completely after applying the solution. This process will help eliminate any lingering odors, leaving your driftwood fresh and pleasant smelling.

Sealing and preserving the driftwood

To prolong the life of your driftwood and maintain its appearance, sealing it is highly recommended. Choose a sealant suitable for driftwood, such as a clear varnish or polyurethane sealant. Apply the sealant to the entire surface of the driftwood, ensuring it is evenly coated. Allow the sealant to dry completely according to the manufacturer’s instructions. Once dry, the sealant will provide protection against moisture and UV damage, preserving the natural beauty of the driftwood. For optimal maintenance, reapply the sealant annually or as needed, especially if the driftwood is exposed to outdoor elements.

Decorating or using driftwood

Now that your driftwood is clean and preserved, you can unleash your creativity and find various uses for it. Use the cleaned driftwood for various craft projects, such as making unique wall art, photo displays, or even jewelry holders. Display the driftwood as standalone decor pieces, either as a centerpiece on a table or as an accent on a shelf. Incorporate the driftwood into aquariums or terrariums, creating a natural and aesthetically pleasing environment for your aquatic or plant life. If you’re feeling even more artistic, use the driftwood as a base for creating sculptures or other art forms. The possibilities are endless, and with your beautifully cleaned driftwood, you can showcase your creativity while adding a touch of nature to your surroundings.

In conclusion, cleaning driftwood requires gathering the necessary supplies, preparing the driftwood, and following the appropriate cleaning methods based on the color or type of wood. Remember to protect yourself with gloves and choose a well-ventilated area. Bleach, hydrogen peroxide, or vinegar can be used depending on the color of the driftwood. Additionally, removing stains and neutralizing odors are important steps to ensure a clean and fresh final result. Sealing and preserving the driftwood will help maintain its appearance and durability. Finally, let your imagination run wild and use the cleaned driftwood for various decorative or artistic purposes. With these steps, you’ll be able to transform ordinary driftwood into stunning pieces that enhance the beauty of your space.

Filed Under: Driftwood Tagged With: cleaning, DIY, Driftwood

How Clean Driftwood?

January 19, 2024 by admin

You’ve just stumbled upon a collection of beautifully weathered driftwood and can’t wait to incorporate it into your home decor. But before you do, you might be wondering, “How clean is this driftwood?” This article is here to guide you through the process of effectively cleaning driftwood, ensuring that it is safe to use and showcases its natural beauty. From removing dirt and bacteria to preserving its unique texture, we’ll show you simple yet effective techniques that will have your driftwood looking its best in no time. Get ready to bring a touch of the sea into your home!

How Clean Driftwood?

How to Clean Driftwood

Driftwood can be a beautiful addition to any home or garden decor, but before you can use it in your projects, it’s essential to clean it properly. Cleaning driftwood not only helps remove dirt and debris but also eliminates unpleasant odors and potential contaminants. In this comprehensive guide, we will walk you through the process of gathering, inspecting, and cleaning driftwood, as well as share some tips on maintaining its cleanliness and ensuring your safety.

Gathering Driftwood

Before you begin the cleaning process, you need to gather driftwood. Driftwood can be found along beaches, riverbanks, or near bodies of water. It is essential to check the laws and regulations in your area, as some beaches or rivers may have restrictions on the collection of driftwood. Once you have located a suitable location, take a stroll along the beach or riverbank and keep an eye out for any pieces of driftwood that catch your attention. Remember to choose pieces that are relatively dry and look for interesting shapes and textures.

Inspecting and Preparing Driftwood

Once you have collected your driftwood, it’s time to inspect and prepare it for cleaning. Inspecting the driftwood is crucial as it allows you to identify any mold, rot, or other issues that may need to be addressed. Start by examining the wood closely, paying attention to any signs of decay, insect infestations, or other damage. If you notice any such problems, it’s best to discard those pieces as they may be unstable or harmful.

After inspecting the driftwood, you can prepare it for cleaning by removing any loose debris or dirt. Gently brush the surface of the wood with a soft-bristled brush to dislodge any dirt or sand. Be careful not to apply too much pressure, as this can damage more delicate pieces. Additionally, if you prefer a smoother finish, you can use sandpaper to remove any rough edges or splinters.

Cleaning Techniques

There are various methods you can use to clean driftwood, depending on its condition and the level of cleanliness you desire. Here are some popular cleaning techniques to consider:

Cleaning with Water and Brush

One of the simplest methods to clean driftwood is by using water and a brush. Fill a basin or large container with warm water and gently immerse the driftwood in it. Allow the wood to soak for a few minutes, then scrub the surface with a soft brush or sponge. This method is effective for removing dirt, salt residue, and loose debris. Rinse the wood thoroughly with clean water and allow it to air dry before using it in your projects.

Boiling Driftwood

Boiling driftwood is another effective method to disinfect and clean the wood thoroughly. Fill a large pot with water and bring it to a boil. Carefully place the driftwood into the boiling water, ensuring it is entirely submerged. Allow the wood to boil for 1-2 hours, periodically checking on it. The boiling process helps kill any bacteria, molds, or insects present. Once done, carefully remove the driftwood and let it cool completely before using it.

Soaking Driftwood in Bleach Solution

If you come across driftwood with visible mold or mildew, soaking it in a bleach solution can be an effective solution. Mix one part bleach with ten parts water in a large container. Submerge the driftwood in the bleach solution and allow it to soak for 24-48 hours, depending on the severity of the mold. Be sure to wear gloves and work in a well-ventilated area when handling bleach. After soaking, rinse the driftwood thoroughly with clean water and let it air dry.

Bleaching Driftwood

Bleaching driftwood is a method often used to lighten the wood’s color or remove stubborn stains. To bleach driftwood, dilute bleach with water in a ratio of 1:10 (one part bleach to ten parts water). Apply the bleach solution to the wood using a brush or sponge. Allow the bleach to sit on the wood for a few minutes, then rinse it off with clean water. Repeat this process until you achieve the desired lightness. Afterward, let the driftwood dry completely.

Using Hydrogen Peroxide

Hydrogen peroxide can be an alternative to bleach when cleaning driftwood. Mix equal parts of hydrogen peroxide and water in a container. Submerge the driftwood in the solution and let it soak for 24 hours. Hydrogen peroxide helps in whitening the wood and removing any bacteria or mold present. Once the soaking time is complete, rinse the driftwood thoroughly and let it air dry.

Scrapping or Sanding Driftwood

If you prefer a smoother texture or want to remove stubborn dirt or stains, you can consider scraping or sanding the driftwood. Use a scraper or sandpaper to carefully remove the outer layer of the wood, exposing a cleaner and smoother surface. Remember to work in a well-ventilated area and wear protective goggles and a mask to avoid breathing in any dust particles.

Freezing Driftwood

Freezing driftwood is a method commonly used to kill any potential pests or insects present in the wood. Place the driftwood in a plastic bag, ensuring it is sealed tightly. Put the bag in the freezer and leave it for at least 48 hours. The extreme cold temperature kills any pests or insect eggs that may be harboring within the wood. After the freezing process is complete, remove the driftwood from the freezer and allow it to thaw and dry naturally.

Using Vinegar Solution

Vinegar is a natural cleaning agent that can be used to clean driftwood effectively. Fill a container with equal parts white vinegar and water. Submerge the wood in the vinegar solution and allow it to soak for several hours or overnight. The vinegar solution helps dissolve dirt and remove any odors. After soaking, rinse the driftwood with clean water and let it air dry.

Pressure Washing

For larger pieces of driftwood or for a more thorough cleaning, pressure washing can be a practical option. Set your pressure washer to a low or medium setting and spray the driftwood, focusing on areas with dirt or debris buildup. Be cautious not to use excessive pressure, as this can cause damage to the wood. After pressure washing, let the driftwood dry completely before using or displaying it.

Tips for Maintaining Clean Driftwood

While cleaning driftwood is essential, maintaining its cleanliness is equally important. Here are some tips to help you keep your driftwood looking its best:

Avoiding Contaminated Driftwood

When collecting driftwood, be mindful of any potential contaminants, such as oil, chemicals, or debris washed up from the water. Avoid picking up driftwood that appears to be heavily soiled or contaminated, as cleaning such wood may prove difficult or ineffective. It is always best to choose driftwood that is relatively clean and dry to avoid unnecessary challenges during the cleaning process.

Drying and Sealing Driftwood

After cleaning the driftwood, it’s crucial to let it dry completely before using it. Place the wood in a well-ventilated area where it can air dry naturally. Depending on the size and thickness of the wood, drying can take several days or even weeks. Once the driftwood is fully dry, you may consider sealing it with a clear varnish or sealant to protect and preserve its natural beauty. Follow the instructions provided by the manufacturer and apply a thin and even coat of the sealant, allowing it to dry before applying subsequent layers if desired.

How Clean Driftwood?

Precautions While Cleaning Driftwood

While cleaning driftwood, it’s essential to prioritize your safety and take necessary precautions. Here are some precautions to keep in mind:

Using Protective Gear

When handling cleaning agents or while scrubbing and sanding driftwood, it is crucial to protect yourself by wearing suitable protective gear. Wear gloves to protect your hands from chemicals, splinters, and rough surfaces. Additionally, consider wearing goggles and a mask when working with substances like bleach or sanding dust to protect your eyes and respiratory system.

Choosing Suitable Cleaning Location

Select a suitable location for cleaning driftwood, preferably an outdoor area with good ventilation. Some cleaning methods may produce strong odors or fumes, and it is crucial to work in a well-ventilated space to avoid inhaling any potentially harmful substances. Cleaning driftwood outdoors also allows for easy cleanup and minimizes the risk of accidentally damaging indoor surfaces.

Disposing of Chemicals Properly

When using cleaning agents like bleach or vinegar, it’s important to dispose of the solutions properly. Avoid pouring them down drains or into bodies of water, as they can be harmful to the environment. Instead, follow local disposal guidelines or take the solutions to a designated hazardous waste facility. Proper disposal ensures the protection of both the environment and human health.

By following these comprehensive steps and techniques, you’ll be able to clean driftwood effectively, transforming it into a stunning centerpiece for your home or garden. Remember to gather the wood responsibly, inspect and prepare it thoroughly, and choose the appropriate cleaning method based on its condition. With proper care and maintenance, your driftwood will preserve its natural beauty and add a touch of coastal charm to your surroundings.

Filed Under: Driftwood Tagged With: cleaning, DIY, Driftwood

Driftwood How To Clean?

January 9, 2024 by admin

So you’ve stumbled upon a beautiful piece of driftwood and the burning question on your mind is, “How do I clean it?” Well, fret not, because in this article, we will uncover the secrets of driftwood cleaning. Whether you’re a seasoned collector or a novice explorer, we’ve got you covered with useful tips and tricks that will leave your driftwood looking fresh, sanitized, and ready to bring nature’s charm into your home. Get ready to discover the step-by-step process and the few essentials you’ll need to revive your driftwood treasure and make it shine once again.

Driftwood How To Clean?

Types of Driftwood

Driftwood comes in various types, each with its own unique characteristics and appearances. Understanding the different types of driftwood can help you determine the best cleaning methods for your specific piece.

Weathered Driftwood

Weathered driftwood has been exposed to the elements for an extended period, resulting in a beautifully worn and aged appearance. It usually has a grayish or brownish color, with intricate textures and patterns created by erosion and water damage. Cleaning weathered driftwood requires a delicate approach to preserve its natural charm.

Fresh Driftwood

Fresh driftwood refers to pieces that have recently washed up onshore and have not undergone significant weathering or decay. It often retains its original color, which can range from light brown to deep red. Cleaning fresh driftwood is essential to remove any debris or impurities it may have accumulated during its time in the water.

Bleached Driftwood

Bleached driftwood is characterized by its pale and faded appearance. This type of driftwood has been exposed to intense sunlight for extended periods, causing the colors to lighten significantly. Bleached driftwood is often used for a more minimalistic or coastal aesthetic and requires appropriate cleaning to maintain its light and airy look.

Materials Needed

Before you begin cleaning your driftwood, make sure you gather the necessary materials. Having them prepared will ensure a smooth and efficient cleaning process. Here are the items you will need:

Soft-Bristled Brush

A soft-bristled brush is essential for gently removing dirt, debris, and loose particles from the driftwood’s surface without causing any damage. Be sure to choose a brush that won’t scratch or scrape the wood.

Mild Soap or Detergent

Using a mild soap or detergent will help dissolve dirt and grime on the driftwood’s surface during the cleaning process. Opt for a gentle soap to avoid any potential damage to the wood.

Bleach (optional)

Bleach may be necessary for cleaning fresh driftwood, as it helps remove bacteria and prevent mold growth. However, it’s important to note that not all driftwood requires bleaching. Use it only if necessary and with caution, as excessive use of bleach can damage the wood.

Water

Water is essential for various steps throughout the cleaning process. Ensure you have a sufficient amount of clean water available for rinsing and soaking the driftwood.

Gloves

Wearing gloves while cleaning driftwood is advisable to protect your hands from any chemicals or rough surfaces. Choose gloves that are durable and can withstand prolonged contact with water and cleaning agents.

Protective Eyewear

To safeguard your eyes from any potential debris or cleaning agents splashing up, wearing protective eyewear is highly recommended. Safety glasses or goggles will provide adequate protection while cleaning your driftwood.

Preparation

Proper preparation is crucial for achieving the best results when cleaning driftwood. Before diving into the cleaning process, make sure to follow these important preparation steps:

Choose a Suitable Location

Selecting an appropriate location for cleaning your driftwood is essential. Ideally, choose an outdoor area with good ventilation to ensure proper air circulation while you work. Cleaning driftwood outdoors can also help minimize the mess and make it easier to rinse off any cleaning products.

Inspect the Driftwood

Before cleaning, carefully inspect the driftwood for any signs of damage, such as cracks or weak spots. Identifying such issues beforehand will help you decide on the best cleaning approach and prevent further damage during the process.

Remove Loose Debris

Gently brush off any loose debris, sand, or dirt from the surface of your driftwood using a soft-bristled brush. This step will make the subsequent cleaning process more effective and prevent any dirt from spreading or sticking to the wood during cleaning.

Cleaning Weathered Driftwood

Cleaning weathered driftwood requires a gentle approach to preserve its natural worn appearance and unique textures. Follow these steps to clean weathered driftwood effectively:

Step 1: Brush Off Loose Dirt

Using a soft-bristled brush, gently remove any loose dirt, dust, or debris from the surface of the weathered driftwood. Take care not to scrub too hard, as this can damage the delicate textures of the wood.

Step 2: Soak in Soapy Water

Prepare a mixture of mild soap or detergent and warm water. Place the weathered driftwood in a bucket or basin and carefully submerge it in the soapy water mixture. Allow it to soak for about 20-30 minutes to loosen any stubborn dirt or grime.

Step 3: Scrub Gently

After soaking, use the soft-bristled brush to scrub the driftwood gently. Work in small circular motions, focusing on areas that require more attention. Be mindful not to scrub too hard, as this can damage the delicate surfaces of the weathered driftwood.

Step 4: Rinse and Dry

Thoroughly rinse the weathered driftwood with clean water to remove any residual soap or dirt. Once rinsed, shake off any excess water and pat dry with a clean towel. Leave the driftwood to air dry completely before proceeding to the next steps.

Driftwood How To Clean?

Cleaning Fresh Driftwood

Cleaning fresh driftwood is crucial to remove any impurities it may have accumulated during its time in the water. Follow these steps to clean fresh driftwood effectively:

Step 1: Remove Bark (if desired)

If your fresh driftwood has bark attached to it and you prefer a smoother finish, you can choose to remove the bark. Carefully peel or scrape off the bark using a dull knife or a specific bark removal tool. Take caution not to damage the underlying wood while removing the bark.

Step 2: Brush Off Debris

Using a soft-bristled brush, gently brush off any loose debris or dirt from the surface of the fresh driftwood. This will help prepare the wood for the subsequent cleaning steps.

Step 3: Soak in Bleach Solution

Prepare a bleach solution by combining water and bleach in a well-ventilated area. The ratio of bleach to water will depend on the level of cleaning required for your driftwood. Soak the fresh driftwood in the bleach solution for approximately 24 hours to eliminate any bacteria or mold.

Step 4: Rinse Thoroughly

After the soaking process, remove the fresh driftwood from the bleach solution and rinse it thoroughly with clean water. Rinse repeatedly until the water runs clear, ensuring all traces of bleach are removed.

Step 5: Dry

Place the freshly cleaned driftwood in a well-ventilated area to air dry completely. Make sure it is exposed to adequate airflow to avoid moisture buildup. Once dry, your fresh driftwood is ready to be displayed or used in your desired project.

Cleaning Bleached Driftwood

Bleached driftwood offers a beautiful and light aesthetic that complements various decor styles. To clean bleached driftwood effectively, ensure you follow these steps:

Step 1: Dust Off Residue

Using a soft-bristled brush, gently dust off any residue or loose particles from the surface of the bleached driftwood. This will help prepare the wood for the subsequent cleaning process.

Step 2: Soak in Water

Fill a bucket or basin with clean water and immerse the bleached driftwood. Allow it to soak for around 30 minutes to loosen any dirt or grime that may have accumulated. This step will make the subsequent cleaning process more effective.

Step 3: Scrub with Brush and Soap

After soaking, use a soft-bristled brush and mild soap or detergent to gently scrub the bleached driftwood. Work in small circular motions, ensuring all areas are cleaned. Pay extra attention to any stubborn or dirty spots, being careful not to scrub too hard and damage the wood.

Step 4: Rinse and Dry

Thoroughly rinse the bleached driftwood with clean water to remove any soap or residue. Ensure all cleaning agents are completely removed. Once rinsed, pat dry with a clean towel and allow the driftwood to air dry completely before proceeding.

Removing Odors

Sometimes driftwood may have unpleasant odors that need to be addressed before displaying or using it in your home. Follow these steps to remove odors effectively:

Step 1: Soak in Vinegar Solution

Prepare a solution of equal parts water and distilled white vinegar in a container large enough to submerge the driftwood. Immerse the driftwood in the vinegar solution and allow it to soak for 24-48 hours. Vinegar helps eliminate odors and neutralize any bacteria or mold present.

Step 2: Rinse with Water

After soaking, remove the driftwood from the vinegar solution and rinse it thoroughly with clean water. Ensure all traces of vinegar are washed off. Repeat the rinsing process if necessary until the water runs clear.

Finishing Touches

Once your driftwood is thoroughly cleaned and odor-free, you may consider adding finishing touches to enhance its appearance and longevity. Follow these steps for the final touches:

Step 1: Sanding (if desired)

If you prefer a smoother or polished finish, you can opt to sand the driftwood lightly. Use fine-grit sandpaper to gently sand the surface, removing any roughness or unevenness. This step can help prepare the driftwood for the application of wood sealer if desired.

Step 2: Apply Wood Sealer (optional)

To further protect and enhance the appearance of your driftwood, you may choose to apply a wood sealer. Ensure you select a sealer suitable for your specific driftwood type. Apply the sealer according to the manufacturer’s instructions, allowing sufficient drying time before handling or displaying the driftwood.

Safety Precautions

When cleaning driftwood, it’s essential to prioritize safety to prevent any accidents or injuries. Follow these safety precautions while cleaning your driftwood:

Wear Protective Gear

Before starting the cleaning process, wear protective gloves and eyewear to safeguard your hands and eyes from any potential risks, such as chemicals or debris.

Avoid Harsh Chemicals

While some cleaning solutions may require the use of bleach, it’s important to avoid excessive use or prolonged exposure to harsh chemicals. Always follow the recommended instructions and handle cleaning agents with caution.

Proper Ventilation

Ensure you clean your driftwood in a well-ventilated area, especially when using cleaning agents or bleach. Adequate ventilation will help prevent the inhalation of potentially harmful fumes and promote a safer environment for cleaning.

Display Tips

Once your driftwood is clean and ready, displaying it properly can enhance its aesthetic appeal. Consider these tips for displaying your driftwood:

Choosing a Suitable Location

Select a location in your home or outdoor space that complements the overall decor and style. Driftwood can be displayed on mantels, shelves, or incorporated into centerpieces. Ensure the location provides appropriate lighting to showcase the unique textures and colors of the driftwood.

Styling with Other Decor

Driftwood pairs well with various decor elements such as plants, shells, or other natural materials. Experiment with different arrangements and combinations to create visually appealing displays. Embrace your creativity and let the driftwood become a focal point or an accent piece in your design.

Regular Dusting

To maintain the beauty of your driftwood over time, make sure to dust it regularly using a soft cloth or a feather duster. This will help prevent the buildup of dirt and ensure your driftwood remains clean and vibrant.

Cleaning driftwood can be a rewarding and enjoyable process. By following the correct cleaning techniques and safety precautions, you can restore the natural beauty of your driftwood and display it proudly in your home or outdoor space. Enjoy the process and let your creativity shine as you incorporate this unique element of nature into your decor.

Filed Under: Driftwood Tagged With: cleaning, Driftwood, maintenance

Does Driftwood Need To Be Cleaned?

December 21, 2023 by admin

Are you a fan of beachcombing? Then surely you’ve stumbled across some beautiful driftwood during your explorations. But have you ever wondered if that driftwood needs to be cleaned before you can incorporate it into your décor? In this article, we will explore whether or not driftwood needs cleaning and uncover the best methods to do so, ensuring that you can enjoy its natural beauty in your home without any worries. So, let’s embark on this journey to discover the secrets of driftwood maintenance!

Does Driftwood Need To Be Cleaned?

The Importance of Cleaning Driftwood

Driftwood is not only a beautiful addition to any home or garden decor, but it also carries numerous benefits. However, before incorporating driftwood into your design, it is crucial to understand the importance of cleaning it thoroughly. This article will guide you through the various reasons why cleaning driftwood is essential, along with the methods, techniques, and mistakes to avoid to ensure that your driftwood remains in pristine condition.

Removing Dirt and Debris

One of the primary reasons for cleaning driftwood is to remove the dirt and debris it accumulates during its time in the water or on the beach. Driftwood is often covered in sand, seaweed, and other natural elements, which not only detract from its beauty but can also be a breeding ground for bacteria. By cleaning the wood, you eliminate any potential health hazards and create a clean and safe environment for both yourself and your surroundings.

Preventing Pest Infestation

Another crucial reason to clean driftwood is to prevent pest infestation. This untreated wood can become a cozy home for termites, ants, and other wood-boring insects. Failure to clean driftwood thoroughly before bringing it into your home or garden could lead to an unwanted pest invasion. By taking the time to clean the wood properly, you reduce the risk of encountering these pesky critters and protect your living spaces from potential damage.

Maintaining Aesthetics

Driftwood’s natural beauty enhances any setting it is placed in, whether it’s used as a centerpiece, incorporated into furniture, or displayed as a standalone piece of art. However, over time, dirt and grime can dull its appearance and diminish its aesthetic appeal. Cleaning driftwood regularly ensures that it retains its natural allure, highlighting the intricate shapes, textures, and colors that make each piece unique. By prioritizing cleaning, you can showcase the wood’s inherent beauty and make a lasting impression on anyone who encounters it.

Methods for Cleaning Driftwood

When it comes to cleaning driftwood, there are several methods to choose from, each with its own benefits and drawbacks. Depending on the level of dirt and the specific needs of your driftwood, you can opt for rinsing with water, soaking in a cleaning solution, or using brushing and scrubbing techniques.

Rinsing with Water

For driftwood that hasn’t accumulated too much dirt or debris, a simple rinse with water may be sufficient. Begin by finding a suitable outdoor area where you can set up a cleaning station. Using a hose or a bucket of water, gently wash the driftwood, paying close attention to the crevices and hard-to-reach areas. This method is ideal for smaller pieces or for driftwood with a minimal amount of dirt. However, for more stubborn stains or deeply ingrained dirt, additional cleaning techniques may be necessary.

Soaking in a Cleaning Solution

When dealing with heavily soiled driftwood or persistent stains, soaking it in a cleaning solution can provide more effective results. Fill a container large enough to accommodate the wood with a mixture of warm water and a mild cleaning agent, such as dish soap or vinegar. Submerge the driftwood in the solution and leave it to soak for a few hours or overnight, depending on the severity of the dirt. This method allows the cleaning solution to penetrate the wood, loosening and dissolving the dirt for easier removal. After soaking, rinse the driftwood thoroughly with water to remove any residue from the cleaning solution.

Brushing and Scrubbing

For stubborn stains or hard-to-remove dirt, brushing and scrubbing techniques can be employed. Using a soft-bristled brush or an old toothbrush, gently scrub the surface of the driftwood, focusing on the stained or dirty areas. Be careful not to apply too much pressure, as it may damage the wood or alter its appearance. This method requires patience and diligence, as it may take some time to completely remove the dirt. Once you are satisfied with the cleanliness of the wood, rinse it with water to remove any loosened debris.

Choosing the Right Cleaning Solution

When deciding on a cleaning solution for your driftwood, it is essential to consider both the wood’s needs and your environmental impact. While commercial wood cleaners are readily available, there are also natural alternatives that can be just as effective, if not more so. By choosing the right cleaning solution, you can ensure that your driftwood remains clean and vibrant while also minimizing the potential harm to the environment.

Natural Solutions

Natural cleaning solutions are an eco-friendly option that can effectively clean driftwood without introducing harmful chemicals into the environment. One common natural solution is a mixture of white vinegar and water. Vinegar’s acidic properties help break down dirt and grime, making it an excellent choice for cleaning driftwood. Another natural option is a solution of lemon juice and water, which not only cleans but also leaves behind a refreshing scent. These natural solutions are safe to use and can be easily made at home, providing a cost-effective and environmentally friendly option for driftwood cleaning.

Commercial Wood Cleaners

If you prefer the convenience of a ready-to-use cleaning product, there are numerous commercial wood cleaners available on the market. These cleaners are specifically formulated to clean and protect wood surfaces, including driftwood. When choosing a commercial cleaner, ensure that it is suitable for use on natural wood and read and follow the instructions carefully. Look for products with environmentally friendly certifications or those that use biodegradable ingredients to minimize potential harm to the environment.

Avoiding Harmful Chemicals

Regardless of the cleaning solution you choose, it is vital to avoid using harsh chemicals that can damage the driftwood or pose a risk to your health. Harsh chemicals, such as bleach or ammonia-based cleaners, can strip the wood of its natural oils and cause discoloration or deterioration. These chemicals can also create fumes that are harmful to inhale. It is always best to opt for milder, natural alternatives that are safe for both you and the environment when cleaning your driftwood.

Proper Techniques for Cleaning Driftwood

Cleaning driftwood requires not only the right cleaning solution but also proper techniques to ensure that the wood remains in optimal condition. By following these techniques, you can clean your driftwood effectively, remove stains, and preserve its natural beauty.

Handling with Care

When cleaning driftwood, always handle it with care to prevent any damage. While driftwood is durable, rough handling or applying excessive force can cause it to break or splinter. To minimize the risk of damage, hold the wood firmly but gently, avoiding any sudden movements that may cause it to impact other surfaces. By treating the driftwood with respect and care, you can maintain its integrity and extend its lifespan.

Removing Stains

Stains can mar the appearance of driftwood and diminish its aesthetic appeal. Fortunately, many stains can be removed with the right techniques. For organic stains, such as those caused by algae or moss, a mixture of vinegar and water can be effective in breaking down the discoloration. Apply the solution to the stain and gently scrub it with a soft brush or cloth. Rinse the area thoroughly with water and repeat the process if necessary. For tougher, oil-based stains, such as grease or paint, a specialized wood cleaning solvent may be needed. Consult the product instructions and test on a small, inconspicuous area before applying it to the entire stain.

Preserving Natural Elements

Driftwood is often cherished for its unique shapes, textures, and colors. When cleaning, it is essential to preserve these natural elements. Avoid using excessive force or abrasive materials that can alter the wood’s appearance. Instead, opt for soft brushes, cloths, or even toothbrushes to gently clean the driftwood. By taking a delicate approach, you can maintain the wood’s natural beauty and ensure that its distinctive characteristics are highlighted.

Does Driftwood Need To Be Cleaned?

Drying and Sealing Driftwood

Once your driftwood is clean, it is essential to dry it thoroughly and consider applying a protective sealant to maintain its condition and prolong its lifespan. Proper drying techniques, along with the application of a sealant, can enhance the driftwood’s durability and preserve its beauty.

Air Drying

After cleaning, allow the driftwood to air dry naturally in a well-ventilated area. Place it on a clean surface, such as a drying rack or a layer of old newspapers, and ensure that there is sufficient airflow around the wood. Avoid placing the driftwood in direct sunlight or near a heat source, as this can cause the wood to warp or crack. Depending on the size and thickness of the wood, drying may take several days to weeks. Patience is key during this process, as rushing the drying time may lead to moisture remaining within the wood, which can cause decay or mold growth.

Using a Dehumidifier

If you live in a humid environment or are experiencing high levels of humidity, using a dehumidifier can aid in the drying process. Place the driftwood in a room with a dehumidifier, and ensure that it is not exposed to direct airflow from the machine. The dehumidifier will help minimize the moisture content in the air, allowing the driftwood to dry more effectively. Monitor the progress regularly and adjust the dehumidifier settings as needed until the wood is completely dry.

Applying a Protective Sealant

To protect the cleaned driftwood from future damage and maintain its appearance, consider applying a protective sealant. Sealing the wood helps to prevent moisture absorption, decay, and discoloration. When selecting a sealant, look for options specifically formulated for use on wood. Before applying the sealant, ensure that the driftwood is completely dry. Apply the sealant evenly, following the product instructions, and allow it to dry thoroughly. Once the sealant has dried, your driftwood will be better prepared to withstand the elements and maintain its beauty.

Maintaining Clean Driftwood

Keeping your driftwood clean is an ongoing process, as dirt and debris can accumulate over time. Establishing a regular cleaning routine, along with a few additional precautions, can help you maintain the cleanliness and beauty of your driftwood.

Regular Cleaning Routine

Incorporate cleaning your driftwood into your regular household cleaning routine. Dust the wood regularly using a soft brush or cloth to remove any loose debris. If you notice any signs of dirt buildup or stains, perform a deeper cleaning using the methods described earlier. By maintaining a regular cleaning schedule, you can prevent the accumulation of dirt and avoid more extensive cleaning sessions in the future.

Avoiding Sunlight and Moisture

To preserve the cleanliness and integrity of your driftwood, it is important to avoid exposing it to excessive sunlight and moisture. Direct sunlight can cause the wood to fade and lose its vibrant colors over time. Similarly, excessive moisture can lead to mold growth, warping, or decay. When displaying driftwood, choose a location away from direct sunlight and sources of moisture, such as bathrooms or kitchens. By protecting your driftwood from these elements, you can extend its lifespan and maintain its beauty for years to come.

Display and Storage Tips

When displaying driftwood indoors, consider placing it out of reach of curious hands and pets. Driftwood can be fragile, and accidental mishandling can lead to breakage or splintering. If displaying outdoors, ensure that the wood is sheltered from extreme weather conditions, such as heavy rain or wind. When storing driftwood, keep it in a dry and cool environment, away from any potential sources of moisture or pests. By implementing these display and storage tips, you can prevent damage and maintain the cleanliness of your driftwood collection.

Common Mistakes to Avoid

While cleaning driftwood may seem straightforward, there are a few common mistakes that can undermine your efforts and potentially harm the wood. By being aware of these mistakes and avoiding them, you can ensure that your cleaning endeavors yield the best results and protect your driftwood investment.

Using Harsh Chemicals

The use of harsh chemicals, such as bleach or ammonia-based cleaners, can be detrimental to the beauty and longevity of your driftwood. These chemicals strip the wood of its natural oils, leading to discoloration and potential deterioration. Additionally, the fumes from these chemicals can be harmful to inhale. Instead, opt for milder, natural cleaning solutions that are safe for the wood and the environment.

Ignoring Signs of Infestation

Pest infestation is a common issue with uncleaned driftwood. Ignoring or failing to address signs of infestation can lead to potential damage to your home or garden. If you notice small holes or piles of sawdust near your driftwood, it is crucial to take immediate action. Consult with a pest control professional to identify and treat any infestations before they spread to other areas. By addressing the issue promptly, you can prevent further damage and protect your living spaces.

Improper Drying Techniques

Properly drying your driftwood is essential to prevent mold growth, decay, and warping. Rushing the drying process or not ensuring complete dryness can lead to these issues. Avoid placing the wood in direct sunlight, as excessive heat can cause the wood to warp or crack. Using a dehumidifier can aid in the drying process, but ensure that the driftwood is not exposed to direct airflow from the machine. By adopting appropriate drying techniques, you can safeguard your driftwood from future damage and preserve its aesthetic appeal.

Conclusion

Cleaning driftwood is a vital step in maintaining its natural beauty, prolonging its lifespan, and preventing potential issues such as pest infestation or decay. By removing dirt and debris, preventing pest infestation, and preserving aesthetics, you can ensure that your driftwood remains a stunning addition to your home or garden decor. Whether you choose to rinse with water, soak in a cleaning solution, or employ brushing and scrubbing techniques, remember to handle the wood with care and remove stains using suitable methods. Once the driftwood is clean, drying it thoroughly and applying a protective sealant can enhance its durability. By following a regular cleaning routine, avoiding sunlight and moisture, and implementing proper display and storage practices, you can maintain the cleanliness of your driftwood collection. And finally, by steering clear of harsh chemicals, promptly addressing signs of infestation, and using appropriate drying techniques, you can avoid common mistakes that could harm your driftwood. With these tips and techniques in mind, you can enjoy the beauty of clean driftwood for years to come.

Filed Under: Driftwood Tagged With: cleaning, Driftwood, maintenance

How to Clean and Decorate Driftwood Tutorial

October 5, 2023 by admin

Hey there! If you’re a fan of amazing driftwood and have been wondering how to clean and decorate it, then you’re in luck! In this tutorial by Cement Plus, you’ll learn all the tips and tricks to make your driftwood shine ✨. From the cleaning process to the final decorative touches, this video has got you covered. So grab a cup of tea, sit back, and get ready to transform your driftwood into a stunning piece of art!

Thanks for watching and for your support. Don’t forget to subscribe, comment, like, and share this video if you found it helpful. Let’s spread the love for amazing driftwood together!

How to Clean and Decorate Driftwood Tutorial

This image is property of i.ytimg.com.

H2: Introduction

Welcome to the world of driftwood! If you’re a nature lover or someone who appreciates unique and natural home decor, then you’re in for a treat. Driftwood has become increasingly popular in recent years, thanks to its rustic and coastal charm. It can be used in a variety of ways to add a touch of nature and elegance to your living space. In this article, we will guide you through the process of gathering, cleaning, preparing, and decorating with driftwood. Whether you’re a beginner or a seasoned DIY enthusiast, we’ve got you covered. So let’s dive in and discover the wonders of driftwood together!

H2: Gathering Driftwood

H3: Where to Find Driftwood

The first step in working with driftwood is, of course, finding it. Luckily, you don’t necessarily have to live by the ocean to get your hands on this natural treasure. Driftwood can be found near rivers, lakes, and even in forests after heavy rainfall. Look for areas where water meets land, such as riverbanks or shorelines, as these are prime spots for driftwood accumulation. Additionally, keep an eye out for fallen trees or branches during your outdoor adventures. They can be excellent sources of driftwood for your projects.

H3: Choosing the Right Pieces

When it comes to choosing the right pieces of driftwood, there are a few things to consider. First, opt for driftwood that is sturdy and in good condition. Avoid pieces that are rotten or too fragile, as they may not hold up well over time. Also, consider the size and shape of the driftwood in relation to your project. If you’re planning to create a small centerpiece, for example, look for smaller, more intricate pieces. Larger pieces are better suited for larger-scale projects like sculptures or garden accents. Lastly, take note of the color and texture of the driftwood. Some pieces may have unique markings or a weathered look that adds to their charm.

H2: Cleaning Driftwood

H3: Removing Dirt and Debris

Before you begin any decorative or practical work with driftwood, it’s important to clean it thoroughly. Start by rinsing off any visible dirt and debris using plain water. A gentle scrub with a soft brush can be helpful for removing stubborn grime. If there are any attached materials like seaweed or shells, gently remove them using tweezers or a small tool. Be careful not to apply too much pressure, as you don’t want to damage the natural integrity of the driftwood.

H3: Sanitizing the Driftwood

To ensure that the driftwood is free from bacteria or pests, it’s essential to sanitize it. Soak the cleaned driftwood in a mixture of water and bleach for about 24 hours. The ratio of water to bleach should be approximately 10 parts water to 1 part bleach. This solution will help kill any bacteria or pests that might be present on the driftwood. After the soaking process, rinse the driftwood thoroughly with fresh water to remove any traces of bleach.

H3: Dealing with Mold and Mildew

If you come across driftwood that has mold or mildew on it, don’t panic! This is a common occurrence, especially with pieces that have been in contact with water for a long time. To remove mold or mildew, create a solution of equal parts water and vinegar. Gently scrub the affected areas using a soft brush or cloth soaked in the solution. This will help eliminate the mold and mildew while also neutralizing any unpleasant odors. Rinse the driftwood thoroughly with water afterward, and allow it to dry completely before moving on to the next step.

H2: Preparing Driftwood for Decoration

H3: Sanding and Smoothing

Once the driftwood is clean and dry, it’s time to prepare it for decoration. Start by sanding the surface of the driftwood to remove any rough spots or splinters. Use a fine-grit sandpaper and work in the direction of the grain to achieve a smooth finish. Sanding not only helps create a polished look but also prepares the driftwood for further treatment, such as staining or painting. Be sure to wear protective gloves and a dust mask during this process to avoid any potential injuries or inhalation of dust particles.

H3: Bleaching and Staining

If you desire a lighter or more uniform color for your driftwood, bleaching and staining can be the next steps. To bleach the driftwood, mix equal parts water and hydrogen peroxide in a container large enough to submerge the pieces. Leave the driftwood in the solution for a few hours or until the desired level of lightness is achieved. Once bleached, rinse the driftwood thoroughly with water and allow it to dry completely. If you prefer a darker or richer color, you can apply wood stain using a brush or cloth. Follow the instructions on the stain product for the best results.

H3: Drying the Driftwood

Properly drying the driftwood is crucial to prevent any future issues such as mold or warping. After rinsing or treating the driftwood, allow it to air dry completely in a well-ventilated area. Avoid placing it in direct sunlight, as this can cause discoloration or excessive drying. Depending on the size and thickness of the driftwood, the drying process may take several days or even weeks. Patience is key here, as you want to ensure that the driftwood is completely dry before moving on to the next steps.

How to Clean and Decorate Driftwood Tutorial

H2: Decorating with Driftwood

H3: Driftwood Wall Art

One of the most popular ways to decorate with driftwood is by creating wall art. The organic shapes and textures of driftwood lend themselves beautifully to this type of decor. You can arrange the driftwood pieces in various patterns, such as a sunburst, chevron, or abstract design, and attach them to a wooden board or canvas using strong adhesive or small nails. This creates a stunning and unique piece of art that adds a touch of nature to your walls.

H3: Driftwood Centerpieces

If you’re looking to create a centerpiece that stands out, driftwood can be a perfect choice. Simply gather a variety of driftwood pieces of different lengths and shapes. Arrange them in a container, such as a glass vase or a wooden tray, and add elements like candles, flowers, or seashells for an extra touch of beauty. The natural and rustic elements of the driftwood will bring a sense of tranquility and elegance to your table.

H3: Driftwood Sculptures

For those with a flair for the artistic, sculpting with driftwood can be a truly rewarding experience. Let your creativity flow as you combine and shape the driftwood pieces into unique sculptures. You can create anything from abstract figures to animals or even functional items like lamps or hangers. The possibilities are endless, and the end result will be a conversation-starter in any room.

H2: Driftwood in Aquariums

H3: Preparing Driftwood for Aquarium Use

Driftwood is a popular addition to aquariums, as it not only provides a natural and appealing aesthetic but also offers hiding places and surfaces for beneficial bacteria to grow. However, before adding driftwood to your aquarium, it’s important to properly prepare it. Start by soaking the driftwood in a bucket or basin of water for several weeks, changing the water every few days. This process helps to remove tannins and reduce the chances of the driftwood leaching harmful substances into the water.

H3: Placing Driftwood in the Aquarium

Once the driftwood is properly soaked and free from tannins, it’s time to place it in your aquarium. Consider the layout of your tank and decide where you want to position the driftwood. Avoid placing it too close to the filter intake or anywhere it may obstruct the flow of water. Secure the driftwood in place using aquarium-safe rocks or adhesive if necessary. Take note of the positioning of the driftwood and rearrange if needed to create an aesthetically pleasing display.

H3: Maintaining Driftwood in Aquariums

Driftwood in aquariums requires some maintenance to ensure its longevity and optimal conditions for aquatic life. Regularly inspect the driftwood for signs of decay or buildup of algae. If you notice any soft or decaying areas, remove those pieces and replace them to prevent contamination of the water. Additionally, you may need to lightly brush or scrub the driftwood to remove any algae or residue. It’s important to balance the water parameters and regularly monitor the water quality to ensure the health of your aquarium community.

How to Clean and Decorate Driftwood Tutorial

H2: Driftwood as Home Decor

H3: Driftwood Mirrors

If you’re looking to add a touch of coastal charm to your living space, a driftwood mirror can be the perfect addition. Start with a plain mirror of your desired size and shape. Measure and cut the driftwood pieces to fit around the edge of the mirror frame. Attach the driftwood using a strong adhesive or small nails, making sure they are securely attached. Hang the finished driftwood mirror on a wall, and watch as it effortlessly transforms the room into a coastal oasis.

H3: Driftwood Picture Frames

For a more subtle yet equally stylish decor option, consider creating driftwood picture frames. Gather small driftwood pieces and measure them against the size of your desired picture. Glue the driftwood pieces around the edges of the picture frame to create a unique and rustic border. Allow the adhesive to dry completely before inserting your favorite photo and displaying it proudly on a shelf or wall.

H3: Driftwood Shelving

Driftwood shelves are not only functional but also serve as eye-catching statement pieces. Begin by finding a sturdy piece of driftwood that can act as the base for your shelf. Measure and cut wooden planks or boards to create the shelving surfaces. Attach the planks to the driftwood using screws or brackets, ensuring they are securely fastened. Hang your driftwood shelf on the wall using appropriate hardware and enjoy the natural beauty it brings to your space.

H2: Driftwood in Landscaping

H3: Driftwood Pathways

Create a whimsical and charming pathway in your garden or backyard by using driftwood. Lay the driftwood pieces in a desired pattern, spacing them evenly apart and aligning them to create a smooth walking surface. To ensure stability, bury the driftwood ends slightly in the ground or secure them with small stakes. This unique and natural pathway will add texture and visual interest to your outdoor space.

H3: Driftwood Planters

Driftwood planters offer a creative and sustainable way to showcase your favorite plants and flowers. Find a sturdy and hollow driftwood piece that can act as the base for your planter. Using a drill, create holes in the driftwood for drainage and place a liner or plastic insert inside to prevent soil from falling through. Fill the planter with potting soil and plant your chosen greenery. Whether placed indoors or outdoors, the driftwood planter will bring a touch of nature and elegance to any setting.

H3: Driftwood Garden Accents

Enhance the beauty of your garden by incorporating driftwood accents. Large driftwood pieces can be used as standalone sculptures, while smaller ones can be arranged in clusters around plants or flower beds. They can also serve as natural stakes or supports for climbing plants. Get creative and experiment with different placements to find the perfect balance between the organic forms of driftwood and the lushness of your garden.

H2: Maintaining Driftwood Over Time

H3: Cleaning and Dusting

To keep your driftwood looking its best, regular cleaning and dusting are important. Use a soft brush or cloth to gently remove any dust from the surface of the driftwood. Be careful not to use any harsh chemicals or abrasive materials, as these can damage the natural texture or finish of the wood. If necessary, lightly dampen the cloth or brush with water to aid in the cleaning process. Regular maintenance will help preserve the beauty and integrity of your driftwood pieces.

H3: Avoiding Direct Sunlight

Driftwood, like any other natural material, can be affected by prolonged exposure to direct sunlight. Over time, the sun’s rays can cause fading or discoloration of the driftwood. To prevent this, avoid placing driftwood in areas where it will be directly exposed to sunlight for extended periods. Instead, opt for indoor or shaded outdoor locations where the driftwood can be admired without the risk of sun damage.

H3: Treating with Oils or Wax

Applying natural oils or wax to your driftwood can help maintain its moisture and enhance its natural beauty. Choose food-safe oils such as mineral oil or coconut oil, and apply a thin layer using a soft cloth or brush. This will not only protect the driftwood from drying out but also give it a subtle sheen. Be sure to wipe off any excess oil or wax to prevent a greasy residue. Repeat this process every few months or as needed to keep your driftwood well-nourished and looking its best.

H2: Conclusion

Congratulations on completing your journey into the world of driftwood! We hope this comprehensive guide has inspired you to explore the countless possibilities of this natural and versatile material. Whether you choose to decorate your home, create stunning artworks, or enhance your outdoor space, driftwood will infuse a touch of rustic elegance and coastal charm into your life. Remember to gather your driftwood responsibly, clean it thoroughly, and let your creativity run wild. Embrace the beauty of nature and enjoy the unique and enchanting wonders of driftwood!

Filed Under: DriftWood Art Tagged With: cleaning, decorating, Driftwood, tutorial

  • « Previous Page
  • Page 1
  • Page 2

Primary Sidebar

Driftwood4us.com, is a participant in the Amazon Services LLC Associates Program, an affiliate advertising program designed to provide a means for sites to earn advertising fees by advertising and linking to amazon.com.