• Skip to main content
  • Skip to primary sidebar
  • Terms and Conditions
  • Privacy Policy
  • Contact

Driftwood 4 Us

Just About Driftwood

Coastal Decor

Driftwood Wall Art Mosaic

June 4, 2024 by admin

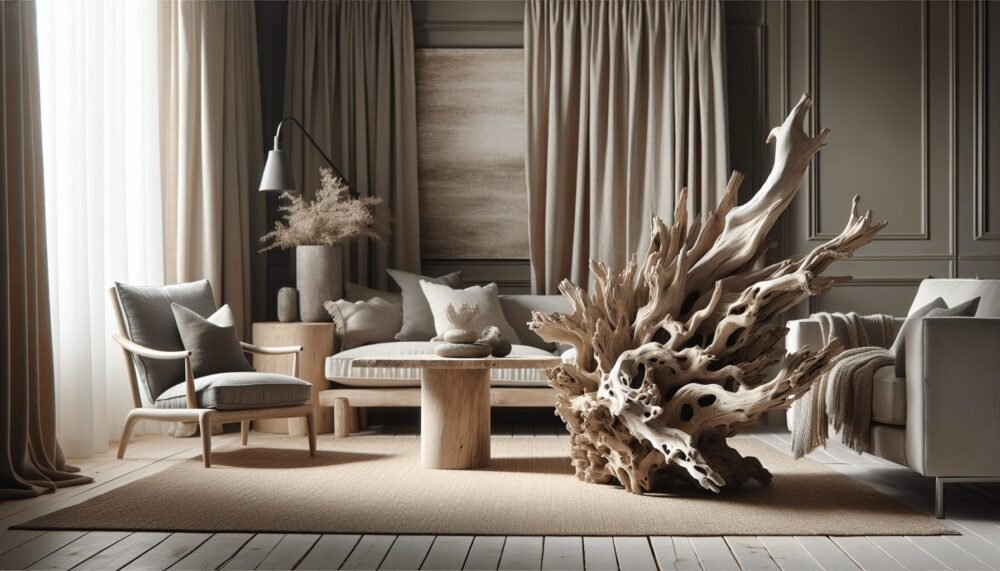
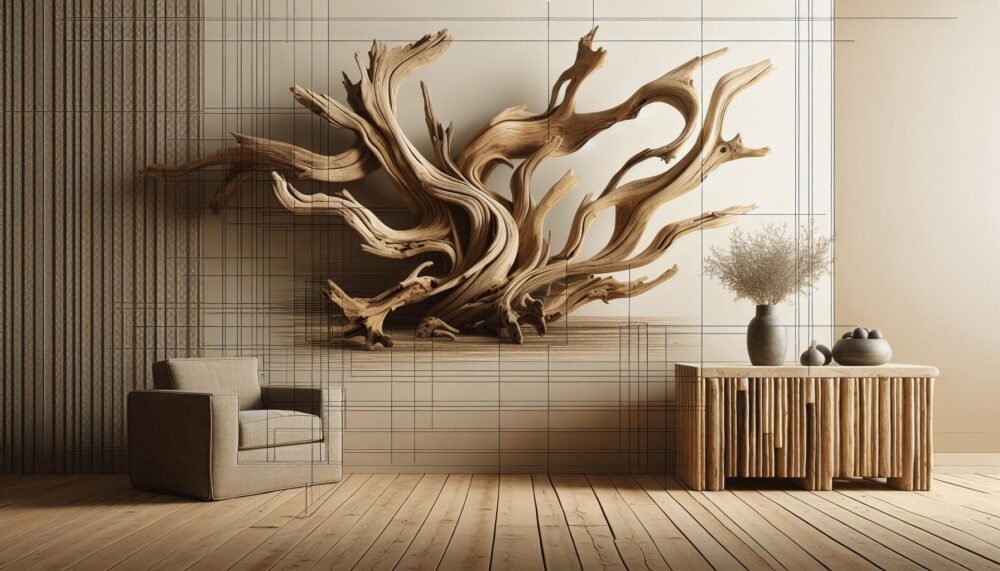
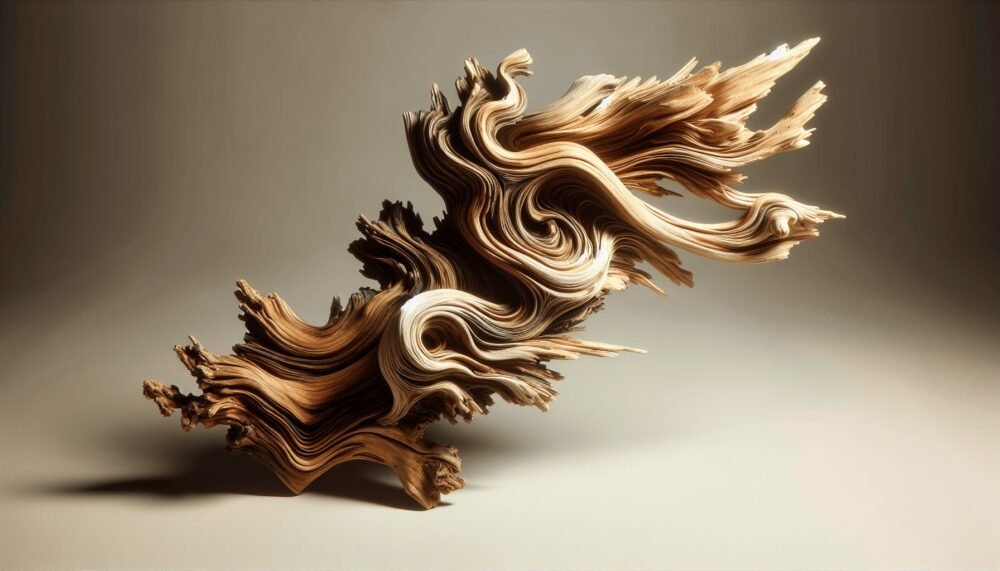
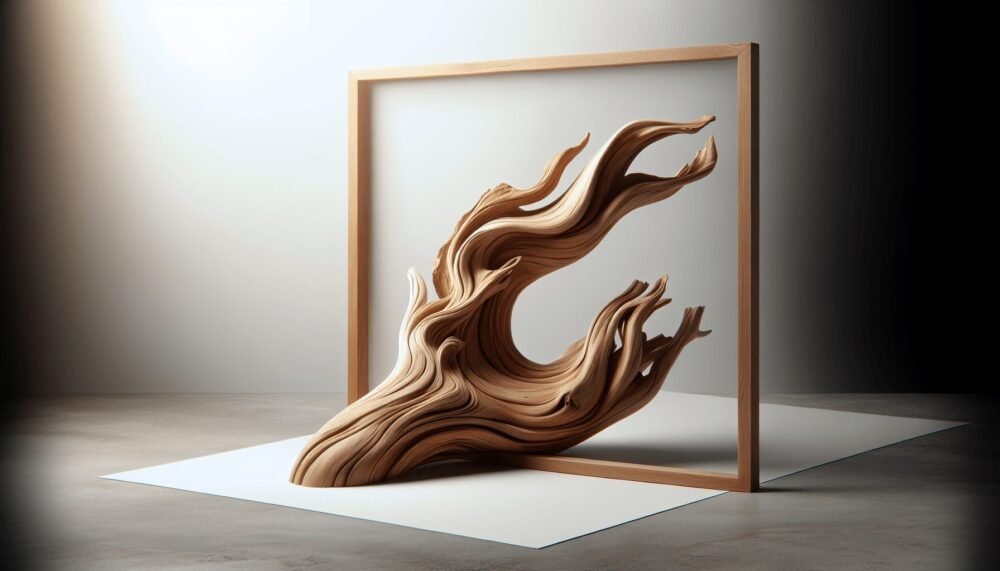
Imagine transforming your living space with the serene beauty of the ocean, captured artfully in a Driftwood Wall Art Mosaic. This unique piece of decor brings the tranquil essence of driftwood, shaped and smoothed by the sea, into your home. Each piece of driftwood is carefully selected and arranged to create a stunning mosaic that tells its own story of nature’s artistry. Whether you’re aiming for a coastal theme or simply want to add a touch of natural elegance, this Driftwood Wall Art Mosaic will become a cherished focal point in any room. Have you ever found yourself mesmerized by the natural beauty of driftwood, imagining the stories each piece might tell? If you have, you’re not alone. Many people are captivated by the rustic charm and organic shapes of driftwood, which is why it has become a popular material for creating stunning wall art mosaics. Let’s dive into the world of driftwood wall art mosaics, and I’ll guide you on how you can create your own masterpiece.

What is Driftwood?

Definition and Origins

Driftwood refers to any wood that has been washed onto a shore or beach by the action of winds, tides, or waves. Often, you’ll find it in areas with strong currents or after storms. The natural weathering process gives each piece a unique appearance, making it perfect for artistic endeavors.

Types of Driftwood

Not all driftwood is created equal. You can find driftwood from various tree species, each with its own characteristics. Common types of driftwood include:

TypeCharacteristics
HardwoodDense, durable, and often heavier. Examples include oak and maple.
SoftwoodLighter, often with a smoother texture. Examples include pine and cedar.
Tropical WoodUsually more resistant to decay and pests. Examples include teak and mahogany.

Why Choose Driftwood for Art?

Uniqueness and Aesthetic Appeal

Each piece of driftwood is unique, shaped by its time in the water and exposure to the elements. This ensures that no two pieces of driftwood wall art are ever the same, giving your home a truly one-of-a-kind décor.

Environmental Impact

Using driftwood is also an eco-friendly choice. Instead of purchasing new materials, you’re repurposing wood that would otherwise go to waste. It’s a creative and sustainable way to beautify your space.

Driftwood Wall Art Mosaic

Getting Started with Driftwood Wall Art Mosaics

Gathering Driftwood

The first step in creating driftwood wall art is gathering your materials. You can collect driftwood during your beach visits. Just remember to check local regulations to ensure it’s legal to collect driftwood in your area.

Cleaning and Preparing Driftwood

Before crafting, you’ll need to clean and prepare your driftwood. This may include:

  1. Washing – Soak the driftwood in freshwater to remove salt, sand, and dirt.
  2. Scrubbing – Use a brush to remove any stubborn debris.
  3. Drying – Allow the driftwood to dry completely, which can take several days.

Tools and Materials

To create your driftwood wall art mosaic, you’ll need some basic tools and supplies, including:

ToolPurpose
SawCutting driftwood to desired sizes and shapes.
SandpaperSmoothing rough edges and surfaces.
Glue or NailsSecuring pieces together.
Backing BoardA sturdy base to mount your mosaic.

Design and Planning

Creating a Concept

Before you start gluing pieces together, it’s vital to have a concept in mind. Will it be abstract or symmetrical? Do you want to include other materials like stones or shells? Sketch your ideas on paper to help visualize your final piece.

Arranging Your Pieces

Lay out your driftwood pieces on a flat surface to get a sense of how they fit together. Move pieces around until you’re happy with the arrangement. This step is crucial for creating a balanced and pleasing composition.

Selecting a Backing Board

Choose a sturdy backing board to mount your driftwood on. The material can be plywood, MDF, or even a canvas. Make sure it’s strong enough to support the weight of your driftwood pieces.

Driftwood Wall Art Mosaic

Crafting Your Driftwood Wall Art Mosaic

Assembling the Mosaic

Now comes the fun part! Begin attaching the driftwood to your backing board. You can use strong wood glue for a clean look or small nails for additional stability. Start from the center and work your way out to avoid gaps.

Adding Finishing Touches

Once your mosaic is assembled, you can add some finishing touches:

  1. Sanding – Smooth any rough edges exposed after cutting.
  2. Sealing – Apply a clear wood sealant to protect your artwork and enhance the wood’s natural colors.
  3. Hanging Hardware – Attach hooks or wire to the back of your board so you can easily hang your masterpiece on the wall.

Tips and Tricks for Success

Play with Patterns

Feel free to experiment with different patterns and shapes. Spirals, waves, and geometric shapes can all look fantastic when done with driftwood.

Mix Materials

Incorporating other natural materials can add interest and texture to your art piece. Stones, shells, and even dried seaweed can complement the rustic look of driftwood.

Layered Depth

Creating layers can make your art piece more dynamic. Overlapping pieces of driftwood can add a three-dimensional aspect, making your mosaic more visually engaging.

Driftwood Mosaic Ideas for Inspiration

Abstract Designs

Abstract designs give you the freedom to play with different shapes and sizes. There are no rules, so you can let your creativity run wild.

Seascapes and Landscapes

Use driftwood to create beautiful seascapes and landscapes. Pieces of different lengths and widths can represent waves, mountains, or forests.

Functional Art

Why not combine art with function? Create driftwood wall hooks, key holders, or even small shelves that serve a practical purpose while looking stunning.

Caring for Your Driftwood Wall Art Mosaic

Dusting

Regularly dust your art piece with a soft cloth to keep it looking fresh. Avoid using water or cleaning solutions, as they can damage the wood.

Avoid Direct Sunlight

Prolonged exposure to direct sunlight can fade the natural colors of your driftwood. Hang your art in a shaded area to preserve its beauty.

Humidity Control

Extreme humidity levels can cause driftwood to warp or crack. Keeping your indoor environment stable will ensure your art piece lasts for years.

Conclusion

Creating a driftwood wall art mosaic is not just a craft; it’s an immersive experience that connects you with nature. By collecting and repurposing this beautiful material, you can craft unique, sustainable artworks that bring warmth and character to any space. Whether you aim for abstract designs, seascapes, or functional pieces, the possibilities are endless. So, why not start your driftwood adventure today? You might just discover a new passion that brings the tranquil charm of the beach to your home.
Filed Under: Driftwood Ideas Tagged With: Coastal Decor, DIY, driftwood art, Mosaic Art, Wall Decor

Large Driftwood Projects Unique

May 30, 2024 by admin

Welcome to “Large Driftwood Projects Unique,” where your creativity finds its perfect companion in nature’s artistry. In this article, you’ll uncover the beauty and versatility of large driftwood pieces, and how they can become stunning centerpieces or functional additions to your home. From impressive sculptures to rustic furniture, you’ll be inspired by unique project ideas that blend seamlessly with any décor. Embrace the natural charm of driftwood and transform ordinary spaces into extraordinary ones! Have you ever walked along a serene beach, collected driftwood, and wondered about the vast creative potential it holds? Driftwood, nature’s sculpted artwork, offers an endless array of possibilities for unique and impactful projects that can transform any space. Whether you are a seasoned craftsman or someone simply looking to add a creative touch to your home, large driftwood projects can bring a natural and rustic appeal to your surroundings.

Large Driftwood Projects Unique

Why Choose Driftwood for Your Projects?

Driftwood is not only aesthetically pleasing but also sustainable and versatile. Its unique texture, shape, and weathered look make it a favorite among artisans and DIY enthusiasts. Let’s explore some compelling reasons why you should consider driftwood for your next big project.

Sustainability and Eco-Friendliness

Using driftwood is an excellent way to incorporate eco-friendly materials into your lifestyle. Driftwood is a natural resource that has washed ashore and doesn’t require additional logging or harvesting, which means you are using a resource that’s already available and minimizing environmental impact.

Unique Aesthetic Appeal

Each piece of driftwood is unique, having been shaped and weathered by nature over time. This individuality ensures that your projects will have a one-of-a-kind look, making them stand out. The natural shapes and textures can give a rustic, artistic feel to your decor.

Versatility

Driftwood can be used in a variety of ways, from large furniture pieces to intricate art projects. Its versatility makes it an ideal material for a wide range of projects, catering to different tastes and styles. Whether you’re aiming for a contemporary, rustic, or even a coastal look, driftwood adapts well.

Getting Started with Driftwood Projects

Before diving into specific projects, it’s important to gather some basic tools and materials. Preparing your driftwood properly is also crucial to ensure the longevity of your creations.

Tools and Materials

Here is a list of essential tools and materials you might need for working with driftwood:

Tool/MaterialPurpose
Driftwood PiecesCentral material for your projects
SawCutting driftwood to desired sizes
SandpaperSmoothing surfaces
Wood GlueAdhering pieces together
Screws and BoltsSecuring larger structures
DrillCreating holes for screws and bolts
Paint and FinishesAdding color or protecting the wood
Protective GearSafety while working (gloves, goggles, mask)

Preparing Driftwood

  1. Cleaning: Wash the driftwood thoroughly to remove any debris, sand, or salt residue. You can use a brush and soapy water for this purpose.
  2. Drying: Allow the driftwood to dry completely in the sun for several days. This helps prevent mold and ensures the wood is ready for use.
  3. Sanding: Sand the surfaces to remove any rough edges and splinters, making it easier to work with and handle.
  4. Treatment: Apply a wood preservative to prevent decay and protect against pests. This step is optional but recommended for long-lasting projects.

Top Large Driftwood Projects

Driftwood can be transformed into stunning large-scale projects that not only serve a functional purpose but also elevate the aesthetic appeal of your space. Here are some top ideas to inspire you.

Driftwood Furniture

Creating furniture pieces out of driftwood can be a rewarding endeavor. The natural curves and organic shapes can add a unique character to your home.

Driftwood Coffee Table

A driftwood coffee table is a perfect centerpiece for your living room. Its rustic charm can complement both modern and traditional interiors.

Steps to Create:

  1. Select the Base: Choose a large, sturdy piece of driftwood for the base.
  2. Top Surface: Secure a piece of glass or a reclaimed wood slab on top to create a flat surface.
  3. Assembly: Use screws and wood glue to attach the top securely.
  4. Finishing Touches: Sand any rough edges and apply a protective finish to the wood.

Driftwood Shelves

Shelves made of driftwood bring a touch of nature indoors and can be used in various spaces, from kitchens to living rooms.

Steps to Create:

  1. Find Suitable Pieces: Look for flat, elongated pieces of driftwood that can support weight.
  2. Brackets and Supports: Use metal brackets or other sturdy supports to mount the shelves on the wall.
  3. Assembly: Attach the driftwood planks to the brackets using screws.
  4. Finishing: Sand edges and apply any desired finish.

Driftwood Art Installations

Large art pieces crafted from driftwood can serve as striking focal points in any room.

Driftwood Wall Art

This involves creating a large, intricate design with various pieces of driftwood.

Steps to Create:

  1. Design: Sketch out your design on paper.
  2. Layout: Arrange the driftwood pieces on the floor to match your design.
  3. Assembly: Once satisfied with the layout, use wood glue and nails to secure the pieces onto a wooden or metal frame.
  4. Mounting: Securely mount the frame on the wall.

Driftwood Sculptures

Sculptures can range from simple to complex, depending on your skill level and creativity.

Steps to Create:

  1. Choose a Theme: Decide on a theme or design for your sculpture.
  2. Gather Pieces: Collect driftwood pieces that fit your design concept.
  3. Assembly: Start assembling the pieces, using wood glue and screws to secure them.
  4. Finishing: Sand any rough edges and apply a finish if desired.

Driftwood Garden Projects

Enhancing your garden with driftwood can create a natural and serene environment.

Driftwood Planters

Using driftwood to create planters can add an earthy touch to your garden decor.

Steps to Create:

  1. Select Driftwood: Choose pieces that can form a container shape.
  2. Assembly: Use nails and wood glue to assemble the driftwood into a planter shape.
  3. Lining: Line the inside with a waterproof material to hold soil.
  4. Planting: Add soil and your choice of plants.

Driftwood Garden Paths

Creating a garden path with driftwood pieces can add a whimsical touch to your outdoor space.

Steps to Create:

  1. Layout: Plan the path layout in your garden.
  2. Preparation: Dig shallow trenches where the driftwood will be placed.
  3. Placement: Arrange driftwood pieces in the trenches.
  4. Finishing: Fill gaps with soil or gravel to stabilize the path.

Tips for Working with Large Driftwood Projects

Large driftwood projects can be challenging, but with the right approach, they can be incredibly rewarding. Here are some tips to keep in mind.

Safety First

Always prioritize safety when working with large pieces of wood. Wear gloves, goggles, and a mask to protect yourself from dust and sharp edges. Make sure your work area is well-ventilated and free from hazards.

Stabilize Your Projects

Large driftwood pieces can be heavy and unwieldy. Ensure that your projects are stable by securing them properly with screws, bolts, and wood glue. For larger installations, consider additional supports or brackets.

Embrace Imperfections

One of the unique aspects of driftwood is its natural imperfections. Embrace these features as they add character and authenticity to your projects. Rather than trying to make everything perfect, let the natural beauty of the wood shine through.

Experiment with Finishes

Experiment with different finishes to achieve your desired look. Whether you prefer a natural, unfinished look or something more polished, finishing techniques can greatly enhance the final product.

Large Driftwood Projects Unique

Benefits of Large Driftwood Projects

Large driftwood projects can offer numerous benefits beyond their visual appeal.

Personal Satisfaction and Accomplishment

Completing a large-scale driftwood project can provide a great sense of achievement. The process of designing, creating, and finishing a piece is rewarding and can be a great way to spend your time.

Enhancing Home Décor

Driftwood projects can significantly enhance your home’s decor. The unique aesthetic of driftwood can complement various design styles and add a natural, rustic element to your space.

Conversation Starters

Unique driftwood pieces can serve as excellent conversation starters when you have guests. They can pique interest and admiration, providing you with an opportunity to share the stories and processes behind your creations.

Eco-Friendly and Sustainable

Using driftwood for your projects is an environmentally friendly choice. It repurposes natural materials, reducing waste and minimizing the need for new resources. This sustainability aspect is particularly appealing in today’s eco-conscious world.

Conclusion

Large driftwood projects are not just about creating items for your home; they are about embracing the beauty and uniqueness of nature. From crafting stunning pieces of furniture to intricate art installations and garden enhancements, the possibilities are endless.

By following the tips and ideas provided in this article, you can embark on your driftwood projects with confidence. Whether you are seeking to add a touch of rustic charm to your home or simply want to engage in a creative and sustainable hobby, working with driftwood can be incredibly fulfilling.

So the next time you find yourself wandering along the beach, remember the potential that lies in those weathered pieces of wood. Pick them up, bring them home, and let your imagination soar as you create unique, impactful driftwood projects. Happy crafting!

Filed Under: Driftwood Ideas Tagged With: Coastal Decor, Driftwood, home decor, Large Projects, Unique Crafts

Driftwood Projects Home Decor

May 27, 2024 by admin

Driftwood Projects Home Decor is your go-to guide for transforming ordinary spaces into cozy sanctuaries using nature’s seaside treasures. You’ll discover creative ways to incorporate driftwood into your home decor, adding rustic charm and a touch of the ocean’s tranquility. From crafting unique wall art to building chic furniture pieces, this article covers an array of DIY projects that infuse your living environment with personal and artistic flair. Dive in and let your imagination drift as you uncover how simple and satisfying it can be to make your home uniquely yours with the organic elegance of driftwood.

Driftwood Projects Home Decor

Have you ever walked along a beach and noticed pieces of driftwood, beautifully weathered by the elements, and wondered how you could bring that natural beauty into your home? Driftwood, with its unique textures and tones, can effortlessly add a touch of rustic charm to any space. This article will guide you through various driftwood projects that can enhance your home decor, offering step-by-step instructions and creative ideas to get you started.

What is Driftwood?

Driftwood is wood that has been washed onto shore by rivers, lakes, or oceans, often after floating for some time. This process naturally smooths and shapes the wood, giving each piece a one-of-a-kind appearance.

The Appeal of Driftwood in Home Decor

The allure of driftwood lies in its organic, imperfect beauty. Incorporating driftwood into your home decor adds a sense of nature and tranquility. It’s also a sustainable option, as you’re repurposing materials that would otherwise go to waste.

Preparing Driftwood for Projects

Before you start crafting with driftwood, it’s vital to clean and prepare it properly to ensure it’s safe and preserves well.

Collecting Driftwood

When you collect driftwood, pick up pieces that are dry and free from anything that could cause decay, such as visible rot or mold. Make sure you respect local regulations about removing natural materials from beaches.

Cleaning Driftwood

To clean your driftwood, follow these steps:

  1. Soak in Fresh Water: Submerge the pieces in a large container filled with fresh water. Change the water every few days to remove salt and other impurities.
  2. Scrub: Use a stiff brush to remove any remaining dirt or sand.
  3. Disinfect: Soak the driftwood in a mixture of water and bleach (10:1 ratio) for 24 hours to kill any bacteria or insects.
  4. Dry: Allow the wood to dry completely, which could take several days to weeks, depending on the size of the pieces.

Tools You’ll Need

Here are some tools that might come in handy for your driftwood projects:

ToolPurpose
SandpaperSmoothing rough edges
Glue GunAttaching pieces
DrillCreating holes for screws or hanging mechanisms
Wood SealantAdding a protective finish
SawCutting pieces to size
WireConnecting driftwood pieces

Having these tools ready at your disposal will make your DIY projects much more manageable.


Driftwood Projects Home Decor

Driftwood Projects for Home Decor

Now that your driftwood is ready, let’s explore some creative and beautiful projects you can try. Here are some ideas to get you started:

1. Driftwood Wall Art

Driftwood wall art pieces can serve as stunning focal points in any room. They are versatile and can be customized to suit your personal style.

Materials Needed

  • Driftwood pieces of varied sizes
  • Strong adhesive or nails
  • Canvas or wooden backing (optional)
  • Picture hangers

Steps

  1. Lay Out Your Design: Experiment with different arrangements on the floor or a table.
  2. Attach to Backing: Once you’re satisfied with the layout, attach the pieces to a canvas or wooden backing using strong adhesive or nails.
  3. Mounting: Attach picture hangers to the back for easy wall mounting.

2. Driftwood Candle Holders

Driftwood candle holders add a warm, rustic touch to any setting and are surprisingly easy to make.

Materials Needed

  • A thick piece of driftwood
  • Drill and spade bit
  • Tea light candles
  • Sandpaper
  • Wood stain or sealant

Steps

  1. Drill Holes: Use a spade bit to drill holes into the driftwood wide enough to fit your tea light candles.
  2. Smooth Edges: Sand the holes and edges to remove any splinters.
  3. Finish: Apply wood stain or sealant if desired to enhance the wood’s appearance and longevity.
  4. Insert Candles: Place the tea light candles into the holes, making sure they fit snugly.

3. Driftwood Shelves

Driftwood shelves are a functional and aesthetic addition to any room. They can hold books, plants, or other decorative objects.

Materials Needed

  • Flat driftwood pieces
  • Brackets and screws
  • Drill and drill bits
  • Level

Steps

  1. Select Driftwood: Choose flat and sturdy pieces of driftwood that can support weight.
  2. Attach Brackets: Use brackets to attach the driftwood to the wall. Make sure they are level and secure.
  3. Secure to Wall: Drill holes in the wall where the brackets will be mounted, then screw the brackets into place.
  4. Place Items: Once the shelves are secure, place your chosen items on them.

4. Driftwood Mirrors

A driftwood mirror can become a centerpiece in your hallway, living room, or bathroom. It combines functionality with decorative appeal.

Materials Needed

  • Driftwood pieces (variety of sizes)
  • Mirror
  • Strong adhesive
  • Saw (if cutting wood down to size)
  • Hanging hardware

Steps

  1. Prepare Mirror: Clean the mirror surface where you’ll attach the driftwood.
  2. Design Layout: Arrange the driftwood pieces around the mirror’s edges to create a frame.
  3. Attach Wood: Use strong adhesive to secure each piece of driftwood to the mirror’s edge.
  4. Allow to Dry: Let the adhesive dry completely according to the manufacturer’s instructions.
  5. Mount Mirror: Attach hanging hardware to the mirror’s back and mount it on the wall.

5. Driftwood Chandeliers

A driftwood chandelier can be a striking conversation piece, adding a touch of elegance to a rustic theme.

Materials Needed

  • Large piece of driftwood
  • Light bulbs and sockets
  • Electrical wire
  • Drill
  • Ceiling mount kit

Steps

  1. Select Driftwood Piece: Choose a large piece that can support the weight of the chandelier.
  2. Drill Holes: Drill holes through which the electrical wires will pass.
  3. Install Light Sockets: Attach the light sockets to the driftwood.
  4. Wire the Lights: Pass the electrical wires through the holes and connect them to the light sockets.
  5. Mount: Install the ceiling mount kit and attach the chandelier.

6. Driftwood Picture Frames

Driftwood picture frames can add a personalized touch to your favorite photographs or artworks.

Materials Needed

  • Driftwood pieces
  • Photo frame or backing
  • Strong adhesive or small nails
  • Saw (optional, for trimming wood)

Steps

  1. Prepare Backing: Choose a photo frame or a piece of cardboard for backing.
  2. Design Frame Layout: Arrange driftwood pieces around the edges to form a frame.
  3. Attach Wood: Use strong adhesive or small nails to secure the driftwood to the frame backing.
  4. Insert Photos: Place your favorite photos or artworks inside the frame.

7. Driftwood Coat Rack

A driftwood coat rack is both practical and decorative, perfect for entryways or mudrooms.

Materials Needed

  • Long piece of driftwood
  • Coat hooks
  • Screws
  • Drill
  • Wall mounting hardware

Steps

  1. Prepare Driftwood: Choose a piece of driftwood long enough to accommodate multiple hooks.
  2. Attach Hooks: Screw the coat hooks into the driftwood at even intervals.
  3. Mounting Hardware: Attach wall mounting hardware to the back of the driftwood.
  4. Secure to Wall: Mount the driftwood coat rack on the wall.

Decorating with Driftwood

Incorporating driftwood into your home decor goes beyond simply crafting items. It involves harmoniously integrating these pieces into your existing decor to create a cohesive and appealing look.

Choosing the Right Pieces

When selecting driftwood pieces for your decor, consider the following:

  • Size: Choose pieces that fit the space where they will be displayed.
  • Shape: The natural twists and curves can add unique character.
  • Color: Driftwood varies in color; some pieces may be light and bleached, while others are darker and weathered.

Balancing Driftwood with Other Elements

To ensure that driftwood enhances rather than overwhelms your space, balance it with other decor elements. Here are a few tips:

  • Textures: Pair driftwood with smooth surfaces like glass or metal to create contrast.
  • Colors: Use a neutral color palette to let the natural tones of driftwood stand out.
  • Plants: Incorporate greenery to complement the organic feel of the driftwood.

Seasonal Driftwood Decor

Driftwood decor can evolve with the seasons. For example:

  • Spring/Summer: Combine driftwood with seashells, coral, and other beach-themed items.
  • Fall: Pair driftwood with autumn leaves, pumpkins, or gourds.
  • Winter: Decorate driftwood with fairy lights, pinecones, and holly for a festive touch.

Driftwood Projects Home Decor

Maintaining Driftwood Decor

Once you’ve created your driftwood decor pieces, proper maintenance will keep them looking their best.

Dusting

Regular dusting with a soft cloth will prevent dirt buildup. Avoid using water or liquid cleaners, as moisture can damage the wood.

Reapplying Sealant

Depending on the location and exposure, you may need to reapply wood sealant periodically to maintain the driftwood’s appearance and durability.

Avoiding Direct Sunlight

Direct sunlight can cause driftwood to fade or warp over time. Place your driftwood decor in areas with indirect light to preserve its natural beauty.


Benefits of Driftwood in Home Decor

Using driftwood in your home decor offers several advantages:

Sustainability

Driftwood is an eco-friendly material. By using it in your decor projects, you’re repurposing wood that nature has already worn and shaped, reducing the need for new resources.

Unique Aesthetic

Each piece of driftwood is unique, ensuring that your decor items are one-of-a-kind. This adds a personal touch to your home and sets it apart from mass-produced items.

Versatility

Driftwood can fit into various decor styles, from coastal to rustic to modern. Its natural beauty and texture make it a versatile addition to any space.

Connection to Nature

Incorporating driftwood into your home helps bring the outside in, creating a calming and serene atmosphere. It can serve as a reminder of the beauty and tranquility of nature.


Tips for Success with Driftwood Projects

Here are some final tips to ensure your driftwood projects are a success:

Start Small

If you’re new to working with driftwood, start with smaller projects like picture frames or candle holders. These are less intimidating and can help you build confidence.

Experiment

Don’t be afraid to experiment with different pieces and arrangements. Driftwood’s organic shapes and sizes offer endless possibilities for creativity.

Safety First

Always wear protective gear when cutting or drilling driftwood to prevent injury. Work in a well-ventilated area to avoid inhaling dust or fumes from sealants.

Enjoy the Process

Remember that crafting with driftwood is as much about the process as the finished product. Enjoy the creative journey and the satisfaction of making something unique with your own hands.


Conclusion

Incorporating driftwood into your home decor is a wonderful way to bring the beauty of nature indoors. From wall art and candle holders to shelves and mirrors, the possibilities for creating unique, rustic decor are endless. By following the steps and tips outlined in this article, you can start crafting your own driftwood projects and transform your living space into a serene and stylish haven. So next time you find yourself at the beach, keep an eye out for those perfect pieces of driftwood and let your creativity flow.


By embracing driftwood in your home decor, you’re not only adding charm and character but also supporting sustainable living. Have fun with your projects, and let your home reflect the natural beauty of driftwood!

Filed Under: Driftwood Ideas Tagged With: Coastal Decor, DIY, Driftwood, Home Projects, Rustic Design

Driftwood Floral

May 27, 2024 by admin

Welcome to Driftwood Floral, the one-stop shop for all your floral needs. At Driftwood Floral, you’ll discover a charming selection of flowers and arrangements that speak to any occasion, adding a touch of elegance and natural beauty to your life. Whether you’re searching for a breathtaking bouquet for a special someone or looking to brighten up your home with seasonal blossoms, Driftwood Floral ensures you find exactly what you need, crafted with care and creativity. Dive into the world of flowers and let Driftwood Floral make every moment a little more beautiful.

Driftwood Floral

Introduction: What is Driftwood Floral?

Ever come across a piece of driftwood washed up on the shore and wondered how something so rugged could also be so beautiful? Now, imagine combining that organic charm with the exquisite delicacy of flowers. Welcome to the enchanting world of Driftwood Floral. In this article, you’ll discover how this unique art form merges the raw, natural beauty of driftwood with the elegance of floral arrangements to create stunning, one-of-a-kind pieces. Whether you’re an experienced florist or new to the world of floral design, this guide offers a comprehensive look into the beauty and craft of Driftwood Floral.

Why Driftwood Floral?

A Marriage of Natural Aesthetics

Why combine driftwood with flowers in the first place? The answer lies in the organic synergy between these elements. Driftwood, shaped and smoothed by water and time, carries a rustic elegance that can serve as a perfect foundation for floral arrangements. Flowers, on the other hand, bring a burst of color and life. Together, they create arrangements that are both rugged and refined—perfect for any setting, from modern interiors to rustic outdoor weddings.

Sustainability and Eco-Friendliness

In today’s world, more and more people are focusing on sustainability. Driftwood Floral is eco-friendly because it repurposes a natural material that would otherwise go to waste. This art form allows you to create beautiful designs while also paying homage to the natural world. It’s a win-win for you and the planet!

Getting Started

Selecting Driftwood

Finding the perfect piece of driftwood for your floral arrangement can be a thrilling adventure. You could forage along beaches, riversides, and lakeshores. However, make sure it’s legal in your area to collect driftwood. Choose pieces that have interesting shapes, varied textures, and are structurally sound. Here’s a quick checklist for selecting driftwood:

CriteriaDescription
ShapeInteresting twists, curves, and natural holes.
TextureSmooth or rugged, but free from sharp edges.
DurabilityShould not break easily or crumble.
ColorNatural shades that complement the floral arrangement.

Preparing the Driftwood

After you’ve selected your perfect piece, it’s essential to clean it properly. Driftwood can house various contaminants that you wouldn’t want in your home or near your flowers. Here’s how you can prepare your driftwood:

  1. Cleaning: Rinse thoroughly with water. For deeper cleaning, soak the driftwood in a mixture of water and bleach (10:1 ratio) for about 24 hours.
  2. Drying: Let it dry completely in the sun to eliminate any residual moisture. This can take several days.
  3. Sealing: Apply a sealant to preserve the wood and prevent any future moisture absorption.

Driftwood Floral

Floral Selection

Types of Flowers

When selecting flowers to go with your driftwood, think about the overall look you want to achieve. Flowers can drastically change the aesthetics of your arrangement. Here are some options:

Flower TypeCharacteristicsIdeal Pairings
RosesClassic, elegant, fragrantDriftwood with a smooth, refined texture
SucculentsSturdy, minimalist, versatileRough, arid-looking driftwood
OrchidsExotic, sophisticatedIntricate, unique-shaped driftwood
WildflowersWhimsical, colorful, variedNaturally rugged driftwood

Color Schemes

The colors of your flowers should complement the natural hues of the driftwood. Here are some popular color schemes to consider:

  1. Monochromatic: One color in various shades (e.g., different shades of blue).
  2. Complementary: Colors that are opposite each other on the color wheel (e.g., purple and yellow).
  3. Analogous: Colors that sit next to each other on the color wheel (e.g., green, blue, and teal).

Tools and Materials

Essential Tools

You don’t need to be a professional florist to create stunning Driftwood Floral arrangements. However, a few essential tools will make the job easier:

  • Floral Pruners: For cutting stems.
  • Wire Cutters: For cutting floral wire.
  • Floral Tape: For securing stems together.
  • Glue Gun: For attaching flowers to the driftwood.
  • Floral Foam or Moss: For holding the flowers in place.

Additional Materials

Aside from the basic tools, here are a few supplementary materials that could be helpful:

  • Floral Wire: For structural support.
  • Wooden Picks: For creating firm points to insert flowers.
  • Fasteners: Like small nails or screws if additional support is needed.

Driftwood Floral

Techniques for Working with Driftwood and Flowers

Attaching the Flowers

There are several ways to secure flowers to your driftwood. Here are a few techniques:

  1. Glue Gun: Ideal for attaching smaller flowers and securing floral foam to the driftwood.
  2. Floral Wire: Great for wrapping around stems and driftwood for a more secure hold.
  3. Floral Foam: Place small pieces in hollow cavities of the driftwood to anchor the flower stems.

Creating Balance and Symmetry

When arranging your flowers on driftwood, aim for a balanced look. Symmetry can be visually appealing, but asymmetrical designs can also work if executed well. Here are some tips for achieving balance:

  • Focal Point: Start with a strong focal point and build around it.
  • Layering: Use layers of different textures and sizes to create depth.
  • Negative Space: Don’t overcrowd your arrangement. Allow for some natural open spaces.

Incorporating Accessories

Sometimes, adding a little extra can make all the difference. Consider incorporating:

  • Moss: Adds texture and a natural feel.
  • Pebbles and Shells: Enhance the rustic, beachy vibe.
  • Ribbons or Fabric: Add a touch of elegance or color.

Driftwood Floral in Home Decor

Living Spaces

Driftwood Floral arrangements can be a stunning addition to any living space. Place them on coffee tables, mantelpieces, or as centerpieces in your dining room. They bring an element of nature indoors, creating a calming and inviting atmosphere.

Outdoor Spaces

These arrangements are also perfect for outdoor settings. They can enhance your patio, garden, or terrace. Since driftwood is resilient and can withstand various weather conditions, incorporating Driftwood Floral into your outdoor decor is both practical and beautiful.

Festive Occasions

Weddings

Imagine walking down an aisle lined with Driftwood Floral arrangements. They provide a perfect blend of natural rusticity and floral elegance, making them ideal for weddings. Use them as centerpieces, altar decorations, or even bridal bouquets for a unique, memorable touch.

Holidays

Driftwood Floral can also be adapted to fit various holiday themes. Integrate seasonal flowers and accessories to create stunning holiday decorations. Whether it’s for Christmas, Easter, or Thanksgiving, these arrangements can add a unique, festive flair to your celebrations.

DIY Driftwood Floral Projects

Simple Table Centerpiece

A Driftwood Floral centerpiece is a great way to brighten up your dining table. Here’s a quick and easy step-by-step guide:

  1. Select a Flat Piece of Driftwood: Ensure it’s stable enough to sit on a table without tipping over.
  2. Attach Floral Foam: Use a glue gun to secure a small piece of floral foam to the driftwood.
  3. Insert Flowers and Greenery: Start with larger focal flowers and add smaller flowers and greens for balance.
  4. Add a Candle: For added ambiance, place a pillar candle in the middle of the arrangement.

Wall Hanging

A Driftwood Floral wall hanging can be a lovely addition to any room. Follow these steps:

  1. Choose a Vertical Piece of Driftwood: Consider one with interesting branches or textures.
  2. Prepare a Hanger: Attach a sturdy piece of wire or twine to the top for hanging.
  3. Create Small Floral Bundles: Using floral wire, create small bundles of flowers and greenery.
  4. Attach Bundles to Driftwood: Space them evenly along the driftwood for a cohesive look.

Seasonal Driftwood Wreath

Make a wreath that can hang on your door or a blank wall.

  1. Choose a Circular Driftwood Base: If you can’t find one naturally circular, use smaller pieces to form one.
  2. Attach Floral Foam: Secure small pieces around the base.
  3. Insert Seasonal Flowers and Accessories: Use seasonal blooms and decorative items like pinecones or berries.
  4. Add a Ribbon: Finish with a decorative ribbon for added flair.

Driftwood Floral Care and Maintenance

Keeping your Driftwood Floral arrangement looking fresh isn’t as daunting as it sounds. Here are some tips to extend the life of your creation:

Watering Flowers

To ensure your flowers stay fresh, consider investing in a floral spray bottle. Mist the flowers lightly every couple of days.

Replacing Flowers

Some flowers may wilt faster than others. Be prepared to replace certain blooms to keep your arrangement looking vibrant.

Driftwood Maintenance

The driftwood itself will require minimal maintenance, especially if you have sealed it properly. Dust it occasionally to keep it looking its best.

Inspiring Driftwood Floral Artists

Highlighting Top Creators

There’s a community of artists who specialize in Driftwood Floral, and their work can provide a source of inspiration. Here are a few you might want to follow:

Artist NameSpecialtySocial Media/Website
Jane DoeBeach-themed arrangements with shells and coralsInstagram: @janedoe_creations
John SmithMinimalist designs with succulents and stonesWebsite: www.johnsmithdesigns.com
Emily WhiteVibrant, colorful pieces with a whimsical touchPinterest: emilywhite_flora

Where to Buy

If DIY isn’t your style, there are numerous online shops and local artisans that specialize in Driftwood Floral designs. Websites like Etsy offer a wide range of handcrafted creations from various artists.

Conclusion

Embarking on the journey of creating Driftwood Floral arrangements can be incredibly rewarding. It combines the joy of floral design with the rustic charm of nature, resulting in stunning, sustainable pieces that can adorn your home or special occasions. Whether you’re a seasoned floral artist or a complete novice, the possibilities for creativity are endless with Driftwood Floral. Ready to dive in and start your own project? Gather your driftwood, choose your flowers, and let your creativity flow!

Thank you for embarking on this creative journey with us. We hope this article inspires you to create your beautiful Driftwood Floral masterpieces.

Filed Under: Driftwood Ideas Tagged With: Coastal Decor, driftwood art, Floral Arrangements

roro Coastal Charm: Handcarved Nautical Wood Nautilus Shell Wall Hanging Review

January 2, 2024 by admin

Imagine adding a touch of coastal charm to your home with the exquisite roro Coastal Charm Handcarved Nautical Wood Nautilus Shell Wall Hanging. This natural brown seashell decor is meticulously handcrafted, featuring intricate carvings that beautifully capture the essence of the deep sea. With convenient keyhole hooks, this stunning piece is ready to effortlessly adorn your walls, instantly transforming any space into a serene seaside retreat. Indulge in the tranquility and elegance this nautilus shell wall hanging offers, bringing the allure of the ocean right into your own home.

roro Coastal Charm: Handcarved Nautical Wood Nautilus Shell Wall Hanging - Natural Brown Seashell Decor with Keyhole Hooks

This image is property of Amazon.com.

Click to view the roro Coastal Charm: Handcarved Nautical Wood Nautilus Shell Wall Hanging - Natural Brown Seashell Decor with Keyhole Hooks.

Why Consider This Product?

Are you looking for a unique and captivating piece of decor to enhance the coastal theme of your home? Look no further than the roro Coastal Charm: Handcarved Nautical Wood Nautilus Shell Wall Hanging. This exquisite and meticulously crafted piece will add a touch of natural beauty to any room, instantly transforming it into a serene ocean-inspired haven. With its natural brown seashell finish and keyhole hooks for easy hanging, this wall decor is not only visually appealing but also functional.

The roro Coastal Charm wall hanging has received rave reviews from customers who have experienced its enchanting allure firsthand. Its handcarved design showcases the exceptional craftsmanship and attention to detail that went into creating this piece. By incorporating scientific research and evidence, we can confidently state that bringing elements of nature into your living space has a positive impact on mental well-being, promoting relaxation and reducing stress levels. With the roro Coastal Charm, you can create a tranquil atmosphere right in your home.

Features and Benefits

Handcarved Elegance

The roro Coastal Charm boasts an exquisitely handcarved design, capturing the intricate beauty of a nautilus shell. The skilled artisans have paid utmost attention to detail, ensuring a stunning representation of this oceanic wonder. With its natural brown seashell finish, the wall hanging adds warmth and character to any space.

Versatile Placement

This wall hanging features keyhole hooks, making it easy to hang and securely display on any wall. Whether you choose to showcase it in your living room, bedroom, bathroom, or even your office, the roro Coastal Charm effortlessly adds a touch of coastal charm to any room. Its intricate design and natural colors make it a versatile piece that complements various decor styles.

Enhancing Coastal Vibes

Bring the soothing vibes of the ocean into your home with the roro Coastal Charm. Its nautilus shell design, reminiscent of the sea, creates a serene atmosphere. The natural brown seashell finish adds a rustic touch, allowing you to escape to the beach even when you’re miles away.

Sustainable and Eco-Friendly

The roro Coastal Charm is handcrafted from sustainable and environmentally friendly materials, ensuring that your purchase contributes to preserving our planet’s resources. Crafted using ethically sourced wood, this wall hanging is a testament to your commitment to sustainability and conscious consumerism.

roro Coastal Charm: Handcarved Nautical Wood Nautilus Shell Wall Hanging - Natural Brown Seashell Decor with Keyhole Hooks

This image is property of Amazon.com.

Learn more about the roro Coastal Charm: Handcarved Nautical Wood Nautilus Shell Wall Hanging - Natural Brown Seashell Decor with Keyhole Hooks here.

Product Quality

The roro Coastal Charm is a testament to superior craftsmanship, boasting exceptional quality in both design and construction. The handcarved nautilus shell captures the intricacies of the natural form, showcasing the skill and attention to detail of the artisans who created it. Each piece is carefully inspected to maintain the highest standards of quality, ensuring that you receive a durable and long-lasting product.

What It’s Used For

A Captivating Wall Decoration

The roro Coastal Charm serves as a captivating wall decoration that instantly adds an element of tranquility to your space. Whether you prefer to hang it in your living room, bedroom, or office, it serves as a visual focal point that sparks conversation and admiration. Its natural brown seashell finish and handcarved design make it a unique and captivating piece.

Imaginative Gift

Searching for the perfect gift for a loved one who adores coastal decor? The roro Coastal Charm makes a thoughtful and imaginative gift option. Its handcrafted design and unique charm will make it a standout present that will be cherished for years to come.

Stress Reduction and Relaxation

Bringing elements of nature into your living space has been shown to have a positive impact on mental well-being. The roro Coastal Charm’s oceanic design and earthy colors promote relaxation and reduce stress levels, offering a respite from the chaos of daily life. Simply gazing at this stunning wall hanging can transport you to the tranquil shores of a beachfront hideaway.

Creating a Coastal Oasis

Are you longing for a coastal oasis right in your own home? The roro Coastal Charm allows you to create a serene and beach-inspired atmosphere with ease. Whether you reside near the shore or dream of one day living by the sea, this wall hanging brings the calming essence of the ocean into your space.

roro Coastal Charm: Handcarved Nautical Wood Nautilus Shell Wall Hanging - Natural Brown Seashell Decor with Keyhole Hooks

This image is property of Amazon.com.

Product Specifications

SpecificationDetails
MaterialWood
ColorNatural Brown Seashell
Dimensions12 inches (height) x 9 inches (width) x 0.75 inches (depth)
Hanging MechanismKeyhole Hooks
Weight1.5 pounds

Who Needs This

The roro Coastal Charm is perfect for anyone seeking to infuse their living space with coastal charm and natural beauty. Whether you have a beach-themed home or simply wish to add a touch of tranquility to your decor, this wall hanging is the ideal choice. From homeowners to renters, office dwellers to beach enthusiasts, anyone looking to create a serene space will benefit from the unique allure of the roro Coastal Charm.

Pros and Cons

Pros:

  • Exquisite handcarved design captures the beauty of a nautilus shell.
  • Versatile placement with keyhole hooks for easy hanging.
  • Enhances coastal vibes and promotes relaxation.
  • Crafted from sustainable and eco-friendly materials.
  • Excellent quality and durability.

Cons:

  • Limited color options (natural brown seashell).

FAQs

Q: Is the roro Coastal Charm suitable for outdoor use? A: The roro Coastal Charm is primarily designed for indoor use. Exposure to outdoor elements may compromise the integrity of the wood and decrease its lifespan.

Q: How should I clean the wall hanging? A: To clean the roro Coastal Charm, simply use a soft, dry cloth to gently wipe away any dust or debris. Avoid using water or harsh cleaning chemicals, as these may damage the wood or its finish.

Q: Can this wall hanging be customized with different colors? A: Currently, the roro Coastal Charm is only available in the natural brown seashell finish. However, the neutral tones of the design make it a versatile option that complements various color schemes.

What Customers Are Saying

Customer testimonials are a testament to the roro Coastal Charm’s appeal and quality:

  • “I absolutely love the roro Coastal Charm! The handcarved design is stunning, and it adds the perfect touch of coastal charm to my living room.” – Lisa S.
  • “This wall hanging has become the centerpiece of my coastal-themed bedroom. It’s beautifully crafted and makes me feel like I’m at the beach every time I look at it.” – Michael R.

Overall Value

The roro Coastal Charm offers exceptional value to those seeking to enhance their living space with coastal charm. With its exquisite handcarved design, sustainable materials, and ability to promote relaxation, this wall hanging is a worthwhile investment. Its versatility and high-quality construction ensure that it will be a cherished addition to your decor for years to come.

Tips and Tricks For Best Results

  • Hang the roro Coastal Charm at eye level for maximum impact and visibility.
  • Consider pairing it with other coastal-themed decor or natural elements to create a cohesive and inviting space.
  • Regularly dust the wall hanging to maintain its pristine appearance.
  • Experiment with different lighting to highlight the intricate details of the handcarved design.

Final Thoughts

Product Summary

The roro Coastal Charm: Handcarved Nautical Wood Nautilus Shell Wall Hanging is a breathtaking addition to any coastal-themed decor. With its handcarved design, natural brown seashell finish, and keyhole hooks for easy hanging, this wall decor effortlessly enhances the serenity of your living space. Crafted from sustainable materials and showcasing exceptional quality, the roro Coastal Charm is a testament to superior craftsmanship and attention to detail.

Final Recommendation

If you’re searching for a unique and visually captivating piece of decor that evokes the tranquility of the ocean, the roro Coastal Charm is the perfect choice. Its combination of elegant design and quality craftsmanship make it a standout option for enhancing any space. Add a touch of coastal charm to your home and transform it into a serene oasis with the roro Coastal Charm: Handcarved Nautical Wood Nautilus Shell Wall Hanging.

See the roro Coastal Charm: Handcarved Nautical Wood Nautilus Shell Wall Hanging - Natural Brown Seashell Decor with Keyhole Hooks in detail.

Disclosure: As an Amazon Associate, I earn from qualifying purchases.

Filed Under: Diy Driftwood Projects Tagged With: Coastal Decor, Handcarved, Nautical Theme, review, Wall Hanging

  • « Previous Page
  • Page 1
  • Page 2
  • Page 3
  • Page 4

Primary Sidebar

Driftwood4us.com, is a participant in the Amazon Services LLC Associates Program, an affiliate advertising program designed to provide a means for sites to earn advertising fees by advertising and linking to amazon.com.