• Skip to main content
  • Skip to primary sidebar
  • Terms and Conditions
  • Privacy Policy
  • Contact

Driftwood 4 Us

Just About Driftwood

cross

Driftwood Cross Diy

February 3, 2025 by admin

Have you ever stumbled upon a beautiful piece of driftwood while walking along the beach and wondered how you could transform it into something unique for your home? Crafting a driftwood cross can be a fulfilling project that infuses a touch of nature and spirituality into your space. With a bit of creativity and some basic materials, you can create a stunning piece that resonates with personal meaning and rustic charm.
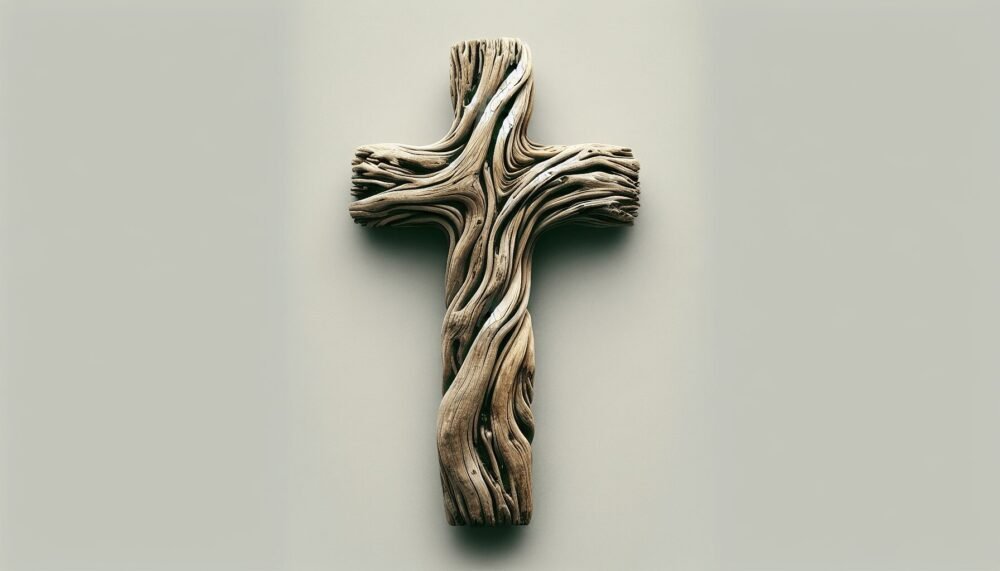
Driftwood Cross Diy

Understanding Driftwood

Before you begin your DIY project, it’s essential to understand what driftwood is and why it’s a fantastic material for crafting. Driftwood refers to the weathered pieces of wood that wash ashore on beaches, having been shaped and smoothed by water and sand over time. Each piece tells its own story, with its unique textures and patterns.

Why Choose Driftwood for DIY?

Choosing driftwood for your DIY projects offers both aesthetic and environmental benefits. Not only does each piece serve as a unique canvas, but using driftwood repurposes natural materials that might otherwise go unused. Its rustic appeal complements various decor styles, adding a hint of coastal ambiance to your home.

Collecting the Perfect Piece of Driftwood

Finding the right driftwood pieces is both an adventure and a mindful process. While walking along the beach, look for pieces that are lightweight, relatively dry, and without rot. Remember to check local regulations, as some areas may have restrictions on collecting driftwood.

Materials and Tools You’ll Need

Gathering the right materials and tools is crucial for a smooth crafting process. Here’s what you’ll need:

  • Driftwood Pieces: Look for a selection of lengths that can be layered to form a cross.
  • Wood Glue: A strong adhesive to hold your structure together.
  • Small Drill and Drill Bits: For making holes if you decide to use screws.
  • Screws: Optional, for added stability.
  • Wood Sandpaper: To smooth any rough edges.
  • Protective Finish or Sealant: To preserve the wood.
  • Twine or Wire: For additional support or a decorative element.
  • Saw or Pruning Shears: To cut the wood down to size if needed.
  • Decorative Items: Like shells, stones, or small plants to personalize your creation.

Steps to Create Your Driftwood Cross

Creating a driftwood cross involves a few straightforward steps. Planning and organizing will ensure your project comes together beautifully.

Step 1: Design Your Cross

Start by visualizing the shape and size of your cross. Arrange your driftwood pieces on a flat surface. Play around with different configurations until you find the one that speaks to you. Don’t worry about perfection—part of the charm lies in its uniqueness.

Step 2: Prepare Your Driftwood

Once you’re satisfied with the layout, it’s time to prepare your driftwood for assembly. Use sandpaper to address any rough spots. This step ensures your final piece is smooth and safe to handle. If needed, use a saw to resize any pieces for your desired dimensions.

Step 3: Assemble the Cross

With your design settled and wood prepared, start assembling. Begin with the vertical piece and attach the horizontal one at your preferred position to form the cross. Apply wood glue at the joining point. Hold the pieces together while the glue sets. For added strength, consider drilling and using screws.

Step 4: Secure with Twine or Wire

After assembling, grab some twine or wire to wrap around the central junction. This not only strengthens the hold but adds to the rustic, natural aesthetic. Wrap firmly but not too tight to avoid breaking the wood.

Step 5: Add Finishes

When your cross structure is solid, apply a protective finish or sealant. This step will protect it from environmental factors, deepening the wood’s natural hues.

Step 6: Customize with Decorations

Personalize your driftwood cross further by adding decorations. Glue shells, small stones, or incorporate small plants for a touch of greenery. Think of colors and elements that complement your overall theme.

Troubleshooting Tips

Every DIY project comes with its challenges. Here are a few tips to help you navigate common pitfalls when crafting your driftwood cross.

Securing Loose Pieces

If you find driftwood pieces are not adhering well, assess whether more wood glue, twine, or wire is needed. Sometimes, adding additional glue and allowing extra drying time solves loose piece issues.

Dealing with Fragile Wood

Driftwood can sometimes be fragile. Avoid forceful sanding, and handle with care during assembly. If a piece seems too fragile, consider replacing it with a stronger one.
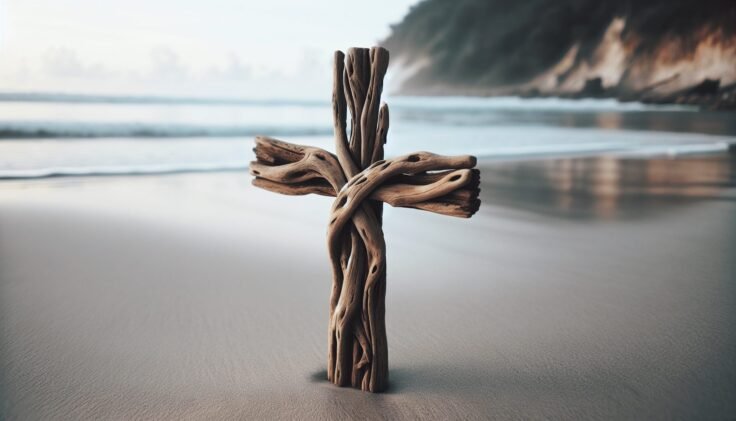
Driftwood Cross Diy

Displaying Your Driftwood Cross

Once your cross is complete, choosing where and how to display it becomes part of the creative process. Consider hanging options or standing it against a backdrop.

Hanging Your Cross

For hanging, attach discreet hooks at the back or loop a strong wire that blends with your wall color. Choose a wall that offers contrast, allowing your creation to shine.

Creating a Stand

If you prefer to have it freestanding, attach a base or weighted stand. Use wood or a heavier rock, securing with wood glue or screws, and ensure your cross can balance.

Caring for Your Driftwood Cross

Regular Dusting

Keep your cross looking fresh by dusting it regularly. Use a soft, dry cloth or a duster to remove any accumulated dirt or dust.

Resealing If Necessary

Over time, your driftwood cross may require resealing to maintain its beauty. Monitoring the sealant’s integrity and reapplying as needed ensures preservation.

The Meaning Behind the Cross

A driftwood cross holds personal significance for many. Bringing together nature and spirituality, it represents connections to both the earth and a higher power.

Spiritual Significance

For many, a cross is a symbol of faith and hope. Creating one from driftwood is an opportunity for reflection, making it meaningful for your spiritual journey.

Nature’s Touch

A driftwood cross captures the essence of nature’s beauty. It’s a reminder of the calming presence and strength found in the natural world.

How to Gift a Driftwood Cross

Driftwood crosses make thoughtful gifts. Their personal touch and handmade charm convey deep sentiment.

Presentation Ideas

Consider wrapping in recyclable materials, staying consistent with its natural theme. A simple paper wrap with a twine bow or an eco-friendly gift bag would enhance its rustic appeal.

Writing a Personal Note

Accompany your gift with a handwritten note. Share the inspiration and thoughts behind your creation, adding a personal touch that the recipient will cherish.

Exploring Further Projects

Creating a driftwood cross may inspire you to explore more DIY projects. Here are some ideas to extend your creativity using driftwood.

Driftwood Picture Frames

Design and create unique driftwood picture frames to showcase your favorite photographs. The rugged texture juxtaposed with photographs adds depth and charm.

Driftwood Wall Art

Form intricate wall patterns by assembling various driftwood pieces, creating art that speaks both subtlety and modernity.

Driftwood Furniture

For the more adventurous, crafting small furniture items like tables or stools using driftwood can be a rewarding challenge.

Conclusion

Crafting a driftwood cross is not just a project but a journey merging creativity, nature, and personal meaning. The steps outlined here guide you from concept to completion, allowing you to enjoy the crafting process while ending with a beautiful piece that resonates personally. Your driftwood cross will be more than a decorative item; it will be an emblem of craftsmanship and inspiration. Enjoy your crafting adventure, and may your new creation bring warmth and joy to your space or to those you choose to gift it.
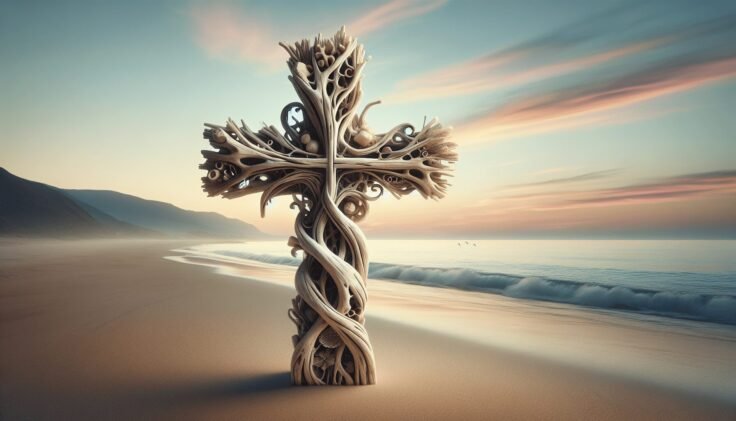
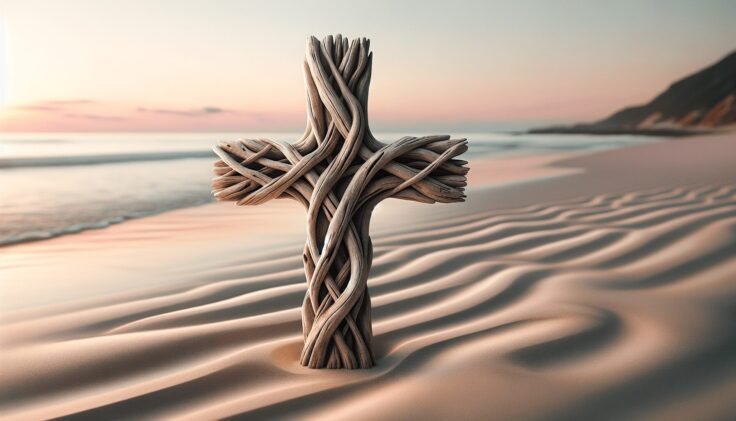
Filed Under: Driftwood Ideas Tagged With: craft, cross, Driftwood, Handmade, home decor

Driftwood Cross

February 3, 2025 by admin

Have you ever stumbled upon a piece of driftwood on a beach and wondered about its journey? Driftwood has a way of captivating the imagination with its weathered appearance and unique shapes. Its story intertwines with nature’s elements of water, wind, and time. Among the myriad forms driftwood can take, the “Driftwood Cross” stands out, both for its simple beauty and the symbolic meanings it may convey.

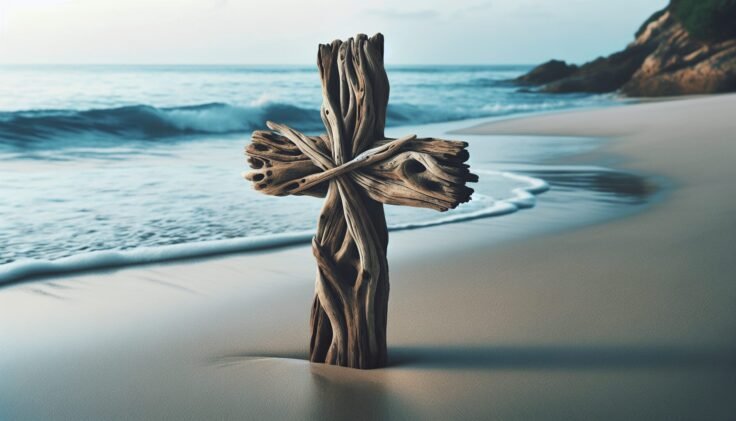
Driftwood Cross

The Origin of Driftwood

Driftwood begins its journey as a vital part of forest ecosystems, playing a role in the life cycles of various species. When trees fall naturally or due to external forces like storms, parts of them enter waterways. Streams and rivers carry these logs and branches, eventually leading them to lakes, seas, or oceans. During this voyage, the wood undergoes significant transformation.

Transformation Through Time

The constant movement and exposure to elements like water, sun, and salt play a significant role in shaping driftwood. The water wears the wood smooth, removing bark and any sharp edges. Salt can bleach the driftwood, giving it a distinctive pale coloration. Over time, these factors, combined with the effects of wind and sand, create the characteristic appearance of driftwood that many find intriguing and aesthetically pleasing.

Driftwood Uses and Cultural Significance

Throughout history, driftwood has been utilized in various ways by different cultures. Its natural beauty and availability make it a versatile material for numerous applications.

Artistic and Decorative Uses

Artists and artisans have long recognized the aesthetic potential of driftwood. Its unique forms and textures lend themselves to creativity. Artists may use it to make sculptures, furniture, or even jewelry. Its organic appeal makes it a popular choice for home decor, often seen as centerpieces, wall hangings, or incorporated into larger artistic pieces.

Symbolism and Spiritual Connections

In some cultures, driftwood holds symbolic or spiritual significance. The process by which wood becomes driftwood—a journey of transformation, endurance, and resilience—is often seen as a metaphor for life’s journey. The Driftwood Cross, in particular, can symbolize hope, faith, and the interconnectedness of nature and spirituality. These symbolic meanings can add layers of personal or communal significance to the simple act of displaying or gifting a Driftwood Cross.

Creating a Driftwood Cross

If you’re in tune with nature and enjoy crafting, making a Driftwood Cross can be a rewarding experience. This project combines the natural beauty of driftwood with the symbolic meaning of the cross, creating a piece that can serve as both a decorative item and a meaningful artifact.

Gathering Materials

Begin by collecting suitable pieces of driftwood. Look for two pieces that naturally intersect or align well to form a cross. Consider their texture, color, and overall appearance. Driftwood can be found along beaches, riverbanks, or coastal areas.

Crafting Your Driftwood Cross

  1. Preparation: Clean your driftwood pieces to remove any dirt or debris. A gentle scrubbing with a brush and a rinse with water should suffice. Allow the wood to dry completely before you begin crafting.

  2. Assembly: Arrange the pieces to form a cross, with one piece overlapping the other. Decide on the orientation that feels aesthetically pleasing to you.

  3. Securing the Pieces: Use string, twine, or wire to secure the two pieces together at the intersection. Consider using natural materials to enhance the organic appearance of the cross. Additionally, glue or nails can provide extra stability if needed.

  4. Finishing Touches: Once assembled, you can leave the Driftwood Cross in its natural state or apply a light finish. This might include sanding rough edges or applying a sealant to protect the wood and preserve its appearance.

Incorporating a Driftwood Cross in Your Space

Once you’ve crafted your Driftwood Cross, there are various ways you can incorporate it into your home or garden.

Home Decor

The natural charm of a Driftwood Cross makes it an excellent addition to many decor styles, from rustic and coastal to modern and minimalist. It can be hung on a wall, placed on a mantle, or used as a centerpiece. The key is to find a spot where it complements the existing decor while allowing its uniqueness to stand out.

Outdoor Spaces

Consider using a Driftwood Cross in your garden or outdoor living space. It can serve as a focal point, adding a sense of tranquility and connection to nature. Ensure it’s placed under cover or finishes are applied to protect it from weather conditions.

Driftwood Cross

The Environmental Impact of Using Driftwood

While driftwood is a wonderful natural resource for crafts and decor, it’s essential to consider its environmental implications. Driftwood provides important habitats in aquatic ecosystems, offering shelter and supporting biodiversity. Collecting driftwood should always be approached with sensitivity to the environment.

Sustainable Practices for Driftwood Collection

  1. Research Local Regulations: Some areas may have restrictions on collecting driftwood to protect ecosystems. Always adhere to local guidelines and regulations.

  2. Collect Responsibly: Take only what you need, leaving behind ample wood for the ecosystem. Avoid removing large pieces or excessive amounts from one area.

  3. Choose Storm-Felled Wood: Opt for driftwood that has been naturally felled by storms rather than wood that is still attached to living trees.

Preserving the Beauty of Driftwood Art

Driftwood art offers a unique way to showcase nature’s beauty. However, without proper care, driftwood can deteriorate over time.

Maintenance Tips

  • Clean Gently: Regularly dust your driftwood pieces with a soft cloth. If deeper cleaning is needed, use a slightly damp cloth.

  • Avoid Direct Sunlight: Prolonged exposure to direct sunlight can bleach and weaken the wood. Place your Driftwood Cross in a location with indirect light.

  • Apply a Finish: Consider applying a protective finish to maintain the wood’s appearance and prevent decay. Natural oils or waxes can be effective options.

Driftwood Cross as a Gift

A Driftwood Cross can make a thoughtful, personalized gift. Its symbolism, combined with the time spent crafting it, adds layers of meaning, particularly for those who appreciate handmade or nature-inspired gifts.

Personalizing Your Driftwood Cross Gift

  • Add Inscribed Messages: Consider adding an inscription to the wood with a meaningful message or date.

  • Attach Complementary Elements: Incorporate other natural materials like dried flowers, shells, or stones for added personalization.

  • Wrap Creatively: Present the Driftwood Cross in a way that reflects its natural essence, such as wrapping it in recycled paper or burlap.

Reflecting on the Driftwood Cross Journey

The Driftwood Cross serves as a reminder of resilience and transformation. Each piece of driftwood has its own story, shaped by the forces of nature. By creating and sharing a Driftwood Cross, you’re not only embracing its aesthetic appeal but also honoring the natural journey that brought it to you. Whether serving as a decorative item, a symbol of personal significance, or a thoughtful gift, the Driftwood Cross carries with it a profound connection to the natural world.

In crafting and appreciating driftwood art, you are engaging with these natural narratives, bridging the gap between nature’s processes and human creativity in a manner both sustainable and soulful.

Filed Under: Driftwood Ideas Tagged With: cross, DIY, Driftwood, Handmade, Nature Art

Driftwood Cross Art

March 22, 2024 by admin

Imagine strolling along the pristine shores of a secluded beach, the salty scent of the ocean filling the air. As your eyes wander, they fall upon a mesmerizing sight: intricate sculptures crafted from weathered driftwood, forming delicate crosses that seem to hold stories of their own. Driftwood Cross Art, a unique form of expression that marries nature’s discarded treasures with artistic vision, invites you to embark on a journey of reflection and appreciation for the beauty that can be found in the simplest of materials.

What is Driftwood Cross Art?

Driftwood Cross Art is a unique and creative form of artistic expression that combines the natural beauty of driftwood with the symbolic representation of a cross. It involves assembling and arranging pieces of driftwood to create stunning and meaningful artworks that can add a touch of rustic charm to any space. This art form allows you to create personalized and one-of-a-kind pieces that reflect your own style and creativity.

Definition of Driftwood Cross Art

Driftwood Cross Art refers to the process of using driftwood, which is wood that has been washed ashore by a body of water, typically the ocean, to create a cross-shaped art piece. It involves selecting, preparing, and assembling the driftwood pieces to form the desired shape of the cross. The finished artwork can be left in its natural state or decorated with paint, patterns, or other materials to enhance its beauty and meaning.

Origin of Driftwood Cross Art

The origin of Driftwood Cross Art can be traced back to coastal areas where people have long been collecting driftwood for various uses. The idea of using driftwood to create cross-shaped artworks likely emerged as a way to combine the artistic potential of the wood with the religious symbolism of the cross. Over time, this art form has gained popularity and has become a beloved craft among artists, collectors, and beachcombers alike.

Materials Used in Driftwood Cross Art

To create a driftwood cross artwork, you will need a few essential materials. These include:

  • Driftwood Pieces: The main material for this art form is, of course, driftwood. Look for driftwood pieces in various sizes and shapes, depending on your desired final artwork.
  • Wood Glue: This adhesive is crucial for securing the driftwood pieces together. Choose a strong and durable wood glue that dries clear for a seamless finish.
  • Saw: A saw will come in handy for cutting and trimming the driftwood pieces to the desired lengths and shapes.
  • Sandpaper: Sandpaper is essential for smoothing rough edges, creating texture, and preparing the driftwood for painting or varnishing.
  • Acrylic Paint and Brushes: If you wish to add color to your driftwood cross, acrylic paint and brushes are perfect for this purpose. Choose colors that complement your desired aesthetic.
  • Optional: Sealer or Varnish: Applying a sealer or varnish can protect the driftwood cross from moisture and extend its lifespan. It can also enhance the natural beauty of the wood and give it a polished look.

Tools and Supplies Needed

Before diving into your driftwood cross art project, it’s important to gather all the necessary tools and supplies. Here’s a list of what you’ll need:

Driftwood Pieces

Begin by collecting a variety of driftwood pieces. Look for different shapes, sizes, and textures that will add visual interest and dimension to your driftwood cross. You can find driftwood along the beach or purchase it from local craft stores.

Wood Glue

Choose a high-quality wood glue that is strong and dries clear. This adhesive will be used to secure the driftwood pieces together, ensuring that your driftwood cross remains intact.

Saw

A saw will be useful for cutting and trimming the driftwood pieces to the desired lengths and shapes. Ensure that you have a saw that is appropriate for cutting through wood.

Sandpaper

To create a smooth and polished look, sandpaper is essential. Use different grades of sandpaper to smooth out rough edges, create texture, and prepare the driftwood for painting or varnishing.

Acrylic Paint and Brushes

If you desire to add color to your driftwood cross, acrylic paint is a great choice. Select a variety of colors that align with your artistic vision. Additionally, make sure to have a selection of brushes in different sizes to accommodate various painting techniques and designs.

Optional: Sealer or Varnish

To protect the driftwood cross from moisture and give it a finished appearance, consider applying a sealer or varnish. This optional step will help preserve the natural beauty of the wood while adding a protective layer.

Driftwood Cross Art

This image is property of images.unsplash.com.

Choosing and Preparing Driftwood

Selecting Suitable Driftwood Pieces

When selecting driftwood pieces for your project, look for ones that are sturdy and in good condition. Avoid pieces that are rotten, moldy, or too brittle. The size and shape of the driftwood will depend on your desired final artwork. Consider the overall aesthetic you want to achieve and choose driftwood pieces that align with that vision.

Cleaning and Drying Driftwood

Before working with the driftwood, it’s important to clean and dry it properly. Rinse the pieces with fresh water to remove any salt, sand, or debris. You can also soak the driftwood in a bucket of water for a short period to further remove impurities. Once cleaned, pat the driftwood pieces dry using a clean towel or let them air dry completely.

Removing Loose Bark or Debris

After cleaning and drying the driftwood pieces, inspect them for any loose bark or debris. Gently remove any loose bark using a soft brush or your fingers. Be careful not to damage the surface of the driftwood while doing so. Removing loose debris will ensure that the finished driftwood cross looks clean and polished.

Designing Your Driftwood Cross

Planning the Size and Shape

Before starting the construction of your driftwood cross, take some time to plan the size and shape of the artwork. Consider the space where you intend to display it and envision how the driftwood cross will fit in that area. Determine whether you want a simple or elaborate design, as this will guide you in selecting the appropriate driftwood pieces.

Sketching the Design on Paper

Once you have a clear idea of the size and shape, sketch the design of your driftwood cross on paper. This will help you visualize the final artwork and provide a reference while assembling the driftwood pieces. Play around with different arrangements and combinations until you find a design that you’re satisfied with.

Adjusting and Finalizing the Design

After sketching the initial design, take a moment to review and adjust any aspects that may need tweaking. Consider the overall balance, symmetry, and aesthetic appeal of the design. Make any necessary revisions or modifications until you are fully satisfied with the final design. This step ensures that you have a clear vision for creating your driftwood cross.

Driftwood Cross Art

This image is property of images.unsplash.com.

Creating the Driftwood Cross

Cutting and Trimming Driftwood Pieces

With your design finalized, it’s time to start creating the actual driftwood cross. Begin by measuring and marking the driftwood pieces according to your desired lengths and shapes. Using a saw, carefully cut the pieces to the specified dimensions. Take your time and exercise caution to ensure accurate cuts and a precise fit for the cross shape.

Assembling the Cross Shape

Once you have cut the driftwood pieces, begin assembling them to form the cross shape. Lay out the cut pieces on a flat surface, referring to your sketch as a guide. Experiment with different arrangements until you find the configuration that you find most visually appealing. Take note of how the pieces fit together and make any necessary adjustments to ensure a tight and secure fit.

Applying Wood Glue and Securing the Pieces

After determining the ideal arrangement, it’s time to secure the driftwood pieces together using wood glue. Apply a thin, even layer of wood glue to the areas where the pieces will come into contact with each other. Press the pieces firmly against each other to ensure a strong bond. Wipe off any excess glue that seeps out. Allow the glue to dry thoroughly according to the manufacturer’s instructions.

Allowing the Glue to Dry

Patience is key when allowing the wood glue to dry. Follow the recommended drying time provided by the manufacturer to ensure a secure and durable bond. It’s important to resist the temptation to handle the driftwood cross while the glue is still drying, as this may compromise the integrity of the construction.

Sanding and Shaping

Smoothing Rough Edges

After the wood glue has fully dried, it’s time to sand the driftwood cross to achieve a polished and cohesive look. Use sandpaper to smooth out any rough edges or imperfections. Start with a coarser grade sandpaper to remove any larger bumps or rough surfaces, gradually moving to a finer grade for a smoother finish. Pay attention to every angle and curve of the driftwood cross to ensure a consistent texture.

Creating Texture and Dimension

To add visual interest and dimension to your driftwood cross, consider creating texture in certain areas. You can achieve this by using sandpaper or a carving tool to etch lines or grooves into the driftwood. This technique adds depth and creates a more dynamic appearance. Experiment with different textures and patterns to find the one that best complements your design.

Removing Splinters

As you work with the driftwood, you may encounter splinters or rough spots that could potentially cause injury. Take the time to carefully remove any splinters using sandpaper or a sanding block. Pay close attention to the areas where the driftwood may come into contact with skin or other surfaces. By ensuring a smooth and splinter-free surface, you enhance both the safety and aesthetic appeal of your driftwood cross.

Driftwood Cross Art

This image is property of images.unsplash.com.

Painting and Decorating

Choosing Paint Colors and Techniques

Once the driftwood cross is sanded to your satisfaction, you may choose to add a splash of color to enhance its visual appeal. Acrylic paint is an excellent choice for this purpose as it adheres well to wood surfaces. Select paint colors that align with your desired aesthetic or consider using a color palette that complements the space where you plan to display the artwork. Experiment with different painting techniques, such as dry brushing or blending, to create unique effects and textures.

Adding Patterns, Designs, or Symbols

To further personalize your driftwood cross, consider adding patterns, designs, or symbols. This is an opportunity for you to incorporate elements that hold personal meaning or align with your artistic style. You can hand-paint intricate designs, stencils, or even use decals to create patterns. Let your creativity shine through as you embellish your driftwood cross with meaningful and visually captivating elements.

Creating a Weathered or Distressed Look

If you prefer a more weathered or distressed look for your driftwood cross, there are various techniques you can employ. Tackle this effect by applying a base coat of paint and then lightly sanding certain areas to expose the natural wood underneath. You can also use techniques such as dry brushing or applying a wash of diluted paint to create an aged appearance. Experiment with different approaches until you achieve the desired weathered effect.

Optional Finishing Touches

Applying a Sealer or Varnish

Adding a sealer or varnish to your driftwood cross is an optional step but can significantly enhance its longevity and appearance. Choose a sealer or varnish specifically formulated for wood surfaces and apply it according to the manufacturer’s instructions. The sealer or varnish will protect the driftwood from potential moisture damage and provide a lustrous finish, further highlighting the natural beauty of the wood.

Adding Decorative Elements (e.g., shells, beads)

To add extra charm and character to your driftwood cross, consider incorporating decorative elements. Shells, beads, or other small trinkets can be attached to the driftwood using a strong adhesive or by drilling small holes for stringing materials. These added embellishments can enhance the coastal or organic theme of your driftwood cross, making it a truly unique and eye-catching piece of artwork.

Attaching a Hanger or Stand

To display your driftwood cross, you may need to attach a hanger or stand. If you plan on hanging it on a wall, attach a hanger to the back of the cross using screws or strong adhesive. If you prefer a tabletop or shelf display, find or create a stand that will support the weight and size of your driftwood cross. Ensure that the hanger or stand is securely attached to prevent any accidents or damage to the artwork.

Driftwood Cross Art

Display and Care

Choosing the Right Display Location

When deciding where to display your driftwood cross, consider both aesthetic and practical factors. Choose a location that allows the artwork to be appreciated visually and harmonizes with the overall theme and style of the space. Ensure that the driftwood cross is positioned securely and is not at risk of being knocked over or damaged by accidental contact.

Avoiding Direct Sunlight or Moisture

To preserve the integrity and beauty of your driftwood cross, it’s important to avoid prolonged exposure to direct sunlight or moisture. Direct sunlight can cause fading and discoloration over time, while moisture can lead to rot or decay. Choose a display location that protects the artwork from these potentially damaging elements and periodically inspect it for any signs of deterioration.

Cleaning and Dusting the Driftwood Cross

Regular maintenance is important to keep your driftwood cross looking its best. While driftwood is relatively low-maintenance, it still requires occasional cleaning and dusting. Gently dust the surface of the driftwood using a clean, soft cloth or a feather duster. If more thorough cleaning is needed, use a damp cloth or sponge and mild soap to wipe away any dirt or grime. Avoid using harsh chemicals or abrasives that could damage the driftwood or paintwork.

Ideas and Inspiration

Different Cross Shapes and Sizes

Embrace your creativity by exploring different cross shapes and sizes for your driftwood cross art. From traditional crosses to abstract or contemporary designs, the possibilities are endless. Experiment with variations in length, width, and overall structure to create a unique and captivating centerpiece for your space.

Incorporating Other Natural Materials

Don’t limit yourself to using only driftwood in your creations. Expand your artistic horizons by incorporating other natural materials such as seashells, sea glass, or even feathers. By combining different elements, you can create visually stunning driftwood crosses that showcase the beauty of nature in all its forms.

Themed or Seasonal Driftwood Crosses

For special occasions or to celebrate different seasons, consider designing themed or seasonal driftwood crosses. Incorporate colors, symbols, or motifs that correspond to the specific theme or season. For example, you could create a driftwood cross adorned with flowers and pastel colors for spring or one with warm autumn hues and leaf patterns for fall. Let your imagination run wild and infuse your driftwood crosses with the spirit of any occasion or time of the year.

In conclusion, driftwood cross art is a wonderful and fulfilling way to express your creativity and love for nature. By carefully selecting, preparing, and assembling driftwood pieces, you can create unique and meaningful artworks that bring a touch of natural beauty to any space. Whether you choose to leave the driftwood cross in its natural state or add your personal artistic touch with paint and decorations, the end result will be a stunning piece that reflects your individual style. Remember to experiment, explore different techniques and designs, and most importantly, enjoy the process of creating your very own driftwood cross art.

Driftwood Cross Art

Filed Under: Driftwood Ideas Tagged With: Art, cross, Driftwood

Primary Sidebar

Driftwood4us.com, is a participant in the Amazon Services LLC Associates Program, an affiliate advertising program designed to provide a means for sites to earn advertising fees by advertising and linking to amazon.com.