Have you ever pondered how to add a natural, artistic touch to your home or garden? Creating a driftwood number sign could be the perfect solution. These unique pieces not only serve a practical function but also add rustic charm and character to your space. They’re a wonderful blend of artistry and nature, making them both functional and aesthetically pleasing.

What is a Driftwood Number Sign?
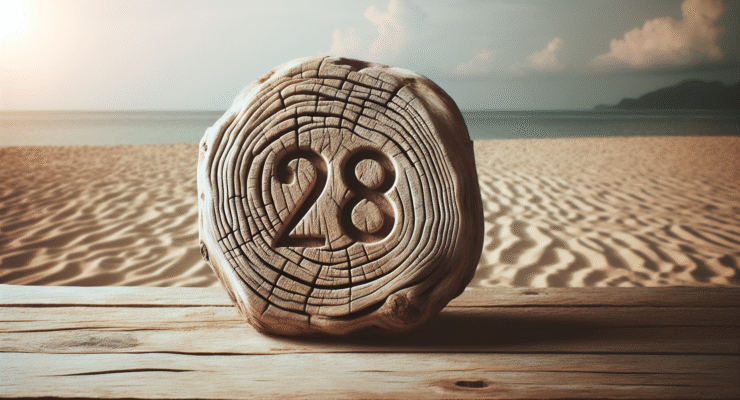
A driftwood number sign is essentially a house or garden sign crafted using pieces of driftwood. Driftwood is wood that has been washed onto the shore by the weather, seawater, or a natural mechanism. Over time, it has become smooth and uniquely shaped, making it not only durable but also distinctively beautiful. By affixing numbers to the driftwood, you get a one-of-a-kind sign that can be used to display your house number or label different areas in your garden.
Why Choose Driftwood?
Driftwood is not only visually appealing due to its organic shapes and patterns; it is also eco-friendly. Reusing natural materials lessens our environmental impact, giving new life to what might otherwise be disregarded as waste. Furthermore, each piece of driftwood is unique, ensuring that no two signs will be exactly alike. This offers a personal touch that adds an element of character and allure to your living space.
Benefits of a Driftwood Number Sign
Incorporating a driftwood number sign into your home or garden décor comes with a plethora of benefits. Not only does it create a warm, inviting atmosphere, but it also serves as a conversation starter. Let’s delve into some of the key advantages.
Aesthetic Appeal
One of the most significant benefits of using driftwood is its natural beauty. Each piece carries its own personality, whether it adorned coastlines in its previous life or journeyed through rivers. Its textured surface and irregular shapes lend an artistic flair to any environment. When numbers are attached, these driftwood pieces transform into eye-catching, functional art.
Durability
Driftwood is often very robust, having been naturally weathered and hardened by exposure to the elements. This makes it particularly suitable for outdoor use. It can withstand harsh weather conditions that might otherwise damage other materials, allowing it to remain beautiful year-round.
Customizability
Creating a driftwood number sign offers you a high level of customizability. From the size of the driftwood piece to the style of numbering and the type of finish you apply, you have the power to create something that perfectly matches your taste and complements your home’s style.
Easy Maintenance
Driftwood is relatively low maintenance. It can be left to weather naturally, which only enhances its rustic charm, or it can be sealed with varnish or oil for added longevity and finish. Either way, it requires minimal care to stay in excellent condition.
How to Create Your Own Driftwood Number Sign
Crafting your driftwood number sign can be a rewarding endeavor. While it does not require an exceptional level of skill, it does involve patience and creativity. Here’s a step-by-step guide to creating your personalized driftwood number sign.
Materials Needed
Before getting started, gather the necessary materials. Here’s a list that will be helpful:
- Driftwood
- House numbers (metal or wood)
- Strong adhesive or small screws
- Drill (if using screws)
- Sealant (optional)
- Sandpaper
- Varnish or wood oil (optional)
Step One: Selecting Driftwood
Choosing the right piece of driftwood is crucial. Aim to find a balanced piece that’s sturdy yet visually interesting. Consider the location where you’ll hang the sign: a larger, bold piece may work well in a spacious garden, while a more delicate piece might be better suited for a home entrance.
Step Two: Cleaning the Driftwood
Once selected, the driftwood should be cleaned thoroughly. Use a stiff brush to remove any dirt, sand, or loose bark. If it’s particularly dirty, a gentle wash with water and mild soap should suffice. After cleaning, leave it to dry completely.
Step Three: Preparing the Driftwood
Lightly sand any rough edges or surfaces for a smoother finish. This step is especially important if you’re planning to apply a varnish or sealant, as it allows the product to adhere more effectively. Once sanded, ensure all dust is removed and the wood is as clean as possible.
Step Four: Attaching the Numbers
Decide on the placement of your numbers. Arrange them until satisfied with the design. If using an adhesive, simply dab a generous amount onto the back of each number and press firmly onto the driftwood. When using screws, drill small pilot holes before fixing the numbers. Ensure each number is securely attached.
Step Five: Finishing Touches
At this stage, you can choose to apply a sealant or varnish to your driftwood for extra protection, especially if it will be exposed to the elements. A wood oil can also be used to enhance the grain and color of the wood. Allow sufficient drying time before displaying your driftwood number sign.
Displaying Your Driftwood Number Sign
Once your driftwood number sign is complete, it’s time to decide where it will be displayed. The location will depend on its primary purpose and your personal preference.
Outdoor Placements
For homes, an obvious choice is near the front door or on a mailbox, making it easy for visitors or delivery personnel to find the address. If you’re considering a garden, placing it at the entry or alongside a pathway can direct guests while adding a unique artistic feature.
Indoor Uses
Inside, driftwood number signs can become striking decorative pieces. Consider using them in a child’s room to denote their space, or as part of an artistic installation in a living area. Whatever the location, ensure it enhances and aligns with the surrounding interior design.

Driftwood Number Sign Ideas
Still not sure about how your own driftwood number sign should look? Here are a few creative ideas to spark your inspiration:
Nautical Theme
If your home embraces a coastal aesthetic, incorporate maritime elements like shells or small anchors beside or around the numbers. These can be glued onto the driftwood and painted in shades of blue or turquoise for a cohesive ocean vibe.
Minimalist Style
Opt for a simple yet elegant design with clean, straight house numbers in a monochrome palette. Let the driftwood’s natural form and texture take center stage.
Vintage Look
Achieve a vintage feel by selecting aged metal numbers and lightly distressed driftwood. Complement this look with a patina finish to evoke rustic charm.
Nature-Inspired Design
Combine driftwood with other natural materials such as stone or small moss patches. This can create a seamless harmony with a lush garden backdrop.
How Driftwood Number Signs Impact Your Space
Driftwood number signs can significantly enhance both the look and feel of a space. Their natural origin renders them appealing to those seeking a connection with nature, while their artistic merit offers an exciting creative outlet.
Enhancing Curb Appeal
These signs are excellent for boosting your property’s curb appeal. They can make a strong first impression on visitors or potential buyers, contributing positively to initial perceptions of your home.
Reflecting Personal Style
A driftwood number sign is a custom piece that can reflect your personal taste in a small yet impactful way. Whether your style is bohemian, classic, or eclectic, the versatility of driftwood allows you to express yourself.
Functional Art
Beyond their decorative appeal, driftwood number signs serve a functional purpose, merging utility with artistry. They can guide guests, identify locations, or simply add to the environment’s vibrancy.
Caring for Your Driftwood Number Sign
Although driftwood is resilient, some care will ensure it remains attractive over time. Here are a few simple tips to maintain its condition:
Protective Coating
If your sign is displayed outdoors, consider applying a protective coating annually to guard against moisture and UV damage. Using marine varnish can offer added resistance.
Regular Checks
Inspect your sign periodically for any loose numbers or significant wear. Reinforce anything that seems unstable and smooth down any emerging rough edges.
Cleaning
Use a damp cloth to gently wipe off dirt and debris that accumulates. Avoid harsh chemicals; mild soapy water works well for heavier cleaning, ensuring you dry the wood thoroughly afterward.
In conclusion, creating a driftwood number sign offers not only a practical solution for marking your home or garden but also a chance to engage with nature in a unique and creative way. By combining the beauty of natural elements with personal creativity, you produce a one-of-a-kind piece that enhances your environment and reflects your individual style. Whether you’re a seasoned DIY enthusiast or a beginner, this project promises satisfaction and a visually stunning result.