• Skip to main content
  • Skip to primary sidebar
  • Terms and Conditions
  • Privacy Policy
  • Contact

Driftwood 4 Us

Just About Driftwood

DIY

Driftwood Headboard Ideas

October 21, 2024 by admin

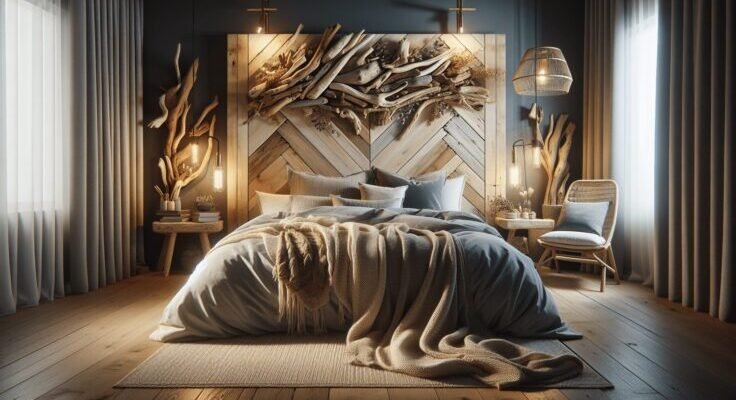
Have you ever considered using driftwood as an element in your bedroom decor? Driftwood, with its naturally weathered look and unique character, can bring a touch of rustic and organic charm to your space. It’s an excellent way to express creativity and incorporate a piece of nature into your home design. A driftwood headboard, in particular, can serve as a stunning focal point, adding both texture and warmth to your bedroom.

This article will guide you through various driftwood headboard ideas, discussing how you can make the most out of this unique resource to enhance the aesthetic appeal of your bedroom. You’ll also discover tips on how to find driftwood, prepare it for use, and integrate it seamlessly with your existing decor.

Driftwood Headboard Ideas

Why Choose Driftwood for Your Headboard?

The primary allure of using driftwood as a headboard material lies in its natural beauty and sustainability. Each piece of driftwood is unique, shaped and smoothed by the elements over time, giving you a one-of-a-kind headboard no factory could replicate. Driftwood is not only visually appealing but also an eco-friendly option, especially if sourced responsibly from naturally fallen branches and logs.

Unique Aesthetic Appeal

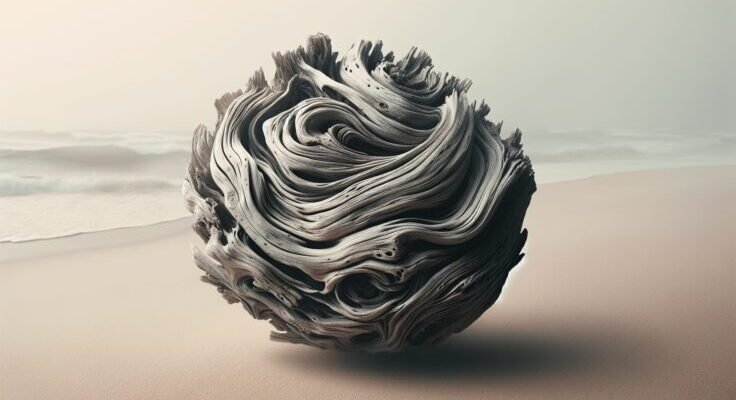
Driftwood boasts a naturally weathered appearance that adds depth and character to any room. Its colors range from soft grays to warm browns, with sometimes a hint of white, making it versatile enough to complement various color schemes and design styles—from coastal to bohemian, and rustic to modern.

Versatility in Design

The versatility of driftwood makes it suitable for different styles. You can create a simple, minimalist headboard or a more elaborate, artistic piece. This adaptability ensures that no matter your taste, a driftwood headboard can fit perfectly within your preferred aesthetic.

Eco-Friendly Option

By choosing driftwood, you are also making an environmentally conscious decision. Using naturally fallen pieces reduces the demand for new materials, minimizing your environmental footprint and helping promote sustainable practices.

Finding and Preparing Driftwood

Before deciding to create a driftwood headboard, you first need to source suitable driftwood pieces. It’s important to consider legality, location, and preparation methods when collecting driftwood for use in home decor.

Sourcing Driftwood

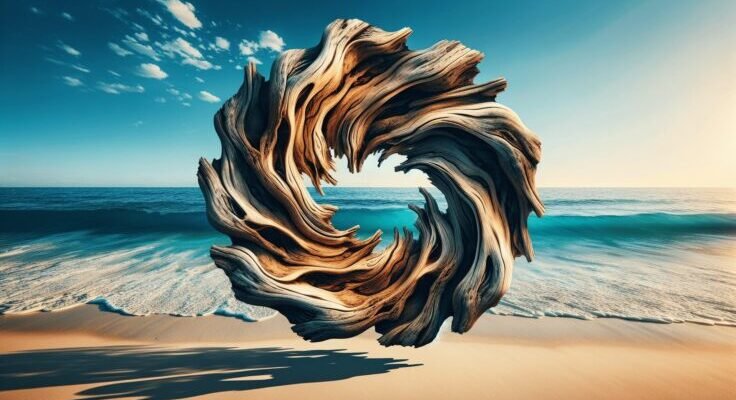
Driftwood is typically found along beaches, rivers, or lakes. While these natural sites often have an abundance of driftwood, it’s essential to adhere to local regulations regarding its collection, as some areas may have restrictions to protect the natural environment.

Tips for Sourcing Responsibly

  • Check Regulations: Always check local laws and regulations before collecting driftwood. Some natural reserves restrict collection to preserve local habitats.
  • Collect from Approved Areas: Choose areas where collection is permitted and does not endanger local wildlife or ecosystems.
  • Be Selective: Look for pieces that are already detached and naturally weathered, ensuring you aren’t disrupting the natural landscape.

Preparing Driftwood

Preparing your driftwood carefully will ensure its longevity and suitability as a headboard. It involves several steps, including cleaning, drying, and potentially treating the wood.

Cleaning

To clean your driftwood, scrub it with a stiff brush and soapy water to remove any salt, sand, or organic matter. Rinse thoroughly with fresh water to remove any soap residues.

Drying

Proper drying is crucial to prevent mold and rot. Place your pieces in a dry, well-ventilated area and let them air out for several weeks. This process may take longer for larger, denser pieces.

Treating

Treating driftwood can enhance its durability and prevent pests. Consider using a wood preservative or sealant—all based on natural oils or water-based solutions—to protect it from decay while preserving its natural beauty.

Driftwood Headboard Design Ideas

Now that you’ve sourced and prepared your driftwood, it’s time to explore various design ideas to bring your headboard to life. Whether you wish to create a minimalist masterpiece or an artistic installation, there are plenty of options available to inspire your creative process.

Minimalist Driftwood Headboard

A minimalist driftwood headboard design focuses on letting the natural beauty of the wood shine through. This design typically features a straightforward arrangement of vertically or horizontally aligned pieces, often incorporating only a single color or tone.

Features

  • Simple Lines: Maintain clean, straight lines for cohesion.
  • Focus on Texture: Let the texture of the driftwood be the star of the show.
  • Neutral Colors: Use the natural colors of the driftwood to harmonize with other elements in your bedroom.

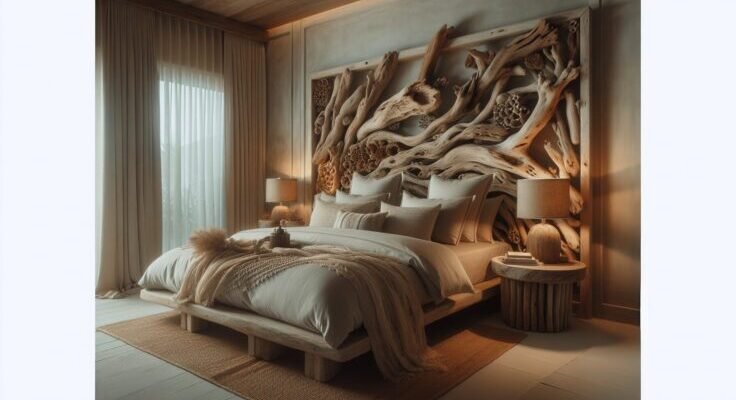
Artistic Driftwood Headboard

For those seeking a bolder look, an artistic driftwood headboard serves as a canvas to express personality and creativity. This design might involve intricate patterns or the use of driftwood pieces in varying sizes and shapes.

Features

  • Asymmetrical Arrangement: Play with different shapes and sizes to create an eye-catching display.
  • Mixed Materials: Combine driftwood with other natural elements like shells, stones, or plant decor for added dimensions.
  • Color Accents: Add subtle color stains or paint for contrast while retaining the driftwood’s character.

Driftwood and Fabric Combo

Combining driftwood with fabric adds softness and additional textures to your headboard. This approach allows for more comfort and customization, such as using cushions, upholstery, or hanging fabric as a backdrop.

Features

  • Fabric Backdrop: Hang a fabric panel behind the driftwood to set the stage for your design.
  • Cushion Addition: Attach cushions or padded panels directly to the driftwood for a cozy feel.
  • Color Coordination: Use fabric colors and patterns that complement the existing driftwood tones.

LED Integrated Driftwood Headboard

For a modern touch, integrating LED lights into your driftwood headboard design can create an ambient and cozy atmosphere. Strategically placed lighting highlights the wood’s natural textures and colors.

Features

  • Accent Lighting: Use LED strips to outline the headboard for a subtle glow.
  • Backlighting Effect: Install lights behind the driftwood for a floating illusion.
  • Remote Control: Opt for color-changing LEDs to adapt the mood of your room with ease.

Incorporating Driftwood Headboard into Your Decor

Successfully integrating a driftwood headboard into your decor requires thoughtful consideration of your room’s design elements. Harmonizing colors, introducing complementary textures, and maintaining balance are critical factors.

Harmonizing Colors

Ensure that the colors of the driftwood blend well with the existing tones in your bedroom. Driftwood’s neutral palette of greys, tans, and whites pairs beautifully with both bold and pastel shades, allowing for versatile combinations.

Complementary Textures

Driftwood naturally adds texture to your space. Pair it with other textural elements like woven rugs, knitted throws, or linen bedding to enhance the tactile appeal of your bedroom.

Maintaining Balance

Maintain balance by considering the proportion and scale of your headboard related to other furniture. Keep an eye on the size of the driftwood headboard to ensure it doesn’t overwhelm or underwhelm your room’s layout.

Example Table: Harmonizing Colors with Driftwood

Driftwood ToneComplementary ColorsDecorative Elements
GraySoft Blues, WhitesSeashells, Linen Fabrics
TanCreams, Pastel PinksJute Rugs, Woolen Throws
BrownDeep Greens, Earthy RedsTerracotta Pots, Leather Accessories

Driftwood Headboard Ideas

Caring for Your Driftwood Headboard

Driftwood is relatively low-maintenance, but regular care ensures its beauty and longevity in your home.

Dusting

Regular dusting with a microfiber cloth or a duster keeps your headboard clean and free from debris. Being gentle protects the natural surface from scratches.

Refreshing

Occasionally refresh the surface by wiping with a damp cloth soaked in a water-vinegar solution. This helps in preserving the natural luster of the wood and eliminating any unwanted odors.

Inspect and Repair

Regularly inspect the driftwood for signs of wear or damage. Address any loose pieces or cracks promptly to prevent further deterioration. Small repairs can often be managed with non-toxic wood glue.

Conclusion

Driftwood headboards showcase the beauty of nature through unique textures and organic forms. Creating a driftwood headboard not only celebrates sustainable design but also provides an opportunity to personalize your space with a touch of the outdoors. Whether embarking on a DIY project or collaborating with a craftsman, the possibilities with driftwood are endless. As you begin your journey with driftwood in home decor, remember to blend creativity with respect for the natural world, crafting a space that’s as inviting as it is beautiful.

Filed Under: Driftwood Ideas Tagged With: Bedroom Ideas, DIY, Driftwood, Headboard, Interior Design

543 Driftwood Grout

October 20, 2024 by admin

Have you ever wondered what the right grout choice could mean for your next tiling project? Selecting the perfect grout can be a game-changer, determining not just the aesthetics but also the durability and maintenance of your tiles. Today, let’s explore the world of “543 Driftwood Grout,” a unique and elegant solution that stands out in the vast selection of grout options available.

543 Driftwood Grout

Understanding Grout: The Unsung Hero of Tile Projects

Grout might seem like just a filler, but it plays a crucial role in your tile installations. Grout is essential for providing a finished look, keeping tiles in place, and protecting them from moisture and dirt. But did you know it also significantly affects the overall appeal of your space?

Why Grout Choices Matter

Your choice of grout can impact both the functionality and aesthetics of your project. The right grout can enhance your tiles’ look and longevity, whereas the wrong choice can lead to maintenance issues and a less appealing finish. Choosing wisely ensures that your tiles always look their best.

Key Grout Types

There are various grout types available, each suited for different applications and conditions. Understanding the key differences can help you make an informed decision:

Grout TypeCharacteristicsBest Used For
Sanded GroutContains sand particles, ideal for wider jointsFloors, wider tile joints
Unsanded GroutSmooth texture, perfect for narrow jointsWalls, narrow tile joints
Epoxy GroutStain-resistant and durable, but more expensiveHigh-traffic areas, commercial use
Polyurethane GroutFlexible and durable, great for indoor and outdoor useSwimming pools, exterior tiles

With this understanding of grout, let’s focus specifically on one of the most sought-after grout solutions for its aesthetic and functional benefits—543 Driftwood Grout.

Introducing 543 Driftwood Grout

543 Driftwood Grout is a distinctive choice for those looking to blend style with practicality. Its name is inspired by natural driftwood tones, offering a unique, muted color that works perfectly with various tile designs and settings.

The Unique Shade of 543 Driftwood

This grout brings a subtle elegance to your space with its neutral tone, reminiscent of weathered driftwood washed ashore. Its color harmonizes perfectly with natural textures and materials, such as wood-like tiles, stone, and ceramics, making it versatile for numerous design applications.

Physical and Chemical Properties

543 Driftwood Grout isn’t just about its looks – its formulation ensures it performs well in diverse environments. It’s blended to resist cracking, moisture, and stains, ensuring longevity and minimal maintenance, even in high-moisture areas.

543 Driftwood Grout

Benefits of Using 543 Driftwood Grout

Using 543 Driftwood Grout in your tiling project can offer an array of benefits, all of which contribute to both visual appeal and long-term performance.

Aesthetic Appeal

Its neutral yet distinctive hue helps it blend seamlessly with various tile colors and designs, providing a cohesive look without overshadowing the tiles themselves. It subtly enhances the tiles, allowing them to stand out while also warming the overall ambiance of the space.

Durability and Maintenance

Crafted to handle wear and moisture, this grout proves effective in areas prone to spills and humidity, like kitchens and bathrooms. Its composition makes it less likely to crack over time, reducing the need for frequent repairs.

Versatility in Application

543 Driftwood Grout is suitable for both residential and commercial spaces, adaptable enough to be used in various settings such as kitchens, bathrooms, entryways, and outdoor patios. Its versatility means it can be a one-stop solution for diverse tiling needs.

Comparing 543 Driftwood Grout with Other Grout Options

Understanding how 543 Driftwood Grout stacks up against other popular choices can provide more clarity in making your decision.

Performance Comparison

Feature543 Driftwood GroutSanded GroutUnsanded GroutEpoxy Grout
Moisture ResistanceHighModerateLowVery High
Stain ResistanceHighLowLowVery High
Joint Width SuitabilityMedium to WideWideNarrowAny
DurabilityHighModerateModerateHigh

Aesthetic Comparison

When it comes to aesthetics, 543 Driftwood offers a unique blend of color and texture that aligns well with both contemporary and traditional designs. Its subtlety is a feature that most other brighter or stark options do not offer.

Best Practices for 543 Driftwood Grout

Having decided on this grout, it’s essential to apply it correctly to achieve the best results. Here’s what you need to keep in mind.

Preparation

Ensure surfaces are clean and dry before applying the grout. This preparation minimizes the risk of dirt and moisture negatively impacting grout adhesion and finish.

Application Tips

Mix the grout as per manufacturer instructions, ensuring it has the correct consistency. Apply it using a float, and force the grout into joints while holding the float at an angle.

Curing and Sealing

Allow the grout to cure properly, usually around 24-72 hours, before applying a sealant. Sealing the grout enhances its resistance to stains and moisture, extending its lifespan.

Addressing Common Concerns

You might have several questions or concerns before choosing and applying grout. Let’s address a few common ones related to 543 Driftwood Grout.

Color Consistency Concerns

One might worry about color consistency throughout the application. To avoid this, mixing thoroughly and applying uniformly can prevent significant variations in shade.

Maintenance and Cleaning

Routine maintenance of 543 Driftwood Grout is straightforward. Use gentle cleaners to avoid damaging the grout or tile, and reseal periodically to maintain its protective properties.

Inspiring Use Cases and Design Ideas

543 Driftwood Grout can be paired with various design styles. Here are some ways you can incorporate it into your projects:

Coastal and Beach House Styles

With its driftwood inspiration, this grout complements coastal themes beautifully. Use it with tiles that echo sea hues and textures for a seamless beach house aesthetic.

Rustic and Farmhouse Designs

Pair it with wood-like tiles or natural stone for a warm, rustic ambiance. Its neutral color enhances the organic feel of farmhouse interiors.

Modern Minimalist Spaces

Embrace simplicity with sleek, monochromatic tiles and use 543 Driftwood Grout for a clean, understated look that doesn’t overpower the minimalist design.

Conclusion

Choosing the right grout is about more than just filling the gaps between tiles. With 543 Driftwood Grout, you can enjoy a harmonious balance between aesthetics and function, ensuring that your space remains beautiful and easy to maintain for years to come. By understanding its unique properties and how it compares to other options, you can confidently integrate it into your next tiling project, achieving a beautiful, cohesive finish that stands the test of time.

Filed Under: Driftwood Ideas Tagged With: Construction Materials, DIY, flooring, Home Renovation, Tile Grouting

Driftwood Headboard Diy

October 19, 2024 by admin

Have you ever thought about adding a touch of nature and artistry to your bedroom decor with your own DIY project? Creating a driftwood headboard could be the perfect solution to add a coastal and rustic vibe to your space while expressing your creativity and craftsmanship. Even if you don’t live near a beach and are wondering how to source the materials and craft such a headboard, this guide is designed to walk you through each step of the process in a friendly and accessible way.

Driftwood Headboard Diy

Understanding the Appeal of Driftwood

Driftwood offers a unique aesthetic that blends rustic charm with natural elegance. Each piece of driftwood is distinct, shaped, and weathered by the elements over time, giving it its character and charm. Incorporating driftwood into your decor provides an organic and calming effect, reminiscent of tranquil beaches and seaside breezes. The beauty of driftwood lies in its imperfection and natural textures, making every creation truly one-of-a-kind.

Why Driftwood for a Headboard?

Using driftwood for a headboard is an excellent way to bring the outdoors into your bedroom. It not only serves as a functional piece of furniture but also as an art installation, elevating your space’s aesthetic. A driftwood headboard can act as a focal point, adding warmth and an earthy texture that balances well with both modern and traditional decor styles. Plus, creating your own driftwood headboard allows you to personalize your space and showcase your unique taste.

Sourcing Your Driftwood

Finding the right driftwood for your headboard is the first critical step. Whether you live by the coast or inland, there are ways to collect or purchase driftwood that meets your needs.

Collecting Driftwood from Nature

If you are lucky enough to live near a beach, collecting your driftwood can be an enjoyable and rewarding experience. Here are a few tips to ensure your collecting process is both safe and environmentally conscious:

  1. Check Local Regulations: Before gathering driftwood, research any local regulations or restrictions. Some areas protect driftwood for ecological reasons, and collecting without permission could harm the environment.

  2. Select the Right Pieces: Look for pieces that are stable, free of rot, and have smooth edges. Consider the size and shape according to your design vision.

  3. Be Eco-Friendly: Avoid taking more than you need and consider other natural options like sticks or fallen branches that have already began weathering naturally.

Purchasing Driftwood

If you don’t live near a coastline or collecting isn’t feasible, purchasing driftwood is another viable option. Many craft stores, lumber yards, and online retailers offer driftwood for crafting purposes. When purchasing, pay attention to the size, texture, and color of the wood to ensure it fits your aesthetic.

Preparing Your Driftwood

Once you’ve sourced your driftwood, it’s crucial to prepare it properly. This step involves cleaning, drying, and treating the wood to make it suitable for indoor use.

Cleaning Your Driftwood

Proper cleaning ensures that your newly acquired driftwood is free of sand, salt, and potential pests. Here’s how to clean your driftwood effectively:

  1. Rinse Thoroughly: Use a hose to rinse away debris and salt. This may require several rinses to ensure all surfaces are clean.

  2. Soak the Wood: Fill a large tub or container with fresh water and allow the driftwood to soak for at least 24 hours. For larger pieces, consider soaking them in a kiddie pool or a bathtub.

  3. Scrub Gently: Use a soft brush to scrub away any remaining dirt. Be gentle to maintain the wood’s natural texture.

Drying and Treating the Wood

After cleaning, it’s important to dry and treat your driftwood:

  1. Drying: Place your driftwood in a dry, sunny spot. This helps eliminate moisture, which can lead to mold or decay if left untreated. Make sure the pieces are thoroughly dry before moving forward.

  2. Sanding for Smoothness: Sand the wood lightly to smoothen any rough edges. Take care not to over-sand, as much of the driftwood’s charm lies in its natural imperfections.

  3. Sealing: Apply a clear wood sealant to protect the driftwood from moisture and preserve its color. Choose a sealant appropriate for interior use and follow the manufacturer’s instructions.

Design Considerations

With your driftwood clean and ready, it’s time to consider the design of your headboard. Driftwood can be crafted into various designs, accommodating a variety of styles from minimalist to more intricate compositions.

Sketching Your Design

Creating a sketch of your headboard design can help solidify your vision. Consider the following elements:

  • Size and Dimensions: Decide how large you want your headboard to be. Measure your bed and wall space to ensure a perfect fit.

  • Pattern and Layout: Consider a simple linear arrangement or an organic, staggered design. Balance is key, so play with different configurations.

  • Incorporation of Other Materials: Think about integrating other materials such as metal or textiles for added texture and complexity.

Choosing Your Tools

Selecting the right tools for your project is crucial to ensure both efficiency and safety. Here is a basic list of tools you may need:

ToolPurpose
Measuring TapeTo ensure accurate sizing and fit.
SawTo cut pieces of driftwood to your desired length.
DrillTo attach pieces together or to the wall.
SandpaperFor smoothing rough edges.
Sealer BrushTo apply finish to your driftwood.
Protective GearSafety glasses and gloves to protect yourself while working.

Driftwood Headboard Diy

Assembling Your Driftwood Headboard

Now that you have prepared your materials and designed your headboard, the exciting task of assembly begins. Follow these steps to put together your beautiful driftwood headboard:

Creating a Support Structure

A solid support structure is essential for your driftwood pieces. Consider these tips:

  1. Base Structure: Use a plywood board as a base to which you will attach the driftwood pieces. This ensures stability and eases the installation process.

  2. Framework: If not using a full base board, create a frame using wooden beams to form the outline of your headboard.

Assembling the Driftwood

With your support structure in place, you can start applying your driftwood pieces:

  1. Lay Out Your Pieces: Arrange your driftwood on the floor in the desired pattern before attaching. This allows for adjustments before making permanent decisions.

  2. Attachment Method: Use wood glue for small, lightweight pieces, or screws for larger, heavier ones. Ensure that each piece is securely fastened to the base or the framework.

  3. Check Alignment: Continuously check your pattern for alignment and balance, adjusting the pieces as necessary to achieve the desired look.

Finishing Touches

Your headboard is nearly complete, and now it’s time to add those finishing touches to ensure it looks polished and fits perfectly within your bedroom decor.

Sand and Smooth

Perform a final round of sanding to ensure all surfaces are smooth and safe, removing any splinters or overly sharp edges that might cause harm.

Final Sealing

Apply one last coat of sealer to protect your driftwood from dust and maintain its appearance. This step will enhance durability and visually unify the different pieces.

Installing Your Headboard

With your driftwood headboard complete, the final step is installation. Here’s how to ensure it’s securely mounted and aesthetically integrated:

Attachment to Wall or Bed

Decide whether you will attach your headboard directly to the wall or the bed frame:

  • Wall Mounting: Use sturdy wall brackets or a French cleat system for support. This method offers a clean, floating appearance.
  • Bed Frame Attachment: Use bolts to secure the headboard directly to your bed frame, providing a strong and seamless connection.

Positioning

Hang your headboard at the desired height, ensuring it is centered and level. Consider the headboard’s impact on your room’s overall design and how it complements other furniture pieces.

Caring for Your Driftwood Headboard

To ensure your new headboard remains a stunning part of your decor for years to come, it’s important to care for it properly. Here are tips for maintaining its condition:

Regular Dusting

Dust your headboard regularly to keep it clean. Use a soft cloth or microfiber duster to avoid scratching the surface.

Avoid Excess Moisture

Since wood is susceptible to water damage, avoid placing your headboard in areas of high humidity or splashing. Consider using a humidifier or dehumidifier to maintain optimal air quality.

Refresh the Sealer

Periodically reapply a wood sealer to maintain the protective layer and enhance the driftwood’s natural beauty. This is especially important if your headboard is near a window or heat source.

DIY Challenges and Solutions

Embarking on a DIY project like a driftwood headboard may come with challenges. Anticipating some common obstacles and their solutions can help ease the process:

Finding Uniform Driftwood

Creating a uniform look with varied driftwood pieces can be challenging. Mix sizes and shapes creatively to achieve balance, or cut larger pieces to desired proportions.

Secure Fastening

Ensuring each piece of driftwood is securely fastened is crucial. Using the right adhesive and hardware will offer stability. If a piece seems insecure, consider reworking or reinforcing its attachment.

Balancing Design Elements

Maintaining visual balance in your headboard design is key to its overall success. Step back periodically during assembly to assess alignment and symmetry. Don’t hesitate to rearrange pieces if the layout looks off balance.

Delight in Your Creation

Constructing a driftwood headboard is more than just a project; it’s a personal journey that involves creativity, patience, and craftsmanship. By embracing rustic elegance with the imperfections of nature, you have crafted a piece that speaks to your individuality and appreciation for the earth’s raw beauty. Enjoy the earthy ambiance it brings to your space, and take pride in the work and passion you brought to life through your artistry. Let your headboard be a testament to your dedication, a piece that not only transforms your bedroom but enriches your soul.

Filed Under: Driftwood Ideas Tagged With: Bedroom Decor, crafting, DIY, Driftwood, Headboard

Driftwood Hat Hanger

October 15, 2024 by admin

Have you ever considered using natural elements to enhance the decor of your home? Embracing nature through home decor isn’t just a growing trend; it’s a timeless way to bring warmth and uniqueness into your space. Driftwood, with its soft, weathered textures and unique shapes, is a perfect example of such an element. It’s no wonder that many people are intrigued by the idea of using driftwood to create functional art like a hat hanger. Imagine combining the beauty of nature with the practicality of storage – that’s the charm of a driftwood hat hanger.

Driftwood is more than just what the tide washes ashore. Each piece tells a story of its journey through winding rivers and open seas. When utilized creatively, these stories can become a part of your home, offering an eclectic touch to any room. In this guide, I will take you on a journey to understand the allure of a driftwood hat hanger, discovering how such a simple item can transform the aesthetic of your space.

Driftwood Hat Hanger

What is Driftwood?

Before you delve into crafting your hat hanger, it helps to know what driftwood truly is. Driftwood refers to wood that has been washed onto a shore, river, or lake, often by winds, tides, or waves. This wood has an underlying beauty, shaped and weathered by its experiences. You may find pieces that have floated in freshwater or have been tossed around in the ocean’s salty currents. It’s this natural exposure that gives driftwood its unique appearance.

The Natural Journey of Driftwood

Driftwood begins as trees, branches, or logs from fallen trees that find their way into bodies of water. Over time, they are shaped and polished by the elements. The impact of water and sun add depth and character to each piece, creating unique textures and tones of color. The wood often becomes bleached and smoothed out, providing a distinct look that is hard to replicate artificially. Understanding its journey can give you a deeper appreciation for its aesthetic and potential uses.

The Charm of Driftwood in Home Decor

There’s something undeniably captivating about incorporating natural elements into your home. Driftwood brings a distinct rustic charm with an element of surprise due to its unrefined beauty. Using driftwood in home decor reflects an appreciation for nature’s artistry and can significantly change the ambiance of your space.

Why Choose Driftwood for a Hat Hanger?

There are practical as well as aesthetic reasons to choose driftwood for creating a hat hanger. It is naturally durable and can support the weight of hats, while its unique structure makes each hanger visually interesting. Each piece of driftwood is different, giving you a truly one-of-a-kind creation. All these factors contribute to its ability to enhance any foyer, mudroom, or hallway.

Creating a Driftwood Hat Hanger

Turning driftwood into a practical piece of art like a hat hanger is an enjoyable and rewarding DIY project. This process allows your creativity to flourish while working with a piece of nature’s art.

Selecting the Right Piece of Driftwood

Selecting the right driftwood is the first and one of the most important steps. Look for a piece that has natural hooks or curves where hats can easily hang. It should be sturdy enough to handle the weight and have a smooth surface to avoid damaging your hats. When selecting driftwood, consider its size, shape, and character to ensure it fits aesthetically into your intended space.

Driftwood Selection Criteria

CriterionDescription
SizeChoose a size that fits the space where it will be mounted.
ShapeLook for natural hooks or areas where hats can hang.
Texture and SmoothnessEnsure it’s smooth enough not to catch material from hats.
SturdinessCheck its durability and strength to hold weight.

Cleaning and Treating Driftwood

Once you have found the perfect piece, it’s essential to clean and treat it properly. This helps remove any dirt, salt, or organisms that have made the driftwood their temporary home. Start by scrubbing the driftwood with a brush and rinsing it with fresh water. You may need to soak it in a mixture of water and bleach to ensure any bacteria or mold is eliminated.

Steps for Cleaning and Treating

  1. Scrub: Gently scrub with a stiff brush to remove debris and dirt.
  2. Rinse: Thoroughly rinse with fresh water.
  3. Soak: Immerse in a solution of water and bleach (1 part bleach to 9 parts water) for several hours to sterilize.
  4. Dry: Allow the driftwood to sun-dry completely for at least a week.

Designing Your Hat Hanger

Once cleaned, the fun part begins: designing your driftwood hat hanger. Consider the placement and number of hooks needed. You can use metal or wooden hooks or even get creative with other materials like ropes or strings to hang the hats.

Designing Tips

  • Placement: Plan for balanced spacing of hooks.
  • Number of Hooks: Decide based on the number of hats you intend to hang.
  • Aesthetic: Ensure that the design complements the decor of your space.

Mounting Your Driftwood Hat Hanger

The final step in your project is mounting your creation on the wall. It’s crucial to ensure that the hanger is securely fastened to prevent it from falling and to maintain the decor.

Choosing the Right Location

The location of your hat hanger can greatly impact its utility and style contribution. Place it where it’s easily accessible while also considering the overall home aesthetics. Hallways, entryways, or mudrooms are ideal spots.

Mounting Tips:

  • Height: Ensure it’s at a convenient height for easy access.
  • Wall Type: Consider the wall material for the appropriate mounting hardware.
  • Security: Use suitable brackets or screws to ensure it holds the weight effectively.

Installation Steps

  • Mark the Spot: Use a level to ensure even alignment and mark the wall where screws will be placed.
  • Drill Holes: Use a drill to make holes for the screws or wall anchors.
  • Mount: Position the driftwood and secure it with screws and brackets.

Driftwood Hat Hanger

Care and Maintenance of Your Driftwood Hat Hanger

Once installed, your driftwood hat hanger requires minimal maintenance. However, occasional care will keep it looking its best. Simply dust it regularly and keep it out of direct sunlight to prevent discoloration.

Simple Upkeep Tips

  • Dusting: Regular dusting keeps it clean and highlights its natural beauty.
  • Avoiding Sunlight: Prolonged exposure to direct sunlight may lead to fading.

Conclusion

Creating a driftwood hat hanger offers you a unique way to blend natural beauty with practicality. The process itself is a creative adventure — from selecting the perfect piece of driftwood to the satisfaction of hanging that last hat. This project isn’t just about creating a household item; it’s about crafting something natural and personal that can be a conversation piece and a functional addition to your home.

By bringing elements of nature indoors, you invite warmth, creativity, and a sense of tranquility into your living space. So, why not give it a try and add a slice of the outdoors to your home with your very own driftwood hat hanger?

Filed Under: Driftwood Ideas Tagged With: craft, DIY, Driftwood, Hat Hanger, Rustic

Driftwood Handrail

October 9, 2024 by admin

Have you ever imagined transforming your home into a serene coastal retreat? One simple way to bring the tranquility of the ocean into your living space is by incorporating elements that remind you of the sea. A driftwood handrail could be just the touch your home needs to create that calming, beach-inspired atmosphere. Let’s explore how you can use driftwood in this unique and creative manner.

Driftwood Handrail

What is Driftwood?

Driftwood is essentially pieces of wood that have been washed ashore by the action of winds, tides, or waves. These wooden pieces have often spent years in the water, giving them a worn, smooth texture and a unique appearance. The natural process it undergoes, being buffeted and polished by the elements, creates a desirable rustic charm. Driftwood’s distinctive look makes it popular for crafting, home décor, and especially for creating unique handrails.

Why Choose a Driftwood Handrail?

Aesthetic Appeal

You are likely drawn to the unique appearance of driftwood, its fascinating textures, and varied colors that range from bleached whites to rich, dark browns. These variations make each piece of driftwood one-of-a-kind, adding a natural, artistic element to your home.

Connection to Nature

Using driftwood connects you to the natural world. It brings the essence of the beach and its calming influence into your home. This connection can benefit your mental health by promoting relaxation and wellbeing.

Eco-Friendly

Incorporating driftwood into your home is an environmentally friendly choice. By using wood that has naturally washed ashore, you are repurposing materials that might otherwise remain unused or be disposed of. This sustainable practice contributes positively to the environment.

Selecting the Right Driftwood

Before creating your driftwood handrail, it is important to select the right pieces. Here’s how you can find the perfect driftwood for your project:

Quality and Size

When selecting driftwood, look for pieces that are strong and durable, yet easy to work with. A long, sturdy piece will provide the necessary support for a handrail. Ensure it’s free of cracks or significant damage. Check stability and weight-bearing capacity, especially if you plan to use it in an area requiring more support.

Aesthetic Considerations

Focus on the look of the driftwood. Consider its shape, the natural curvature, and where you want to position it. Some people prefer straight pieces for a minimalist look, while others might select more intricately shaped pieces that add artistic flair.

Sourcing Driftwood

Finding driftwood can be part of the fun! Visit local beaches or lakeshores to hunt for the ideal pieces. Remember to check local regulations regarding collecting natural materials. If self-collecting isn’t feasible, many suppliers specialize in driftwood, providing a variety of options to choose from.

Preparing Driftwood for Use

After you’ve chosen your driftwood, it’s critical to prepare it for installation. Here’s how you can ready your driftwood for its new role as a handrail:

Cleaning

Begin by thoroughly cleaning the driftwood. Use a stiff brush to remove loose debris and sand. You might need to rinse it with water, but ensure you let it dry completely to prevent mold or wood rot.

Sanding

Sanding your driftwood removes rough areas and sharp edges, creating a smooth finish. Use sandpaper with varying grit levels, starting coarse and gradually moving to finer grits for a polished end result.

Sealing

Sealing is a vital step that protects the wood from moisture, cracks, and other deterioration while enhancing its natural color. Many seals are available, but choose one that highlights the natural beauty of your wood.

Driftwood Handrail

Installation of the Driftwood Handrail

The installation of a driftwood handrail can seem daunting, but with the right approach, you can complete the task successfully. Here’s a step-by-step guide:

Tools and Materials

Before starting, gather the necessary tools and materials:

  • Drill
  • Screws and anchors
  • Measuring tape
  • Level
  • Brackets (if applicable)

Determining Placement

Place your driftwood handrail along areas that benefit from support and aesthetic enhancement. Common areas include staircases and hallways. Use a level and measuring tape to mark out the exact alignment and height.

Securing the Handrail

Secure the driftwood to walls using sturdy brackets or directly screw it in place. Ensure the installation is safe and stable. This often requires anchoring screws into wall studs for maximum support.

Special Considerations

If you’re installing the handrail outdoors, ensure your chosen sealant is appropriate for exterior conditions. Also, check that the installation withstands different weather elements, considering factors like moisture or temperature changes.

Maintenance and Care

Like any home feature, driftwood needs certain care to preserve its beauty and function. Here are some tips:

Regular Cleaning

Occasionally clean the handrail to maintain its appearance. Use a damp cloth and a soft brush for dust and dirt. Ensure it remains dry to prevent any damage from sustained moisture exposure.

Inspection

Regularly inspect the driftwood for any signs of wear or damage. Look for loose screws or brackets and address any issues promptly to ensure continued safety and appearance.

Re-Sealing

Depending on the conditions it is exposed to, you may need to reapply the sealer once a year or as needed to maintain protection against elements and enhance the wood’s natural beauty.

Creative Design Ideas

Driftwood’s unique look allows for a range of creative design options. Here are a few ideas to incorporate driftwood handrails with flair:

Contrasts with Modern Elements

Pairing a rustic driftwood handrail with modern design elements creates a striking contrast. The combination of natural textures with sleek, minimalistic styles can be quite eye-catching.

Nautical Themes

Embrace a nautical theme by incorporating driftwood alongside other maritime-inspired elements such as rope or netting. This enhances the coastal vibe and creates a cohesive design scheme across your home.

Blending with Nature

Use the driftwood handrail as a feature in an indoor garden setting. The natural tones and textures of driftwood beautifully complement the greens and earth tones of plants, creating a harmonious look.

Overcoming Common Challenges

As with any DIY project, you might face challenges when creating a driftwood handrail. Here are solutions to some common obstacles:

Handling Delicate Wood

If your chosen driftwood is particularly delicate, take care during preparation and installation to avoid breaking it. Working slowly and carefully will help prevent unintentional damage.

Weight and Support Concerns

Driftwood pieces can vary in weight and may require additional support. If necessary, use more brackets or heavy-duty fasteners. Ensuring proper attachment to wall studs will provide significant stability.

Adjustments for Uneven Walls

If your walls are uneven, consider using adjustable brackets or custom shims to ensure the handrail remains level. This keeps the installation both practical and visually appealing.

Driftwood Handrail: The DIY Experience

Creating a driftwood handrail is not only about the end product but also about the experience of working with natural materials to craft something unique. Here’s what you’ll likely find rewarding:

Personal Touch

Every piece of driftwood is different, which means your handrail will be uniquely yours. It’s a personalized addition to your home that reflects your taste and creativity.

Sense of Accomplishment

Installing your driftwood handrail is sure to provide a sense of accomplishment. It takes skill, patience, and care to complete such a project, and the result is a beautiful testament to your efforts.

Conversation Piece

A driftwood handrail is sure to draw attention and compliments. It acts as a conversation starter, offering you the chance to share the story of its crafting and installation with guests, deepening the personal connection with your home.

Conclusion

In conclusion, a driftwood handrail offers an incredible opportunity to introduce a touch of nature into your home while enhancing its aesthetic appeal. Whether you’re an experienced DIY enthusiast or new to crafting, working with driftwood allows you to express creativity and bring a piece of the beach to your living space. By selecting the right pieces, preserving their beauty, and thoughtfully installing them, you can enjoy a sustainable and uniquely artistic feature that’s sure to be cherished for years to come. So, are you ready to bring the charm of the seashore into your own home with a driftwood handrail?

Filed Under: Driftwood Ideas Tagged With: DIY, Driftwood, Handrail, Interior Design, Rustic Design

Driftwood Hat Rack

October 8, 2024 by admin

Have you ever gazed at a piece of driftwood and imagined it as a unique piece of home decor? If you’re pondering how nature’s artistry can be transformed into functional household items, you’re not alone. Driftwood, with its natural textures and organic appearance, tells a story that can add character to your living space while serving a practical purpose. A driftwood hat rack can not only organize your headwear but also become a stunning focal point in your home. Let’s dive into the world of driftwood hat racks, exploring their creation, the charm they bring to interiors, and how you can craft one to suit your personal style.

Driftwood Hat Rack

The Charm of Driftwood

Driftwood is not just any wood; it’s wood that has been shaped and sculpted by the elements. Time, water, and weather conditions have given driftwood its unique texture and character. Each driftwood piece is distinct, carrying its own history as it’s tossed and turned by the sea. This makes them special and so appealing for creating home decor items like a hat rack.

The Natural Aesthetic

The organic beauty of driftwood lies in its imperfections—rounded edges, bleached hues, and porous textures. These qualities can lend a natural aesthetic to any room, offering a rustic, beach-inspired look that is both serene and inviting. Whether you live by the coast or in a bustling city, incorporating driftwood into your decor fosters a sense of tranquility and connection to nature.

Eco-Friendly and Sustainable

Driftwood is an excellent resource for creating eco-friendly home decor. By utilizing driftwood, you give new life to a naturally occurring material without the need for processing or manufacturing. It’s a sustainable choice that reflects an awareness of environmental issues and a commitment to reducing your carbon footprint.

Choosing the Right Driftwood for Your Hat Rack

When selecting driftwood to create your hat rack, there are a few factors to keep in mind to ensure that your final product is both beautiful and functional.

Size and Shape

Consider the size and shape of the driftwood piece. Your chosen piece should be large and sturdy enough to support the weight of several hats. Look for pieces that are long and somewhat straight, as they will better serve the purpose of a rack. However, feel free to let your creativity guide you; unique shapes can offer a one-of-a-kind visual appeal.

Sturdiness

It’s crucial to ensure that your piece of driftwood is strong and free from rot, as it will need to bear weight. Test its durability by applying gentle pressure; if it shows signs of cracking or breaking, it’s best to select a different piece. Over time, a weak or damaged piece may not hold up well, so the initial selection process is important.

Aesthetic Appeal

While practicality is key, the appearance of your driftwood is also important, especially if it will serve as a visible focal point in your home. Look for pieces with interesting textures, colors, or features that align with your interior design preferences. Remember that driftwood can often be enhanced with finishing techniques that bring out its natural beauty.

Crafting Your Driftwood Hat Rack

Creating a driftwood hat rack can be a straightforward project with a rewarding result. Here’s a step-by-step guide to designing your own.

Materials You’ll Need

  • Selected piece of driftwood
  • Sandpaper or sanding block
  • Varnish or sealant (optional)
  • Hooks or knobs
  • Screws and a screwdriver
  • Wall anchors (if needed)
  • Drill

Steps to Create Your Driftwood Hat Rack

  1. Clean Your Driftwood: Make sure your piece of driftwood is clean. You may need to scrub it to remove any dirt or debris. Allow it to dry thoroughly before proceeding.

  2. Sanding: Use sandpaper to smooth out any rough edges or splinters, ensuring a safe surface. Sanding also prepares the wood for any finishing touches you might choose.

  3. Finishing Touches: Seal your driftwood with varnish or sealant if desired. This step can protect the wood and enhance its natural hues. Allow the sealant to dry completely.

  4. Attach Hooks or Knobs: Determine where you would like to place hooks or knobs for hanging hats. Drill pilot holes to avoid splitting the wood, and then attach your hooks or knobs securely using screws.

  5. Install Your Hat Rack: Decide on the placement of your hat rack and mark the wall where it will be mounted. If necessary, use wall anchors for added support and screw the rack into place.

Personalization Options

There are countless ways to personalize your driftwood hat rack. You might consider painting certain areas, adding decorative elements like shells or stones, or using vintage hooks to further enhance its character. Your driftwood hat rack can be as unique as your imagination allows.

Styling and Placement in Your Home

Once your driftwood hat rack is complete, it’s ready to be displayed and put to use. Consider various areas of your home to maximize both utility and aesthetics.

Entryway Use

The entryway is a perfect spot for a hat rack, offering guests a convenient place to store their hats or coats upon arrival. It sets the tone for the natural, inviting atmosphere of your home.

Bedroom or Closet Accessory

Install your hat rack in a bedroom or walk-in closet to display your hat collection stylishly. This placement can help you easily coordinate hats with outfits and maintain organization.

Living Room or Hallway Statement Piece

Consider placing your driftwood hat rack in an unexpected area like the living room or a hallway, where it can serve as an artistic conversation starter. Such placement ties together a natural, eclectic design aesthetic and makes excellent use of wall space.

Driftwood Hat Rack

Caring for Your Driftwood Hat Rack

While driftwood is a low-maintenance material, a little care can go a long way in preserving its beauty over time.

Regular Dusting

Dust your hat rack regularly using a soft, dry cloth to remove any dust or debris. This simple step will keep it looking its best and ensure the longevity of your hats displayed upon it.

Inspect and Maintain Hooks

Periodically check the hooks or knobs for signs of wear or loosening. Make any necessary adjustments to ensure that they remain sturdy and secure enough to support your hats.

Driftwood Hat Racks as Gifts

Consider crafting a driftwood hat rack as a thoughtful, handmade gift for friends or family. Personalize the piece to reflect the recipient’s taste for an even more appreciated present. This gift demonstrates attention to detail and conveys a personal touch that store-bought presents cannot match.

Why Handmade Gifts Matter

Handmade gifts, particularly those crafted from natural materials, show creativity and effort. They often symbolize a more profound level of care and thoughtfulness compared to commercially purchased items, making them cherished keepsakes.

The Broader Appeal of Driftwood Crafting

Embracing driftwood crafting extends beyond making a hat rack. You’ll find other compelling projects that highlight the beauty and versatility of driftwood, enhancing the decor of your entire home.

Other Driftwood Projects

  • Driftwood Mirrors: Create a frame for mirrors using an assortment of driftwood pieces, adding intriguing, natural aesthetic to a common household item.
  • Driftwood Shelving: Use large, flat pieces of driftwood as rustic shelves to display knick-knacks, books, or plants.
  • Driftwood Art Pieces: Arrange pieces creatively to build abstract wall art or three-dimensional sculptures.

Conclusion

Incorporating driftwood into your home decor in the form of a hat rack can bring a touch of nature indoors, echoing calm seaside retreats, while serving practical purposes. Whether you create it yourself or give it as a gift, a driftwood hat rack showcases the organic beauty of nature, customized to your lifestyle and interior preferences. A perfect harmony of form and function, its appeal lies not only in aesthetics but also in the sustainable use of natural resources, making it a treasure in its simplicity and elegance. So, let the natural beauty of driftwood inspire you to craft a piece that not only organizes but also enlivens your living space.

Filed Under: Driftwood Ideas Tagged With: DIY, Driftwood, Hat Rack, Interior Design, Rustic

Driftwood Hanging Decor

October 7, 2024 by admin

Have you ever considered how a walk along the beach can transform your home decor in a way that’s both sustainable and stylish? Driftwood hanging decor might just be the perfect design solution you’ve been searching for. This unique type of home decoration not only brings the serene beauty of the coast into your living space but also allows you to express creativity in a form that’s eco-friendly and full of character. Let’s explore how you can bring this natural charm into your home with driftwood.

What is Driftwood?

Before jumping into the creative aspects of driftwood decor, it’s important to understand what driftwood is. Driftwood refers to pieces of wood that have been washed ashore by the action of tides, waves, or wind. It often comes from trees that have been uprooted by storms or other natural occurrences. As driftwood travels through water, it becomes smoothed and bleached by the salt and sun, resulting in a uniquely weathered and distinctive look that blends beautifully with different interior styles.

The Appeal of Driftwood Hanging Decor

The distinct allure of driftwood decor lies in its organic appearance and the story each piece tells. Every piece of driftwood has its journey, which adds character and authenticity to your living space. Driftwood hanging decor can be a conversation starter, bringing the calmness and rustic charm of the ocean right into your home. It fits seamlessly in both contemporary and traditional settings, providing a versatile option for various style preferences.

Driftwood Hanging Decor

Benefits of Using Driftwood in Home Decor

Driftwood isn’t just aesthetically pleasing; it has several benefits that make it an attractive choice for interior decoration.

Sustainability

Driftwood is an excellent choice for eco-conscious individuals. By using driftwood in your decor, you’re repurposing nature’s castaways and reducing environmental impact. This makes your decoration efforts part of a broader sustainability movement.

Unique Character

No two pieces of driftwood are the same. Their individual shapes, textures, and sizes offer endless possibilities for creating truly unique decor pieces that reflect your personal style.

Versatility

Whether you prefer a minimalist aesthetic or a more eclectic approach, driftwood can be adapted to suit any number of themes. With its natural tones and textures, it’s a flexible material that complements different color palettes and room designs.

Types of Driftwood Hanging Decor

Once you decide to incorporate driftwood into your home, the next step is choosing how to best display it. Here are a few fantastic ideas for driftwood hanging decor that might inspire you.

Driftwood Wall Art

Natural art can add incredible beauty to your walls. Driftwood wall sculptures or art pieces offer an excellent way to bridge the gap between art and nature. You can use singular impressive branches or smaller pieces arranged into elaborate designs.

Driftwood Mobiles

Mobiles are a playful form of hanging decor that creates movement and adds a dynamic quality to your space. Crafted by arranging driftwood with other materials like seashells or glass, they create a tranquil, melodic ambiance influenced by the breeze.

Driftwood Chandeliers

Driftwood chandeliers bring a touch of elegance and craftsmanship to traditional lighting solutions. These pieces paint the perfect picture of rustic meets luxurious, providing an attractive focal point for your room.

Driftwood Shelves

Functional and aesthetic, hanging driftwood shelves provide practical storage while adding a touch of the natural world to your living space. They offer a great way to display sentimental items or small planters for an added pop of greenery.

Driftwood Hanging Decor

Creating Your Own Driftwood Hanging Decor

Creating driftwood hanging decor is a rewarding project that allows you to personalize your home with your own unique touch. Here are some steps and tips for getting started.

Collecting Driftwood

  • Location and Timing: Look for driftwood along beaches or lake shores, particularly after storms when tides have recently receded, leaving behind natural treasures.

  • Choose Wisely: Select pieces that resonate with you. Look for those that have interesting shapes, textures, and patterns.

Preparing Driftwood

  • Cleaning: Remove any dirt or debris. Soak in hot water to extract the salt and kill any insects or bacteria.

  • Drying and Bleaching: Let your driftwood dry completely in the sun. If desired, you can bleach the wood slightly using a soaking solution of water and household bleach for a less sun-bleached look.

Designing the Project

  • Plan the Layout: Draw sketches or use a digital layout tool to visualize your finished piece.

  • Tools and Materials: You may need a drill, twine, hooks, or fishing line depending on the complexity of your design.

Assembling Your Decor Piece

  • Start Gradually: Assemble your decor piece slowly, building from your initial design and allowing for any spontaneous changes along the way.

  • Balance and Secure: Pay attention to how each part hangs in relation to others and ensure that everything is securely fastened.

Caring for Driftwood Decor

Once you have beautifully crafted your driftwood hanging decor, it’s essential to care for it properly.

Regular Dusting

Driftwood often has many nooks and crannies that can collect dust. Use a soft cloth or a feather duster to keep it clean.

Protect from Moisture

Although driftwood originates from the sea, your indoor decor will benefit from a dry environment to prevent any unwanted mold or mildew growth.

Where to Buy Driftwood Hanging Decor

If you are not inclined to DIY, there are plenty of places where you can purchase beautiful driftwood decor.

Local Artisans and Boutiques

Checking out local artisan markets or boutiques is a great way to find bespoke pieces that are handcrafted with care.

Online Marketplaces

Websites like Etsy or specialized home decor shops offer a wide range of driftwood pieces, from small accents to large artistic creations.

Incorporating Driftwood Decor into Different Rooms

Driftwood can enhance any room in your home with its natural charm. However, using it effectively requires a thoughtful approach.

Living Room

Create a peaceful and inviting space by integrating large driftwood wall art or a striking chandelier. Use driftwood accents to complement your existing decor without overpowering it.

Bedroom

In the bedroom, consider using driftwood as a headboard, or incorporate a mobile above your bed to enhance a peaceful sleep environment.

Bathroom

Bring a spa-like calm to your bathroom with driftwood shelves or hang a small piece as a focal point. Its natural hues blend beautifully with neutral and sea-inspired palettes.

Kitchen

Consider driftwood towel racks or decorative pieces to accentuate a rustic or coastal kitchen design, enhancing the culinary environment with a natural touch.

Emphasizing Personal Style with Driftwood

Driftwood decor offers a unique opportunity to inject personal style into your home. By mixing and matching with other natural materials like stones, shells, or even plants, you can create decor that reflects your tastes and passions authentically.

Conclusion

Driftwood hanging decor is more than a home design trend; it’s an invitation to connect with nature and infuse your surroundings with organic beauty and tranquility. By understanding its unique attributes and embracing its versatility, you can transform your living spaces into serene sanctuaries, each telling a unique story of nature’s timeless journey. Whether through personal creation or curated purchase, driftwood brings with it a sense of calm that resonates with anyone who values the beauty of the natural world.

Filed Under: Driftwood Ideas Tagged With: Coastal Design, DIY, Driftwood, Hanging Decor, natural materials

Driftwood Guest Book

October 5, 2024 by admin

Have you ever considered the unique charm that a driftwood guest book could bring to your special occasion? Whether you are planning a wedding, a birthday party, or any other memorable event, incorporating a driftwood guest book can be an enchanting way to capture heartfelt messages from your guests. This article will guide you through everything you need to know about driftwood guest books, including their allure, creation, and use in various settings.

Understanding Driftwood Guest Books

Driftwood guest books are a beautiful blend of nature and nostalgia. They often consist of pieces of naturally weathered wood on which guests can write messages, wishes, or signatures. This unique keepsake not only serves as a creative alternative to traditional paper guest books but it also provides a rustic and organic feel that can add a touch of uniqueness to any event.

The Allure of Driftwood

Driftwood is not just ordinary wood; it carries with it stories of the sea and the journey it has undergone. Its naturally aged appearance, with smooth edges and unique textures, adds an element of intrigue and charm. This makes driftwood an excellent conversational piece and a personal memento for those who appreciate nature’s artistry.

Why Choose a Driftwood Guest Book?

Opting for a driftwood guest book allows you to stand out with a piece that’s as much a work of art as it is a functional item. Unlike traditional paper guest books, a driftwood piece serves as an attractive display item that can adorn your home long after your event. It’s a sustainable option, too, often sourced in an environmentally friendly manner.

Unique Settings for Driftwood Guest Books

Driftwood guest books are versatile and fit seamlessly into a variety of settings. Whether you are hosting a beach wedding, a rustic farmhouse dinner, or a nature-themed celebration, they add a perfect touch of earthiness. Here’s a look at how you can use driftwood guest books in different settings:

  • Beach Settings: Highlight the nautical theme by pairing the earthy tones of driftwood with seashells and blue accents.

  • Farmhouse or Rustic Venues: Complement the raw beauty of driftwood with warm tones and natural fabrics.

  • Garden Parties: Blend the organic texture of driftwood with floral arrangements for an exquisite presentation.

How to Create a Driftwood Guest Book

Crafting a driftwood guest book can be a rewarding endeavor, giving you the freedom to personalize it to your taste. Here’s how you can embark on this creative journey:

Gathering Your Materials

First and foremost, you’ll need to acquire pieces of driftwood. Depending on the size and scope of your guest book, you may need several pieces. Here’s a checklist of items you might consider:

  • Driftwood Pieces: Look for sizes that fit your needs, ensuring they are free from insects and moisture.

  • Fine Grain Sandpaper: To smooth any rough edges.

  • Wood Sealant or Finish: To preserve the wood and prevent it from drying out further.

  • Paint Pens or Markers: Choose colors that will stand out against the natural wood grain.

Preparing the Driftwood

Once you have chosen your driftwood, preparing it properly can ensure it’s ready for guests to inscribe their messages. Here’s a step-by-step guide:

  1. Clean the Driftwood: Soak the driftwood in a mixture of water and mild soap to remove any salts, dirt, and debris. Allow it to dry completely in a sheltered area away from direct sunlight.

  2. Sanding: Using fine grain sandpaper, lightly sand the surfaces where guests will write. This creates a smooth surface that is easier to write on.

  3. Sealing the Wood: Apply a wood sealant or finishing oil to protect the wood from cracking or fading. Allow it to dry thoroughly before use.

Designing Your Layout

Whether you plan to display your driftwood guest book flat or mount it vertically, arranging your pieces creatively can enhance its visual appeal. Consider:

  • Flat Layout: Pieces can be arranged on a large board or canvas for guests to freely pick and write on.

  • Vertical Display: Mount pieces on a standalone board with spaces for writing, perfect for hanging as a wall art piece later.

Driftwood Guest Book

Making Your Event Unforgettable

Incorporating a driftwood guest book into your event is not only about preserving memories but also about creating an experience. Here are ways to make lasting impressions:

Interactive Elements

Engage your guests with interactive elements. Provide an assortment of paint pens, stamps, or even small embellishments that they can use to personalize their messages. Creating these options invites creativity and ensures that every entry is unique.

Framing the Experience

Consider making the act of signing the guest book a delightful part of the celebration. Arrange a designated signing area with thoughtful decor that matches your theme. Add personal touches, like photos, anecdotes, or banners that invite guests to participate.

Combining with Other Memorabilia

If you are gathering other types of memorabilia, such as Polaroid photos or small keepsakes from the event, combining these with your driftwood guest book into a comprehensive display can make for a heartwarming showcase.

Caring for Your Driftwood Guest Book

Preserving your driftwood guest book ensures that it remains in great condition for years to come. Here are some care tips:

Display Considerations

If you plan to display your driftwood guest book, select a location away from direct sunlight and extreme humidity to prevent warping or fading. Displaying it in a protected frame or casing can add an extra level of protection.

Periodic Maintenance

Over time, driftwood can become brittle if left untreated. Polish the wood occasionally with a beeswax or wood conditioner to maintain its resilience and luster. Additionally, if the written messages begin to fade, you can trace over them with a similar pen to refresh their appearance.

Driftwood Guest Book

Driftwood Guest Books: Inspiration and Ideas

Taking a peek at various driftwood guest books can provide insight and spark creativity for your own project. Here are some inspiring concepts:

Driftwood Art Installation

Create a statement piece that incorporates larger driftwood with spaces for guest messages. This approach allows for a functional guest book that doubles as an impressive art piece for your home.

Mixed Media Driftwood

Combine driftwood with other natural elements, like dried flowers, vines, or pebbles, to enhance its visual appeal. Using different textures can create a layered and multidimensional display.

Themed Driftwood Settings

Bring your theme to life by customizing the driftwood guest book to fit specific motifs, such as nautical ropes for a sea theme or lace for a vintage event. Themed elements can tie together the entire decor scheme beautifully.

Final Thoughts: A Keepsake That Lasts

Choosing a driftwood guest book adds a personal and artistic touch to your special event while offering a memorable keepsake that you and your guests will cherish. It provides a wonderful opportunity to create something meaningful and lasting. As you reflect on these shared memories in the years to come, may your driftwood guest book continue to bring you joy and remind you of the beautiful connections and sentiments captured within. Let this unique piece inspire both you and your guests, capturing the spirit and warmth of your cherished occasion.

Filed Under: Driftwood Ideas Tagged With: DIY, Driftwood, Guest Book, Rustic, Wedding

Driftwood 2126 Stain

October 5, 2024 by admin

Have you ever stood in front of a wall of stains in a hardware store, utterly perplexed by the sea of colors, numbers, and finishes? Choosing the right stain for your project can feel overwhelming, especially if you’re striving for a specific aesthetic. One option you might encounter is the Driftwood 2126 Stain, a choice that could transform your project into something truly special.

Understanding Driftwood 2126 Stain

Before diving into specifics, it’s important to understand what sets Driftwood 2126 apart from other stains. This stain carries a unique charm, evoking the serene and weathered look of driftwood washed ashore. If you’re looking to add a touch of rustic elegance to your space, this could be the perfect solution.

What is Driftwood 2126 Stain?

Driftwood 2126 Stain is a color option that recreates the natural, sun-bleached appearance of driftwood. It taps into a sense of tranquility and connection to nature. The stain works well on various wood surfaces, offering a unique finish that balances rustic appeal with modern sophistication.

The Aesthetic Appeal

This particular stain is popular for its natural, light grayish-brown color that mimics the effects of long-term exposure to elements. It’s perfect for those who appreciate a minimalist design with a touch of nature-inspired beauty. If your vision involves a weathered yet warm look, Driftwood 2126 aligns seamlessly with coastal, farmhouse, or shabby chic styles.

Characteristics of Driftwood 2126 Stain

To truly understand why Driftwood 2126 Stain is a favorite among enthusiasts, let’s delve into its distinctive characteristics.

Color Profile

The color of Driftwood 2126 is reminiscent of time-worn wood with subtly muted tones. It adds depth without overwhelming the natural grain of the wood. The stain strikes a balance between gray and brown, providing a neutral base that complements a variety of decor styles.

Finish Types

While color is crucial, the finish type also plays a pivotal role in your project. Driftwood 2126 Stain typically offers finishes in matte, satin or gloss, each affecting the final look. Matte provides a flat, more natural appearance, whereas gloss offers a shiny, polished finish that can highlight the wood’s texture.

Durability and Longevity

A good stain does more than just enhance appearance; it also offers protection. Driftwood 2126 is known for its durability, resisting wear and tear while maintaining its beautiful pigment. This makes it suitable for both interior and exterior projects, standing up to various environmental conditions with ease.

Driftwood 2126 Stain

Applications of Driftwood 2126 Stain

Understanding where and how to use Driftwood 2126 Stain is key to maximizing its beauty and utility.

Home Interior

This stain is an excellent choice for indoor applications, including flooring, furniture, and cabinetry. Driftwood 2126 can transform a mundane piece into a stunning focal point. Consider using it on accent pieces or to revamp old wooden furniture, giving them a new lease of life with a vintage twist.

Exterior Use

For outdoor projects, Driftwood 2126 brings a natural, harmonious look. Whether it’s a wood deck, pergola, or garden furniture, the stain’s weathered effect resonates beautifully with the great outdoors. Its durability ensures that these outdoor structures remain visually appealing through different seasons.

Creative Projects

Driftwood 2126 Stain isn’t just confined to conventional woodwork; it offers endless possibilities for creative endeavors. Use it on picture frames, decorative signs, or art pieces to infuse a touch of nature and elegance. Its versatility makes it a favorite among DIY enthusiasts looking to create bespoke items.

How to Apply Driftwood 2126 Stain

Effective application can make all the difference in achieving the desired look with Driftwood 2126 Stain. Here’s a step-by-step guide on how to apply this stain to ensure the best results.

Preparing Your Surface

Preparation is critical in any staining project. Start by thoroughly cleaning the wood surface, ensuring it is free of dust, dirt, and old finishes. Sand the wood to a smooth finish with fine-grit sandpaper, which helps the stain adhere better. Make sure to remove any sanding residue with a clean, dry cloth.

Necessary Tools and Materials

Here is a helpful table detailing the tools and materials you’ll need:

Tools and MaterialsPurpose
Fine-grit sandpaperSmoothens wood surface
Clean cloth or tack clothRemoves dust and debris
Paintbrush or foam applicatorApplies the stain evenly
Protective glovesKeeps your hands safe
Stir stickMixes the stain thoroughly

Applying the Stain

Once your surface is prepped, it’s time to apply the Driftwood 2126 Stain:

  1. Stir the Stain: Use a stir stick to ensure the pigments are well-mixed.
  2. Test First: Try the stain on a scrap piece of wood to check if the color meets your expectations.
  3. Apply Evenly: Using a brush or foam applicator, apply the stain in the direction of the wood grain.
  4. Wipe Off Excess: After a few minutes—depending on the desired darkness—wipe off the excess stain with a clean cloth. This prevents uneven patches and helps achieve a uniform finish.
  5. Let it Dry: Allow the stain to dry completely, ensuring it’s protected from dust and moisture during the drying process.

Final Touches

Once the stain has dried, consider applying a sealant or topcoat to protect the finish and enhance the wood’s longevity. Depending on your preference, this could be a polyurethane finish, wax, or oil. Make sure to follow the instructions on the label for the best results.

Driftwood 2126 Stain

Maintenance and Care

To maintain the beauty of Driftwood 2126 Stain and ensure it lasts for years, regular care and maintenance are key.

Routine Cleaning

Use a soft cloth to dust off surfaces regularly, preventing any accumulation of debris that can mar the finish. For more thorough cleaning, use a damp cloth with mild soap, avoiding harsh chemicals that might degrade the stain.

Periodic Inspection

Inspect stained surfaces periodically for signs of wear, such as fading or scratches. Address any issues promptly by lightly sanding the affected area and reapplying the stain as needed. This keeps your wood pieces looking fresh and vibrant.

Protection Measures

For outdoor items, consider additional protective measures like furniture covers or storing them in a shed during harsh weather. Indoors, use coasters and placemats to prevent water rings and scratches on tabletops.

Benefits of Using Driftwood 2126 Stain

Beyond its physical appearance, the Driftwood 2126 Stain offers several benefits that can make it a wise choice for various projects.

Versatility

Its neutral tones and ability to blend with different styles make it versatile for numerous decors and applications. Driftwood 2126 serves as a chameleon, adapting to the existing aesthetics while providing contrast and interest.

Environmentally Friendly Option

Many manufacturers offer Driftwood 2126 Stain formulas with low VOCs, making it a more environmentally-friendly option. This aligns well with eco-conscious individuals aiming to reduce their environmental footprint.

Cost-Effective

Applying a wood stain can be a cost-effective way to rejuvenate old furniture and fixtures, extending their life and saving money on replacements. With improvements to aesthetics, you can update your space without a significant investment.

Driftwood 2126 Stain Variants and Alternatives

Knowing what else is out there can provide you with options in case Driftwood 2126 isn’t quite the right fit.

Similar Stain Colors

If you’re exploring other colors in the same family, consider stains like Weathered Oak, Sun-bleached Ash, or Coastal Gray. These stains offer similar weathered appearances with slight variations in tone and undertone, allowing for even more customization in your projects.

Custom Mixing

Some manufacturers offer custom mixing services where you can create bespoke shades tailored to your specific needs. This might be a great option if you want something truly unique while keeping the essence of a weathered look.

Natural Alternatives

If you’re interested in achieving a driftwood look naturally, consider using steel wool and vinegar to create your own wood stain. This method allows you to customize the intensity of the color and provides a DIY angle to the project.

Conclusion

Choosing the right stain can make or break your woodworking project. Driftwood 2126 Stain is a remarkable option for those seeking a natural, weathered effect that combines modern elegance with rustic charm. With its adaptability, eco-friendly formulas, and cost-effective appeal, it stands as a popular choice for interior, exterior, and creative applications alike. Remember, the key to a successful project lies not just in the stain choice, but also in thorough preparation, careful application, and diligent maintenance. May your next project with Driftwood 2126 Stain bring the ethereal beauty of driftwood into whatever space you seek to enhance.

Filed Under: Driftwood Ideas Tagged With: DIY, Driftwood, home decor, Woodworking

Driftwood Greenhouse

October 1, 2024 by admin

Have you ever considered combining your love for gardening with a touch of rustic, natural aesthetics? If so, a driftwood greenhouse might be the perfect project for you. Imagine stepping into a unique space where the natural beauty of driftwood fuses seamlessly with the lush greenery of your favorite plants. In this article, you’ll discover how to create your very own driftwood greenhouse, understand its benefits, and learn how to maintain it.

What is a Driftwood Greenhouse?

A driftwood greenhouse is essentially a greenhouse made using driftwood as a primary structural component. Driftwood, being wood that’s washed ashore by rivers, lakes, or oceans, has a weathered look that adds a rustic charm to any space. When used in a greenhouse, it creates a unique and aesthetically pleasing environment for growing plants.

Benefits of a Driftwood Greenhouse

Incorporating driftwood into your greenhouse can offer several advantages:

  1. Aesthetic Appeal: Driftwood’s natural, weathered look can make your greenhouse stand out and appear more in tune with nature.
  2. Sustainability: Using driftwood is an eco-friendly option as it involves recycling wood that would otherwise go unused.
  3. Durability: Properly treated driftwood can be quite durable, withstanding the elements better than some other materials.
  4. Biodiversity Support: Driftwood can harbor beneficial fungi and microorganisms that can create a healthier environment for your plants.

Materials Needed for Your Driftwood Greenhouse

Creating a driftwood greenhouse requires a mix of traditional materials and driftwood components. Here’s a list to get you started:

MaterialPurpose
DriftwoodMain structural component and aesthetic element
Polycarbonate panels or glassFor constructing the greenhouse walls and roof
Wood sealantTo treat driftwood and protect it from moisture and pests
Screws and nailsFor assembling driftwood and other structural materials
Metal bracketsTo provide additional support and stability
Door hardwareFor creating a functional and secure entry
Paint or wood stainOptional, for additional aesthetic customization

Selecting Driftwood

When selecting driftwood, look for pieces that are:

  • Sturdy and Solid: Avoid driftwood that is brittle or shows signs of decay.
  • Shape and Size: Choose pieces that can be easily incorporated into your design.
  • Aesthetic Fit: Opt for driftwood that matches your desired look, whether it’s sleek and smooth or rugged and knotty.

Driftwood Greenhouse

Building Your Driftwood Greenhouse

Building a driftwood greenhouse can be a rewarding project, but it requires careful planning and execution. Here’s a step-by-step guide to help you through the process.

Step 1: Planning and Design

The planning phase lays the foundation for your entire project. Consider the following aspects:

  • Location: Choose a spot that gets ample sunlight throughout the day.
  • Size: Determine the size of your greenhouse based on the space available and your gardening needs.
  • Design: Sketch out a basic design, including the placement of doors, windows, and ventilation.

Step 2: Collecting and Preparing Driftwood

Once you have a design in mind, you can start collecting driftwood. Remember to seek permission if you’re gathering driftwood from public or protected areas.

  • Cleaning: Clean the driftwood thoroughly to remove any dirt, sand, and salt.
  • Drying: Allow the driftwood to dry completely. This can take several days depending on the wood’s moisture content.
  • Treatment: Apply a wood sealant to protect the driftwood from future decay and pests.

Step 3: Constructing the Frame

The frame is the backbone of your greenhouse. Follow these steps:

  1. Foundation: Lay a solid foundation using concrete blocks or treated lumber.
  2. Assemble Driftwood Frame: Use metal brackets and screws to assemble the driftwood pieces into a sturdy frame. This will include the base, side walls, and roof supports.
  3. Stability Check: Ensure the structure is stable and can support the weight of the glass or polycarbonate panels.

Step 4: Installing Walls and Roof

With the frame in place, it’s time to add the protective covering.

  1. Cut Panels: Measure and cut the polycarbonate panels or glass to fit the walls and roof.
  2. Attach Panels: Secure the panels to the frame using screws and appropriate fasteners.
  3. Door and Windows: Install the door and any windows, ensuring they open and close properly for ventilation.

Step 5: Final Touches

Add the final touches to complete your greenhouse.

  • Sealing Gaps: Check for any gaps and seal them to ensure the greenhouse is airtight.
  • Interior Setup: Arrange shelves, plant beds, and any other interior features according to your gardening needs.
  • Decorative Elements: Add decorative elements like hanging plants, pots, or garden art to personalize your space.

Maintaining Your Driftwood Greenhouse

Proper maintenance will ensure your driftwood greenhouse remains beautiful and functional for years to come.

Regular Cleaning

Keep the greenhouse clean by removing dead leaves and debris regularly. Wipe down the glass or polycarbonate panels to ensure maximum light penetration.

Wood Treatment

Periodically check the driftwood for signs of wear or damage. Reapply wood sealant as needed to protect it from moisture and pests.

Ventilation and Temperature Control

Ensure your greenhouse has proper ventilation to prevent overheating and to regulate humidity levels. Install fans or vents if necessary to maintain an optimal growing environment.

Driftwood Greenhouse

Plants That Thrive in a Driftwood Greenhouse

Certain plants can thrive particularly well in the unique environment of a driftwood greenhouse. Here are some suggestions:

Type of PlantBenefits/Reasons for Suitability
Succulents and CactiThrive in bright, sunny conditions and low humidity
HerbsIdeal for a controlled environment, easy to manage in various sizes
Tropical PlantsBenefit from higher humidity levels and consistent temperatures
Vegetables and BerriesCan be grown year-round, taking advantage of the greenhouse’s controlled climate
OrchidsEnjoy the stable environment and can benefit from the natural aesthetic of driftwood

Managing Pests and Diseases

Maintaining a healthy environment in your greenhouse is crucial to preventing pest infestations and diseases.

  • Inspect Regularly: Regularly inspect plants for signs of pests or diseases.
  • Use Natural Remedies: Opt for natural pest control methods such as neem oil or insecticidal soap.
  • Maintain Cleanliness: Keep the greenhouse clean and remove any infested plants promptly.

Aesthetics and Personalization

One of the charming aspects of a driftwood greenhouse is its potential for personalization. Consider the following ideas to make it uniquely yours:

Creative Plant Displays

Use the natural shapes of driftwood to create unique plant displays. Consider:

  • Hanging Plants: Use sturdy pieces of driftwood as natural hanging supports.
  • Planter Bases: Attach small driftwood branches to pots or planter boxes for an integrated look.

Decorative Elements

Incorporate decorative elements that complement the rustic vibe of driftwood:

  • Garden Art: Add sculptures or garden art that reflects your personal style.
  • Lighting: Use string lights or solar lanterns to add ambiance.
  • Labels and Markers: Create plant labels or markers from small pieces of driftwood.

Incorporating Water Features

A water feature can add a tranquil element to your greenhouse. Consider:

  • Small Pond: Use a container or create a small, lined pond edged with driftwood.
  • Fountain: Install a small fountain, using driftwood as a natural focal point.

Seasonal Adjustments

A driftwood greenhouse can serve you well throughout the year, but it’s essential to make seasonal adjustments to optimize plant growth and health.

Spring and Summer

  • Ventilation: Increase ventilation to prevent overheating.
  • Shade: Provide additional shading if necessary to protect plants from intense sun.
  • Watering: Adjust watering routines to account for higher temperatures and evaporation rates.

Autumn and Winter

  • Insulation: Add insulation to retain heat, especially at night.
  • Heating: Use supplemental heating if necessary to maintain a stable temperature.
  • Lighting: Ensure adequate lighting since daylight hours are shorter.

Environmental Impact and Sustainability

A driftwood greenhouse not only looks beautiful but also supports sustainable practices.

Eco-Friendly Materials

By using driftwood, you recycle natural materials that might otherwise contribute to environmental clutter.

Water Conservation

Incorporate water-efficient systems such as drip irrigation or rainwater collection to conserve resources.

Biodiversity

The use of natural materials like driftwood can promote a diverse ecosystem within your greenhouse, encouraging beneficial insects and microorganisms.

Conclusion

Building and maintaining a driftwood greenhouse can be an incredibly rewarding experience. It offers a sustainable way to enjoy gardening while creating a unique and beautiful space that reflects your personal style. With careful planning, creative design, and ongoing maintenance, your driftwood greenhouse can become a haven for both you and your plants.

Are you ready to embark on this exciting project? Whether you’re a seasoned gardener or a beginner, a driftwood greenhouse can provide you with a functional yet aesthetically pleasing space to grow your plants and express your creativity.

Filed Under: Driftwood Ideas Tagged With: DIY, Driftwood, Greenhouse, Home Projects, Sustainable Gardening

  • « Previous Page
  • Page 1
  • …
  • Page 17
  • Page 18
  • Page 19
  • Page 20
  • Page 21
  • …
  • Page 41
  • Next Page »

Primary Sidebar

Driftwood4us.com, is a participant in the Amazon Services LLC Associates Program, an affiliate advertising program designed to provide a means for sites to earn advertising fees by advertising and linking to amazon.com.