• Skip to main content
  • Skip to primary sidebar
  • Terms and Conditions
  • Privacy Policy
  • Contact

Driftwood 4 Us

Just About Driftwood

DIY

Driftwood Reindeer

September 2, 2024 by admin

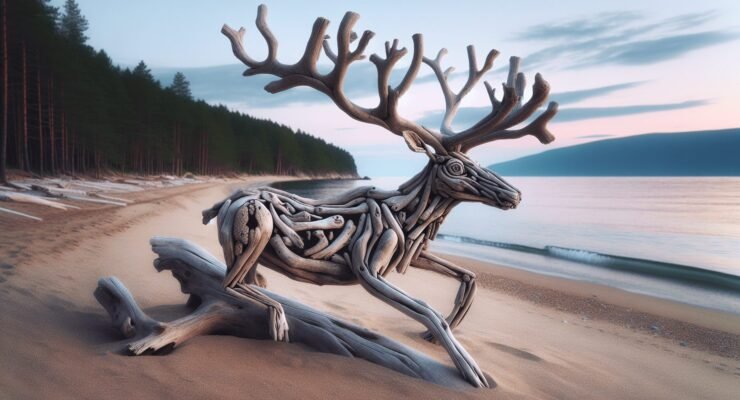
Have you ever found yourself walking along a beach, noticing scattered pieces of driftwood, and wondering what you could create with them? Driftwood, molded by nature’s forces, carries a certain rustic charm that can inspire interesting and unique creations. One delightful project you might consider is crafting a driftwood reindeer. These whimsical creatures make beautiful additions to your home decor, especially during the holiday season.

Driftwood Reindeer

What is Driftwood?

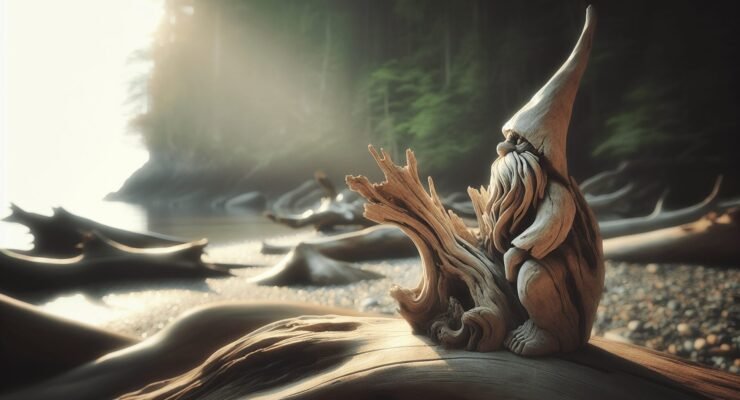
Driftwood is any kind of wood that has washed up onto shores, riverbanks, or beaches through the action of winds, tides, and waves. Over time, it becomes weathered and smooth, creating a unique look that’s prized by artists and DIY enthusiasts. In essence, driftwood combines nature’s raw beauty with your creativity, offering endless possibilities for hand-crafted projects such as driftwood reindeer.

Materials You’ll Need

Getting started with a driftwood reindeer project involves gathering the right materials. Let’s break down the essentials:

Driftwood

Of course, the star component of this project is driftwood. You’ll need a good amount of it in various shapes and sizes. Collect pieces of different lengths and thicknesses to give your reindeer a natural look.

Tools

You’ll also need a set of basic tools. Here’s a table that lists the needed tools along with their uses:

ToolUse
Hand sawCutting the driftwood to desired sizes
SandpaperSmoothing rough edges
DrillCreating holes for connecting pieces
Screws or NailsSecuring the pieces together
Wood GlueAdding additional support
ClampsHolding pieces together while glue dries

Additional Materials

Don’t forget to gather some optional materials that can add detail and flair to your reindeer:

MaterialUse
PaintAdding color to your reindeer
Small TwigsCreating antlers or additional details
VarnishSealing and protecting your creation
Buttons or BeadsMaking eyes or embellishments

Step-by-Step Guide

Creating a driftwood reindeer might seem challenging, but breaking it down into manageable steps can make it easier. Let’s begin!

Step 1: Planning and Designing

Before you start cutting or gluing anything, sketch a rough design of your reindeer. Consider what kind of stance you want it to have and how detailed you’d like it to be. This planning phase can save you time and headaches later on.

Step 2: Collecting Driftwood Pieces

Spend some time walking along a beach or a riverbank collecting driftwood. Look for pieces that suggest legs, bodies, heads, and antlers. Bring more than you’ll likely need; it’s always good to have options.

Step 3: Preparing the Driftwood

Once you have gathered your pieces, clean them thoroughly. Driftwood often has salt, sand, or debris on it. Give it a good rinse and let it dry completely. You might also want to sand the pieces down to remove any rough spots.

Step 4: Constructing the Body

Start with the body of the reindeer. Choose a sturdy, elongated piece of driftwood for the torso. Use your saw to cut it to the desired length. Drill holes where you plan to attach the legs and head. Using wood glue and screws, attach four driftwood pieces for the legs. The screws and glue will ensure that the legs are stable and can support the body.

Step 5: Adding the Neck and Head

For the neck, select a piece of driftwood that’s sturdy but flexible enough to give a natural curve. Cut it and attach it to the body using wood glue and screws. Next, choose a piece for the head. This piece should have a shape that resembles a reindeer’s head. Attach it to the neck in the same manner.

Step 6: Crafting the Antlers

Antlers are the trickiest part but also add the most character. Smaller twigs or branching driftwood pieces work well here. Attach them to the head using small screws or strong glue.

Step 7: Detailing and Finishing Touches

Now that your basic reindeer shape is complete, it’s time for the details. Paint the eyes or use buttons for a whimsical look. Add varnish to protect the wood and bring out its natural beauty. Consider other embellishments like a small red bead for a nose to mimic Rudolph.

Displaying Your Driftwood Reindeer

Once your driftwood reindeer is complete, think about how to display it. These can stand alone in the yard, atop a mantelpiece, or even incorporated into a holiday centerpiece. The simplicity and rustic charm make it a versatile decor item any time of year, though particularly festive during the winter months.

Driftwood Reindeer

Customization Ideas

Driftwood reindeer are highly customizable. Here are some ideas to inspire you:

Seasonal Themes

You can adapt the decoration to fit various seasons. For winter holidays, add small pine cones, holly berries, or a tiny Santa hat. In the fall, surround it with miniature pumpkins and autumn leaves.

Adding Light

For a magical touch, weave small LED fairy lights through the antlers or around the body. It not only looks stunning but also provides soft lighting for a cozy atmosphere.

Color Variations

While the natural look of driftwood is beautiful, you can also paint your reindeer in various colors to match your home decor. Metallic paints can offer a modern, chic version, while pastel colors might give it a whimsical touch.

The Benefits of Driftwood Crafts

Eco-Friendly

Using driftwood is an eco-friendly way to decorate your home. Since driftwood is essentially recycled by nature, you’re giving new life to something that would otherwise be waste.

Therapeutic

Crafting can be a therapeutic activity. The process of creating something with your hands can be incredibly satisfying and a great way to reduce stress.

Unique Decor

Each piece of driftwood is unique, which means no two reindeer will be exactly alike. This ensures that your creation is truly one-of-a-kind.

Safety Tips

When working with tools and materials, always follow safety guidelines.

  1. Wear Safety Goggles: Protect your eyes from sawdust and wood chips.
  2. Use Gloves: This helps to prevent splinters and improve grip.
  3. Work in a Well-Ventilated Area: Especially important if you’re using varnish or paint.
  4. Keep Tools Away from Children: Ensure that all tools are stored safely out of reach when not in use.

Troubleshooting Common Issues

Sometimes things don’t go as planned. Here are some common issues and how to solve them:

Wobbly Legs

If your reindeer’s legs are not stable, try reinforcing the connections with additional screws or glue. You can also use small clamps to hold joints in place while the glue dries.

Uneven Antlers

Uneven antlers can add a lot of character. However, if you prefer symmetry, spend some extra time finding matching pieces of driftwood and cut them to ensure they’re the same length.

Cracked Wood

Driftwood can be fragile. If you notice a crack, use wood glue to seal it. Small cracks can also be filled with wood filler and then sanded smooth.

Sustainable Crafting

As you embark on your driftwood reindeer project, consider the environmental impact. Sustainable crafting practices not only benefit the planet but also give added value to your creative endeavors.

  1. Responsible Collection: Only gather driftwood that has naturally washed ashore. Avoid taking wood from live trees or protected areas.
  2. Non-Toxic Materials: Use non-toxic glue, paint, and varnish whenever possible.
  3. Recycling and Reusing: Try to use leftover materials from other projects, and always recycle scraps responsibly.

Conclusion

Crafting a driftwood reindeer is a rewarding project that combines creativity, nature, and woodworking skills. By following this guide, you’ll be able to create a piece that is not only unique and beautiful but also eco-friendly. The time and effort invested in every step—from planning and collecting materials to the final touches—will be evident in the charming character of your reindeer. Use this creative endeavor to not only brighten up your home but also to relish the therapeutic and satisfying process of crafting with nature’s gifts.

Filed Under: Driftwood Ideas Tagged With: crafting, DIY, Driftwood, Holiday decor, Reindeer

Driftwood Railing

September 1, 2024 by admin

Have you ever considered adding a touch of natural beauty to your home with a driftwood railing? Utilizing driftwood as a construction material can provide a rustic, elegant, and organic feel that blends seamlessly with various types of decor. With its uniqueness and intriguing texture, driftwood can offer a striking contrast to modern materials, making it a versatile choice for both indoor and outdoor projects.

What is Driftwood?

Driftwood refers to wood that has been washed onto a shore or beach by the action of winds, tides, or waves. This type of wood is naturally weathered and often carries a distinguished, smooth texture due to its prolonged exposure to the elements. As a result, each piece of driftwood is unique, adding a natural and artistic element to any setting.

Sources of Driftwood

Driftwood can be sourced from a variety of locations, including oceans, rivers, and lakes. Each environment imparts different characteristics to the driftwood:

SourceCharacteristics
OceanOften bleached white by the sun and saltwater
RiversSmoother, less bleached, often darker in color
LakesLess saline environment, leading to diverse textures

Understanding the different sources can help you select the driftwood that best fits your design.

Why Choose Driftwood for Railing?

A driftwood railing can offer several compelling benefits that make it a worthwhile consideration for your space.

Aesthetic Appeal

The natural beauty of driftwood is unparalleled. Its unique shapes and textures can bring a sense of nature indoors. Driftwood railings can seamlessly blend with various home styles, from rustic to modern, adding a touch of authenticity and warmth.

Environmental Impact

Using driftwood is an eco-friendly choice. Since it’s naturally sourced, it doesn’t add to deforestation. You’re repurposing material that has already served its time in nature, which makes it an excellent choice for environmentally conscious homeowners.

Durability and Strength

Though it might seem delicate due to its weathered appearance, driftwood is often quite strong. When it comes to building a railing, the robustness of properly chosen and treated driftwood ensures long-lasting durability.

Driftwood Railing

Selecting the Right Driftwood

Choosing the right pieces of driftwood for your railing project is essential for both functionality and aesthetics.

Size and Shape

Consider the dimensions of your railing. Large, sturdy pieces are ideal for the main supports, while smaller, intricate pieces can be used for decorative elements. The shape should be naturally appealing but also fit securely within your railing structure.

Dryness and Condition

Ensure the driftwood is fully dry to prevent any warping or rotting. Seasoned driftwood, which is wood that has dried naturally over time, tends to be more stable.

Treatment and Preparation

Once you have selected the pieces, they need to be thoroughly cleaned and treated to remove any remaining salt, dirt, or pests. This can involve soaking the wood in freshwater and then allowing it to dry thoroughly.

How to Install a Driftwood Railing

The installation process for a driftwood railing can be broken down into several steps, ensuring a secure and aesthetically pleasing result.

Pre-Installation Planning

Before you begin, make sure you have a clear plan and necessary materials. You’ll need driftwood pieces, mounting brackets, screws, and possibly a sealant for the final finish.

Step-by-Step Guide

  1. Measure and Cut: Measure the area where you will install the railing and cut the driftwood pieces to fit. Ensure the cuts are clean and precise.

  2. Mounting Brackets: Attach the mounting brackets to your pre-determined points on the wall or floor. These will hold the driftwood in place. Ensure they are securely fastened.

  3. Placement: Position your driftwood pieces and secure them to the mounting brackets with screws. Check that each piece is level and firmly attached.

  4. Finishing Touches: Apply a suitable wood sealant to protect the wood from wear and tear, enhancing its longevity.

Safety Considerations

Safety is paramount. Make sure the railings are securely installed and check for any sharp edges that could pose a risk. Regular maintenance checks can ensure that the structure remains sound over time.

Driftwood Railing

Creative Ideas for Driftwood Railings

A driftwood railing doesn’t have to be purely functional; it can also be a statement piece. Here are some creative ideas to inspire you:

Combining Materials

Pair driftwood with other materials like wrought iron, glass, or metal to add sophistication and contrast. For instance, you could use driftwood as the main support with glass paneling in between for a modern look.

Light Fixtures

Incorporate lighting into your driftwood railing. LED strips or small lanterns can be attached to the driftwood to create a warm, inviting glow, perfect for enhancing outdoor spaces.

Thematic Designs

Create a theme around your driftwood railing. Nautical themes can be accentuated with ropes and seashells, while a forest-inspired design may include natural moss and vines.

Maintenance of Driftwood Railings

Maintenance is straightforward but essential to maximize the lifespan and look of your driftwood railing.

Regular Cleaning

Regular dusting and occasional washing with a mild soap solution can keep the railing looking fresh. Avoid harsh chemicals that can damage the wood.

Inspections

Perform regular inspections to check for any loose connections or damage. Early detection of issues can prevent more significant problems later on.

Driftwood Railing for Different Spaces

Driftwood railings can be adapted for various areas of your home, each offering its unique charm.

Indoor Spaces

In interior settings, driftwood railings can enhance staircases, lofts, or balconies. They can blend with wooden flooring or contrast with modern decor for a stunning visual effect.

Outdoor Spaces

For outdoor use, driftwood railings suit decks, garden bridges, and patios. They not only look natural in an outdoor environment but also withstand the elements when properly treated.

Commercial Spaces

Driftwood railings are not just for homes; they can also be a unique feature in commercial spaces like restaurants, cafes, or boutique stores. They create a memorable and inviting atmosphere for customers.

DIY vs. Professional Installation

Deciding whether to tackle the project yourself or hire a professional is an important consideration.

DIY Installation

If you enjoy hands-on projects and have basic carpentry skills, a DIY approach can be rewarding. It allows for personal touches and can be more cost-effective.

Professional Installation

Hiring a professional ensures precision and safety, particularly for complex designs or large projects. Professionals can often source better quality materials and have the tools to achieve a polished finish.

Conclusion

Choosing a driftwood railing for your home can bring a unique blend of beauty, functionality, and eco-friendliness. From sourcing and selecting the perfect pieces to installation and maintenance, this guide offers a comprehensive look into creating a stunning driftwood railing. Whether you opt for a DIY project or professional help, the end result will undoubtedly add charm and character to your space. Don’t forget the personal touches and creative ideas that can make your driftwood railing truly one-of-a-kind.

Filed Under: Driftwood Ideas Tagged With: DIY, Driftwood, Home Improvement, Railing, Rustic

Gnome Driftwood

September 1, 2024 by admin

Have you ever wondered about the enchanting world of gnomes and how they find their way into your life through something as simple as driftwood? “Gnome Driftwood” might sound a bit whimsical, but it holds a world of charm and fascinating details that could turn a piece of driftwood into a magical gnome-inhabited art piece.

What is Gnome Driftwood?

Gnome Driftwood refers to artistic creations that blend the whimsical charm of gnomes with the natural beauty of driftwood. These unique pieces can range from simple, small carvings to elaborate, intricate sculptures. The combination of natural elements and mythical creatures provides a fantastic aesthetic that appeals to both nature lovers and fantasy enthusiasts alike.

Origin of Driftwood

Driftwood is wood that has been washed ashore by the action of winds, tides, or waves. It comes from various sources, including fallen trees, branches, and human-made wooden objects. Over time, the water and sand smooth the wood, giving it its distinctive, worn appearance.

Source of DriftwoodDescription
Fallen TreesTrees that have fallen into rivers or seas.
BranchesDetached branches floating downstream.
Wooden ObjectsItems such as furniture remnant or ship parts.

The Mystique of Gnomes

Gnomes, often depicted as small, bearded men wearing pointed hats, have roots in European folklore. Known for their protective and mischievous nature, gnomes are believed to bring good luck and guard over treasures. Their connection to the natural world makes them perfect companions for driftwood art.

Creating Gnome Driftwood Art

Creating gnome driftwood art is a blend of imagination, craftsmanship, and a touch of magic. Whether you’re an experienced woodcarver or a beginner, the following sections will guide you through the process.

Gathering Driftwood

The first step is to find the perfect piece of driftwood. Look for pieces that inspire you with their shapes and textures. Walk along beaches, riverbanks, or lakeshores to collect driftwood. Ensure that it’s legally permissible to collect driftwood in your chosen location.

Cleaning and Preparing Driftwood

Before diving into the creative process, it’s vital to clean your driftwood properly. Here’s how you can prepare your found treasure:

  1. Wash Thoroughly: Rinse the driftwood in freshwater to remove any salt, dirt, or debris.
  2. Soak in a Bleach Solution: Prepare a mixture of one-part bleach to nine parts water and soak the driftwood for 24 hours to eliminate any pests or fungi.
  3. Dry Completely: Allow the driftwood to dry in a shaded area for several days, ensuring it’s completely dry before use.

Basic Tools and Materials

The tools and materials you need will vary depending on the complexity of your project. Here are some basic necessities:

  • Knife or Chisel: For carving details into the driftwood.
  • Sandpaper: To smooth out rough edges and surfaces.
  • Paints or Stains: To add color to your gnome and driftwood.
  • Varnish or Sealant: To protect your finished piece.
  • Glue or Epoxy: For attaching smaller pieces or embellishments.

Carving Your Gnome

When carving a gnome, you can either work with the natural shape of the driftwood or whittle a more defined shape. Here’s a basic step-by-step guide:

  1. Sketch Your Design: Draw your gnome on paper, considering how it will fit into the natural contours of the driftwood.
  2. Outline on Wood: Transfer your sketch onto the driftwood using a pencil.
  3. Begin Carving: Use your knife or chisel to carve out the basic shape, starting with broader strokes and gradually refining the details.
  4. Detail Work: Focus on facial features, the hat, and any other intricate details.
  5. Sand Edges: Smooth the edges with sandpaper to finish.

Adding Color and Detail

Once you’ve carved your gnome, you can bring it to life with color. Use non-toxic paints or stains, especially if your gnome driftwood piece will be displayed outdoors. Apply the colors gradually, allowing each layer to dry before adding more detail. Finally, protect your artwork with a coat of varnish or sealant.

Emphasizing Natural Features

Some artists prefer to leave parts of the driftwood in its natural state, incorporating the wood’s natural grain and imperfections into the design. This approach not only simplifies the process but also highlights the inherent beauty of the driftwood.

Gnome Driftwood

Incorporating Gnome Driftwood into Your Decor

Gnome driftwood art can be a delightful addition to various spaces in your home or garden. Here are some creative ideas for incorporating these magical pieces:

Garden Features

Gnome driftwood can serve as charming garden accents. Place them among flower beds, under trees, or along garden paths to create a whimsical, fairy-tale-like atmosphere.

Indoor Decorations

Indoors, gnome driftwood art can be used as focal points in living rooms, on mantels, or bookshelves. Their rustic charm makes them versatile pieces that suit various interior styles, from bohemian to farmhouse.

Seasonal Displays

Create seasonal scenes with your gnome driftwood pieces. For instance, during the winter holiday season, add miniature snowmen or festive decor. In spring, surround your gnome with flowers and greenery.

Gnome Driftwood as Gifts

Handcrafted gnome driftwood pieces make unique and heartfelt gifts. Since each piece is one-of-a-kind, they’re perfect for friends or family members who appreciate art, nature, and folklore. Personalize the gift by adding the recipient’s name or a special message to make it even more memorable.

Gnome Driftwood

Benefits of Engaging in Gnome Driftwood Art

Engaging in gnome driftwood art is more than just a hobby; it has several benefits for your well-being and creativity.

Stress Relief

The process of carving and creating can be therapeutic, helping to relieve stress and anxiety. The repetitive motions and focus required in carving can bring a sense of calm and tranquility.

Boosting Creativity

Working with driftwood and designing gnomes can significantly enhance your creative abilities. It encourages you to see potential in everyday objects and think outside the box.

Connection with Nature

Collecting driftwood and working with natural materials fosters a deeper connection with nature. It can encourage you to spend more time outdoors, appreciating and understanding the beauty of natural landscapes.

Skill Development

Carving and creating detailed driftwood art can improve your hand-eye coordination and fine motor skills. Over time, you may find yourself becoming more adept at various crafting techniques.

Popular Themes and Inspirations

For those looking for additional inspiration, here are some popular themes and variations in the world of gnome driftwood art.

Rustic Gnomes

Rustic gnome driftwood pieces emphasize the natural texture and aged appearance of the wood. These designs often feature simple, earthy colors and minimal detailing to maintain a natural look.

Fantasy Scenes

Create intricate scenes that tell a story. For instance, a gnome village crafted from several pieces of driftwood, complete with miniature houses, bridges, and other fantastical elements.

Seasonal Gnomes

Design gnomes that reflect the seasons. Spring gnomes could be adorned with flowers, while winter gnomes might wear tiny scarves and stand beside snow-laden driftwood.

Animal Companions

Include tiny animals in your driftwood art. Imaginary friends like owls, squirrels, or birds can accompany your gnomes, adding an extra layer of charm and detail to your creations.

Advanced Techniques and Workshops

Once you’re comfortable with the basics, you might want to explore advanced techniques or even attend workshops to further hone your skills.

Pyrography

Pyrography, or wood burning, can add fine details and textures to your driftwood gnomes. This technique involves using a heated metal pen to burn designs into the wood.

Relief Carving

Relief carving involves carving figures that project slightly from a flat background. This adds depth and dimension to your pieces, making your gnomes appear more lifelike.

Mixed Media

Incorporate other materials like clay, fabric, or metal into your driftwood art. For instance, a gnome might have a clay hat, fabric clothing, or metal accessories to enhance the overall visual impact.

Attending Workshops

Look for local artists or community centers offering workshops on wood carving and gnome driftwood art. These can provide valuable hands-on experience, tips from experts, and a chance to connect with fellow enthusiasts.

Preserving and Caring for Gnome Driftwood Art

Proper care and preservation of your gnome driftwood art ensure it remains in excellent condition for years to come.

Indoor Care

For indoor displays, dust your pieces regularly with a soft cloth. Avoid placing them in direct sunlight, as prolonged exposure can cause the colors to fade. If your piece becomes soiled, gently clean it with a damp cloth and allow it to air dry.

Outdoor Care

If you’re displaying gnome driftwood art outdoors, apply a weather-resistant varnish or sealant to protect it from the elements. Check periodically for any signs of wear or damage and reapply the varnish as needed.

Repairing Damage

Minor damages can be repaired at home using wood glue or epoxy. For more significant repairs, consult a professional woodworker or artist who specializes in driftwood art.

Conclusion

The magic of gnome driftwood art lies in its ability to blend the fantastical with the natural world effortlessly. Whether you’re a hobbyist looking to explore a new creative outlet or a seasoned artist seeking fresh ideas, gnome driftwood art offers endless possibilities for imagination and craftsmanship. The process of gathering, preparing, and transforming driftwood into charming gnome art not only brings joy but also fosters a deeper connection with nature and a sense of accomplishment. So, next time you find yourself strolling along a beach or riverbank, keep an eye out for that perfect piece of driftwood—it might just become your next enchanting creation.

Filed Under: Driftwood Ideas Tagged With: DIY, Driftwood projects, garden decor

Driftwood Resin

September 1, 2024 by admin

Have you ever found yourself mesmerized by the beauty of driftwood washed ashore, bleached by the sun and polished by the sands of time? Imagine combining this natural allure with the translucent marvel of epoxy resin to create breathtaking art pieces. This captivating fusion is known as “driftwood resin.”

Driftwood Resin

What is Driftwood Resin?

Driftwood resin is a creative technique where the organic texture and unusual shapes of driftwood are combined with epoxy resin to make stunning art pieces, furniture, or decor items. You might think of it as a marriage between nature and art, merging rustic elements with modern materials to craft something unique and beautiful.

Why Choose Driftwood Resin?

The charm of driftwood resin lies in its versatility and uniqueness. Each piece of driftwood comes with its distinct shape, size, and texture, resulting in one-of-a-kind creations. Here are a few reasons why you might want to consider driftwood resin for your next project:

  1. Aesthetic Appeal: Driftwood adds a touch of natural beauty, while the resin brings in a sleek, contemporary look.
  2. Durability: Epoxy resin is a robust material that helps preserve the delicate structures of driftwood.
  3. Customization: You can experiment with colors, shapes, and inclusions to create a piece that suits your taste perfectly.

Materials Required for Driftwood Resin Projects

Before you start your driftwood resin adventure, it’s essential to gather all the necessary materials. Here’s a handy table to help you identify and organize what you’ll need:

MaterialsDescription
DriftwoodNaturally sourced wood pieces, cleaned and dried
Epoxy ResinA two-part resin consisting of resin and hardener
Measuring CupsFor accurately measuring resin and hardener
Mixing SticksFor combining resin and hardener thoroughly
Silicone MoldTo shape the resin into your desired form
SandpaperFor smoothing edges and surfaces
Safety GearGloves, protective eyewear, and masks to ensure safe handling
Heat Gun or TorchTo remove bubbles from the resin
Pigments or InksFor coloring the resin (optional)
Additional InclusionsItems like shells, stones, or metal shavings (optional)

Selecting the Right Driftwood

Choosing the right piece of driftwood is crucial for your project. The wood should be free of rot and thoroughly dried. You can find driftwood on beaches, riversides, or lakeshores. If you’re sourcing wood from the wild, make sure to clean it well to get rid of salt, debris, and other residues.

Preparing Driftwood for Resin

Proper preparation of driftwood is vital to ensure a smooth and successful resin application. Follow these steps for the best results:

Cleaning

Start by cleaning the driftwood. Remove any dirt, sand, or organic material using a stiff brush and water. For a thorough clean, you can soak the driftwood in a mixture of water and bleach (about 1:10 ratio) for 24 hours. This will kill any remaining microorganisms and brighten the wood. Rinse it well and let it dry completely.

Drying

Drying the driftwood is a crucial step. Wet wood can cause the resin to cure improperly, leading to cloudy or brittle results. Air dry the wood in a well-ventilated space for several days or use a kiln or oven at a low temperature to speed up the process.

Sanding

Once the driftwood is dry, sand it to smoothen any rough edges and enhance the texture. Use varying grits of sandpaper to achieve a perfect finish. Sand until the wood feels smooth to the touch.

Working with Epoxy Resin

Epoxy resin is what brings the magic to your driftwood creations. Though it may seem intimidating at first, working with resin can be quite enjoyable and rewarding.

Mixing Resin and Hardener

When working with epoxy resin, following the correct mixing ratio is imperative. Usually, the ratio is 1:1 or 2:1 resin to hardener, but always refer to the product instructions. Use measuring cups to ensure accurate proportions. Combine the two parts in a clean, dust-free container and mix thoroughly for at least 3 minutes, scraping the sides and bottom regularly.

Removing Bubbles

Bubbles can be a common issue when working with resin. To minimize them, mix the resin slowly and gently. After pouring the resin, use a heat gun or torch to remove any bubbles that rise to the surface. Move the heat source in a sweeping motion over the resin surface to pop the bubbles without holding it in one spot for too long, which can burn the resin.

Coloring the Resin

If you want to infuse color into your resin, you can use pigments, inks, or powders. Start with a small amount and gradually add more until you achieve the desired shade. Mixing different colors can also create stunning effects.

Driftwood Resin

Creating Driftwood Resin Art

Now comes the fun part—bringing your driftwood resin project to life! Whether you’re making a simple decor piece or an elaborate artwork, follow these guidelines for a successful crafting experience.

Setting Up the Mold

Choose a silicone mold that fits the size and shape of your driftwood. Alternatively, you can create a custom mold using silicone rubber. Ensure the mold is clean and free of dust and debris. Position the driftwood inside the mold, propping it up if needed to achieve the desired look.

Pouring the Resin

Pour the mixed resin slowly into the mold, covering the driftwood and filling any gaps. This gradual pour helps reduce the formation of air pockets. If you have any inclusions like shells or stones, add them now. Use a stick to position and adjust them as needed.

Curing Time

Epoxy resin takes time to cure. This can range from 24 to 72 hours, depending on the resin brand and environmental conditions. Keep the mold in a level, dust-free environment during this period. Cover the mold to protect it from dust and debris.

Demolding and Finishing

After the resin has fully cured, carefully remove the piece from the mold. Trim any excess resin using a sharp utility knife. Sand the edges and surfaces with fine-grit sandpaper to smoothen them. If needed, you can apply a final coat of resin or a polish to enhance the shine.

Common Issues and Troubleshooting

Even with careful planning, you might encounter a few challenges when working with driftwood resin. Here’s how to tackle some common problems:

Cloudy Resin

Cloudy resin usually results from improper mixing or moisture contamination. Ensure your driftwood is completely dry and measure and mix your resin accurately. Using a dehumidifier in your workspace can also help.

Uneven Surface

An uneven surface can occur if the resin settles or cures unevenly. Make sure your mold is placed on a level surface and check it periodically during the curing process. Sand down any uneven areas and apply a thin coat of resin to correct the issue if necessary.

Sticky Resin

Sticky or tacky resin is usually a result of incorrect mixing or curing conditions. Verify that you have used the correct resin-to-hardener ratio and allowed sufficient curing time. If areas remain sticky, you might need to mix and reapply a new layer of resin.

Tips and Tricks for Success

Here are some handy tips to enhance your driftwood resin projects and avoid common pitfalls:

  1. Practice on Small Projects: Start with small pieces to get comfortable with the materials and techniques before tackling larger projects.
  2. Keep it Clean: Ensure your workspace is clean and free from dust. Cover your work with a box or plastic container during curing to protect it.
  3. Consistency Matters: Always measure your resin and hardener accurately and mix them thoroughly to ensure proper curing.
  4. Experiment with Inclusions: Don’t be afraid to incorporate other elements like flowers, stones, or metallic flakes to add an extra dimension to your work.
  5. Safety First: Always work in a well-ventilated area and wear safety gear like gloves, glasses, and a mask to protect yourself from fumes and skin contact.

Applications of Driftwood Resin Art

Driftwood resin can be used to create a variety of items that are both functional and decorative. Here are some popular applications:

Furniture

Combining driftwood and resin can produce stunning furniture pieces like tables, shelves, or benches. The natural forms of driftwood serve as a base, with resin used to create a smooth, durable surface.

Home Decor

Driftwood resin art pieces make beautiful additions to home decor. Imagine a resin-encased driftwood centerpiece, candle holders, or picture frames gracing your living room or hallway.

Jewelry

Small pieces of driftwood encased in resin can be transformed into unique jewelry items like pendants, earrings, or bracelets. These pieces make for perfect handmade gifts.

Wall Art

Large slabs of resin-embedded driftwood can be mounted on walls to create one-of-a-kind artwork. Experiment with colors, inclusion, and arrangements to offer a captivating visual display.

Driftwood Resin Projects Step-By-Step Guide

To give you a more practical understanding, let’s walkthrough a simple driftwood resin project—a driftwood resin coaster. This straightforward project will help you get the hang of the basics.

Materials Needed

  • Small pieces of dried driftwood
  • Epoxy resin kit
  • Silicone coaster mold
  • Measuring cups
  • Mixing sticks
  • Sandpaper
  • Heat gun
  • Protective gear (gloves, mask, goggles)
  • Color pigments (optional)
  • Small inclusions (optional)

Step 1: Prepare the Driftwood

Clean and dry the small pieces of driftwood. Sand any rough edges until they are smooth.

Step 2: Set Up the Mold

Place the driftwood pieces in the silicone coaster mold. Arrange them in a visually pleasing pattern.

Step 3: Mix the Resin

Measure out the resin and hardener according to the manufacturer’s instructions. Mix them thoroughly using a mixing stick, ensuring you scrape the sides and bottom of the container.

Step 4: Add Color (Optional)

If you want colored resin, add a few drops of pigment or ink and mix until you achieve the desired color.

Step 5: Pour the Resin

Pour the mixed resin slowly into the mold, filling it just enough to cover the driftwood. Use the heat gun to remove any bubbles that appear on the surface.

Step 6: Curing

Allow the resin to cure according to the instructions, typically 24-72 hours. Keep the mold in a dust-free environment.

Step 7: Demolding and Finishing

Once the resin is fully cured, carefully remove the coaster from the mold. Sand any rough edges and apply a polish if desired. Your driftwood resin coaster is ready to use!

Conclusion

Driftwood resin is a captivating blend of nature and modernity, offering endless possibilities for creative expression. Whether you’re making small decorative items or large furniture pieces, the allure of driftwood combined with the sleek finish of resin is sure to capture anyone’s attention.

Your journey with driftwood resin starts with understanding the materials, preparing them correctly, and following processes meticulously. With practice and creativity, you can transform ordinary pieces of driftwood into extraordinary works of art. So, gather your materials, set up your workspace, and let your imagination run wild with driftwood resin. Happy crafting!

Filed Under: Driftwood Ideas Tagged With: crafts, DIY, Driftwood, home decor, resin art

Painted Driftwood Gnomes

August 31, 2024 by admin

Have you ever found yourself strolling along a beach, picking up uniquely shaped pieces of driftwood and thinking, “There must be something creative I can do with these”?

Introduction to Painted Driftwood Gnomes

If you’re someone who enjoys crafting, especially with natural materials, then painted driftwood gnomes might be the perfect project for you. Driftwood, with its weathered texture and one-of-a-kind shapes, provides a fantastic canvas for a whimsical gnome. These charming creations can serve as quirky home décor, delightful garden accents, or even thoughtful handmade gifts. In this article, you’ll learn everything you need to know to create your very own painted driftwood gnomes.

What Are Driftwood Gnomes?

Driftwood gnomes are wooden crafts made from pieces of driftwood, artistically decorated to resemble tiny gnomes. The beauty of this craft lies in the uniqueness of each piece of driftwood, making each gnome a one-of-a-kind creation. You can paint them in various colors, add charming little features like beards and hats, and give them personalities that reflect your own creativity.

Materials Needed

Before you dive into creating your driftwood gnomes, it’s essential to gather all the necessary materials. Here’s a handy table to keep track of what you’ll need.

ItemDescription
DriftwoodVarious shapes and sizes, preferably smooth and weathered
Acrylic PaintsA variety of colors to bring your gnomes to life
PaintbrushesDifferent sizes for detailed work on the gnomes
SealantTo protect your painted gnomes from the elements
SandpaperTo smooth any rough edges on the driftwood
PaletteFor mixing your paints
PencilFor sketching designs on the driftwood

Painted Driftwood Gnomes

Finding and Preparing Your Driftwood

Where to Find Driftwood

The best place to find driftwood is along beaches, riverbanks, and lakeshores. Look for pieces that are smooth, lightweight, and free of bugs or other critters. The saltwater and sun will often give driftwood its distinctive weathered look, making it perfect for crafting.

Cleaning and Preparing

Once you’ve collected your driftwood, it’s crucial to clean and prepare it before you start painting. Here’s a step-by-step guide:

  1. Rinse thoroughly: Wash your driftwood pieces with fresh water to remove any salt, sand, or dirt.
  2. Soak: Soak the driftwood in a bleach solution (1 part bleach to 9 parts water) for a few hours. This helps to kill any remaining bacteria or bugs.
  3. Dry: Let the pieces air dry completely, which can take several days depending on the size of the driftwood.
  4. Sand: Use sandpaper to smooth any rough edges and prepare the surface for painting.

Designing Your Gnomes

Planning Your Design

The first step in designing your gnome involves deciding on the overall look and personality you want your gnomes to have. Do you want them to be tall and slender, short and chubby, or somewhere in between? This decision will guide your painting and design process.

Sketching Your Gnome

Using a pencil, lightly sketch your gnome’s features onto the driftwood. Common features for gnomes include a tall pointed hat, a round nose, a flowing beard, and sometimes a little outfit. Don’t worry about being too precise – the rougher, more rustic look can add a lot of charm.

Painted Driftwood Gnomes

Painting Your Gnomes

Choosing Your Paints

Acrylic paints are ideal for this project because they are easy to work with, dry quickly, and adhere well to wood. They also come in a wide variety of colors, allowing you to create a colorful and lively gnome.

Basic Painting Techniques

  • Base Layer: Start by applying a base layer of paint to the largest areas, such as the hat and body. Allow this base layer to dry completely before adding more details.
  • Details: Use smaller brushes to paint finer details like the beard, eyes, and clothing. The more details you add, the more character your gnome will have.
  • Layering: Layering different shades of the same color can add depth and dimension to your gnome’s appearance.

Drying and Sealing

After you’ve finished painting, allow your gnomes to dry completely. Once dry, apply a sealant to protect the paint from chipping and to shield your gnome from weather elements if you plan to place it outside.

Adding Personalized Touches

Accessories and Embellishments

To make your gnomes even more unique, consider adding accessories like tiny buttons, miniature glasses, or little patches of fabric for clothes. You can glue these extras onto the driftwood as finishing touches.

Names and Stories

Giving your gnome a name and a backstory can bring a deeper level of enjoyment to this craft. Perhaps your gnome is a wise old forest guardian, or maybe it’s a mischievous little garden helper. You can even create a family of gnomes, each with their own personalities and roles.

Displaying Your Driftwood Gnomes

Indoor Display Ideas

Driftwood gnomes make excellent indoor decorations. They can be placed on shelves, mantels, or windowsills. They add a rustic, whimsical charm to any room and can be a delightful conversation starter.

Outdoor Display Ideas

Your driftwood gnomes can also find a home in your garden, peeking out from among the flowers or sitting beside a garden path. Ensure they are sealed properly to withstand the weather, and find a cozy spot where they can bring a smile to anyone who passes by.

Troubleshooting Common Problems

Paint Not Adhering

If your paint isn’t sticking to the driftwood, it might be too smooth. Try sanding the surface lightly to give the paint some texture to adhere to.

Rough Edges

If your driftwood has rough or splintery edges, sand them down before you start painting. Not only will this make painting easier, but it will also ensure that your gnomes are safe to handle.

Fading Colors

If you notice that the colors are fading over time, it’s likely due to exposure to sunlight. Make sure you are using a quality sealant with UV protection to help preserve the vibrancy of your paints.

Conclusion

Creating painted driftwood gnomes is not only a fun and relaxing craft, but it’s also a fantastic way to repurpose natural materials and bring a touch of magic into your home or garden. Each gnome you create is a unique piece of art that reflects your creativity and personal style. So next time you find yourself walking along a beach, gather some driftwood and let your imagination run wild. Your future gnomes are just waiting to be discovered!

Filed Under: Driftwood Ideas Tagged With: Art, DIY, Driftwood, Gnomes, Handmade, Painting

Driftwood Quilt

August 29, 2024 by admin

Have you ever wondered how a piece of driftwood can tell a story? How every jagged edge and every smooth curve speaks of its journey against the currents and sands of time? Similar to the tales embedded in driftwood, quilts have stories woven into every stitch. Now, imagine combining both these storytelling mediums into a unique creation: the Driftwood Quilt.

Unveiling the Driftwood Quilt

An extraordinary intersection of texture, history, and craftsmanship, a Driftwood Quilt brings to light the hidden tales of the sea and the sensitive artistry of quilt-making. Unlike traditional quilts, which primarily rely on fabric for their narrative, a Driftwood Quilt integrates actual pieces of driftwood to add depth and intrigue.

What is a Driftwood Quilt?

A Driftwood Quilt is a creative blend of quilting and driftwood art. It merges the warmth of fabric with the rustic beauty of driftwood, creating a stunning piece that captures the spirit of nature and the history that each piece of driftwood embodies. The process involves selecting and preserving driftwood, incorporating it into the quilt’s design, and marrying these elements with classic or contemporary fabric patterns.

The Symbolism of Driftwood

Driftwood symbolizes resilience, endurance, and timelessness. Every piece of driftwood is unique, shaped by the forces of nature over time. When used in quilts, they not only add texture but also impart a sense of continuity and narrative. The driftwood carries within it the strength of the seas, making the quilt not just an art piece but a storyteller in its own right.

The Making of a Driftwood Quilt

Creating a Driftwood Quilt is an immersive process that requires both passion and skill. The journey starts with sourcing the driftwood and then moves on to preservation, quilt design, and finally, the assembly.

Sourcing Driftwood

One of the most enjoyable parts of creating a Driftwood Quilt is sourcing the driftwood itself. Here’s a simple table to help you understand where and how to find the best pieces:

LocationBest Time for CollectionTip
BeachesAfter a stormLook for naturally dried and weathered pieces
River BanksSpringtimeCheck shallow areas for unique shapes
Lake ShoresEarly summerChoose non-deteriorated, solid pieces
Wooded TrailsAnytimePick pieces that have a natural, aged look

Preserving Driftwood

After collecting the driftwood, it is crucial to preserve it properly to ensure it lasts as a permanent fixture in your quilt. Here’s a step-by-step guide:

  1. Cleaning: Start by scrubbing the driftwood with a stiff brush to remove any dirt or debris.
  2. Soaking: Soak the driftwood in a solution of water and white vinegar (1:1 ratio) for 24 hours to get rid of any pests or microorganisms.
  3. Drying: Let the driftwood dry in the sun for a couple of days to prevent mold growth. Make sure the pieces are completely dry before proceeding.
  4. Sealing: Apply a wood sealer or a mixture of white glue and water (3:1 ratio) to preserve the driftwood and prevent it from becoming brittle over time.

Designing Your Driftwood Quilt

The design phase is where creativity meets functionality. You will have to consider the following aspects to design a quilt that seamlessly integrates driftwood:

  1. Theme: Decide on a central theme for your quilt, which can range from maritime adventures to forest landscapes. The theme will guide your choice of fabric colors and driftwood shapes.
  2. Layout: Sketch a rough layout that shows where each piece of driftwood will be placed. This helps in balancing the weight and the visual appeal.
  3. Fabric Selection: Choose fabrics that complement the natural tones of driftwood. Earthy colors usually blend well, but you can also opt for contrasting shades to make the driftwood stand out.

Assembly Techniques

Now that you have your design and materials ready, it’s time to start assembling your Driftwood Quilt. Here’s a detailed walkthrough:

  1. Creating the Quilt Top: Start by cutting your chosen fabrics into squares, triangles, or any other shapes that fit your design. Sew these pieces together to create the quilt top.
  2. Placement of Driftwood: Once your quilt top is ready, lay out the driftwood pieces according to your design. Make sure they are balanced in terms of weight and positioning.
  3. Attaching Driftwood: Use a strong, clear-drying adhesive to attach the driftwood pieces to the quilt. Ensure that the glue is applied evenly to prevent any drips. For added security, you can also sew the driftwood pieces with thick, strong thread, making small holes in the wood where necessary.
  4. Layering and Quilting: Lay the quilt top (with driftwood attached) over the batting and the quilt backing. Quilt through all layers, either by hand or using a sewing machine. Pay special attention to areas around the driftwood pieces to ensure the fabric doesn’t shift.
  5. Binding the Quilt: Finally, add a binding around the edges of the quilt to give it a finished look. This also helps in securing the layers together.

Driftwood Quilt

Care and Maintenance of a Driftwood Quilt

Driftwood Quilts, while incredibly durable, do require some special care to keep them in pristine condition.

Cleaning

Regular cleaning is essential, especially to prevent dust accumulation around the driftwood pieces. Here’s how you should go about it:

  1. Dusting: Use a soft brush or cloth to gently dust off the driftwood and fabric. A small vacuum with a brush attachment can also be useful but ensure it is set to the lowest suction.
  2. Spot Cleaning: For light stains on the fabric, use a damp cloth with mild soap. Avoid scrubbing the driftwood to prevent damage.
  3. Dry Cleaning: If the quilt needs extensive cleaning, it’s best to take it to a professional dry cleaner who has experience handling mixed-material quilts.

Storage

Proper storage is crucial to maintain the quilt’s integrity, particularly the driftwood components.

  1. Cool, Dry Place: Store the quilt in a cool, dry place away from direct sunlight to prevent fading and wood degradation.
  2. Avoid Plastic: Plastic can trap moisture, which can lead to mold. Opt for a breathable fabric storage bag or an acid-free box.
  3. Flat or Rolled Storage: If possible, store the quilt flat to avoid bending the driftwood. If space is an issue, gently roll the quilt with a fabric layer between each roll to prevent friction.

The Artistic and Emotional Appeal of Driftwood Quilts

A Driftwood Quilt is much more than a functional item — it is a work of art that captures the essence of both the quilt-maker and the driftwood.

Unique and Personal

Every Driftwood Quilt is unique, and that uniqueness reflects your personal touch. By carefully selecting each piece of driftwood and integrating it into your design, you infuse a part of yourself into the quilt. This personal touch makes it a perfect keepsake or a heartfelt gift.

Connection to Nature

These quilts establish a profound connection to nature. The driftwood brings a piece of the natural world into your living space, reminding you of its beauty and timelessness. This connection can be particularly soothing and can enhance the ambiance of any room.

Storytelling

The combination of fabric and driftwood creates a rich tapestry of stories. Each piece of driftwood has its narrative, shaped by the forces of nature, while the fabric can represent your life’s experiences, memories, and emotions. Together, they create a compelling story that is unique and deeply meaningful.

Driftwood Quilt

Driftwood Quilts in Modern Decor

Driftwood Quilts have found their place in modern home decor due to their blend of rustic charm and artistic elegance.

Rustic Elegance

The use of driftwood gives the quilt a rustic look, perfect for homes that aim for a warm, cozy, and natural ambiance. Combined with soft fabrics, the quilt introduces an element of elegance that can beautifully complement interior designs, especially those that lean toward farmhouse, coastal, or rustic aesthetics.

Statement Pieces

A Driftwood Quilt can serve as a focal point in any room. Its uniqueness and the story it tells can draw attention and spark interesting conversations. Whether draped over a couch, hung on a wall, or laid out on a bed, it offers a distinct touch that differentiates your space.

Versatility

These quilts are incredibly versatile. They can be used in various rooms and settings, adding texture and warmth. Here’s a table to show some ideas:

RoomUse/Display OptionImpact
Living RoomDraped over a couch or armchairAdds a cozy, inviting feel
BedroomLaid out on the bed or as a decorative throwCreates a nature-inspired, tranquil space
Dining RoomHung on a feature wallActs as a beautiful conversation starter
Home OfficeUsed as a backdrop or wall hangingBrings in a calming, natural element

Final Thoughts

Creating and cherishing a Driftwood Quilt is a deeply fulfilling experience. It’s a project that requires patience, creativity, and a love for storytelling. As you engage in this craft, you don’t merely create a quilt; you weave together elements of nature and personal experiences into a seamless tapestry that tells a tale of its own.

By sourcing and preserving driftwood, designing, and assembling your quilt with care, you can create a unique piece that captures the essence of nature and artistry. Whether it becomes a part of your home decor or a cherished gift, a Driftwood Quilt stands as a testament to your creativity and a celebration of the natural world.

So, take a step into the art of Driftwood Quilts and discover how this unique blend of materials and stories can transform simple pieces into stunning artwork that packs a personal touch and timeless appeal.

Filed Under: Driftwood Ideas Tagged With: DIY, Driftwood, Handmade, home decor, Quilting

Driftwood Gnomes

August 29, 2024 by admin

Have you ever wondered what kind of magic can be found along the shoreline? One of the most delightful discoveries you can stumble upon are driftwood gnomes. These whimsical creations start their journey as simple pieces of driftwood, shaped by the forces of nature until they are transformed into tiny, enchanting beings by imaginative artists.

The Origin of Driftwood Gnomes

Understanding Driftwood

Driftwood begins its life as a tree, perhaps in a forest or on a hillside, before it is swept into a river or the ocean. Over time, the wood is subjected to the elements—water, wind, and sun—which smooth it out and shape it uniquely. What was once a sturdy piece of timber becomes a uniquely formed piece of driftwood, each with its own story.

The Gnome Lore

Gnomes have long been a staple of folklore, believed to be guardians of the natural world. These diminutive figures are often depicted as earth-dwellers residing in harmony with nature. Driftwood gnomes take this traditional concept and blend it with natural materials, giving them an even closer connection to the environment.

Creating Driftwood Gnomes

Gathering Your Materials

To create your own driftwood gnome, you’ll need a few essential items:

ItemPurpose
DriftwoodThe body and primary material for your gnome
Acrylic PaintTo add facial features or embellishments
Glue GunTo attach smaller pieces of wood or accessories
SealantTo protect your creation from the elements

Tools You Might Need

Certain tools can make the creation process easier:

ToolUse
SandpaperFor smoothing out the wood
Small SawTo shape pieces of driftwood
BrushesFor painting details
TweezersHandy for placing small items like beads or eyes

Basic Steps to Craft a Driftwood Gnome

Here’s a simple guide to crafting your driftwood gnome:

  1. Select Your Driftwood: Pick pieces that inspire you. Look for shapes that resemble a face or a small body.
  2. Clean the Driftwood: Ensure your driftwood is free of debris and sand; you can scrub it lightly with a brush and water.
  3. Sand and Shape: Use sandpaper to smooth any rough edges and a small saw to shape it as needed.
  4. Assemble Your Gnome: Use a glue gun to attach smaller pieces of wood, forming limbs or even a little hat.
  5. Paint Details: Add eyes, a nose, or a mouth using acrylic paint. Feel free to use other embellishments like tiny beads or fabric.
  6. Seal Your Creation: Apply a sealant to protect your gnome from moisture and wear.

Driftwood Gnomes

Inspiring Ideas for Driftwood Gnomes

Beachcomber Gnomes

Create gnomes that look like they belong by the sea. Maybe they hold tiny shells or wear miniature sailor hats.

Garden Guardians

Your gnome could be a protector of the garden, perhaps holding a small watering can or surrounded by moss and tiny rocks.

Seasonal and Holiday Themes

Gnomes can be customized for various seasons or holidays. Think of a winter gnome with a snowy hat or a fall gnome holding a miniature pumpkin.

Where to Display Your Driftwood Gnomes

Indoor Decorations

Place your gnomes on shelves, mantels, or as part of a centerpiece. They can add a touch of whimsy to any room.

Garden Art

Driftwood gnomes make enchanting garden decorations. Place them among your plants or near a water feature for a magical touch.

Gifts

Handcrafted gnomes make delightful gifts, showing a personal touch that factory-made items simply can’t replicate.

Driftwood Gnomes

Maintaining and Caring for Driftwood Gnomes

Indoor Care

Dust your gnomes gently with a cloth. If you’ve used a sealant, simply wiping them down occasionally is enough.

Outdoor Care

Outdoor driftwood gnomes should be resealed every couple of years to protect them from the elements. Place them in sheltered spots to extend their lifespan.

Community and Resources for Driftwood Gnomes

Online Communities

Various online platforms and forums are devoted to driftwood art. You can join these communities to share your creations and gather tips.

Workshops and Classes

Look for local workshops or classes focused on driftwood art. These can provide hands-on experience and professional guidance to refine your skills.

Books and Resources

Several books offer detailed guides on driftwood art, some specifically on creating gnomes. They provide step-by-step instructions, tips, and inspiration.

The Joy of Driftwood Gnomes

Therapeutic Benefits

Engaging in this creative process can be incredibly therapeutic. The act of crafting something unique from natural materials can be a relaxing and fulfilling pastime.

Environmental Connection

By using driftwood and other natural materials, you cultivate a deeper connection with the environment. It teaches patience and appreciation for nature’s slow but impactful processes.

Creative Expression

Making driftwood gnomes is a form of art that allows you to express yourself uniquely. Each gnome is a creation unlike any other, reflecting the individuality of the artist.

Final Thoughts

Crafting driftwood gnomes is more than a hobby; it’s a way to breathe life into a piece of wood shaped by the world. Whether you’re a beginner or a seasoned artist, the possibilities are endless, and the joy they bring is boundless.

So, next time you find yourself walking along the beach, keep an eye out for that perfect piece of driftwood. You might just bring home a future gnome, ready to be transformed by your imagination.

Filed Under: Driftwood Ideas Tagged With: Art, DIY, Gnomes, Handmade

Driftwood Quilt Pattern

August 29, 2024 by admin

Have you ever found yourself enchanted by the graceful dance of driftwood along a serene shore? Imagine translating that tranquil beauty into a quilt that tells a story through every stitch and patch. That’s what the Driftwood Quilt Pattern is all about—bringing the organic, imperfect beauty of natural coastlines into the comforting, artistic realm of quilting.

What is the Driftwood Quilt Pattern?

The Driftwood Quilt Pattern is a quilting design that mimics the natural, flowing lines and varied textures of driftwood pieces found along a beach. It’s a pattern that emphasizes simplicity and elegance, focusing on irregular shapes and soft, neutral tones to evoke the essence of nature.

Unlike many rigid, symmetrical quilt patterns, the Driftwood Quilt Pattern embraces a freeform aesthetic. Each piece of fabric can be cut and arranged in slightly different shapes, much like how individual pieces of driftwood each have their own unique form and grain. This leads to a quilt that is both modern and timeless, perfect for those who appreciate nature-inspired décor.

Materials Needed

Before you start with your Driftwood Quilt, you need to gather all the essential materials. Having the right supplies will ensure that your project goes smoothly from start to finish.

Fabric Choices

The choice of fabric is critical in capturing the essence of driftwood. Think about natural textures and colors you see along the beach.

  1. Primary Fabrics: Aim for a palette of soft, neutral colors like beige, light gray, and muted blues.
  2. Accent Fabrics: You can use darker shades of gray, brown, or even subtle sea greens to add depth.
  3. Backing Fabric: Choose a fabric that complements your primary and accent fabrics but isn’t too bold. A solid neutral color often works best.
  4. Binding Fabric: This fabric should frame your quilt beautifully. Again, soft neutral tones are ideal.
TypeSuggested Colors
Primary FabricBeige, Light Gray, Muted Blues
Accent FabricDark Gray, Brown, Sea Green
Backing FabricSolid Neutral Colors
Binding FabricSoft Neutral Colors

Tools and Supplies

Here’s a checklist of basic quilting tools you’ll need.

  1. Rotary Cutter and Mat: For precise cutting of fabric.
  2. Iron and Ironing Board: To press seams and fabrics.
  3. Sewing Machine: Any sewing machine capable of quilting will work.
  4. Cutting Ruler: Essential for cutting straight lines.
  5. Pins and Needles: To hold pieces together while sewing.
  6. Thread: Choose a color that blends well with your fabric selection.
  7. Batting: To give your quilt its warmth and thickness.
  8. Quilting Gloves: Optional but helpful for controlling your fabric.

Driftwood Quilt Pattern

Preparing Your Fabric

Before you begin cutting into your fabric, you’ll need to prepare it properly. This step is crucial to ensure your quilt pieces are true to size and remain durable through multiple washes.

Washing and Ironing

Start by washing all your fabrics. This pre-washing step removes any chemicals and prevents the fabric from shrinking later. After washing, iron your fabrics to remove wrinkles and make cutting easier.

Starching and Cutting

Once ironed, some quilters prefer to starch their fabrics lightly. Starching can help keep your fabric pieces crisp, which is especially useful for intricate cutting.

  1. Lay your fabric flat on your cutting mat.
  2. Use your rotary cutter and cutting ruler to cut the fabric into strips or pieces as needed by your pattern.
  3. Take your time and ensure your cuts are straight and accurate.

Designing Your Quilt Layout

The creative part of quilting is in the design. With the Driftwood Quilt Pattern, you have a lot of freedom to innovate while keeping the natural driftwood theme.

Layout Variations

One of the beauties of this pattern is its flexibility. You can stick to a traditional, repetitive block layout or go for something more freeform and abstract.

Here are a few ideas:

  1. Repetitive Blocks: Cut your fabric into uniform blocks and arrange them in a consistent pattern.
  2. Offset Blocks: Place blocks in a staggered arrangement to create visual interest.
  3. Freeform Pieces: Go completely abstract by cutting your fabric into various shapes and sizes, then arranging them to mimic the natural placement of driftwood pieces.

Arranging Colors and Textures

To capture the essence of driftwood, consider the visual balance of your different fabrics. Alternate between lighter and darker tones, and mix in textured fabrics with smoother ones for a tactile experience.

Mock Layout

Before you start sewing, lay out your pieces on a flat surface and arrange them according to your plan. This mock layout will give you a sense of how your finished quilt will look and allow you to make adjustments as needed.

Driftwood Quilt Pattern

Sewing Your Quilt Top

With your layout finalized, it’s time to sew the quilt top. This part requires patience and precision but is extremely rewarding.

Piecing the Quilt

  1. Piece by Piece: Start by sewing smaller sections together. Use a ¼-inch seam allowance as standard.
  2. Pressing Seams: After sewing each seam, press it open or to the side with your iron. This keeps your quilt top flat and easy to work with.
  3. Joining Sections: Once you have several smaller sections sewn together, join these to create larger sections until your quilt top is complete.

Checking Accuracy

Periodically measure your quilt top to ensure that your pieces are aligning correctly and that your quilt is the intended dimensions. Minor adjustments can often be made by adjusting seam allowances.

Quilting the Layers Together

Now that your quilt top is ready, you need to sandwich it with batting and backing fabric. This step is essential for giving your quilt its final form and texture.

Assembling the Quilt Sandwich

  1. Layering: Lay your backing fabric flat on a clean surface, then place the batting on top. Finally, position your quilt top face-up on the batting.
  2. Smoothing Out: Carefully smooth out all layers to remove wrinkles and ensure everything is lying flat.

Basting the Quilt

To keep all the layers together while you quilt, you’ll need to baste them. You can use pins or basting spray to hold the layers in place.

  1. Pin Basting: Pin through all layers with quilting pins, spacing them every few inches.
  2. Spray Basting: Spray a light adhesive across the backing fabric, then carefully lay the batting and quilt top over it, smoothing as you go.

Quilting Techniques

You have several options for quilting the layers together. Consider your skill level and the look you want to achieve.

  1. Straight-Line Quilting: Simple and elegant, this method involves sewing straight lines across your quilt.
  2. Free-Motion Quilting: More advanced, this technique allows for more creative, curvy designs.
  3. Hand Quilting: A traditional method that adds a personal, handmade touch.

Binding the Quilt

The final step in the quilting process is to bind the edges. Binding not only secures the quilt’s layers but also gives it a finished look.

  1. Cutting Binding Strips: Cut your binding fabric into strips, typically 2.5 inches wide.
  2. Attaching the Binding: Sew the binding strips to the outer edges of your quilt, folding them over the edge and stitching them down to cover the raw edge.

Caring for Your Driftwood Quilt

Now that you’ve poured your heart and soul into creating your Driftwood Quilt, you’ll want to take good care of it. Proper maintenance will ensure that your quilt remains beautiful for years to come.

Washing

When washing your quilt, it’s best to use a gentle, cold-water cycle. This helps prevent fabrics from fading and keeps the stitching intact. If possible, use a mild detergent formulated for delicate fabrics.

Drying

Air drying is the safest method for preserving your quilt. Lay it flat on a clean, dry surface away from direct sunlight. If you use a dryer, select the lowest heat setting to avoid shrinkage and damage.

Storing

Store your quilt in a cool, dry place, preferably away from light and moisture. Avoid plastic containers, as they can trap humidity. Instead, opt for a breathable fabric bag or a cotton sheet.

Bringing Driftwood Quilt Pattern into Your Home

The Driftwood Quilt Pattern isn’t just about creating a beautiful quilt; it’s about infusing your home with a sense of calm and natural beauty.

Home Décor Ideas

  1. Living Room: Drape your quilt over a sofa or chaise lounge to add a cozy, inviting touch.
  2. Bedroom: Use the quilt as a bedspread or folded neatly at the foot of the bed for an added layer of comfort.
  3. Wall Art: Consider hanging your quilt as a unique piece of textile art.

Gifting Your Quilt

A handmade Driftwood Quilt makes an incredibly thoughtful gift. Whether for a wedding, birthday, or housewarming, it’s a meaningful present that carries your love and craftsmanship.

Selling Your Quilts

If you’re a skilled quilter, consider selling your Driftwood Quilts. There’s a market for handmade, natural-inspired home goods, and your quilts could bring warmth and joy to others while providing you with a profitable outlet for your creativity.

Tips and Resources for Quilting Success

Embarking on the Driftwood Quilt Pattern can be deeply satisfying, but like any craft, it comes with its challenges. Here are some additional tips and resources to help you along the way.

Quilting Tips

  1. Take Your Time: Quilting is a marathon, not a sprint. Slow and steady stitching will yield a more precise and durable quilt.
  2. Stay Organized: Keep your fabric pieces, tools, and pattern instructions well-organized to avoid confusion.
  3. Practice Makes Perfect: If you’re new to quilting, spend time practicing your stitches and techniques on scrap fabric.

Learning Resources

  1. Books and Magazines: There are many excellent quilting books and magazines that provide patterns, tips, and inspiration.
  2. Online Tutorials: Websites like YouTube, Craftsy, and numerous quilting blogs offer free tutorials and courses.
  3. Local Quilting Groups: Connect with other quilters in your area for shared learning and camaraderie.

Conclusion

The Driftwood Quilt Pattern offers a perfect blend of nature-inspired beauty and creative freedom. It allows you to craft something uniquely your own, while also embracing the serene, timeless qualities of driftwood. From the planning stages to the final stitch, this pattern provides a rewarding experience that results in a stunning and functional piece of art.

Take the time to gather your materials thoughtfully, design your layout creatively, and enjoy the process of sewing and quilting your layers together. Whether you keep your Driftwood Quilt in your home or give it as a gift, it’s sure to bring warmth and tranquility wherever it goes. Happy quilting!

Filed Under: Driftwood Ideas Tagged With: DIY, driftwood quilt, quilt pattern, sewing

Driftwood Plant Stand

August 27, 2024 by admin

Have you ever wondered how to bring a touch of nature into your home while showcasing your favorite plants in a unique way?

Driftwood Plant Stand

What is a Driftwood Plant Stand?

A driftwood plant stand is exactly what it sounds like—a plant stand crafted from pieces of driftwood. Driftwood, being weathered and worn down by the elements, gives a distinctive, rustic look that’s perfect for adding an organic feel to your decor. It’s an eco-friendly way to bring a piece of the beach into your living area.

Why Driftwood?

Driftwood is naturally beautiful due to its weathered and rustic appearance. Each piece is unique, having been shaped by water, wind, and time. Utilizing driftwood in your home decor not only looks appealing but also promotes a sustainable lifestyle by reusing natural materials.

Benefits of Using Driftwood for Plant Stands

  • Aesthetic Appeal: The timeless, natural look of driftwood adds instant character to any room.
  • Eco-Friendly: Reusing driftwood is a sustainable choice that minimizes waste.
  • Unique Design: No two pieces of driftwood are alike, ensuring your plant stand is truly one-of-a-kind.

How to Choose the Right Driftwood

Size and Shape

When selecting driftwood for your plant stand, consider the size and shape that will best fit your space and the types of plants you want to display. Larger pieces can serve as the base, while smaller branches can be added for support.

Condition

Make sure the driftwood is dry and free of pests. You can clean driftwood by soaking it in fresh water to remove salt and debris, then allowing it to dry completely in the sun.

Color and Texture

Different types of wood will offer various colors and textures. Some might be smooth and bleached by the sun, while others might be darker and more textured. Choose pieces that complement your existing decor.

Materials You’ll Need

Before diving into the construction, gather all the materials you will need for your driftwood plant stand:

MaterialPurpose
Driftwood PiecesMain structure; base and support per specified design
Screws/NailsFastening the driftwood pieces together
Drill/ScrewdriverCreating holes for screws/nails
SandpaperSmoothing rough edges and surfaces
Varnish/Paint (optional)Finishing touch to preserve and enhance the wood
LevelEnsuring stand is stable and even
Measuring TapeAccurate measurements for fitting pieces together

Steps to Create Your Driftwood Plant Stand

Step 1: Plan Your Design

Sketch out a rough design of your driftwood plant stand. Decide on the height, width, and layout. This will guide you in selecting and cutting your driftwood.

Step 2: Prepare the Driftwood

  • Clean: Soak the driftwood in fresh water for 24-48 hours if needed.
  • Dry: Allow it to dry completely to avoid warping or mold.
  • Sand: Use sandpaper to smooth any rough edges while preserving the natural texture of the wood.

Step 3: Assemble the Base

  • Lay out the driftwood pieces you plan to use for the base.
  • Use a level to ensure stability.
  • Drill pilot holes and use screws/nails to secure the pieces together.

Step 4: Construct the Supportive Frame

  • Add vertical support pieces to the base.
  • Secure these with screws/nails.
  • Add cross-supports as needed for additional stability.

Step 5: Final Adjustments

  • Ensure all parts are tightly secured.
  • Check stability with a level.
  • Sand any remaining rough spots.

Step 6: Finishing Touches

  • Apply varnish or paint if desired to protect the wood and enhance its appearance.
  • Allow it to dry thoroughly before placing any plants on it.

Driftwood Plant Stand

Caring for Your Driftwood Plant Stand

Regular Cleaning

To maintain your driftwood plant stand, regularly dust it with a soft cloth. If spills occur, wipe them up immediately to prevent stains.

Avoid Excessive Moisture

Since driftwood is porous, avoid placing it in areas with excessive humidity to prevent mold growth.

Periodic Inspection

Check the stand periodically for any loose screws or nails. Tighten them as needed to ensure stability.

Creative Ideas for Styling Your Driftwood Plant Stand

Indoor Garden

Transform your living room or hallway into an indoor garden by displaying a variety of plants on your driftwood plant stand. Mix and match different species for a lush, vibrant look.

Seasonal Decor

Integrate seasonal elements like pumpkins in fall or ornaments during winter to make your plant stand festive.

Art Display

Use the stand to showcase smaller pieces of driftwood art or other natural artifacts alongside your plants.

Frequently Asked Questions

Can I Use Driftwood Found on the Beach?

Yes, but make sure to clean and dry it thoroughly to remove any salt, sand, or pests.

Is Driftwood Durable?

While driftwood is naturally strong, it’s essential to select well-aged pieces and use proper sealing like varnish or paint to increase its longevity.

How Do I Know if Driftwood is Stable Enough?

Use a level to check stability while assembling, and ensure all pieces are securely fastened.

Conclusion

Creating a driftwood plant stand is a fulfilling DIY project that merges creativity, nature, and sustainability. With each piece of driftwood telling its own story, you’ll not only have a functional piece but also a unique work of art. Whether you are an experienced DIY enthusiast or a beginner, this guide aims to assist you in crafting a driftwood plant stand that enhances your living space beautifully. So, get started and let your imagination flow!

Filed Under: Driftwood Ideas Tagged With: DIY, Driftwood, home decoration, natural materials, Plant Stand

Driftwood Painting

August 26, 2024 by admin

Have you ever walked along the beach, admiring the driftwood scattered along the shore, and wondered what you could create from such naturally beautiful pieces? Driftwood painting is a delightful and unique way to turn nature’s debris into stunning art. This guide will walk you through everything you need to know to start your driftwood painting journey, from finding the perfect piece of wood to the finishing touches that will make your artwork shine.

What is Driftwood Painting?

Driftwood painting is the art of transforming weathered wood washed ashore into visual masterpieces. The combination of natural textures and your creative flair can result in astonishing artwork that draws on the beauty and ruggedness of the seaside. This art form encapsulates a fusion of natural beauty and human creativity.

The Appeal of Driftwood

Driftwood carries a unique charm due to its journey through water and its exposure to the elements. Each piece has its own story, reflected in its shapes, textures, and worn surfaces. The artistic potential is vast, and each piece of driftwood offers a blank canvas for your creativity.

Why Choose Driftwood Painting?

Driftwood painting is not just about creating art; it’s about the process of transformation and the enjoyment of seeing something beautiful arise from what was once considered waste. It’s an eco-friendly way of creating art that resonates with the natural world and offers a sense of peace and accomplishment.

Gathering Your Materials

Before you begin painting, you need to gather your materials. Here’s what you will need for a basic driftwood painting project:

MaterialPurpose
DriftwoodThe canvas for your artwork
SandpaperSmoothing the wood surface
Acrylic PaintAdding color and design to your driftwood
Paint BrushesVarious sizes for different details
Sealing VarnishProtecting your painted driftwood
PaletteMixing and holding your paint
Water and ClothCleaning brushes and wiping off excess paint
Sketch PencilsOutlining your design before painting
Protective GearEnsuring safety during sanding and painting

Finding the Right Driftwood

The most critical part of your preparation is finding the right piece of driftwood. Aim for pieces that are naturally worn, free of excessive rot, and of a size manageable for your project. Beaches, riverbanks, and lakesides are terrific places to find driftwood.

Driftwood Painting

Preparing Your Driftwood

Preparation is key to ensuring your driftwood is ready for painting. This involves cleaning, drying, and sanding the wood.

Cleaning the Driftwood

First, you should clean your driftwood to remove any sand, dirt, or salt. Soak the driftwood in a mixture of water and a mild detergent for a couple of hours. You can use a soft brush to scrub off any remaining debris. After cleaning, rinse the driftwood thoroughly with clean water.

Drying the Driftwood

Drying your driftwood is equally important. Allow the driftwood to air dry completely, which can take a few days to a couple of weeks depending on the humidity and the size of the wood. Place it in a well-ventilated, dry area during this period.

Sanding the Driftwood

Once dry, sand the driftwood to smooth out any rough spots and prepare the surface for painting. Use a fine-grit sandpaper and be gentle to maintain the character of the wood. Wipe the driftwood with a damp cloth to remove any dust after sanding.

Creating Your Design

Now that your driftwood is prepped, it’s time to plan your design. Think about the natural shapes and contours of the wood and how they can inspire your artwork.

Sketching Your Design

Use a light pencil to sketch your design onto the driftwood. Whether you are painting a landscape, abstract shapes, or intricate patterns, having a rough outline will help guide your painting process.

Choosing Your Color Palette

Selecting the right colors is crucial. Consider the natural tones of the driftwood and choose colors that will complement or contrast effectively. Acrylic paints are commonly used for driftwood painting as they adhere well to wood and are available in a variety of vibrant colors.

Driftwood Painting

Painting Your Driftwood

With your design sketched out and your colors selected, you can start painting your driftwood.

Base Coats and Backgrounds

Begin with base coats and backgrounds. Paint larger areas and allow them to dry before adding more detailed work. This stage sets the foundation for the subsequent layers of paint and helps cover the natural color of the driftwood if needed.

Adding Details

Once the base layers are dry, start adding details. Use smaller brushes for intricate patterns and details. Take your time with this step to ensure that your design is meticulously applied.

Layering Techniques

Layering is essential for creating depth and dimension in your painting. Allow each layer of paint to dry before adding another to prevent colors from blending unintentionally. Experiment with different techniques such as dry brushing and glazing to add texture and interest.

Sealing and Finishing Touches

After completing your painting, the final step is to seal and protect your artwork.

Sealing Your Artwork

Sealing your painted driftwood is crucial for durability, especially if it will be displayed outdoors. Apply a clear sealing varnish or polyurethane finish to protect the paint. These products come in matte, satin, and glossy finishes, so choose one that suits your desired look.

Attaching Hardware

If you plan to hang your driftwood painting, attach appropriate hardware to the back. Screws or D-rings work well for larger pieces, while smaller driftwood can be fitted with picture hangers or wire.

Final Inspection

Before declaring your work complete, inspect it for any touch-ups that may be needed. Check for any missed spots or areas that might need an extra coat of sealer.

Displaying Your Driftwood Art

Where you display your driftwood painting can enhance its beauty even more. Consider various locations and methods to show off your artwork.

Indoor Display

Indoor displays allow you to control the environment around your artwork. Hang your piece in a well-lit area to make the colors pop. Mantels, walls, and shelves provide excellent display options.

Outdoor Display

If you prefer to display your driftwood outside, ensure it is in a sheltered area to minimize exposure to harsh weather. The sealant will protect it, but additional care, such as periodic re-sealing, may extend its longevity.

Combining Pieces

Consider creating a series of driftwood paintings that can be displayed together. This can create a cohesive and dramatic visual impact.

Tips and Tricks for Driftwood Painting

Here are some valuable tips and tricks to help you on your driftwood painting journey:

Experiment with Techniques

Don’t be afraid to try new painting techniques. Experimenting can lead to the discovery of unique styles and effects that might work perfectly for your driftwood.

Incorporate Natural Features

Use the natural features of the driftwood in your design. The grain, knots, and texture can all contribute to the final appearance of your artwork.

Practice Patience

Patience is vital in driftwood painting. Allowing your layers to dry fully and spending extra time on details can make a significant difference in the final product.

Keep Learning

Stay curious and keep learning. There are always new styles, techniques, and ideas to explore. Joining an art group or following online tutorials can provide fresh inspiration.

Challenges You May Encounter

Every artistic endeavor has its challenges. Here are some common issues you might face and how to tackle them:

Uneven Surfaces

Driftwood often has uneven surfaces that can make painting challenging. Use fine brushes to navigate these areas or incorporate them into your design.

Paint Adherence

Sometimes paint may not adhere well to driftwood. Ensuring proper cleaning and sanding will help, but you can also use a primer to improve adhesion.

Weathering and Fade

If exposed to the elements, your driftwood painting may weather and fade over time. Regular maintenance and re-sealing can mitigate this issue.

Conclusion

Driftwood painting is a rewarding and eco-friendly art form that allows you to connect with nature while expressing your creativity. From gathering materials to finishing touches, each step in the process offers an opportunity to learn and grow as an artist. Embrace the journey and enjoy the beautiful transformations that driftwood painting can bring to your artistic repertoire.

Filed Under: Driftwood Ideas Tagged With: crafts, DIY, Driftwood, home decor, Nature Art, Painting

  • « Previous Page
  • Page 1
  • …
  • Page 21
  • Page 22
  • Page 23
  • Page 24
  • Page 25
  • …
  • Page 41
  • Next Page »

Primary Sidebar

Driftwood4us.com, is a participant in the Amazon Services LLC Associates Program, an affiliate advertising program designed to provide a means for sites to earn advertising fees by advertising and linking to amazon.com.