• Skip to main content
  • Skip to primary sidebar
  • Terms and Conditions
  • Privacy Policy
  • Contact

Driftwood 4 Us

Just About Driftwood

DIY

How To Get A Driftwood Finish

July 19, 2024 by admin

Welcome to your guide on how to achieve that perfectly weathered, driftwood finish for your furniture and decor. In this article, you’ll discover the easy steps and necessary materials to transform any piece of wood into a stunning centerpiece with a rustic touch. Whether you’re a seasoned DIY enthusiast or just looking to try your hand at a new project, you’ll love how simple and satisfying it can be to create a look that brings a slice of seaside charm into your home. Have you ever looked at a piece of driftwood and wondered how you could bring that gorgeous, weathered look to your home decor? Achieving a driftwood finish on your furniture and DIY projects can bring a touch of coastal charm and rustic elegance to your space. It’s like bringing a piece of the beach into your own home.

In this guide, we’ll walk you through the steps to achieve that beautiful, aged driftwood finish using simple tools and materials. It’s easier than you might think, and fun too!

How To Get A Driftwood Finish

Understanding the Driftwood Finish

What is a Driftwood Finish?

A driftwood finish mimics the look of aged wood that has been naturally weathered by water and sunlight. It typically features a mix of gray, brown, and white tones, giving it a soft, antiqued look that works perfectly in shabby chic, coastal, or rustic decor.

Why Choose a Driftwood Finish?

Besides its aesthetic appeal, a driftwood finish is quite practical. It can enhance old furniture, giving it new life, and it’s versatile enough to complement a variety of interior design styles. Plus, it’s a great way to add character to your home without breaking the bank.

The Basics

Before jumping into the process, it’s useful to understand the basic steps. Here’s a quick overview to give you an idea of what to expect:

StepDescription
Step 1Gather all necessary materials and tools.
Step 2Sand the wood surface to prepare it for staining or painting.
Step 3Apply a wood conditioner if necessary.
Step 4Use a weathering mix to create a grayish tone.
Step 5Apply a driftwood stain or paint, and layer with different colors if desired.
Step 6Seal the finish with a topcoat for durability.

Step-by-Step Process to Achieve a Driftwood Finish

Step 1: Gather Your Materials and Tools

Here’s a comprehensive list of what you’ll need:

MaterialsTools
Sandpaper (80 to 220 grit)Sanding block or electric sander
Wood conditionerPaintbrushes
Driftwood stain or paintRags
Gray and white acrylic paintPlastic or disposable containers
WaterMixing sticks
Clear protective finish (optional)Gloves
White vinegarStir sticks
Steel woolDrop cloth

Having all your materials and tools ready before you start will make the process smoother and more enjoyable.

Step 2: Prepare the Wood Surface

Start by sanding your wood piece to remove any existing finish, smooth out rough spots, and open up the wood grain. This ensures that the stain or paint adheres properly. Use 80 grit sandpaper to remove heavy finishes, followed by finer grits (up to 220) to smooth the surface.

Make sure to clean up any dust residues with a damp cloth or tack cloth. A clean surface is key to achieving a beautiful finish.

Step 3: Apply Wood Conditioner (if necessary)

Applying a wood conditioner is optional but highly recommended, especially if you’re working with soft woods like pine. Wood conditioner helps to even out the absorption of stain, preventing blotchy and uneven color. Follow the manufacturer’s instructions on the conditioner bottle for the best results.

Step 4: Create a Weathering Mixture

Here’s where the magic begins! Create a weathering mixture using white vinegar and steel wool. Fill a container with vinegar, add a piece of steel wool, and let it sit for about 24 hours. The steel wool dissolves, creating a liquid that will react with the tannins in the wood, giving it a gray, weathered look.

Strain the mixture through a fine mesh or cheesecloth to remove any steel wool particles before application.

Step 5: Apply the Weathering Mixture

Using a paintbrush or rag, apply the vinegar and steel wool mixture to the wood surface. You’ll see the wood start to change color within a few minutes. Let it dry completely to fully reveal the weathered look. The color will continue to age and set over the next 24 hours.

Step 6: Apply Driftwood Stain or Paint

Once your wood is dry, it’s time to add depth and dimension with multiple layers of stain or paint.

Staining Method:

  1. Select Your Stain: Choose a driftwood or weathered gray stain.
  2. Apply the Stain: Using a brush or rag, apply the stain in the direction of the wood grain.
  3. Wipe Off Excess: After 5-10 minutes, wipe off any excess stain with a clean rag.
  4. Dry: Let it dry completely before deciding if you need a second coat.

Painting Method:

  1. Base Coat: Apply a base coat of light gray paint and let it dry.
  2. Dry Brush Technique: Dip a brush into white or darker gray paint, then remove most of it on a rag or paper towel. Lightly brush the surface, letting the base coat show through.
  3. Layering: Repeat with as many colors as desired to achieve the depth you want.

Step 7: Seal the Finish

Once you’re satisfied with the look, protect your work with a clear topcoat. Options include matte or satin polyurethane, clear wax, or a water-based polycrylic. Apply the sealer following the manufacturer’s instructions.

Tips and Tricks for the Best Results

Here are some expert tips to help you achieve the perfect driftwood finish:

  • Test First: Always test your stain or paint on a scrap piece of wood or an inconspicuous area before applying it to your entire piece.
  • Layer Colors: Don’t be afraid to layer multiple colors. This adds depth and authenticity to the finish.
  • Proper Ventilation: Work in a well-ventilated area, especially when using chemicals like vinegar and stains.
  • Gloves: Wear gloves to protect your hands from staining.

Common Mistakes and How to Avoid Them

  1. Skipping Sanding: Avoid skipping the sanding step—it ensures that your finish adheres properly.
  2. Not Letting Layers Dry Completely: Be patient. Let each layer of stain or paint dry completely before adding another.
  3. Over-staining or Over-painting: It’s easy to go overboard. Always start with less and build up as needed.

How To Get A Driftwood Finish

Projects Ideas to Try Driftwood Finish

Now that you know how to achieve a driftwood finish, here are some project ideas to get you started:

  • Furniture: Tables, chairs, or headboards.
  • Decor: Picture frames, mirror frames, or shelves.
  • DIY Creations: Wooden crates, tissue boxes, or plant stands.

Conclusion

Creating a driftwood finish is a rewarding and enjoyable process that lets you bring a touch of the coast into your home. With some basic materials and a little elbow grease, you can transform everyday items into beautiful, rustic pieces. Remember, practice makes perfect, and don’t be afraid to experiment. Enjoy bringing a piece of the beach into your home!

If you have any questions or need further assistance, feel free to reach out. Happy crafting!
Filed Under: Driftwood Ideas Tagged With: DIY, Driftwood Finish, furniture, Home Improvement, Woodworking

Driftwood Coffee Table

July 19, 2024 by admin

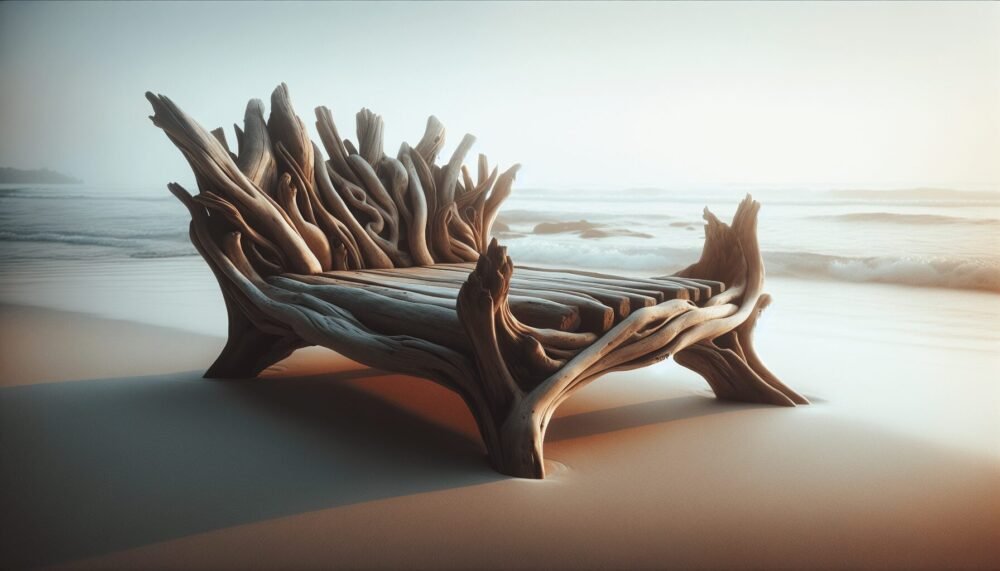
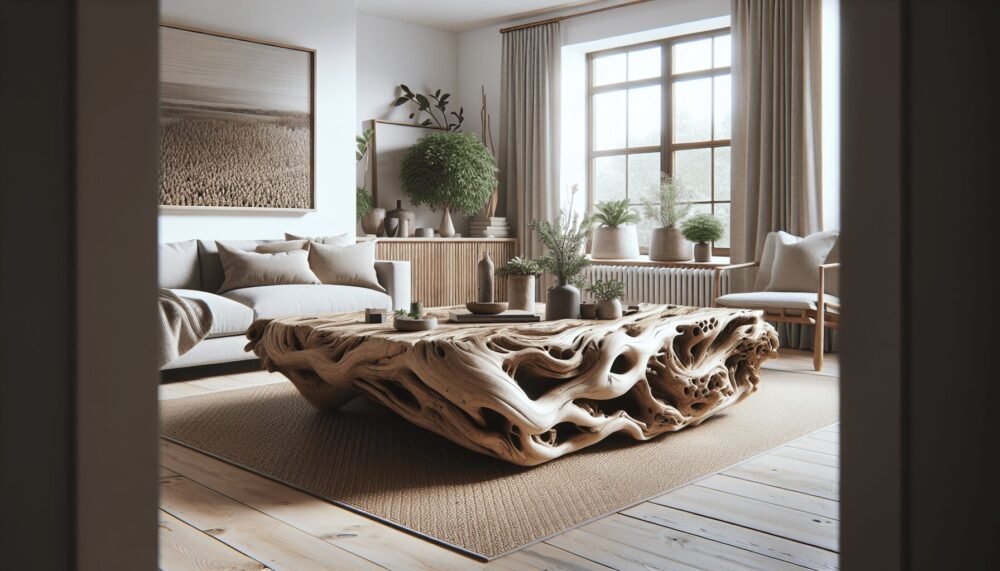
Discover the charm and uniqueness of coastal décor with the Driftwood Coffee Table, a beautiful centerpiece that infuses your living space with natural elegance. You’ll find that each table is a one-of-a-kind masterpiece, crafted from carefully selected pieces of driftwood, providing a touch of seaside serenity to your home. Whether you’re aiming to create a rustic retreat or a modern aesthetic with a twist, this coffee table effortlessly brings warmth and character to your gathering area, making it the ideal spot for your morning coffee or evening conversations. Have you ever found yourself enchanted by the rustic charm of driftwood? If so, you’re not alone. Driftwood has a unique beauty that brings a little piece of the ocean into your home, making it a popular choice for furniture and home decor. One of the most beloved pieces you can create or purchase is none other than the driftwood coffee table.

Driftwood Coffee Table

What is Driftwood?

Driftwood is wood that has been washed onto shore by the sea, river, or lake. It’s often weathered and smoothed by the elements, giving it a natural, rustic appeal that is hard to replicate with other materials. This weathered look is what makes driftwood ideal for creating unique and attractive furniture pieces like coffee tables.

Driftwood not only offers stunning aesthetics but also tells a story of nature’s journey. Each piece is one-of-a-kind, shaped by wind, water, and time, making your driftwood coffee table truly unique.

Why Choose Driftwood for Your Coffee Table?

Choosing driftwood for your coffee table comes with several benefits:

  • Sustainability: Driftwood is an eco-friendly choice because it repurposes natural materials that would otherwise go to waste.
  • Aesthetic Appeal: Driftwood’s natural, rustic look adds character and charm to any living space.
  • Versatility: Driftwood fits well with various decor styles, including coastal, rustic, bohemian, and even modern settings.

Designing Your Driftwood Coffee Table

Designing a driftwood coffee table involves several exciting yet thoughtful steps. The beauty of working with driftwood is that it allows you to embrace imperfections and uniqueness. Let’s break down the process to make it easy and enjoyable.

Selecting the Driftwood

The first step in designing your driftwood coffee table is selecting the wood. Here are some tips to guide you:

  • Size and Shape: Look for pieces that are large and flat enough to serve as a tabletop or a base.
  • Condition: Choose driftwood that is not rotting or overly fragile. You want it strong enough to handle regular use.
  • Aesthetic: Consider the color and texture of the wood. The more character, the better!

Preparing the Driftwood

Once you’ve selected your driftwood, preparation is key. Here’s what you need to do to get it ready for crafting:

  1. Clean the Wood: Remove dirt, sand, and any tiny creatures that might be hiding in the crevices. Soak the wood in fresh water for several days, changing the water daily. After soaking, scrub it with a stiff brush.
  2. Dry the Wood: Allow the wood to dry completely. Depending on the size, this could take a few days to a couple of weeks. Drying it ensures that the wood doesn’t warp or crack later on.
  3. Sand the Wood: Sand the surface to remove rough edges and splinters, but be careful to retain its natural texture and beauty.

Table Base and Top

A driftwood coffee table can come in many forms. You might use a single large piece of driftwood as a base or several pieces assembled together. Your tabletop could be made of glass, wood, or even the driftwood itself.

Base Options

Here are a few ideas for creating the base of your driftwood coffee table:

Base TypeDescriptionLook & Feel
Single PieceUse one sturdy piece of driftwood as a base.Simple, natural appeal. Emphasizes the beauty of the single piece.
Assembled PiecesCombine various pieces to form a unique shape.Creative and artistic. Allows for more customization.
Frame SupportAttach driftwood to a wooden or metal frame.Provides stability and a mix of materials for added interest.

Tabletop Choices

When it comes to the tabletop, you have several options as well:

Tabletop MaterialDescriptionLook & Feel
GlassTransparent top that showcases the base.Modern, elegant, allows full view of the driftwood.
Wooden PlanksUse reclaimed or treated wood planks.Adds a rustic, cohesive feel.
Driftwood TopUse a flat piece of driftwood or assemble pieces.Consistent natural look, more rustic and raw.

Assembling Your Table

Once you’ve prepared your materials, it’s time to assemble your driftwood coffee table. Here’s a basic outline of the steps involved:

  1. Attach the Base: Whether you’re using a single piece or multiple pieces, secure them together using screws, bolts, or strong adhesive suitable for wood.
  2. Secure the Tabletop: If you’re using glass, place rubber pads or cushions between the base and the tabletop to protect both materials. For wood, screw or bolt the tabletop securely to the base.
  3. Finishing Touches: Sand any rough edges, apply a sealant to protect the wood, and ensure everything is firmly in place.

Maintaining Your Driftwood Coffee Table

A driftwood coffee table is relatively low maintenance, but it does require some care to keep it looking its best. Here are a few tips:

  • Cleaning: Wipe down the table regularly with a damp cloth to remove dust and dirt. Avoid using harsh chemicals that can damage the wood.
  • Sealant: Reapply a wood sealant every few years to keep the wood protected from moisture and wear.
  • Avoid Direct Sunlight: Prolonged exposure to direct sunlight can cause the wood to dry out and fade, so try to position your table out of direct sunlight.

Pros and Cons of Driftwood Coffee Tables

Considering a driftwood coffee table means weighing its advantages and potential drawbacks. Here’s a quick look to help you make the best decision:

Pros

  • Unique Aesthetic: Each piece of driftwood is one-of-a-kind, ensuring your table is truly unique.
  • Environmentally Friendly: Using driftwood repurposes natural materials, making it an eco-conscious choice.
  • Versatile Design: Driftwood coffee tables can blend with various home decor styles, from coastal to rustic to modern.
  • Conversation Starter: Its natural beauty and unique story make it a great topic during gatherings.

Cons

  • Durability: Depending on the condition of the driftwood, the coffee table may be more fragile compared to conventional materials.
  • Maintenance: Driftwood requires regular maintenance to keep it in good shape, such as reapplying sealant.
  • Limited Availability: Finding the perfect piece of driftwood can be time-consuming and may require visits to various locations or specialty stores.

Driftwood Coffee Table

Integrating Driftwood Coffee Table into Your Home Decor

A driftwood coffee table can seamlessly fit into various styles of home decor. Here’s how you can integrate it into different settings:

Coastal Style

If you love the beach, a driftwood coffee table can amplify the coastal vibes in your home. Pair it with sea blue cushions, white walls, and rope accents for a complete seaside retreat feel.

Rustic Style

For a rustic farmhouse look, combine your driftwood coffee table with other wooden furniture and earthy tones. Add cozy throws and vintage decor pieces to enhance the rustic charm.

Modern Style

You can also incorporate a driftwood coffee table into a modern setting. Choose a glass tabletop and sleek, minimalist furnishings to create a balanced look that highlights the driftwood without overpowering the room.

Bohemian Style

Bohemian decor is all about eclectic mixes and natural materials. A driftwood coffee table fits perfectly with colorful cushions, patterned rugs, and an array of plants. It adds an earthy, grounded touch to the bohemian chaos.

DIY Driftwood Coffee Table Projects

Feeling inspired to create your own driftwood coffee table? Here are a couple of simple DIY projects to get you started:

Project 1: Basic Driftwood Coffee Table

Materials Needed:

  • Large piece of driftwood for the base
  • Glass tabletop
  • Rubber pads or cushions
  • Sandpaper
  • Wood sealant
  • Screws and drill

Steps:

  1. Prepare the Driftwood: Clean, dry, and sand the driftwood piece.
  2. Apply Sealant: Coat the wood with a sealant and let it dry completely.
  3. Attach Rubber Pads: Place rubber pads on top of the driftwood to support the glass tabletop.
  4. Place The Glass Top: Carefully place the glass tabletop onto the rubber pads. Ensure it’s centered and stable.

Voila! You have a beautiful, minimalistic driftwood coffee table ready to adorn your living room.

Project 2: Driftwood and Pallet Coffee Table

Materials Needed:

  • Driftwood pieces (various sizes)
  • Wooden pallet
  • Screws and drill
  • Saw
  • Sandpaper
  • Wood sealant

Steps:

  1. Disassemble Pallet: Carefully break down the wooden pallet into individual planks.
  2. Prepare Driftwood: Clean, dry, and sand the driftwood.
  3. Build Frame: Use the pallet planks to create a rectangular frame.
  4. Attach Driftwood: Screw the driftwood pieces onto the frame, arranging them in a visually pleasing way.
  5. Apply Sealant: Coat the entire table with wood sealant.

This project results in a more rustic and robust driftwood coffee table, combining reclaimed materials for an eco-friendly and stylish piece.

Where to Buy Driftwood Coffee Tables

If DIY isn’t your thing or you simply want to explore professional designs, there are plenty of places where you can buy a driftwood coffee table.

Online Retailers

  • Etsy: A treasure trove for handmade and unique designs.
  • Wayfair: Offers a variety of styles and sizes.
  • Amazon: Provides multiple options with customer reviews.

Local Businesses

  • Boutique Furniture Stores: These often offer custom designs and high-quality craftsmanship.
  • Antique Shops: You might find a vintage driftwood coffee table with a unique history.
  • Craft Fairs: Local artisans often showcase their driftwood furniture at craft fairs and markets.

Conclusion

A driftwood coffee table is more than just a piece of furniture; it’s a work of art that brings a piece of nature into your home. Whether you choose to create your own or buy one, this beautiful addition can transform your living space, making it warm, inviting, and uniquely yours. So next time you’re at the shore, keep an eye out for that perfect piece of driftwood—it might just be the start of your next DIY adventure or the perfect addition to your home decor.

Feel free to embrace the beauty of imperfections and the story each piece of driftwood carries with it. With a little creativity and care, you can have a coffee table that’s not only functional but also a conversation starter, bringing the natural beauty of the sea into your daily life.

Filed Under: Driftwood Ideas Tagged With: Coffee Table, DIY, Driftwood, furniture, Rustic

Driftwood Centerpiece

July 19, 2024 by admin

Creating your own driftwood centerpiece is a delightful way to bring the rustic charm of nature into your home. You’ll discover how to select the perfect pieces of driftwood, prepare them, and assemble a stunning centerpiece that will leave your guests in awe. Get ready to transform a simple gathering of driftwood into a captivating focal point for your table that adds a touch of the coastal outdoors to your decor. Have you ever looked at a piece of driftwood and imagined the decorative possibilities it holds? Finding beauty in nature is an art, and transforming that beauty into a functional piece of decor is a rewarding journey. In this article, you’ll discover how to create a stunning driftwood centerpiece that can become the talking point of any room.

Driftwood Centerpiece

What is Driftwood?

Driftwood refers to wood that has been washed onto the shore of a sea, river, or lake by the winds, tides, or waves. It can be anything from small branches to large tree trunks. The natural weathering process gives it a unique, rustic appearance and an array of colors, which makes it a favorite material for home décor projects.

Why Use Driftwood for a Centerpiece?

Natural Beauty

One of the main reasons to use driftwood is its inherent beauty. The unique textures and shapes add a touch of nature to your living space. No two pieces are alike, making your centerpiece one-of-a-kind.

Eco-Friendly

Using driftwood is a great way to incorporate eco-friendly practices into your home. Instead of buying manufactured materials, you are re-purposing something from nature, reducing your carbon footprint.

Versatility

Driftwood is extremely versatile. It can be painted, stained, adorned with additional elements, or left in its natural state. Whatever your style, driftwood can be integrated seamlessly into your decor.

Gathering Your Materials

Before you get started, gather all the materials you’ll need. This way, you won’t have to interrupt your creative flow to hunt for supplies.

Essential Materials

Here’s a handy table of the essentials you’ll need for your driftwood centerpiece:

MaterialPurpose
DriftwoodThe core of your centerpiece.
SandpaperTo smooth the wood.
Hot Glue GunFor attaching elements together.
Wood Finish (optional)To treat and enhance the wood’s appearance.
Decorative ElementsItems such as shells, stones, and candles to enhance your centerpiece.
Protective GlovesTo protect your hands while handling the wood and using tools.

Optional Materials

Depending on your design, you may need some optional materials:

  • Paint or stain for color.
  • Varnish for a glossy finish.
  • Moss or small plants for added decoration.
  • Twine or rope for a rustic touch.

Preparing the Driftwood

Preparation is key to making a beautiful centerpiece. Here’s how to prepare your driftwood for the project:

Cleaning the Wood

Driftwood found on the beach can be quite dirty. Start by rinsing it thoroughly with fresh water. Scrub off any sand, algae, or remaining debris. You might also consider soaking the driftwood in a bleach solution (1 part bleach to 9 parts water) for a few hours to remove any hidden bacteria or insects.

Drying Process

Once clean, let the driftwood dry completely. This can take anywhere from a few days to a couple of weeks. Place it in a dry, well-ventilated area. Be patient; this step is crucial in preventing any potential mold or rot.

Sanding the Driftwood

Use sandpaper to smooth out any rough spots. This will not only make it safer to handle but also enhance its natural beauty. Start with a medium-grit sandpaper and finish with a fine-grit for the best results.

Driftwood Centerpiece

Designing Your Centerpiece

Choosing a Theme

Decide on the overall theme for your driftwood centerpiece. Is it coastal, rustic, minimalistic, or bohemian? Your theme will guide the decorative elements you choose and how you arrange them.

Planning Your Layout

Lay out all your materials and start planning the arrangement. Play around with different configurations until you find one that looks cohesive and balanced.

Assembling Your Driftwood Centerpiece

Building the Base

Choose one or more large, flat pieces of driftwood for the base. This foundation should be sturdy enough to support additional elements. Arrange smaller pieces around it, using a hot glue gun to secure them.

Adding Decorative Elements

Once the base is secure and stable, it’s time to add your decorative elements. Here are some ideas:

Candles

Candles are a popular choice for driftwood centerpieces. They add a warm, inviting light that complements the natural aesthetics of the wood. Use hot glue or small candle holders to keep them in place.

Shells and Stones

For a coastal theme, integrate shells and stones. Glue them in clusters or scatter them sporadically for a more natural look.

Mini Plants or Moss

Living elements like small plants or moss can add a touch of greenery and life to your centerpiece. Use small amounts of soil or just hot glue for non-rooted plants.

Final Touches

Look over your masterpiece and add any final touches. Maybe some twine around a piece of wood or a touch of paint for added color. Be sure not to overdo it; sometimes less is more.

Placing Your Centerpiece

Once your driftwood centerpiece is complete, finding the perfect spot for it is key. Here are some placement ideas:

Dining Table

A driftwood centerpiece can be a showstopper on your dining table. It adds a touch of tranquility and serves as a great conversation starter.

Coffee Table

A smaller driftwood centerpiece is perfect for a coffee table. It’s an eye-catching addition that can help create a cozy atmosphere.

Mantelpiece

For a more traditional look, place your driftwood centerpiece on the mantel. It will draw the eye upward and can anchor the room’s décor.

Outdoor Spaces

Driftwood fits seamlessly into outdoor settings as well. Use it as a centerpiece for patio or garden tables to bring a bit of the indoors out.

Maintaining Your Driftwood Centerpiece

Like any piece of decor, your driftwood centerpiece will need some maintenance to keep it looking its best.

Dusting and Cleaning

Regular dusting with a soft cloth will keep your centerpiece clean. For a deeper clean, use a damp cloth and avoid soaking the wood.

Replacing Elements

Over time, some decorative elements may need replacement or refreshment, particularly if your centerpiece includes living plants or candles.

Preventing Damage

Keep your centerpiece out of direct sunlight to prevent the wood from drying out and cracking. Also, avoid placing it in overly humid environments, as this can encourage mold growth.

Customization Ideas for Your Driftwood Centerpiece

Adding Personal Touches

Incorporate personal items like small photo frames or souvenirs to make your centerpiece uniquely yours.

Seasonal Changes

Update your driftwood centerpiece with the seasons. Add autumn leaves and mini pumpkins for fall, holly and pinecones for winter, and flowers for spring.

Light It Up

Fairy lights can add a whimsical touch to your centerpiece. Weave them through the driftwood and turn them on for a soft, magical glow.

Conclusion

Creating a driftwood centerpiece is a fulfilling and creative project that brings the beauty of nature into your home. With a bit of preparation and a dash of creativity, you’ll craft a unique piece that reflects your personal style and adds an earthy, artistic touch to any space. So why not give it a try? Your perfect centerpiece is waiting to be created.

Filed Under: Driftwood Ideas Tagged With: Centerpiece, craft, DIY, Driftwood, Home Design

Driftwood Christmas Tree

July 19, 2024 by admin

Discover the magic of creating a unique holiday centerpiece with a “Driftwood Christmas Tree.” Imagine decorating your home with a tree that brings a touch of coastal elegance and natural charm. In this friendly guide, you’ll learn how to transform simple pieces of driftwood into a beautiful, handcrafted Christmas tree. Additionally, we’ll share tips on where to find the best driftwood, how to prepare the pieces, and creative ideas for decorating your tree to make your holiday season truly special. Get ready to embrace the beauty of nature in your festive decor with a Driftwood Christmas Tree. Have you ever thought about swapping out your traditional evergreen Christmas tree for something a bit more unique and eco-friendly? If you’re looking for something different this holiday season, a driftwood Christmas tree might just be the perfect alternative for you. Not only are driftwood trees sustainable, but they also bring a touch of natural beauty into your home. Let’s dive into everything you need to know to create your very own driftwood Christmas tree!

What is a Driftwood Christmas Tree?

A driftwood Christmas tree is a modern twist on the conventional holiday tree. Instead of using evergreen branches, this tree is crafted from pieces of driftwood. The driftwood is usually collected from beaches, lakes, or rivers, making each tree unique and organically beautiful. These trees can be as large or small as you like, standing as table centerpieces or commanding the living room as the main celebration icon.

Why Choose a Driftwood Christmas Tree?

Eco-Friendly Option

Traditional Christmas trees often come at an environmental cost. Whether it’s a real tree that gets cut down or an artificial tree made from plastic, neither option is particularly sustainable. Driftwood trees, on the other hand, make use of natural materials that have already washed up on shore, resulting in a low environmental impact.

Aesthetic Appeal

Driftwood has its own rugged charm. Each piece of wood has been shaped by nature, creating intricate textures and forms that add a rustic, eco-chic vibe to your holiday decor. The neutral tones of driftwood can easily fit into various decor styles, from coastal to minimalist to bohemian.

Uniqueness

No two pieces of driftwood are exactly alike, meaning that your driftwood Christmas tree will be a one-of-a-kind masterpiece. This individuality brings a special touch to your holiday decorations and makes for an excellent conversation starter.

Driftwood Christmas Tree

Gathering Materials

Finding Driftwood

Collecting driftwood can be a fun adventure. Head to your local beaches, lakes, or riverbanks where driftwood is more likely to be found. Make sure to check local regulations to ensure that collecting driftwood is legal in your area. Look for pieces that are dry, as wet wood may be more challenging to work with and prone to mold.

Additional Materials

To assemble your driftwood Christmas tree, you will need a few additional materials:

MaterialPurpose
DriftwoodMain structure
Screws or NailsFor securing the driftwood pieces together
DrillTo create holes for screws or string
String or WireOptional, for extra support
Base or StandTo hold the tree upright
DecorationsLights, ornaments, ribbon, etc., as per preference

Building Your Driftwood Christmas Tree

Step 1: Plan Your Design

Before you start assembling, it’s a good idea to sketch out your design. Decide on the height and width of your tree. Will it be a tabletop piece or a full-sized floor tree? Planning ahead will make the assembly process much smoother.

Step 2: Sort and Arrange Driftwood

Lay out your driftwood pieces and sort them by size. This makes it easier to build a stable structure, with longer pieces at the bottom and shorter ones at the top. Ensure that your base is sturdy enough to support the entire tree.

Step 3: Drill Pilot Holes

Drill pilot holes through the center of each piece of driftwood. These holes will make it easier to screw or string the pieces together. If you’re using a wooden dowel as a central spine, drill through this as well.

Step 4: Assemble the Tree

Start from the bottom and work your way up. Secure each piece of driftwood to the central spine or to each other using screws or nails. If you’re using string or wire for extra support, tie each piece securely before moving to the next.

Step 5: Attach the Base

Secure your tree to a sturdy base or stand. You can use a pre-made wooden base, a pot filled with rocks, or even a heavy book to keep your tree upright.

Driftwood Christmas Tree

Decorating Your Driftwood Christmas Tree

Types of Decorations

The neutral tones and natural texture of driftwood provide a fantastic backdrop for a variety of decorations. Here are some ideas to inspire you:

  • String Lights: Fairy lights can add a magical touch to your tree.
  • Ornaments: Baubles, stars, and other ornaments in neutral or metallic tones can complement the natural look of your driftwood.
  • Garlands: Ribbons, beads, or even a handmade paper chain can go a long way.
  • Natural Elements: Pine cones, dried flowers, or seashells can enhance the organic feel.

DIY Decoration Tips

Creating your own decorations can be a fun holiday project. Consider crafting salt dough ornaments or making folded paper stars. Personalized decorations add a unique touch to your driftwood tree and can become family keepsakes.

Maintaining and Storing Your Driftwood Christmas Tree

Cleaning and Preservation

To ensure your driftwood tree lasts for many seasons, it’s essential to clean and preserve the wood. You can use a soft brush to remove any debris and dirt from the surface. If you’re concerned about insects, you can also bake the driftwood in an oven at low heat for about 30 minutes.

Storing Your Tree

If you plan to reuse your driftwood tree next year, you’ll need to store it properly. Disassemble the tree and wrap each piece in a soft cloth or bubble wrap. Store the pieces in a dry, cool area to prevent mold and mildew.

Where to Buy a Driftwood Christmas Tree

Online Retailers

Not everyone has the time or desire to create their own driftwood Christmas tree, and that’s perfectly okay! There are several online retailers where you can purchase pre-made driftwood trees. Websites like Etsy, Amazon, and specialty décor shops offer a variety of options.

RetailerWebsite
Etsywww.etsy.com
Amazonwww.amazon.com
Wayfairwww.wayfair.com
West Elmwww.westelm.com

Specialty Shops

Local home décor or craft stores may also carry driftwood trees, especially during the holiday season. Supporting small businesses in your community is always a good idea, and you might find some unique pieces not available online.

Conclusion

Opting for a driftwood Christmas tree introduces a unique, eco-friendly, and aesthetically appealing decoration into your home for the holidays. Whether you collect your own driftwood and build a tree from scratch, or purchase one ready-made, you’ll be adding a touch of natural beauty to your festive celebrations.

If you’re looking for a holiday project that’s different from the usual and gives you a chance to get creative, the driftwood Christmas tree is the perfect challenge. You’ll create memories during the building process, and the end result will be a beautiful, unique tree that you can treasure for years to come.

So why not give it a try this holiday season? Embrace the driftwood Christmas tree trend and enjoy a festive décor that’s both unique and sustainable. Your holiday season will be filled with rustic charm, timeless elegance, and a sense of accomplishment that comes from crafting something truly special. Happy holidays!

Filed Under: Driftwood Ideas Tagged With: christmas, Decor, DIY, Driftwood, tree

Driftwood Chandelier

July 18, 2024 by admin

Imagine walking into a room where nature meets elegance, with a touch of coastal charm. The Driftwood Chandelier is not just a lighting fixture; it’s a statement piece that transforms any space into a serene, stylish haven. Crafted from genuine driftwood, each chandelier has a unique, rustic character that brings the beauty of the outdoors inside. With its warm, inviting glow, the Driftwood Chandelier adds a breath of fresh air to your décor, making it the perfect centerpiece for creating a cozy and welcoming atmosphere in your home. Have you ever wondered how you can bring a touch of nature into your home decor while making a bold and elegant statement? Allow me to introduce you to the marvel of a driftwood chandelier. Combining the rustic charm of nature with the sophistication of a chandelier, this unique piece of decor can transform any room into a haven of elegance and warmth.

What is a Driftwood Chandelier?

To start with the basics, a driftwood chandelier is a lighting fixture constructed using pieces of driftwood—wood that has been washed onto the shore by waves. The ocean naturally smoothens the wood, giving it a weathered yet stunningly organic appearance. Unlike conventional chandeliers which are often made from metal or crystal, driftwood chandeliers bring an earthy feel to your home.

Why Choose a Driftwood Chandelier?

Choosing a driftwood chandelier allows you to merge natural elements with refined craftsmanship. Here are a few compelling reasons:

  1. Eco-friendly: Utilizing driftwood rescues this natural resource, preventing it from rotting or being wasted.
  2. Unique Designs: Each piece of driftwood has its own unique shape, ensuring that no two chandeliers are alike.
  3. Versatile Style: Fits well in various decor themes, from beach-inspired to rustic and even modern settings.

Key Components of a Driftwood Chandelier

Understanding the essential elements can be a big help in appreciating the charm and complexity of a driftwood chandelier. Here are the main components:

Driftwood

The star of the show, the driftwood pieces, takes center stage. These come in numerous shapes, sizes, and colors, each adding its own personality to the chandelier.

Lighting Fixtures

The lighting fixtures may vary. Some chandeliers use simple bulb sockets, while others may have vintage-style lanterns or more modern LED lights.

Metal Framework

Usually, a metal framework holds the driftwood pieces together. This structure provides the necessary stability and support.

Electrical Wiring

The electrical wiring is crucial for functionality and safety. It can be discreetly integrated into the metal framework to avoid disrupting the rustic aesthetic.

DIY Driftwood Chandelier: Steps to Create Your Own

Feeling crafty? Creating your own driftwood chandelier can be a rewarding experience. Here’s a step-by-step guide:

Materials You’ll Need

MaterialQuantity
Driftwood pieces10-15
Metal frame1
Light bulbs and socketsVaries
Electrical wiringAs needed
Glue gun1
Screws and screwdriver1 set

Steps to Follow

  1. Gather Driftwood: Collect driftwood pieces from a nearby beach or purchase them from a craft store.
  2. Clean the Wood: Thoroughly clean the driftwood to remove any sand, salt, or debris.
  3. Construct the Frame: Use a metal frame as the base to support your chandelier.
  4. Attach Driftwood: Secure the driftwood to the frame using a glue gun and screws for added stability.
  5. Install Lighting: Attach the bulb sockets along the driftwood framework.
  6. Wiring: Carefully integrate the electrical wiring to ensure it’s safe and functional.
  7. Final Touches: Once everything is assembled, perform a final check to ensure the stability and reliability of the chandelier.

Driftwood Chandelier

Decorating Your Space with a Driftwood Chandelier

Now that you’ve either bought or created your driftwood chandelier, it’s time to think about where to place it and how to enhance its beauty.

Ideal Rooms

A driftwood chandelier can fit almost any room, but it shines especially bright in:

  1. Living Room: A statement piece for a big entertaining space.
  2. Dining Room: Perfect for creating a cozy, inviting dining experience.
  3. Entryway: Sets the tone for your home’s decor right from the entrance.

Complementary Decor

Pairing your driftwood chandelier with the right decor elements can elevate its beauty. Consider these options:

  • Natural Textiles: Incorporate linen, cotton, and wool to keep the earthy vibe.
  • Neutral Colors: Opt for whites, beiges, and grays to make the driftwood stand out.
  • Botanical Elements: Add potted plants and flowers to bring in more of nature’s touch.

Maintenance and Care

While driftwood chandeliers are durable, some routine maintenance can keep them looking their best for years.

Cleaning

  • Dust Regularly: Use a soft cloth or feather duster.
  • Deep Clean: Occasionally, use a damp cloth to remove any build-up, but avoid soaking the wood.

Check Wiring

  • Annual Inspection: Check the wiring and fixtures at least once a year to ensure everything is in working order.
  • Professional Help: If you notice any electrical issues, seek professional assistance immediately.

Protecting the Driftwood

Though driftwood is naturally resistant, you can prolong its life by:

  • Avoiding Excess Moisture: Keep the chandelier in a dry environment.
  • Treating the Wood: Apply a light coating of wood preservative every few years for added protection.

Stories Behind Driftwood Chandeliers

One of the most fascinating aspects of driftwood chandeliers is the story each piece of driftwood tells. Perhaps it was once part of a great tree that stood for centuries or drifted from a distant shore. By incorporating a driftwood chandelier into your home, you are also bringing a piece of history and natural wonder into your space.

Buying Guide: What to Consider

Before purchasing a driftwood chandelier, consider these key factors to ensure you make the best choice:

Size and Scale

  • Room Size: Measure the space where you intend to hang the chandelier. A too-large fixture can overpower a small room, while a too-small fixture might get lost in a large space.
  • Ceiling Height: Ensure there’s enough clearance for both the chandelier and the people walking under it.

Style

  • Shape: Driftwood chandeliers come in various shapes, from cascading designs to circular or linear formations. Choose one that complements your room’s layout.
  • Lighting Needs: Determine the amount of light you need. Some chandeliers are more decorative with subtle lighting, while others are designed to illuminate a room.

Budget

  • Price Range: Driftwood chandeliers can range from affordable DIY projects to high-end designer pieces. Determine your budget before you start shopping.
  • Installation Costs: Factor in potential installation fees, especially if you need to hire a professional electrician.

Where to Buy

Looking to purchase rather than DIY? Here are some ideal places to find your perfect driftwood chandelier:

Local Stores

  • Home Decor Shops: Specialized shops often carry unique, handcrafted pieces.
  • Antique Stores: Occasionally, you might stumble upon a vintage driftwood chandelier.

Online Platforms

  • Etsy: A marketplace for handmade and vintage items, offering a variety of driftwood chandeliers.
  • Wayfair: Provides a wide selection of lighting fixtures, including driftwood chandeliers.
  • Houzz: Known for its range of home decor items, Houzz is another excellent platform for finding unique lighting options.
PlatformFeatures
EtsyHandcrafted, customizable options
WayfairWide selection, customer reviews
HouzzUnique designs, professional-grade items

Conclusion: Embrace the Beauty of Nature

A driftwood chandelier is more than just a lighting fixture; it’s a testament to nature’s beauty and creativity. Whether you choose to buy a pre-made piece or create your own, this chandelier will undoubtedly bring a unique and elegant touch to your home. Celebrate the beauty of natural elements and enjoy the warm, inviting ambiance that a driftwood chandelier can offer.

Filed Under: Driftwood Ideas Tagged With: chandelier, DIY, Driftwood, Lighting, Rustic

Driftwood Bed

July 18, 2024 by admin

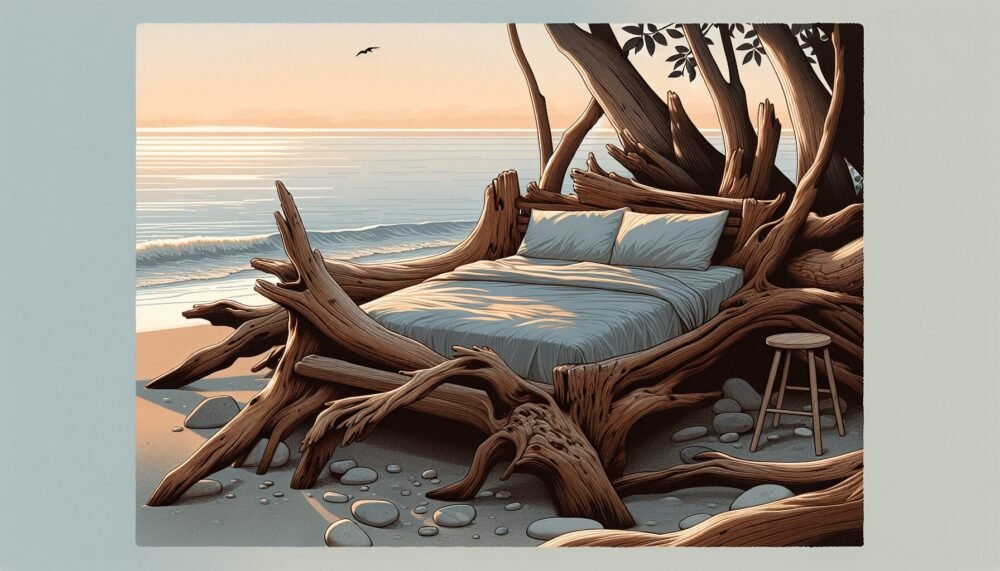
Feel the embrace of nature in your bedroom with the enchanting Driftwood Bed. This unique piece of furniture is crafted from carefully selected driftwood, each piece telling its own story of time and tides. The natural textures and earthy hues bring a sense of rustic charm and tranquility, turning your sleeping space into a serene retreat. Whether you’re amidst the hustle and bustle of city life or nestled in a countryside cottage, the Driftwood Bed invites a refreshing touch of the outdoors into your home. Snuggle in and let the gentle, raw elegance of the driftwood cradle you into peaceful dreams. Have you ever stood on a beach, gazing at a piece of driftwood and wondering about its journey through the sea? This natural wonder has floated across oceans, been battered by waves, and smoothed by sand before ending up on shore. Now, imagine turning that piece of driftwood into a beautiful bed for your home. Intrigued? Let’s dive into the world of “Driftwood Beds.”

Driftwood Bed

Understanding Driftwood

What is Driftwood?

Driftwood is any wood that has been washed onto the shore of oceans, seas, or rivers due to tides, winds, or waves. These pieces of wood often start their journey as parts of trees, branches, or even man-made structures that enter waterways due to natural forces. Over time, they are weathered and transformed into unique pieces by the elements.

The Appeal of Driftwood

The allure of driftwood lies in its natural beauty and irregularities. Each piece tells a story and has been sculpted by nature into a one-of-a-kind form. The uneven surfaces, varied textures, and earth-toned colors make driftwood a popular choice for rustic and coastal-themed décor. When incorporated into furniture like beds, driftwood brings an organic, serene feel to interiors.

The Driftwood Bed: Bringing Nature Indoors

Why Choose a Driftwood Bed?

Opting for a driftwood bed has multiple benefits. First, it adds a distinctive, natural aesthetic to your bedroom. Unlike mass-produced furniture, a driftwood bed is unique, with no two pieces being exactly alike. Additionally, using driftwood is an eco-friendly choice. By repurposing wood that has already endured the elements, you contribute to sustainable practices.

Design Variations

Driftwood beds come in various styles and designs to suit different tastes and room decors. From minimalist frames to intricate headboards, the versatility of driftwood means there’s likely a design that complements your personal style. Below are a few common styles:

StyleDescription
MinimalistSimple, clean lines with a focus on the wood’s natural beauty.
RusticEmphasizes rugged textures and irregular shapes. Often paired with heavy fabrics.
CoastalIncorporates elements of beach design, such as light colors and nautical accessories.
BohemianCombines driftwood with eclectic, colorful textiles and patterns.

Building Your Own Driftwood Bed

Materials Needed

Before starting your project, gather the necessary materials. The following items are generally required for building a driftwood bed:

  • Driftwood pieces (ensure they are dry and free from pests)
  • Sandpaper
  • Wood glue
  • Screws and nails
  • A saw (manual or electric)
  • A tape measure
  • A drill

Preparing the Driftwood

Preparing driftwood is a crucial step. Here’s how to do it:

  1. Cleaning: Wash the driftwood thoroughly to remove any salt, sand, or debris. Use a brush and, if necessary, a mild detergent.
  2. Drying: Let the wood dry completely to avoid issues like mold. You can air-dry it or use a kiln for faster results.
  3. Sanding: Sand the driftwood to remove rough spots and create a smoother surface for working.

Assembling the Bed Frame

Step 1: Measuring and Cutting

Measure the dimensions of your bed frame (length, width, and height). Use a saw to cut the driftwood pieces to the required lengths. It’s essential to double-check measurements to ensure parts fit together correctly.

Step 2: Creating the Headboard and Footboard

Arrange the driftwood pieces for the headboard and footboard according to your chosen design. You might want an even surface or embrace the irregularity of driftwood. Secure the pieces together using wood glue and reinforce them with screws or nails.

Step 3: Constructing the Side Rails

Cut driftwood pieces for the side rails. These should be sturdy enough to support the bed’s weight. Attach them to the headboard and footboard using a drill and screws, ensuring the structure is secure.

Step 4: Adding Support Slats

Cut slats to place across the frame for mattress support. Space them evenly and attach them securely to the side rails. Ensure they are strong enough to hold the mattress and the weight of those sleeping on it.

Maintaining Your Driftwood Bed

Regular Cleaning

A driftwood bed requires some upkeep to maintain its beauty. Regular dusting and occasional cleaning with a damp cloth will keep the wood looking fresh. Avoid harsh chemicals that could damage the wood’s surface.

Protecting the Wood

Applying a wood sealer can protect driftwood from potential damage, such as cracks or discoloration. Choose a product that enhances the wood’s natural color without making it too glossy.

Driftwood Bed

Driftwood Bed Décor Ideas

Styling Your Bedroom

Your driftwood bed can be the centerpiece of a beautifully styled bedroom. Here are some tips for enhancing your space:

  1. Color Palette: Opt for earthy tones and soft hues that complement the natural wood. Whites, beiges, and pastels work well.
  2. Textiles: Combine natural fabrics like linen and cotton for bedding and curtains. Adding knitted throws or woven rugs can enhance the cozy feel.
  3. Accessories: Incorporate beach-inspired elements such as seashells, coral, or maritime artwork to tie the look together.

Lighting

Proper lighting can accentuate the beauty of your driftwood bed. Consider using soft, ambient lighting such as bedside lamps or fairy lights. Natural light also works wonders, so keep your windows unobstructed.

Environmental Impact

Sustainability

One of the significant advantages of using driftwood is its environmental friendliness. Repurposing driftwood reduces the demand for newly harvested wood and promotes sustainable practices. It’s an excellent choice if you are mindful of your ecological footprint.

Ethical Considerations

Ensure that the driftwood you collect or purchase is ethically sourced. Avoid taking driftwood from protected areas or in a way that might harm the ecosystem. There are many suppliers who specialize in sustainably sourced driftwood.

Buying a Driftwood Bed

Where to Purchase

If DIY isn’t your thing, fear not! There are plenty of places to buy expertly crafted driftwood beds. Many furniture stores, both online and offline, offer beautifully designed driftwood beds that cater to various tastes.

What to Look For

When purchasing a driftwood bed, consider the following:

  1. Quality of Wood: Ensure the driftwood is properly treated and free from pests.
  2. Craftsmanship: Look for solid construction and a sturdy frame.
  3. Design: Choose a design that complements your style and bedroom décor.
  4. Price: Driftwood beds can range in price. Determine your budget beforehand.

Popular Retailers

  • Etsy: Offers a range of handcrafted driftwood beds from various artisans.
  • Wayfair: Features a selection of driftwood-inspired furniture.
  • Local Artisans: Check with local woodworkers who may offer custom driftwood bed designs.

The Future of Driftwood Furniture

Trends

The popularity of driftwood furniture is enduring, driven by a growing appreciation for sustainable and unique home decor. Current trends include incorporating mixed materials, such as metal and glass, to create modern yet natural designs.

Innovations

Innovative designs continue to emerge, pushing the boundaries of what can be achieved with driftwood. From intricate carvings to integrating lighting elements, the possibilities are endless.

Adopting New Styles

As styles evolve, so can your driftwood bed. Consider repurposing elements or updating accessories to keep your décor fresh and current.

Conclusion

Creating or purchasing a driftwood bed offers an opportunity to bring a piece of nature into your home. Each bed tells a story, enriched by its journey through the elements. Whether you choose to embark on a DIY project or buy a finished product, a driftwood bed can transform your bedroom into a serene, stylish sanctuary. So why not start your journey with driftwood today? Embrace the beauty, sustainability, and unique charm that only a driftwood bed can provide.

Filed Under: Driftwood Ideas Tagged With: Bed Design, Bedroom Ideas, DIY, Driftwood, Rustic Furniture

Driftwood Branch Decor

July 18, 2024 by admin

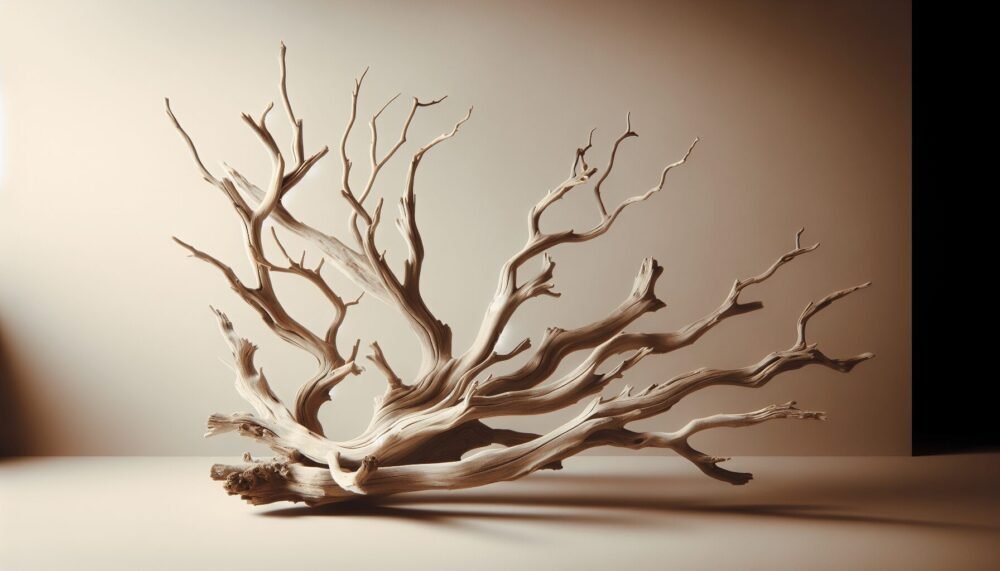
Driftwood Branch Decor offers a unique and organic way to bring nature into your home. This trend takes beautifully weathered driftwood branches, each with its own unique texture and history, and transforms them into stunning pieces of art. Whether adorning your walls, acting as the centerpiece of a table setting, or becoming part of a larger installation, driftwood branch decor adds an element of rustic charm and coastal elegance to any space. With a touch of creativity and a little bit of nature, your living space can be transformed into a serene and stylish sanctuary. Have you ever found yourself enchanted by the rustic charm of driftwood and wondered how you could incorporate it into your home decor? Driftwood branch decor has a natural beauty and unique appeal that can transform any space into a cozy, coastal retreat. Whether you live by the sea or just dream of peaceful beach days, using driftwood in your interior design can bring a touch of the ocean’s serenity into your home. Let’s explore how you can bring this trend into your own living space with style and creativity.

What is Driftwood?

Driftwood refers to pieces of wood that have been washed ashore by tides and currents. Over time, the sea’s saltwater and sand smooth the wood, giving it a distinctive, weathered appearance. This natural aging process creates pieces that are uniquely sculpted, making driftwood a popular choice for art and decor.

The Appeal of Driftwood

Driftwood is not just a piece of wood; it’s a piece of nature’s artistry. Each piece is unique, having traveled through the sea and weathered many storms before reaching the shore. This journey imbues driftwood with a character that manufactured wood simply cannot replicate. Its rustic appearance can add a sense of calm and timelessness to your decor.

Sustainability

Using driftwood is an eco-friendly choice. Instead of cutting down trees for decorative purposes, you are repurposing wood that the ocean has naturally recycled. This makes driftwood decor an excellent option for those who are mindful of their environmental impact.

Sourcing Driftwood

Before you can start creating your driftwood masterpieces, you’ll need to source some driftwood. Here are some options to consider.

Beachcombing

If you live near the coast, beachcombing can be a delightful activity. Take a stroll along the shore and keep an eye out for interesting pieces of driftwood. Remember to follow local regulations and guidelines, as some areas have restrictions on collecting driftwood to preserve natural habitats.

Online Retailers

There are many online retailers specializing in driftwood for decor. Websites like Etsy and Amazon often have a wide variety of pieces to suit different needs. This option is perfect if you are looking for a specific type of driftwood or if you do not live near the beach.

Online RetailersProsCons
EtsyUnique pieces, Support artisansMay be expensive
AmazonWide variety, ConvenientQuality may vary

Craft Stores

Local craft stores often carry driftwood, especially if you live in a coastal area. While these pieces might be slightly more expensive than what you find during beachcombing, they are typically cleaned and ready to use for your decor projects.

Driftwood Branch Decor

Preparing Driftwood for Use

Before you start turning your driftwood into decor, it’s important to clean and prepare it properly. This ensures it’s safe and durable for use in your home.

Cleaning Driftwood

Cleaning driftwood is essential to remove any remaining salt, sand, and possible pests. Here’s a step-by-step guide:

  1. Rinse Thoroughly: Rinse the driftwood with fresh water to remove any loose debris and sand.
  2. Soak: Soak the driftwood in a solution of water and mild bleach (1 part bleach to 9 parts water) for 24 hours. This will help to kill any pests and remove any remaining salt.
  3. Rinse Again: After soaking, rinse the driftwood thoroughly with fresh water to remove any bleach residue.
  4. Dry: Let the driftwood dry completely in the sun for a few days. This will help to ensure it’s fully cleaned and ready for use.

Sealing Driftwood

Sealing your driftwood can help to preserve its appearance and make it more durable. Use a clear wood sealer, marine varnish, or polyurethane to protect the wood. Apply multiple thin coats, allowing each coat to dry completely before applying the next.

Driftwood Decor Ideas

Now that you have your clean and prepared pieces of driftwood, it’s time to get creative! Here are some ideas to inspire your driftwood decor projects.

Driftwood Wall Art

Create a stunning focal point in any room with driftwood wall art. This can range from simple framed pieces to elaborate arrangements.

  • Simple Design: Attach smaller pieces of driftwood to a canvas or wooden board in an attractive pattern.
  • Sculptural Pieces: Combine various pieces of driftwood to create a three-dimensional sculpture that hangs on the wall.

Driftwood Shelves

Driftwood shelves are both functional and decorative. Use larger, flat pieces of driftwood as shelves. Secure them to the wall using sturdy brackets or ropes for a nautical touch. These shelves can be used to display other coastal decor elements, books, or plants.

Driftwood Furniture

Incorporate driftwood into your furniture for a unique and rustic look.

  • Coffee Tables: Use a larger piece of driftwood as the base and top it with glass to create a stylish coffee table.
  • Benches: Combine several pieces of driftwood to create a sturdy and attractive bench for your entryway or garden.

Driftwood Chandeliers

Driftwood chandeliers can add a touch of coastal elegance to any room. Use smaller, uniform pieces of driftwood to create a circular frame. Attach string lights or candles to the frame for a warm and inviting glow.

Driftwood Mirrors

Enhance your mirror with a driftwood frame. Collect smaller pieces of driftwood and glue them around the edge of a mirror, overlapping them for a natural, textured look. This can add a coastal charm to your bathroom, bedroom, or hallway.

Driftwood Centerpieces

Driftwood centerpieces are perfect for both everyday decor and special occasions. Use a large piece of driftwood as the base and decorate it with candles, shells, and greenery for a beautiful centerpiece that brings a touch of nature indoors.

Driftwood Branch Decor

DIY Driftwood Projects

If you’re feeling crafty, there are plenty of DIY projects you can tackle to incorporate driftwood into your home decor. Here are a few detailed project ideas to get you started.

Driftwood Coat Rack

A driftwood coat rack is a practical and stylish addition to any entryway. You will need:

  • A large piece of driftwood
  • Sandpaper
  • Wood glue or screws
  • Coat hooks
  • Drill

Steps:

  1. Sand the Driftwood: Smooth any rough edges with sandpaper.
  2. Attach the Hooks: Decide where you want to place the coat hooks and mark the spots. Drill pilot holes and attach the hooks using screws or wood glue.
  3. Mount the Rack: Secure the driftwood coat rack to the wall using sturdy brackets or screws.

Driftwood Candle Holders

Driftwood candle holders can add a warm and cozy ambiance to any room. You will need:

  • Small to medium-sized pieces of driftwood
  • Tea light candles
  • Drill with a spade bit

Steps:

  1. Select Your Driftwood: Choose pieces that are relatively flat and stable.
  2. Drill Holes: Use the spade bit to drill holes into the driftwood pieces, ensuring they are deep enough to securely hold the tea light candles.
  3. Insert Candles: Place the tea light candles into the drilled holes.

Driftwood Photo Display

Showcase your favorite photos with a driftwood photo display. You will need:

  • A long piece of driftwood
  • String or thin wire
  • Small clothespins or clips
  • Photos

Steps:

  1. Prepare the Driftwood: Clean and dry the driftwood if necessary.
  2. Attach the String: Tie the string or thin wire to each end of the driftwood, creating a line for hanging photos.
  3. Hang the Photos: Use small clothespins or clips to attach your photos to the string.

Driftwood Jewelry Holder

Keep your jewelry organized with a driftwood jewelry holder. You will need:

  • A small piece of driftwood with interesting branches
  • Sandpaper
  • Clear wood sealer (optional)
  • Small hooks
  • Drill

Steps:

  1. Prepare the Driftwood: Sand any rough edges and seal with clear wood sealer if desired.
  2. Attach the Hooks: Drill pilot holes and attach small hooks to the driftwood where you want to hang your jewelry.
  3. Mount the Holder: Secure the driftwood to the wall or place it on a stable surface.

Caring for Driftwood Decor

Driftwood decor is relatively low maintenance, but proper care can help to preserve its beauty and durability.

Regular Dusting

Dust your driftwood decor regularly using a soft, dry cloth. This will help to keep it looking clean and fresh.

Avoid Direct Sunlight

Prolonged exposure to direct sunlight can cause driftwood to fade and become brittle. Place your driftwood decor away from direct sunlight whenever possible.

Reapplying Sealant

If you’ve sealed your driftwood, periodic reapplication of the sealant can help to maintain its appearance and protect it from wear and tear. Check the manufacturer’s recommendations for the specific sealant you used and follow their guidelines for reapplication.

Incorporating Driftwood Decor into Different Interior Styles

Driftwood decor is versatile and can be incorporated into various interior design styles. Here’s how you can blend it into different aesthetics:

Coastal Style

Driftwood is a natural fit for coastal decor. Pair it with other coastal elements like shells, starfish, and nautical colors to create a beach-inspired retreat.

Rustic Style

The weathered, aged appearance of driftwood complements rustic decor perfectly. Combine driftwood with other natural materials like stone and metal for a rugged, yet inviting look.

Modern Style

Surprisingly, driftwood can also be incorporated into modern decor. Use sleek, minimalist pieces of driftwood as accents to add a touch of natural texture to clean, contemporary spaces.

Bohemian Style

Driftwood fits seamlessly into bohemian decor with its organic, free-spirited vibe. Mix and match driftwood with colorful textiles, eclectic accessories, and indoor plants for a cozy, boho-chic look.

Expert Tips for Driftwood Decor

Here are some expert tips to help you make the most of your driftwood decor:

  • Start Small: If you’re new to driftwood decor, start with smaller pieces and simple projects. As you become more comfortable working with driftwood, you can move on to larger and more complex creations.
  • Mix Materials: Combine driftwood with other natural materials like seashells, stones, and plants for a layered, textural look.
  • Use Contrast: Pair the rustic texture of driftwood with sleek, modern elements to create an interesting contrast in your decor.
  • Think Outside the Box: Don’t limit yourself to traditional driftwood projects. Get creative and think of unique ways to incorporate driftwood into your decor, like using it as a curtain rod or a base for a plant stand.

Conclusion

Driftwood branch decor offers a unique and charming way to bring the beauty of nature into your home. Whether you’re aiming for a coastal, rustic, or modern look, driftwood can add texture, character, and a touch of the sea to your space. From simple DIY projects to larger furniture pieces, the possibilities are endless. So next time you’re strolling along the beach or browsing online, keep an eye out for that perfect piece of driftwood that could become a treasured part of your home decor. With a bit of creativity and care, you can transform your space into a cozy, coastal haven that reflects your love for the natural world.

Filed Under: Driftwood Ideas Tagged With: Branch Decor, DIY, Driftwood, Natural Decor, Rustic

Driftwood Boat

July 17, 2024 by admin

Welcome to a world where the natural beauty of driftwood meets the craftsmanship of boat building. In this article, you’ll explore the intricate process of creating a “Driftwood Boat.” You’ll discover the journey from collecting pieces of wood adrift in nature to transforming them into a stunning, functional vessel. Along the way, you’ll learn about the tools, techniques, and artistic vision that bring these unique boats to life. Dive in and let your imagination set sail with the inspiring story of driftwood boat making. Have you ever considered building your own driftwood boat? Whether you’re a seasoned craftsman or just someone looking to take on a relaxing and rewarding project, creating a driftwood boat can be an immensely satisfying experience.

Driftwood Boat

What is a Driftwood Boat?

A driftwood boat is essentially a vessel constructed using pieces of driftwood, the naturally weathered wood that has been washed ashore by the tides. Driftwood’s unique appearance and texture make it an attractive material for various forms of art and craft, including boat building.

Why Choose Driftwood?

Natural Aesthetics

Driftwood offers an unparalleled natural beauty that is difficult to replicate. Each piece of driftwood is unique, shaped by the elements over time to create a look that is both rustic and elegant.

Sustainability

Driftwood is an environmentally friendly material. Using it for your boat project helps to upcycle naturally fallen wood that might otherwise go to waste, making it a sustainable choice.

Availability

Driftwood is often readily available along shorelines and riverbanks. This easy access can significantly cut down on material costs and make your building process more economical.

Getting Started with Your Driftwood Boat

Planning Your Project

Before you start collecting driftwood or breaking out the tools, it’s crucial to plan your project in detail.

Questions to ponder:

  • What will be the primary use of the boat? (e.g., fishing, leisure, decoration)
  • What size should the boat be?
  • What tools and materials will you need?

Collecting Driftwood

Locations to Search

Driftwood can be found in various places, but shorelines and riverbanks are usually the best spots.

  • Beaches: Often have a wide variety of driftwood types and sizes.
  • Rivers: Can offer more unique, less weathered pieces.
  • Lakes: A good option if you live inland.

Tip: Check local regulations to ensure you’re allowed to collect driftwood from these areas.

Types of Driftwood

Not all driftwood is created equal. Here are common types you might encounter:

TypeCharacteristics
SmoothSilky texture, well-weathered by water and sand
KnottyRough, with natural knots and twists
BarkPieces with bark still intact, offering more texture
Large LogsBulky, often used for the boat’s main structure

Selecting the Right Pieces

Select pieces that match the specific parts of the boat you need. For instance, larger, sturdier pieces for the boat’s keel and smaller, lighter pieces for the sides and detailing.

Safety Tip: Be careful when handling larger pieces to avoid injuries.

Tools and Materials You’ll Need

Essential Tools

To build a driftwood boat, you’ll need some basic tools and materials:

  • Saw: For cutting wood to desired sizes
  • Hammer: Essential for nailing pieces together
  • Nails and Screws: For joining pieces securely
  • Measuring Tape: For precision in measurements
  • Sandpaper: To smooth rough edges
  • Sealant/Varnish: To protect the wood from water damage

Optional Tools

  • Power Drill: For making precise holes
  • Chisels: For detailing and fitting pieces together
  • Jigsaw: For cutting intricate shapes

Driftwood Boat

Building the Boat

Creating the Frame

The frame is the backbone of your boat, providing structural integrity.

  1. Lay Out the Keel: Start with a large, sturdy piece of driftwood for the keel. This will run from the front (bow) to the back (stern) of the boat.
  2. Attach the Transom: The transom is the flat piece at the back of the boat. Secure it to the keel using nails or screws.
  3. Install the Ribbing: These are the curved pieces that give the boat its shape and are attached perpendicular to the keel.

Adding the Hull

The hull is the boat’s outer shell and is vital for buoyancy.

  1. Select Appropriate Driftwood Pieces: Look for long, straight pieces to form the hull’s outline.
  2. Attach Planks: Securely nail or screw these pieces to the frame, making sure there are no large gaps.
  3. Seal the Joints: Use a high-quality marine sealant to ensure watertight joints.

Finishing Touches

Once the primary structure is complete, it’s time to add some finishing touches:

  1. Sand All Surfaces: Use sandpaper to smooth out any rough edges.
  2. Apply Sealant or Varnish: This will protect the wood from water damage and bring out its natural beauty.
  3. Add Seats and Other Features: If your boat is functional, consider adding seats, oar locks, and other necessary features.

Safety Considerations

Testing for Buoyancy

Before taking your driftwood boat out on open water, it’s crucial to test its buoyancy in a controlled environment, like a swimming pool or a shallow part of a lake.

Load Capacity

Be aware of the boat’s load capacity. Driftwood boats, while sturdy, might not hold as much weight as commercially produced boats.

Safety Gear

Ensure you have life jackets, a first aid kit, and other necessary safety gear onboard whenever you set sail.

Enjoying Your Driftwood Boat

Fishing

The calmness of being on the water, paired with the rugged beauty of your driftwood boat, makes fishing an even more relaxing activity.

Leisure

Whether it’s a romantic evening rowing around a lake or spending a day soaking up the sun, your driftwood boat offers endless opportunities for enjoyment.

Decoration

Even if you’re not planning to take it out on the water, a driftwood boat can serve as a fantastic nautical decoration for your garden or home.

Maintenance Tips

Regular Inspections

Frequently inspect your boat for any signs of wear or damage. Look for cracks, loose joints, or areas where the sealant might be wearing off.

Reapplying Sealant

Over time, the sealant or varnish can wear off, especially if the boat is frequently in use. Regularly reapply to ensure the wood remains protected.

Storing the Boat

When not in use, store your driftwood boat in a dry, sheltered area to protect it from the elements.

Building Your Driftwood Boat: A Personal Voyage

Patience and Perseverance

Building a driftwood boat is not an overnight project. It takes time, effort, and a lot of patience.

Creative Freedom

One of the greatest joys of building with driftwood is the creative freedom it offers. No two pieces of driftwood are the same, and each board will give your boat its own character.

A Labor of Love

A driftwood boat isn’t just a functional vessel or a decorative item; it’s a labor of love. Each cut, nail, and stroke of varnish is part of a unique narrative you’re creating with your own hands.

Engaging with the Driftwood Community

Online Forums and Groups

There are several online communities where enthusiasts share tips, plans, and stories about their own driftwood boat projects. These platforms can be a valuable resource for troubleshooting and inspiration.

Workshops and Meetups

Keep an eye out for local workshops or meetups focused on driftwood crafts. These can provide hands-on experience and the opportunity to learn from seasoned builders.

Final Thoughts

Building a driftwood boat is a deeply rewarding endeavor that combines creativity, craftsmanship, and a love for nature. The process is as enriching as the final product, offering numerous opportunities to connect with the natural world and showcase your artistic skills. Whether you’re planning to cruise serenely across a lake or display your work as a centerpiece in your garden, your driftwood boat will be a testament to your dedication and ingenuity.

So, get out there, start collecting those unique pieces of driftwood, grab your tools, and embark on this thrilling adventure. Your driftwood boat awaits!

Filed Under: Driftwood Ideas Tagged With: boat, DIY, Driftwood, Handmade Craft, Woodworking

Driftwood Bathroom

July 17, 2024 by admin

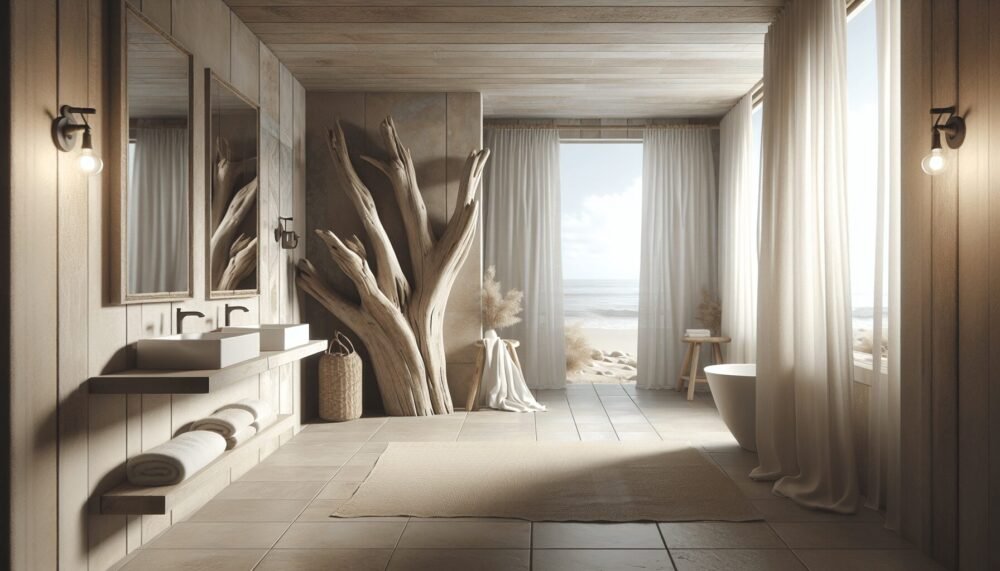
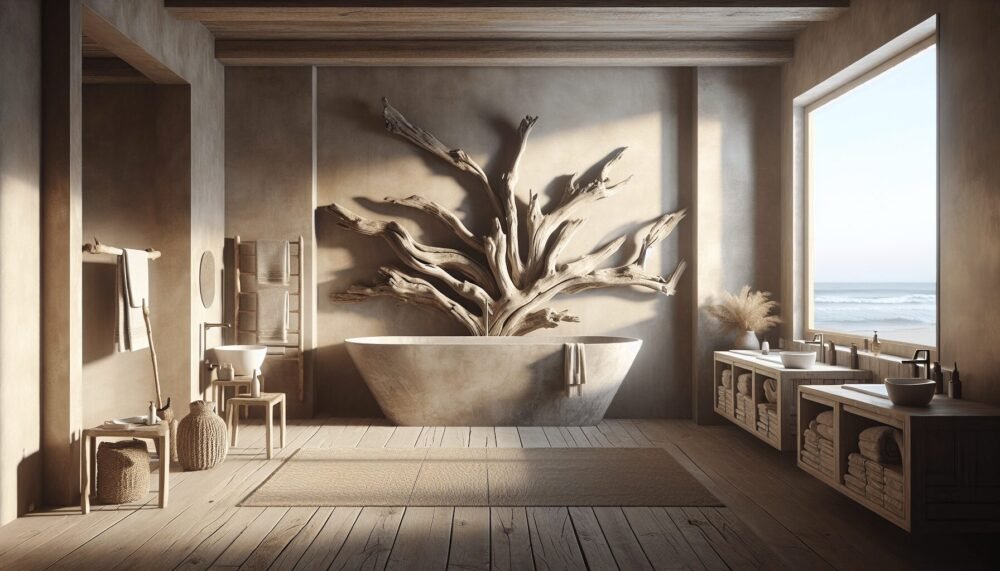
Imagine stepping into your very own Driftwood Bathroom, where the serene ambiance of a coastal retreat meets the rustic charm of weathered wood. In this article, you’ll discover how to transform your bathroom into a tranquil oasis using driftwood and other natural elements. You’ll learn about the best ways to source and treat driftwood, creative ideas for incorporating it into your decor, and tips on harmonizing the overall design with soft, earthy tones and textures. Get ready to drift away into a world of relaxation and natural beauty every time you step into your bathroom. Have you ever dreamed of transforming your bathroom into a tranquil, nature-inspired retreat? If so, a driftwood bathroom might be the perfect design choice for you. The beauty of driftwood lies in its natural, weathered appearance, which evokes memories of serene beach walks and coastal getaways. Plus, its neutral tones can seamlessly blend with various decor styles, from rustic to contemporary.

What is a Driftwood Bathroom?

A driftwood bathroom incorporates elements of driftwood and other natural materials to create a rustic, coastal-inspired atmosphere. It’s a bathroom where functionality meets beauty, where nature and modern design meld seamlessly. This space aims to evoke a sense of calm and relaxation, making it the ideal spot to unwind after a long day.

The Essence of Driftwood

Driftwood, as the name suggests, is wood that has been worn smooth by the action of seawater, sand, and time. Its natural, weathered appearance exudes a sense of history and timeless beauty. This makes it an excellent material for adding an earthy, organic touch to any room, especially a bathroom.

Benefits of a Driftwood Bathroom

A driftwood bathroom isn’t just about aesthetics. Here are some additional benefits:

  • Eco-friendly: Using driftwood is a great way to recycle and repurpose natural materials.
  • Versatile: Driftwood can be adapted to various styles, from rustic to chic.
  • Durable: Properly treated driftwood is extremely durable and can withstand wet environments, making it perfect for bathrooms.
  • Unique: Each piece of driftwood is unique, lending a one-of-a-kind charm to your bathroom decor.

Key Elements of a Driftwood Bathroom

To create a cohesive driftwood bathroom, it’s important to include a few key elements. These include walls, floors, fixtures, and accessories. Let’s dive deeper into each of these components.

Walls: The Backbone of Your Design

The walls set the stage for your driftwood bathroom. Depending on your preference and budget, there are several ways to incorporate driftwood into your walls.

Driftwood Cladding

This involves attaching pieces of driftwood directly to your walls. It can be a time-consuming process, but the results are stunning. You’ll get a unique, textured wall that serves as a beautiful focal point in your bathroom.

Driftwood Panels

If cladding your entire wall seems daunting, you can opt for driftwood panels. These are pre-assembled sections of driftwood that can be easily attached to walls. They provide a similar look with less effort.

Wallpaper

For an easier and more budget-friendly option, consider driftwood-patterned wallpaper. It gives the illusion of driftwood without the time and cost associated with real wood.

Floors: Setting a Natural Foundation

The flooring in your driftwood bathroom should complement the walls while also being practical for a wet environment.

Solid Wood Floors

For a truly authentic look, you can use solid wood flooring. However, make sure the wood is properly sealed to withstand moisture.

Wood-look Tiles

These tiles mimic the appearance of wood but are made from materials like porcelain or ceramic. They’re an excellent choice for a bathroom because they are water-resistant and easy to clean.

Fixtures: Functional Beauty

Fixtures are the functional elements in your bathroom, including the sink, tub, and vanity. Choose pieces that not only serve their purpose but also enhance your driftwood theme.

Sink and Vanity

A driftwood vanity can be a stunning centerpiece in your bathroom. Combine it with a vessel sink made of natural materials like stone or copper for an added touch of luxury.

Bathtub

A freestanding tub made from natural materials can elevate your driftwood bathroom. Stone, copper, or even a beautifully crafted wooden tub can be excellent choices.

Accessories: The Finishing Touches

The right accessories can tie your driftwood bathroom together and make it truly special. Here are a few ideas to consider.

Mirrors

A mirror framed with driftwood can add a rustic charm to your bathroom. It’s a simple yet effective way to incorporate more driftwood into the space.

Shelving

Driftwood shelves are both functional and decorative. They provide storage space while also adding to the overall aesthetic of your bathroom.

Lighting

Choose lighting fixtures that complement your driftwood theme. Think of pendant lights with natural fiber shades or sconces made from metal and wood.

Driftwood Bathroom

How to Source Quality Driftwood

Finding the perfect driftwood can be a bit of a challenge, but it’s worth the effort. Here are some tips to help you source quality driftwood.

Beachcombing

One of the most enjoyable ways to find driftwood is by beachcombing. Head to your nearest beach and look for pieces that catch your eye. Be mindful of local regulations, as some areas may have restrictions on collecting driftwood.

Online Retailers

If beachcombing isn’t an option, there are plenty of online retailers that sell driftwood. Websites like Etsy and eBay often have unique, high-quality pieces available.

Local Artisans

Check out local artisans and craftsmen who specialize in working with driftwood. They often have beautiful, one-of-a-kind pieces that can add a special touch to your bathroom.

Incorporating Driftwood with Other Materials

While driftwood is the star of the show, it should be complemented by other materials to create a balanced and harmonious space.

Natural Stone

Natural stone, such as slate or marble, pairs beautifully with driftwood. Use it for your countertops, flooring, or even as an accent wall.

Metals

Metal fixtures in brushed nickel, copper, or wrought iron can add a modern touch and contrast beautifully with the organic look of driftwood.

Fabrics

Soft, natural fabrics like linen or cotton can add a cozy feel to your bathroom. Think of towels, shower curtains, and even small rugs to soften the space.

Plants

Adding some greenery can bring life to your driftwood bathroom. Choose plants that thrive in humid conditions, such as ferns, pothos, or orchids.

Driftwood Bathroom

Maintenance Tips for a Driftwood Bathroom

While driftwood bathrooms are relatively low-maintenance, there are a few key things to keep in mind to ensure your bathroom stays beautiful for years to come.

Sealing Your Driftwood

One of the most important steps you can take is to seal your driftwood. This helps protect it from moisture and prevents it from deteriorating over time. Use a high-quality sealant specifically designed for wood.

Cleaning

Regular cleaning is essential. Use mild, non-abrasive cleaners to keep your driftwood and other materials looking their best. Avoid harsh chemicals that can damage the wood.

Humidity Control

Bathrooms are naturally humid environments, but excessive moisture can be damaging. Make sure your bathroom is well-ventilated. An exhaust fan can be very helpful in controlling humidity levels.

Driftwood Bathroom Inspiration

Need some inspiration? Here are a few driftwood bathroom ideas to spark your creativity.

Coastal Retreat

Imagine a bathroom that feels like a seaside escape. Use driftwood cladding on one wall, pair it with white wood-look tiles on the floor, and add nautical-inspired accents such as seashells and coral.

Rustic Elegance

Combine driftwood elements with luxurious materials like marble and brass. A driftwood vanity paired with a marble countertop and brass fixtures can create a stunning, elegant look.

Modern Minimalist

For a more modern approach, use driftwood sparingly. A single, striking piece of driftwood as a shelf or mirror frame can make a bold statement in an otherwise minimalist bathroom.

Common Mistakes to Avoid

When creating your driftwood bathroom, there are a few common mistakes you should avoid to ensure the end result is both beautiful and functional.

Overusing Driftwood

While driftwood is beautiful, it’s possible to have too much of a good thing. Make sure to balance driftwood elements with other materials to avoid an overwhelming look.

Ignoring Practicality

It’s easy to get caught up in the aesthetics, but don’t forget about functionality. Make sure your bathroom is still practical and easy to use. For example, choose materials that are easy to clean and maintain.

Skimping on Quality

Quality matters, especially in a bathroom environment. Invest in high-quality driftwood and other materials that can withstand moisture and humidity.

Budgeting for Your Driftwood Bathroom

Creating a driftwood bathroom doesn’t have to break the bank. With careful planning and budgeting, you can achieve a beautiful, high-end look without overspending.

High-End Budget

If money is no object, you can splurge on custom-made driftwood furniture, high-end fixtures, and luxury materials like marble and natural stone.

Mid-Range Budget

With a mid-range budget, you can still achieve a stylish driftwood bathroom. Consider using a mix of real driftwood and driftwood-look materials, and shop for mid-range fixtures and accessories.

Budget-Friendly

For those on a tighter budget, focus on subtle, DIY driftwood touches. Use driftwood-inspired wallpaper, thrift store finds, and simple accessories to achieve the look without spending a fortune.

Here’s a simple table summarizing budgeting tiers:

Budget TypeKey Features
High-EndCustom driftwood furniture, luxury materials
Mid-RangeMix of real and imitation driftwood, mid-range fixtures
Budget-FriendlyDIY projects, driftwood wallpaper, thrifted items

Bringing Your Driftwood Bathroom to Life

Now that you have all the information you need, it’s time to bring your driftwood bathroom to life. Remember to balance driftwood elements with other natural materials, maintain practicality, and, most importantly, create a space that reflects your personal style.

Step-by-Step Guide

Here’s a simple step-by-step guide to help you get started:

  1. Plan Your Design: Start with a clear vision of what you want your driftwood bathroom to look like.
  2. Budget: Determine your budget and decide which elements are most important to you.
  3. Source Materials: Begin sourcing your driftwood and other materials.
  4. Prep Your Space: Clean and prep your bathroom for the new design.
  5. Install Major Elements: Start with the bigger elements like walls, floors, and fixtures.
  6. Add Details: Finish with the smaller details like accessories and plants.
  7. Seal and Maintain: Make sure everything is sealed properly and establish a regular maintenance routine.

Creating a driftwood bathroom is a rewarding project that can transform your space into a serene and stylish retreat. By paying attention to the key elements and avoiding common mistakes, you can achieve a beautiful, eco-friendly bathroom that you’ll love for years to come. Enjoy the process and let your creativity flow!

Filed Under: Driftwood Ideas Tagged With: Bathroom Design, Coastal Decor, DIY, Driftwood, Rustic style

How To Get Pottery Barn Driftwood Finish

July 17, 2024 by admin

Ready to transform your furniture with the charming, coastal appeal of Pottery Barn’s driftwood finish? This guide will walk you through the steps to achieve that weathered, rustic look on your own pieces, whether you’re working with new or old wood. From prepping your materials to applying the final touches, you’ll discover tips and tricks to create a beautiful and durable finish that mimics the rich texture and color of driftwood. Get ready to give your home a fresh, beachy vibe with this easy-to-follow tutorial on achieving the perfect Pottery Barn driftwood finish. Have you ever fallen in love with the timeless and rustic elegance of the Pottery Barn Driftwood finish? Whether it’s a gorgeous console table, a sophisticated dresser, or a set of driftwood frames, the unique blend of natural charm and crafty sophistication can make any furniture piece stand out. But if buying new isn’t in your budget, or you are feeling a bit crafty, don’t worry! You can achieve this beautiful finish yourself with a few simple steps and materials.

How To Get Pottery Barn Driftwood Finish

Understanding the Driftwood Finish

The driftwood finish is all about replicating the natural aging process that wood undergoes when exposed to the elements over time. It gives pieces a weathered, sun-bleached look that’s perfect for coastal and rustic décor. Before we dive into the ‘how-tos,’ it helps to understand why the driftwood finish is so enchanting.

Benefits of Driftwood Finish

Beyond its aesthetic appeal, the driftwood finish comes with several benefits:

  • Timeless Appeal: It fits various décor styles, from coastal to rustic to shabby chic.
  • Versatility: Works on different types of wood and a variety of furniture pieces.
  • DIY Friendly: You can achieve professional results with basic tools and materials.

Materials You’ll Need

Gathering the right materials is the first step to achieving the Pottery Barn driftwood finish. Here’s what you’ll need to get started:

MaterialPurpose
Sandpaper (120 and 220 grit)For sanding the wood surface
White vinegar and steel woolTo create the aging solution
Paintbrushes and ragsFor applying varnish and stains
Gray stain and whitewash paintFor achieving the signature driftwood color
Clear matte finish sealantTo protect the finished piece
Painter’s tapeTo protect areas not intended for finishing

Preparing Your Furniture

Preparation is key to ensure that the finish adheres well and looks fantastic. Here’s a step-by-step guide on how to prepare your furniture piece.

Clean the Surface

Start by cleaning the surface of your furniture thoroughly. Remove any dirt, grease, or old paint using a mixture of water and mild soap. Make sure the wood is completely dry before moving on to the next step.

Sand the Surface

Using 120-grit sandpaper, sand the entire surface of the furniture lightly. This ensures that the wood will absorb the stain evenly. Once you’ve completed the initial sanding, switch to 220-grit sandpaper for a smoother finish. Always sand in the direction of the wood grain to avoid scratches.

Creating the Aging Solution

A significant part of the driftwood effect comes from the aged look of the wood. You can easily create an aging solution at home using white vinegar and steel wool.

Making the Solution

  1. Prepare the Steel Wool: Take a piece of steel wool (preferably the finest grade) and tear it into smaller pieces.
  2. Combine with Vinegar: Place the steel wool pieces into a jar and pour white vinegar over them, ensuring they are fully submerged.
  3. Let it Sit: Secure the jar with a lid and let the mixture sit for at least 24 hours. The vinegar will break down the steel wool, creating a dark, iron-infused solution.

Applying the Aging Solution

Once your solution is ready:

  1. Strain the Solution: Use a coffee filter or cheesecloth to strain out any remaining steel wool fragments.
  2. Apply to Wood: Using a paintbrush or a rag, generously apply the solution to the wood. Let it dry completely. The wood should take on a naturally aged, grayish tint.

How To Get Pottery Barn Driftwood Finish

Achieving the Driftwood Color

Now comes the fun part—layering stains and washes to achieve the perfect driftwood look.

Applying Gray Stain

  1. Choose the Right Stain: Select a gray wood stain that closely resembles the driftwood color.
  2. Apply the Stain: Using a paintbrush, apply the gray stain evenly across the surface. Make sure to follow the wood grain.
  3. Wipe Excess: After about 5-10 minutes, use a clean rag to wipe off any excess stain. Let it dry for at least 24 hours.

Whitewashing the Wood

The whitewash step adds to the weathered essence of driftwood.

  1. Dilute the Paint: Mix white latex paint with water at a ratio of approximately 1:1 to create a whitewash.
  2. Apply Thinly: Using a paintbrush, apply a light coat of the whitewash over the stained wood. Allow it to sit for a few minutes before wiping off any excess with a clean rag.
  3. Layer if Needed: If the whitewash is too light, apply another thin layer until you achieve the desired effect.

Sealing the Finish

To protect your newly finished piece and give it a long-lasting appeal, it’s crucial to apply a sealant.

Choosing the Right Sealant

For a natural look, opt for a clear matte finish sealant. It will protect the wood without making it overly glossy.

Application Steps

  1. Prepare: Ensure your piece is clean and free of dust.
  2. Apply Sealant: Using a clean brush, apply the sealant evenly across the surface.
  3. Multiple Coats: For best results, apply 2-3 coats, allowing each coat to dry thoroughly according to the manufacturer’s instructions.

Troubleshooting Common Issues

Even with the best preparations, you might encounter a few issues along the way. Here’s how to troubleshoot common problems:

IssueSolution
Stain Isn’t Absorbing EvenlySand the surface more thoroughly to open up the wood grain.
Finish Looks Too DarkLightly sand the surface and reapply a diluted whitewash.
Blotchy AppearanceApply a pre-stain conditioner before staining.

Fixing Uneven Stain Absorption

If the stain isn’t absorbing evenly, there might be a coating or residue on the wood surface. Lightly sanding the affected areas and reapplying the stain can help improve absorption.

Adjusting the Tone

If the finish looks too dark, you can lighten it by lightly sanding and applying another layer of diluted whitewash. On the contrary, if it’s too light, adding another coat of the aging solution or gray stain can darken it.

Dealing with Blotchy Results

Blotchy appearances can be minimized by using a pre-stain wood conditioner. This step ensures more even stain absorption, especially on softer woods.

Maintaining Your Driftwood Finished Furniture

To keep your driftwood-finished pieces looking their best, some regular maintenance is required.

Cleaning Tips

  • Dust Regularly: Use a soft cloth to remove dust and debris.
  • Avoid Harsh Chemicals: Clean with mild soap and water to avoid damaging the sealant.

Reapplying Sealant

Over time, the protective sealant may wear off.

  • Inspect Regularly: Check your furniture for wear and tear signs.
  • Reapply Sealant: When needed, lightly sand the surface and reapply a fresh coat of clear matte finish sealant.

Frequently Asked Questions

1. Can I use this technique on all types of wood?

While this technique works best on porous woods like pine, oak, and cedar, you can also use it on other types of wood by ensuring rigorous sanding to open up the grain.

2. How long will this finish last?

With proper care and maintenance, your driftwood finish can last many years. Regular cleaning and occasional reapplication of the sealant can keep it looking fresh.

3. Can I skip the aging solution?

The aging solution helps achieve the authentic, weathered look. While you can skip it, the results might not be as naturally textured.

4. Is it possible to reverse the driftwood finish?

Reversing this finish involves sanding down the wood and starting fresh. It can be labor-intensive but not impossible.

5. Can I use this finish on outdoor furniture?

While you can use this technique on outdoor furniture, ensure you use a weather-resistant sealant to protect it from the elements.

Conclusion

Achieving the Pottery Barn driftwood finish is a rewarding and enjoyable DIY project. Not only do you get to create a piece of furniture that’s uniquely yours, but you also imbue your home with a touch of rustic elegance that you can be proud of. With patience, the right materials, and a bit of elbow grease, you can transform any wooden piece into a stunning driftwood masterpiece.

So grab your sandpaper and brushes, and get ready to bring the beauty of driftwood into your home! Feel free to experiment and make the finish your own—after all, that’s the charm of DIY projects. Enjoy the process, and happy crafting!

Filed Under: Driftwood Ideas Tagged With: DIY, Driftwood Finish, home decor, Pottery Barn

  • « Previous Page
  • Page 1
  • …
  • Page 27
  • Page 28
  • Page 29
  • Page 30
  • Page 31
  • …
  • Page 41
  • Next Page »

Primary Sidebar

Driftwood4us.com, is a participant in the Amazon Services LLC Associates Program, an affiliate advertising program designed to provide a means for sites to earn advertising fees by advertising and linking to amazon.com.