• Skip to main content
  • Skip to primary sidebar
  • Terms and Conditions
  • Privacy Policy
  • Contact

Driftwood 4 Us

Just About Driftwood

DIY

Driftwood Lampshade

May 4, 2025 by admin

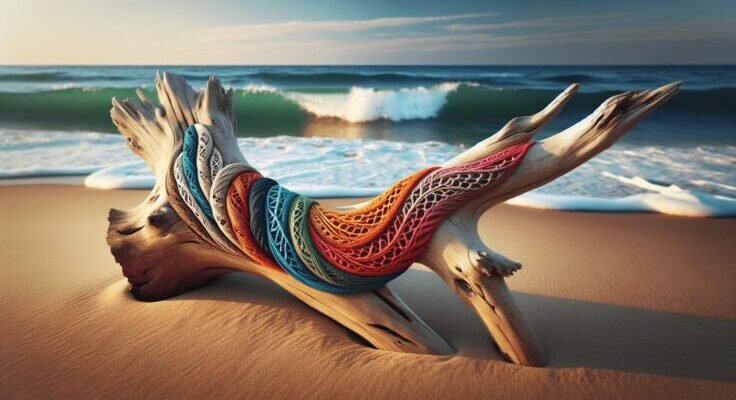
Have you ever looked at a piece of driftwood and imagined what stories it could tell? As you walk along a beach, with the gentle waves kissing the shoreline, you might notice intriguing pieces of driftwood scattered about, each with its own unique shape and character. Often, these naturally sculpted wood pieces hold untapped potential, waiting for someone creative to transform them into a functional art piece, like a stunning lampshade for your home.

What is Driftwood?

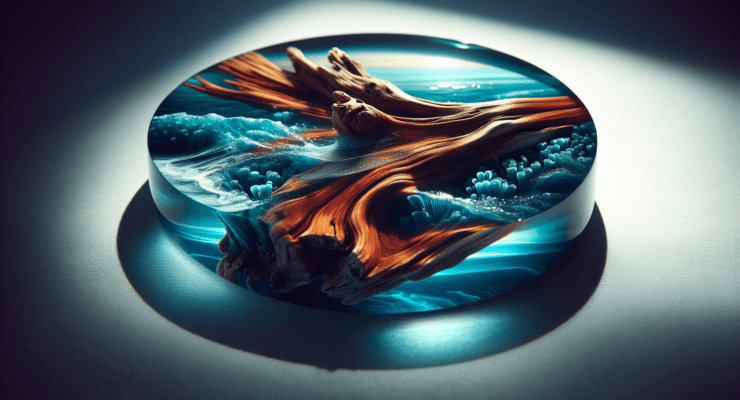
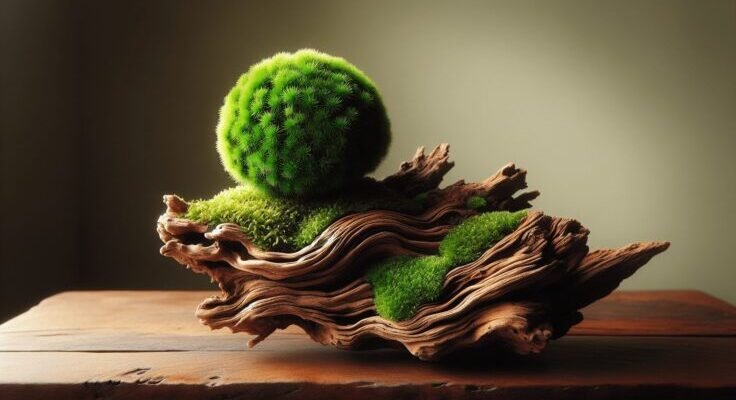
Driftwood is a term for wood that has been washed onto the shore by winds, waves, tides, or floods. The process of becoming driftwood often takes years, with the wood picked up by the ocean and weathered over time. This weathering process enhances its unique texture, making each piece different. Driftwood can be remnants of trees, branches, or man-made wooden objects that have been worn down by water, giving them a smooth, rustic appearance.

The Appeal of Driftwood in Decor

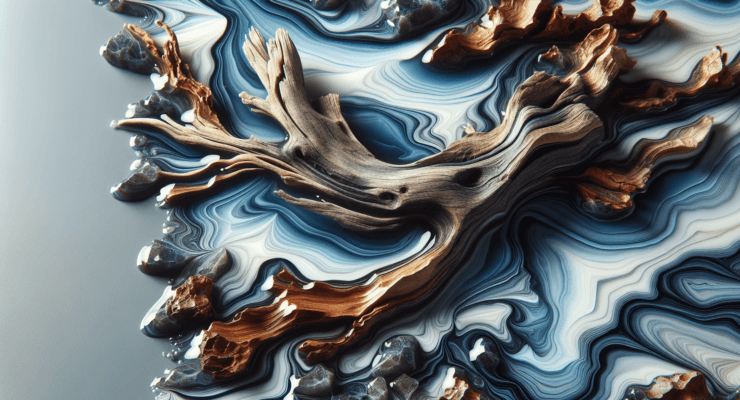
The allure of driftwood in home decor is its ability to bring a piece of nature indoors. It’s not just about the look; it’s about the story and history encapsulated within each piece. The natural, rustic texture of driftwood adds warmth and character to any room, making it a favored material for interior designers and DIY enthusiasts alike. Its versatile nature complements various styles, from the minimalist aesthetic to the more eclectic or rustic vibes.

Why Choose a Driftwood Lampshade?

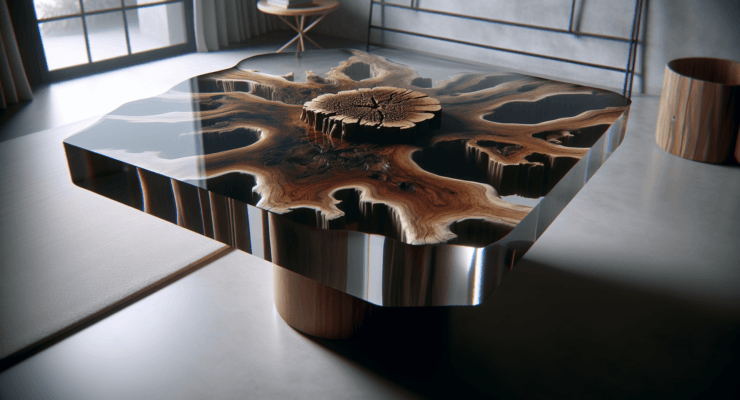
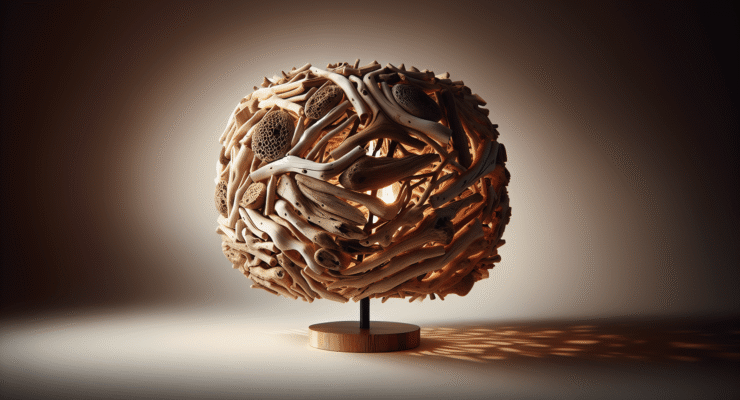
When considering elements to enhance the ambiance of a space, lighting plays a pivotal role. A driftwood lampshade serves as both a source of light and an artistic statement. The organic shapes and textures of the driftwood can bring a touch of nature, giving your space a serene, coastal feel.

Eco-friendly and Sustainable

In today’s world, sustainability is key, and using driftwood is an excellent way to incorporate eco-friendly materials into your home. Driftwood is recycled by nature, already altered by the elements, requiring no further processing. By choosing driftwood, you are repurposing something that would otherwise be left to decompose naturally, thus reducing waste and minimizing environmental impact.

Unique and Customized

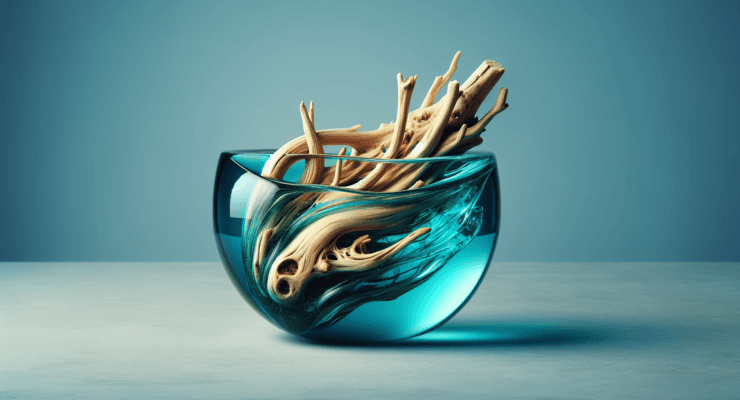
Each driftwood lampshade is unique. Due to the natural process of how driftwood is formed, no two pieces are identical. This uniqueness allows for personalized home decor that stands out. You have the opportunity to create or commission a lampshade that reflects personal taste and style, making it a perfect piece for someone who values individuality in their home design.

Driftwood Lampshade

Creating Your Driftwood Lampshade

Making your own driftwood lampshade can be a rewarding endeavor. Not only do you end up with a beautiful piece of functional art, but you also gain the satisfaction of crafting something unique with your hands.

Gathering Materials

The first step is gathering the necessary materials. You will need to go on a driftwood hunt, perhaps a fun outing to your local beach. Look for pieces that appeal to you in terms of shape and size, considering how they might fit together in a lampshade form.

Here’s a basic list of what you might need:

MaterialsTools
Driftwood piecesDrill
Lamp hardware kitHot glue gun
Shade frameSandpaper
Epoxy or wood glueProtective gloves
Light bulbWire cutters

Choosing the Right Driftwood Pieces

Selecting the right driftwood can be the most creative part. Consider the size of the lampshade you want to create and which pieces of driftwood will complement each other. It’s essential to ensure the wood is completely dried out to prevent any issues with moisture later on. Sand down any rough edges to make the pieces easier to handle and arrange.

Constructing the Lampshade

Once you have your materials ready, it’s time to start constructing your lampshade. Begin by arranging the driftwood on the frame, ensuring they align in a way that covers the entire structure and adheres securely. You can use wood glue or epoxy for bonding the driftwood to the frame, and for a quicker process, a hot glue gun can be handy. Drill appropriately sized holes if necessary to fit pieces together snugly.

Installing the Lamp Hardware

With the driftwood in place, attach the lamp hardware. Most lamp hardware kits come with instructions, making it easy to follow. Ensure the light bulb sits securely and test the electrical components before finalizing the setup.

Final Touches

To give your driftwood lampshade a finished look, consider sealing it with a clear, matte varnish. This not only protects the wood from dust and grime but also enhances its natural color and texture.

Caring for Your Driftwood Lampshade

Maintaining your driftwood lampshade is relatively simple but requires some attention to preserve its beauty.

Regular Cleaning

Dust the driftwood lampshade regularly with a soft, dry cloth. Avoid using water or any cleaning agents, as they might damage the wood or cause discoloration.

Managing Humidity

Try to keep the lampshade in areas with stable humidity levels. Fluctuations can cause the wood to crack or warp.

Light Bulb Considerations

Consider using LED bulbs, which emit less heat, helping preserve the integrity of the driftwood over time.

Driftwood Lampshade

Styling Ideas for Driftwood Lampshades

The beauty of driftwood lampshades is in their versatility, fitting seamlessly in various decor styles. Here are some ideas on where to place your driftwood lampshade in your home:

Coastal Chic

If your home has a coastal chic style, a driftwood lampshade complements the light and airy vibes. Pair it with soft blues, sandy neutrals, and woven textures to create a serene and relaxing atmosphere reminiscent of a beach house.

Rustic Retreat

For a rustic or cabin-style home, a driftwood lampshade pairs perfectly with warm woods and cozy textiles, adding to the welcoming and homey feel.

Modern Minimalist

In a modern minimalist home, a single statement piece like a driftwood lampshade can add interest and texture without overwhelming the space. Pair it with simple, neutral decor to keep the focus on the unique features of the driftwood.

Eclectic Elegance

For those who prefer an eclectic style, the driftwood lampshade can serve as a conversation starter. Mix and match textures, colors, and patterns, using the lampshade as a central piece to tie elements of the room together.

Conclusion

The driftwood lampshade is more than just a source of light—it’s a piece of art, a talking point, and a sustainable choice that brings nature’s beauty into your home. Whether creating one yourself or purchasing a bespoke piece, the driftwood lampshade offers limitless potential to personalize and enhance your living space. As you admire its beauty and uniqueness, you’ll be reminded of the natural world and the creative possibilities that driftwood provides. Embrace this chance to bring a touch of the shoreline into your home, crafting an atmosphere filled with warmth, personality, and charm.

Filed Under: Driftwood Ideas Tagged With: DIY, Driftwood, Lampshade, Rustic

Driftwood With Epoxy

April 20, 2025 by admin

Have you ever gazed upon a piece of driftwood and wondered what beauty could be crafted if it were combined with the fluid elegance of epoxy resin? Driftwood, with its naturally sculpted forms, and epoxy, with its glossy finish, can unite to create truly stunning art and functional pieces. In this article, you’ll discover the magic of transforming driftwood with the help of epoxy, offering endless possibilities in your creative journey.

Driftwood With Epoxy

Understanding Driftwood

Driftwood is wood that has washed onto the shore, shaped and changed by the natural forces of water and weather. It’s often found along beaches, riverbanks, and lakesides. Naturally weathered and smoothed, each piece of driftwood carries its own unique character and story.

The Appeal of Driftwood

Why use driftwood in your projects? Driftwood carries a natural beauty brought on by its journey through water, which might span years or even decades. It encapsulates nature’s artistry—a unique testament to time and environment. Its organic shapes and varied textures make it an interesting and dynamic material for a wide range of creative projects.

Environmental Considerations

When collecting driftwood, it’s important to be mindful of environmental impacts. Always ensure that you’re collecting legally and ethically, respecting local restrictions and habitats. Many regions have guidelines to protect ecosystems that rely on driftwood, so research local regulations before gathering materials for your project.

The Magic of Epoxy Resin

Epoxy resin is a versatile medium used frequently in arts and crafts, as well as in industrial applications. Known for its firm, clear finish, it can combine seamlessly with other materials to enhance their natural beauty.

What is Epoxy Resin?

Epoxy resin is a polymer that begins in a liquid form but hardens to a glass-like sheen when mixed with a curing agent. This transformative process can protect surfaces, provide structural strength, and offer a variety of finishes from matte to glossy.

Why You Should Consider Epoxy

The advantages of using epoxy resin are numerous. It provides a protective and durable finish, enhances colors and textures, and adds a professional touch to any project. The resin’s clarity can also highlight the intricate details of the driftwood, making the collaboration of these two materials visually stunning.

Preparing Driftwood for Epoxy Projects

Before you can pair driftwood with epoxy, the wood must be properly prepared. Preparation ensures the durability of your final project and helps achieve the look you desire.

Cleaning Your Driftwood

Begin by cleaning the wood to remove dirt, salt, and other residues. Soak the driftwood in fresh water, changing it regularly until the water runs clear. You might also scrub the surface with a brush to remove any stubborn debris. Allow the wood to dry completely before moving on to the next step.

Stabilizing and Treating

To stabilize the driftwood, you might need to seal it to prevent interactions between the wood’s natural oils and the epoxy. You can seal the wood using a coat of clear spray varnish before applying epoxy. Ensure that the driftwood is completely dry to prevent any trapped moisture from causing issues during the epoxy curing process.

Structuring and Designing

Consider how you want to use your driftwood. Will it serve as a stand-alone piece, or is it part of a larger structure such as a table or sculpture? This step is crucial to ensuring that your design vision is practical and achievable. Draft designs and plan your epoxy application to bring your concept to fruition.

Driftwood With Epoxy

Creating Your Driftwood and Epoxy Masterpiece

After preparing your materials, the real fun begins—creating with driftwood and epoxy resin. This process can enhance the natural features of both materials while adding your personal artistic touch.

Choosing the Right Epoxy

When selecting epoxy, consider the requirements of your specific project. Different formulations cater to various needs, such as speed of curing, UV resistance, and clarity. Ensure the chosen epoxy suits the conditions in which the object will be used (e.g., indoors vs. outdoors) and the aesthetic effect you wish to achieve.

Mixing and Applying Epoxy

Follow manufacturer instructions carefully when mixing epoxy. Ensuring the precise ratio of resin to hardener is crucial for a successful cure. Once mixed, apply the epoxy evenly onto the driftwood. Depending on your design, consider whether you’ll pour it to fill crevices, coat surfaces, or encapsulate objects within your resin.

Layering for Depth and Interest

Multiple layers of epoxy can add depth and interest to your project. Allowing each layer to cure before adding the next can create a sense of dimension and complexity. You might also consider adding colorants or inclusions to layers for unique effects.

Crafting Projects with Driftwood and Epoxy

The potential projects that use driftwood and epoxy are virtually limitless. Here are a few ideas to spark your creativity:

Driftwood and Epoxy Tables

A popular use of driftwood and epoxy is in creating custom tables. Position the driftwood as the centerpiece of a table and encase it within a mold filled with epoxy to create a striking natural work of art.

Sculptures and Art Pieces

Driftwood’s natural form is perfect for creating sculptures. The combination with epoxy allows for the introduction of color and fluid movement that contrasts beautifully against the natural textures of the wood.

Jewelry and Home Decor

Even small pieces of driftwood can become extraordinary when enhanced with epoxy. Consider crafting unique jewelry pieces or home decor such as wall hangings, clocks, or candle holders.

Caring for Your Driftwood and Epoxy Creations

Proper care and maintenance will ensure that your creations are enjoyed for years to come.

Cleaning Tips

When cleaning, avoid harsh chemicals that could damage the epoxy finish. Instead, use a soft cloth and mild soap solution for regular upkeep. Wipe surfaces gently to avoid scratching or dulling the surface.

Repairing Scratches

Over time, epoxy surfaces might get scratched. You can buff out minor scratches with a polishing compound and a soft cloth. For deeper scratches, consider applying a new topcoat of epoxy after lightly sanding the affected area.

Challenges and Solutions in Working with Driftwood and Epoxy

Like any creative endeavor, working with driftwood and epoxy may present certain challenges, but most can be easily overcome with preparation and knowledge.

Common Challenges

Some potential issues include bubbles forming in the epoxy, uneven surfaces, or unsatisfactory curing. These can usually be avoided with careful preparation and attention to detail.

Overcoming Challenges

To prevent bubbles, consider using a heat gun to gently remove them after pouring. Consistent ambient temperature and humidity can help ensure even curing. Should any challenges arise, a patient and methodical approach can usually lead to successful resolution.

Your Journey with Driftwood and Epoxy

Driftwood and epoxy resin are a harmonious combination that dares you to explore the boundaries of your imagination. The blend of natural and synthetic materials results in pieces that are as functional as they are beautiful. Whether you’re crafting a small keepsake or embarking on a larger-scale project, you’ll find this medium versatile and rewarding.

Experiment and Enjoy

The most important aspect of your creative journey is to enjoy the process. Experiment with different techniques, play with colors and textures, and allow your artistic intuition to guide you. As you develop your skills, you’ll not only create stunning art but also hone a craft that is both satisfying and rewarding.

Conclusion

Transforming driftwood with epoxy resin is an exciting venture into the world of artistic creativity. By understanding how to prepare, design, and bring your unique vision to life, you can craft breathtaking pieces that meld the timeless beauty of nature with the innovative potential of modern materials. Embrace the opportunity to create art that tells a story and inspires wonder.

Filed Under: Driftwood Ideas Tagged With: DIY, Driftwood, Epoxy Resin, home decor, Woodworking

Driftwood And Epoxy

April 18, 2025 by admin

Have you ever found yourself captivated by the beauty of driftwood washed ashore, weathered by the elements and full of character, only to wonder how to incorporate such natural elegance into your home? Driftwood and epoxy work together seamlessly, crafting stunning pieces that blend the raw allure of natural materials with the glossy perfection of synthetics. This fusion not only showcases artistic flair but also respects and honors the natural beauty of the wood itself.

Driftwood And Epoxy

Understanding Driftwood

Driftwood, nature’s artwork, is a wood piece that’s been shaped and smoothed by natural forces such as water and weather. Originating from fallen trees or branches, it can travel for miles, tumbling and turning until it washes ashore, cast by the waves. Each piece is unique, bearing the marks of its journey.

Characteristics of Driftwood

When you first consider driftwood, its unique characteristics immediately stand out. Each piece is shaped by its own journey through rivers and seas, making it a canvas rich with history and texture. The colors range from soft grays to warm, earthy browns, often bleached by the sun and stained by minerals from the water.

Collecting Driftwood

If you enjoy beachcombing, collecting driftwood can be a rewarding experience. However, it’s important to respect the environment and local regulations, as some areas prohibit the removal of driftwood to preserve natural habitats. When you find driftwood you can collect, ensure it’s solid and not crumbly, as sturdier pieces are better suited for crafting.

Introducing Epoxy

Epoxy resin is a versatile material used widely in the art and crafting community for its ability to create a clear, hard surface. This synthetic compound is applied in liquid form and then hardens, making it perfect for a myriad of applications, from table coatings to intricate art pieces.

Why Use Epoxy with Driftwood?

The marriage of epoxy with driftwood enhances the natural beauty of the wood, filling crevices and cracks while preserving its organic form. Epoxy adds durability and a polished look that complements the rustic appeal of driftwood, providing both function and form. When cured, epoxy is incredibly strong and water-resistant, making it ideal for household items like tables, sculptures, and countertops.

Driftwood And Epoxy

Crafting with Driftwood and Epoxy

Blending driftwood and epoxy is not merely an art; it’s a process, one that involves patience, precision, and creativity. Here’s a closer look at how you can start crafting your own driftwood and epoxy masterpiece.

Choosing Your Driftwood

Your first step is choosing the right piece of driftwood. Consider your project’s size and purpose, whether for a small decorative piece or a larger furniture item. Ensure the wood is clean and free of debris, which might require some scrubbing or even gently sanding.

Preparing Driftwood for Epoxy

Preparation is key to a successful driftwood and epoxy piece. The wood must be completely dry, as any moisture can affect the epoxy application. You may need to dry the wood in an oven on a low setting or leave it in a dry area for several weeks. Clean the driftwood thoroughly, using a brush to remove all sand, dirt, and salt deposits.

Applying Epoxy Resin

Epoxy application requires a careful hand. Mix the epoxy resin according to the manufacturer’s instructions, usually involving combining a resin and a hardener. You must measure accurately to ensure consistency and strength. Once mixed, it can be poured or brushed onto the wood, as you desire a thin protective coating or a more substantial layer filling cracks and gaps. Use a torch or heat gun to remove any bubbles formed during application.

Curing the Epoxy

Curing time can vary based on the type and brand of epoxy used, as well as temperature and humidity levels. Ensure the resin is left undisturbed during this period to prevent defects and unevenness. Curing generally takes between 24-72 hours, but always consult the product’s instructions for specifics.

Creating Projects with Driftwood and Epoxy

Now that you’re familiar with the basics, let’s explore some projects that you can create with driftwood and epoxy. These projects highlight the versatility and beauty of combining these materials.

Driftwood and Epoxy Table

One popular project is crafting a table using driftwood and epoxy. These tables serve as stunning focal points in a room, blending natural wood patterns with a sleek, durable finish. You might choose a single large piece of driftwood or a collection of smaller ones embedded in epoxy to form the tabletop.

Driftwood Sculptures

Utilize driftwood’s organic shapes to create sculptures that capture the essence of nature. The imperfections and curvature of driftwood can be highlighted with strategic epoxy applications, allowing you to mold artistic expressions that emphasize the raw and the refined.

Decorative Driftwood and Epoxy Accessories

Small pieces of driftwood adorned with epoxy can become a variety of decorative items, such as picture frames, coasters, or candle holders. These smaller projects are perfect for beginners starting to experiment with combining these materials.

Advantages of Driftwood and Epoxy Creations

Choosing to work with driftwood and epoxy comes with several advantages. These creations are not only visually stunning but also practical and durable.

Durability and Longevity

Epoxy adds a layer of protection to driftwood, ensuring the natural material is preserved for years to come. Its water-resistant and robust surface makes driftwood and epoxy creations suitable for both indoor and outdoor settings.

Unique Aesthetics

Every piece of driftwood tells its own story, full of unique textures and shapes that are beautifully preserved and enhanced with epoxy. Your creations will stand out as one-of-a-kind, intertwining the natural world with human creativity.

Environmental Considerations

Utilizing driftwood can be a sustainable practice, as it involves repurposing a natural resource. By transforming driftwood into art, you give it a new life while respecting the environment. Always ensure that your collection practices are sustainable and permissible.

Challenges in Working with Driftwood and Epoxy

As with any crafting process, working with driftwood and epoxy does present some challenges that you may encounter.

Handling Epoxy Safely

Epoxy resin, while generally safe, does require careful handling. Always work in a well-ventilated area, wear gloves and protective eyewear, and adhere to all safety instructions. Inappropriate handling can lead to health risks and compromised project quality.

Achieving Desired Results

It might take more than one attempt to achieve the results you envision. Experimentation is a part of the creative process when working with driftwood and epoxy. Don’t be discouraged by initial failures; instead, consider each project a learning experience.

Maintaining the Finished Product

Though epoxy provides a protective layer, it might require occasional maintenance to keep the surface looking fresh. Regular cleaning with mild soap and water is usually adequate, but avoid abrasive materials that could damage the epoxy.

Tips for Success When Working with Driftwood and Epoxy

Working successfully with driftwood and epoxy requires some insight. Here are a few tips to guide you:

Selecting the Right Epoxy

Not all epoxy resins are created equal. Some are better suited for thinner applications, while others are designed for deeper pours. Consider your project’s requirements and select an epoxy that meets those needs. Look for UV-resistant varieties to prevent yellowing.

Patience is Key

Crafting with driftwood and epoxy is not a rushed process. Allow ample time for each stage, particularly drying and curing times, to achieve the best results. Rushing the process can lead to imperfections and a less durable finish.

Embrace Imperfection

One of the beautiful things about working with driftwood is its inherent imperfection. Embrace the curves, holes, and textures instead of seeing them as flaws. Epoxy’s clarity will highlight these natural characteristics, adding to the unique appeal of your work.

Conclusion

Driftwood and epoxy provide a captivating way to bring a touch of natural beauty into your home. The artistic journey of combining these materials involves a blend of patience, skill, and creativity. Whether you’re crafting a symbolic small sculpture or a statement piece of furniture, these materials offer endless possibilities. By embracing both the challenges and opportunities that come with working with driftwood and epoxy, you can create stunning pieces that reflect the harmonious blend of nature’s artistry and human ingenuity. Why not begin this creative endeavor and transform a simple piece of driftwood into a memorable work of art?

Filed Under: Driftwood Ideas Tagged With: DIY, Driftwood, Epoxy, home decor, Woodworking

Driftwood And Epoxy Resin

April 17, 2025 by admin

Have you ever marveled at the effortless beauty of nature’s artistry combined with human craftsmanship? Driftwood and epoxy resin together create stunning pieces that captivate and inspire. Let’s dive into this fascinating blend, exploring how the marriage of these two elements brings a unique allure to both artistic and functional creations.

Driftwood And Epoxy Resin

Understanding Driftwood

What is Driftwood?

Driftwood is wood that has been washed onto the shore of oceans, seas, or rivers by tides, winds, or waves. Over time, exposure to the elements shapes the wood into unique forms and textures, making each piece a testament to nature’s artistry. Its natural beauty and interesting shapes make it a popular material for artists and craftspeople.

The Origin of Driftwood

Driftwood originates from various sources, including fallen trees, pieces of branches, or man-made wooden objects that have found their way into water bodies. These woods traverse miles, sculpted naturally by water currents and sand, and bleached by the sun into soft, muted colors.

Why Use Driftwood?

Utilizing driftwood in your projects adds a touch of nature and history to your creation. Each piece tells a story of its journey, adding a unique character. It’s also an environmentally friendly option as it reuses natural materials that might otherwise be considered waste.

What is Epoxy Resin?

Understanding Epoxy Resin

Epoxy resin is a versatile synthetic thermosetting polymer known for its strong adhesive and seamless finish. It’s a combination of two components: the resin and hardener. When mixed, they trigger a chemical reaction, curing into a strong and durable material.

Properties of Epoxy Resin

Epoxy resin is prized for its high-gloss finish, durability, and strength. It’s also water-resistant, making it ideal for various applications. Its clear formulation allows it to encapsulate other elements without obscuring their natural beauty—perfect for preserving delicate textures and colors of driftwood.

Why Combine Driftwood and Epoxy Resin?

Combining driftwood’s rustic charm with the modern appeal of epoxy resin creates a harmony that elevates designs. Epoxy resin not only enhances the natural beauty of driftwood but also provides a protective coating. This combination results in pieces that are aesthetically pleasing and durable.

Driftwood And Epoxy Resin

Crafting Projects with Driftwood and Epoxy Resin

Ideas for Driftwood and Epoxy Projects

Driftwood and epoxy resin can be used to create myriad projects, from small decorative pieces to functional furniture. Here are some ideas:

  • Driftwood Tables: Use larger pieces of driftwood as distinctive table bases, pairing them with an epoxy-resin-coated tabletop.

  • Wall Art: Arrange driftwood pieces and encapsulate them in epoxy to create unique visual stories.

  • Coasters and Trays: Smaller pieces of driftwood can be embedded in epoxy resin to create practical items that also serve as conversation starters.

Materials Needed

To get started with your driftwood and epoxy project, gather these materials:

MaterialPurpose
DriftwoodBase material with character and texture
Epoxy Resin KitIncludes resin and hardener for coating
Mixing ContainersFor blending resin and hardener
Protective GearGloves, masks, and goggles for safety
SandpaperTo smooth driftwood and resin finish
BrushesFor applying epoxy resin over surfaces

Preparing Driftwood

Before combining driftwood with epoxy resin, you need to prepare it:

  1. Cleaning: Remove debris and dirt using a brush or sponge and mild soap. Rinse thoroughly and let it dry completely.

  2. Sanding: Smooth the surface to remove rough edges or splinters, enhancing both handling and the resin finish.

  3. Sealing: Apply a sealant to prevent excessive absorption of epoxy resin into the driftwood, ensuring a uniform finish.

Step-by-Step Guide to Combining Driftwood and Epoxy Resin

Step 1: Planning Your Design

Before starting, envision what you want to create. Sketch your design, deciding how much driftwood to use and where epoxy resin will enhance your piece.

Step 2: Mixing Epoxy Resin

Follow the manufacturer’s instructions for mixing epoxy resin and hardener, ensuring the right ratio. Mix slowly to avoid bubbles, which can cloud the resin.

Step 3: Applying Resin

Carefully pour or brush the mixed epoxy resin over the driftwood. Ensure an even coating, allowing the resin to seep into crevices, enhancing the driftwood’s unique features.

Step 4: Curing

Allow the resin to cure completely, keeping it in a dust-free environment to maintain a pristine finish. Curing times vary, so refer to your epoxy resin kit for specifics.

Step 5: Finishing Touches

Once cured, sand the surface for a smooth finish, if needed. Follow with a soft cloth and polish to reveal its glossy shine.

Tips for Success

Avoiding Common Mistakes

  • Bubbles in Resin: Prevent bubbles by mixing slowly; use a heat gun to help remove any remaining bubbles after application.

  • Driftwood Absorption: Minimize resin absorption by adequately sealing the driftwood with a pre-coat of epoxy or a specific sealant.

Safety Measures

Always work in a well-ventilated area. Wear protective gear, including gloves and goggles, and ensure the resin doesn’t touch your skin, as it may cause irritation.

Inspiration and Possibilities

Creating with driftwood and epoxy resin opens endless possibilities, limited only by your imagination. Each piece you craft will hold its unique story and charm, standing testament to the blend of natural beauty and human creativity.

Whether you’re creating art or functional items, the marriage of driftwood and epoxy resin will add a distinctive touch to your work, inviting admiration and curiosity.

Embark on your creative journey with confidence and excitement, and discover the rewarding experience of crafting with driftwood and epoxy resin. Celebrate the seamless connection between the raw beauty of nature and the polished brilliance of modern materials.

Filed Under: Driftwood Ideas Tagged With: DIY, Driftwood, Epoxy Resin, Handmade, home decor

Driftwood Epoxy Resin Table

April 16, 2025 by admin

Have you ever wondered how to bring a piece of nature’s beauty into your home décor? In the realm of unique and captivating furniture pieces, a driftwood epoxy resin table stands out as a true masterpiece. This article is your comprehensive guide to understanding and creating a driftwood epoxy resin table. With its rustic charm and modern elegance, this type of table can become a stunning centerpiece in your living space.

Driftwood Epoxy Resin Table

Understanding Driftwood and Epoxy Resin

What is Driftwood?

Driftwood refers to pieces of wood that have been washed ashore by the tides. This natural phenomenon occurs when trees and branches enter river systems, eventually finding their way to the ocean. Over time, the water smooths and distresses the wood, giving it a unique and weathered appearance. Each piece of driftwood has its own story and character, making it a distinctive choice for furniture creation.

The Art and Science of Epoxy Resin

Epoxy resin is a polymer that, when mixed with a hardening agent, transforms into a durable and clear material. It is widely used in various crafts, including creating unique and resin-rich tabletops. The resin provides both strength and a glossy finish, allowing the underlying driftwood to shine through magnificently. The combination of driftwood and epoxy resin creates a visual contrast and texture that is both modern and natural.

The Appeal of Driftwood Epoxy Resin Tables

Unique Aesthetic

One of the most appealing aspects of driftwood epoxy resin tables is their individuality. No two pieces of driftwood are the same, which means each table is a one-of-a-kind creation. These tables often capture the rustic elegance of natural wood combined with the contemporary allure of clear, glossy resin.

Versatility in Design

Whether your style is modern, rustic, or a blend of both, driftwood epoxy resin tables can complement any interior design. The versatility lies in choosing the perfect piece of driftwood and customizing the resin finish to match your décor. From minimalist designs to more intricate, artistic styles, the possibilities are endless.

Driftwood Epoxy Resin Table

Making Your Own Driftwood Epoxy Resin Table

Gathering Materials

To start your project, you’ll need the following materials:

  • Driftwood: Sourced naturally or purchased from a specialty store.
  • Epoxy Resin: Purchase a quality resin and hardener for best results.
  • Mold or Frame: Create or buy a mold that fits your desired table dimensions.
  • Tools: Sandpaper, measuring cups, protective gloves, mixing sticks, and safety goggles.

Preparing the Driftwood

Before you begin pouring resin, it’s important to prepare your driftwood properly. Clean any debris and allow the wood to dry completely. If necessary, sand the wood to remove rough edges or to achieve a smoother finish. This preparation ensures the resin adheres well and the final product is structurally sound.

Creating the Table Mold

The mold is crucial as it determines the shape and integrity of the finished table. You can build a mold using materials like melamine or plywood, sealed with a release agent. The release agent prevents the resin from sticking to the mold, making it easier to remove once cured.

Mixing and Pouring the Resin

Following the manufacturer’s instructions, mix the epoxy resin and hardener. Stir thoroughly, but slowly, to minimize the formation of bubbles. Pour the mixture over the driftwood within the mold, ensuring it covers the wood evenly. You may need to pour in layers, allowing each layer to cure before adding the next, especially for thicker tables.

Removing Air Bubbles

Air bubbles are a common challenge when working with epoxy resin. Carefully use a heat gun or torch to remove bubbles by running it just above the resin surface. By doing so, you’ll ensure a smooth, glossy finish free of imperfections.

Finishing Touches

Once fully cured, remove the table from the mold and inspect for any rough spots. Sand the edges and surfaces as needed, then apply a final coat of resin or a protective sealant to enhance durability and shine. These steps are vital to achieving that polished, showroom-quality appearance.

Adding Legs and Supports

Choose table legs or a base that complements the style and strength of your tabletop. Metal, wood, or a combination of both can serve as sturdy supports while enhancing the table’s overall aesthetic. Secure the legs properly, considering the weight of the table to ensure stability.

Caring for Your Driftwood Epoxy Resin Table

Cleaning Tips

To maintain the beauty of your table, clean it using a soft, damp cloth. Avoid harsh chemicals or abrasive materials that can scratch or damage the resin surface. Regular dusting and occasional polishing will keep it looking pristine.

Addressing Repairs

Accidents happen, and if your table suffers scratches or damage, they can often be addressed with a small amount of epoxy resin. Sand the affected area lightly, clean it, and apply the resin following the same steps as your initial pour. This can restore its appearance while extending its lifespan.

Environmentally Friendly Considerations

Sustainable Sourcing

When selecting materials, aim to source your driftwood ethically, ensuring it is collected without harming natural ecosystems. You can also consider purchasing reclaimed wood as an alternative. These choices contribute to environmentally friendly practices while still achieving an aesthetically pleasing result.

Eco-Friendly Resin Options

Some epoxy resins on the market are formulated to be more biodegradable and less harmful to the environment. Research and choose products that align with your commitment to sustainability, helping to reduce your project’s overall ecological impact.

Conclusion

Creating a driftwood epoxy resin table not only challenges your creativity but also allows you to introduce a piece of natural beauty into your home. By following these detailed steps, you can craft an exquisite table that reflects both personal style and appreciation for natural elements. Whether it’s a new addition to your living space or a thoughtful gift, the blend of driftwood and resin ensures that each table tells its own unique story. As you embark on this project, you’re not just building furniture – you’re crafting a timeless piece of art.

Filed Under: Driftwood Ideas Tagged With: DIY, Epoxy Resin, furniture, Table Design

Driftwood Epoxy Art

April 15, 2025 by admin

Have you ever found yourself walking along the shoreline, spotting pieces of driftwood, and wondering about their potential in art and decoration? Driftwood, with its naturally weathered appearance and unique shapes, offers an excellent medium for creating stunning art pieces, especially when combined with epoxy resin. If you’ve ever been curious about how to transform oceanic treasures into captivating works of art, you’re in the right place. Let’s delve deeper into the world of driftwood epoxy art, exploring what makes it special, the tools and materials you need, and how to craft your very own masterpiece.

Driftwood Epoxy Art

What is Driftwood Epoxy Art?

Driftwood epoxy art merges the organic allure of driftwood with the glossy, modern finish of epoxy resin. These two materials together create pieces that are both rustic and polished, offering a blend of natural beauty and intricate artistry. The result can be anything from functional items like tables and lamps to purely decorative pieces such as wall hangings and sculptures.

The Appeal of Driftwood

Driftwood is wood that has been washed onto shore by the action of winds, tides, or waves. Its unique texture and form are a result of years of exposure to the elements. Each piece has its own story, etched into its surface by water and time, which makes it an ideal medium for artists who cherish one-of-a-kind materials.

Benefits of Using Epoxy Resin

Epoxy resin is a versatile polymer known for its high-gloss finish and durability. It acts as both a glue and a protective coat, offering clarity that enhances the natural beauty of the encased driftwood. It is especially loved by artists for its ability to preserve and highlight organic materials while adding an additional layer of depth and dimension.

Tools and Materials Needed

Embarking on a project in driftwood epoxy art requires some specific tools and materials. Whether you’re a seasoned artist or a beginner, having the right equipment can make all the difference. Here’s a breakdown of what you might need:

Basic Materials

  • Driftwood: Select pieces that speak to you, factoring in the shape, size, and texture.
  • Epoxy Resin: Choose a high-quality brand that offers clarity, UV protection, and longevity.
  • Measuring Cups and Stirring Sticks: Accurate measurement is crucial for mixing epoxy resin.
  • Protective gear: Gloves, goggles, and a mask to ensure your safety from fumes and spills.

Tools for Crafting

  • Saws: To cut driftwood to size if necessary.
  • Power Sander: For smoothing any rough edges and surfaces.
  • Brushes: Useful for applying epoxy and ensuring it covers all areas.
  • Heat Gun or Torch: To remove bubbles from the resin surface.

Driftwood Epoxy Art

Selecting and Preparing Your Driftwood

Finding the perfect piece of driftwood is an adventure in itself. Each piece offers a distinct character, challenging and inspiring your creative vision. These are steps to follow to prepare the driftwood:

Finding the Ideal Piece

Search along beaches, riverbanks, and lakeshores where debris is likely to accumulate. Take note of the wood’s condition; it should be neither too fragile nor too dense.

Cleaning and Sanitizing

It’s essential to clean your driftwood to remove any salt, sand, algae, and insects. Begin by rinsing it thoroughly with fresh water. Then, soak it in a bleach solution (1 part bleach to 9 parts water) for at least 24 hours to disinfect it. Finally, rinse it again and let it dry completely in sunny conditions or a well-ventilated area.

Smoothing and Shaping

Using a sander, smooth away any overly rough patches. Shape the wood as desired, keeping in mind the vision you have for your art piece.

Working with Epoxy Resin

Epoxy resin might seem intimidating at first, but with practice, it becomes a rewarding part of the creative process. Here’s how you can work with this material to get the best results.

Mixing the Resin

Follow the product instructions carefully, usually calling for a proper ratio mix of resin and hardener. Use separate measuring cups for each component before mixing them in one container. Stir slowly to avoid introducing air bubbles.

Applying Epoxy to Driftwood

Pour the mixed epoxy over the driftwood, ensuring it covers all surfaces uniformly. Use a brush to spread it out evenly, paying special attention to crevices and curves.

Removing Bubbles

After application, you might notice bubbles forming. Use a heat gun or torch gently to eliminate them, ensuring a crystal-clear finish without altering the texture beneath.

Design Inspirations and Ideas

Driftwood epoxy art can be as varied as your imagination allows. Whether you’re interested in functional pieces or purely decorative ones, there are countless possibilities.

Functional Art Pieces

  • Driftwood Tables: Use larger pieces of driftwood as bases or accents for table tops covered in epoxy resin.
  • Lamps and Light Fixtures: Integrate lighting elements to create bespoke pieces that add warmth and intrigue to any space.

Decorative Artworks

  • Wall Hangings: Arrange smaller driftwood pieces into artistic collages, safely enclosed in epoxy.
  • Sculptures: Let the natural form of the driftwood guide you in assembling free-standing sculptures.

Finishing and Preserving Your Artwork

After successfully crafting your driftwood epoxy art, finishing touches are crucial for longevity and presentation.

Final Sanding and Polishing

Once the resin is fully cured, you may need to perform a final sanding to remove any imperfections. Follow this with a polish using fine-grit sandpaper to achieve a sleek finish.

Preserving the Art

Consider adding a UV-resistant topcoat to prevent any yellowing and enhance durability. Also, ensure the driftwood is securely bonded to any mounting surface, providing stability over time.

Troubleshooting Common Issues

Even with careful preparation, challenges can arise. Addressing them is part of the learning journey.

Common Problems

  1. Bubbles in Resin: Ensure you mix slowly and use a heat gun to remove any bubbles during application.
  2. Discoloration: This can be due to contamination. Ensure your pots, stirrers, and environment are clean.

Solutions

If discoloration or other minor defects are unavoidable, they can often be fixed by applying an additional layer of epoxy or sanding down and re-polishing the surface.

Conclusion

Driftwood epoxy art is a testament to nature’s beauty and human creativity working in harmony. Whether you’re making functional furniture or creating sculptures and wall art, the combination of driftwood and epoxy provides endless opportunities for artistic expression. So, next time you find yourself on a beach walk, you might just see those pieces of driftwood through the lens of an artist, ready to transform them into something truly remarkable.

Through understanding the materials, refining your techniques, and being unwavering in experimenting, you stand at the cusp of creating breathtaking pieces that capture the organic elegance of the natural world, complemented by the sleek brilliance of epoxy resin. Let the driftwood guide your creativity, and may your artistic journey be as fluid and enchanting as the waves that brought your materials to shore.

Filed Under: Driftwood Ideas Tagged With: Art, craft, DIY, Driftwood, Epoxy

Driftwood Epoxy Resin

April 13, 2025 by admin

Have you ever wandered along a beach, marveling at the beautifully intricate pieces of driftwood washed ashore, and wondered how you could incorporate these natural treasures into your home decor? If so, you’re in for a treat. Driftwood, when combined with epoxy resin, can create stunning pieces of art and function that not only elevate the aesthetic of any space but also tell a story of nature and creativity intertwining.

Driftwood Epoxy Resin

The Allure of Driftwood

Driftwood possesses a unique charm, shaped and weathered by nature over time. Its rustic appearance and organic forms offer an aesthetic that is both calming and captivating. Driftwood pieces often carry unique shapes that offer endless possibilities for creativity, especially when used in crafting and furniture making. But why do many artisans and hobbyists choose to pair it with epoxy resin?

What Makes Driftwood Special?

Driftwood is wood that has been washed onto a shore or beach by the action of winds, tides, or waves. The natural process of weathering gives it a distinct look, often featuring smooth textures, interesting shapes, and a naturally bleached color. Its uniqueness lies in its randomness—no two pieces are identical, which guarantees that anything made from driftwood is one-of-a-kind.

The Connection Between Nature and Art

Using driftwood in artistic endeavors symbolizes the blending of nature with human creativity. It allows artists to work with unpredictable elements and shapes, enabling the creation of pieces that are entirely unique. This inherent unpredictability is what makes driftwood an appealing medium for many craftspeople and artists.

Epoxy Resin: A Modern Artistic Medium

Epoxy resin is a versatile material favored by both artists and craftsmen for its durability, versatility, and remarkable finish. It can be used to coat objects, fill spaces, and create striking surfaces that enhance the beauty of the underlying materials. But what makes epoxy resin such an appealing partner for driftwood?

Understanding Epoxy Resin

Epoxy resin consists of two parts—a resin and a hardener. When combined, they undergo a chemical reaction that results in a hard, clear, and durable material. This process can be managed to include colors, textures, or clear finishes, making it suitable for a wide range of applications.

The Marriage of Driftwood and Epoxy Resin

When combined, driftwood and epoxy resin complement each other in various ways. The resin can solidify the shape of the driftwood, fill gaps, or create a clear, glass-like surface that enhances the natural beauty of the wood. This combination can produce breathtaking tables, wall art, jewelry, and much more.

Driftwood Epoxy Resin

Creating Driftwood Epoxy Resin Art: A Step-by-Step Guide

Taking on a driftwood epoxy resin project can be incredibly rewarding. Whether you’re creating a simple decorative piece or a functional work of art, the process allows for creativity and innovation.

Gathering Your Materials

Before you begin, it’s essential to gather all necessary materials to avoid interruptions. Here’s a simple checklist:

  • Driftwood: Collect pieces that inspire you; various sizes and shapes can add interest.
  • Epoxy Resin Kit: Ensure this includes both resin and hardener.
  • Protective Gear: Gloves, goggles, and a breathing mask for safety.
  • Mixing Tools: Measuring cups, stirring sticks, and mixing containers.
  • Tools for Sanding and Cutting: Sandpaper, saws, and other necessary tools.

Preparing the Driftwood

Preparation is crucial to any successful project. Start by cleaning the driftwood thoroughly. Remove any dirt, salt, or debris, and allow it to dry completely. Sand the wood to ensure a smooth finish and remove any rough edges or splinters.

Designing Your Piece

Before you mix your epoxy, plan your design. Decide how you want the resin to interact with your driftwood and the overall look you aim to achieve. This could include filling gaps, creating a high-gloss finish, or incorporating color or patterns.

Mixing and Pouring the Epoxy Resin

Follow the manufacturer’s instructions carefully when mixing the resin and hardener. Ensure a proper ratio to avoid complications later. Stir thoroughly to avoid bubbles. When pouring, do so gradually, allowing the resin to flow around the wood naturally.

Curing and Finishing

Once poured, allow the epoxy to cure completely, which can take anywhere from several hours to a couple of days, depending on the resin used and environmental conditions. Once cured, sand any rough edges and polish the surface to the desired sheen.

Inspiring Ideas for Driftwood and Epoxy Resin Projects

Your imagination is the only limit when it comes to creating with driftwood and epoxy resin. Here are some ideas to inspire your next project.

Driftwood and Epoxy Tables

One of the most popular uses for driftwood and epoxy resin is in table creation. Whether it’s a coffee table, end table, or dining table, the combination can produce stunning results. Imagine a piece of driftwood encapsulated within a clear epoxy surface, serving as a conversation starter and a functional piece of furniture.

Wall Art and Sculptures

Turn natural pieces of driftwood into stunning wall art or sculptures. Use resin to enhance the wood’s natural textures and colors, or combine pieces to create intricate designs that draw the eye and provoke thought.

Jewelry Making

On a smaller scale, driftwood and epoxy resin can be transformed into unique jewelry pieces. Create pendants, earrings, or bracelets that capture the organic beauty of the wood within a sleek resin form.

Home Decor Items

Consider creating functional yet beautiful home items such as coasters, bowls, or lampshades. These small touches can bring a cohesive and natural aesthetic to any room.

Driftwood Epoxy Resin Safety Tips

While working with epoxy resin can be fun and fulfilling, safety should be your top priority. Here are some essential safety tips to keep in mind.

Using Protective Gear

Always wear gloves to protect your skin from potential irritation and a mask and goggles to protect your respiratory system and eyes. Epoxy resin can emit fumes, especially when mixed, so work in a well-ventilated area.

Handling and Disposal

Handle all materials carefully, and be sure to follow local regulations for disposal of leftover materials. Always clean your tools and workspace thoroughly after completing your project.

The Environmental Aspect

While creating art and functional pieces with driftwood and epoxy resin is incredibly satisfying, it’s also essential to consider the environmental impact.

Responsible Sourcing of Materials

When collecting driftwood, be mindful not to disturb wildlife or ecosystems. Driftwood plays a crucial role in some environments, providing habitat and contributing to the landscape. Take only what you need, and make sure you are allowed to collect wood in the area.

Eco-Friendly Epoxy Options

Look for environmentally friendly epoxy resin options that are bio-based or have a reduced environmental impact. Many suppliers offer products that focus on sustainability while still providing the durability and finish you desire.

Conclusion: Express Your Creativity

Driftwood and epoxy resin projects are a tool for self-expression, combining the organic beauty of nature with human craftsmanship. Each piece tells a unique story and shares a bit of its journey with its creator. Whether you’re crafting a simple piece of jewelry or an intricate piece of furniture, the process is both satisfying and fulfilling.

Engaging with driftwood epoxy resin art allows you to push the boundaries of creativity while staying connected to the natural world. So why not let your next project tell a new story? Embrace the endless possibilities, revel in the journey from idea to creation, and make something truly special that incorporates the timeless beauty of driftwood with the modern elegance of epoxy resin.

Filed Under: Driftwood Ideas Tagged With: crafting, DIY, Driftwood, Epoxy Resin, Woodworking

Kokedama On Driftwood

March 27, 2025 by admin

Have you ever found yourself captivated by the beauty of plants and wished you could bring a piece of nature’s charm into your home in a unique way? Imagine combining the elegance of kokedama with the rustic appeal of driftwood. This combination offers a striking and artistic way to enjoy indoor gardening. Let’s explore how you can craft your own kokedama on driftwood, marrying two elements of nature to create a visually stunning piece for your home or office.

What is Kokedama?

Kokedama, often referred to as the “poor man’s bonsai,” is a Japanese garden art form that involves a plant growing from a ball of soil covered in moss. The term “kokedama” translates to “moss ball” in English. Kokedama offers a minimalist yet striking way to display plants, often by suspending them in the air or placing them in containers. This art form is centuries old and is gaining popularity worldwide for its simplicity and elegance.

The Art and History Behind Kokedama

Kokedama originated from the Nearai method of bonsai. Nearai involves creating a root system in a compact ball, allowing the plant to grow within its natural, minimalist aesthetic. This technique delighted Japanese gardeners who cherished the beauty of simplicity and natural forms. As you embark on creating your kokedama, you’re participating in a rich tradition that marries horticulture and artistry.

Why Choose Kokedama?

Kokedama is an ideal choice for those who appreciate unique and artistic plant displays. Unlike traditional potted plants, kokedama provides a 360-degree view so you can appreciate the plant from all angles. This living art form requires relatively minimal materials and can be tailored to fit your personal style, making it an excellent option for creative expression.

Why Add Driftwood?

Driftwood refers to timber that has been washed onto the shore by the tides. Each piece tells a unique story of its journey through water and wind. Incorporating driftwood into your kokedama creation not only adds a natural, sculptural element but also enhances the aesthetic, providing a contrast between the vibrant greenery and the aged, detailed structure of the wood.

The Unique Aesthetic of Driftwood

Driftwood adds an organic and somewhat mystical quality to any art piece. Its weathered appearance and unique shapes serve as natural sculptures and can enhance the visual appeal of your kokedama. Each piece of driftwood is unique, offering endless possibilities for creative expression.

Sustainability and Driftwood

Using driftwood in your designs can also be an environmentally friendly choice. Since driftwood has naturally washed ashore, utilizing it doesn’t contribute to deforestation. Instead, it repurposes materials that nature has already shaped and abandoned. This practice aligns with a sustainable approach to indoor gardening and design.

Kokedama On Driftwood

Creating Your Kokedama on Driftwood

Now that we understand the beauty and history behind kokedama and driftwood, let’s dive into how you can create your own kokedama on driftwood. The process involves gathering the right materials, choosing the suitable plants, and carefully constructing your piece. Here’s how:

Materials You Will Need

Creating kokedama on driftwood doesn’t require a lot of tools, but there are specific materials you will need to ensure the success and longevity of your plant. Here’s a list:

MaterialsPurpose
Plant of choiceThe star of your kokedama
MossCovering and holding the soil ball together
DriftwoodBase for mounting your kokedama
Bonsai soil mixProvides structure and nutrients to plant
String or twineSecures the moss around the soil
ScissorsCutting string and shaping moss
Water spray bottleFor moistening the moss during assembly
Gloves (optional)Protecting your hands during the process

Selecting the Right Plant

Not every plant is suitable for kokedama. Choose plants that thrive in high-humidity environments and have relatively small root systems. Popular options include ferns, pothos, ivy, and orchids. Consider the lighting conditions in your home and choose plants that will thrive in your specific environment.

Preparing the Soil and Moss

Combine a mixture of bonsai soil and water until it forms a clay-like consistency. Mold the soil around the roots of your plant to create a ball. Ensure the ball is compact and firm before proceeding.

Next, soak the moss in water for a few minutes to make it pliable. Squeeze out excess water and lay the moss on a flat surface. Wrap the moss around the soil ball, making sure it is completely covered.

Assembly Instructions

  1. Mounting the Soil Ball: Secure the moss around the soil ball using string or twine. Wrap it tightly to ensure stability without damaging the roots of the plant.
  2. Attaching to the Driftwood: Find a flat surface on the driftwood to mount your kokedama. Use additional string to tie the moss ball securely to the driftwood. Choose a binding method that complements the natural lines of the wood for aesthetic harmony.
  3. Final Placement and Adjustments: Once secure, adjust the plant and moss for optimal presentation. Use scissors to trim any excess string or stray pieces of moss. Ensure that the kokedama is balanced and stable on the driftwood.

Caring for Your Kokedama on Driftwood

Now that you’ve created your unique art piece, maintaining its beauty involves regular care and attention. Here are some tips for keeping your kokedama healthy and vibrant.

Watering

The key to a thriving kokedama is maintaining the right moisture level in the moss ball. Depending on your plant choice and environmental conditions, this could mean watering once or twice a week.

  • Watering Method: Submerge the kokedama (plant side up) into a bowl of water until fully saturated. Allow excess water to drip off before replacing.

Light Requirements

Ensure that your kokedama receives appropriate sunlight for the specific plant type. Most kokedama plants prefer indirect sunlight. Too much direct sunlight could dry out the moss, while too little could hinder plant growth.

Humidity and Temperature

Maintain a humid environment to keep the moss lush. If your home is particularly dry, consider misting your kokedama regularly or using a humidifier. Keep your plant away from drafts or direct heat sources that could dry out or stress the plant.

Regular Trimming

Trim any yellowing or browning leaves to encourage healthy growth. Keep an eye on any overgrowth that might unbalance the kokedama, and use scissors to carefully prune as needed.

Kokedama On Driftwood

Benefits of Kokedama on Driftwood

Combining kokedama with driftwood not only creates an eye-catching display but also brings several benefits, from enhancing your living space to improving your well-being.

Artistic Expression

Crafting kokedama on driftwood provides you with a creative outlet. The distinct characteristics of each driftwood piece, combined with various plant types, allow for infinite artistic possibilities.

Enhanced Indoor Air Quality

Plants are natural air purifiers. By incorporating kokedama into your home, you benefit from improved air quality as the plant absorbs carbon dioxide and releases oxygen.

Low Maintenance

Once established, kokedama on driftwood requires less maintenance than traditional houseplants as long as you stay on top of watering and light needs.

Connection to Nature

Having a piece of nature in your space can bring peace and mindfulness. Observing your kokedama grow and change over time fosters a deeper connection with nature and can lead to a greater sense of appreciation for life’s simple pleasures.

Troubleshooting Common Issues

While kokedama is generally straightforward, sometimes challenges may arise. Here are some solutions to common issues you might encounter:

Moss Drying Out

If you notice the moss drying out quickly, it may need more frequent watering. Ensure you submerge the kokedama entirely and consider misting it in addition to regular watering.

Yellowing Leaves

Yellow leaves can be a sign of overwatering, inadequate light, or nutrient deficiencies. Adjust your watering schedule accordingly and ensure the plant is receiving sufficient but indirect sunlight.

Weak Attachment to Driftwood

Should your kokedama become loose on the driftwood, resecure it with additional string. Place extra moss or padding if the driftwood surface isn’t providing adequate support.

Overgrowing Roots

If the roots begin to overgrow the ball, you may need to trim them back slightly or recreate the moss ball with fresh soil and moss to accommodate the expanded root system.

Conclusion

Crafting kokedama on driftwood offers a beautiful way to connect with nature and embrace an ancient art form within your modern home. This combination allows you to create a unique, living sculpture that not only decorates but invigorates your space with natural beauty. By understanding the steps and care involved, you can enjoy the artistic process and the simple joys of plant care. Embrace this creative challenge, and you will have a stunning, natural masterpiece that brings tranquility and elegance to any room.

Filed Under: Driftwood Ideas Tagged With: Decoration, DIY, Driftwood, Kokedama, Plant Care

Driftwood Knitting

March 10, 2025 by admin

Have you ever wondered what it would be like to bring the calming essence of the seaside into your home through knitting? Driftwood Knitting offers a unique way to connect the beauty of the ocean with your creative spirit, all through the art of knitting. Imagine the soothing sound of waves crashing on the shoreline and replicate that peacefulness in your knitting projects. Let’s embark on a journey to understand what Driftwood Knitting is all about and how you can incorporate it into your own knitting repertoire.

Driftwood Knitting

What is Driftwood Knitting?

Driftwood Knitting is inspired by the aged and weathered beauty of driftwood often found on the beach. This style is less about specific patterns and more about capturing the organic and natural feel of the ocean and its treasures. It’s an approach that emphasizes texture, color, and materials that mimic or pay homage to the serene coastal environment.

The Essence of Driftwood

Driftwood, as it lays on the shore, tells a story of its journey across the ocean, shaped by the elements over time. Knitting with this aesthetic means incorporating elements that are natural, muted, and earthy. It involves choosing yarns and patterns that reflect the gentle, weathered elegance of driftwood itself.

Materials You’ll Need

Before you begin, you’ll want to gather specific materials to get the right look and feel of Driftwood Knitting. Here’s a table to help you see what essentials you need:

MaterialDescription
Natural Fiber YarnOpt for cotton, linen, or wool for a more rustic texture.
Earth Tones and BluesChoose colors like soft grays, light browns, and sea blues to mimic the ocean.
Wooden or Bamboo NeedlesThese provide a more organic feel compared to metal or plastic needles.
Beach-Inspired EmbellishmentsIncorporate shells or natural stones as decorative elements.

Selecting the Right Yarn

Yarn selection is crucial in Driftwood Knitting as it sets the tone for your project. Focus on using natural fibers. These materials not only emulate the look and feel of driftwood but are also gentle to the touch, making your knitting experience comforting. Remember, yarns with subtle variations can add depth and character, similar to natural driftwood patterns.

Driftwood Knitting Techniques

Driftwood Knitting is about embracing imperfection and organic results. Here are some specific techniques to master this style:

Texture Creation

Driftwood has a unique texture that’s rough yet smooth over time. In knitting, you can create this effect by:

  • Using seed stitches: They create a pebbly surface that mimics natural grain.
  • Incorporating garter stitches: This stitch lends a ridged effect, perfect for a driftwood-like texture.

Color Blending

Beyond texture, color blending plays a significant role in Driftwood Knitting. Implement gradual color transitions by:

  • Holding two yarns together: Especially one in a neutral and another in a soft hue, to create a marled effect.
  • Using tonal yarns: These subtle color variations within the yarn itself can mimic the sun-dappled variations seen on driftwood.

Pattern Freestyle

Embrace the ebb and flow of nature by:

  • Allowing improvisation: Don’t shy away from deviating from patterns. The goal is to replicate natural unpredictability.
  • Adding asymmetrical elements: This could include uneven edges or unexpected color changes akin to driftwood’s irregular form.

Bringing Driftwood Knitting into Your Projects

Integrating Driftwood Knitting elements into your current or new knitting projects is a rewarding experience. Here are a few project ideas to get you started:

Simple Scarves and Wraps

A scarf or wrap is an ideal canvas for experimenting with Driftwood Knitting. Play with different combinations of fibers and textures to create a piece that echoes the ocean’s tranquility.

  • Pattern Variation: Mix garter and seed stitches throughout the length of your project.

Cozy Sweaters

Imagine wrapping yourself in a cozy sweater that feels like a warm hug from the seashore. When knitting a sweater with a Driftwood theme:

  • Use a neutral base color: Then introduce patches of oceanic blues or browns to reflect natural driftwood variations.

Home Décor Items

Driftwood Knitting doesn’t have to be confined to wearables. You can create home décor items like:

  • Pillows: Knit covers with textures and colors reminiscent of the seaside.
  • Throws: Add warmth and character to any room, offering both comfort and a nod to the calming aura of the coast.

Driftwood Knitting

Benefits of Driftwood Knitting

You may wonder, beyond aesthetics, what benefits Driftwood Knitting might offer. There are several reasons why this approach can improve both your knitting skills and your well-being.

Meditative Experience

Driftwood Knitting encourages a slower, more deliberate pace, allowing you to be fully present in the moment. The repetitive motion of knitting, paired with the tactile sensation of natural fibers, brings about a meditative state that can reduce stress.

Boosts Creativity

Since Driftwood Knitting promotes improvisation and deviation from traditional patterns, it naturally enhances your creative abilities. With each project, you are free to explore and experiment with different techniques, which can boost your creative confidence in other areas of life.

Sustainability

By choosing natural fibers and eco-friendly materials, you’re contributing to a more sustainable crafting practice. This approach not only benefits the environment but also ensures that your knitting projects are safe for sensitive skin and have a minimal carbon footprint.

Tips for Beginners

If you’re new to the concept of Driftwood Knitting, no worries! Here are some helpful tips to ensure a smooth start:

Start Small

Begin your Driftwood Knitting journey with small, manageable projects like dishcloths or pot holders. These items are excellent for experimenting with different stitches and techniques without feeling overwhelmed.

Embrace Mistakes

Remember, Driftwood Knitting celebrates the beauty of imperfection. Mistakes or unexpected outcomes often add character to your projects. Don’t hesitate to incorporate what others might see as flaws, as they can enhance the overall aesthetic.

Seek Out Inspiration

Find inspiration in nature, such as a local beach or even images of coastal settings that evoke the feel of driftwood. Inspiration can also come from social media communities where fellow knitters share their creations and tips.

Driftwood Knitting Community

You don’t have to engage in Driftwood Knitting alone. There’s an entire community of enthusiasts who share your passion. Connecting with others can offer fresh insights and foster a sense of belonging.

Online Forums and Groups

Platforms like Ravelry or knitting Facebook groups have dedicated spaces for Driftwood Knitting. Joining these groups can provide you with a wealth of knowledge and support from seasoned knitters.

Local Knitting Meetups

Check local listings or craft stores for knitting meetups or workshops. These environments are excellent for hands-on learning and can introduce you to new knitting friends who share your enthusiasm for the Driftwood style.

Conclusion

Driftwood Knitting is more than just a style; it’s a philosophy that emphasizes mindfulness, creativity, and an appreciation for the natural world. Whether you’re a seasoned knitter or a newcomer, this approach offers a refreshing way to engage with your craft. By exploring textures, colors, and improvisation inspired by driftwood, your knitting projects can become a source of relaxation and enjoyment. So gather your materials, experiment with colors and stitches, and let the essence of the sea guide your knitting journey. Happy knitting!

Filed Under: Driftwood Ideas Tagged With: DIY, Driftwood, Handmade, Knitting, Textile Art

Driftwood Knife

March 9, 2025 by admin

Have you ever thought about the tales a piece of driftwood could tell, or how such a simple object could be transformed into a beautiful and unique tool like a driftwood knife? This rustic yet elegant creation can bring the stories of the sea into your home or craft collection. Let’s journey into the world of driftwood knives where artistry, craftsmanship, and nature converge.

Understanding Driftwood

Driftwood is essentially wood that has been washed onto the shore by tides or waves. Over time, the relentless motion of the ocean smoothes the wood, giving it a unique texture and appearance. Each piece of driftwood is a testament to nature’s artistry, showcasing unique shapes and the weathering of time.

Origins and Formation

Driftwood begins its journey in forests or as parts of trees lining riverbanks. When floods invade these areas, trees can break and be carried downstream. Lost to torrents, they find their way to bodies of water where, over time, they are sculpted by the sea. This process can take years, turning raw, rugged wood into something visibly softer and more aesthetic.

Nature’s Unique Touch

The natural process of erosion by water, sun, and wind adds a distinctive charm to driftwood. It isn’t just wood; it is a piece of history shaped by natural forces. Each contour and mark could narrate decades of travel across water, giving it a character no other piece of wood has.

The Concept of a Driftwood Knife

A driftwood knife combines practical utility with artistic value. Imagine wielding a tool that’s not only functional but also a conversation starter about nature and craftsmanship.

A Fusion of Craft and Nature

Creating a driftwood knife involves crafting a blade and combining it with driftwood to create a handle. This blend of man-made and nature-made objects results in a tool that is both practical and decorative. It’s both an art form and a testament to sustainability.

Uses and Appeal

While not your typical utility knife, a driftwood knife is appealing to collectors of artisanal goods, chefs, and outdoors enthusiasts alike. Its uniqueness lies in its non-uniformity; no two driftwood knives are identical. The naturally shaped handle may cater to your hands with surprising comfort, making tasks more pleasant.

Driftwood Knife

Crafting a Driftwood Knife

Creating a driftwood knife is no simple feat. It requires a deep understanding of materials and mastery of tools. This craftsmanship respects both the heritage of metalwork and the beauty found in natural objects.

Selecting the Driftwood

The journey starts with choosing the right piece of driftwood. The best wood for a knife handle is dense and has a favorable grain pattern. You also need to ensure that the wood is dry enough to be worked with. These characteristics ensure durability and a visually appealing finish.

Material Selection for the Knife Blade

Once you have the driftwood, attention turns to the blade. Stainless steel, carbon steel, or Damascus steel are popular choices. Each has its pros and cons: stainless steel is rust-resistant, carbon steel holds a sharp edge, and Damascus steel offers stunning patterns. Your choice should align with your intended use and aesthetic preference.

Creating the Knife Blade

Forging the blade is both science and art. This is where metal is heated and shaped using traditional methods. Intricate finishing touches are applied to enhance both usability and beauty. The process requires skill and patience, as every hammer strike is deliberate and every step carefully executed.

Shaping the Driftwood Handle

Step by step, the wood is cut, shaped, and sanded to fit snugly in your hand while also housing the blade securely. Attention to detail is critical, as the harmony between the blade and handle ensures a long-lasting bond. Finally, sealing and treating the wood protects it from moisture and enhances its natural patterns.

Joining Blade and Handle

This is the final but most crucial step in bringing your driftwood knife to life. Bonding materials join the blade to the handle securely. Traditional methods might involve rivets or pins, but modern adhesives can also be effective. The balance between handle and blade defines the overall functionality and aesthetics of the knife.

Driftwood Knife Maintenance

You don’t just own a driftwood knife; you also need to maintain it. Proper care is critical to retaining its beauty and functionality over time.

Cleaning and Storing

After every use, clean your knife gently with a damp cloth and dry it immediately afterward. Avoid using harsh chemicals or immersing it in water, as these can damage both metal and wood. For storage, keep it in a dry place, preferably in a protective sheath or wrapped in cloth.

Regular Maintenance Tips

Regular maintenance involves oiling the handle with natural oils like linseed or mineral oil to preserve the wood’s luster and prevent it from drying out. The blade might require sharpening using a whetstone or specialized sharpeners. Proper care not only prolongs its life but also enhances its appeal.

Driftwood Knife

The Aesthetic and Symbolic Appeal

Beyond practical uses, a driftwood knife represents a bond between nature and mankind’s craftsmanship. It symbolizes resilience, sustainability, and the elegant union of two natural elements.

Symbolism and Craftsmanship

Such a knife is more than a tool; it’s a representation of years of natural formation and hours of skilled craftsmanship. The driftwood speaks to time and history, while the blade speaks to human ingenuity and skill.

Unique Artistry

Each driftwood knife is unique, no two pieces are ever the same. This artistic individuality appeals to collectors and art enthusiasts alike. Displaying the knife in your home or office can serve as a unique focal point — encouraging dialogue and admiration.

Where to Find a Driftwood Knife

If you’re fascinated by the idea of owning a driftwood knife, several avenues can lead you to the perfect piece. Whether seeking something custom or purchasing through an established retailer, options abound.

Artisans and Custom Makers

Supporting individual artisans who specialize in driftwood knives offers a bespoke experience. They often allow customization from blade to handle and personalized engravings, offering you a truly one-of-a-kind piece.

Online Marketplaces

Driftwood knives can also be purchased from online marketplaces where artisans or larger manufacturers sell their creations. E-commerce platforms can offer detailed specifications, customer reviews, and comparisons of products, making it easier for you to find exactly what you’re looking for.

Sustainable Art: Supporting Eco-friendly Craftsmanship

When purchasing a driftwood knife, you’re supporting sustainable art, as driftwood itself is an eco-friendly material repurposed into something new.

Repurposing Nature’s Offerings

The creation of these knives involves using materials naturally cast away by nature. By transforming this discarded wood into a functional item, we’re both reducing waste and celebrating its aesthetic appeal.

The Eco-friendly Cut

By investing in a driftwood knife, you’re embracing a piece of craftsmanship that respects the environment. It’s a small but meaningful step towards more sustainable living, where functionality and beauty cleverly align with eco-consciousness.

Conclusion

Crafting and owning a driftwood knife is a journey in itself — from the selection of materials to the admiration as a finished piece. Each knife is a seamless blend of history, art, nature, and utility that tells a story far greater than initially perceived. These pieces embody the harmony of nature and human ingenuity, making them perfect gifts, collectible items, and daily tools with a difference.

So, have you imagined holding in your hand a piece of history seamlessly married with craftsmanship? With each detail contributing to its legacy, a driftwood knife is indeed a remarkable creation. Whether you decide to make your own or invest in one, it’s clear that this unique tool is much more than just a knife. It’s a conversation between the elements and human artistry.

Filed Under: Driftwood Ideas Tagged With: DIY, Driftwood, Handmade, Knife, Woodworking

  • « Previous Page
  • Page 1
  • …
  • Page 3
  • Page 4
  • Page 5
  • Page 6
  • Page 7
  • …
  • Page 41
  • Next Page »

Primary Sidebar

Driftwood4us.com, is a participant in the Amazon Services LLC Associates Program, an affiliate advertising program designed to provide a means for sites to earn advertising fees by advertising and linking to amazon.com.