Have you ever found yourself strolling along the beach, picking up pieces of driftwood and thinking about the endless possibilities they hold? Ocean treasures like driftwood are nature’s artwork, weathered by time and elements, each piece unique with its own story to tell. Today, let’s transform those coastal finds into a beautiful driftwood wall hanging that will capture the essence of the sea and bring a touch of coastal charm to your home.
Why Choose Driftwood?
Driftwood, with its unique texture and weather-worn look, brings a subtle, organic aesthetic to any decor. Its natural appeal makes it a popular choice for rustic, coastal, and modern home designs. Beyond its aesthetic value, using driftwood for your art pieces is an eco-friendly way to recycle nature’s remnants.
Materials You’ll Need
Before you start your project, gather all the essential materials. Here’s a list to ensure you have everything you need:
| Material | Description |
|---|---|
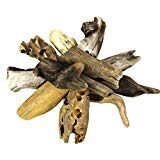
| Driftwood Pieces | Various sizes and shapes, cleaned and dried |
| Cord or Twine | Strong enough to support the driftwood |
| Beads (optional) | Can be wooden, glass, or any style you prefer |
| Hooks or Nails | For hanging the completed project |
| Scissors | For cutting the cord or twine |
| Drill (optional) | For making holes in driftwood pieces if necessary |
| Sandpaper | For smoothing any rough edges on the driftwood |

Prepping Your Driftwood
The first step in creating your driftwood wall hanging is to prepare the driftwood itself. This process ensures your artwork is clean and safe to handle.
Cleaning Your Driftwood
It’s essential to clean the driftwood thoroughly to remove any sand, salt, or debris. Follow these steps:
- Soaking: Immerse the driftwood in a large container of water. Add a little bleach to the water to help disinfect and clean the wood.
- Scrubbing: After soaking for 24 hours, use a brush to scrub off any remaining debris.
- Rinse: Rinse the driftwood with clean water to remove any bleach residue.
- Drying: Allow the driftwood to air dry completely before use. This may take several days, depending on the size and density of the pieces.
Sanding for Safety
Driftwood can have rough edges or splinters, so sanding is vital for a smooth finish. Use sandpaper to gently smooth down any jagged parts, ensuring each piece is safe to handle.
Planning Your Design
Creating a visually appealing driftwood wall hanging involves some thoughtful planning. Decide whether you want a symmetrical or asymmetrical design, how many pieces you want to use, and the overall size of the hanging.
Symmetrical vs. Asymmetrical
A symmetrical design provides a balanced and orderly look. Each side mirrors the other, creating harmony. An asymmetrical design, on the other hand, offers a more natural and organic appeal, showcasing the unique characteristics of each driftwood piece.
Sketching Your Layout
Sketch out your design on paper, arranging the driftwood pieces in a way that pleases your eye. This rough draft helps visualize the final look and serves as a guide during assembly.

Assembling Your Driftwood Wall Hanging
With your design plan ready, it’s time to assemble your driftwood wall hanging. This stage involves arranging, connecting, and securing all pieces together.
Laying Out the Pieces
Lay all the pieces on a flat surface, following your sketched design. Ensure you’re happy with the arrangement before moving on to the next step.
Connecting the Pieces
There are several ways to connect your driftwood pieces. The method you choose depends on the design and your preference.
Using Cord or Twine
Cord or twine is commonly used for its rustic appearance. Follow these steps:
- Cut Lengths of Cord: Cut the cord or twine into lengths that can comfortably tie the driftwood pieces together with a little extra length for adjustments.
- Attach the Bottom Piece: Starting from the bottom, tie a secure knot around a piece of driftwood, leaving enough cord to attach to the piece above.
- Knot and Secure: Continue tying knots around each driftwood piece, securing them together as you move upwards. Ensure each piece is tightly connected before moving to the next one.
Drilling and Using Hooks
If you prefer a more sturdy connection, drilling holes and using hooks or screws can be effective:
- Drill Holes: Drill small holes at each end of the driftwood pieces where they will connect.
- Insert Screws or Hooks: Place screws or hooks into the holes, ensuring they are secure.
- Connect the Pieces: Hook or screw the pieces together as per your design.
Adding Personality
To make your driftwood wall hanging even more special, consider adding some personal touches.
Beads and Other Embellishments
Threading beads onto the cord or twine between driftwood pieces can add a pop of color and extra charm. Choose beads that complement your home decor and the natural tones of the driftwood.
Painting or Staining
If you’re interested in adding color, consider painting or staining a few pieces of driftwood before assembly. This gives a unique and personalized look, making your wall hanging stand out.
Hanging Your Driftwood Art
Once your driftwood wall hanging is complete, it’s time to display it.
Choosing the Right Spot
Pick a location that highlights your creation. Ensure the spot is well-lit to showcase the natural beauty of the driftwood. Popular choices include above a sofa, in the hallway, or even outdoors on a patio wall.
Securing Your Wall Hanging
Use sturdy hooks or nails to secure your wall hanging. If it’s a larger piece, consider using multiple hooks to distribute the weight evenly.
Maintaining Your Driftwood Wall Hanging
To keep your driftwood wall hanging looking its best, minimal maintenance is required.
Regular Dusting
Gently dust your driftwood wall hanging with a dry cloth or a soft brush regularly to prevent dust build-up. Avoid using water or cleaning products as they can damage the wood.
Checking the Connections
Periodically check the knots, hooks, or screws to ensure they remain secure. Retie or tighten them if necessary to maintain the integrity of your artwork.
Bringing Coastal Charm to Life
Creating a driftwood wall hanging is a rewarding way to bring a piece of the coast into your home. Each piece of driftwood tells a story, and when combined, they create a unique artwork that adds character and charm to your space. Whether you choose to keep it simple or add your personal touches, your driftwood wall hanging will undoubtedly become a cherished part of your home decor.
So, why not start gathering some driftwood on your next beach walk and let your creativity flow? Happy crafting!