• Skip to main content
  • Skip to primary sidebar
  • Terms and Conditions
  • Privacy Policy
  • Contact

Driftwood 4 Us

Just About Driftwood

Epoxy

Driftwood And Epoxy

April 18, 2025 by admin

Have you ever found yourself captivated by the beauty of driftwood washed ashore, weathered by the elements and full of character, only to wonder how to incorporate such natural elegance into your home? Driftwood and epoxy work together seamlessly, crafting stunning pieces that blend the raw allure of natural materials with the glossy perfection of synthetics. This fusion not only showcases artistic flair but also respects and honors the natural beauty of the wood itself.

Driftwood And Epoxy

Understanding Driftwood

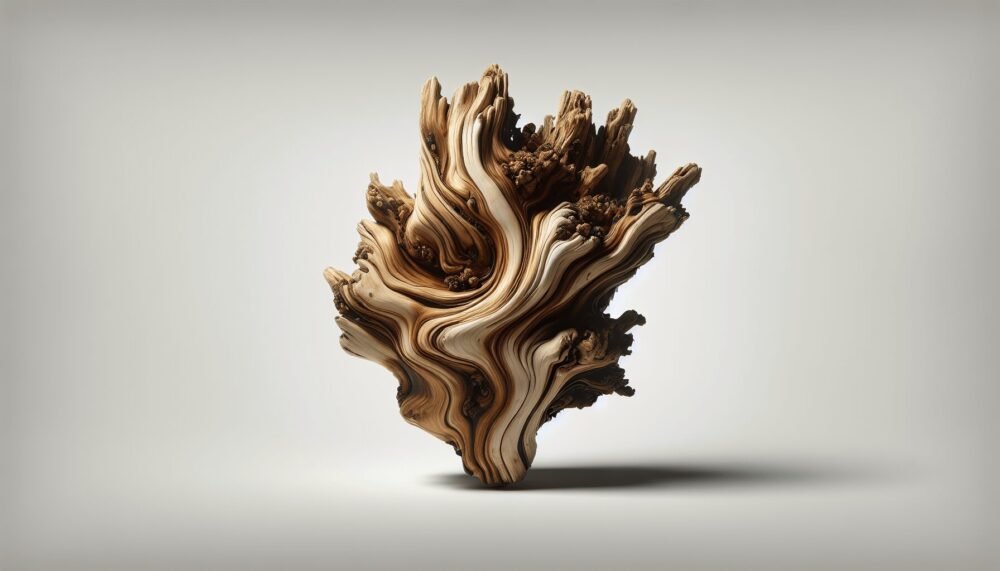
Driftwood, nature’s artwork, is a wood piece that’s been shaped and smoothed by natural forces such as water and weather. Originating from fallen trees or branches, it can travel for miles, tumbling and turning until it washes ashore, cast by the waves. Each piece is unique, bearing the marks of its journey.

Characteristics of Driftwood

When you first consider driftwood, its unique characteristics immediately stand out. Each piece is shaped by its own journey through rivers and seas, making it a canvas rich with history and texture. The colors range from soft grays to warm, earthy browns, often bleached by the sun and stained by minerals from the water.

Collecting Driftwood

If you enjoy beachcombing, collecting driftwood can be a rewarding experience. However, it’s important to respect the environment and local regulations, as some areas prohibit the removal of driftwood to preserve natural habitats. When you find driftwood you can collect, ensure it’s solid and not crumbly, as sturdier pieces are better suited for crafting.

Introducing Epoxy

Epoxy resin is a versatile material used widely in the art and crafting community for its ability to create a clear, hard surface. This synthetic compound is applied in liquid form and then hardens, making it perfect for a myriad of applications, from table coatings to intricate art pieces.

Why Use Epoxy with Driftwood?

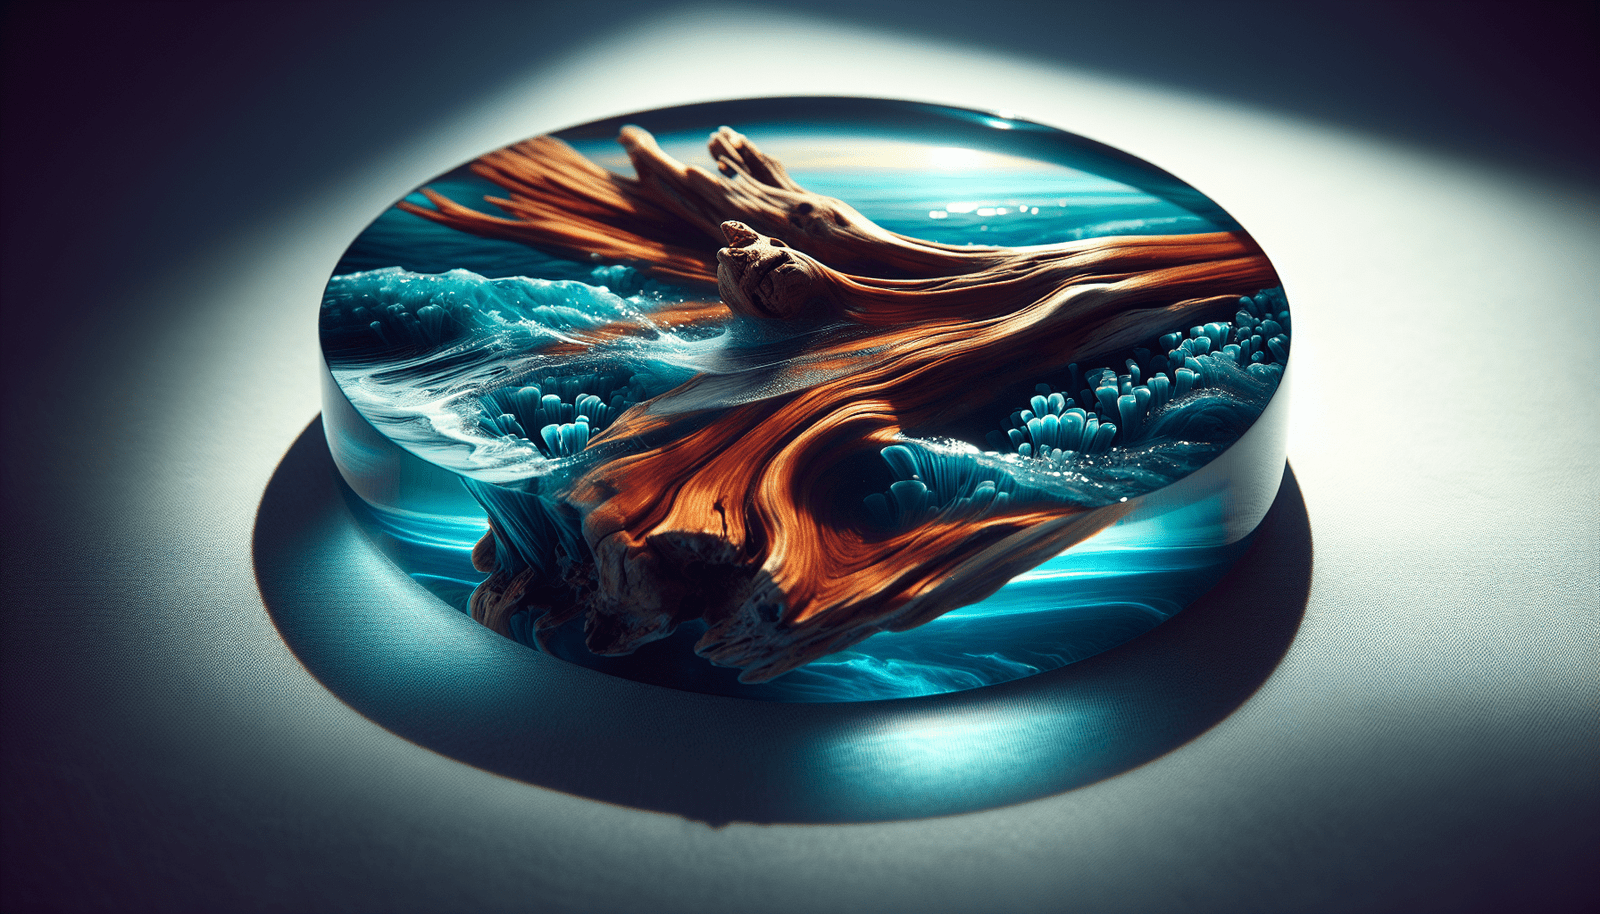
The marriage of epoxy with driftwood enhances the natural beauty of the wood, filling crevices and cracks while preserving its organic form. Epoxy adds durability and a polished look that complements the rustic appeal of driftwood, providing both function and form. When cured, epoxy is incredibly strong and water-resistant, making it ideal for household items like tables, sculptures, and countertops.
Driftwood And Epoxy

Crafting with Driftwood and Epoxy

Blending driftwood and epoxy is not merely an art; it’s a process, one that involves patience, precision, and creativity. Here’s a closer look at how you can start crafting your own driftwood and epoxy masterpiece.

Choosing Your Driftwood

Your first step is choosing the right piece of driftwood. Consider your project’s size and purpose, whether for a small decorative piece or a larger furniture item. Ensure the wood is clean and free of debris, which might require some scrubbing or even gently sanding.

Preparing Driftwood for Epoxy

Preparation is key to a successful driftwood and epoxy piece. The wood must be completely dry, as any moisture can affect the epoxy application. You may need to dry the wood in an oven on a low setting or leave it in a dry area for several weeks. Clean the driftwood thoroughly, using a brush to remove all sand, dirt, and salt deposits.

Applying Epoxy Resin

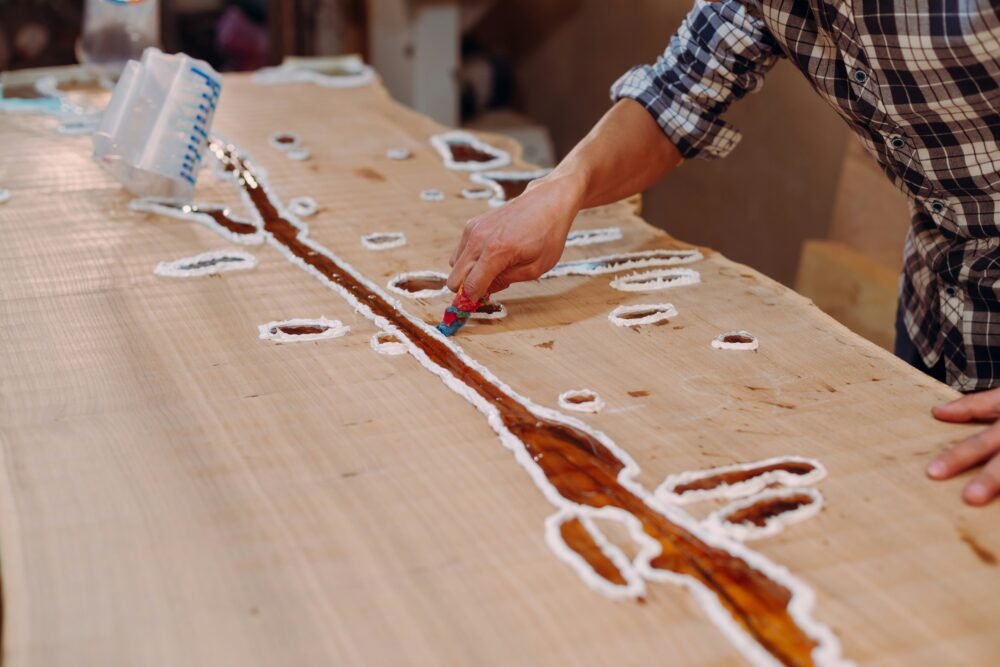
Epoxy application requires a careful hand. Mix the epoxy resin according to the manufacturer’s instructions, usually involving combining a resin and a hardener. You must measure accurately to ensure consistency and strength. Once mixed, it can be poured or brushed onto the wood, as you desire a thin protective coating or a more substantial layer filling cracks and gaps. Use a torch or heat gun to remove any bubbles formed during application.

Curing the Epoxy

Curing time can vary based on the type and brand of epoxy used, as well as temperature and humidity levels. Ensure the resin is left undisturbed during this period to prevent defects and unevenness. Curing generally takes between 24-72 hours, but always consult the product’s instructions for specifics.

Creating Projects with Driftwood and Epoxy

Now that you’re familiar with the basics, let’s explore some projects that you can create with driftwood and epoxy. These projects highlight the versatility and beauty of combining these materials.

Driftwood and Epoxy Table

One popular project is crafting a table using driftwood and epoxy. These tables serve as stunning focal points in a room, blending natural wood patterns with a sleek, durable finish. You might choose a single large piece of driftwood or a collection of smaller ones embedded in epoxy to form the tabletop.

Driftwood Sculptures

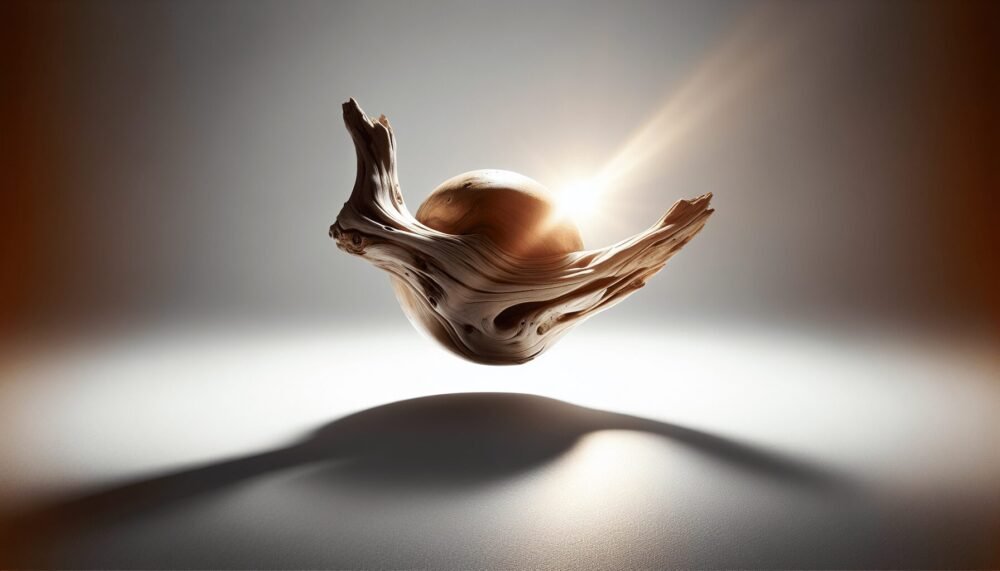
Utilize driftwood’s organic shapes to create sculptures that capture the essence of nature. The imperfections and curvature of driftwood can be highlighted with strategic epoxy applications, allowing you to mold artistic expressions that emphasize the raw and the refined.

Decorative Driftwood and Epoxy Accessories

Small pieces of driftwood adorned with epoxy can become a variety of decorative items, such as picture frames, coasters, or candle holders. These smaller projects are perfect for beginners starting to experiment with combining these materials.

Advantages of Driftwood and Epoxy Creations

Choosing to work with driftwood and epoxy comes with several advantages. These creations are not only visually stunning but also practical and durable.

Durability and Longevity

Epoxy adds a layer of protection to driftwood, ensuring the natural material is preserved for years to come. Its water-resistant and robust surface makes driftwood and epoxy creations suitable for both indoor and outdoor settings.

Unique Aesthetics

Every piece of driftwood tells its own story, full of unique textures and shapes that are beautifully preserved and enhanced with epoxy. Your creations will stand out as one-of-a-kind, intertwining the natural world with human creativity.

Environmental Considerations

Utilizing driftwood can be a sustainable practice, as it involves repurposing a natural resource. By transforming driftwood into art, you give it a new life while respecting the environment. Always ensure that your collection practices are sustainable and permissible.

Challenges in Working with Driftwood and Epoxy

As with any crafting process, working with driftwood and epoxy does present some challenges that you may encounter.

Handling Epoxy Safely

Epoxy resin, while generally safe, does require careful handling. Always work in a well-ventilated area, wear gloves and protective eyewear, and adhere to all safety instructions. Inappropriate handling can lead to health risks and compromised project quality.

Achieving Desired Results

It might take more than one attempt to achieve the results you envision. Experimentation is a part of the creative process when working with driftwood and epoxy. Don’t be discouraged by initial failures; instead, consider each project a learning experience.

Maintaining the Finished Product

Though epoxy provides a protective layer, it might require occasional maintenance to keep the surface looking fresh. Regular cleaning with mild soap and water is usually adequate, but avoid abrasive materials that could damage the epoxy.

Tips for Success When Working with Driftwood and Epoxy

Working successfully with driftwood and epoxy requires some insight. Here are a few tips to guide you:

Selecting the Right Epoxy

Not all epoxy resins are created equal. Some are better suited for thinner applications, while others are designed for deeper pours. Consider your project’s requirements and select an epoxy that meets those needs. Look for UV-resistant varieties to prevent yellowing.

Patience is Key

Crafting with driftwood and epoxy is not a rushed process. Allow ample time for each stage, particularly drying and curing times, to achieve the best results. Rushing the process can lead to imperfections and a less durable finish.

Embrace Imperfection

One of the beautiful things about working with driftwood is its inherent imperfection. Embrace the curves, holes, and textures instead of seeing them as flaws. Epoxy’s clarity will highlight these natural characteristics, adding to the unique appeal of your work.

Conclusion

Driftwood and epoxy provide a captivating way to bring a touch of natural beauty into your home. The artistic journey of combining these materials involves a blend of patience, skill, and creativity. Whether you’re crafting a symbolic small sculpture or a statement piece of furniture, these materials offer endless possibilities. By embracing both the challenges and opportunities that come with working with driftwood and epoxy, you can create stunning pieces that reflect the harmonious blend of nature’s artistry and human ingenuity. Why not begin this creative endeavor and transform a simple piece of driftwood into a memorable work of art?

Filed Under: Driftwood Ideas Tagged With: DIY, Driftwood, Epoxy, home decor, Woodworking

Driftwood Epoxy Art

April 15, 2025 by admin

Have you ever found yourself walking along the shoreline, spotting pieces of driftwood, and wondering about their potential in art and decoration? Driftwood, with its naturally weathered appearance and unique shapes, offers an excellent medium for creating stunning art pieces, especially when combined with epoxy resin. If you’ve ever been curious about how to transform oceanic treasures into captivating works of art, you’re in the right place. Let’s delve deeper into the world of driftwood epoxy art, exploring what makes it special, the tools and materials you need, and how to craft your very own masterpiece.

Driftwood Epoxy Art

What is Driftwood Epoxy Art?

Driftwood epoxy art merges the organic allure of driftwood with the glossy, modern finish of epoxy resin. These two materials together create pieces that are both rustic and polished, offering a blend of natural beauty and intricate artistry. The result can be anything from functional items like tables and lamps to purely decorative pieces such as wall hangings and sculptures.

The Appeal of Driftwood

Driftwood is wood that has been washed onto shore by the action of winds, tides, or waves. Its unique texture and form are a result of years of exposure to the elements. Each piece has its own story, etched into its surface by water and time, which makes it an ideal medium for artists who cherish one-of-a-kind materials.

Benefits of Using Epoxy Resin

Epoxy resin is a versatile polymer known for its high-gloss finish and durability. It acts as both a glue and a protective coat, offering clarity that enhances the natural beauty of the encased driftwood. It is especially loved by artists for its ability to preserve and highlight organic materials while adding an additional layer of depth and dimension.

Tools and Materials Needed

Embarking on a project in driftwood epoxy art requires some specific tools and materials. Whether you’re a seasoned artist or a beginner, having the right equipment can make all the difference. Here’s a breakdown of what you might need:

Basic Materials

  • Driftwood: Select pieces that speak to you, factoring in the shape, size, and texture.
  • Epoxy Resin: Choose a high-quality brand that offers clarity, UV protection, and longevity.
  • Measuring Cups and Stirring Sticks: Accurate measurement is crucial for mixing epoxy resin.
  • Protective gear: Gloves, goggles, and a mask to ensure your safety from fumes and spills.

Tools for Crafting

  • Saws: To cut driftwood to size if necessary.
  • Power Sander: For smoothing any rough edges and surfaces.
  • Brushes: Useful for applying epoxy and ensuring it covers all areas.
  • Heat Gun or Torch: To remove bubbles from the resin surface.

Driftwood Epoxy Art

Selecting and Preparing Your Driftwood

Finding the perfect piece of driftwood is an adventure in itself. Each piece offers a distinct character, challenging and inspiring your creative vision. These are steps to follow to prepare the driftwood:

Finding the Ideal Piece

Search along beaches, riverbanks, and lakeshores where debris is likely to accumulate. Take note of the wood’s condition; it should be neither too fragile nor too dense.

Cleaning and Sanitizing

It’s essential to clean your driftwood to remove any salt, sand, algae, and insects. Begin by rinsing it thoroughly with fresh water. Then, soak it in a bleach solution (1 part bleach to 9 parts water) for at least 24 hours to disinfect it. Finally, rinse it again and let it dry completely in sunny conditions or a well-ventilated area.

Smoothing and Shaping

Using a sander, smooth away any overly rough patches. Shape the wood as desired, keeping in mind the vision you have for your art piece.

Working with Epoxy Resin

Epoxy resin might seem intimidating at first, but with practice, it becomes a rewarding part of the creative process. Here’s how you can work with this material to get the best results.

Mixing the Resin

Follow the product instructions carefully, usually calling for a proper ratio mix of resin and hardener. Use separate measuring cups for each component before mixing them in one container. Stir slowly to avoid introducing air bubbles.

Applying Epoxy to Driftwood

Pour the mixed epoxy over the driftwood, ensuring it covers all surfaces uniformly. Use a brush to spread it out evenly, paying special attention to crevices and curves.

Removing Bubbles

After application, you might notice bubbles forming. Use a heat gun or torch gently to eliminate them, ensuring a crystal-clear finish without altering the texture beneath.

Design Inspirations and Ideas

Driftwood epoxy art can be as varied as your imagination allows. Whether you’re interested in functional pieces or purely decorative ones, there are countless possibilities.

Functional Art Pieces

  • Driftwood Tables: Use larger pieces of driftwood as bases or accents for table tops covered in epoxy resin.
  • Lamps and Light Fixtures: Integrate lighting elements to create bespoke pieces that add warmth and intrigue to any space.

Decorative Artworks

  • Wall Hangings: Arrange smaller driftwood pieces into artistic collages, safely enclosed in epoxy.
  • Sculptures: Let the natural form of the driftwood guide you in assembling free-standing sculptures.

Finishing and Preserving Your Artwork

After successfully crafting your driftwood epoxy art, finishing touches are crucial for longevity and presentation.

Final Sanding and Polishing

Once the resin is fully cured, you may need to perform a final sanding to remove any imperfections. Follow this with a polish using fine-grit sandpaper to achieve a sleek finish.

Preserving the Art

Consider adding a UV-resistant topcoat to prevent any yellowing and enhance durability. Also, ensure the driftwood is securely bonded to any mounting surface, providing stability over time.

Troubleshooting Common Issues

Even with careful preparation, challenges can arise. Addressing them is part of the learning journey.

Common Problems

  1. Bubbles in Resin: Ensure you mix slowly and use a heat gun to remove any bubbles during application.
  2. Discoloration: This can be due to contamination. Ensure your pots, stirrers, and environment are clean.

Solutions

If discoloration or other minor defects are unavoidable, they can often be fixed by applying an additional layer of epoxy or sanding down and re-polishing the surface.

Conclusion

Driftwood epoxy art is a testament to nature’s beauty and human creativity working in harmony. Whether you’re making functional furniture or creating sculptures and wall art, the combination of driftwood and epoxy provides endless opportunities for artistic expression. So, next time you find yourself on a beach walk, you might just see those pieces of driftwood through the lens of an artist, ready to transform them into something truly remarkable.

Through understanding the materials, refining your techniques, and being unwavering in experimenting, you stand at the cusp of creating breathtaking pieces that capture the organic elegance of the natural world, complemented by the sleek brilliance of epoxy resin. Let the driftwood guide your creativity, and may your artistic journey be as fluid and enchanting as the waves that brought your materials to shore.

Filed Under: Driftwood Ideas Tagged With: Art, craft, DIY, Driftwood, Epoxy

Driftwood Apoxy

November 30, 2024 by admin

Have you ever considered the beauty and potential in something as simple as driftwood? Driftwood itself holds an organic, rustic charm, but have you wondered how adding a bit of creativity and innovation could take it to the next level? Enter the world of driftwood epoxy — a fascinating blend of nature and craftsmanship that you can explore to create stunning art pieces and functional items.

Driftwood Apoxy

What is Driftwood Epoxy?

When you hear the term “driftwood epoxy,” it essentially refers to the union of driftwood — those wonderfully weathered wood pieces found ashore or floating along a body of water — with epoxy resin. Epoxy itself is a versatile thermosetting polymer known for its strong adhesive properties and crystal-clear finish once set. By combining the two, you can create everything from gorgeous tables and art pieces to smaller decorative items that highlight the unique texture and form of the driftwood.

A Natural and Creative Medium

Driftwood epoxy combines natural materials with artistic expression. By using epoxy resin with driftwood, you preserve the organic aesthetic of the wood while enhancing it with the resin’s durability and gloss. The result can be a creation that is both eye-catching and timeless, capturing the rustic beauty of the wood while protected and accentuated by the resin.

Why Choose Driftwood Epoxy?

There are several reasons you might choose to work with driftwood epoxy. For one, it allows you to recycle and repurpose materials that nature has already crafted into unique shapes. By using driftwood, you’re contributing to sustainable practices, giving new life to what might otherwise be discarded. Furthermore, the combination of driftwood and epoxy resin often results in pieces that are sturdy and long-lasting, ensuring they can be enjoyed for years to come.

The Basics of Working with Driftwood and Epoxy

Before you dive into creating your masterpiece, it’s important to understand the fundamentals of working with driftwood and epoxy. This will ensure your project is successful and satisfying.

Selecting Your Driftwood

Choosing the right piece of wood is a crucial first step. Driftwood comes in various shapes, sizes, and textures, depending on its origin and journey. Look for pieces that inspire you — whether due to their shape, the intricacy of their grain, or the story they seem to hold.

  • Size and Shape: Consider the project you’re planning and select wood that fits your intended use.
  • Texture and Color: Each piece of driftwood is unique in terms of its surface texture and coloration. Select a texture that complements your vision.
  • Condition: The driftwood should be relatively free from rot. Too much decay can compromise the structure and integrity of your final product.

Preparing the Driftwood

Once you’ve selected the driftwood you’ll work with, it’s important to prepare it properly. Start by cleaning the wood thoroughly to remove any dirt, salt, or organisms it may have picked up in its travels. Soak it in freshwater for several days, changing the water regularly. After cleaning, allow the driftwood to dry completely, which may take several days.

Selecting and Mixing Epoxy

The epoxy resin you choose will influence the outcome of your project. Epoxy resins vary in terms of thickness, clarity, and setting time. Opt for a clear, marine-grade epoxy for durability and optimal aesthetic results.

Once you’ve selected your resin, you’ll need to prepare it according to the manufacturer’s instructions.

  • Measurements: Mix resin and hardener in the correct ratios. Improper measurements can prevent the mixture from curing properly.
  • Mixing: Stir the mixture slowly and thoroughly to avoid air bubbles and ensure uniformity.

Crafting with Driftwood Epoxy

With your prepared driftwood and mixed epoxy resin, you’re ready to begin crafting. Here’s how you can create various items with driftwood epoxy.

Creating Driftwood Epoxy Art

Driftwood epoxy can be used to create beautiful, nature-inspired art pieces. Whether it’s a wall hanging or a standalone sculpture, the process allows you to highlight the organic textures and forms of driftwood.

  1. Design Concept: Plan a design before you begin. You can sketch your ideas or visualize the final piece in your mind.
  2. Construct a Mold: You may need to construct a mold or frame to support the structure while the epoxy cures.
  3. Pouring Epoxy: Carefully pour or apply the epoxy over your driftwood, covering edges and beneath crevices to ensure comprehensive coverage.
  4. Curing Process: Allow the epoxy to cure as per the instructions. Curing time can vary based on the environment and resin.

Making Functional Items

Beyond aesthetic art, driftwood epoxy offers potential for creating functional items such as lamps, furniture, or even kitchen utensils.

  • Unique Tables: Use driftwood as a base or accent within a resin river table design.
  • Decorative Bowls and Trays: Form practical yet decorative items that exhibit the character of the driftwood.
  • Lamp and Light Fixtures: Incorporate driftwood with epoxy resin to create lighting that adds warmth and character to a room.

Coating and Finishing

Regardless of your project, finishing touches are key to a polished result. Sand the cured epoxy to eliminate imperfections or bubbles, followed by a final polish or varnish to enhance the lustrous shine.

Caring for Driftwood Epoxy Creations

Once you’ve completed your driftwood epoxy project, proper care and maintenance will ensure it remains in excellent condition for years to come.

Cleaning and Dusting

  • Use a gentle cloth for regular dusting.
  • Avoid harsh chemicals; a damp cloth with mild soap is preferable for cleaning.

Environmental Considerations

  • Keep your items away from direct sunlight and extreme temperatures to prevent expansion or warping.

Driftwood Apoxy

Challenges and Solutions in Driftwood Epoxy Projects

Like any creative project, working with driftwood epoxy comes with its own set of challenges. Here are some common ones and solutions to overcome them.

Air Bubbles

Air bubbles can occur when mixing or pouring epoxy. Stir slowly to minimize air introduction, and use a heat gun to eliminate bubbles after pouring.

Uneven Surfaces

Driftwood can be irregular, creating challenges for leveling your project. Consider using clamps or weights to hold the epoxy even during curing.

Inspirational Ideas for Driftwood Epoxy

Embarking on your driftwood epoxy journey can be a rewarding experience with endless possibilities. To help spark your creativity, here are some inspirational ideas you might consider:

Driftwood Epoxy Jewelry

Transform small, unique pieces of driftwood into exquisite pendants or earrings by encasing them in vibrant or translucent epoxy. Not only do they serve as conversation pieces, but they also allow you to wear a piece of art wherever you go.

Outdoor Furniture

Craft rustic yet elegant outdoor seating or tables using larger pieces of driftwood set in resin. Their natural resilience against weather makes them durable, and they bring a touch of natural elegance to any garden or patio.

Decorative Wall Panels

Create stunning, large-scale wall art by embedding driftwood into resin panels. This can serve as a dramatic focal point in both home and office environments, bringing a slice of nature indoors.

Conclusion

Driftwood epoxy is a remarkable medium that invites you to combine creativity with nature’s artistry. By blending the organic allure of driftwood with the versatility of epoxy resin, you can create pieces that are both visually captivating and sustainably sourced. Whether your goal is to craft a beautiful art piece or a functional item imbued with personality, driftwood epoxy offers limitless possibilities. So why not embrace the natural beauty and embark on a creative journey that’s as rewarding as it is environmentally conscious?

Filed Under: Driftwood Ideas Tagged With: crafting, Driftwood, Epoxy, home decor, Woodworking

Driftwood Epoxy Table

July 23, 2024 by admin

Creating your own Driftwood Epoxy Table is an exciting journey that combines the raw beauty of nature with the sleek elegance of modern design. Imagine the satisfaction of transforming natural driftwood into a stunning centerpiece for your living room. This article will guide you through each step, offering tips and tricks to ensure your project is both enjoyable and successful. From selecting the perfect piece of driftwood to applying the epoxy resin flawlessly, you’ll learn everything you need to know to craft a unique table that’s sure to impress. So, roll up your sleeves and get ready to bring a touch of nature into your home with your very own handmade masterpiece. Have you ever wanted to bring a touch of the seaside into your home, combining the raw beauty of driftwood with the modern elegance of epoxy? If so, a driftwood epoxy table could be the perfect project for you! Whether you’re a seasoned woodworker or a curious DIY enthusiast, you’ll find the journey both rewarding and surprisingly manageable.

Driftwood Epoxy Table

What Is a Driftwood Epoxy Table?

A driftwood epoxy table is a stunning piece of furniture that merges the rustic charm of driftwood with the contemporary sleekness of epoxy resin. This type of table is unique because it often features pieces of driftwood encased in clear or colored epoxy, creating the illusion that the wood is floating or suspended within the table itself.

Why Choose Driftwood?

Driftwood is naturally weathered wood that has spent a significant amount of time in the water. Its distinctive look and unique texture make it a sought-after material for various decorative projects, especially furniture. Driftwood carries a bit of history with it, making each piece entirely unique.

Why Use Epoxy Resin?

Epoxy resin is a versatile material that, when cured, forms a hard, clear, and durable surface. It brings out the natural beauty of the wood while providing a high-gloss finish. Epoxy resin is also incredibly durable, making it ideal for use in furniture that will experience everyday wear and tear.

Benefits of a Driftwood Epoxy Table

Choosing to build a driftwood epoxy table offers several advantages:

  1. Uniqueness: No two pieces of driftwood are the same, and the epoxy allows for endless customization.
  2. Durability: Epoxy resin provides a tough, damage-resistant surface.
  3. Aesthetic Appeal: The combination of driftwood and epoxy resin creates a stunning visual contrast.
  4. Conversation Piece: This type of table is often a focal point of any room due to its distinctive look.

Materials You Will Need

To get started on your driftwood epoxy table, you’ll need the following materials:

MaterialPurpose
DriftwoodMain aesthetic element
Epoxy ResinTo encapsulate the driftwood and form the table surface
Mold/FrameTo hold the epoxy and wood in place while it cures
Mixing CupsFor measuring and mixing the epoxy resin
Stir SticksFor mixing the resin and hardener
Safety GearGloves, goggles, and respirator for protection
SandpaperFor smoothing the finished surface
Release AgentTo prevent the epoxy from sticking to the mold
LevelTo ensure the table is even
Heat GunTo remove bubbles from the epoxy

Step-by-Step Guide

Step 1: Gathering Your Driftwood

First things first, you need to source your driftwood. You can find driftwood at beaches, lakeshores, or even purchase it from stores and online vendors. Look for pieces that are dry, relatively clean, and free of rot.

Step 2: Preparing the Driftwood

Before you start working with your driftwood, make sure it is thoroughly cleaned and dried. Use a wire brush to remove any dirt, and wash it with mild soap and water. Allow it to dry completely, which may take several days.

Step 3: Designing Your Table

Sketch out a design for your table. Decide how you want the driftwood to be arranged and the size and shape of your table. This is your chance to get creative! You can build a simple rectangular table, a round coffee table, or even an intricate design.

Step 4: Building the Mold

Construct a mold using plywood or MDF (Medium Density Fiberboard) to hold the epoxy in place while it cures. Line the inside of your mold with a release agent, such as packing tape or a commercial mold release spray, to prevent the epoxy from sticking.

Step 5: Arranging the Driftwood

Place your cleaned, dried driftwood pieces into the mold according to your design. Make sure to secure the driftwood, as it might float when you pour the epoxy resin.

Step 6: Mixing the Epoxy Resin

Follow the manufacturer’s instructions to mix the epoxy resin and hardener in the correct ratio. Use your mixing cups and stir sticks to ensure a thorough mix. Make sure to wear your safety gear during this process, as the chemicals can be hazardous.

Step 7: Pouring the Epoxy Resin

Slowly pour the mixed epoxy resin into the mold, starting from one end and working your way across. This helps to minimize air bubbles. Use a heat gun to eliminate any bubbles that do form by gently waving it over the surface of the resin.

Step 8: Letting It Cure

Allow the epoxy to cure according to the manufacturer’s instructions. This usually takes about 24-72 hours. Make sure your work area is level, as you don’t want the epoxy to set unevenly.

Step 9: Sanding and Finishing

Once the epoxy has fully cured, remove the table from the mold. Sand the surface with fine-grit sandpaper to remove any imperfections and achieve a smooth finish. You can polish the table to bring out a high-gloss shine or apply a finish of your choice.

Step 10: Attaching Legs

If you haven’t already, now is the time to attach legs to your table. You can purchase pre-made legs or build your own, depending on your design and skill level. Make sure they are securely attached and your table is stable.

Driftwood Epoxy Table

Tips for Success

  • Work in a Ventilated Area: Epoxy resin fumes can be potent.
  • Measure Accurately: Precise measurements ensure the epoxy cures properly.
  • Take Your Time: Rushing can lead to mistakes or imperfections in the epoxy.
  • Level Ground: Ensure your mold sits on a flat, level surface to avoid uneven curing.
  • Safety Gear: Always wear gloves, goggles, and a respirator.

Common Mistakes and How to Avoid Them

Mistake 1: Bubbles in Epoxy

Bubbles can ruin the look of your table. Use a heat gun or torch to pass over the surface of the epoxy after pouring to remove bubbles.

Mistake 2: Poor Wood Preparation

Not cleaning and drying the driftwood properly can cause issues with the epoxy bond. Ensure your driftwood is thoroughly prepared before encapsulating it in epoxy.

Mistake 3: Improper Mixing

Not following the correct resin-to-hardener ratio can result in an epoxy that doesn’t cure properly. Always measure and mix according to the instructions.

Mistake 4: Inadequate Mold Release

If you forget to apply a release agent to your mold, your table may stick to it. Line your mold well to prevent this.

Creative Variations

One of the best things about making a driftwood epoxy table is the sheer range of creative possibilities. Here are some ideas to inspire you:

Color Pigments

Add color pigments to your epoxy resin to create a vivid or translucent effect. Colors like blue or turquoise can impart a beach-like feel that complements the driftwood.

Embedded Objects

Consider embedding objects such as shells, stones, or even small trinkets into the epoxy resin to add more visual interest.

LED Lighting

For a truly unique piece, consider adding LED lights within the epoxy. This can create a mesmerizing effect, especially in low light settings.

Sustainable Practices

Using repurposed driftwood is an excellent way to embrace sustainability in your DIY projects. Here are some ways to make your project even more eco-friendly:

  • Local Sourcing: Collect driftwood locally to minimize your carbon footprint.
  • Eco-Resin: Choose eco-friendly epoxy resins that are less harmful to the environment.
  • Recycled Materials: Use reclaimed wood or recycled materials wherever possible.

Frequently Asked Questions

How Long Does It Take to Make a Driftwood Epoxy Table?

The entire process, from preparing your driftwood to the final touches, can take around one to two weeks. This timeline can vary depending on factors like drying times, curing times for the epoxy, and your level of experience.

Can I Use Any Type of Epoxy Resin?

Not all epoxy resins are the same. Look for those specifically labeled for casting and deep pour projects. These types are designed to cure well even in thicker layers, reducing the risk of overheating.

How Do I Maintain My Driftwood Epoxy Table?

To keep your table in tip-top shape, regularly clean it with a soft cloth. Avoid harsh chemicals and always use coasters to prevent scratches and stains.

Conclusion

By following this comprehensive guide, you can create a beautiful and unique driftwood epoxy table that will be a standout piece in any room. The combination of rustic driftwood and glossy epoxy resin is stunning and timeless. Plus, every table you make will carry its own unique character and history, making it much more than just a piece of furniture. So grab your materials and let your creativity flow – the perfect driftwood epoxy table is waiting for you!

Filed Under: Driftwood Ideas Tagged With: DIY, Driftwood, Epoxy, Handmade, Table

Driftwood Epoxy

July 22, 2024 by admin

Driftwood Epoxy is your ultimate guide to transforming ordinary pieces of driftwood into extraordinary works of art. Through the fusion of natural beauty and glossy, crystal-clear epoxy, you’ll learn how to bring out the hidden charm of driftwood, making each creation a unique statement piece. This short article introduces you to the basics of selecting the perfect driftwood, preparing it for epoxy application, and mastering the techniques that result in stunning, durable decor. Dive in and discover how you, too, can turn nature’s remnants into timeless treasures with Driftwood Epoxy. Have you ever stumbled upon a beautiful piece of driftwood and wondered how to turn it into something extraordinary? Driftwood combined with epoxy resin creates stunning, unique pieces of art that can transform any room. If you’ve been curious about the process, benefits, and techniques of driftwood epoxy projects, you’re in the right place!

Driftwood Epoxy

What is Driftwood Epoxy?

Driftwood epoxy is a creative craft that combines the natural beauty of driftwood with the sleek, modern look of epoxy resin. This versatile material can be used to create stunning tables, decorative items, and even functional household pieces. By encapsulating driftwood in epoxy, you can preserve its intricate details while adding a glossy, smooth finish.

The Basics of Epoxy Resin

Epoxy resin is a two-component material, consisting of resin and hardener. When these two components are mixed, they undergo a chemical reaction, resulting in a hard, durable, and glossy surface. This makes epoxy resin perfect for a myriad of applications, from crafting to industrial uses.

Why Driftwood?

Driftwood is naturally beautiful, often featuring unique shapes, textures, and colors that can’t be replicated. Each piece tells a story, having been weathered by water, sun, and time. When combined with epoxy resin, driftwood pieces become part of exquisite, long-lasting works of art.

Benefits of Driftwood Epoxy Projects

Driftwood epoxy projects come with a host of benefits. Whether you’re a craft enthusiast or a professional artist, you’ll find significant value in this form of artistry.

Aesthetic Appeal

One of the most compelling benefits is the aesthetic appeal. The natural beauty of driftwood, enhanced by the glossy, modern finish of epoxy resin, creates a captivating look that fits both rustic and contemporary styles.

Durability

Epoxy resin is known for its toughness and resistance to scratches, stains, and yellowing. This durability ensures that your driftwood epoxy project will stand the test of time, retaining its beauty for years.

Customization

The possibilities for customization are endless. You can add pigments, dyes, or even embed small objects within the epoxy to make your piece truly unique. Experimenting with different types of wood and resin tints lets you express your personal style.

Eco-Friendly

Using driftwood for your projects is an eco-friendly choice. Instead of harvesting new wood, you’re giving a second life to wood that’s already been weathered and discarded. Many epoxy resins are also developed with environmental consideration, making it a sustainable choice.

Choosing the Right Driftwood

Selecting the proper driftwood is crucial for the success of your project. Not all driftwood is created equal, and understanding what to look for can make a big difference.

Assessing Quality

Quality driftwood should be structurally sound and free from excessive rot or damage. While some imperfections can add character, too much decay can compromise the integrity of your piece.

Size and Shape

The size and shape of the driftwood should complement the vision you have for your project. Larger pieces are ideal for tables or larger artworks, while smaller bits can be used for intricate designs or smaller decorative items.

Project TypeIdeal Driftwood Size
Coffee table3-4 feet long
Wall art1-2 feet long
Decorative coasters4-6 inches long
JewelryLess than 4 inches

Preparing the Driftwood

Proper preparation is essential to ensuring the best results. This involves cleaning, drying, and sometimes treating the wood to remove any pests or mildew.

Tools and Materials Needed

To get started with driftwood epoxy projects, you’ll need some basic tools and materials. Here’s a comprehensive list to make your crafting journey smooth and enjoyable.

Essential Tools

  • Protective Gear: Gloves, masks, and goggles
  • Mixing Containers: Plastic containers for mixing resin and hardener
  • Measuring Tools: Measuring cups or scales for accuracy
  • Mixing Sticks: Wooden or plastic stir sticks
  • Sandpaper: Various grits for smoothing the wood and cured resin
  • Clamps: For holding pieces in place while the resin cures
  • Brushes or Rollers: For applying resin

Necessary Materials

  • Epoxy Resin and Hardener: Specifically designed for woodworking
  • Driftwood: Your chosen pieces
  • Pigments or Dyes: Optional, for adding color to the resin
  • Mold Release Agent: To prevent resin from sticking to molds
  • Tarp or Drop Cloth: To protect your workspace

Driftwood Epoxy

Step-by-Step Guide to Creating Driftwood Epoxy Pieces

Creating driftwood epoxy pieces can be a rewarding experience. Here’s a step-by-step guide to help you get started and ensure success.

Step 1: Gather and Prepare Materials

Set up your work area by covering it with a tarp or drop cloth. Gather all your tools and materials to keep everything within reach.

Step 2: Clean the Driftwood

Clean the driftwood thoroughly by washing it with water and a mild detergent. Scrub off any dirt, debris, or algae. Let it dry completely, which might take several days or even weeks, depending on the wood’s density and moisture content.

Step 3: Sand the Driftwood

Use sandpaper to smooth rough edges and surfaces. Start with a coarser grit (60-80) and progress to a finer grit (220). This will help the epoxy adhere better to the wood.

Step 4: Mix the Epoxy Resin

Follow the manufacturer’s instructions to mix the resin and hardener in the correct ratio. Use a clean container and stir slowly to minimize air bubbles.

Step 5: Apply a Seal Coat

Apply a thin layer of epoxy to the driftwood as a seal coat. This helps to prevent air bubbles and ensures the wood absorbs the resin evenly. Let this coat cure according to the resin’s specified time.

Step 6: Pour the Epoxy

After the seal coat has cured, you can pour the additional epoxy layers. Pour slowly and evenly, allowing the resin to cover the entire surface. Use a heat gun or torch to gently remove any bubbles that form.

Step 7: Let It Cure

Allow the epoxy to cure for the time specified by the manufacturer. This usually takes between 24 to 72 hours. Ensure the piece is in a dust-free environment to prevent particles from sticking to the surface.

Advanced Techniques and Tips

Once you’re comfortable with the basics, you might want to explore some advanced techniques to further enhance your driftwood epoxy projects.

Adding Pigments and Dyes

Experiment with adding pigments and dyes to your epoxy resin to create vibrant, colorful pieces. Different pigments can create a variety of effects, such as marbling or layering.

Embedding Objects

Consider embedding small objects like shells, stones, or even LED lights into the epoxy. This adds an extra layer of interest and uniqueness to your piece.

Using Molds

Using molds can help you shape your epoxy projects more precisely. Silicone molds are especially useful as epoxy doesn’t stick to them, making the demolding process simple.

Common Challenges and How to Overcome Them

Every craft comes with its own set of challenges. Here are some common issues you might face and tips on how to overcome them.

Air Bubbles

Air bubbles are a common problem in epoxy projects. To minimize them, stir the resin slowly and apply a seal coat before the full pour. Using a heat gun can help release trapped air bubbles.

Uneven Curing

If the epoxy doesn’t cure evenly, it could be due to an incorrect mixing ratio. Carefully follow the manufacturer’s instructions and measure precisely to ensure proper curing.

Warping

Driftwood can sometimes warp when encapsulated in epoxy. Using clamps and ensuring the wood is fully dry before applying epoxy can help prevent this issue.

Maintaining Your Driftwood Epoxy Pieces

Proper maintenance will keep your driftwood epoxy creations looking stunning for years.

Cleaning

Clean the surface with a damp cloth and mild detergent. Avoid abrasive cleaners that can scratch the epoxy surface.

Repairing

Minor scratches can be buffed out with fine-grit sandpaper and polished with a resin-specific polish. For deeper scratches or chips, you may need to apply a small amount of epoxy to fill in the damaged area.

Environmental Considerations

Keep your epoxy pieces away from direct sunlight to prevent UV damage, which can cause yellowing over time. Consider using UV-resistant epoxy for pieces that will be in sunlit areas.

Inspiring Driftwood Epoxy Project Ideas

Looking for some inspiration for your next project? Here are a few ideas to spark your creativity.

Driftwood Epoxy Table

Create a stunning coffee table with a large piece of driftwood encapsulated in a crystal-clear epoxy resin. This can serve as an eye-catching centerpiece in your living room.

Wall Art

Use smaller driftwood pieces to create intricate wall art. Combine different shades of epoxy and embed natural elements like stones or sea glass for a coastal vibe.

Coasters and Trivets

Smaller driftwood pieces can be turned into beautiful coasters and trivets. Add pigments to the epoxy for a pop of color or keep it transparent to showcase the wood’s natural beauty.

Jewelry

Create unique jewelry pieces by combining small driftwood fragments with colorful epoxy resin. Earrings, pendants, and bracelets are all possible with this versatile craft.

Conclusion

Driftwood epoxy is not just a craft; it’s a way of turning nature’s discarded pieces into something spectacular and lasting. By understanding the materials, mastering the techniques, and following a few simple steps, you can create stunning pieces that are both beautiful and functional.

So, why not give it a try? Your next masterpiece might just be waiting in the form of a weathered piece of driftwood and a little bit of epoxy resin. Happy crafting!

Filed Under: Driftwood Ideas Tagged With: crafts, Driftwood, Epoxy, home decor, Woodworking

Driftwood Epoxy Projects

May 25, 2024 by admin

Welcome to the captivating world of “Driftwood Epoxy Projects,” where your creativity can bloom and your hands can bring life to nature’s most weathered treasures. You’ll discover how to combine age-old driftwood with modern epoxy resin to create stunning, one-of-a-kind pieces for your home. Whether it’s a rustic table, a unique piece of wall art, or a mesmerizing centerpiece, you’ll be inspired to turn your newfound skills into lasting memories. Let’s dive in and transform ordinary driftwood into extraordinary art!

Driftwood Epoxy Projects

Have You Thought About Incorporating Driftwood in Your Next DIY Project?

Driftwood has a unique beauty only nature can provide. Its weathered texture, interesting shapes, and natural appeal make it a perfect element for a variety of DIY projects. Combined with epoxy resin, driftwood transforms into stunning art pieces, functional items, and eye-catching decor. Intrigued? Let’s dive into the world of driftwood epoxy projects and discover how you can create your own masterpieces.

Why Driftwood?

Unique Aesthetics

When you use driftwood, you’re incorporating a piece of nature that has been shaped by the elements. The wood has unique textures and patterns that can’t be replicated. Driftwood’s aesthetic value is its singularity; no two pieces are alike, making your project one of a kind.

Environmental Impact

Using driftwood is eco-friendly. You’re repurposing wood that has washed ashore, rather than cutting down trees. It’s a great way to contribute to sustainability while creating beautiful objects. Driftwood projects allow you to bring a piece of nature indoors without harming the environment.

Driftwood Epoxy Projects

Why Use Epoxy Resin?

Durability

Epoxy resin is incredibly strong and durable once it cures. This makes it ideal for projects that need to withstand daily wear and tear, such as tables, countertops, and coasters. When combined with driftwood, the strength of epoxy ensures your project will last for many years.

Aesthetic Versatility

Epoxy resin can be clear, colored, or even embedded with objects like stones, shells, or glitter. This versatility allows you to customize your driftwood projects to fit your style and taste. You can achieve a variety of finishes, from glossy and smooth to matte and textured.

Protection and Preservation

One of the great benefits of using epoxy is that it encapsulates the driftwood, protecting it from further decay and damage. The resin preserves the wood in its current state, ensuring that its unique textures and beauty remain intact over time.

Getting Started: Materials and Tools

Basic Materials

Before you start your project, you need to gather the essential materials. Here is a list to get you started:

MaterialDetails
DriftwoodChoose pieces that appeal to you; shape, size, and texture vary widely
Epoxy ResinPurchase high-quality resin suitable for the specific project
HardenerComes with the epoxy resin and necessary for curing

Essential Tools

You’ll also need some basic tools to handle the materials and complete your project. Here’s what you’ll need:

ToolPurpose
SandpaperFor smoothing the wood before applying resin
Mixing CupsFor blending resin and hardener in the correct proportions
Stirring SticksTo mix the epoxy thoroughly to avoid bubbles
Brushes or SpreadersTo apply the epoxy resin evenly over the wood
Gloves and Safety GearTo protect your skin and eyes while working with the resin
Heat Gun or TorchTo remove bubbles from the epoxy surface during curing

Optional Items

Depending on your project, you might also want these additional materials:

ItemUse
Color PigmentsTo tint the epoxy resin and add color variations
MoldsFor shaping resin into specific forms like coasters or small art pieces
EmbellishmentsItems like shells, stones, or glitter to embed in the resin

Driftwood Epoxy Projects

Popular Driftwood Epoxy Projects

Driftwood Epoxy Tables

One of the most popular uses for driftwood and epoxy is creating tables. These tables can be statement pieces in your home. Let’s break down how you can make one.

Materials Needed

  1. Driftwood piece (larger, flat pieces work well)
  2. Epoxy Resin and Hardener
  3. Table legs (metal, wood, or another material)
  4. Sandpaper
  5. Mixing cups and stirrers
  6. Brushes or spreaders
  7. Heat gun or torch

Steps to Create

  1. Select Your Driftwood: Choose a piece of driftwood with a shape you like and enough surface area.
  2. Prep the Wood: Sand the driftwood to remove any rough edges.
  3. Mix the Epoxy: Follow the instructions on your epoxy product to mix the resin and hardener.
  4. Apply a Base Coat: Use a brush to apply a thin layer of epoxy to the wood, sealing the surface. This helps to prevent bubbles.
  5. Embed the Driftwood: Place the driftwood on a flat surface and pour the epoxy over it. Use a heat gun or torch to remove any bubbles that form.
  6. Cure Time: Allow the epoxy to cure for at least 24 hours.
  7. Attach Legs: Once cured, attach the table legs to complete your table.

Driftwood Epoxy Coasters

If you’re looking for a smaller project to start with, consider making driftwood epoxy coasters.

Materials Needed

  1. Driftwood pieces (small, flat pieces)
  2. Epoxy Resin and Hardener
  3. Molds (coaster size)
  4. Sandpaper
  5. Mixing cups and stirrers
  6. Heat gun or torch

Steps to Create

  1. Select Your Driftwood: Pick smaller pieces that fit well into your molds.
  2. Prep the Wood: Sand down any rough edges.
  3. Position in Molds: Place the driftwood pieces in your molds.
  4. Mix the Epoxy: Follow the product instructions to mix resin and hardener.
  5. Pour into Molds: Pour the mixed epoxy into the molds, ensuring the driftwood is well embedded.
  6. Remove Bubbles: Use a heat gun or torch to get rid of bubbles.
  7. Cure Time: Allow the epoxy to cure fully.
  8. Finish: Once cured, remove the coasters from the molds and sand the edges if necessary.

Driftwood Epoxy Wall Art

Wall art can be a striking way to display the beauty of driftwood combined with epoxy resin.

Materials Needed

  1. Driftwood pieces (varied sizes and shapes)
  2. Epoxy Resin and Hardener
  3. A wooden frame or panel
  4. Sandpaper
  5. Brushes or spreaders
  6. Mixing cups and stirrers
  7. Heat gun or torch

Steps to Create

  1. Select Your Driftwood: Choose pieces that form an appealing composition.
  2. Prep the Wood: Sand the pieces to smooth any rough areas.
  3. Arrange on Frame: Lay out your design on the wooden frame or panel.
  4. Mix the Epoxy: Follow the resin and hardener instructions for mixing.
  5. Apply the Resin: Apply a layer of epoxy over the pieces, ensuring they are covered and secured.
  6. Remove Bubbles: Use a heat gun or torch to remove bubbles as the resin sets.
  7. Cure Time: Let the epoxy cure for the recommended time.
  8. Mounting: Once cured, the wall art is ready to be hung or displayed.

Tips and Tricks for Working with Driftwood and Epoxy

Preparing Driftwood

Before using driftwood, it’s essential to clean and prep it properly:

  1. Cleaning: Remove any sand, bark, or organic material. You can soak the wood in a mixture of water and bleach to kill any remaining bacteria or insects.
  2. Drying: Ensure the driftwood is completely dry before using it in epoxy projects. This may require several days of air drying.
  3. Sanding: Sand the surface to smooth out any rough textures and make the wood easier to work with.

Working with Epoxy

Using epoxy resin can be tricky, but these tips can help:

  1. Mix Thoroughly: Ensure that you mix the resin and hardener well to avoid inconsistencies in curing.
  2. Temperature Matters: Work in a controlled environment where the temperature is stable to avoid bubbles and improper curing.
  3. Degassing: Use a heat gun or torch to remove bubbles and achieve a smooth finish.
  4. Protective Gear: Always wear gloves and safety glasses when handling epoxy to protect your skin and eyes.

Embellishments and Coloration

Adding unique touches to your driftwood epoxy projects can make them even more personalized:

  1. Color Pigments: Add pigments to your epoxy mix to create colored resin. This can enhance the natural beauty of the driftwood.
  2. Embedded Objects: Consider embedding small objects like shells, stones, or dried flowers to add another layer of interest.
  3. Metallic Effects: You can incorporate metallic powders or leafing for a luxurious finish.

Troubleshooting Common Issues

Bubbles in Epoxy

Bubbles can be a frustrating issue when working with epoxy. Here are some solutions:

  • Pre-seal the Wood: Apply a thin base coat of epoxy to seal the wood before the final pour.
  • Mix Slowly: Mix the resin and hardener slowly to minimize air infusion.
  • Use Heat: A heat gun or torch can help to release trapped air bubbles.

Curing Problems

Sometimes epoxy doesn’t cure as expected. This could be due to:

  • Incorrect Ratios: Ensure you’re mixing the resin and hardener in the recommended proportions.
  • Environmental Conditions: Temperature and humidity can affect curing times.
  • Mixing Inconsistency: Thoroughly mix the components to ensure even curing.

Resin Overflow

To avoid resin overflow:

  • Proper Molds: Use the correct size molds or frames to contain the epoxy.
  • Measure Carefully: Ensure that you measure the right amount of epoxy to avoid overflow.
  • Edges and Boundaries: Apply a barrier or tape around the edges to contain the resin.

Inspiration and Ideas

Seasonal Decor

Seasonal decor pieces like festive ornaments, candle holders, or centerpiece trays can all be made more unique with the use of driftwood and epoxy. Whether it’s for summer, winter, autumn, or spring, incorporating natural elements can bring a piece of the outdoors into your home.

Personalized Gifts

Handmade gifts like custom coasters, framed wall art, or small tables made with love and driftwood epoxy are treasured presents. You can personalize these items with embedded names, dates, or other significant symbols.

Functional Household Items

Functional items like driftwood epoxy cutting boards, key holders, or lamp bases can be both practical and beautiful. These pieces add a unique touch to everyday items, making them stand out.

Safety Considerations

Epoxy Safety

Working with epoxy resin requires some safety precautions:

  • Ventilation: Always work in a well-ventilated area to avoid inhaling fumes.
  • Protective Gear: Use gloves, safety glasses, and, if necessary, masks.
  • Spills and Clean-up: Clean up any spills immediately to avoid skin contact and ensure a safe workspace.

Wood Safety

When preparing and working with driftwood:

  • Safe Tools Usage: Use sanders and saws carefully to avoid accidents.
  • Wood Treatment: Ensure the driftwood is free from contaminants by cleaning and bleaching if necessary.
  • Splinters: Be cautious of splinters when handling un-sanded wood.

Final Words: Let Your Creativity Flow

Working with driftwood and epoxy resin opens up endless opportunities for creative expression. From tables to coasters and wall art to functional household items, there’s no limit to what you can create.

So why not take a piece of driftwood and let your imagination guide you? Whether you are an experienced DIY enthusiast or a novice looking to try something new, driftwood epoxy projects offer a rewarding experience. You get to craft items that not only showcase your skills but also bring the beauty of nature into your living space. Enjoy the process, take your time, and most importantly, have fun crafting your unique driftwood epoxy masterpieces. Happy crafting!

Filed Under: Driftwood Ideas Tagged With: crafting, Driftwood, Epoxy, Handmade, projects

Epoxy Driftwood Art

March 23, 2024 by admin

Imagine transforming a piece of driftwood into a stunning work of art that catches the eye and sparks conversations. Enter the world of Epoxy Driftwood Art, where the beauty of nature meets the creativity of human hands. With the enchanting combination of epoxy resin and weathered wood, this unique form of art brings life back to forgotten pieces of driftwood, unveiling their hidden potential. From intricate sculptures to mesmerizing wall decorations, prepare to be captivated by the ethereal beauty that arises when the rawness of nature intertwines with the artistry of epoxy.

Materials Needed

To create your own epoxy driftwood art, you will need the following materials:

Epoxy Resin

Epoxy resin is the main ingredient in this art form. It is a two-part mixture that, when combined, creates a durable and glossy finish. Make sure to choose a high-quality epoxy resin for the best results.

Driftwood

Driftwood is the key element of your artwork. Collect various pieces of driftwood in different sizes and shapes to create a visually appealing design. Look for unique and interesting pieces that will add character to your artwork.

Gloves

Working with epoxy resin can be messy, so it’s important to protect your hands. Wear gloves to prevent any allergic reactions or skin irritation. Additionally, gloves will help to keep your artwork clean and free from fingerprints.

Mixing Cups

You will need mixing cups to accurately measure and mix the epoxy resin. Use disposable cups for easy cleanup.

Mixing Sticks

Mixing sticks are necessary for blending the epoxy resin components together. They ensure a thorough and even mixture.

Preparation

Before starting your epoxy driftwood art project, it’s important to prepare your materials and workspace.

Cleaning the Driftwood

Begin by cleaning the driftwood to remove any dirt, sand, or debris. Use a soft brush or cloth to gently scrub the surface. If needed, you can also rinse the driftwood with water. Allow it to dry completely before proceeding.

Sanding the Driftwood

To achieve a smooth and polished finish, sand the driftwood with fine-grit sandpaper. This step will remove any rough edges, splinters, or imperfections. Sanding also helps the epoxy resin adhere better to the wood.

Choosing a Workspace

Select a well-ventilated area where you can work comfortably for an extended period. Ensure you have enough space to lay out your materials and accommodate the size of your artwork. Cover the work surface with a plastic sheet or wax paper to protect it from any spills or drips.

Epoxy Driftwood Art

This image is property of images.unsplash.com.

Creating the Design

The design is where your creativity comes into play. Take some time to plan and experiment with different layouts before committing to a final arrangement.

Planning the Design

Consider the size and shape of your artwork and how the driftwood pieces will fit together. Think about the desired composition and any color schemes or themes you want to incorporate. Sketch out your ideas or create a digital mock-up to help visualize the final design.

Experimenting with Layout

Layout experimentation is an exciting part of the creative process. Arrange the driftwood pieces on your workspace to find the most appealing configuration. Play with different arrangements, angles, and overlaps to achieve balance and visual interest. Take photos of each layout to compare and choose the one that you like the most.

Mixing and Pouring Epoxy Resin

Now that you have your design in mind, it’s time to mix and pour the epoxy resin.

Measuring and Mixing the Resin

Follow the manufacturer’s instructions to measure the epoxy resin and hardener in the correct ratio. Use separate mixing cups for each component. Pour the resin into one cup and the hardener into another. Then, slowly combine the two parts and stir thoroughly for several minutes until the mixture is well blended.

Pouring the Base Layer

To create a solid foundation for your artwork, start by pouring a base layer of epoxy resin onto your prepared workspace. Use a mixing stick to spread the resin evenly, ensuring it covers the entire area. This base layer will act as an adhesive for the driftwood pieces.

Adding Color or Pigments

If desired, you can add color or pigments to the epoxy resin. Mix in a small amount of resin-safe dye or pigment to achieve the desired hue. Experiment with different colors to match your design or create a unique effect. Remember, a little goes a long way, so start with a small amount and gradually add more if needed.

Epoxy Driftwood Art

This image is property of images.unsplash.com.

Embedding Driftwood

Now it’s time to embed the driftwood pieces into the epoxy resin base layer.

Arranging the Driftwood Pieces

Using the layout you decided on earlier, carefully arrange the driftwood pieces onto the wet epoxy resin base. Press them gently into the resin to ensure they adhere properly. Pay attention to the composition and spacing between the pieces to create an aesthetically pleasing arrangement.

Securing the Driftwood

To prevent the driftwood from shifting or floating to the surface, use a mixing stick or a small tool to push the pieces slightly into the resin. This will help secure them in place and ensure they stay embedded during the curing process.

Pouring Additional Epoxy

Once the driftwood pieces are arranged to your satisfaction, pour additional epoxy resin over the artwork. Slowly pour the resin to cover the driftwood completely, allowing it to flow and settle naturally. Use a mixing stick to spread the resin evenly and fill any gaps or voids.

Curing and Finishing

After pouring the epoxy resin, you will need to allow it to cure before proceeding to the finishing touches.

Allowing the Resin to Cure

The curing time for epoxy resin can vary depending on the brand and environmental conditions. Follow the manufacturer’s instructions regarding the curing time. It is essential to be patient and avoid disturbing the artwork during this process to achieve the best results.

Sanding and Polishing

Once the resin has fully cured, you can sand the surface to smooth out any imperfections or rough edges. Begin with a lower grit sandpaper and gradually move to higher grits for a smoother finish. Take your time and be gentle to avoid damaging the artwork. After sanding, wipe away any dust with a clean cloth.

Applying a Protective Finish

To enhance the shine and durability of your epoxy driftwood art, apply a protective finish. Select a clear, non-yellowing epoxy or varnish specifically designed for use on epoxy resin. Follow the application instructions provided by the manufacturer, and allow the finish to dry completely before handling or displaying your artwork.

Epoxy Driftwood Art

This image is property of images.unsplash.com.

Display and Presentation

Now that your epoxy driftwood art is complete, it’s time to think about how you want to display and present it.

Choosing a Display Method

Consider the size and shape of your artwork when choosing a display method. Options include placing it on a tabletop or shelf, hanging it on a wall, or incorporating it into a larger installation. Think about the overall aesthetic you want to achieve and choose a display method that best suits your vision.

Mounting or Framing the Artwork

If you want to add an extra touch of elegance, you can mount or frame your epoxy driftwood art. Select a frame or mounting board that complements the colors and style of your artwork. Ensure that the chosen method securely holds the artwork in place without distracting from the beauty of the piece.

Adding Hanging Hardware

If you plan to hang your artwork, attach suitable hanging hardware to the back. Choose hardware that is sturdy enough to support the weight of the artwork and follow the manufacturer’s guidelines for proper installation. Consider using multiple hooks for larger pieces to distribute the weight evenly.

Maintenance and Care

To keep your epoxy driftwood art looking its best, proper maintenance and care are essential.

Cleaning and Dusting

Regularly dust your artwork with a soft, lint-free cloth to remove any surface dust or debris. If needed, you can also use a mild soap and water solution to gently clean the surface. Avoid using abrasive cleaners or rough materials that could scratch the epoxy resin.

Avoiding Direct Sunlight

To prevent fading or discoloration, avoid placing your artwork in direct sunlight or exposing it to excessive heat. Prolonged exposure to sunlight can cause the epoxy resin to yellow or become brittle over time. Instead, choose a location where your artwork will be shielded from direct sunlight.

Repairing Any Damages

In the event of any accidental damages or scratches, you can repair minor imperfections in your epoxy driftwood art. Follow the manufacturer’s instructions for epoxy resin repair kits or consult a professional if needed. Taking prompt action and addressing any damages will help preserve the longevity and beauty of your artwork.

Epoxy Driftwood Art

Further Inspiration and Techniques

If you’re looking to expand your creativity and explore new techniques, there are endless possibilities to consider.

Exploring Different Designs

Experiment with different designs and patterns to create unique and visually captivating epoxy driftwood art. Branch out from traditional layouts and explore asymmetry, geometric shapes, or even abstract compositions. Let your imagination guide you and don’t be afraid to push the boundaries of your creativity.

Incorporating Other Materials

Don’t limit yourself to just driftwood. Explore the use of other materials, such as seashells, stones, or even metals, to add texture and depth to your artwork. These additional elements can complement the natural beauty of the driftwood and create a more dynamic and visually striking piece.

Experimenting with Dye Techniques

Epoxy resin offers endless possibilities when it comes to color and texture. Experiment with various dye techniques, such as marbling, layering, or even creating gradients. These techniques can add depth and dimension to your artwork, making it even more captivating and eye-catching.

Safety Considerations

While creating epoxy driftwood art is an enjoyable and rewarding process, it’s important to prioritize your safety throughout each step.

Using Epoxy Resin in a Well-Ventilated Area

Epoxy resin emits fumes that can be harmful if inhaled in large quantities. Always work in a well-ventilated area, such as an open garage or outdoor space, to minimize exposure to these fumes. Consider using a respirator or wearing a mask if necessary to further protect your respiratory system.

Wearing Protective Gear

Protective gear, including gloves, safety glasses, and a long-sleeved shirt, should be worn when working with epoxy resin. This will help protect your skin and eyes from potential allergic reactions or irritation. Additionally, it will prevent any resin from accidentally coming into contact with your skin, which can be difficult to remove once cured.

Properly Storing and Disposing of Epoxy Resin

After completing your artwork, ensure any leftover epoxy resin or mixed materials are properly stored. Follow the manufacturer’s guidelines for storing epoxy resin to maintain its quality and prevent hardening. When disposing of unused or expired epoxy resin, consult your local waste management facility for proper disposal methods to minimize environmental impact.

Creating epoxy driftwood art is a fascinating and fulfilling artistic endeavor. By following these steps and guidelines, you can create stunning and unique pieces that showcase the beauty of nature and your artistic vision. So gather your materials, unleash your creativity, and embark on this exciting artistic journey today!

Epoxy Driftwood Art

Filed Under: Driftwood Ideas Tagged With: Driftwood, Epoxy

How To Epoxy Driftwood

March 3, 2024 by admin

Imagine transforming a piece of ordinary driftwood into a stunning work of art that not only showcases nature’s beauty but also preserves it for years to come. In this article, you will learn the step-by-step process of how to epoxy driftwood, giving it a durable, glossy finish that enhances its natural colors and textures. Whether you’re a budding DIY enthusiast or simply someone who appreciates unique home decor, this guide will walk you through the materials needed, the techniques to achieve a flawless epoxy coating, and the final touches that will make your driftwood creation truly one-of-a-kind. Get ready to unleash your creativity and embark on an exciting journey of transforming ordinary driftwood into extraordinary artwork!

What is Epoxy Driftwood?

Epoxy driftwood refers to the process of sealing and enhancing real driftwood pieces using epoxy resin. Driftwood is a type of wood that has been washed ashore on beaches, rivers, or lakes after floating in the water for an extended period. It often features unique shapes, textures, and colors, making it a popular choice for various crafts and home decor projects. By applying epoxy resin, driftwood can be preserved, strengthened, and transformed into stunning art pieces or functional objects.

Explanation of Epoxy and Driftwood

Epoxy is a versatile and durable substance that consists of a resin and a hardener. When these two components are mixed together, a chemical reaction occurs, resulting in a hard and glossy finish. Epoxy is commonly used in various applications, such as coatings, adhesives, and fillers, due to its excellent adhesion and protective properties. On the other hand, driftwood is wood that has been weathered and shaped by natural forces like water, wind, and sun. It can be found in different sizes and shapes, offering a unique and rustic beauty that can be enhanced with the use of epoxy resin.

Benefits of Using Epoxy on Driftwood

Using epoxy on driftwood offers several benefits. Firstly, it acts as a protective layer, sealing the wood and preventing further deterioration caused by moisture or pests. The epoxy coating also enhances the natural colors and patterns of the driftwood, bringing out its beauty and uniqueness. Additionally, the epoxy resin strengthens the wood, making it more durable and less susceptible to breakage. Lastly, epoxy can be used to fill any cracks, holes, or gaps in the driftwood, allowing for a smoother surface and improving its overall aesthetic appeal.

Choosing the Right Materials

When embarking on an epoxy driftwood project, it is essential to choose the right materials to ensure the best results.

Selection of Driftwood

When selecting driftwood, look for pieces that are dry, sturdy, and free from signs of rot or decay. Consider the size and shape of the driftwood, depending on the intended use or design. Opt for pieces with interesting textures and unique features that will stand out once coated with epoxy.

Types of Epoxy Resin

There are various types of epoxy resin available, each offering different characteristics and application methods. Choose a high-quality epoxy resin specifically designed for woodworking or art projects. Consider factors such as working time, curing time, UV resistance, and level of gloss desired. It is advisable to read product reviews and follow manufacturer recommendations to ensure the best outcome.

Other Materials Needed

In addition to driftwood and epoxy resin, gather other necessary materials and tools for the project. These may include sandpaper or a sanding block for surface preparation, mixing cups and stir sticks for epoxy resin, protective gear such as gloves and a respirator, pigment or dye (optional) for adding color, and a workspace with proper ventilation and lighting.

How To Epoxy Driftwood

This image is property of images.pexels.com.

Preparing the Driftwood

Before applying epoxy resin, it is crucial to properly prepare the driftwood to achieve the best adhesion and finish.

Cleaning the Driftwood

Start by cleaning the driftwood to remove any dirt, debris, or potential contaminants. Use a brush or compressed air to dislodge loose particles, and then gently wash the driftwood with mild soap and water. Rinse thoroughly to ensure the surface is clean and ready for further preparation.

Removing Any Loose Parts

Inspect the driftwood for any loose, flaky, or deteriorating parts. Carefully remove these with a chisel, sandpaper, or a rotary tool, ensuring a stable and solid base for the epoxy resin.

Sanding the Surface

To improve adhesion, sand the surface of the driftwood lightly. Start with a coarse-grit sandpaper, and gradually move to finer grits for a smooth finish. Sanding not only prepares the wood for epoxy but also helps to reveal any hidden patterns or colors within the grain.

Mixing the Epoxy Resin

Mixing epoxy resin requires precision and careful attention to detail to achieve the desired consistency and curing properties.

Measuring the Epoxy Resin and Hardener

Follow the manufacturer’s instructions to measure the correct amounts of epoxy resin and hardener. It is crucial to maintain the recommended ratios for optimal curing and performance. Using a digital scale or graduated mixing cups, carefully measure equal parts of resin and hardener.

Mixing Ratios

Once the resin and hardener are accurately measured, mix them thoroughly according to the recommended mixing time and technique. Stir slowly and evenly to prevent introducing air bubbles into the mixture. Continue stirring until the resin and hardener are fully blended and appear uniform in color and consistency.

Adding Pigments or Dyes (Optional)

For those looking to add color to their epoxy driftwood project, now is the time to incorporate pigments or dyes. Follow the manufacturer’s instructions for the proper ratio of pigment to epoxy resin. Mix the pigment thoroughly with the epoxy resin and hardener until the desired color is achieved.

How To Epoxy Driftwood

This image is property of images.pexels.com.

Applying the Epoxy to Driftwood

Once the epoxy resin is mixed and ready to apply, it’s time to start transforming the driftwood into a stunning art piece or functional object.

Preparing the Workspace

Before applying epoxy to the driftwood, ensure that the workspace is clean, well-ventilated, and at the appropriate temperature. Place a drop cloth or plastic sheeting to protect the surface from any epoxy drips or spills.

Applying the First Coat of Epoxy

Using a brush or foam applicator, apply a thin and even coat of epoxy resin to the driftwood. Work in small sections, ensuring that all surfaces, edges, and crevices are covered. Avoid applying too much epoxy to prevent pooling or drips. Allow the first coat to partially cure according to the manufacturer’s instructions.

Filling Any Holes or Gaps

After the first coat has partially cured, inspect the driftwood for any holes, cracks, or gaps that may need to be filled. Mix a small amount of epoxy resin and carefully fill these imperfections using a brush or syringe. Ensure that the epoxy is level with the surrounding surface to create a smooth and seamless finish.

Applying Subsequent Coats (If Desired)

Once the filled areas have hardened, additional coats of epoxy resin can be applied to enhance the durability and depth of the finish. Follow the same process as before, applying thin and even coats and allowing each layer to partially cure before applying the next. Multiple coats may be necessary to achieve the desired thickness and glossiness.

Curing and Finishing

After applying the desired number of epoxy coats, it is crucial to allow the epoxy to fully cure before proceeding with any finishing touches.

Allowing the Epoxy to Cure

Follow the manufacturer’s instructions for the recommended curing time. This typically ranges from 24 to 72 hours, depending on the brand and type of epoxy resin used. Ensure that the curing process takes place in a dust-free and temperature-controlled environment to minimize any potential imperfections.

Sanding the Surface for Smoothness

Once the epoxy has fully cured, sand the surface lightly with fine-grit sandpaper or a sanding block. This helps to remove any imperfections or bubbles and creates a smooth and even finish. Be cautious not to apply excessive pressure and inadvertently remove too much epoxy.

Applying a Final Top Coat (Optional)

For added shine and protection, consider applying a final top coat of epoxy resin. This optional step can provide an extra layer of durability and enhance the glossiness of the driftwood. Follow the same process as before, applying a thin and even coat and allowing it to cure fully.

Polishing and Buffing

To achieve a professional and flawless finish, consider polishing and buffing the cured epoxy surface. This step can help to remove any minor scratches or blemishes and create a smooth and glossy appearance. Use a polishing compound and a soft cloth or buffer to gently buff the surface until it achieves the desired shine.

How To Epoxy Driftwood

This image is property of images.pexels.com.

Displaying Epoxy Driftwood

Now that your epoxy driftwood piece is complete, it’s time to showcase it in a way that highlights its beauty and uniqueness.

Choosing the Right Display Method

Consider the size and shape of the epoxy driftwood when selecting a display method. Options could include mounting it on a wall, placing it on a shelf, or creating a decorative centerpiece. Choose a display method that complements the overall aesthetic and fits seamlessly into the desired space.

Creating a Stand or Base

If the epoxy driftwood piece requires additional support or stability, consider creating a stand or base. This can be made from various materials such as wood, metal, or acrylic, depending on the desired aesthetic and functionality. Ensure that the stand or base securely holds the driftwood while enhancing its visual appeal.

Incorporating Epoxy Driftwood into Home Decor

There are numerous ways to incorporate epoxy driftwood into home decor. It can be used as a statement piece on a mantel, a centerpiece on a dining table, or a focal point in a room. Additionally, epoxy driftwood can be incorporated into furniture, such as coffee tables or shelves, to add a touch of natural beauty to the overall design aesthetic.

Maintenance and Care

To ensure the longevity and beauty of your epoxy driftwood creation, proper maintenance and care are essential.

Cleaning and Dusting

Regularly clean and dust your epoxy driftwood using a soft cloth or duster. This helps to remove any accumulated dirt or debris and maintains its luster. Avoid using harsh chemicals or abrasive cleaning agents that may damage the epoxy surface.

Avoiding Direct Sunlight and Extreme Temperatures

To prevent any potential damage or discoloration, avoid placing epoxy driftwood in direct sunlight or exposing it to extreme temperatures. Prolonged exposure to sunlight can cause the epoxy to yellow or become brittle over time. Additionally, extreme temperature fluctuations can lead to cracking or warping of the wood.

How To Epoxy Driftwood

Inspiration and Ideas

The possibilities and creative potential with epoxy driftwood are virtually limitless. Explore different styles and designs to find inspiration for your next project.

Different Styles and Designs

Epoxy driftwood can be incorporated into various styles and designs, ranging from rustic and natural to modern and avant-garde. Experiment with different epoxy colors, patterns, and techniques to create unique and personalized pieces. Consider incorporating other materials, such as metal, glass, or gemstones, to further elevate the design.

Using Epoxy Driftwood in Art and Crafts

Epoxy driftwood can be utilized in art and crafts projects, adding a distinct touch to paintings, sculptures, or mixed media creations. It can be used as a focal point or as a complementary element, adding texture and visual interest to the overall composition. Let your creativity flow and explore the endless possibilities of incorporating epoxy driftwood into your artistic endeavors.

Safety Precautions

Working with epoxy resin requires taking proper safety precautions to protect yourself and ensure a safe working environment.

Wearing Protective Gear

Always wear appropriate protective gear, including gloves, safety goggles, and a respirator, when working with epoxy resin. This helps to prevent skin irritations, eye injuries, and inhalation of harmful fumes. Follow the manufacturer’s recommendations for the specific type of epoxy resin being used.

Working in a Well-Ventilated Area

Ensure that your workspace is well-ventilated to minimize exposure to potentially harmful fumes. Work near an open window, use fans, or consider using a ventilation system specifically designed for epoxy resin applications. Adequate ventilation helps to maintain good air quality and reduces the risk of inhaling noxious vapors.

Proper Disposal of Epoxy Waste

Dispose of any excess or unused epoxy resin and related materials properly. Follow local waste disposal regulations to avoid environmental contamination. Use containers specifically designed for epoxy waste and consult local authorities for guidance on proper disposal procedures.

In conclusion, epoxy driftwood offers a fascinating and creative way to enhance the natural beauty of driftwood pieces while protecting and preserving them for years to come. By following the steps outlined above and considering safety precautions and design inspiration, you can create stunning and unique epoxy driftwood art pieces that will be a focal point in your home decor or a valuable addition to your artistic endeavors. Let your imagination run wild with endless possibilities as you embark on your epoxy driftwood journey.

How To Epoxy Driftwood

Filed Under: Driftwood Ideas Tagged With: Driftwood, Epoxy, How-To

Epoxy Driftwood

October 24, 2023 by admin

Imagine transforming ordinary pieces of driftwood into stunning art pieces that will add a touch of natural beauty to your home. With the innovative and mesmerizing technique of epoxy resin, you can now easily turn driftwood into unique sculptures or functional pieces that capture the essence of nature. Epoxy Driftwood is the perfect way to unlock your creativity and create one-of-a-kind masterpieces that will awe your guests and inspire conversations. Let your imagination run wild as you explore the endless possibilities of epoxy driftwood and unleash your inner artist.

What is Epoxy Driftwood?

Definition

Epoxy driftwood refers to the process of combining natural driftwood with epoxy resin to create unique and durable pieces of art and home decor. This technique involves preserving the organic beauty of driftwood while enhancing its durability and visual appeal through the application of a protective resin coating.

Origin

The origin of epoxy driftwood can be traced back to the growing popularity of epoxy resin as a versatile and durable material for various crafting and art projects. Artists and DIY enthusiasts began experimenting with combining epoxy resin with different materials, including wood, to create stunning and long-lasting pieces. Epoxy driftwood is a modern take on traditional woodworking, taking advantage of the natural shapes and textures of driftwood to create visually captivating pieces.

How is Epoxy Driftwood Made?

Selecting the Driftwood

The process of creating epoxy driftwood starts with carefully selecting the right pieces of driftwood. It is essential to choose driftwood with interesting shapes, unique textures, and distinctive grain patterns. Driftwood that is free from rot or damage is preferred to ensure the longevity and quality of the final piece.

Preparing the Driftwood

Before applying the epoxy resin, the driftwood needs to be properly prepared. This involves cleaning the surface of the wood to remove any dirt, debris, or loose bark.

sea, water, beach
. Sanding the driftwood can help smooth out rough edges and surfaces, ensuring a clean and even finish.

Mixing the Epoxy Resin

The next step in creating epoxy driftwood is mixing the epoxy resin. Epoxy resin is typically a two-part mixture that needs to be combined in specific ratios. Follow the manufacturer’s instructions carefully to ensure the resin cures correctly. Additionally, consider adding color pigments or dyes to the resin to create unique and customized finishes.

Applying the Epoxy Resin

Once the driftwood is prepared and the epoxy resin is mixed, it’s time to apply the resin to the driftwood. Using a brush or pouring the resin directly onto the wood, carefully cover the entire surface.

root, driftwood, wooden
. It’s essential to apply a thin, even coat to avoid excess resin pooling or dripping. Allow the resin to cure according to the manufacturer’s instructions, ensuring a solid and durable finish.

Benefits of Epoxy Driftwood

Enhanced Durability

One of the primary benefits of epoxy driftwood is the enhanced durability it provides to the natural driftwood. The epoxy resin acts as a protective coating, preventing damage from moisture, insects, and general wear and tear. This extended lifespan ensures that the beauty and integrity of the driftwood piece are preserved for years to come.

Improved Aesthetics

Epoxy driftwood offers an opportunity to enhance the natural beauty of the driftwood by bringing out its distinctive features. The transparent nature of the epoxy resin allows the unique grain patterns, knots, and textures of the wood to be showcased. Additionally, the resin can be customized with different colors, pigments, or dyes, adding a touch of creativity and personalization to the final piece.

Easy Maintenance

Unlike raw driftwood, epoxy driftwood requires minimal maintenance. The epoxy resin creates a smooth and sealed surface that is easy to clean. Simply wipe the surface with a damp cloth to remove any dust or dirt, and the piece will maintain its original beauty.

Versatility in Design

Epoxy driftwood offers endless possibilities in terms of design. The unique shapes and textures of driftwood, combined with the customization options provided by epoxy resin, allow artists and craftsmen to create one-of-a-kind pieces. Whether it’s a rustic home decor item or a contemporary sculpture, epoxy driftwood can adapt to various design styles and preferences.

Applications of Epoxy Driftwood

Home Decor

Epoxy driftwood is a popular choice for home decor pieces. From coffee tables and side tables to shelves and wall hangings, the natural beauty and durability of epoxy driftwood make it a versatile and eye-catching addition to any living space. Whether incorporated into a modern or rustic interior design, epoxy driftwood brings a touch of nature indoors.

Furniture

Furniture pieces made with epoxy driftwood are exceptionally unique and captivating. Merging the functionality of furniture with the organic beauty of driftwood, epoxy driftwood furniture becomes a statement piece in any home. From dining tables and chairs to bed frames and cabinets, these furniture items offer a blend of functionality, aesthetics, and durability.

Art and Sculpture

Epoxy driftwood lends itself well to artistic expression. Artists can utilize the natural curves, twists, and imperfections of driftwood to create intricate sculptures or wall art. The addition of epoxy resin enhances the visual appeal and longevity of these art pieces, turning driftwood into a canvas for creative expression.

Aquarium Decoration

Epoxy driftwood is also a popular choice for aquarium enthusiasts. Its ability to withstand water and moisture, combined with the natural and textured appearance, makes it an ideal decoration for fish tanks. The epoxy resin coating ensures that the driftwood remains safe for fish and other aquatic creatures while adding a touch of beauty and realism to the underwater environment.

Choosing the Right Epoxy Resin

Type of Resin

When selecting an epoxy resin for driftwood projects, consider the specific requirements of the piece and the desired finish. There are various epoxy resin types available, including clear epoxy resin or epoxy resin with UV-resistant properties. Choose a resin that suits the project’s needs in terms of transparency, UV protection, and durability.

Curing Time

Different epoxy resins have varying curing times. Take into account the time required for the resin to dry and cure fully. It is essential to plan the project accordingly and allow sufficient time for each coat of resin to cure before applying additional layers or completing the project.

Heat Resistance

If the epoxy driftwood piece will be exposed to heat, such as hot beverages on a tabletop, consider selecting a heat-resistant epoxy resin. This will ensure that the resin does not warp, bubble, or become damaged when exposed to high temperatures.

Color and Clarity

Epoxy resins are available in different colors, and some resins offer better clarity than others. Consider the desired color and transparency of the finished project and choose a resin that will achieve the desired effect. Additionally, look for resins that are resistant to yellowing over time to maintain the pristine appearance of the epoxy driftwood.

Techniques and Tips for Creating Epoxy Driftwood

Layering Technique

Layering is a popular technique in creating epoxy driftwood. By pouring multiple thin layers of epoxy resin, artists can create depth and dimension in the finished piece. This technique allows for the preservation of the unique textures and patterns of the driftwood while adding a glossy and fascinating visual effect.

Wood Staining

Before applying the epoxy resin, consider staining the driftwood to enhance its natural color or achieve a desired hue. Wood stains are available in various shades, allowing artists to customize the visual appearance of the driftwood piece. Staining before applying the epoxy resin adds an extra layer of depth and richness to the final result.

Creating Texture

To further enhance the visual appeal of epoxy driftwood, artists can experiment with creating texture on the surface of the wood. This can be achieved by using tools like sandpaper, chisels, or even a blowtorch to create unique patterns, grooves, or indentations. The epoxy resin will then highlight these textural elements, adding depth and interest to the overall piece.

Avoiding Bubbles

Bubbles can sometimes form when working with epoxy resin, which can negatively impact the final result of the epoxy driftwood. To avoid bubbles, ensure the workspace is clean and dust-free. Consider using a torch or heat gun to carefully remove any bubbles that arise during the mixing or pouring process. Conducting a small test project or practicing on a small piece of driftwood prior to the main project can also help refine the technique and minimize the occurrence of bubbles.

Maintenance and Care of Epoxy Driftwood

Cleaning

To keep epoxy driftwood looking its best, regular cleaning is necessary.

autumn colors, lake driftwood, sunlight
. Use a soft, damp cloth to wipe away any dust or dirt that may accumulate over time. Avoid using abrasive cleaners or rough scrubbing materials, as they may scratch or damage the epoxy resin.

Avoiding Scratches

While epoxy driftwood is durable, it is still susceptible to scratching. To prevent scratches, avoid placing sharp or abrasive items directly on the surface of the driftwood. Use coasters, placemats, or felt pads under objects to provide a protective barrier between the item and the epoxy resin.

Preventing UV Damage

Direct and prolonged exposure to sunlight can cause UV damage to epoxy driftwood. Over time, the epoxy resin may yellow or become discolored. To prevent this, place epoxy driftwood pieces away from direct sunlight or consider using UV-resistant epoxy resin for projects intended for outdoor or sun-exposed areas.

Repairing Damages

In the event of any damages to the epoxy driftwood, such as cracks or chips, repairs can be made. However, repairing epoxy driftwood can be a complex process and may require professional assistance. It is best to consult with an experienced artisan or artist who specializes in epoxy resin to ensure proper and seamless repairs.

Inspiration and Ideas for Epoxy Driftwood Projects

Epoxy Driftwood Table

A coffee table or dining table made with epoxy driftwood serves as a stunning centerpiece in any living space. The combination of wood and epoxy resin creates a unique and eye-catching surface that draws attention and sparks conversation. The table can be customized with different colors and textures to fit various design styles.

Epoxy Driftwood Wall Art

Transform a blank wall into a captivating display with epoxy driftwood wall art. Create a striking focal point using a single large piece of driftwood coated in epoxy resin, or arrange multiple smaller pieces to form an abstract composition. The natural beauty of the driftwood, combined with the glossy finish of the resin, adds a touch of elegance to any room.

Epoxy Driftwood Jewelry

For a more personal and wearable art piece, consider creating epoxy driftwood jewelry. Earrings, necklaces, and bracelets made with epoxy-coated driftwood offer a unique and nature-inspired accessory. These pieces can be combined with other materials like beads or metals to create stunning and one-of-a-kind jewelry designs.

Epoxy Driftwood Aquarium Background

Enhance the aesthetics of your aquarium with an epoxy driftwood background. The combination of the natural textures and colors of driftwood, together with the protective epoxy resin, creates a realistic and visually appealing underwater landscape. The background can provide a natural habitat for fish and other aquatic creatures while adding a touch of artistry to the aquarium.

Exploring the Epoxy Driftwood Trend

Popularity in Home Decor

Epoxy driftwood has gained significant popularity in the world of home decor. Its unique blend of natural elements and modern design aesthetic makes it a go-to choice for individuals looking to enhance their living spaces. From rustic cabins to contemporary urban apartments, epoxy driftwood pieces fit seamlessly into various interior design styles.

Emerging Artists and Designers

The rise in the popularity of epoxy driftwood has led to the emergence of talented artists and designers specializing in this craft. Many artists have honed their skills in creating epoxy driftwood art, pushing the boundaries of creativity and innovation. Their stunning creations continue to inspire and captivate art enthusiasts around the world.

Online Communities and Inspiration

Thanks to the internet and social media, enthusiasts of epoxy driftwood can connect and share their passion with like-minded individuals. Online communities and platforms dedicated to epoxy driftwood provide a space for artists, DIY enthusiasts, and hobbyists to exchange ideas, showcase their creations, and find inspiration for future projects. These communities serve as valuable resources for those looking to embark on their epoxy driftwood journey.

Conclusion

Epoxy driftwood brings together the raw beauty of driftwood and the durability of epoxy resin, resulting in unique and breathtaking pieces of art and home decor. Whether used in furniture, sculptures, or as a decorative element in aquariums, epoxy driftwood offers enhanced aesthetics, durability, and ease of maintenance. With the ability to customize colors, textures, and designs, epoxy driftwood allows for endless creativity and endless possibilities. So, why not try your hand at epoxy driftwood and create a truly captivating and personalized piece that will be admired for years to come?

Filed Under: Driftwood Tagged With: Driftwood, Epoxy, home decor

Primary Sidebar

Driftwood4us.com, is a participant in the Amazon Services LLC Associates Program, an affiliate advertising program designed to provide a means for sites to earn advertising fees by advertising and linking to amazon.com.