• Skip to main content
  • Skip to primary sidebar
  • Terms and Conditions
  • Privacy Policy
  • Contact

Driftwood 4 Us

Just About Driftwood

Furniture makeover

Driftwood Effect Chalk Paint

March 9, 2025 by admin

Have you ever admired the muted, weathered charm of driftwood and wished you could capture that rustic elegance in your home decor? The driftwood effect using chalk paint is a fantastic way to do just that. This technique can transform the simplest piece of furniture into a stunning centerpiece, boasting the natural beauty and subtle sophistication of driftwood. By using chalk paint, known for its versatility and lovely matte finish, you can achieve this look with ease. In this guide, you’ll explore how to create that driftwood effect using chalk paint, discuss its nuances, and get inspired to apply it to your own projects.

What is Driftwood Effect in Chalk Paint?

The driftwood effect in chalk paint refers to a painting technique designed to mimic the natural, aged appearance of driftwood. This look can add a touch of rustic elegance to any room. Achieving this effect means using a series of painting and distressing techniques to get that naturally weathered look.

Why Use Chalk Paint?

Chalk paint is a popular choice for achieving the driftwood effect because it’s easy to use and requires minimal preparation. It adheres to almost any surface without needing primer or sanding. Chalk paint’s matte finish and ability to layer and blend colors make it ideal for creating the nuanced textures seen in driftwood.

Materials You’ll Need

Before you start your driftwood effect project, gather the following materials:

  1. Chalk Paint: Choose at least two complementary colors. A light base color and a darker ‘driftwood’ hue work well.
  2. Brushes: A good quality paintbrush or two for application, and a smaller one for details.
  3. Sandpaper: Medium and fine grit for distressing.
  4. Wax or Sealant: To protect your finished piece.
  5. Cloth: For blending and removing excess paint.

Choosing the Right Colors

The colors you choose can make or break the driftwood effect. Generally, shades of gray, taupe, and white work best. You can mix these colors to create a gradient effect simulating the various tones found in natural driftwood.

Light Base ColorDarker “Driftwood” ColorSuggested Combination
Soft WhiteLight GraySubtle and airy
Light BeigeMedium GrayRustic and elegant
Pale GrayDark TaupeBold and striking

By selecting harmonious shades, you’ll be better able to mimic the natural variations in real driftwood.
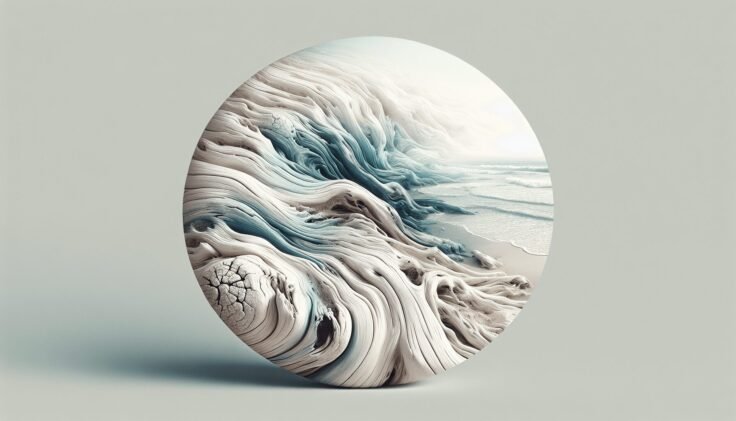
Driftwood Effect Chalk Paint

Steps to Create Driftwood Effect

Let’s get into the step-by-step process of creating the driftwood effect with chalk paint.

Step 1: Prepare Your Surface

Begin by wiping down your furniture piece to ensure it’s clean and free of dust. Chalk paint adheres better on a clean surface, so a quick cleaning can make a substantial difference.

Step 2: Apply the Base Coat

Start with the lighter color as your base. Apply this coat evenly across your piece. Since chalk paint often dries quickly, work efficiently to cover the entire surface without leaving streaks.

Step 3: Layer on the ‘Driftwood’ Color

Once your base coat is dry, it’s time to add the darker ‘driftwood’ color. Use a dabbing technique with a brush or cloth to apply this color. The key is to apply it unevenly, allowing the base color to show through in some areas, creating depth and dimension.

Step 4: Blend the Colors

With a damp cloth, gently blend the painted layers to soften the transition between colors. This helps in replicating the gradual color shifts seen in real driftwood.

Step 5: Distressing

For a more authentic look, distress your furniture by lightly sanding areas where natural wear might happen, such as edges and corners. Use the medium grit sandpaper first, then smooth out with fine grit.

Step 6: Seal Your Work

Finally, protect your masterpiece with a layer of wax or sealant. This not only adds durability but also enhances the colors and texture of the finish.

Tips for Achieving a Believable Driftwood Look

  • Work with Grains: Follow the natural wood grain of your piece to ensure the finish looks organic.

  • Don’t Overthink: The beauty of the driftwood effect lies in its randomness. Don’t strive for perfection—imperfection is where the character shines.

  • Practice Makes Perfect: If you’re unsure, try the technique on a test piece or an inconspicuous area before starting your main project.
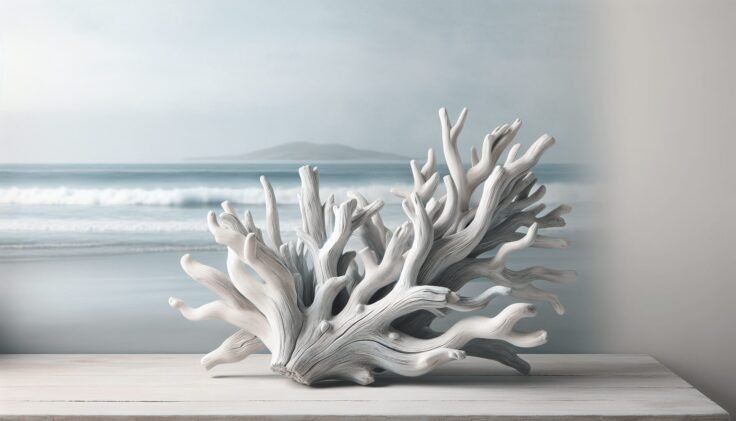
Driftwood Effect Chalk Paint

Common Mistakes to Avoid

While drifting towards greatness, it’s easy to trip up along the way. Here are a few common mistakes to steer clear of:

  • Skipping Preparation: Even though chalk paint is forgiving, a dirty or greasy surface can thwart your efforts.

  • Going Too Heavy on the Dark Tones: Excessive application of the ‘driftwood’ color can overshadow the base color and diminish the effect.

  • Rushing the Process: Each layer should be thoroughly dry before moving on to the next step to prevent smudging and to maintain clarity.

Creative Uses for Driftwood Effect Chalk Paint

The driftwood effect with chalk paint isn’t limited to just wooden furniture. You can apply this technique onto a variety of surfaces.

Upcycled Items

Turn old or unwanted items into stunning decor. An old picture frame or a bland wooden tray can become an eye-catching centerpiece when adorned with the driftwood look.

Kitchens and Bathrooms

Add a rustic vibe to frequently used spaces. Cabinets, shelves, or even mirror frames in kitchens and bathrooms can benefit from the breath of character imparted by this technique.

Outdoor Decor

Create an outdoor oasis by sprucing up garden furniture or planters. The driftwood effect is particularly stunning in a natural, bountiful garden where the artistry of wood meets lush greenery.

Enhancing the Driftwood Paint Effect

After mastering the basic technique, consider these advanced tips to further your driftwood paint effect:

Using Multiple Colors

Adding additional layers of different hues can increase the visual interest of your project. Try incorporating a touch of blue or green to your usual gray tones to mimic the sea-aged appearance of driftwood.

Incorporating Textured Techniques

Introduce texture by using a stiff brush to create striations resembling grain patterns of weathered wood. This makes the piece not only visually engaging but also texturally dynamic.

Adding Finishing Touches

Experiment with additional finishes like copper or silver highlights to imply sun glinting off aged wood. These embellishments can take your project from rustic to elevated art.

Understanding Care and Maintenance

Once you’ve completed your driftwood effect project, knowing how to maintain it ensures its longevity and continued beauty.

Routine Cleaning

Keep your piece clean by regularly dusting it with a soft cloth. Avoid abrasive cleaners that could damage the wax or sealant layer.

Reapplying Protective Finishes

Over time, the sealant may wear thin, especially in high-use areas. Regularly inspect your piece, and apply a fresh coat of wax or sealant as needed to protect against damage and wear.

Handling Chips and Cracks

For any chips or cracks that develop, gently sand the area and apply a matching coat of chalk paint. This touch-up will blend seamlessly with the existing finish.

Bring Driftwood Charm Into Your Space

The ability to transform ordinary objects into extraordinary ones with the driftwood effect can breathe new life into your home decor. With a blend of creativity and the right techniques, you can create pieces that evoke the serene and rustic beauty of natural driftwood. Whether it’s a statement piece in your living room or a subtle touch in your study, this versatile technique in chalk paint allows you to embrace imperfection and create art that resonates with personal and aesthetic appeal.

By mastering the driftwood effect with chalk paint, you’re not just reinventing your furniture, but also adding a personal touch to your space that captures an essence of coastal charm. Are you ready to get started and see where your creativity can take you? Embrace the transformative power of driftwood effect chalk paint and bring a touch of seaside serenity home!

Filed Under: Driftwood Ideas Tagged With: Chalk Paint, DIY, Driftwood Effect, Furniture makeover, Interior Design

Rethunk Junk Kitchen Cabinets Driftwood

February 9, 2025 by admin

Have you ever found yourself staring at your kitchen cabinets, wondering how you could give them a fresh new look without a complete overhaul? If the idea of transforming your kitchen charm with something as simple as a paint finish appeals to you, then you’re in the right place. Let’s talk about transforming your kitchen cabinets with a unique finish known as “Driftwood.”

Rethunk Junk Kitchen Cabinets Driftwood

Understanding the Concept of Rethunk Junk

The term “Rethunk Junk” shines a spotlight on the artistic process of transforming old, tired items into eye-catching pieces you can cherish. It’s all about imaginative upcycling, especially focusing on furniture like kitchen cabinets, where the goal is to rejuvenate and give them new life. It’s not merely a technique but more of a mindset; a creative endeavor that sees beauty in imperfection and potential in the discarded.

What is Rethunk Junk Kitchen Cabinets Driftwood?

When you work with “Rethunk Junk Kitchen Cabinets Driftwood,” you’re essentially using a distinctive paint finish on your cabinet surfaces that mimics the natural, rustic appearance of driftwood. This finish gives you the beauty of weathered wood without the hefty cost or need for new materials. The driftwood aesthetic is a perfect blend of texture and tone that can work with various kitchen styles, from coastal to modern farmhouse, offering a cozy yet elegant atmosphere.

Why Choose a Driftwood Finish?

Opting for a driftwood finish for your rethunk junk kitchen cabinets provides several advantages. Firstly, it is environmentally friendly since you’re upcycling and reusing materials already available in your home rather than contributing to waste. Secondly, the aesthetic is a neutral, calming tone that can blend with many color schemes and decor styles, providing flexibility in the design. Finally, driftwood finishes require less maintenance than dark or glossy finishes, as they do not show dust and fingerprints readily.

Preparing Your Kitchen Cabinets for the Driftwood Look

Preparation sets the stage for success in any DIY project, and rethunk junking your cabinets is no exception. With diligent preparation, you ensure a smooth application process and a long-lasting result.

Clearing and Cleaning the Cabinets

Before you begin the transformation, fully empty your cabinets. You’ll want to remove all contents and, if possible, take down any removable cabinet doors and hardware. A clean surface is crucial, so wash down your cabinets using a grease-cutting cleaner to remove dirt, grease, and grime. This cleaning step is vital because built-up residues can impact paint adhesion.

Sanding: To Sand or Not to Sand?

One of the frequently asked questions about painting cabinets is whether you need to sand them. The good news: with the right products, you might not have to. However, lightly sanding your cabinets with fine-grit sandpaper can enhance adhesion, especially if the existing finish is glossy. If you choose not to sand, using a deglosser can also prepare the surface effectively.

Priming the Surface

Depending on the base color and type of your cabinets, you may need to apply a primer. Priming helps with coverage, conceals dark colors, and prevents stains or tannins from bleeding through your new paint finish. Choose a primer compatible with the final finish you intend to use for the best results.

Applying the Driftwood Finish

The magic begins when you start the application process of the driftwood finish. It involves multiple layers and techniques that bring out that nuanced, weathered wood appearance.

Choosing the Right Paints and Tools

The success of achieving a driftwood effect greatly depends on the types of paints and tools you use. Typically, you’ll work with chalk-style or mineral paints due to their matte finish and ease of distressing. You might need two or three different shades of paint, a natural bristle brush for texturing, and possibly a cloth or sponge to blend the colors.

Layering Up: Creating the Basecoat

Firstly, establish a base color that complements the colors you’ll layer over. A light, neutral shade often does well as a base. Once your basecoat dries, apply a secondary color by dry brushing—this technique involves using a brush with minimal paint to add texture and visible strokes that mimic wood grain.

Achieving the Driftwood Texture

The driftwood effect is built upon layers, integrating streaks and washes of grey, beige, and white into your base. Consider using a ragging technique, lightly dragging a cloth dipped in water-thinned paint across the surface to create organic patterns. You can also use a combination of brushes and sponges to get the right blend of tones, and trial different combinations on a small section beforehand can be beneficial.

Distressing: Adding Character to Your Cabinets

Distressing is where the personality of driftwood truly shines through, offering a well-worn, vintage appeal.

How to Distress for That Authentic Look

Using a light hand and sandpaper, selectively distress areas of your cabinets that would naturally wear down with time, such as corners and edges. You might also use a scraping tool to add lines or small divots. This gives depth and authenticity to the driftwood look and enhances the kitchen’s rustic feel.

Sealing Your Work for Longevity

Once you achieve the desired look, it’s important to protect your hard work. Use a clear, matte polycrylic sealer that won’t add shine but will protect against scratches, moisture, and daily wear and tear.

Ensure the sealer is applied thinly and evenly. In most cases, two to three layers give sufficient protection, allowing each coat to dry completely before applying the next.

Rethunk Junk Kitchen Cabinets Driftwood

Incorporating Driftwood Cabinets into Your Kitchen Design

With your hard work complete, it’s time to integrate your fresh driftwood cabinets into your kitchen aesthetic.

Complementing Color Schemes

The subtle tones of driftwood allow you to be versatile with your kitchen’s color scheme. This finish blends beautifully with whites, blues, and other neutral shades. Consider adding contrasting elements like bold-colored kitchen accessories or lighting fixtures to create an inviting space.

Styling Tips and Ideas

Modern appliances and minimalist décor keep a kitchen containing driftwood cabinets feeling contemporary. Rustic elements such as woven baskets or a wooden countertop echo the natural driftwood vibe. Alternatively, industrial lighting or metal barstools can add an edgy contrast, creating a balanced and welcoming kitchen environment.

Enhancing Kitchen Functionality

As you celebrate the aesthetic, ensure your redesigned cabinets don’t just look good but also enhance functionality. Incorporate modern storage solutions, like pull-out shelves or integrated spice racks, for greater efficiency and comfort.

Conclusion

Revitalizing your kitchen cabinets with a driftwood finish under the philosophy of “rethunk junk” infuses a unique character and charm into your home. It blends creativity, sustainability, and practicality, allowing you to adopt a stunning rustic aesthetic without discarding what you already have. You now have a roadmap to undertake this rewarding DIY project, knowing your kitchen can enjoy beauty and purpose with a personal touch.

Your effort contributes to a greener planet and a richer living environment, where each cabinet tells a story of transformation. So why not turn your ‘junk’ into something cherished and memorable?

Filed Under: Driftwood Ideas Tagged With: DIY, Driftwood, Furniture makeover, kitchen cabinets, Rethunk Junk

How To Get Driftwood Look On Furniture

July 21, 2024 by admin

Welcome to your ultimate guide on transforming your furniture to achieve that charming, rustic driftwood look. In “How To Get Driftwood Look On Furniture,” you’ll discover a step-by-step process that makes it surprisingly easy to give your old pieces a fresh, coastal vibe. From selecting the right materials to mastering the perfect finish, this article walks you through everything you need to turn any piece of furniture into a stunning showcase with a naturally weathered appearance. Get ready to dive into a fun and creative project that will breathe new life into your space! Have you ever admired the weathered beauty of driftwood and wondered how you could bring that look to your own furniture? Achieving that rustic, coastal aesthetic is not as difficult as you might think! In this guide, you’ll learn how to transform your furniture into pieces that look like they’ve been crafted by nature herself.

How To Get Driftwood Look On Furniture

Understanding the Driftwood Look

Before diving into the techniques, it’s important to understand what exactly constitutes the driftwood look. Driftwood has a unique appearance — it’s weathered, sun-bleached, and often has a slightly grayish tone. The wood shows signs of aging, such as natural cracks, worn edges, and a patina developed over time.

Why Opt for the Driftwood Look?

The driftwood look can add a touch of rustic charm and coastal vibes to your space. Whether you’re decorating a beach house or just want to bring a bit of the seaside into your home, this style offers a relaxed, timeless appeal. Plus, it’s a versatile look that complements a variety of interior design styles, from shabby chic to modern rustic.

Materials and Tools You’ll Need

To achieve the driftwood look, you’ll need a few specific materials and tools. Gathering these beforehand will make the process smoother and more enjoyable.

Materials

  • Sandpaper (various grits)
  • Wood stain (gray or weathered wood tone)
  • White or light-colored paint
  • Rag or sponge
  • Sealant or varnish
  • Wood conditioner (optional, but recommended for even staining)
  • Paintbrushes

Tools

  • Electric sander or sanding block
  • Paint tray
  • Stir sticks
  • Protective gloves
  • Drop cloth
  • Painter’s tape

Having these materials and tools ready will ensure you can start and finish your project without unnecessary interruptions.

Preparing Your Furniture

Preparation is key to achieving a professional finish. This is where you lay the groundwork for the driftwood look.

Choose the Right Piece

Not all furniture pieces are suitable for this transformation. Opt for those made of wood — softwoods like pine and fir are especially good candidates because they absorb stains well.

Sand the Surface

The first step is to sand the surface of your furniture. Begin with a medium-grit sandpaper to remove any old finishes, varnish, or paint. Then, use a fine-grit sandpaper to smooth out the surface. This ensures the wood will readily absorb the stain and paint in the steps to come.

Clean the Wood

Once you’ve sanded the furniture, it’s crucial to clean the wood thoroughly. Use a damp cloth to wipe away any dust and debris. Let the wood dry completely before moving on to the next step.

Applying the Base Stain

The base stain will give your furniture that aged, weathered appearance characteristic of driftwood.

Choose Your Stain Color

Go for a color that mimics weathered wood. Gray or light brown stains work well. If you’re uncertain, test the stain on a hidden part of the furniture to see how it looks.

Apply the Stain

Using a brush or rag, apply the stain evenly over the surface of the furniture. Follow the grain of the wood for the best results. Allow it to sit for a few minutes, then wipe off the excess with a clean rag. Depending on the desired intensity, you might need to apply multiple coats. Always let each coat dry completely before applying the next.

Optional: Use a Wood Conditioner

For a more even stain, especially on softwoods, consider using a wood conditioner before applying the stain. This step can help the wood absorb the stain more uniformly.

How To Get Driftwood Look On Furniture

Adding the Weathered Look

Now it’s time to create that sun-bleached, weathered effect.

Dry Brushing Technique

Dry brushing is a simple technique that gives furniture an aged, distressed appearance.

  1. Dip a Dry Brush: Lightly dip the tip of a dry brush into white or very light-colored paint. Wipe off most of the paint on a rag or paper towel.
  2. Lightly Brush the Surface: Gently brush the surface of your furniture, moving in the direction of the wood grain. The goal is to let the paint catch only on the raised surfaces.
  3. Layer if Necessary: You can apply several light coats, allowing each to dry between applications, until you achieve the desired look.

Distressing the Wood

If you want to go a step further and add more character to your piece, consider distressing the wood. Here’s how:

  1. Use Sandpaper: Lightly sand areas that would naturally wear over time, such as edges and corners.
  2. Add Knocks and Dents: Lightly tap the wood with a hammer or other blunt object to create small dents and imperfections.

These techniques mimic the natural aging process of driftwood, adding to the authenticity of the look.

Sealing the Finish

Once you’re happy with the driftwood look of your furniture, it’s time to seal the finish. Sealing protects your work and gives it longevity.

Choose a Sealant

Opt for a clear, matte sealant to maintain the natural driftwood appearance. Glossy finishes can undermine the rustic effect you’ve achieved.

Apply the Sealant

Using a clean brush, apply the sealant evenly across the surface of the furniture. Follow the manufacturer’s instructions regarding drying time and additional coats. Be sure each layer is completely dry before adding another.

Tips and Tricks for the Best Results

Getting the driftwood look just right can take some practice. Here are a few tips and tricks to keep in mind:

Test Before You Commit

Always test your stains and paints on a small, inconspicuous area of your furniture. This helps you make sure you love the color and finish before applying it to the entire piece.

Layer for Depth

Don’t be afraid to layer stains, paints, and distressing techniques to add depth and interest to your piece. Multiple layers can create a more complex, textured look.

Use High-Quality Materials

Invest in good-quality stains, paints, and sealants. The quality of your materials can significantly impact the final result.

Common Mistakes to Avoid

Even with the best intentions, mistakes can happen. Here are a few common pitfalls to watch out for:

Over-Sanding

While it’s important to sand your furniture before staining, over-sanding can close the grain of the wood and make it harder for the stain to penetrate. Stick to medium and fine grits, and avoid excessive sanding.

Rushing the Process

Patience is key when transforming furniture. Allow each layer of stain, paint, and sealant to dry completely before moving on to the next step. Rushing can lead to a tacky, uneven finish.

Not Wiping Off Excess Stain

After applying the stain, always wipe off the excess. Leaving too much stain on the wood can result in a blotchy, uneven appearance.

Incorporating Driftwood Furniture in Your Home

Now that you know how to achieve the driftwood look, consider how to incorporate these pieces into your home decor.

Complementary Styles

Driftwood furniture pairs beautifully with various interior styles, such as:

  • Coastal: Embrace the beachy vibe with light, airy furnishings and ocean-inspired accents.
  • Shabby Chic: Combine distressed driftwood furniture with romantic, vintage touches.
  • Modern Rustic: Integrate sleek, modern pieces with natural driftwood elements for a balanced look.

Suggested Rooms

Driftwood furniture can be a stunning addition to many spaces in your home, including:

  • Living Room: A driftwood coffee table or side table can be a focal point.
  • Bedroom: Consider a driftwood headboard or nightstand for a cozy, serene atmosphere.
  • Dining Room: Driftwood dining tables or buffets add a touch of elegance and history.

Mixing and Matching

Don’t be afraid to mix and match driftwood furniture with other materials like metal, glass, or upholstered pieces. The contrast can enhance the visual appeal of your space.

Maintaining Your Driftwood Furniture

To keep your driftwood furniture looking its best, follow these maintenance tips:

Regular Dusting

Dust your furniture regularly with a soft, dry cloth. This helps prevent the build-up of dirt and grime.

Gentle Cleaning

For more thorough cleaning, use a damp cloth with a mild soap solution. Avoid harsh chemicals that can damage the finish.

Reseal When Necessary

Depending on the usage and exposure, you might need to reseal your furniture every couple of years. This maintains its protective finish and keeps it looking fresh.

Pros and Cons of DIY Driftwood Look

Before embarking on this project, it’s good to be aware of the potential benefits and drawbacks.

Pros

  • Customization: You have complete control over the color and level of distressing.
  • Cost-Effective: DIYing can be more affordable than purchasing pre-made driftwood furniture.
  • Satisfaction: There’s a great sense of accomplishment in transforming something with your own hands.

Cons

  • Time-Consuming: The process can be time-intensive, especially if you’re working on a large piece.
  • Initial Cost: Gathering all the necessary materials and tools can be a bit pricey upfront.
  • Skill Level: There’s a learning curve, especially if you’re new to DIY projects.

Weighing Your Options

Consider your time, budget, and experience level before starting. With patience and effort, even beginners can achieve beautiful results.

Final Thoughts

Transforming your furniture to have a driftwood look is a rewarding and fun project. Not only do you get to create something uniquely yours, but you also bring a bit of the natural world into your home. With a little bit of time, the right materials, and some creative flair, you can give your furniture that weathered, coastal charm you love.

So why wait? Grab your sandpaper and stain, and start your driftwood transformation today. Your stunning, rustic, driftwood-inspired furniture awaits!

Filed Under: Driftwood Ideas Tagged With: Driftwood Finish, Furniture makeover, home decor, Painting techniques, Upcycling

Primary Sidebar

Driftwood4us.com, is a participant in the Amazon Services LLC Associates Program, an affiliate advertising program designed to provide a means for sites to earn advertising fees by advertising and linking to amazon.com.