• Skip to main content
  • Skip to primary sidebar
  • Terms and Conditions
  • Privacy Policy
  • Contact

Driftwood 4 Us

Just About Driftwood

furniture

Driftwood Fusion Stain

June 29, 2024 by admin

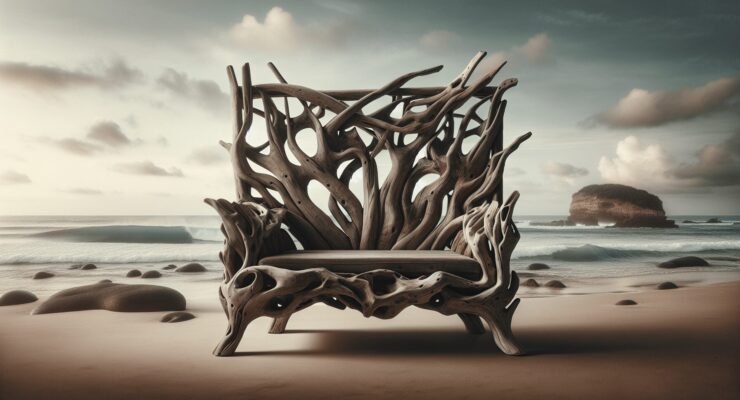
Discover the magic of Driftwood Fusion Stain—a versatile product that effortlessly transforms your DIY projects into stunning works of art. With its unique blend of earthy tones, Driftwood Fusion Stain brings an authentic, weathered look to any piece of wood, imbuing it with character and depth. Whether you want to refresh an old furniture item or bring a rustic charm to your new creation, this stain is your perfect ally. Dive into the easy application process and enjoy the frustration-free experience of bringing your vision to life with Driftwood Fusion Stain. Have you ever found yourself captivated by the rustic charm of driftwood furniture, wishing you could capture that weathered elegance in your home? If so, you’re in good company. Driftwood adds a unique, coastal ambiance to any space, but achieving that perfect look can be a challenge. That’s where Driftwood Fusion Stain comes in! Let’s dive into the world of Driftwood Fusion Stain, and explore how you can master this technique to bring a touch of the seaside into your living area.

Understanding Driftwood Fusion Stain

Driftwood Fusion Stain is a specialized staining technique that aims to replicate the natural, weathered look of driftwood. This stain is a game-changer for anyone interested in DIY projects, as it allows you to transform ordinary wood into a piece that evokes the beauty of naturally aged driftwood.

What is Driftwood Fusion Stain?

Driftwood Fusion Stain is a type of wood stain formulated with a blend of colors and pigments that mimic the variegated tones and textures of driftwood. Unlike traditional stains, this fusion stain tackles both the aesthetic and protective needs of the wood.

Benefits of Using Driftwood Fusion Stain

  • Natural Aesthetic: The stain provides a gorgeous, natural driftwood appearance without the hassle of finding and preparing actual driftwood.
  • Easy Application: Designed for ease of use, even beginners can achieve stunning results.
  • Durability: It offers not just beauty but also protection, making your furniture last longer.

Why Opt for Driftwood Fusion Stain?

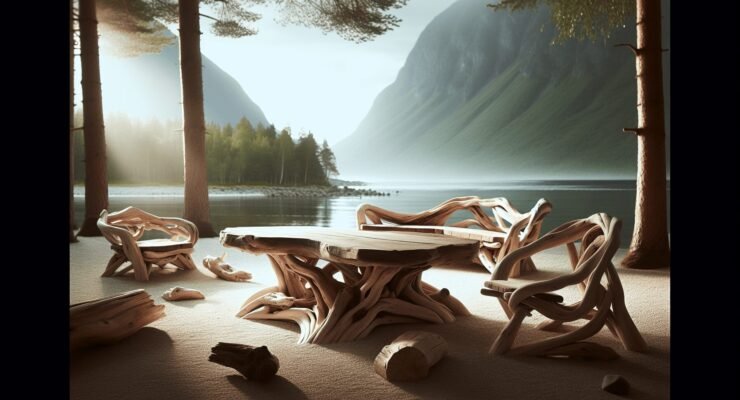
Selecting Driftwood Fusion Stain brings numerous benefits to your woodworking projects. This stain type is not just about color; it’s about creating an atmosphere. Whether it’s for a coffee table, a bookshelf, or even kitchen cabinets, Driftwood Fusion Stain can imbue your furniture with a rustic, coastal vibe that is hard to beat.

Preparation

Before embarking on your Driftwood Fusion Stain project, you need to prepare adequately. Preparation is key to achieving a professional-looking finish. Let’s go over some essential steps:

Choosing the Right Wood

Not all types of wood are created equal. While Driftwood Fusion Stain can work on most types, some woods take stain better than others. Softwoods like pine or poplar are generally good choices.

Wood TypeStain AbsorptionRecommended for Beginners
PineHighYes
PoplarModerateYes
OakLowNo
CherryLowNo

Preparing Your Workspace

A clean, well-ventilated workspace is crucial. The stain can emit strong fumes, so make sure you’re working in an area with good airflow. Lay down some newspapers or drop cloths to protect your surfaces from accidental spills.

Tools and Materials You’ll Need

Before you begin, gather all the necessary tools and materials:

  • Driftwood Fusion Stain
  • Sandpaper (various grits)
  • Brushes or staining pads
  • Gloves
  • Stir sticks
  • Tack cloth
  • Protective finish (optional but recommended)

Driftwood Fusion Stain

Application Techniques

Understanding the proper techniques for applying Driftwood Fusion Stain will significantly enhance the outcome of your project. Let’s break down the steps involved.

Step-by-Step Guide

  1. Sand the Wood: Start by sanding your wood surface. Begin with a rough grit (around 80-grit) to remove any existing finish, then move to a finer grit (220-grit) for a smooth finish.
  2. Clean the Surface: Use a tack cloth to wipe away any dust and debris from sanding.
  3. Stir the Stain: Stir your Driftwood Fusion Stain thoroughly to ensure an even consistency.
  4. Apply the Stain: Use a brush or a staining pad to apply the stain. Always go in the direction of the wood grain for a natural look.
  5. Wipe Off Excess: Allow the stain to sit for 5-15 minutes, then wipe off any excess using a clean cloth.
  6. Let It Dry: Allow the stained piece to dry for at least 24 hours before applying a protective finish.

Tips for a Professional Finish

  • Do a Test Spot: Always test the stain on a small, inconspicuous area to see how it reacts with your wood.
  • Multiple Coats: Apply additional coats if you desire a darker, more textured look.
  • Sand Between Coats: Lightly sanding between coats can help achieve a smoother finish.

Maintenance and Care

Once your project has been stained and completed, taking care of it will ensure it remains beautiful for years to come.

Routine Cleaning

  • Dust Regularly: Use a microfiber cloth to dust your stained furniture regularly.
  • Avoid Excess Moisture: Wipe up any spills immediately to prevent water damage or staining.

Protective Finish

Applying a protective finish like polyurethane or a simple wax coating can extend the life of your stained furniture. It’s an optional step, but highly recommended for pieces that will see frequent use.

Finish TypeDurabilityGloss LevelReapplication Frequency
PolyurethaneHighHighEvery few years
WaxMediumLowAnnually
Linseed OilLowLowEvery six months

Driftwood Fusion Stain

Advanced Techniques and Troubleshooting

Even with the best preparation and application, sometimes things don’t go as planned. Let’s look into advanced techniques and common issues you might encounter.

Creating Texture

To add a more authentic driftwood feel, you can create texture by using methods such as:

  • Wire Brush: Scrape the surface gently with a wire brush to add grain texture.
  • Dry Brushing: Use a dry brush technique with a lighter or darker shade to add depth and variation.

Common Issues and Solutions

  • Blotchy Finish: If your stain appears blotchy, it might be because of uneven staining. Sanding the wood more thoroughly and reapplying a second coat can help.
  • Color Too Dark/Light: Lighten the color by wiping the wood with a damp cloth. If too light, add additional coats of stain until desired color is achieved.

Environmental and Health Considerations

While creating beautiful furniture is exciting, it’s crucial to consider the environmental and health aspects of using stains.

Eco-Friendly Options

Look for Driftwood Fusion Stain brands that focus on low VOC (volatile organic compounds) to reduce your footprint. Water-based stains are typically more environmentally friendly than their oil-based counterparts.

Safety Precautions

  • Ventilation: Ensure you are working in a well-ventilated area.
  • Protective Gear: Wear gloves, masks, and safety glasses to protect yourself from fumes and accidental spills.

Driftwood Fusion Stain Projects and Inspiration

Feeling inspired? Here are some projects you can tackle with Driftwood Fusion Stain to add that coastal charm to your home.

Driftwood-Stained Coffee Table

A coffee table is often the centerpiece of a living room. A Driftwood Fusion Stain can transform a simple wooden table into a rustic focal point.

Bookshelf Makeover

Give your tired old bookshelf a new lease on life with a driftwood feel. It’s a simple project that can dramatically change the look of your space.

Kitchen Cabinets

For those feeling a bit more adventurous, try using Driftwood Fusion Stain on your kitchen cabinets. It creates a coastal vibe that’s perfect for a beach-themed or rustic kitchen.

Conclusion

Driftwood Fusion Stain opens up a world of possibilities for DIY enthusiasts and professional woodworkers alike. It’s an accessible and rewarding way to bring a touch of the sea into your home, offering a blend of natural beauty and durability. From choosing the right wood to mastering the application techniques, we hope this guide sets you on the right path to creating stunning driftwood-stained pieces. Happy staining!

Filed Under: Driftwood Ideas Tagged With: DIY, Driftwood, furniture, home decor, Wood Stain

Driftwood Furniture Diy

June 27, 2024 by admin

Driftwood Furniture DIY

Imagine transforming found treasures from nature into stunning pieces that adorn your home. In this article, you’ll discover the art of crafting bespoke furniture using driftwood, combining rustic charm with unique character. From gathering the perfect pieces along your favorite beach to sanding and assembling them into coffee tables, shelves, or statement decor, this guide walks you through each step with easy-to-follow instructions. You’ll not only learn the practical aspects of working with driftwood but also gain inspiration to infuse your space with a touch of coastal beauty, all created by your own hands. Have you ever strolled along a beach and found yourself captivated by the artistry of nature-worn driftwood? If so, you’re not alone! This natural treasure has a unique charm, making it a perfect candidate for DIY furniture projects. Whether you’re a seasoned DIY enthusiast or just getting started, creating driftwood furniture can be both rewarding and enjoyable. In this guide, we’ll walk you through everything you need to know to get started with your own driftwood furniture DIY projects.

What is Driftwood?

Driftwood is wood that has been washed ashore by the forces of tides, currents, and waves. This type of wood usually originates from trees that have been uprooted and carried into bodies of water. Over time, the water and elements smooth the wood, giving it a beautiful, rustic appearance that’s perfect for furniture making.

The Appeal of Driftwood

Driftwood’s natural weathering process results in unique shapes, textures, and colors. Each piece is a one-of-a-kind find, adding character and charm to your furniture. Plus, using driftwood in your projects contributes to sustainable practices by recycling nature’s bounty into functional art.

Where to Find Driftwood

Before you can start creating, you’ll need to gather materials. Driftwood can be found along beaches, riverbanks, and lakeshores. Always be sure to check local regulations regarding the collection of driftwood to ensure you’re in compliance. Some areas have restrictions to protect natural habitats.

Planning Your Project

Before diving into your DIY driftwood project, it’s crucial to plan properly. This includes selecting the right kind of furniture to make, sourcing materials, and deciding on a design.

Choosing Your Project

Begin by deciding what type of furniture you want to create. Here are some ideas to get your creative juices flowing:

  • Coffee Tables: Use driftwood pieces as legs or a base.
  • Shelves: Create rustic shelves with pieces of driftwood as supports.
  • Headboards: Construct a unique driftwood headboard to give your bedroom a coastal feel.
  • Chairs and Benches: Make a statement piece for your patio or living room.

Sketch Your Design

Having a plan on paper helps visualize the project and serves as a useful guide during construction. Sketch a simple drawing of your desired furniture piece, noting the dimensions and where each piece of driftwood will go.

Driftwood Furniture Diy

Gathering Your Materials

Aside from your driftwood, you’ll need a variety of tools and materials to bring your project to life. Here are some essentials:

Basic Tools and Materials

Tool/MaterialPurpose
SandpaperSmoothes rough edges
SawCuts driftwood to the desired length
DrillCreates holes for screws or dowels
ScrewsSecures pieces together
Wood GlueProvides additional hold
Finishing OilEnhances the wood’s natural beauty
ClampsHolds pieces together while drying

Safety Gear

It’s important to prioritize safety. Here’s what you’ll need:

  • Gloves: To protect your hands from splinters.
  • Goggles: To shield your eyes from dust and debris.
  • Mask: To avoid inhaling dust particles.

Preparing the Driftwood

Once you have gathered your materials and tools, the next step is preparing the driftwood. Proper preparation ensures that your furniture will be both beautiful and durable.

Cleaning the Driftwood

Begin by thoroughly cleaning your driftwood pieces. Use a stiff brush to remove sand, dirt, and any loose bark. If the driftwood is still dirty, soak it in a mixture of water and mild detergent for a few hours, then rinse and let it dry completely.

Sanding and Cutting

Once the driftwood is clean, use sandpaper to smooth out any rough edges. This will make the wood safer to handle and give it a finished look. If you need to cut the driftwood to specific lengths or shapes, use a saw at this point. Carefully measure and cut as required by your design.

Driftwood Furniture Diy

Constructing Your Furniture

With your materials prepped and your design in hand, it’s time to start building. This is the most exciting part of any DIY project!

Assembling Pieces

Follow your sketched design as you begin assembling the pieces of your furniture. Use a combination of screws and wood glue to secure the driftwood. Clamps can be incredibly helpful to hold pieces together as the glue dries.

Drilling and Dowel Pins

For added stability, you may want to use dowel pins in addition to screws. Drill holes where the pieces will connect and insert wooden dowels, securing them with glue. This will provide extra strength to your furniture.

Checking for Stability

Before moving on to finishing touches, ensure that your furniture is stable and all parts are securely fastened. Give it a few shakes and make any necessary adjustments.

Finishing Your Driftwood Furniture

The finishing touches will enhance the natural beauty of the driftwood and help protect your furniture.

Cleaning Up

Before applying any finish, make sure your furniture is clean and free of dust. A tack cloth or a damp rag can be used to wipe away any remaining particles.

Applying Finishing Oil

Using a good quality finishing oil will bring out the natural colors and textures of the driftwood. Apply the oil with a clean cloth, following the grain of the wood. Allow it to soak in and then buff away any excess with a dry cloth. This will leave a smooth, polished surface.

Adding Protective Coatings

For extra protection, especially for outdoor furniture, consider adding a clear sealant. This will protect the wood from moisture and UV rays, prolonging the life of your furniture.

Tips and Tricks

Every DIY project comes with its own set of challenges. Here are some tips to help you along the way:

Selecting the Right Driftwood

  • Size and Shape: Look for pieces that match the dimensions you need.
  • Condition: Avoid driftwood that is rotten or has extensive damage.
  • Texture: The more unique the texture, the more character your furniture will have.

Making Adjustments

  • Flexibility: Be prepared to adjust your design based on the pieces you find.
  • Extra Material: Always collect more driftwood than you think you’ll need. This gives you more options during construction.

Enhancing Natural Beauty

Use natural oils and minimal coatings to maintain the rustic look of the driftwood. Too many layers of finish can take away from the wood’s natural charm.

Budget Considerations

DIY projects can be quite cost-effective, especially when using materials like driftwood that you gather yourself. However, there are still costs to consider.

Budget Breakdown

ItemEstimated Cost
DriftwoodFree (if collected yourself)
Basic Tools$50 – $100
Screws and Dowels$10 – $20
Wood Glue$5 – $10
Finishing Oil$10 – $20
Safety Gear$20 – $40

Saving Money

  • Thrift Stores: Check for second-hand tools and materials.
  • Sales and Discounts: Look for sales at hardware stores.
  • Borrow or Rent: If you don’t plan on making furniture often, consider borrowing or renting tools.

Inspiration and Ideas

Sometimes, seeing what others have created can spark your own creativity. Look for inspiration online or in coastal living magazines. Here are a few ideas to get you started:

Driftwood Picture Frames

A driftwood picture frame adds a touch of coastal charm to any room. Simply collect smaller pieces of driftwood, cut them to size, and attach them around a basic frame.

Driftwood Mirrors

Similar to picture frames, driftwood mirrors are visually stunning and can become a focal point in your home. Attach driftwood pieces around the perimeter of a mirror for a rustic appeal.

Driftwood Candleholders

Create simple candleholders by attaching a few pieces of driftwood together with glue and placing a small candle on top. These can be used as table centerpieces or decorative accents.

Troubleshooting Common Issues

Even with meticulous planning, issues can arise. Here are some common problems and how to address them:

Uneven Surfaces

Driftwood often has uneven surfaces that can make assembly challenging. Use a sander or planer to even out the areas where the pieces will connect.

Structural Weakness

If you find that your furniture is wobbly or unstable, reinforce the joints with additional screws or dowels. Ensure that all connections are tight and secure.

Finish Issues

If your finish isn’t coming out as expected, it might be due to residual dust or dirt. Clean the wood thoroughly before applying the finish, and always follow the manufacturer’s instructions.

Conclusion

Creating your own driftwood furniture can be an incredibly rewarding experience. Not only do you end up with a unique, eye-catching piece, but you also gain the satisfaction of crafting something with your own hands. With careful planning, the right materials, and a bit of patience, you’ll have beautiful driftwood furniture that brings a touch of nature into your home.

So what are you waiting for? Grab your tools, head to the beach, and start collecting that driftwood. Your next DIY project awaits, and who knows – it might just be your best one yet!

Filed Under: Driftwood Ideas Tagged With: crafting, DIY, Driftwood, furniture, home decor

Driftwood Furniture Ideas

June 25, 2024 by admin

Driftwood Furniture Ideas explores the enchanting world of driftwood and its potential to transform your living space into a rustic, coastal haven. Through this article, you’ll discover how to create stunning and unique furniture pieces that not only tell a story but also bring the beauty of nature into your home. From elegant coffee tables to charming headboards, you’ll see how incorporating driftwood can add character and a touch of the sea to your decor. Whether you’re an experienced DIY enthusiast or just starting out, these driftwood furniture ideas will inspire you to get creative and bring a piece of the beach into your everyday life. Have you ever wandered along the beach, admired the weathered pieces of driftwood, and thought about the endless creative possibilities they hold? Driftwood has a unique charm, infused with nature’s artistry, making it an excellent material for furniture. Imagine bringing a piece of the beach into your home! It can add a warm, rustic feel to any space. Wondering how you can incorporate driftwood into your home décor? Let’s dive into some inspiring driftwood furniture ideas that you can try.

Driftwood Furniture Ideas

Why Choose Driftwood?

Driftwood is not only beautiful but offers numerous benefits when used in furniture making. It provides a unique aesthetic that can’t be created through traditional woodworking methods. Each piece of driftwood tells a story of its journey through water, sand, and sun, making your furniture truly one-of-a-kind.

Sustainability

Driftwood furniture is an eco-friendly choice. By repurposing what nature has provided, you help reduce deforestation and minimize environmental impact. Driftwood pieces can often be found easily at beaches, requiring no additional resource-intensive processes to acquire.

Durability

Driftwood is surprisingly durable. The exposure to elements like saltwater and sun hardens the wood, making it robust and long-lasting. It’s perfect for both indoor and outdoor furniture.

Aesthetic Versatility

The natural, weathered look of driftwood can enhance various home styles, from rustic and coastal to modern and minimalist. It’s versatile enough to complement a range of décor themes. Plus, the fact that each piece is unique ensures your furniture will be a standout feature in your home.

DIY Projects with Driftwood

You don’t need to be a professional carpenter to create stunning driftwood furniture. Here are some easy-to-follow DIY project ideas that you can try.

Driftwood Coffee Table

A driftwood coffee table can serve as a fantastic centerpiece in your living room. Start by finding a large, flat piece of driftwood for the tabletop. Attach sturdy legs, either made of wood or metal, depending on your style preference. Finish it off with a glass top to protect the wood and provide a smooth, level surface.

Driftwood Wall Shelf

Transform a small or medium piece of driftwood into a unique wall shelf. Securely mount the driftwood to your wall using strong brackets. This shelf can be a beautiful place to display books, plants, or small decorative items.

Driftwood Candle Holder

A driftwood candle holder brings warmth and coziness to any room. Find a piece of driftwood with an interesting shape and drill evenly spaced holes to fit the candles. You can choose to leave the wood natural or give it a light sanding and finish to match your décor.

Driftwood Lamp

Making a driftwood lamp can be an exciting project. You’ll need a long, sturdy piece of driftwood as the lamp base and a lamp kit, which can be found at most hardware stores. Fit the lamp kit through the driftwood and attach a lampshade that complements the natural, rustic look.

Professional Driftwood Furniture Options

If DIY isn’t your thing, there are plenty of ready-made driftwood furniture options available. These pieces often combine driftwood with traditional woodworking techniques to create functional and artistic furniture.

Driftwood Dining Tables

A driftwood dining table can be a stunning feature in your dining area. Many designs incorporate driftwood bases with glass or solid wood tops. The blend of rustic charm with a polished surface can elevate your dining experience.

Driftwood Beds

Imagine lying down on a bed frame made of carefully selected driftwood pieces. Driftwood beds often feature headboards crafted from large, dramatic pieces of driftwood, creating a focal point in the bedroom. Some designs also incorporate driftwood into the footboard and side rails for a cohesive look.

Driftwood Mirrors

Mirrors framed with driftwood can add a unique touch to any room. The natural texture of the driftwood adds character to the reflective surface, making it more than just a functional piece. These mirrors are perfect for hallways, bathrooms, or as part of a gallery wall.

Driftwood Benches

A driftwood bench can be a versatile addition to your home, perfect for entryways, gardens, or living rooms. The sturdy nature of driftwood ensures it can withstand regular use, while its natural beauty makes it a conversation piece.

Driftwood Consoles

Consoles made from driftwood can serve both practical and decorative purposes. Position one in your hallway, living room, or entryway to hold keys, mail, and decorative items. The mix of functionality and artistry that driftwood consoles offer is hard to beat.

Tips for Working with Driftwood

Now that you’re inspired, here are some tips to help you get started on your driftwood furniture journey.

Collecting Driftwood

When collecting driftwood, make sure you’re allowed to take it from the area. Some beaches have restrictions to protect their ecosystems. Look for pieces that are dry, as wet driftwood can be more difficult to work with and may contain moisture that can lead to mold.

Cleaning and Preparing Driftwood

Before you start crafting, it’s important to clean your driftwood thoroughly. Remove any sand, dirt, or salt by scrubbing the wood with a brush and water. Allow the driftwood to dry completely in the sun. You might also want to treat it with a wood preservative to protect against pests.

Tools and Techniques

Basic woodworking tools like saws, drills, and sandpaper are essential. Depending on your project, you might also need brackets, screws, wood glue, or a lamp kit. Driftwood can be unpredictable to work with due to its unique shapes and hardness, so be patient and flexible with your design plans.

Finishing Touches

Consider the finish you want for your driftwood furniture. Some people prefer to leave the wood natural, while others might opt for a light sanding and a protective coat of sealant. A matte finish can preserve the rustic look, while a glossy finish can give the wood a more polished appearance.

Driftwood Furniture Ideas

Combining Driftwood with Other Materials

Driftwood pairs beautifully with various materials, allowing you to create sophisticated and eclectic designs.

Driftwood and Glass

The transparency of glass complements the natural ruggedness of driftwood. Using a glass top on a driftwood base for tables or incorporating glass shelves with driftwood supports can result in stunning contrast and balance.

Driftwood and Metal

Combining driftwood with metal elements can add a modern twist to rustic designs. Metal brackets and legs can enhance the structural integrity of your driftwood furniture while adding a sleek, contemporary touch.

Driftwood and Stone

Stone and driftwood together can evoke a strong natural aesthetic. Consider using stone bases with driftwood table tops or incorporating stone elements into driftwood garden benches. This combination is perfect for creating a natural, earthy vibe in your outdoor spaces.

Driftwood and Upholstery

For pieces like benches and bed frames, incorporating upholstered elements can add comfort and style. Choose fabrics that complement the natural look of driftwood, such as linen or burlap, to maintain a cohesive design.

Where to Purchase Driftwood Furniture

If DIY isn’t your strength or you prefer ready-made pieces, numerous retailers and artisans specialize in driftwood furniture. Here are some tips for finding the best pieces.

Online Marketplaces

Websites like Etsy, eBay, and Wayfair offer a variety of driftwood furniture options. You can find unique, handcrafted items from artisans around the world. Be sure to read reviews and check the seller’s return policy before making a purchase.

Local Artisans

Supporting local artisans can ensure you get a one-of-a-kind piece made with care and attention to detail. Visit local craft fairs, art shows, or furniture stores that showcase handmade items.

Specialty Stores

Some specialty stores focus on coastal and rustic furniture, often featuring driftwood pieces. These stores typically offer higher-quality items and can provide customization options to suit your specific needs.

Caring for Driftwood Furniture

Once you have your beautiful driftwood furniture, proper care will ensure it lasts for years to come.

Regular Cleaning

Dust your driftwood furniture regularly to keep it looking its best. For deeper cleaning, use a damp cloth and mild soap solution. Avoid harsh chemicals that can damage the natural finish of the wood.

Protection from Elements

Even though driftwood is durable, it’s best to protect it from extreme elements. If you have outdoor driftwood furniture, consider using covers when it’s not in use or during harsh weather conditions.

Occasional Re-Sealing

If your driftwood furniture has a protective finish, it might need occasional re-sealing to maintain its appearance and durability. Follow the manufacturer’s recommendations or seek advice from a professional for the best results.

Inspiration from Driftwood Artists

Numerous artists and designers have created stunning driftwood pieces that can inspire your own projects.

James Doran-Webb

James Doran-Webb is a renowned sculptor known for his lifelike driftwood animal sculptures. His work showcases the potential of driftwood in creating intricate and detailed art.

Heather Jansch

Heather Jansch creates beautiful horse sculptures using driftwood. Her attention to detail and ability to capture motion and form in her work is truly inspiring.

Paul Baliker

Paul Baliker blends driftwood with other natural materials to create large-scale sculptures that often convey environmental messages. His work highlights how art can inspire change and awareness.

Driftwood Furniture in Different Décor Styles

Driftwood furniture can fit seamlessly into various décor styles, adding character and warmth.

Coastal Decor

Driftwood is a natural choice for coastal-themed décor. Combine it with light, airy colors, nautical accents, and beach-inspired accessories to create a serene, coastal retreat in your home.

Rustic Decor

Embrace the rustic charm of driftwood by pairing it with earthy tones, natural fibers, and vintage accessories. Driftwood furniture can be the perfect addition to a cozy, rustic cabin or farmhouse-style home.

Modern Decor

Incorporate driftwood into modern décor by combining it with clean lines, minimalist designs, and contemporary materials. Driftwood pieces can add warmth and texture to modern interiors, creating a balanced and inviting space.

Bohemian Decor

The eclectic nature of bohemian décor pairs wonderfully with driftwood furniture. Mix and match vibrant colors, patterns, and textures to create a boho-chic space with a touch of natural beauty.

Final Thoughts

Driftwood furniture is more than just a piece of décor; it’s a piece of nature, history, and art combined. Whether you’re a DIY enthusiast or prefer purchasing ready-made pieces, driftwood offers endless possibilities to enhance your home with its unique charm. From coffee tables and benches to intricate sculptures and practical shelves, there’s no limit to what you can create or find.

By incorporating driftwood furniture into your home, you’re not just adding style and functionality—you’re bringing a piece of the beach, with its story and character, right into your living space. So next time you find yourself on the shore, don’t just admire the driftwood; envision it transforming your home into a rustic, coastal haven.

Filed Under: Driftwood Ideas Tagged With: DIY, Driftwood, furniture, Interior Design, Rustic

Driftwood Furniture Diy Projects

May 26, 2024 by admin

Discover the joy of creating with “Driftwood Furniture DIY Projects,” your go-to guide for transforming nature’s treasures into stunning home decor. As you delve into this unique world of craftsmanship, you’ll find easy-to-follow instructions and inspiring ideas that will ignite your creativity. This article shares everything you need to know, from sourcing the perfect driftwood to assembling one-of-a-kind pieces that add a touch of rustic charm to your living space. Get ready to bring the serene beauty of the shoreline into your home with your very own handmade driftwood furniture!

Driftwood Furniture DIY Projects

Have you ever wandered along a beach, collected a piece of driftwood, and wondered what to do with it? Well, you’re not alone. Many people find the beauty and uniqueness of driftwood irresistible, but aren’t quite sure how to turn it into something useful or decorative. That’s where this guide comes in handy!

In this article, you’ll learn how to transform those lovely pieces of driftwood into stunning pieces of furniture. By the end of your read, you’ll be ready to embark on your own driftwood DIY projects.

Driftwood Furniture Diy Projects

Why Choose Driftwood for DIY Projects?

Before diving into the projects, let’s explore why driftwood is such an excellent material for DIY furniture. Driftwood, as the name suggests, is wood that has been carried by the water to the shore. The natural weathering process gives it a distinctive look that you can’t find with other types of wood.

Unique Aesthetic

One of the main reasons to use driftwood is its unique aesthetic. Each piece is different, shaped by the tides, sun, and time. It’s like bringing a piece of nature into your home with all its imperfections and beauty.

Eco-Friendly

Driftwood is essentially recycled wood, which makes it an eco-friendly option for DIY enthusiasts. When you use driftwood, you’re repurposing a material that would otherwise potentially go to waste.

Durability

Driftwood is naturally durable. The process of being weather-beaten and sun-bleached makes this type of wood robust. It’s perfect for creating furniture that will stand the test of time.

Things to Consider Before Starting

There are a few key points you should consider before diving into your DIY projects.

Safety Measures

While working with driftwood is generally safe, certain precautions should be taken. Driftwood may have splinters, nails, or other sharp objects embedded in it. Always wear gloves when handling driftwood and safety glasses when cutting or sanding it.

Tools You’ll Need

Having the right tools is crucial. Here’s a basic list:

ToolPurpose
SawFor cutting pieces of driftwood
Sandpaper/ SanderTo smooth surfaces and edges
DrillFor making holes and attaching screws
Screws and NailsFor joining pieces together
Paint/ Wood VarnishTo finish and protect your final piece
Measuring TapeFor accurate measurements

Surface Preparation

Before using driftwood in any project, you’ll need to clean it and remove any salt, sand, or dirt. Soak the driftwood in a solution of water and bleach for 24 hours. Rinse it well and let it dry thoroughly before use.

Driftwood DIY Furniture Project Ideas

Now that you’ve prepared and gathered your materials, let’s explore some DIY projects you can embark on.

Driftwood Coffee Table

Creating a driftwood coffee table is a fantastic first project and offers a great combination of function and style.

Materials Needed:

  • Several pieces of driftwood
  • Glass tabletop (optional)
  • Screws and nails
  • Wood glue
  • Sandpaper

Steps to Follow:

  1. Design your table: Lay out your pieces of driftwood and try various arrangements until you find a design that you like.
  2. Cut and sand: Cut the driftwood to the desired length and sand down any rough edges.
  3. Assemble the base: Use screws and wood glue to assemble the base of your table. Ensure it is stable.
  4. Add the tabletop: If you’re using a glass top, simply place it on top of your base. For a wooden top, attach it using screws or nails.

Driftwood Lamp

A driftwood lamp can add a rustic yet elegant touch to any room. It’s also a relatively simple project if you’re just starting out.

Materials Needed:

  • Driftwood piece (suitable for a lamp base)
  • Lamp kit (available at most hardware stores)
  • Sandpaper
  • Drill

Steps to Follow:

  1. Select your driftwood: Choose a piece of driftwood that has a flat bottom stable enough to stand on its own.
  2. Bore a hole: Drill a hole through the selected driftwood to run the lamp cord through.
  3. Assemble the lamp kit: Follow the manufacturer’s instructions for the rest of the setup.
  4. Finishing touches: Sand the driftwood to smooth out any rough areas and apply a finish if desired.

Driftwood Shelves

Adding shelves made of driftwood can elevate your home decor by introducing a natural, rustic element.

Materials Needed:

  • Pieces of driftwood (straight for shelving)
  • Brackets for wall mounting
  • Screws and anchors
  • Sandpaper

Steps to Follow:

  1. Measure and cut: Measure the space where you want to place the shelves and cut the driftwood pieces to the desired length.
  2. Sand the wood: Smooth out any rough areas with sandpaper.
  3. Install brackets: Use screws and wall anchors to attach the brackets to the wall.
  4. Place the driftwood: Securely place the driftwood on the brackets, making sure everything is level.

Driftwood Headboard

A driftwood headboard can become the focal point of your bedroom, giving it a cozy and earthy feel.

Materials Needed:

  • Long pieces of driftwood (similar in length)
  • Wood screws
  • Sandpaper
  • Drill

Steps to Follow:

  1. Design layout: Arrange the pieces of driftwood on the floor to determine the design of your headboard.
  2. Sand and cut: Sand the pieces and cut them to the same height.
  3. Assemble the headboard: Attach the driftwood pieces to a wooden frame using wood screws. Ensure it’s stable and secure.
  4. Mount or place: Attach the headboard to your bed frame or mount it on the wall behind your bed.

Driftwood Planters

Driftwood planters are an excellent way to bring greenery into your home while maintaining a natural aesthetic.

Materials Needed:

  • Small pieces of driftwood
  • Wood screws or nails
  • Small pots or plastic liners
  • Sandpaper

Steps to Follow:

  1. Design your planter: Arrange the driftwood pieces to form the sides of a box.
  2. Sand the wood: Smooth out any rough edges with sandpaper.
  3. Assemble the planter: Attach the pieces together using wood screws or nails.
  4. Finish: Place the small pots or liners inside the wooden box, and add your plants.

Tips for Success

Here are some valuable tips that will help you succeed in your driftwood furniture projects:

Working with Imperfections

Driftwood is naturally imperfect, and that’s part of its charm. Embrace the unique shapes and textures. Work with the wood, not against it.

Patience Pays Off

Working with driftwood can sometimes be time-consuming. Whether it’s waiting for the wood to dry or sanding it down, be patient. The results will be worth the effort.

Experiment and Innovate

Don’t be afraid to try something new. Experiment with different finishes, stains, or even combining driftwood with other materials like metal or glass.

Driftwood Furniture Diy Projects

Finishing Touches

Once your furniture is assembled, you’ll want to put some finishing touches on it to enhance its look and durability.

Sanding and Sealing

Sanding your driftwood furniture will remove any rough spots and give it a smooth finish. After sanding, consider sealing the driftwood to protect it from future wear and tear.

Sealing Tips:

  • Use a clear wood sealer if you want to maintain the natural look.
  • For a different aesthetic, consider staining the wood before sealing.

Adding Cushions or Decorative Elements

For pieces like benches or chairs, adding cushions can increase comfort. Look for materials that complement the natural look of driftwood. Decorative elements like rope, shells, or even lights can enhance the rustic charm of your driftwood furniture.

Driftwood Furniture in Different Rooms

Let’s explore how you can incorporate driftwood furniture into various rooms in your home.

Living Room

  • Coffee Table: As mentioned earlier, a driftwood coffee table can be a centerpiece in your living room.
  • Shelves: Small driftwood shelves can hold books, plants, or decorative items.

Bedroom

  • Headboard: A driftwood headboard adds a rustic touch and can be crafted to fit any size bed.
  • Lamp: Bedside driftwood lamps create a cozy atmosphere.

Kitchen and Dining Area

  • Dining Table: A larger project, a driftwood dining table can be a breathtaking piece for your dining area.
  • Bar Stools: Driftwood bar stools are a quirky, natural addition to your kitchen island or bar area.

Outdoor Space

  • Benches: Create comfy seating for your garden or deck.
  • Planters: Use driftwood planters to house flowers, herbs, or small shrubs.

Cleaning and Maintenance

Driftwood furniture, like any other type of furniture, requires care and maintenance to keep it looking its best.

Regular Cleaning

Regular dusting with a soft cloth will keep your furniture looking fresh. For deeper cleaning, use a damp cloth but avoid soaking the wood.

Maintenance Tips

  • Inspect Regularly: Periodically check for loose screws or nails and tighten them as needed.
  • Reapply Sealant: Depending on the environment, you may need to reapply a sealant every few years to protect the wood.

Driftwood Furniture: A Sustainable Choice

Choosing driftwood for your DIY furniture projects isn’t just a creative choice, but a sustainable one as well. Here’s why:

Less Waste

Driftwood is often considered “waste” by the natural environment. Repurposing it means less waste overall.

Eco-Friendly Materials

Using natural materials like driftwood reduces the demand for new, commercially produced wood, which often involves harmful deforestation practices.

Conclusion

Turning driftwood into beautiful, functional pieces of furniture is not only rewarding but also eco-friendly. Whether you’re making a coffee table, lamp, or shelves, each project allows you to bring a unique piece of nature into your home. With a bit of patience, creativity, and effort, you can create stunning driftwood furniture that showcases the beauty of the natural world.

So, next time you find yourself on the beach, pick up a piece of driftwood and envision the endless possibilities for your next DIY project. Happy crafting!

Filed Under: Driftwood Ideas Tagged With: crafts, DIY, Driftwood, furniture, home decor

Driftwood Finish Furniture

May 16, 2024 by admin

Imagine walking into a room filled with the serene beauty of nature, imprinted on every piece of furniture. Driftwood Finish Furniture allows you to bring the essence of the beach into your home. With its unique and rustic charm, each piece is crafted to perfection, capturing the raw beauty of driftwood. Whether it’s a coffee table, dining set, or a cozy bed frame, this collection combines elegance and nature in one breathtaking package. Let Driftwood Finish Furniture transform your space into a coastal haven where relaxation meets exquisite design.

Driftwood Finish Furniture

What is Driftwood Finish Furniture

Driftwood finish furniture refers to a type of furniture that is designed to mimic the natural weathered appearance of driftwood, which is wood that has been washed ashore by the sea or other bodies of water. This unique finish is achieved through various techniques, giving furniture pieces a rustic and coastal-inspired look. Driftwood finish furniture has gained popularity in recent years due to its natural beauty, versatility, and eco-friendliness.

Definition

Driftwood finish furniture is characterized by its weathered and textured appearance, resembling the wood that has been exposed to elements such as water, sun, and wind. It is commonly achieved through techniques such as bleaching, distressing, and staining, which create a worn-out look. The goal is to replicate the natural beauty of driftwood and infuse it into different types of furniture.

Characteristics

Driftwood finish furniture is known for its unique and distinctive characteristics. It typically features a light, neutral color palette, with shades ranging from whitewashed grays to soft, sandy tones. The finish often highlights the natural grain and textures of the wood, adding depth and visual interest. The overall look of driftwood finish furniture exudes a sense of tranquility and coastal charm.

Popularity

In recent years, driftwood finish furniture has gained significant popularity. This trend can be attributed to its ability to bring a touch of nature and relaxation into any space. Many homeowners and interior designers appreciate the rustic and beachy vibes that this type of furniture offers. It has become a go-to choice for those looking to create a coastal or beach-themed ambiance in their homes.

Why Choose Driftwood Finish Furniture

There are several compelling reasons why you should consider choosing driftwood finish furniture for your home. From its natural beauty to its versatility and eco-friendliness, this type of furniture has a lot to offer.

Natural Beauty

One of the main reasons people are drawn to driftwood finish furniture is its natural beauty. The weathered appearance and neutral color palette evoke a sense of serenity and bring a touch of the outdoors into your living space. The unique grain patterns and textures of the wood add visual interest, making each piece one-of-a-kind.

Versatility

Driftwood finish furniture is incredibly versatile, suitable for a variety of interior design styles. Whether you prefer a coastal, rustic, or even a modern aesthetic, these furniture pieces can seamlessly blend in with different decor themes. From living room tables to bedroom shelves, there are many options available, allowing you to incorporate driftwood furniture in various rooms in your home.

Eco-Friendly

If you are conscious about the environment, driftwood finish furniture is an eco-friendly choice. This type of furniture often utilizes reclaimed or repurposed wood, reducing the demand for new resources. By choosing driftwood finish furniture, you are actively participating in sustainable practices and promoting the reuse of materials.

Unique and Distinctive

Driftwood finish furniture stands out from other types of furniture due to its unique and distinctive appearance. Each piece has its own story to tell, with its weathered finishes and natural imperfections. The charm and character that driftwood finish furniture brings to a space cannot be replicated with mass-produced furniture pieces. It adds a personal touch and becomes a conversation starter in any room.

Types of Driftwood Finish Furniture

Driftwood finish furniture comes in various forms, catering to different functional needs and design preferences. Whether you are looking for a statement piece or subtle accents, there is a wide range of options available.

Tables

Driftwood finish tables are a popular choice for many homeowners. Coffee tables, side tables, and dining tables with driftwood finishes add an element of rustic elegance to any living space. The natural hues and textures of the wood create a warm and inviting ambiance, perfect for gatherings and everyday use.

Chairs

Driftwood finish chairs are not only functional but also visually appealing. From dining chairs to accent chairs, this type of furniture adds a touch of natural beauty to your seating arrangements. The neutral tones and weathered finishes of the wood blend harmoniously with various upholstery fabrics, allowing you to create a cohesive and stylish look.

Beds

For those looking to incorporate driftwood finishes in the bedroom, driftwood beds are an excellent choice. These beds offer a unique focal point in the room, creating a tranquil and coastal-inspired atmosphere. Whether you prefer a rustic or contemporary look, driftwood finish beds can easily be paired with different bedding styles to achieve your desired aesthetic.

Shelves

Driftwood finish shelves are not only functional for storage but also serve as decorative elements in a room. Floating shelves or wall-mounted shelves with driftwood finishes add a touch of natural elegance to any space. They are perfect for displaying books, plants, or even coastal-themed decor items, enhancing the overall atmosphere of the room.

Cabinets

Driftwood finish cabinets are an ideal choice for those looking to add storage solutions with a rustic and coastal touch. Whether in the kitchen, living room, or bathroom, driftwood finish cabinets provide both functionality and style. The textured and worn-out appearance of the wood adds charm and character to any room.

Creating a Driftwood Finish

If you have a piece of furniture that you want to transform with a driftwood finish, you can do it yourself following a few simple steps. Creating a driftwood finish involves choosing the base material, preparing the wood, and applying the driftwood finish techniques.

Choosing the Base Material

To create a driftwood finish, you can choose a new piece of unfinished wood or repurpose an existing piece of furniture. Opt for a wood type that has a prominent grain pattern, as it will add depth and character to the finish. Popular choices include oak, pine, and ash.

Preparing the Wood

Before applying the driftwood finish, it is essential to prepare the wood surface. Start by sanding the wood to smooth out any rough patches or imperfections. This step ensures that the finish will adhere properly to the surface. After sanding, remove any dust or debris from the wood.

Applying the Driftwood Finish

There are various techniques you can use to achieve a driftwood finish. One popular method is bleaching the wood to lighten its color and give it a weathered look. Another technique is distressing the wood to create texture and simulate the natural wear and tear of driftwood. Staining can also be used to enhance the grain patterns and give the wood a rich, aged appearance. Experiment with different techniques and layers to achieve the desired driftwood effect.

Driftwood Finish Furniture

Decorating with Driftwood Finish Furniture

Driftwood finish furniture offers endless possibilities for decorating your home. Whether you want to create a coastal and beach-themed decor, contrast different styles, or complement natural elements, there are plenty of ways to incorporate driftwood finishes into your interior design.

Coastal and Beach-Themed Decor

Driftwood finish furniture naturally lends itself to coastal and beach-themed decor. Pair your driftwood furniture pieces with soft, ocean-inspired colors such as blues, aquas, and sandy neutrals. Sea-inspired artwork, seashells, and coral accents can further enhance the coastal ambiance. Incorporate natural fibers and textures such as jute, sisal, and woven fabrics to complete the look.

Contrasting Styles

Driftwood finish furniture can also be used to create striking contrasts with different interior design styles. For example, combine a weathered driftwood coffee table with sleek, modern sofas to create a mix of rustic and contemporary aesthetics. The contrast between the worn-out driftwood finish and the clean lines of modern furniture can create a visually appealing and dynamic space.

Complementing Natural Elements

Driftwood finish furniture blends seamlessly with natural elements, making it easy to create an organic and inviting atmosphere. Pair driftwood finishes with indoor plants, natural stone accents, and woven textures to enhance the connection with nature. These natural elements work together to create a harmonious and tranquil environment.

Maintaining Driftwood Finish Furniture

Proper maintenance is essential to ensure that your driftwood finish furniture stays in great condition for years to come. By following a few simple steps, you can keep your furniture looking its best.

Regular Cleaning

Regular dusting and cleaning are necessary to maintain the beauty of your driftwood finish furniture. Use a soft cloth or feather duster to remove dust and debris from the wood surface. Avoid harsh cleaning agents or abrasive materials that may damage the finish or scratch the wood. Instead, opt for gentle, wood-friendly cleaners.

Avoiding Direct Sunlight

Direct sunlight can cause the wood and finish of driftwood furniture to fade over time. To protect your furniture, avoid placing it in areas where it will be exposed to direct sunlight for extended periods. Consider using curtains or blinds to filter sunlight and prevent damage.

Preventing Water Damage

While driftwood finish furniture is designed to mimic the look of driftwood, it is still important to protect it from excessive moisture. Avoid placing your furniture in areas prone to water spills or high humidity levels. Use coasters or placemats under cups, glasses, and other items to prevent water rings or stains.

Treating Scratches and Marks

If your driftwood finish furniture gets scratched or marked, there are ways to address these issues. Minor scratches can often be gently buffed out using a fine-grit sandpaper or a touch-up pen that matches the color of the driftwood finish. For deeper scratches or marks, consult a professional or the manufacturer for the best course of action.

Where to Find Driftwood Finish Furniture

If you are interested in adding driftwood finish furniture to your home, there are several places where you can find a wide selection of options to suit your style and budget.

Furniture Retailers

Many furniture retailers offer driftwood finish furniture as part of their collections. Visit local furniture stores or browse their websites to explore the various options available. Showrooms allow you to see the furniture in person and assess its quality and craftsmanship before making a purchase.

Online Marketplaces

Online marketplaces provide a convenient way to browse and purchase driftwood finish furniture from the comfort of your own home. Well-known websites like Amazon, Wayfair, and Overstock offer a vast selection of furniture pieces in different styles and finishes, including driftwood.

Custom Furniture Makers

For truly unique and personalized driftwood finish furniture, consider working with a custom furniture maker. These artisans can bring your vision to life, creating custom pieces that fit perfectly with your design preferences and functional needs. Research local craftsmen or search online platforms that connect you with skilled artisans.

Price Range of Driftwood Finish Furniture

The price of driftwood finish furniture can vary depending on factors such as the type of wood used, the size of the piece, and the brand or retailer. Here are some general price ranges to give you an idea of what to expect:

Budget-Friendly Options

Budget-friendly options for driftwood finish furniture can typically range from $100 to $500. These may include smaller pieces such as side tables, shelves, or decorations. Keep in mind that prices may vary depending on factors like material quality and craftsmanship.

Mid-Range Options

Mid-range driftwood finish furniture typically falls between $500 and $1500. This price range includes larger furniture pieces such as coffee tables, dining tables, beds, and cabinets. Quality and design play a significant role in the pricing within this range.

High-End and Luxury Pieces

For high-end and luxury driftwood finish furniture, prices can exceed $1500 and even go into the thousands of dollars. These pieces are typically made from high-quality materials and are often crafted by renowned designers or custom furniture makers. They are investment pieces that promise exceptional quality and craftsmanship.

DIY Driftwood Finish Projects

If you enjoy do-it-yourself projects, creating a driftwood finish on your own can be a rewarding endeavor. While it may require some time and effort, the process allows you to unleash your creativity and achieve a personalized look. Here are the main steps involved in a DIY driftwood finish project:

Choosing Reclaimed Wood

To create an authentic driftwood finish, consider using reclaimed wood. Look for salvaged lumber or old furniture pieces that can be repurposed. Using reclaimed wood not only adds character to your project but also promotes sustainability by reducing waste.

Creating a Weathered Look

To achieve a weathered appearance, distress the wood by using techniques such as sanding, hammering, or even staining with darker shades. These techniques will help simulate the natural wear and tear that occurs with driftwood.

Applying the Driftwood Finish

Experiment with different techniques to achieve the desired driftwood finish. Use whitewashing, bleaching, or staining to create the color and texture you want. Apply multiple layers and sand lightly between coats for a more authentic look. Remember to protect your finished piece with an appropriate sealant to ensure durability.

Conclusion

Driftwood finish furniture offers a unique and visually captivating way to incorporate a touch of nature and coastal charm into your home. Whether you choose to purchase pre-made pieces or embark on a DIY project, driftwood finish furniture allows you to create a warm and inviting ambiance. From tables and chairs to beds and shelves, there are numerous options available to suit your style and functional requirements. With proper maintenance, driftwood finish furniture can bring joy and beauty to your living spaces for years to come.

Filed Under: Driftwood Ideas Tagged With: Driftwood, finish, furniture

Driftwood Finish Diy

May 4, 2024 by admin

Imagine transforming your plain wooden furniture into a stunning piece of art with a captivating driftwood finish. With this unique DIY technique, you can bring a touch of coastal charm and rustic elegance to your home decor. By incorporating the natural beauty of driftwood, you can create a weathered, sun-bleached effect that adds character and warmth to any piece of wood. This simple yet creative process allows you to unleash your inner artist and breathe new life into old furniture. Let’s explore the step-by-step process of achieving the mesmerizing driftwood finish DIY and unveil the secrets behind this popular trend. Get ready to embark on a delightful journey of creativity and craftsmanship.

Driftwood Finish Diy

Materials Needed

To start your driftwood finishing project, you will need the following materials:

Sanding block or sandpaper

To prepare the driftwood, you will need a sanding block or sandpaper to smooth out any rough edges and create a clean surface for the finish.

Driftwood pieces

Collect or purchase driftwood pieces of various sizes and shapes that you would like to finish. The unique patterns and textures of driftwood make for beautiful and rustic home decor pieces.

Varnish or paint

Choose between varnish or paint as your finish for the driftwood. Varnish will enhance the natural colors and textures of the wood, while paint allows you to introduce a pop of color or match it with your existing decor.

Brushes

Select a set of brushes suitable for applying varnish or paint. Different brush sizes will come in handy for covering both large and small areas of the driftwood.

Protective coating

To protect the finish and preserve the beauty of your driftwood, you will need a protective coating such as polyurethane. This will help prevent moisture damage and ensure longevity.

Tarp or drop cloth

To protect your work surface, lay down a tarp or drop cloth. This will catch any drips or spills during the finishing process and make clean-up easier.

Optional: wood stain or whitewash paint

If you want to experiment with different finishes and add more character to your driftwood, you can consider using wood stain or whitewash paint. These optional materials can give your driftwood a weathered or aged appearance.

Preparing the Driftwood

Before you can apply the finish to your driftwood, it’s important to prepare it properly. Follow these steps to get your driftwood ready for the finishing process:

Clean the driftwood

Start by cleaning the driftwood to remove any loose dirt or debris. You can use a soft-bristle brush or a cloth to gently scrub the surface. This will ensure that your finish adheres to the wood properly.

Remove any loose dirt or debris

Inspect your driftwood pieces and remove any loose dirt, moss, or other debris. You can use a small brush or compressed air to carefully clean the nooks and crannies of the driftwood.

Sand the driftwood

To achieve a smooth and polished finish, it’s important to sand the driftwood. Use a sanding block or sandpaper to gently sand the surface, concentrating on any rough edges or areas that need smoothing. Sand in the direction of the wood grain for best results.

Smooth out rough edges

If you come across any rough edges or splinters on the driftwood, use sandpaper or a sanding block to carefully smooth them out. This will not only improve the appearance of the finished piece but also make it safer to handle.

Wipe off excess dust

Once you have finished sanding, use a clean cloth or brush to wipe off any excess dust from the driftwood. This will ensure that the finish adheres smoothly and evenly to the surface.

Applying the Finish

Now that your driftwood is prepared, it’s time to apply the finish of your choice. Follow these steps to achieve the desired look for your driftwood:

Choosing the finish

First, decide whether you want to use varnish or paint as your finish. Consider the overall aesthetic you want to achieve and whether you prefer a natural or colored look for your driftwood.

Varnish or paint

If you want to showcase the natural beauty of the driftwood, varnish is a great option. It will enhance the wood’s natural colors and textures while providing a protective coating. On the other hand, if you want to add a pop of color or match the driftwood with your existing decor, consider using paint.

Decide if you want a natural or colored look

Consider the overall look you want to achieve. If you prefer a natural appearance, opt for a clear varnish. For a colored look, choose paint in your desired hue.

Apply the finish

Using a brush or paint applicator, apply the chosen varnish or paint to the driftwood. Make sure to cover all sides and edges for a consistent finish. Apply multiple thin coats rather than one thick coat to avoid drips and uneven drying.

Brush or paint the varnish/color onto the driftwood

For varnish, brush it onto the driftwood in smooth, even strokes, following the direction of the wood grain. If using paint, apply it using a brush or applicator, ensuring full coverage and an even finish.

Allow it to dry between coats

Allow each coat of varnish or paint to dry completely before applying the next. Follow the manufacturer’s instructions for drying times, and be patient to ensure a professional-looking finish.

Optional: Staining or Whitewashing

If you want to add more character and depth to your driftwood, you can consider staining or whitewashing it. These techniques can create unique and eye-catching finishes. Here’s how you can do it:

Staining the driftwood

Choose a wood stain color that complements your decor or desired look. Apply the stain using a brush or cloth, making sure to cover the entire surface of the driftwood. Allow the stain to penetrate the wood for a few minutes before wiping off any excess with a clean cloth. This will create a rich, stained finish that highlights the natural grain patterns of the driftwood.

Choose a wood stain color

When selecting a wood stain color, consider the overall color scheme and style of your space. Darker stains can create a more dramatic and rustic look, while lighter stains can enhance a beachy or coastal vibe. Test the stain color on a small section of the driftwood to ensure it matches your vision.

Apply the stain with a brush or cloth

Using a brush or cloth, apply the wood stain onto the driftwood, making sure to cover all areas evenly. Work in small sections and follow the wood grain for a natural and uniform finish.

Wipe off excess stain

After applying the stain, use a clean cloth to wipe off any excess stain. This will prevent the driftwood from becoming too dark or uneven. Allow the stain to dry according to the manufacturer’s instructions before proceeding to the next steps.

Whitewashing the driftwood

If you prefer a more washed-out or weathered look for your driftwood, whitewashing is a great option. Here’s how you can achieve this effect:

Mix equal parts of water and white paint

Create a whitewash mixture by combining equal parts of water and white paint. Stir well until the mixture is smooth and consistent.

Brush or sponge the mixture onto the wood

Using a brush or sponge, apply the whitewash mixture onto the driftwood. Work in small sections, ensuring full coverage. The mixture will settle into the nooks and crannies of the driftwood, creating a beautiful, weathered appearance.

Wipe off excess whitewash

After applying the whitewash, use a clean cloth to wipe off any excess from the driftwood. This will allow the natural wood grain and texture to show through, adding depth and character to the finished piece.

Driftwood Finish Diy

Protecting the Finish

To ensure the longevity of your driftwood and protect the finish, it’s important to apply a protective coating. Follow these steps to keep your driftwood looking beautiful for years to come:

Applying a protective coating

Choose a protective coating such as polyurethane that is suitable for the type of finish you have applied to the driftwood. Polyurethane will provide a durable and water-resistant seal.

Choose a protective coating such as polyurethane

Research and select a protective coating that is specifically designed for the type of finish you have applied to the driftwood. For varnished driftwood, choose a polyurethane varnish. For painted driftwood, choose a protective coating suitable for painted surfaces.

Brush or spray on a thin layer

Using a brush or spray applicator, apply a thin layer of the protective coating onto the driftwood. Make sure to cover all surfaces and edges for comprehensive protection.

Allow it to dry completely

After applying the protective coating, allow it to dry completely according to the manufacturer’s instructions. Avoid touching or moving the driftwood until it is fully cured to prevent any damage to the finish.

Display and Use

Now that your driftwood is finished and protected, it’s time to decide where and how to display it. Consider these suggestions to showcase and utilize your driftwood:

Choosing where to display

Decide whether you want to display your driftwood indoors or outdoors. Consider the style and theme of the room or space where you plan to showcase it.

Indoor or outdoor

Driftwood can be a great addition to various indoor spaces, such as living rooms, bedrooms, or even bathrooms. It can also add a natural and coastal touch to outdoor areas like patios or gardens. Choose a location that enhances the overall aesthetic and ambiance you want to create.

Consider the style and theme of the room or space

Think about the existing style and theme of the room or space where you will display the driftwood. It should complement and enhance the overall decor and create a cohesive look. For example, a piece of driftwood with a natural finish can add a rustic touch to a farmhouse-style room, while a brightly painted driftwood can be a statement piece in a vibrant and modern space.

Using the driftwood

Apart from displaying the driftwood as standalone decor, you can also use it in various creative ways:

Decorate with other items

Arrange the driftwood along with other decorative items such as seashells, candles, or framed photos. This can create a visually appealing and personalized display.

Create a centerpiece

Place a group of driftwood pieces in the center of a dining table or coffee table to create a unique centerpiece. You can add additional elements like flowers or small trinkets to enhance the visual impact.

Make a wall hanging

Attach a string or wire to the driftwood and hang it on a wall. This can serve as a stylish and eye-catching piece of wall art. You can even hang smaller driftwood pieces together to create a larger statement piece.

Maintenance

To keep your driftwood looking its best and maintain its finish, you need to follow proper maintenance practices. Consider these tips:

Dust regularly

Dust the driftwood regularly using a soft cloth or duster to prevent the buildup of dirt and debris. This will help maintain its appearance and prevent any damage to the finish.

Wipe with a damp cloth

If you notice any stains or spills on the driftwood, wipe them off immediately with a damp cloth. Avoid using harsh chemicals or abrasive cleaners, as they can damage the finish or the wood itself.

Touch up the finish if needed

Over time, the finish on the driftwood may wear off or become dull. If you notice any areas that need touching up, lightly sand the affected area and reapply the appropriate finish, following the same steps as before.

Reapply protective coating if necessary

Depending on the exposure to sunlight, humidity, and other environmental factors, the protective coating on the driftwood may wear off. If you notice any signs of wear, lightly sand the surface, remove any dust, and apply a fresh coat of protective coating.

Safety Precautions

When working on your driftwood finishing project, it’s essential to prioritize safety. Follow these precautions to ensure a safe and enjoyable DIY experience:

Work in a well-ventilated area

To avoid inhaling fumes from the varnish or paint, make sure to work in a well-ventilated area. Open windows or use a fan to improve air circulation.

Wear protective gloves and goggles

Protect your hands and eyes by wearing gloves and goggles. This will prevent any accidental injuries from splinters, sharp edges, or any chemicals used during the finishing process.

Avoid breathing in fumes from varnish or paint

As you work with varnish or paint, be mindful of the fumes they emit. Avoid breathing in these fumes by ensuring proper ventilation and wearing a mask if needed.

Dispose of any waste materials properly

Dispose of any waste materials, such as used brushes, sanding dust, or empty containers, properly. Follow local regulations for the disposal of these materials to minimize environmental impact.

Tips and Tricks

To further enhance your driftwood finishing project, consider these tips and tricks:

Experiment with different finishes

Don’t be afraid to experiment with different finishes and techniques. Try mixing varnish and stain for a unique look or combine multiple layers of whitewash for a weathered effect. The beauty of DIY projects is the opportunity to explore and create your own unique style.

Combine varnish and stain for a unique look

If you want to add depth and character to your driftwood, consider combining varnish and stain. Apply a layer of varnish to enhance the natural colors and textures of the wood, and then apply a wood stain in a complementary color on top. This will create a unique and eye-catching finish.

Use multiple layers of whitewash for a weathered effect

To achieve a weathered or aged look, apply multiple layers of whitewash. Allow each layer to dry before applying the next, and vary the intensity of the whitewash to create depth and dimension. This technique can give your driftwood a beautifully worn and coastal appearance.

Try different techniques for distressing the driftwood

If you want to create a more rustic or distressed look for your driftwood, try different distressing techniques. You can use sandpaper or a wire brush to create dents, scratches, or rough patches on the surface. This will add texture and a sense of history to your finished piece.

Conclusion

Driftwood finishing is a versatile DIY project that allows you to transform natural materials into unique works of art. By following the steps outlined in this article, you can create beautiful and rustic home decor pieces that reflect your personal style. From choosing the right materials and finishes to displaying and maintaining your driftwood, each step contributes to the overall aesthetic and longevity of your finished pieces. So, unleash your creativity and enjoy the rewarding process of turning ordinary driftwood into extraordinary decor.

Filed Under: Driftwood Ideas Tagged With: Driftwood, finish, furniture, home decor

Can Driftwood Be Stained?

October 9, 2023 by admin

Have you ever wondered if driftwood can be stained to enhance its natural beauty? Well, the answer is yes! Driftwood, with its unique texture and weathered appearance, can be transformed into stunning pieces of art by applying a stain. By selecting the right stain color, you can accentuate the grain patterns and create a beautiful rustic look. Whether you want to darken the wood to create a dramatic effect or add a subtle touch of color, staining driftwood offers endless possibilities for creative expression. Let’s delve into the world of driftwood staining and discover the transformative power it holds.

Can Driftwood Be Stained?

Natural Color of Driftwood

Driftwood, as its name suggests, is wood that has been carried and deposited by the movement of water, typically oceans, rivers, or lakes. Its natural color usually falls within the various shades of brown. These earthy tones give driftwood a rustic and organic appeal, making it a popular choice for various art and decor projects.

Shades of Brown

The natural color of driftwood can range from light tan to deep chocolate brown. The specific shade will depend on factors such as the type of wood, how long it has been exposed to water, and the conditions under which it has weathered. Some pieces of driftwood may even have a reddish or grayish undertone, adding further visual interest to its appearance.

Variations in Color

Within the spectrum of brown, there can be significant variation in color among different pieces of driftwood. This uniqueness is due to the combination of factors like the species of wood, where it originated, and how it has been weathered by the elements. This natural variation allows for endless possibilities when incorporating driftwood into artistic projects or interior design.

Factors Affecting Color

There are several factors that can influence the color of driftwood. Sun exposure and the type of water it has been submerged in can both play a role in the wood’s fading or darkening process. Additionally, the mineral content of the water can affect the hue of driftwood, with higher mineral concentrations often resulting in a deeper, richer color. Over time, the wood may also absorb pigments from surrounding vegetation, further altering its natural color.

Reasons for Staining Driftwood

While driftwood’s natural color can be visually appealing on its own, there are times when staining it can enhance its beauty or better fit a specific aesthetic. Staining can be used to bring out the natural colors and patterns within the wood, customize the appearance to match a particular design vision, or preserve and enhance the wood grain for a more defined and polished look.

Enhancing Natural Color

Staining driftwood can bring out the depth and richness of its natural color. By applying a stain that complements the existing tones, you can intensify the beauty of the wood while maintaining its organic charm. The right stain can emphasize the intricate patterns and textures that have developed over time, making them more pronounced and visually striking.

Customizing Aesthetics

Staining driftwood provides the opportunity to customize its appearance to fit your desired aesthetics. Whether you prefer a darker, more dramatic look or a lighter, more subtle tone, staining allows for endless possibilities to match your interior design or artistic vision. By carefully selecting the right stain, you can create a cohesive and personalized look that complements your space or project.

Preserving or Enhancing Wood Grain

For those who appreciate the unique patterns and grain of driftwood, staining can be a way to both preserve and enhance these natural features. By selecting a stain that allows the wood grain to shine through, you can accentuate the organic beauty of the material. This can be especially beneficial for pieces of driftwood that will be used as focal points in artwork or furniture, as it adds a touch of refinement and elegance.

Can Driftwood Be Stained?

Choosing the Right Stain

When it comes to staining driftwood, there are several options available to choose from, each with its own advantages and considerations. Here are some common types of stains used for driftwood projects:

Water-based Stains

Water-based stains are a popular choice for staining driftwood due to their ease of use, low odor, and quick drying time. They are available in a wide range of colors and can be easily diluted or mixed to achieve the desired shade. Water-based stains also tend to be more environmentally friendly than oil-based alternatives.

Oil-based Stains

Oil-based stains are known for their exceptional durability and long-lasting finish. They penetrate deep into the wood, enhancing its natural beauty and providing a rich, lustrous color. However, they can take longer to dry and may require proper ventilation during application due to their strong odor and higher VOC content.

Gel Stains

Gel stains are thick and provide excellent control during application, making them a popular choice for intricate projects or when working with porous materials like driftwood. They are easy to apply, as they do not drip or run, and can be used to achieve a more even color distribution. Gel stains are available in various shades and provide a smooth, opaque finish.

Eco-friendly Options

For those who prioritize environmentally friendly options, there are stains available that are made from natural and non-toxic ingredients. These stains are typically water-based and free from harmful chemicals, making them a safer choice for both the user and the environment. Look for eco-friendly labels or ask for recommendations at your local hardware store.

Preparing Driftwood for Staining

Before applying any stain to your driftwood, it is important to properly prepare the surface to ensure optimal results and long-lasting finish. Here are some essential steps to follow:

Cleaning and Removing Debris

Begin by thoroughly cleaning the driftwood to remove any dirt, debris, or organic matter that may be stuck to the surface. Use a brush or a stiff bristle brush to scrub away any stubborn dirt or algae. Rinse the wood with water and let it dry completely before moving on to the next step.

Sanding and Smoothing

To achieve a smooth and even surface, use sandpaper or a sanding block to sand the driftwood. Start with a coarse grit sandpaper to remove any rough spots or splinters, and gradually move to a finer grit to achieve a polished finish. Sand in the direction of the wood grain, paying attention to any nooks or crevices.

Applying Wood Conditioner

Driftwood can be porous, which can result in uneven stain absorption. To prevent blotchy or streaky results, apply a wood conditioner to the surface before staining. Wood conditioners help to seal the wood’s pores and create a more uniform absorption of the stain. Follow the manufacturer’s instructions for application and drying times.

Applying the Stain

Once your driftwood is prepared and ready, it’s time to apply the stain. Here are some key considerations and techniques to ensure a successful application:

Using a Brush or Cloth

Choose a brush or cloth that is appropriate for the stain type you are using. A foam brush or a soft cloth can work well for water-based stains, while natural bristle brushes are often recommended for oil-based stains. Dip the brush or cloth into the stain and apply it evenly to the driftwood, following the direction of the wood grain for a more natural look.

Applying Multiple Coats

For a deeper color or more intense finish, multiple coats of stain may be required. Wait for each coat to dry completely before applying the next layer. Apply additional coats until the desired depth of color is achieved, allowing enough time for each coat to absorb and dry.

Techniques for Even Coverage

To achieve even coverage, work in small sections and avoid letting the stain dry before blending. Use long, smooth strokes to apply the stain, ensuring that each section is thoroughly coated. Pay close attention to any knots or imperfections in the wood, as they may require extra stain for consistent color. Wipe away any excess stain with a clean cloth to prevent pooling or drips.

Special Effects and Techniques

While staining driftwood can enhance its natural beauty, there are also several techniques that can be used to create unique visual effects or aged appearances. Here are some techniques to consider:

Layering Stains

By layering different stains or applying multiple coats of varying colors, you can create a more complex and multi-dimensional look. Experiment with different combinations to achieve a customized appearance that suits your style or project theme.

Creating a Weathered Look

If you desire a weathered or aged appearance for your driftwood, consider distressing the wood before staining. Use tools such as sandpaper, wire brushes, or even chains to create texture and simulate the effects of years of weather exposure. This can add character and authenticity to your project.

Bleaching and Whitewashing

Bleaching driftwood before staining can create a lighter, sun-bleached effect. This technique is particularly useful if you want to achieve a coastal or beach-themed aesthetic. Whitewashing, on the other hand, involves diluting paint or stain and applying it to the driftwood to create a more subtle and washed-out appearance.

Distressing and Aging

To give your driftwood a distressed or aged look, consider using techniques such as painting on a crackle finish, applying an antique glaze, or lightly sanding some areas to expose the natural wood underneath. These techniques can add depth and character to your project, making it look like a cherished piece of history.

Sealing the Stained Driftwood

After staining your driftwood, it is important to seal the surface to protect the color and finish. Sealing also provides additional durability and enhances the longevity of the wood. Here are some key considerations:

Importance of Sealing

Sealing the stained driftwood helps to protect it from moisture, UV damage, and general wear and tear. It acts as a barrier between the wood and the surrounding environment, preventing fading, discoloration, and potential damage caused by water or sunlight exposure.

Choosing the Right Sealer

Select a sealer that is compatible with the type of stain you have chosen. Water-based stains generally pair well with water-based sealers, while oil-based stains may require an oil-based or polyurethane sealer. Consider the level of protection needed and the desired finish, as some sealers may have a glossy or matte appearance.

Application Methods

Sealers can be applied using a brush, cloth, or sprayer, depending on personal preference and the size of the project. Follow the manufacturer’s instructions for application techniques, such as the number of coats required and the drying time between each layer. Ensure that the driftwood is clean and dry before applying the sealer.

Maintaining the Finish

To maintain the finish of your sealed driftwood, avoid placing it in direct sunlight for extended periods, as this can cause fading and discoloration over time. Regularly clean the surface with a mild soap and water solution, and periodically reapply a thin layer of sealer to ensure ongoing protection and preservation.

Considerations for Outdoor Use

When using stained driftwood for outdoor projects or decor, there are additional considerations to keep in mind to ensure its longevity and resilience. Here are some important factors to consider:

Weatherproofing the Stain

To protect your stained driftwood from the elements, it is crucial to choose a sealer that is specifically formulated for outdoor use. Look for sealers that provide weatherproofing properties, such as resistance to moisture, UV rays, and temperature fluctuations. Apply multiple coats if necessary, following the manufacturer’s instructions.

UV Protection

Exposure to sunlight can cause the color of stained driftwood to fade over time. To minimize the effects of UV rays, consider using a sealer with UV protection properties. These types of sealers help to preserve the color and prevent the wood from turning gray or discolored due to sun exposure.

Protecting Against Moisture

Driftwood that is exposed to outdoor elements, such as rain or humidity, can be prone to moisture damage or rot. To prevent this, ensure that the stained driftwood is adequately protected with a sealer that provides moisture resistance. Regularly inspect the wood for any signs of damage or excessive moisture absorption and take appropriate action to address any issues promptly.

Periodic Maintenance

Even with proper weatherproofing and protection, outdoor elements can still take a toll on stained driftwood over time. To maintain its appearance and ensure its longevity, periodically inspect the wood for any signs of wear, damage, or discoloration. Regularly clean the surface and reapply a fresh coat of sealer as needed to maintain the wood’s beauty and protection.

Potential Challenges and Solutions

While staining driftwood can be a rewarding and creative process, it can also present certain challenges. Here are some common issues that may arise and potential solutions:

Uneven Absorption of Stain

Due to the porous nature of driftwood, it may absorb stain unevenly, resulting in blotchy or streaky spots. To minimize this issue, ensure that the wood is properly sanded and conditioned before staining. Apply a pre-stain wood conditioner to create a more even surface and use long, smooth strokes to apply the stain, allowing it to penetrate evenly.

Blotchy or Streaky Appearance

If you encounter areas with a blotchy or streaky appearance after staining, you may need to apply an additional coat of stain or use a technique called “toning” to even out the color. Toning involves applying a thinned down or diluted stain over the affected areas to create a more consistent appearance. Experiment with different techniques or consult a professional for guidance.

Dealing with Imperfections

Driftwood may have imperfections such as knots, cracks, or irregularities that can affect the staining process. Embrace these imperfections as part of the wood’s natural character, or address them before staining by filling knots with wood putty or using epoxy resin to stabilize any cracks or weak areas. Sanding the wood before staining can also help to minimize the appearance of imperfections.

Fixing Mistakes

If you make a mistake during the staining process, it can usually be corrected with some additional sanding and restaining. If the mistake is minor, you may be able to touch up the affected area with a small brush or cloth. If the mistake is more significant, you may need to sand down the wood and start the staining process from scratch. Take your time, practice on scrap pieces of driftwood, and be patient with the process.

Alternatives to Staining Driftwood

While staining is a popular choice for enhancing the beauty of driftwood, there are alternative methods to consider if staining is not your preferred technique. Here are some alternatives worth exploring:

Natural Oil Finishes

Instead of staining, you can choose to use natural oil finishes to enhance the driftwood’s color and protect its surface. Oils such as tung oil or linseed oil penetrate into the wood, bringing out its natural beauty and providing a protective barrier. These finishes can create a rich, warm glow without altering the wood’s color too much.

Wood Dye and Tinting

Wood dye is another option to consider if you prefer a more vibrant or intense color than what staining can achieve. Wood dye penetrates deeply into the wood fibers, allowing for a more uniform and saturated color. Tinting with pigmented finishes can also provide different shades and tones while still showcasing the wood grain.

Painting Driftwood

If you desire a more colorful or artistic approach, consider painting your driftwood instead of staining it. Painting allows for greater versatility in terms of color choice, patterns, and design possibilities. Whether you prefer a solid color, intricate designs, or bold artistic expressions, painting can help achieve the desired effect.

Using Colored Wood Putty or Epoxy

For delicate or intricate pieces of driftwood that have small holes, cracks, or voids, using colored wood putty or epoxy can be an effective way to fill and seal these imperfections. The colored putty or epoxy can match the surrounding wood or create contrasts for a unique effect. This approach allows you to add color and texture without fully covering the natural beauty of the wood.

In conclusion, while driftwood boasts a natural color palette ranging from various shades of brown, staining can enhance its visual appeal, customize its aesthetics, and preserve or accentuate its wood grain. By choosing the right stain, properly preparing the driftwood, and applying the stain with care, you can achieve beautiful and long-lasting results. Whether you opt for traditional stains, explore unique effects and techniques, or consider alternative finishes, the process of staining driftwood offers endless creative possibilities for both indoor and outdoor projects. So go ahead and let your imagination run wild as you transform driftwood into stunning works of art or decor pieces that reflect your personal style and love for nature.

Filed Under: Driftwood Tagged With: Decor, DIY, Driftwood, furniture, staining

  • « Previous Page
  • Page 1
  • …
  • Page 3
  • Page 4
  • Page 5

Primary Sidebar

Driftwood4us.com, is a participant in the Amazon Services LLC Associates Program, an affiliate advertising program designed to provide a means for sites to earn advertising fees by advertising and linking to amazon.com.