• Skip to main content
  • Skip to primary sidebar
  • Terms and Conditions
  • Privacy Policy
  • Contact

Driftwood 4 Us

Just About Driftwood

home decor

Driftwood Projects Candle Holders

May 22, 2024 by admin

Imagine transforming natural driftwood into a gorgeous centerpiece that adds a touch of coastal elegance to your home. In “Driftwood Projects Candle Holders,” you will discover a step-by-step guide to creating unique and charming candle holders from driftwood. These projects not only allow you to bring the beauty of the shoreline indoors but also provide a delightful way to spend an afternoon crafting. Simple, serene, and stylish—your handmade driftwood candle holders will soon become the talk of your next gathering.

Driftwood Projects: Candle Holders

Have you ever looked at a piece of driftwood and thought about its potential as a beautiful candle holder? Driftwood, weathered by time and elements, holds an inherent rustic charm that can be transformed into unique, functional art pieces. Embracing driftwood for your candle holder projects offers not just a creative outlet, but also a sustainable way to beautify your spaces.

Driftwood Projects Candle Holders

What is Driftwood?

Driftwood is wood that has been washed onto a shore, riverbank, or beach by the forces of wind, tides, or waves. Over time, it’s worn smooth by the elements, giving it a unique texture and appearance. As an artistic material, driftwood is often used in crafting and home décor due to its naturally weathered look and feel.

Characteristics of Driftwood

Driftwood comes in various shapes and sizes, with each piece being one-of-a-kind. Its characteristics often depend on the type of tree it originated from and the duration it spent in water. Some common attributes include:

  • Texture: Smooth and polished surface
  • Color: Various shades of brown, grey, or even bleached white
  • Shapes: Twisted, elongated, or roots-like structures

Why Choose Driftwood for Candle Holders?

Using driftwood for your candle holders is a fantastic choice for several reasons. Let’s break them down:

Eco-Friendly Option

By choosing driftwood, you’re opting for a sustainable material. You’re giving a second life to wood that has drifted across bodies of water, recycling it instead of letting it go to waste.

Aesthetic Appeal

Driftwood brings a natural, rustic charm to your home. Each piece is unique, giving your candle holders an individualistic, artistic touch that’s hard to replicate.

Simple and Versatile

Driftwood is easy to work with, especially for DIY enthusiasts. It can be combined with various materials—glass, metal, or shells—to fit different décor styles, from coastal to bohemian.

Affordable

Driftwood is often free or very cheap to source, making it a cost-effective material for crafting.

Materials You Will Need

Before diving into the project, gather your materials and tools. Here’s a list to get you started:

Basic Materials

  1. Driftwood: Depending on your design, you’ll need pieces that can hold or support candles.
  2. Candles: Tea lights, votives, pillar candles or LED candles.
  3. Epoxy or Wood Glue: For attaching candles or other decorative elements.
  4. Sandpaper: To smooth out rough edges.

Optional Materials

  1. Sealant or Varnish: To protect and preserve the wood.
  2. Decorative Elements: Shells, stones, beads, or metal accents.
  3. Drill and Bits: For making holes to hold candles.
  4. Paints and Brushes: If you wish to add color.

Steps to Create Driftwood Candle Holders

Now that you have your materials ready, let’s delve into the step-by-step process of creating your unique driftwood candle holders.

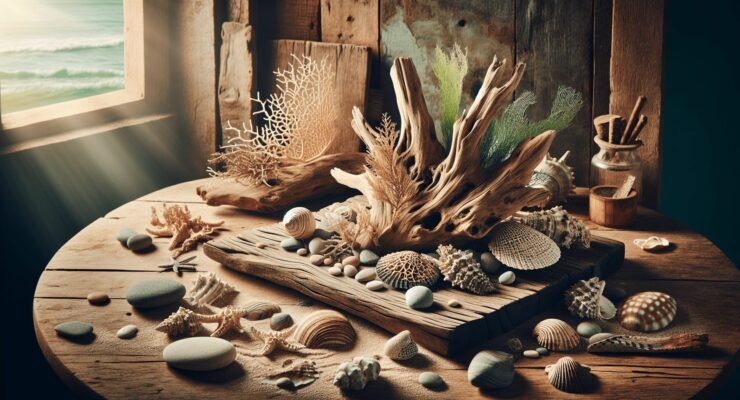
Step 1: Select and Prepare Your Driftwood

Pick pieces of driftwood that catch your eye and visualize how they can be converted into candle holders.

  • Clean the Driftwood: Remove any debris, sand, and salt by scrubbing the driftwood gently with a brush and rinsing it in water. Allow it to dry completely.
  • Sand the Wood: Use sandpaper to smoothen rough edges or surfaces.

Step 2: Design Your Candle Holder

Think about the type of candles you wish to use and how you want them placed. Sketching out a design can help you visualize the final product.

Types of Candle Holders

TypeDescription
Single HolderA single piece of driftwood holding one candle.
Multi-HolderA longer piece of driftwood that can support multiple candles.
HangingDriftwood attached to a wall or suspended from the ceiling.
MantlepieceA decorative piece designed to sit upon a mantle or tabletop.

Step 3: Drilling Holes

If your design involves inserting candles into the driftwood, you will need to drill holes.

  • Choose the Right Bit: Use a drill bit that matches the circumference of your candles for a snug fit.
  • Mark the Position: Use a pencil to mark the spot where you want the holes.
  • Drill Carefully: Slowly drill into the wood to the desired depth. Sand around the holes to ensure there are no splinters.

Step 4: Decorating Your Candle Holder

Customize your candle holders by adding decorative elements.

  • Painting: Consider adding a splash of color or patterns to your driftwood.
  • Adding Shells or Stones: Attach seashells, small stones, or other elements using wood glue or epoxy.
  • Sealant: Applying a coat of sealant can enhance the wood’s appearance and protect it from moisture.

Step 5: Inserting the Candles

  • Test Fit: Insert your candles into the holes to ensure they fit well.
  • Secure with Glue: For added safety, you can use a small amount of glue to secure the candles.

Driftwood Projects Candle Holders

Creative Ideas for Driftwood Candle Holders

Now that you’ve mastered the basics, let’s explore some creative driftwood candle holder ideas.
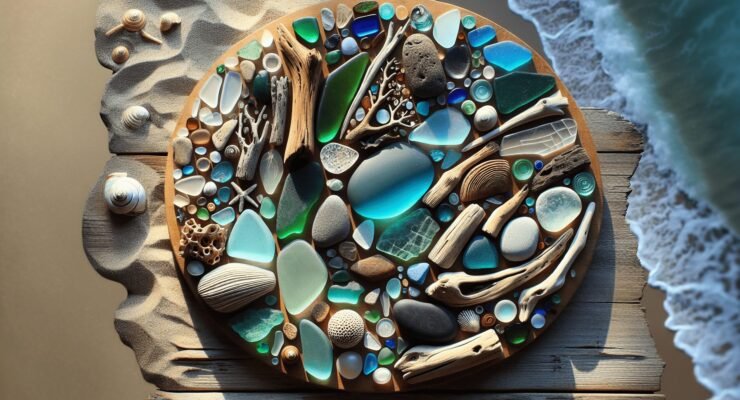
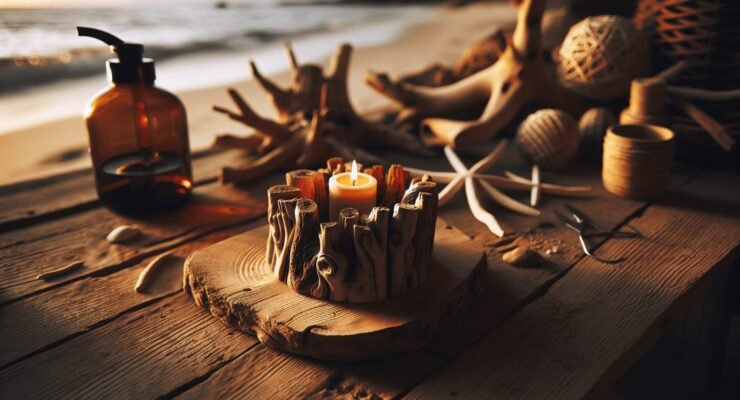
Coastal Vibes

Capture the essence of the beach by creating a coastal-themed candle holder using driftwood, shells, and blue accents. Use a longer piece of driftwood, drilling multiple holes for tea lights, and decorate it with small shells and starfish.

Minimalist Chic

For a minimalist aesthetic, use a single, sleek piece of driftwood with clean lines. Drill one or two holes for white candles, and keep the decoration subtle, maybe just a coat of clear varnish to enhance its natural look.
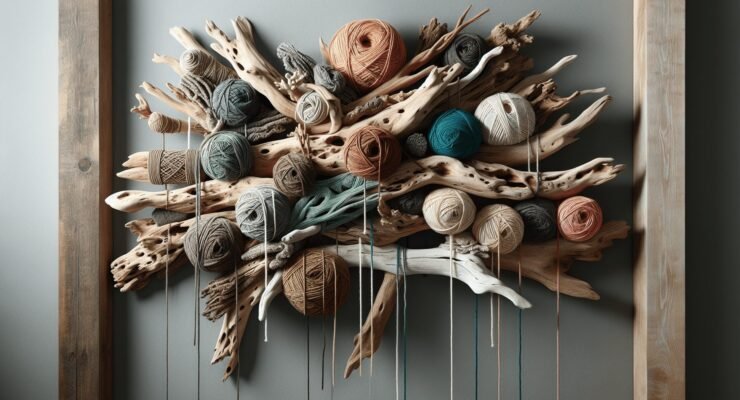
Bohemian Touch

Combine driftwood with colorful beads, feathers, and fabric strips for a bohemian vibe. This style works well with hanging candle holders or ones that incorporate intricate designs.

Rustic Elegance

Combine driftwood with metal elements such as copper or brass for a rustic yet elegant look. You can use metal candle cups glued onto the driftwood or wrap sections with metal wire.

Holiday-Themed

Create seasonal candle holders by adding elements that reflect the holidays. For Christmas, add pine cones, berries, and small ornaments. For Halloween, consider painting the driftwood in spooky colors and adding mini pumpkins.

Safety Tips

While creating and using driftwood candle holders, safety is paramount.

Fire Safety

  • Position Carefully: Always place candle holders on a stable surface away from flammable materials.
  • Supervise Burning Candles: Never leave burning candles unattended.
  • Use LED Candles: If you want to avoid open flames, consider using battery-operated LED candles.

Durability

  • Secure Decorations: Make sure all decorative elements are well-attached to avoid any accidents.
  • Check Stability: Ensure that the candle holder is stable and won’t tip over easily.

Benefits of DIY Projects

Apart from the satisfaction of creating something unique, engaging in DIY projects like driftwood candle holders can offer several benefits.

Personalization

Creating your own candle holders allows you to personalize them according to your taste and style, making each piece uniquely yours.

Stress Relief

Crafting can be a relaxing, therapeutic activity, helping you unwind and de-stress.

Skill Development

Through DIY projects, you can develop new skills and improve your craftsmanship, which can be both fulfilling and practical.

Frequently Asked Questions

Where Can I Find Driftwood?

Driftwood can often be found along riverbanks, beaches, or lakeshores. Ensure that you’re abiding by local regulations when collecting driftwood.

Is It Safe to Use Driftwood?

Yes, it’s safe to use driftwood, especially when it’s properly cleaned. If you find driftwood in saltwater areas, soaking it in freshwater can help remove excess salt.

Can I Use Any Type of Candle?

You can use a variety of candles, but make sure they fit securely in the candle holder to prevent tipping. If using open-flame candles, always follow fire safety guidelines.

How Do I Preserve Driftwood?

You can preserve driftwood by applying a coat of sealant or varnish. This not only protects the wood but also enhances its natural appearance.

Conclusion

Creating driftwood candle holders is not just an art; it’s a way to bring a piece of nature into your home. The uniqueness of each driftwood piece ensures that no two candle holders are the same. Whether you’re looking to add a coastal touch, a minimalist vibe, or a bohemian flair to your decor, driftwood candle holders are a versatile and eco-friendly choice.

So the next time you come across a piece of driftwood, see beyond its rugged exterior and imagine the beautiful candle holder it could become. Grab your tools, unleash your creativity, and get crafting!

Filed Under: Driftwood Ideas Tagged With: Candle Holders, crafting, home decor, Upcycling

Big Driftwood Projects

May 21, 2024 by admin

Welcome to the world of “Big Driftwood Projects,” where your creativity meets the timeless beauty of nature. Imagine finding a piece of driftwood on a serene beach walk and turning it into a stunning centerpiece for your home. This article will guide you through various ways to transform large driftwood pieces into unique, eye-catching art that speaks to your personal style and the raw beauty of the ocean. Dive in and discover how to bring a touch of coastal charm into your living spaces with these big driftwood projects!

Big Driftwood Projects

Have you ever stumbled upon a beautiful piece of driftwood and wondered what to do with it? There’s something magical about driftwood, shaped and smoothed by the waves and time itself. It’s like nature’s artwork, just waiting for you to transform it into something spectacular. In this article, we’ll dive deep into the world of big driftwood projects, giving you ideas, tips, and instructions to help spark your creativity.

What is Driftwood?

Let’s start from the beginning. Driftwood refers to wood pieces that wash ashore on beaches, lakes, or rivers. These wood pieces are often weathered by the elements, giving them a unique and rustic appearance. Not only are they a beautiful natural resource, but they also come with a rich history that adds a unique character to any project.

The Appeal of Driftwood

Why should you consider working with driftwood? Driftwood projects are not only aesthetically pleasing but also environmentally friendly. By using driftwood, you’re recycling natural materials that would otherwise go to waste. Plus, the rustic and natural look of driftwood can complement a variety of home décor styles, from coastal to bohemian to rustic.

Collecting Driftwood

Before you get started with your big driftwood project, let’s talk about collecting driftwood. Make sure to check local regulations, as some areas have restrictions on removing wood from the beach. When collecting, look for pieces that are dry, free from rot, and not infested with insects. Larger pieces are ideal for big projects, but smaller pieces can also be useful for details or accents.

Preparing Driftwood

Once you’ve collected your driftwood, it’s crucial to prepare it before diving into your project. Preparation includes cleaning, drying, and sometimes even treating the wood to ensure it’s safe and sturdy for your intended use.

Cleaning Driftwood

Cleaning is the first and most important step. Here are some essential guidelines for cleaning your driftwood:

  1. Rinse Thoroughly: Start by thoroughly rinsing the driftwood with fresh water to remove sand, dirt, and salt.
  2. Scrub: Use a stiff-bristled brush to scrub off any remaining debris.
  3. Soak: Soak the driftwood in a mixture of water and bleach (1 part bleach to 9 parts water) for about 24 hours to kill any insects, mold, or bacteria.
  4. Rinse Again: After soaking, rinse the wood thoroughly with fresh water to remove any bleach residue.

Drying Driftwood

Drying your driftwood is a crucial step to prevent mold and ensure the wood is ready for your project.

  1. Air Dry: Place the driftwood in a sunny, well-ventilated area. It might take several days to weeks depending on the wood’s size.
  2. Oven Dry: For smaller pieces, you can speed up the process by placing them in an oven at a low temperature (around 200°F, or 90°C) for a few hours.

Optional Treatments

If you want to give your driftwood extra protection, consider applying a sealant or wood preservative. This can help to preserve the wood’s natural look and prevent it from deteriorating over time.

Big Driftwood Projects

Big Driftwood Projects

Now that your driftwood is clean and prepped, it’s time to dive into some big driftwood project ideas. These projects can bring a stunning, natural vibe into your home or garden.

Driftwood Furniture

Among the most impressive uses of large pieces of driftwood is creating furniture. Here are a few ideas to get you started.

Driftwood Coffee Table

A driftwood coffee table can be the centerpiece of your living room. Here’s how you can make one.

Materials Needed:

  • Large piece of driftwood for the base
  • Glass tabletop
  • Sandpaper
  • Wood glue
  • Clamps

Instructions:

  1. Select Driftwood: Choose a sturdy and aesthetically pleasing piece of driftwood.
  2. Sand: Sand the driftwood to smooth out any rough spots.
  3. Attach Glass Top: Secure the glass tabletop to the driftwood base using wood glue and clamps. Allow it to dry completely.

Driftwood Headboard

A driftwood headboard can add a rustic and coastal charm to your bedroom.

Materials Needed:

  • Several long pieces of driftwood
  • Wooden frame
  • Screws and drill
  • Sandpaper

Instructions:

  1. Arrange Driftwood: Arrange your driftwood pieces horizontally or vertically within the wooden frame.
  2. Attach: Secure the pieces to the frame using screws.
  3. Sand: Sand any rough spots to ensure safety.

Driftwood Lighting

Driftwood can also be used to create unique lighting fixtures, from lamps to chandeliers.

Driftwood Lamp

A driftwood lamp can be a brilliant statement piece for your living area or bedroom.

Materials Needed:

  • Driftwood piece
  • Lamp kit
  • Drill
  • Sandpaper

Instructions:

  1. Select Driftwood: Choose a piece of driftwood that has a unique shape and is sturdy.
  2. Drill Hole: Drill a hole through the driftwood to run the lamp’s electrical cord.
  3. Install Lamp Kit: Follow the lamp kit instructions to install the socket and wiring.
  4. Sand: Sand any rough edges for a polished look.

Driftwood Art

Create stunning driftwood art pieces that can be hung on walls or displayed as sculptures.

Driftwood Wall Art

A driftwood wall art piece can be a beautiful addition to any room, adding a touch of nature to your décor.

Materials Needed:

  • Several small to medium pieces of driftwood
  • Wood board or frame for the base
  • Wood glue
  • Nails
  • Hammer

Instructions:

  1. Plan Design: Lay out your driftwood pieces on the wood board in your desired pattern or design.
  2. Attach: Secure each piece to the board using wood glue and nails.
  3. Dry: Allow the glue to dry completely before hanging.

Driftwood Garden Projects

Driftwood can also be a wonderful addition to your garden. Here are a few ideas.

Driftwood Planters

Use driftwood to create unique, rustic planters for your garden.

Materials Needed:

  • Large piece of driftwood with a natural hollow
  • Potting soil
  • Plants

Instructions:

  1. Prepare Driftwood: Make sure the driftwood is clean and dry.
  2. Fill: Fill the hollow with potting soil.
  3. Plant: Add your chosen plants.

Driftwood Garden Trellis

A driftwood trellis can provide support for climbing plants while adding a touch of natural beauty to your garden.

Materials Needed:

  • Several long, sturdy pieces of driftwood
  • Garden twine or wire
  • Sandpaper

Instructions:

  1. Create Frame: Arrange the driftwood pieces into a frame and secure them together with garden twine or wire.
  2. Sand: Sand any rough spots.
  3. Install: Place the trellis in your garden and plant climbing plants at its base.

Tips for Working with Driftwood

Here are some additional tips to keep in mind while working with driftwood:

Tools

Ensure you have the right tools before starting your project. These might include sandpaper, a drill, screws, wood glue, clamps, and a saw.

Safety First

Always wear safety goggles and gloves when working with driftwood to protect yourself from splinters and dust.

Patience is Key

Working with driftwood can be a time-consuming process, so be patient. The end result will be worth the effort.

Experiment and Have Fun

Don’t be afraid to experiment with different designs and techniques. Creativity is key when it comes to driftwood projects.

Big Driftwood Projects

Conclusion

Big driftwood projects can be a fulfilling and rewarding way to bring a piece of nature into your home or garden. From stunning furniture to unique lighting and art, the possibilities are endless. Remember, the key to successful driftwood projects is preparation, creativity, and patience. Now that you have the knowledge and inspiration, it’s time to get started on your big driftwood project. Happy crafting!

Filed Under: Driftwood Ideas Tagged With: crafts, Driftwood, home decor, projects, Woodworking

Drift Wood Art Ideas Driftwood Projects

May 21, 2024 by admin

Welcome to “Drift Wood Art Ideas Driftwood Projects”! Here, you’ll dive into the enchanting world of driftwood, exploring creative projects that transform this natural material into stunning pieces of art. You’ll discover unique ideas and step-by-step guides to craft everything from rustic home decor to intricate sculptures. Let your imagination set sail and find inspiration in the beauty of driftwood, turning washed-up wood into treasured masterpieces that add a coastal charm to your living space.

Drift Wood Art Ideas Driftwood Projects

Have You Ever Considered Turning Driftwood Into Art?

If you’ve ever walked along a beach or lakeshore, you’ve probably encountered fascinating pieces of driftwood, their unique shapes and textures sculpted by nature itself. But did you know that these natural treasures can be transformed into stunning pieces of art? With a little creativity and some basic tools, you can bring the beauty of driftwood into your home through various projects. In this article, we’ll explore numerous driftwood art ideas and projects that you can start on your own.

Why Driftwood?

Before diving into the projects, let’s talk about why driftwood is such a brilliant medium for art. Driftwood is not only eco-friendly but also incredibly versatile. Each piece carries its own history and character, making every creation genuinely one-of-a-kind. Moreover, its rustic, natural charm can complement various interior decor styles, from modern minimalist to cozy rustic.

Gathering Driftwood: The Basics

Where to Find Driftwood

Beachcombing is the most common way to find driftwood. Shorelines along lakes, rivers, and oceans are the best places to look. But before you start collecting, be aware of local regulations regarding the removal of natural materials from protected areas.

Things to Consider When Collecting Driftwood

When collecting driftwood, pay attention to its size, shape, and sturdiness. Avoid pieces that are too brittle or show signs of infestation. Smaller pieces are great for intricate projects, while larger pieces can be the focal points of bigger art installations.

Drift Wood Art Ideas Driftwood Projects

Preparing Driftwood for Art Projects

Cleaning Your Driftwood

Before you start your project, you’ll need to clean the driftwood to remove any dirt, salt, or microorganisms.

  1. Rinse: Start by rinsing the driftwood thoroughly with fresh water.
  2. Scrub: Use a brush to scrub off any surface dirt.
  3. Soak: Soak the driftwood in a mixture of water and a little bleach (usually a cup of bleach per gallon of water) for 24-48 hours. This will kill any remaining organisms.
  4. Dry: Place the driftwood in a sunny, well-ventilated area to dry completely. This can take several days.

Tools You Might Need

Here’s a handy table of tools you might need for your driftwood projects:

ToolPurpose
Hand SawCutting larger pieces to desired lengths
SandpaperSmoothing rough edges
Wood GlueAssembling smaller pieces
DrillCreating holes for fixtures or decorations
Varnish or SealantProtecting the finished product
PaintbrushesApplying varnish, paint, or other finishes

Driftwood Art Ideas and Projects

Driftwood Sculptures

One of the simplest yet most impactful uses of driftwood is creating sculptures. Due to its natural irregularities, each piece can embody a unique, organic aesthetic. You might choose to assemble several small pieces into an intricate design or use a single large piece as a statement sculpture.

Tips for Driftwood Sculptures:

  • Study Your Pieces: Examine each piece from different angles to identify the natural beauty and potential shapes within.
  • Combine with Other Natural Elements: Incorporate stones, shells, or feathers to add more texture and depth to your sculpture.
  • Secure with Glue: Use strong wood glue to attach pieces together securely.

Driftwood Wall Art

Driftwood wall art can range from simple, rustic arrangements to more complex, multi-dimensional pieces. Whether you want to hang a single piece or create an entire mural, driftwood offers a tactile and visual appeal that’s hard to match.

Ideas for Driftwood Wall Art:

  • Collages: Arrange smaller pieces of driftwood in a pattern or shape of your choice and glue them onto a canvas or board.
  • Frames: Use driftwood to create picture frames, adding a coastal touch to your photographs or art prints.
  • Wall Hangings: Combine driftwood with textiles, beads, or macramé to create bohemian wall hangings.

Driftwood Furniture

Building furniture from driftwood can be more challenging but incredibly rewarding. From coffee tables to bed frames, the possibilities are endless.

Driftwood Furniture Ideas:

  • Tables: Use larger, sturdy pieces of driftwood for legs and a solid wooden plank for the tabletop.
  • Shelves: Driftwood logs can be mounted on walls to create rustic, functional shelves.
  • Chairs: For advanced crafters, constructing a chair from driftwood combines artistry with functionality.

Driftwood Home Decor

There are countless ways to incorporate driftwood into your home decor. Here are a few ideas to get you started:

Driftwood Home Decor Projects:

  • Candlesticks: Attach small pieces of driftwood together and secure candle holders on top for a cozy, beachy feel.
  • Mirrors: Frame a mirror with driftwood pieces to add a nautical touch to your bathroom or hallway.
  • Hooks and Hangers: Attach hooks to driftwood pieces for unique coat racks or towel holders.

Driftwood for the Garden

Driftwood isn’t just for indoors; it can enhance your outdoor space as well.

Garden Driftwood Projects:

  • Planters: Use hollowed-out pieces of driftwood as planters for succulents or small flowers.
  • Garden Paths: Lay large, flat pieces of driftwood to create rustic garden pathways.
  • Birdhouses: Construct whimsical birdhouses using driftwood and other reclaimed materials.

Driftwood Jewelry

If you’re into smaller, more intricate projects, driftwood jewelry offers a fantastic way to showcase your creativity in a wearable form.

Driftwood Jewelry Ideas:

  • Pendants: Smaller, polished pieces of driftwood can be turned into unique necklaces.
  • Bracelets: Combine driftwood beads with other natural elements like shells or stones.
  • Earrings: Lightweight pieces of driftwood can be crafted into statement earrings.

Drift Wood Art Ideas Driftwood Projects

Tips and Tricks for Working with Driftwood

Safety First

Whenever you’re working with wood, especially materials collected from the wild, it’s essential to prioritize safety.

Safety Tips:

  • Gloves and Goggles: Wear gloves to protect your hands from splinters and goggles to guard your eyes when sawing or drilling.
  • Ventilation: Ensure you’re working in a well-ventilated area, especially when using sealants or varnishes.
  • Mask: Consider wearing a mask to avoid inhaling any dust or particles created during sanding.

Preserving Your Driftwood Creations

To ensure your driftwood art stands the test of time, it’s crucial to protect it from the elements.

Preservation Tips:

  • Sealant: Apply a coat of varnish or wood sealant to protect against moisture and pests.
  • Location: Avoid placing driftwood items in direct sunlight or damp environments indoors.

Combining Driftwood with Other Materials

Don’t hesitate to mix materials for a more dynamic aesthetic. Combining driftwood with metal, glass, or fabric can result in truly unique pieces.

Experiment with Finishes

Although the natural look of driftwood is beautiful, experimenting with different finishes can add a modern twist. Consider stains, paints, or even metallic finishes to diversify your projects.

Inspiring Driftwood Art Projects Step-by-Step

Let’s walk through a couple of detailed driftwood art projects to inspire you and help you get started.

Driftwood Candle Holder

Materials Needed:

  • Medium-sized driftwood pieces
  • Tea light candle holders
  • Wood glue
  • Sandpaper
  • Varnish
  • Paintbrush

Steps:

  1. Select Driftwood Pieces: Choose medium-sized, sturdy driftwood pieces that can hold candle holders securely.
  2. Sand and Clean: Sand the pieces to smooth any rough edges and clean them thoroughly.
  3. Glue Candle Holders: Use strong wood glue to attach the tea light candle holders to the driftwood pieces. Allow it to dry completely.
  4. Apply Varnish: Apply a coat of varnish to protect the wood. Allow it to dry.
  5. Insert Candles: Place the tea light candles into the holders, and you’re done!

Driftwood Wall Hanger

Materials Needed:

  • Long driftwood branch
  • Rope or twine
  • Hooks
  • Drill

Steps:

  1. Choose a Branch: Select a long, sturdy piece of driftwood that will serve as the base for your hanger.
  2. Clean and Sand: Clean and sand the branch to remove any debris and smooth rough areas.
  3. Drill Holes: Drill evenly spaced holes along the length of the driftwood branch.
  4. Insert Hooks: Screw hooks into the drilled holes securely.
  5. Add Rope: Tie a piece of rope or twine to each end of the branch, allowing enough length to hang it from a wall.
  6. Hang and Use: Hang the driftwood wall hanger in your desired location and use the hooks for items like keys, jewelry, or small tools.

Final Thoughts

Driftwood art is more than just a creative outlet; it’s a way to bring a piece of nature into your living space. Whether you’re a seasoned artist or a beginner looking to explore new mediums, driftwood offers endless possibilities for expression. Not only will you create beautiful art, but you’ll also contribute to sustainable practices by repurposing nature’s leftovers.

So next time you’re at the beach, keep an eye out for those unique pieces of driftwood. With a bit of vision and creativity, you’ll find that the possibilities for driftwood art and projects are as infinite as the ocean itself.

Happy crafting!

Filed Under: Driftwood Ideas Tagged With: Beach Theme, Creative Projects, DIY Crafts, driftwood art, home decor

Driftwood And Sea Glass Projects

May 21, 2024 by admin

“Driftwood and Sea Glass Projects” takes you on a creative journey, transforming nature’s coastal treasures into stunning, unique home décor. You will discover how to combine the rugged beauty of driftwood with the shimmering allure of sea glass to craft everything from elegant wall art to charming table centerpieces. Each project is designed to be accessible, yet inspiring, ensuring your creations not only capture the essence of the beach but also tell your personal artistic story. Get ready to roll up your sleeves and bring a touch of seaside magic into your home with these delightful DIY ideas!

Driftwood And Sea Glass Projects

Have you ever walked along the beach, marveling at the natural beauty of driftwood and sea glass? These beautiful treasures from the sea can transform your home decor and personal projects. But how do you go about using them in a creative way? This article will guide you through everything you need to know about driftwood and sea glass projects.

What Is Driftwood?

Driftwood is wood that has been washed onto shore by waves, wind, and tides. Over time, the wood is weathered and smoothed by sand and water, giving it a unique, rustic appearance. This natural process makes each piece of driftwood completely unique.

Where to Find Driftwood

Driftwood can typically be found along beaches, riverbanks, and lakeshores. Look for pieces that have been thoroughly weathered and dried. If you live near a coastal area, you might find an abundance of driftwood after a storm.

Types of Driftwood

Different types of driftwood are distinguished by their original tree species. Common types include:

Tree SpeciesCharacteristics
Hardwood SpeciesDense, heavy, often darker in color
Softwood SpeciesLighter, often lighter in color
CedarResistant to decay, often aromatic
BirchSmooth texture, pale in color

Preparing Driftwood for Projects

Before using driftwood for any project, it’s important to clean and treat it to ensure it is safe and sanitized.

  1. Clean: Use a stiff brush to remove dirt and debris. Soak the wood in a mixture of water and bleach (one part bleach to ten parts water) for about an hour to kill any insects or bacteria. Rinse thoroughly.
  2. Dry: Allow the driftwood to air dry completely. Leave it in a sunny spot for several days or place it in a dry, well-ventilated area indoors.
  3. Seal: If you plan on using the driftwood for indoor projects, consider applying a clear wood sealer to protect it from moisture and wear.

What Is Sea Glass?

Sea glass is glass that has been naturally tumbled and weathered by the ocean, sand, and rocks. This process smooths and frosts the glass, giving it a beautiful, distinctive appearance.

Where to Find Sea Glass

Sea glass can be found on beaches around the world. It’s often most abundant in areas near historical glass disposal sites such as old shipwrecks or places where glass bottles were discarded into the sea.

Types and Colors of Sea Glass

The color of sea glass is one of its most fascinating aspects. Here are some common colors and their origins:

ColorOrigin
Clear/WhiteCommon glass bottles and jars
BrownBeer and whiskey bottles
GreenWine and soda bottles
BlueMedicine bottles, decorative glass
Rare Colors(e.g., red, purple)

Preparing Sea Glass for Projects

Sea glass usually requires minimal preparation:

  1. Clean: Wash the glass with warm, soapy water to remove any salt, sand, or dirt. Rinse and dry thoroughly.
  2. Sort: Sort the pieces by color and size to make the crafting process easier.

Driftwood And Sea Glass Projects

Creative Driftwood and Sea Glass Projects

Now that you know where to find and how to prepare driftwood and sea glass, let’s dive into some fun and creative projects you can do at home.

Driftwood Furniture and Decor

Driftwood can be used to create stunning furniture and home decor. Here are some ideas:

Driftwood Coffee Table

Create a rustic coffee table by attaching a piece of thick glass to a flat piece of driftwood. This project often requires measuring, sawing, and securing the glass using strong adhesive or screws.

Driftwood Shelves

Attach sturdy pieces of driftwood to the wall to create unique, rustic shelves. Ensure they are securely fastened to support the weight of items you plan to place on them.

Driftwood Candle Holders

Carve or drill small holes into driftwood pieces to hold candle votives. You can create an elegant centerpiece by arranging several candle holders on a dining table.

Sea Glass Jewelry and Accessories

Sea glass can be transformed into beautiful jewelry and accessories. Here are some ideas:

Sea Glass Necklace

Drill a small hole through a piece of sea glass and thread a chain or cord through it to create a simple yet elegant necklace. You can also embellish it with beads or charms.

Sea Glass Earrings

Using wire wrapping techniques, you can create stunning sea glass earrings. Wrap thin wire around the glass pieces and form loops to attach earring hooks.

Sea Glass Keychains

Attach a piece of sea glass to a keyring using wire or strong clear adhesive. This can be a great way to keep a little piece of the sea with you wherever you go.

Combined Projects: Driftwood and Sea Glass Art

Combining driftwood and sea glass can result in beautiful, one-of-a-kind art pieces. Here are some ideas:

Driftwood and Sea Glass Wall Art

Arrange pieces of driftwood and sea glass on a canvas to create a beach-themed piece of wall art. Glue the pieces in place using strong adhesive, and consider adding other beach finds like shells or pebbles.

Driftwood and Sea Glass Wind Chimes

Create a soothing wind chime by tying pieces of driftwood and sea glass to a piece of driftwood hanging horizontally. Ensure the pieces are different lengths to achieve a melodic sound when the wind blows.

Driftwood and Sea Glass Picture Frames

Decorate plain picture frames with pieces of driftwood and sea glass. Use strong glue to attach the materials to the frame, creating a beautiful border for your favorite beach photos.

Tips for Successful Projects

Here are some tips to ensure your driftwood and sea glass projects are a success:

  1. Plan Ahead: Sketch out your ideas and make a list of the materials you’ll need. This will help you stay organized and ensure you have everything you need before you start.
  2. Use the Right Tools: Depending on your project, you might need specific tools like a drill, saw, pliers, or wire cutters. Ensure you have the appropriate tools for your project to make the process smoother.
  3. Take Your Time: Don’t rush! Work at a pace that allows you to pay attention to detail and ensure the quality of your final piece.
  4. Safety First: When working with tools, adhesives, and other crafting materials, always prioritize safety. Wear appropriate protective gear such as gloves and safety glasses if necessary.

Driftwood And Sea Glass Projects

Conclusion

Driftwood and sea glass offer endless possibilities for creative projects. With a little imagination and some time spent beachcombing, you can create beautiful, unique pieces that capture the essence of the sea. Whether you’re making furniture, jewelry, or art, these natural materials are sure to inspire and enhance your creativity.

Feel free to share your own driftwood and sea glass project ideas or ask questions if you’re looking for more inspiration. Let’s turn those beach treasures into something special!

Filed Under: Driftwood Ideas Tagged With: Beach Art, crafts, Driftwood, home decor, Sea Glass

Driftwood Projects Unique Diy

May 21, 2024 by admin

Welcome to “Driftwood Projects Unique DIY,” where you’ll discover the charm and creativity of transforming driftwood into stunning, one-of-a-kind pieces for your home and garden. You’ll learn how to turn found treasures into eye-catching decorations, from rustic picture frames to whimsical wall art. With easy-to-follow instructions and a bit of imagination, you’ll be amazed by how driftwood can bring a touch of nature and elegance into your spaces. Embrace the beauty of the natural world and get started on your next unique DIY project today!

Driftwood Projects: Unique DIY

Do you ever find yourself strolling along the beach, collecting pieces of driftwood and wondering what kind of creative projects you can conjure up with these natural treasures? If so, you’re not alone. Driftwood, with its weathered appearance and unique shapes, is a favorite medium among DIY enthusiasts for creating art and home decor that is both stunning and environmentally friendly.

In this article, you’ll discover unique DIY driftwood projects that will inspire you to turn beach-combing finds into beautiful, functional decor. Whether you’re a seasoned crafter or someone looking for a new way to bring the coastal vibe into your home, these projects are perfect for adding a natural, rustic touch to any space.

Driftwood Projects Unique Diy

The Magic of Driftwood

Driftwood isn’t just any old piece of wood; it’s a testament to the power of nature. Each piece has been shaped and smoothed by the forces of water and wind, giving it a distinctive look that’s hard to replicate. This uniqueness makes driftwood a highly sought-after material for creating one-of-a-kind home decor items.

Why Choose Driftwood?

There are several reasons why you might want to choose driftwood for your next DIY project:

  1. Sustainability: Utilizing driftwood means you’re reusing natural materials, thus reducing waste and minimizing your environmental footprint.
  2. Aesthetic Appeal: The natural, weathered look of driftwood integrates seamlessly into both modern and rustic decor styles.
  3. Versatility: Driftwood can be used in a variety of projects, from large furniture pieces to small decorative items.

Preparing Your Driftwood

Before you can turn your driftwood into a masterpiece, you’ll need to prepare it properly. This involves cleaning, drying, and sometimes treating the wood to ensure it’s safe and ready for crafting.

Cleaning Driftwood

Cleaning driftwood involves removing any debris, salt, or organisms that may be clinging to it. Here’s a simple method to clean your driftwood:

  1. Rinse Thoroughly: Use fresh water to rinse off any sand, dirt, or salt.
  2. Scrub: Use a stiff brush to scrub the wood and remove any remaining debris.
  3. Soak: Soak the driftwood in a mixture of water and vinegar (1:1 ratio) for a couple of days. This helps to kill any bacteria or organisms.
  4. Rinse Again: After soaking, give the wood another good rinse with fresh water.

Drying and Treating Driftwood

It’s crucial to let your driftwood dry completely before starting any project. Here are the steps to dry and treat your driftwood:

  1. Drying: Place the driftwood in a dry, airy spot. Depending on the size and moisture content, this could take anywhere from a few days to a couple of weeks.
  2. Sun Drying: If possible, dry your driftwood in the sun. Sunlight helps to bleach and sanitize the wood naturally.
  3. Optional Treatments: For added preservation, you can treat the driftwood with a mixture of bleach and water (1:9 ratio). Rinse and dry thoroughly afterward.

Unique DIY Driftwood Projects

Now that your driftwood is prepped and ready, let’s dive into some unique DIY projects that you can create.

Driftwood Wall Art

A piece of driftwood wall art can be a stunning focal point in any room. You’ll need several pieces of driftwood, a backing board, and some screws or wood glue to assemble your art piece.

Steps to Create Driftwood Wall Art:

  1. Design Your Layout: Arrange the pieces on a flat surface until you’re happy with the design.
  2. Attach the Pieces: Use screws or a strong wood adhesive to attach each piece of driftwood to your backing board.
  3. Hang Your Art: Attach hanging hardware to the back of your board and display your new art piece on the wall.

Driftwood Mirrors

Incorporating driftwood into a mirror frame is a fantastic way to blend functionality with natural beauty.

Materials:

  • A basic mirror
  • Driftwood pieces
  • Strong adhesive
  • Backing board (if required)

Steps:

  1. Arrange Driftwood Around Mirror: Place your pieces around the mirror to find an arrangement you like.
  2. Attach Driftwood: Use strong adhesive to secure each piece to the mirror frame or backing board.
  3. Let Dry: Allow the adhesive to dry completely before hanging the mirror.

Driftwood Shelves

Create a unique shelving unit using larger pieces of driftwood. This project combines the rustic charm of natural wood with practical storage.

Materials:

  • Large driftwood pieces
  • Wooden or metal brackets
  • Screws
  • Drill

Steps:

  1. Choose Your Driftwood: Find strong, flat pieces that can support weight.
  2. Attach Brackets: Secure the brackets to the driftwood using screws and a drill.
  3. Install: Mount the shelves on your wall, ensuring they are level and secure.

Driftwood Candle Holders

Driftwood candle holders make beautiful centerpieces. Depending on the size and shape of your driftwood, you can create holders for small tea lights or larger pillar candles.

Steps:

  1. Select Driftwood: Choose pieces that are stable and lie flat.
  2. Drill Candle Holes: Use a spade bit to drill holes that fit your candles.
  3. Finish (Optional): Sand any rough edges and apply a clear sealant to protect the wood.

Driftwood Coat Rack

A driftwood coat rack can add a touch of rustic elegance to your entryway.

Materials:

  • Large, sturdy piece of driftwood
  • Coat hooks
  • Screws
  • Drill

Steps:

  1. Plan Hook Placement: Decide where you want to place your hooks and mark these spots on the driftwood.
  2. Attach Hooks: Secure the hooks to the driftwood using screws and a drill.
  3. Mount the Coat Rack: Attach hanging hardware to the back and install your new coat rack.

Final Touches and Tips

To elevate your driftwood projects, consider some final touches and tips that can add to both their appearance and longevity.

Finishing Touches

While driftwood looks beautiful in its natural state, applying a finish can help protect and enhance your projects. Here are some options:

  • Clear Sealant: Keeps the wood looking natural while providing protection.
  • Wood Stain: Enhances the wood grain and color, giving a richer appearance.
  • Paint: Adds a pop of color or helps to match existing decor.

General Tips

  1. Safety First: Always use protective gear when cutting, sanding, or drilling into driftwood.
  2. Plan Ahead: Sketch out your designs before starting to avoid mistakes.
  3. Test Adhesives: Make sure any glue or sealant you use is compatible with driftwood.

Driftwood Projects Unique Diy

Inspiration and Creativity

Don’t be afraid to think outside the box. Driftwood’s unique shapes and textures make it perfect for custom, imaginative projects. Here are some additional ideas to spark your creativity:

Driftwood Lamps

Transform driftwood pieces into the base for a floor or table lamp. This project requires some electrical know-how, but the result is a truly unique lighting solution.

Driftwood Picture Frames

Create custom picture frames by attaching small pieces of driftwood to a basic wooden frame. This makes a great personal touch for displaying your favorite photos.

Driftwood Tables

For more advanced crafters, consider building a coffee table or side table. Combine larger driftwood pieces with glass tops for a modern, beachy look.

Driftwood Garden Decor

Use driftwood to create artistic garden decorations like planters, trellises, or garden pathways. The natural look of driftwood blends beautifully with outdoor settings.

Driftwood Project Examples Breakdown

Here’s a simple table to summarize and break down some of the driftwood projects and the level of difficulty associated with them:

ProjectMaterials NeededDifficulty LevelApproximate Time
Driftwood Wall ArtDriftwood pieces, backing board, screws/glueEasy2-3 hours
Driftwood MirrorMirror, driftwood pieces, adhesive, backing boardMedium3-4 hours
Driftwood ShelvesDriftwood pieces, brackets, screws, drillMedium2-3 hours
Driftwood Candle HoldersDriftwood pieces, spade bit, drillEasy1-2 hours
Driftwood Coat RackDriftwood piece, coat hooks, screws, drillMedium2-3 hours
Driftwood LampsDriftwood pieces, lamp kit, drill, electrical toolsHard4-5 hours
Driftwood Picture FramesSmall driftwood pieces, basic frame, adhesiveEasy1-2 hours
Driftwood TablesLarge driftwood pieces, glass top, screws, bracketsHard5-6 hours
Driftwood Garden DecorDriftwood pieces, depends on project specificsVariesVaries

Conclusion

Creating unique DIY driftwood projects is not only rewarding but also a wonderful way to incorporate natural elements into your home decor. From simple candle holders to intricate pieces of furniture, the possibilities are nearly endless.

So, next time you’re at the beach, gather some driftwood, let your creativity flow, and enjoy the satisfaction of making something truly unique and beautiful. Happy crafting!

Filed Under: Driftwood Ideas Tagged With: crafts, DIY, Driftwood, home decor, Upcycling

Driftwood Projects

May 19, 2024 by admin

Welcome to Driftwood Projects, where your creativity finds its muse in the naturally weathered beauty of driftwood. You’ll discover a variety of easy-to-follow projects that transform simple driftwood pieces into stunning home decor. From rustic picture frames to elegant centerpieces and unique wall art, these DIY ideas are all about bringing a touch of nature indoors. Whether you’re a seasoned crafter or just looking for a new hobby, Driftwood Projects will inspire you to create something beautiful, sustainable, and uniquely yours.

Driftwood Projects

Driftwood Projects

Have You Ever Wondered What You Could Create With Driftwood?

Ever walked along the beach or a lake and found yourself mesmerized by a piece of driftwood? It’s almost as if these naturally sculpted treasures whisper stories of their journey from the forest to the ocean or a river, finally washing up on the shore for you to discover. Driftwood is not just a piece of wood—it’s a wonderful medium that can be transformed into stunning artwork, functional furniture, and unique home décor items.

In this article, we will dive deep into various driftwood projects, offering inspiration and step-by-step guides to help you unleash your creativity. Whether you’re an experienced DIY enthusiast or a beginner eager to start a new hobby, you’ll find a project that excites you. Let’s dive in!

Why Driftwood?

You might be wondering why driftwood has become such a popular medium for DIY projects. Here are some compelling reasons:

Natural Beauty

Driftwood has a rustic charm and unique textures that can’t be replicated by anything man-made. Each piece is different, showcasing the artistry of nature itself. The weathering process of water and time results in wood that’s smooth and uniquely shaped, perfect for a variety of projects.

Eco-Friendly

Using driftwood is an excellent way to incorporate sustainable materials into your projects. By reclaiming wood that has naturally fallen and washed ashore, you’re giving new life to something that would otherwise just sit on the beach or rot away.

Versatility

Driftwood’s natural appeal makes it suited for plenty of projects. Whether you’re looking to create artwork, furniture, or simple decorative items, driftwood provides a versatile medium that can adapt to your vision.

Getting Started: Collecting and Preparing Driftwood

Before diving into your projects, the first step is to collect and prepare your driftwood. Here’s a detailed guide on how to get started.

Collecting Driftwood

Where to Find Driftwood

You can find driftwood along the shores of beaches, lakes, rivers, and even in forest streams. Keep an eye out for areas where water flow tends to deposit debris. Don’t forget to check local regulations, as some areas have restrictions on collecting natural materials.

Safety First

When collecting driftwood, always prioritize safety. Wear sturdy shoes to protect against sharp objects and bring gloves to handle the wood. Ensure you’re familiar with your surroundings to avoid areas with dangerous tides or unstable grounds.

Selecting the Right Pieces

Not all driftwood is suitable for projects. Look for pieces that are well-weathered, free of rot, and unique in shape and size. Avoid wood with mold or excessive cracks.

Preparing Driftwood

Once you’ve collected your driftwood, it’s essential to clean and prepare it before starting your project.

Cleaning

  1. Rinse: Start by rinsing off sand, dirt, and salt using a hose.
  2. Soak: Soak the wood in a mixture of water and bleach (10:1 ratio) for 24 hours to kill any insects or bacteria. This will help preserve the wood.
  3. Scrub: Use a stiff brush to scrub off any remaining debris.
  4. Rinse Again: Thoroughly rinse the wood after soaking and scrubbing.
  5. Dry: Allow the wood to dry completely, preferably in the sun, for several days.

Sanding

After the wood is dry, you can sand it to smooth out rough edges and enhance its natural beauty. Use varying grits of sandpaper, starting coarse and moving to fine, to achieve the desired smoothness.

Driftwood Projects: A World of Creative Possibilities

Now that you have your driftwood ready, let’s explore different projects you can try. We’ll cover projects suitable for various skill levels and purposes.

Simple Driftwood Projects

These projects are perfect for beginners or those looking for quick and easy crafts.

Driftwood Candle Holders

Materials Needed:

  • Small pieces of driftwood
  • Tea light candles
  • Drill with a hole saw or spade bit

Steps:

  1. Choose a piece of driftwood that can hold a tea light candle.
  2. Using the drill and appropriate bit, create a hole slightly larger than the base of the tea light.
  3. Insert the tea light candle into the hole.

You’ve just created a charming and rustic candle holder!

Driftwood Wall Art

Materials Needed:

  • Various pieces of driftwood
  • Hammer and nails or glue
  • Twine

Steps:

  1. Arrange the driftwood pieces on a flat surface in a pattern or shape you like.
  2. Secure the pieces together using nails or glue.
  3. Attach a piece of twine to the back for hanging.

This project is a simple way to add a touch of nature to your home décor.

Intermediate Driftwood Projects

Once you’re comfortable with basic projects, you can move on to more challenging ones.

Driftwood Mirror

Materials Needed:

  • Mirror
  • Medium-sized pieces of driftwood
  • Strong adhesive or glue gun

Steps:

  1. Arrange the driftwood pieces around the mirror’s frame to determine your pattern.
  2. Start gluing the pieces onto the frame, ensuring they’re securely attached.
  3. Allow the glue to dry completely.

Now you have a beautiful, nature-inspired mirror!

Driftwood Coat Rack

Materials Needed:

  • Long piece of driftwood
  • Coat hooks
  • Screws and screwdriver

Steps:

  1. Select a piece of driftwood that’s long and sturdy enough to hold several coats.
  2. Attach the coat hooks to the driftwood using screws.
  3. Mount the driftwood to the wall using appropriate wall anchors.

Your unique coat rack is now ready to use!

Advanced Driftwood Projects

For those of you who are more experienced or looking for a bigger challenge, these advanced projects will allow you to create functional pieces of art.

Driftwood Furniture

Materials Needed:

  • Large pieces of driftwood
  • Screws, nails, and brackets
  • Drill and saw

Steps:

  1. Design your piece of furniture, such as a coffee table or a bench.
  2. Cut the driftwood pieces to the required lengths.
  3. Assemble the pieces using screws, nails, and brackets for added stability.
  4. Sand and finish the furniture to your liking.

Creating furniture from driftwood is a rewarding experience that results in a truly unique piece for your home.

Driftwood Chandelier

Materials Needed:

  • Several pieces of driftwood
  • Light fixture kit
  • Strong rope or chain
  • Drill and screws

Steps:

  1. Design the layout of your chandelier.
  2. Drill holes in the driftwood pieces to run the wiring through.
  3. Assemble the driftwood and secure with screws and rope or chain.
  4. Install the light fixture and wiring.

This eye-catching chandelier will be the highlight of any room.

Driftwood Projects

Maintenance and Care for Driftwood Projects

To ensure your driftwood creations last a long time, follow these maintenance tips.

Regular Cleaning

Dust your driftwood pieces regularly with a soft cloth. If necessary, you can use a damp cloth to gently wipe them down.

Protective Coating

Consider applying a protective coating like polyurethane or linseed oil to your driftwood projects. This will help preserve the wood’s natural beauty and protect it from moisture and wear.

Repairs

If you notice any cracks or damage, address them promptly. Small cracks can be filled with wood filler, while larger repairs might require reassembling parts of your project.

Tips for Successful Driftwood Projects

Here are a few additional tips to ensure your driftwood projects are successful and enjoyable.

Plan Ahead

Outline your project and gather all materials before you start. Having a clear plan can help prevent mistakes and ensure a smoother process.

Experiment

Don’t be afraid to try new ideas and techniques. The unique shapes and textures of driftwood lend themselves to creative and artistic expression.

Patience is Key

Some driftwood projects, especially larger ones, can be time-consuming. Take your time to ensure each step is done properly for the best results.

Conclusion

Driftwood is a versatile and sustainable material that can be transformed into beautiful and functional pieces of art, furniture, and home décor. From simple candle holders to complex furniture, there’s a driftwood project for everyone, regardless of skill level.

By collecting and preparing your driftwood properly and following detailed project steps, you can create stunning pieces that not only add a touch of nature to your home but also tell a story of their own unique journey. So the next time you find yourself strolling along a beach or riverbank, keep an eye out for that perfect piece of driftwood—it might just be the start of your next creative adventure.

Happy crafting!

Filed Under: Driftwood Ideas Tagged With: crafting, Driftwood, home decor, projects, Rustic

Driftwood Fireplace Logs

May 19, 2024 by admin

When it comes to creating a cozy and inviting atmosphere in your home, Driftwood Fireplace Logs are an excellent choice. These unique logs bring a rustic charm and natural beauty to your fireplace, instantly enhancing the warmth and ambiance of any room. Sourced from naturally weathered wood found along coastal shores, each piece of driftwood carries its own story, adding a touch of coastal elegance to your decor. Whether you’re curling up with a good book, hosting a winter gathering, or simply enjoying a quiet evening by the fire, Driftwood Fireplace Logs offer a beautiful and eco-friendly way to transform your space.

Driftwood Fireplace Logs

Have you ever wondered about the charm and functionality of driftwood fireplace logs? If so, you’re not alone. The rustic beauty and unique characteristics of driftwood make it a popular choice for fireplace enthusiasts. Whether you’re aiming to create a cozy atmosphere or simply want an eco-friendly alternative, driftwood might be just what you need.

What are Driftwood Fireplace Logs?

Driftwood fireplace logs are pieces of wood that have been naturally weathered and smoothed by water, typically found along shorelines of rivers, lakes, or oceans. These logs are often revered for their distinct appearance and the atmosphere they bring to any fireplace setting.

Characteristics of Driftwood

Every piece of driftwood you find is unique, reflecting the journey it has taken through water and time. It’s usually lightweight and has an appealing, weathered look with smooth edges. The diverse shapes and sizes contribute to its charm and versatility.

CharacteristicDescription
TextureSmooth and polished by natural elements
WeightGenerally lightweight due to exposure to elements
AppearanceWeathered look, varies in shapes and sizes
ColorOften pale or bleached but can range in various hues

Why Choose Driftwood?

Choosing driftwood fireplace logs can offer various benefits. Not only do they serve as a beautiful decorative element, but they also have a lower environmental impact compared to traditional firewood.

Benefits of Using Driftwood in Your Fireplace

Why should you consider using driftwood for your fireplace? Here are some compelling reasons:

Eco-Friendly Option

Driftwood is naturally abundant and doesn’t require cutting down trees, making it a more sustainable option. Using driftwood that washes up on shores helps clean up the environment.

Unique Aesthetics

Each driftwood log is unique, giving your fireplace a bespoke and one-of-a-kind look. Its weathered, rustic charm can complement various styles, from coastal to farmhouse or even modern interiors.

Versatility

Whether you’re using it for kindling or as a decorative element, driftwood’s varied shapes and sizes make it highly versatile. It’s perfect for artistic projects as well!

Driftwood Fireplace Logs

Potential Drawbacks to Consider

While driftwood has numerous benefits, there are also a few drawbacks you may want to consider.

High Salt Content

Driftwood from ocean sources often contains high salt levels, which can potentially damage your fireplace or chimney over time. The salt can also produce excessive sparks.

Unpredictable Burning Patterns

Due to its porous nature, driftwood can sometimes burn unpredictably, making it less ideal for consistent, stable flames.

Availability

Finding good quality driftwood might be challenging depending on your location and local regulations on collecting it.

Preparing Driftwood for Use

If you’ve decided to use driftwood for your fireplace, you’ll need to prepare it properly to ensure safe burning.

Cleaning

Start by rinsing the driftwood thoroughly to remove sand, debris, and salt. You might need to soak it in freshwater for a few days, changing the water regularly to ensure the salt leaches out.

Drying

After washing, let the driftwood dry completely. This can take several weeks, depending on the wood’s size and environmental conditions. Proper drying is crucial to avoid excessive smoke and ensure safe combustion.

Cutting to Size

For ease of use, you may need to cut larger pieces of driftwood into smaller logs. Ensure they fit your fireplace comfortably and adhere to safety guidelines.

Driftwood Fireplace Logs

Safety Considerations

Ensuring your fireplace safety is crucial when burning any type of wood, including driftwood.

Ventilation

Good ventilation is essential to prevent harmful smoke and fumes from accumulating in your home. Make sure your chimney and flue are clean and in good working order.

Fire Safety Measures

Always follow basic fire safety practices. Use a fire screen to prevent sparks from escaping into the room, and never leave a fire unattended. Keep a fire extinguisher or bucket of water handy just in case.

Combining Driftwood with Other Fireplace Logs

You might also consider mixing driftwood with other types of logs to balance out its burning properties. Here are a few options:

Type of WoodCharacteristics
Hardwood (e.g., oak)Burns slowly and steadily, providing consistent heat
Softwood (e.g., pine)Burns quickly, great for kindling
Fruitwood (e.g., apple)Adds a pleasant aroma when burning

By combining driftwood with other types of wood, you can achieve a more balanced burn and dynamic fire display.

Driftwood Display Ideas

Even when not used for burning, driftwood can serve as a beautiful decorative element in your fireplace.

Rustic Decor

You can arrange the driftwood logs artistically to create a rustic, beach-inspired focal point. Complement it with related decor like seashells, pebbles, or coastal-themed art.

Seasonal Themes

Driftwood can be integrated into seasonal fireplace decorations. For instance, during the holidays, you can add fairy lights and ornaments to create a festive display.

Legal Considerations

Before collecting driftwood, check your local laws and regulations. In some areas, it might be illegal to remove driftwood from beaches or designated conservation areas.

Permits

Some locations may require permits for collecting driftwood. Always ensure you are compliant with local regulations to avoid fines or legal issues.

Purchasing Driftwood

If finding and preparing your own driftwood seems daunting, you can purchase pre-prepared driftwood fireplace logs from various retailers.

Online Stores

Numerous online stores specialize in selling driftwood and driftwood products. Ensure you read reviews and ratings to find a reputable seller.

Local Retailers

Check with local home improvement stores or specialty shops that sell fireplace accessories. They might have driftwood logs available.

Driftwood and Environmental Impact

Understand the ecological impact of driftwood and its role in ecosystems.

Natural Ecosystems

Driftwood plays a crucial role in certain ecosystems. It provides habitat for marine creatures and contributes to beach stability. Collecting driftwood can disturb these natural processes.

Responsible Sourcing

To mitigate environmental impact, consider sourcing driftwood from locations where its removal won’t harm the ecosystem. When purchasing, look for suppliers committed to sustainable practices.

Conclusion

Driftwood fireplace logs offer a unique, eco-friendly, and aesthetically pleasing option for your fireplace. They come with their own set of benefits and considerations and can transform your living space into a cozy, charming retreat. By preparing and using them responsibly, you can enjoy the beauty and warmth they bring to your home.

So, next time you’re walking along the beach or river, keep an eye out for that perfect piece of driftwood. It just might become the highlight of your next cozy evening by the fire.

Filed Under: Driftwood Ideas Tagged With: Driftwood, Fireplace, home decor, Logs

Driftwood Projects Unique

May 19, 2024 by admin

Welcome to the enchanting world of “Driftwood Projects Unique,” where you will discover the endless possibilities that come with transforming simple driftwood into extraordinary creations. This article guides you through the magical process of selecting the perfect pieces, envisioning their potential, and crafting them into remarkable artwork. From rustic home decor to one-of-a-kind sculptures, you’ll be inspired to unleash your creativity and make the most out of nature’s gifts. Dive in and let the beauty of driftwood charm its way into your next DIY project!

Driftwood Projects Unique: Crafting the Extraordinary From Nature

Have you ever stumbled upon a piece of driftwood and wondered about its journey? Or perhaps you’ve imagined transforming it into a stunning piece of art? Driftwood projects are an incredible way to marry creativity with nature, offering a unique touch to any space or occasion. Let’s dive into the world of driftwood and explore how you can create unique projects that will leave everyone in awe.

Driftwood Projects Unique

Understanding Driftwood

Before you can start crafting your unique projects, it’s essential to understand what driftwood is and where it comes from. Driftwood is wood that has been washed ashore by the action of winds, tides, or waves. These pieces of wood can come from trees, shrubs, wood waste, or even lost cargo from ships.

Why Use Driftwood?

Driftwood is more than just a piece of wood. It has a story, a past filled with adventure, and exposure to the elements that give it a distinct look and texture. Using driftwood in your projects not only adds character and history but is also an eco-friendly choice. You are recycling nature’s remnants, turning them into beautiful and functional pieces of art.

Getting Started with Driftwood Projects

Starting on your driftwood project can seem daunting, but with the right approach, it can become a fulfilling and exciting endeavor. Here are some steps to guide you:

Collecting and Preparing Driftwood

The first step to any driftwood project is sourcing your materials. You might find driftwood along beaches, lakesides, or riverbanks. Always be mindful of the environment and ensure that collecting driftwood is permitted in the area you are visiting.

Cleaning Driftwood

Once you’ve gathered your driftwood, cleaning is essential. This not only removes any dirt or organisms attached but also prepares the wood for crafting. Here’s a simple method:

  1. Soak the driftwood in a large container filled with water and bleach (a ratio of 1:9). Let it soak for 24 hours.
  2. Scrub the wood with a stiff brush to remove any remaining dirt.
  3. Rinse thoroughly with clean water.
  4. Dry the wood completely in the sun, which may take several days.

Choosing Your Project

The beauty of driftwood is its versatility. From small decorative pieces to large furniture items, the possibilities are nearly endless. Here are some project ideas to get you inspired:

  1. Driftwood Wall Art
  2. Driftwood Mirrors
  3. Driftwood Shelves
  4. Driftwood Furniture
  5. Driftwood Candle Holders
  6. Driftwood Planters

Let’s explore a few of these projects in more detail.

Creating Driftwood Wall Art

Driftwood wall art can range from simple, minimalistic designs to complex, intricate patterns. This project is perfect for adding a natural touch to your home décor.

Materials Needed

  • Various pieces of driftwood
  • Strong adhesive glue or nails
  • Backing board (optional)
  • Hooks for hanging (if needed)

Steps to Create Driftwood Wall Art

  1. Design Your Layout: Lay out your pieces on the floor or a flat surface to determine your pattern. Play with different arrangements until you find one that you love.

  2. Attach the Pieces: Using a strong adhesive glue, attach your driftwood pieces onto a backing board or directly on the wall. You may also use nails if your design allows it.

  3. Finishing Touches: Add hooks to the back if you are using a backing board or ensure that the pieces are securely attached if directly on the wall.

Feel proud of your unique piece of art. It’s a great conversation starter and adds a personal touch to your space.

Crafting a Driftwood Mirror

A driftwood mirror can be a striking addition to any room. Combining the reflective quality of the mirror with the natural, rugged texture of driftwood creates a stunning contrast.

Materials Needed

  • A mirror (shape and size of your choice)
  • Driftwood pieces
  • Strong adhesive glue
  • Scissors or small saw (for cutting pieces if necessary)
  • Sandpaper (optional)

Steps to Create a Driftwood Mirror

  1. Prepare the Mirror: Clean your mirror thoroughly to ensure there is no dust or grime that will affect the adhesive.

  2. Arrange the Driftwood: Lay the mirror flat and place the driftwood pieces around the edges. Play with the arrangement until you are happy with the look.

  3. Attach the Driftwood: Use strong adhesive glue to attach the driftwood pieces to the mirror’s frame. Hold each piece in place until the glue sets.

  4. Finish the Edges: Sand any rough edges if necessary, or trim pieces to fit your design snugly.

Your driftwood mirror is ready to hang and admire. It’s not only functional but also serves as a piece of art.

Driftwood Projects Unique

Making Driftwood Shelves

Driftwood shelves combine function with beauty, offering a rustic yet refined way to display your belongings.

Materials Needed

  • Sturdy driftwood pieces (for the shelf and supports)
  • Screws and brackets
  • Drill
  • Level

Steps to Create Driftwood Shelves

  1. Select Your Driftwood: Choose sturdy, flat pieces of driftwood for the shelving surface. Ensure they are strong enough to support the weight of what you plan to place on them.

  2. Prepare the Supports: Cut smaller pieces of driftwood to the desired length for the supports. Ensure they are even and level.

  3. Attach the Supports: Use screws and brackets to attach the supports to the wall. Make sure they are level and secure.

  4. Install the Shelves: Place your shelf pieces on the supports and secure them with screws. Double-check that everything is level and stable.

Now you have a set of driftwood shelves that are not only practical but add a unique aesthetic to your space.

Building Driftwood Furniture

Larger driftwood projects like furniture require more skill and patience but can result in stunning, one-of-a-kind pieces.

Materials Needed

  • Large, sturdy pieces of driftwood
  • Screws and bolts
  • Drill
  • Sandpaper
  • Wood finish or sealant

Steps to Build Driftwood Furniture

  1. Plan Your Design: Draw out a detailed plan of your furniture piece, including dimensions and how the pieces will fit together.

  2. Select and Prepare Driftwood: Choose pieces that fit your design. Sand any rough edges and cut pieces to size if necessary.

  3. Assembly: Use screws and bolts to securely attach the pieces. Start with the main structure and add details as you go.

  4. Finishing: Apply a wood finish or sealant to protect your furniture from wear and tear.

Creating driftwood furniture is a rewarding project that results in a functional and beautiful piece. Whether it’s a coffee table, bench, or chair, it’s sure to be a conversation starter.

Crafting Driftwood Candle Holders

Driftwood candle holders are easy to make and add a cozy, natural touch to any setting.

Materials Needed

  • Small to medium driftwood pieces
  • Drill with a spade bit or hole saw
  • Sandpaper
  • Tea light candles

Steps to Create Driftwood Candle Holders

  1. Select Your Driftwood: Choose pieces that are flat and stable to hold the candles securely.

  2. Drill Holes: Use a drill with a spade bit or hole saw to create a hole for the tea light candle. Make sure the hole is deep enough for the candle to sit securely.

  3. Smooth the Edges: Sand the edges of the holes to remove any rough spots.

  4. Insert Candles: Place the tea light candles in the holes. Ensure they fit snugly.

Your driftwood candle holders are ready to light up any occasion with a warm, rustic glow.

Designing Driftwood Planters

Create a beautiful blend of nature by using driftwood as planters. These can be used indoors or outdoors and are perfect for succulents and air plants.

Materials Needed

  • Hollow or curved driftwood pieces
  • Soil
  • Plants (succulents, air plants, or small flowers)
  • Moss (optional, for decoration)

Steps to Create Driftwood Planters

  1. Select Your Driftwood: Choose pieces that have natural hollows or curves to hold soil and plants.

  2. Prepare the Driftwood: Clean any dirt from the wood and ensure it has enough space for your plants.

  3. Add Soil: Fill the hollow areas with soil, ensuring it’s enough to support your plants.

  4. Plant Your Greenery: Place your plants in the soil. Add moss around the base for decoration if desired.

  5. Water and Care: Water your plants as needed, depending on their type.

Your driftwood planters are now ready, bringing a touch of nature and freshness to your home.

Tips for Successful Driftwood Projects

To ensure your driftwood projects turn out beautifully, consider these tips:

Safety First

Always use protective gear such as gloves and goggles when working with tools and cleaning driftwood.

Proper Tools

Ensure you have the right tools for each project. Investing in quality tools can make your work easier and more precise.

Maintenance

Driftwood projects, especially those used outdoors, may require regular maintenance such as reapplying sealants or finishes to keep the wood protected and looking good.

Creativity and Patience

Working with driftwood might require some adjustments as you go along. Be patient and let your creativity flow to adapt to the natural shapes and forms of the wood.

Eco-Friendly Practices

Always collect driftwood responsibly. Avoid taking wood from protected areas and be mindful of preserving nature.

Conclusion

Driftwood projects offer a beautiful way to incorporate natural elements into your home or garden. Each piece of driftwood tells a story, and by transforming it into unique projects, you are giving it a new chapter. From wall art and mirrors to furniture and planters, the possibilities with driftwood are limited only by your imagination.

By understanding how to properly prepare and work with driftwood, you can create stunning, one-of-a-kind pieces that bring nature’s beauty into your everyday life. Whether you are a seasoned crafter or a newcomer, driftwood projects allow you to explore your creativity while making something truly unique. So next time you find a piece of driftwood, think of the endless possibilities it holds and start crafting your extraordinary masterpiece.

Filed Under: Driftwood Ideas Tagged With: Driftwood, Eco-friendly, home decor, projects, Unique Crafts

Driftwood And Yarn Wall Art

May 18, 2024 by admin

Creating a beautiful piece of driftwood and yarn wall art is easier than you might think, and it adds a touch of coastal elegance to your space. You’ll combine the natural textures of driftwood with the vibrant colors of yarn to craft a unique and eye-catching display. This DIY project is perfect for anyone looking to personalize their home decor with a handmade touch that blends rustic charm with creative flair. Following simple steps, you’ll transform ordinary materials into a striking art piece that will surely be a conversation starter.

Driftwood And Yarn Wall Art

Have you ever walked by the beach, picked up some driftwood, and wondered what you could create with it? Driftwood and yarn wall art is not only a great way to bring a touch of the seaside into your home but also a fun and creative project that lets your imagination soar. Let me take you through the magical world of creating stunning wall art using the simplicity of driftwood and the endless possibilities of yarn.

What is Driftwood and Yarn Wall Art?

Driftwood and yarn wall art is a unique form of decoration that combines the natural beauty of driftwood with the vibrant and versatile textures of yarn. This project can be as simple or as intricate as you desire, yielding beautiful pieces for your home that are not only decorative but also personal.

Why Choose Driftwood and Yarn Wall Art?

Natural Appeal

Driftwood inherently brings a touch of nature into your living space. Each piece is unique and has its own story, having been shaped and sculpted by the elements over time. The natural look and feel of driftwood create a calm and serene atmosphere in any room.

Versatility with Yarn

Yarn comes in countless colors, textures, and thicknesses, offering a playground for your creativity. Whether you prefer minimalist designs or intricate patterns, yarn adapts easily to your vision.

Sustainable and Eco-Friendly

By using driftwood and yarn, you’re crafting artwork from sustainable materials. Driftwood is often drifted ashore by natural forces, and yarn can be sourced sustainably, contributing to a more eco-conscious decorating choice.

Gathering Materials

Finding the Perfect Driftwood

Driftwood is typically found along beaches, riverbanks, and lake shores. Look for pieces that have interesting shapes and textures. Make sure the wood is thoroughly dry and free of any mold or insects.

Choosing the Right Yarn

Yarn selection is crucial in defining the aesthetic of your artwork. Do you want vibrant, bold colors, or neutral, calming tones? Wool, cotton, and synthetic yarns each have their unique textures and finish. Consider what suits the mood you want to create.

Additional Supplies

Here’s a list of what you’ll need to get started:

ItemDescription
ScissorsFor cutting yarn to desired lengths
Hot Glue GunTo secure the yarn and wood pieces if needed
Measuring TapeFor precise measurements
Beads and EmbellishmentsOptional items to add extra flair
Comb or BrushTo smooth out yarn if using finer materials
Hooks or NailsFor hanging your finished artwork

Driftwood And Yarn Wall Art

Preparing Your Driftwood

Cleaning the Driftwood

Before starting your project, it’s important to clean the driftwood thoroughly. Soak it in a water-vinegar solution to kill any bacteria or organisms. Rinse it well and let it dry completely.

Sanding and Sealing

While sanding driftwood is optional, it can help to smooth out rough edges and highlight the natural grain. If you want to ensure longevity, consider sealing the wood with a clear varnish.

Designing Your Yarn Patterns

Simple Wraps

For a minimalist approach, simply wrap yarn around the driftwood in your chosen pattern. This method is quick and highlights the natural beauty of the wood.

Macrame Techniques

Macrame involves knotting yarn in intricate patterns. This method might take longer, but it allows for gorgeous, detailed designs that can elevate the elegance of your wall art.

Adding Embellishments

Once you’ve wrapped or knotted your yarn, adding beads, feathers, or other embellishments can give your artwork a unique and personalized touch.

Step-by-Step Guide to Creating Your Driftwood and Yarn Wall Art

Step 1: Plan Your Design

Sketch out your ideas on paper. Planning your design will make the process smoother. Decide on the placement of colors, patterns, and any additional accessories.

Step 2: Measure and Cut Your Yarn

Measure the yarn according to your design and cut it to the required lengths. It’s better to cut a little extra to avoid running short as you wrap or knot.

Step 3: Start Wrapping or Knotting

Begin wrapping or knotting the yarn around your driftwood. Ensure the starting point is secure either by tying a tight knot or using hot glue. Take your time to maintain even tension as you work.

Step 4: Secure Your Yarn

Once your design is complete, securely tie off the end of the yarn or discreetly glue it in place. Trim any excess yarn for a neat finish.

Step 5: Add Embellishments (If Desired)

Feel free to get creative by adding beads, feathers, or other embellishments. Attach them securely with glue or by threading them onto the yarn.

Step 6: Prepare for Hanging

Attach hooks or loops to the back of your driftwood if necessary. Make sure they are secure to avoid any accidents when the art piece is hung.

Driftwood And Yarn Wall Art

DIY Variations and Inspirations

Bohemian Chic

For a bohemian touch, opt for earthy tones and natural fibers. Incorporate feathers, beads, and even small seashells to enhance the seaside feel.

Modern Minimalist

Choose monochromatic yarns and simple, clean lines. The key is in the elegance of simplicity, allowing the natural driftwood to be the focal point.

Rustic Charm

Combine different earthy colors and use thicker yarn or twine. This style highlights a cozy, rustic vibe perfect for country homes or cabins.

Troubleshooting Common Issues

Uneven Yarn Tension

If your yarn tension is uneven, consider using a brush or comb to even it out. Practice maintaining consistent tension as you work.

Driftwood Stability

Make sure your driftwood is not too brittle. If it’s breaking or crumbling, it might not be suitable for intricate designs.

Securing Embellishments

If your embellishments are not staying in place, try reinforcing them with a stronger adhesive or tying them more securely with knots.

Displaying Your Art

Choosing the Right Location

Decide where to display your driftwood and yarn wall art. It could be a living room, bedroom, or even a bathroom to enhance the nautical theme.

Grouping Wall Art

Consider creating multiple pieces that complement each other and arranging them together on a wall for an added visual impact.

Hanging Tips

Ensure you use appropriate wall hooks or nails that can support the weight of your artwork. Double-check the balance so that the art hangs straight.

Driftwood and Yarn Wall Art in Home Décor

Enhancing Aesthetics

Driftwood and yarn wall art can enhance your home’s aesthetics by adding a touch of nature combined with artistic creativity. It can be a statement piece that draws attention and brings character to any room.

Creating Themes

Use your artwork to tie together a theme in a room, whether it’s coastal, bohemian, rustic, or modern. The versatility of driftwood and yarn can adapt to any style.

Seasonal Decorations

Consider creating different pieces for various seasons. Light, airy designs for summer, warm tones for autumn, and rich, cozy yarns for winter can keep your home stylish year-round.

The Benefits of Crafting

Stress Relief

Engaging in creative projects like driftwood and yarn wall art can be a great stress reliever. It allows you to focus on the task at hand and forget about daily pressures.

Boosting Creativity

Crafting stimulates your creativity. Exploring different designs, colors, and patterns can ignite your imagination and lead to more creative endeavors.

Personalized Home Decor

One of the biggest advantages is the ability to personalize your home decor. Crafting your own wall art means that no one else will have the same piece, making your home truly unique.

Safety Tips

Handling Tools

When using scissors, hot glue guns, and other crafting tools, make sure to handle them carefully to prevent any injuries.

Ventilation

If working with adhesives or sealants, ensure you’re in a well-ventilated area to avoid inhaling any harmful fumes.

Supervision

If kids are involved in the project, supervise them closely especially when handling hot glue guns or sharp objects.

Driftwood and Yarn Wall Art for Gifting

Personalized Gifts

Create personalized wall art as gifts for your loved ones. Tailor the colors and designs to match their personality and home decor.

Special Occasions

Design custom pieces for special occasions like birthdays, anniversaries, or holidays. Handmade gifts tend to have a more emotional impact on the receiver.

Gift Wrapping Tips

Consider eco-friendly gift wrapping options. Use recycled paper or repurpose materials that complement the natural theme of your artwork.

Conclusion

Driftwood and yarn wall art is a delightful way to bring nature and creativity into your living space. It’s a sustainable, versatile, and highly personal art form that anyone can enjoy. Whether you’re a seasoned crafter or just starting, the possibilities are endless. So next time you find yourself by the shore, pick up that piece of driftwood, grab some yarn, and let your creativity flow. Happy crafting!

Remember, your imagination is the only limit. Let your spirit of creativity take over and create something truly unique and beautiful. Enjoy the process, and take pride in the serene, natural beauty you bring into your home through driftwood and yarn wall art.

Filed Under: Driftwood Ideas Tagged With: Driftwood, Handmade, home decor, Wall Art, Yarn

Diy Driftwood Yard Art

May 17, 2024 by admin

Welcome to the wonderful world of creating your own DIY driftwood yard art! Driftwood can add a unique and natural touch to your outdoor space, and with a little creativity, you can transform it into stunning pieces of art. In this article, you will learn some simple and creative ways to incorporate driftwood into your yard decor, from creating driftwood sculptures to making driftwood planters. So grab some driftwood and let your imagination run wild as you bring a touch of the beach to your backyard!

“Diy Driftwood Yard Art”

Have you ever taken a walk on the beach and come across beautifully weathered pieces of driftwood? These smooth, sun-bleached branches and logs can make for stunning yard art pieces that add a touch of natural beauty to your outdoor space. In this article, we’ll show you how to create your own DIY driftwood yard art, bringing a piece of the beach right to your backyard.

Finding Driftwood

When it comes to creating driftwood yard art, the first step is finding the perfect pieces of driftwood to work with. Head to your nearest beach or riverbank to start your search. Look for pieces that are smooth, weathered, and interesting in shape. Remember to only collect driftwood from public beaches or areas where collecting is allowed, and always respect the natural environment by following local laws and regulations.

Cleaning and Preparing Driftwood

Before you begin creating your driftwood yard art, it’s important to clean and prepare the pieces you’ve collected. Start by scrubbing the driftwood with a brush and warm, soapy water to remove any sand, dirt, or residue. Rinse the driftwood thoroughly and allow it to dry completely before moving on to the next step.

Cleaning Supplies:

  • Brush
  • Warm, soapy water
  • Rinse with freshwater
  • Towels for drying

Cleaning and preparing your driftwood will not only help to remove any debris or unwanted critters but will also help to enhance the natural colors and textures of the wood.

Diy Driftwood Yard Art

DIY Driftwood Yard Art Ideas

Now that you’ve collected and cleaned your driftwood, it’s time to get creative with your yard art projects. Here are a few ideas to inspire your DIY driftwood creations:

Driftwood Wind Chimes

Create a beautiful and soothing wind chime using driftwood pieces of varying lengths. Attach small bells or seashells to the ends of each driftwood piece with string or fishing line. Hang your driftwood wind chime in a sunny spot in your yard and listen to the peaceful sounds as the wind blows through.

Driftwood Sculptures

Use your driftwood pieces to create unique sculptures for your yard. Arrange the driftwood in interesting shapes and sizes, and secure them together using glue, wire, or nails. You can create abstract shapes, animals, or even geometric designs to add a touch of artistry to your outdoor space.

Driftwood Planters

Turn your driftwood pieces into rustic planters for your favorite flowers or succulents. Hollow out a section of the driftwood to create a small pot, then fill it with soil and plant your greenery. These driftwood planters are perfect for adding a natural and whimsical touch to your garden or patio.

Driftwood Garden Markers

Personalize your garden with driftwood markers for your plants and herbs. Write the names of your plants on small pieces of driftwood using a permanent marker or paint, then place them in the soil next to each plant. These driftwood garden markers not only look charming but also help you keep track of your garden layout.

Securing Driftwood Yard Art

Once you’ve created your driftwood yard art pieces, it’s important to secure them properly in your outdoor space to ensure they withstand the elements and stay in place. Depending on the size and weight of your driftwood art, you may need to use different methods for securing them:

Driftwood Yard Art Placement

Consider the placement of your driftwood yard art pieces to ensure they are protected from strong winds, heavy rain, or other harsh weather conditions. Place larger pieces in a sheltered area or secure them with stakes or anchors to prevent them from tipping over or being blown away.

Anchoring Driftwood Sculptures

For larger driftwood sculptures or installations, you may need to anchor them to the ground to keep them stable. Use metal stakes or rebar to secure the driftwood pieces firmly in place, driving them into the soil or concrete below. This will help prevent your driftwood yard art from shifting or falling over during storms or high winds.

Gluing and Sealing Driftwood Pieces

If you’re creating smaller driftwood art pieces, such as wind chimes or planters, you can use strong adhesives or sealants to secure the pieces together. Choose a waterproof glue or sealant that can withstand outdoor conditions, and apply it to the joints or connections of your driftwood art. This will help ensure that your creations stay intact and looking beautiful for years to come.

Diy Driftwood Yard Art

Maintaining Driftwood Yard Art

To keep your DIY driftwood yard art looking its best and lasting for years to come, it’s important to properly maintain and care for the pieces you’ve created. Here are a few tips for maintaining your driftwood art:

Cleaning and Refreshing

Periodically clean your driftwood art pieces with a brush and mild soap to remove any dirt, dust, or debris that may accumulate over time. Rinse the driftwood thoroughly and allow it to dry completely before returning it to your yard. You can also refresh the appearance of your driftwood art by applying a coat of clear sealer or varnish to protect the wood and enhance its natural colors.

Checking for Damage

Regularly inspect your driftwood yard art for signs of damage, such as cracks, rot, or loose pieces. Repair any damaged areas promptly by applying wood glue, filler, or sealant to strengthen the driftwood and prevent further deterioration. Keeping an eye on the condition of your driftwood art will help ensure it stays in top shape and continues to bring beauty to your outdoor space.

Replacing and Repositioning

If you notice that any pieces of your driftwood yard art are becoming worn or weathered beyond repair, consider replacing them with fresh driftwood pieces to maintain the overall look and aesthetic of your outdoor display. You can also reposition your driftwood art pieces periodically to create new arrangements or focal points in your yard, keeping your space looking fresh and interesting.

Conclusion

Creating DIY driftwood yard art is a fun and creative way to bring the beauty of the beach into your outdoor space. By finding the perfect driftwood pieces, cleaning and preparing them, and using your imagination to craft unique art pieces, you can transform your yard into a seaside oasis. Remember to secure your driftwood art properly, maintain it regularly, and enjoy the natural charm and character that driftwood brings to your home. So why not head to the beach and start collecting driftwood for your next yard art project? Your backyard will thank you for it!

Diy Driftwood Yard Art

Filed Under: Driftwood Ideas Tagged With: Driftwood, home decor, yard art

  • « Previous Page
  • Page 1
  • …
  • Page 23
  • Page 24
  • Page 25
  • Page 26
  • Page 27
  • …
  • Page 30
  • Next Page »

Primary Sidebar

Driftwood4us.com, is a participant in the Amazon Services LLC Associates Program, an affiliate advertising program designed to provide a means for sites to earn advertising fees by advertising and linking to amazon.com.