• Skip to main content
  • Skip to primary sidebar
  • Terms and Conditions
  • Privacy Policy
  • Contact

Driftwood 4 Us

Just About Driftwood

Home Improvement

Driftwood Hexagon Tile Bathroom

October 22, 2024 by admin

Have you ever imagined transforming your bathroom into a serene oasis that reflects the calm and natural beauty of driftwood? If so, incorporating driftwood hexagon tiles might just be the design element you’re searching for. Driftwood hexagon tile not only enhances the aesthetic appeal but also introduces a touch of nature into your bathroom space, making every visit a peaceful retreat. Here’s how you can bring this unique style into your home, from design ideas to practical installation tips.

The Allure of Driftwood and Hexagon Tiles

Why Choose Driftwood?

Driftwood, with its weathered, rustic appearance, offers a sense of the ocean’s tranquility and the earth’s raw beauty. Its natural hues can vary from light tans to deep browns and grays, allowing it to blend seamlessly with a variety of color palettes. Using driftwood in your bathroom space provides a connection to nature, which is both calming and stylish, creating a unique charm that synthetic materials simply can’t replicate.

The Hexagon Tile Trend

Hexagon tiles are geometric, chic, and versatile, making them a popular choice for modern bathrooms. Their honeycomb pattern is visually appealing and adaptable, producing intricate designs whether used on floors, walls, or as a feature piece. Hexagon tiles offer a sophisticated look that enhances the texture and style of any room, bringing a fresh and dynamic appearance to your bathroom.

Transformative Design Ideas

Creating a Feature Wall

Imagine walking into your bathroom and being greeted by a stunning driftwood hexagon tile feature wall. The combination of these tiles creates a focal point that can transform a mundane wall into a work of art. The natural texture and unique pattern add depth and interest without overwhelming the space, making it perfect for both small and large bathrooms alike.

Flooring with Character

Driftwood hexagon tiles provide a durable and attractive option for bathroom flooring. Their non-slip surface is ideal for wet areas, and the pattern draws attention to the floor as a design element in its own right. Pairing these tiles with lighter walls can open up the room and provide a striking contrast, emphasizing the unique tile design.

Balanced Backsplashes

Utilizing driftwood hexagon tiles for backsplashes can balance the aesthetic of your bathroom. These tiles bring texture and a touch of elegance to your sinks or bathtubs, complementing other natural materials and finishes. They’re particularly effective against modern fixtures where the plainness of minimalist design can be offset by the tile’s intricate patterns and natural tones.
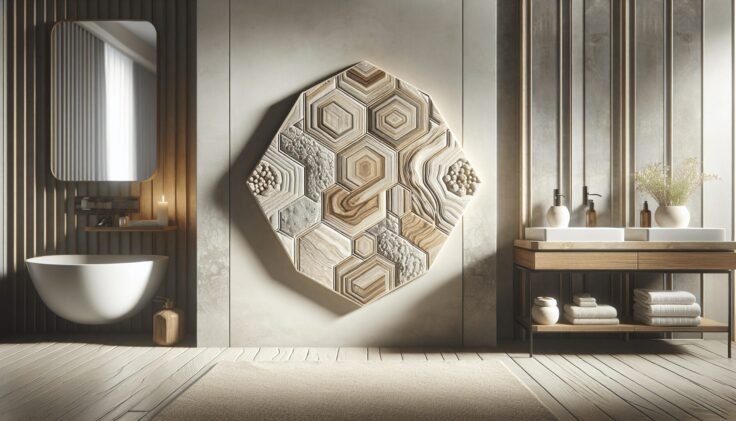
Driftwood Hexagon Tile Bathroom

Practical Installation Tips

Preparing Your Surface

Proper preparation is crucial for any tiling project. Ensure your surface is clean, dry, and smooth before you begin. Any imperfections can affect the finish and longevity of your tiles. It may be necessary to sand down the walls or use a primer depending on the surface material and condition.

Selecting the Right Adhesive

For driftwood hexagon tiles, choosing the right adhesive is essential. A premium-quality thin-set mortar is often recommended for its durability and flexibility, especially in areas exposed to moisture. Ensure the product you select is suitable for wooden and natural stone tiles to provide a strong bond that withstands the test of time.

Grouting Considerations

Selecting the right grout color complements the driftwood tones and enhances the hexagon pattern’s appearance. Neutral grays or browns can merge seamlessly with the tile color, while a contrasting grout can make the hexagon pattern pop and add a modern touch. Remember, waterproof grout is crucial in bathroom spaces to prevent water penetration and mold growth.

Maintenance and Care

Regular Cleaning

Keeping your driftwood hexagon tiles looking their best involves regular cleaning. Use a soft cloth and a mild cleaning solution to prevent damage to the surface. Avoid harsh chemicals or abrasive materials, as these can wear down the natural finish of the tiles. Consistent cleaning will ensure your bathroom stays fresh and inviting.

Sealing for Longevity

Driftwood tiles, like most natural materials, benefit from regular sealing to protect them from moisture and staining. Applying a natural stone sealer annually can preserve the tile’s original beauty and prevent discoloration over time. Always follow the manufacturer’s instructions for the best results.
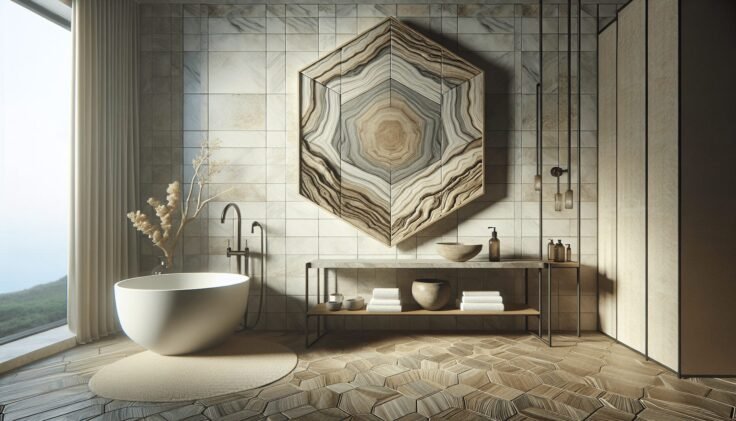
Driftwood Hexagon Tile Bathroom

Complementary Design Elements

Pairing with Bathroom Fixtures

Selecting fixtures that harmonize with your driftwood hexagon tiles is key to creating a cohesive design. Consider matte black or brushed nickel finishes that complement the tiles’ natural tones and add modern elegance. Wooden or stone elements can also integrate seamlessly to enhance the bathroom’s organic feel.

Accessories and Decor

To truly capture the essence of a driftwood-inspired bathroom, choose accessories that enhance this natural theme. Wicker baskets, wooden shelves, and soft, neutral-toned towels can complete the look without overpowering the driftwood tiles. Small indoor plants or succulents can add a touch of greenery, bringing further calmness and freshness to the space.

Cost Considerations

Budgeting for Your Project

While driftwood hexagon tile bathrooms evoke a sense of luxury, they can be achieved even on a budget. Being smart about the choice and coverage of tiles, such as using them in a small accent area or pairing with more affordable tiles in less visible spaces, can manage costs. Consider various suppliers for different price points and seek out sales or bulk purchase discounts.

Weighing Installation Costs

Installing hexagon tiles can be more labor-intensive than ordinary tiles, due to their intricate placement. If you’re hiring professionals, labor costs might be slightly higher. However, the distinctive beauty and appeal these tiles bring can be worth the investment, offering a return in enhanced visual enjoyment and increased home value.

Step-by-Step Installation Guide

Gathering Materials

Start with a checklist of essential materials: driftwood hexagon tiles, thin-set mortar, spacers, grout, sealant, a tile cutter, and necessary tools such as a trowel, grout float, and sponge. Having all your materials ready will streamline the installation process and minimize interruptions.

Measuring and Planning Layout

Accurate measurements and layout planning ensure a smoother installation process. Plan your pattern ahead, considering how the tiles will align with each other and the room. A mock layout using a few tiles can prevent surprises and provide a visual representation of the final look.

Cutting and Placing Tiles

Using a tile cutter, carefully cut the tiles to fit against walls or obstacles like fixtures. Begin placing the full tiles from the center of the room outward, ensuring even spacing. Use tile spacers to maintain consistent gaps between tiles for later grouting.

Grouting and Sealing Tiles

Once the tiles are laid and set, apply grout using a grout float, working it into the spaces and wiping away any excess. Let the grout dry as per manufacturer’s guidelines before sealing, applying the sealer to protect your tiles and grout from future moisture and stains.

Eco-Friendly Considerations

Sustainable Tile Options

When selecting your driftwood hexagon tiles, consider options made from reclaimed or sustainably sourced materials. This not only helps minimize your environmental impact but also ensures the natural elements in your bathroom stay eco-friendly and responsible.

Energy Efficient Installations

Consider incorporating energy-efficient elements alongside your tile installation, such as LED lighting or water-saving fixtures. These small additions can significantly reduce your bathroom’s energy consumption and environmental footprint, aligning your beautiful new design with sustainable living practices.

Inspiring Real-Life Transformations

Design Stories and Examples

Envision your bathroom makeover by exploring how others have transformed their spaces with driftwood hexagon tiles. Real-life examples provide insight and inspiration, showing how different color schemes, fixture styles, and decor choices come together for a cohesive look. Share and learn through design communities or social platforms, where creativity and ideas can flourish and inspire your own unique vision.

Final Thoughts

You’ve embarked on a journey into how driftwood hexagon tile can redefine your bathroom’s ambiance, merging natural beauty with contemporary design. Whether you’re envisioning a major renovation or a subtle refresh, these tiles offer versatility and elegance. By considering the style, practicality, and eco-conscious choices, your new bathroom can be as sustainable as it is stunning.

FAQs About Driftwood Hexagon Tile Bathrooms

QuestionAnswer
What are driftwood hexagon tiles made of?They are crafted from natural materials like wood or stone.
Are driftwood hexagon tiles waterproof?Proper sealing ensures they are water-resistant and durable.
How often should I seal these tiles?It’s recommended to seal them annually for best results.
Can they be used in small bathrooms?Yes, they can enhance and add depth to even the smallest spaces.
Are they difficult to install?The pattern can be intricate, so professional installation is suggested for best results.

Armed with these insights, you’re well-equipped to start your transformation journey towards a peaceful and stylish bathroom structured around the timeless appeal of driftwood hexagon tiles.

Filed Under: Driftwood Ideas Tagged With: Bathroom Decor, Driftwood, Hexagon Tile, Home Improvement, Tile Design

Paint Colors That Go With Driftwood

September 20, 2024 by admin

Have you ever found yourself fascinated by the calming, rustic allure of driftwood and pondered what paint colors might best complement it? You’re not alone! The unique texture and color variations in driftwood provide a beautiful yet neutral backdrop that opens up a world of possibilities for paint colors.

Paint Colors That Go With Driftwood

Understanding Driftwood’s Natural Appeal

Driftwood brings an inherently serene and organic feel to any space. It often boasts a timeless mix of grays, beiges, and sometimes subtle tints of blue or green. Understanding these hues helps you identify the best paint colors to create harmony and balance within a room.

The Neutral Palette

Driftwood’s subtle color spectrum largely consists of cool-toned grays and warm-toned beiges. These neutral shades offer a sense of calm and simplicity, making them extraordinarily versatile.

Texture and Tone

Driftwood’s texture can vary from smooth and polished to rough and rugged. This texture adds depth and complexity to a room, contributing to its overall ambiance. The tones can range from light to dark, further influencing your paint choices.

Paint Colors That Compliment Driftwood

Selecting the perfect paint color involves considering the existing tones in the driftwood as well as the overall look and feel you wish to achieve. Here are some paint color categories and specific shades that pair beautifully with driftwood.

Shades of White and Off-White

Shades of white and off-white are timeless choices that can make a space feel larger and more open while allowing the driftwood to stand out as a focal point.

ShadeDescription
AlabasterA warm off-white that adds a touch of coziness.
SnowboundA cool, crisp white offering a clean backdrop.
Eggshell WhiteHas a slight hint of beige, giving it a warmer feel.

Soft Grays

Soft grays can enhance the natural tones of driftwood, creating a cohesive, relaxing environment.

ShadeDescription
Repose GrayA balanced gray with a light, airy feel.
Agreeable GrayA warmer gray that straddles the line between gray and beige.
Classic GraySoft and subtle, enhancing the driftwood’s natural beauty.

Earthy Greens

Earthy greens add a refreshing, natural element to the space, echoing the organic settings where driftwood is often found.

ShadeDescription
Sage GreenA soft, muted green that evokes serenity.
Clary SageA deeper, more saturated green while still being relaxed.
Seafoam GreenLight and airy with a hint of blue, reminiscent of the sea.

Blues and Blue-Greens

Blues and blue-greens can provide a coastal feel, making you feel as if you’re right by the ocean.

ShadeDescription
Misty BlueA soft, calming blue perfect for a beachy vibe.
TidewaterA more vivid blue-green that adds a splash of color without overwhelming.
Sea SaltA balanced mix of blue and green, offering tranquility.

Warm Tones: Beige and Taupe

Beige and taupe can add warmth to your space, making it feel inviting while effortlessly complementing the driftwood’s neutral tones.

ShadeDescription
Accessible BeigeA middle-of-the-road beige that pairs well with various wood types.
Balanced BeigeSlightly darker, offering a richer feel without being too bold.
Natural LinenA light, airy beige that softens the overall look.

Matching Paint Colors to Different Driftwood Styles

Different types of driftwood can drive your paint choices. Here’s how to match paint colors to various driftwood styles for a cohesive interior design.

Weathered Driftwood

The weathered look often has a weather-beaten, rustic charm with darker gray tones and rough textures.

  • For a balanced look, consider cooler shades like Misty Blue or Repose Gray.
  • To add warmth, use colors like Accessible Beige or Eggshell White.

Smooth and Polished Driftwood

This style often incorporates more refined tones and textures, with smoother surfaces that offer a modern aesthetic.

  • Snowbound or Classic Gray are excellent choices for a clean, contemporary feel.
  • For a bit more depth, Clary Sage or Balanced Beige offer a sophisticated touch.

Driftwood with Blue and Green Undertones

If your driftwood has undertones of blue or green, enhancing this with similar color palettes can make for a captivating design.

  • Sea Salt or Tidewater can deepen these natural undertones and create a serene environment.
  • Seafoam Green can provide an additional layer of freshness and vibrancy.

Functional Considerations For Paint Color Choices

While aesthetics are crucial, functionality should not be overlooked. Here are some practical considerations when choosing paint colors to pair with driftwood.

Lighting Conditions

Natural light can drastically change how paint colors look throughout the day. Conduct a lighting assessment to see how different shades will appear in your space.

  • For bright rooms: Cool shades like Misty Blue or Snowbound can balance the light and create a calm atmosphere.
  • For dim rooms: Warmer colors like Natural Linen or Accessible Beige can add coziness and make the space feel more inviting.

Purpose of the Room

Different rooms serve different purposes, and your paint color choice should align with each room’s function.

  • Living areas: Neutrals like Classic Gray or Eggshell White create a versatile backdrop suitable for a variety of activities.
  • Bedrooms: Soft, calming tones like Sage Green or Sea Salt promote relaxation.
  • Offices: More invigorating colors like Repose Gray or Clary Sage can boost productivity and focus.

Matching Furniture and Decor

Your furniture and decor also impact your paint choices. Consider the overall theme you want to achieve and select complementary colors for a unified look.

  • Modern decor: Pair sleek, sophisticated furniture with colors like Snowbound or Balanced Beige.
  • Rustic or Coastal decor: Enhance these themes with Misty Blue, Seafoam Green, or Accessible Beige.

Paint Colors That Go With Driftwood

Tips for Choosing the Perfect Paint Color

Selecting the right paint color can sometimes feel overwhelming. Here are some tips to make the process smoother:

Test Samples

Always paint small areas on your walls before committing. Observe how they look at different times of the day to find the most appealing shade.

Pairing with Finishes

Consider how the paint color will look with different finishes like satin, matte, or eggshell. The type of finish can significantly affect the overall appearance.

Consult Professionals

If you’re unsure, consulting with an interior designer or paint specialist can provide valuable insights tailored to your specific needs and preferences.

Bringing It All Together

Combining your choices into a cohesive design might feel like putting together pieces of a puzzle. Here’s how to ensure everything comes together beautifully.

Building the Palette

Creating a cohesive color palette that includes both your chosen paint colors and the natural hues of driftwood can create a harmonious look.

ElementColor Choice
Main WallsSea Salt
Accent WallsClary Sage
TrimSnowbound
FurnishingsDriftwood, Light Gray Upholstery

Layering Textures

Utilize various textures through fabrics, rugs, and additional wood elements to complement the driftwood and paint colors, adding depth and visual interest to the space.

  • Comfy throws in soft grays or light beiges
  • Rugs with natural fibers like jute or sisal
  • Decor pieces in matching hues or contrasting materials for impact

Coordinated Decor

Finally, pick decor items that tie into your established palette. Wall art, cushions, and accessories in coordinated colors can elevate the overall look, making your space feel thoughtfully designed.

Conclusion

Identifying the perfect paint colors to complement driftwood involves understanding its unique characteristics and matching them with shades that enhance its natural beauty. By considering factors such as room functionality, lighting, and decor themes, you can make informed decisions that will transform your space into a harmonious, serene environment. Enjoy the soothing, natural charm that driftwood brings and feel confident that the right paint color will elevate its allure to new heights.

Filed Under: Driftwood Ideas Tagged With: Color Matching, Home Improvement, Interior Design, Paint Colors

Driftwood Towel Rack

September 8, 2024 by admin

Have you ever thought about how to add a rustic and natural touch to your bathroom decor? A driftwood towel rack might just be the perfect solution!

Driftwood Towel Rack

What is a Driftwood Towel Rack?

A driftwood towel rack is a functional and decorative piece made from driftwood that has been naturally weathered by sea and sand. The driftwood is often collected from beaches and then cleaned and treated to create a unique, eco-friendly towel rack.

Why Choose Driftwood?

Driftwood is not only beautiful but also sustainable. Using driftwood in your home decor prevents it from ending up in landfills or rotting away on the beach. Each piece of driftwood is unique, offering a one-of-a-kind look that can complement various styles of decor, from coastal to rustic and everything in between.

Benefits of Driftwood Towel Racks

There are multiple benefits to choosing a driftwood towel rack for your home.

Unique Aesthetics

Each piece of driftwood carries its own history, shaping its appearance with distinctive grains, knots, and textures. This uniqueness lends a one-of-a-kind aesthetic to your bathroom.

Eco-Friendly

Driftwood is naturally occurring and recycled, minimizing its environmental impact. By using driftwood, you’re repurposing natural resources rather than contributing to deforestation or the production of synthetic materials.

Versatility

Driftwood towel racks can fit into various home decor styles. Whether your bathroom is modern, rustic, coastal, or eclectic, driftwood can blend seamlessly or stand out as a statement piece.

Durability

Driftwood is naturally tough and resistant to water, making it a suitable choice for bathroom environments. With proper care, a driftwood towel rack can last for many years.

How to Make Your Own Driftwood Towel Rack

Creating your own driftwood towel rack can be a fun and rewarding DIY project. Below, you’ll find a step-by-step guide to making your very own driftwood towel rack.

Materials Needed

Here is a list of materials you’ll need to get started:

MaterialDescription
Driftwood piecePreferably long and straight
Wood screwsTo attach hooks and wall mounts
Wall anchorsFor secure mounting
Screw hooksFor hanging towels
SandpaperFor smoothing driftwood
Wood sealerTo protect and preserve the driftwood
DrillFor making holes
Measuring tapeTo measure placement of screws and hooks
PencilFor marking drill points

Step-by-Step Instructions

Step 1: Choose Your Driftwood

Select a piece of driftwood that is long and sturdy enough to support the weight of towels. Make sure it has an interesting shape and texture that you love.

Step 2: Clean the Driftwood

Before doing anything else, clean the driftwood. You can do this by scrubbing it with a brush and soapy water. Let it dry completely before moving to the next step.

Step 3: Smooth the Driftwood

Use sandpaper to smooth out any rough spots on the driftwood. This will make it safer to handle and give it a more polished look.

Step 4: Seal the Driftwood

Apply a wood sealer to the driftwood. This will help protect it from moisture and extend its lifespan. Follow the manufacturer’s instructions for drying times.

Step 5: Mark and Drill Holes

Using your measuring tape and pencil, mark the spots where you’ll place the screw hooks. Make sure they are evenly spaced. Once marked, drill holes at these spots.

Step 6: Attach Screw Hooks

Insert the screw hooks into the pre-drilled holes. Make sure they are securely fastened to hold the weight of the towels.

Step 7: Mount the Towel Rack

Mark the spots on the wall where you’ll mount the driftwood towel rack. Drill holes for the wall anchors and insert them. Finally, attach the driftwood to the wall using wood screws.

Optional: Add Extra Features

You can customize your driftwood towel rack by adding extra features such as additional hooks for robes or baskets for bathroom essentials.

How to Style Your Driftwood Towel Rack

A driftwood towel rack can serve as a focal point in your bathroom decor. Here are some styling tips to make the most out of your new towel rack.

Coordinate with Natural Elements

Pair your driftwood towel rack with other natural elements like seashells, stone soap dishes, and potted plants to create a cohesive look.

Use Complementary Colors

Driftwood typically has neutral tones that pair well with a variety of color schemes. Consider using towels in shades of blue, white, or beige to complement the driftwood.

Add Functional Decor

Incorporate functional decor such as woven baskets for storing extra towels or toiletries. This will keep your bathroom organized while enhancing its aesthetic appeal.

Driftwood Towel Rack

Care and Maintenance Tips

Maintaining your driftwood towel rack is essential to keep it looking great and ensuring its longevity.

Regular Cleaning

Wipe down the driftwood with a damp cloth periodically to remove dust and grime. Avoid using harsh chemicals that could damage the wood.

Reapply Sealer

Depending on the level of humidity in your bathroom, you may need to reapply the wood sealer every year or so. This will help protect the driftwood from moisture and wear.

Inspect for Damage

Regularly check your driftwood towel rack for any signs of damage, such as cracks or loose screws. Address any issues promptly to ensure the rack remains sturdy and safe to use.

Where to Buy Driftwood Towel Racks

If you’re not inclined to make your own driftwood towel rack, there are plenty of places where you can purchase them. Here are a few options:

Online Marketplaces

Websites like Etsy, eBay, and Amazon offer a variety of driftwood towel racks. These platforms often have unique, handmade pieces that you won’t find in traditional stores.

Local Artisan Shops

Visiting local artisan shops or markets can help you find one-of-a-kind driftwood towel racks while supporting local craftsmen.

Specialty Home Decor Stores

Some specialty home decor stores, especially those that focus on coastal or rustic themes, may carry driftwood towel racks.

Store TypePotential Options
Online MarketplacesEtsy, eBay, Amazon
Local Artisan ShopsLocal markets
Specialty Home Decor StoresStores with coastal/rustic themes

Conclusion

A driftwood towel rack is a splendid way to bring natural beauty and functionality into your bathroom. Whether you choose to DIY or purchase one, this unique piece offers both an aesthetic charm and practical use. Don’t forget to care for and maintain your driftwood towel rack to keep it looking its best for years to come. Consider adding this rustic touch to your home, and enjoy the blend of nature with everyday utility.

Filed Under: Driftwood Ideas Tagged With: DIY, Driftwood Crafts, Home Improvement, Rustic Decor, Towel Rack

Driftwood Shelf

September 3, 2024 by admin

Have you ever strolled along the beach, admiring the beautiful pieces of driftwood washed ashore by the tides? Driftwood possesses a unique charm, weathered by the sea, sun, and sand, and it can bring a touch of rustic beauty into your home when transformed into functional décor. One fantastic item you can craft from this natural wonder is a driftwood shelf. Not only is it a visually striking piece, but it also infuses your space with a sense of nature and history.

What is Driftwood?

Driftwood refers to wood that has been washed onto shorelines, banks, or beaches by winds, tides, or waves. This wood often comes from trees that have fallen into rivers or oceans, where they undergo a process of natural treatment involving water and sand. This creates the distinctive weathered look that makes driftwood so appealing for various decorative purposes.

Why Use Driftwood for Shelves?

Unique Aesthetics

No two pieces of driftwood are identical, making each driftwood shelf a one-of-a-kind creation. The natural contours, colors, and textures offer a rustic aesthetic that is hard to replicate with synthetic materials.

Eco-Friendly

Using driftwood is an environmentally friendly choice. It involves repurposing natural materials that would otherwise go to waste. You are reducing the demand for new timber, which helps in preserving our forests and reducing deforestation.

Versatility

Driftwood shelves can fit into various interior design styles, from coastal-themed homes to rustic or even minimalist settings. Their natural look adds warmth and a touch of nature to any room.

Driftwood Shelf

Gathering Driftwood

Before you start building your driftwood shelf, you need to find the perfect pieces. Here’s how you can do it:

Where to Find Driftwood

While beaches are the most common places to find driftwood, you can also find them near rivers, lakes, and even in wooded areas close to water bodies.

Legal Considerations

Always check local regulations before collecting driftwood. Some beaches and areas have rules protecting natural resources, and you could face fines if caught taking driftwood illegally.

Selecting the Right Pieces

When searching for driftwood, look for pieces that are sturdy and free of rot or infestations. The best pieces are those that have been weathered smooth by water and sand but maintain structural integrity.

Preparing Driftwood

Once you’ve collected your driftwood, there’s some preparation needed before it’s ready to be transformed into a shelf.

Cleaning the Wood

Start by scrubbing away any dirt, sand, and salt residue with a stiff brush. You might also need to rinse it with freshwater to get rid of any remaining debris. Let the wood dry completely in the sun.

Sanitizing the Wood

To ensure that your driftwood is free from pests and bacteria, you can soak it in a mixture of water and bleach (1:9 ratio) for a few hours. Rinse thoroughly and allow it to dry thoroughly before moving on to the next step.

Finishing Touches

Sanding the driftwood helps to smooth out rough edges and splinters. Depending on the look you want to achieve, you can sand your driftwood lightly for a more natural appearance or more extensively for a polished finish.

Driftwood Shelf

Building Your Driftwood Shelf

Now, let’s move on to the fun part—constructing your driftwood shelf!

Materials Needed

MaterialsPurpose
Driftwood piecesMain material for the shelf
Screws or nailsFastening the driftwood together
Brackets or supportsSecuring the shelf to the wall
Wood glueAdditional bonding strength
SandpaperSmoothing the driftwood pieces
Measuring tapeAccurate measurements
Saw (if needed)Cutting wood to size
DrillCreating screw holes

Step-by-Step Instructions

1. Design Your Shelf

Start by sketching a simple design for your shelf. Will it be a single piece of driftwood mounted to the wall, or will you craft a multi-level structure? Consider the space where you plan to install the shelf and measure it precisely.

2. Measure and Cut Wood

Using a measuring tape, mark the driftwood pieces to the required lengths. If you need to cut any piece to size, use a saw to make precise cuts. Sand the cut edges smooth.

3. Arrange Your Pieces

Lay out your pieces to see how they fit together. Adjust as necessary to ensure a level surface and aesthetically pleasing composition.

4. Assemble the Shelf

Using screws or nails, attach the pieces of driftwood together according to your design. For extra strength, apply wood glue to the joints before fastening them.

5. Attach Brackets or Supports

Secure brackets or supports to the back of the shelf. Make sure they are evenly spaced to distribute weight effectively.

6. Install the Shelf

Using a drill, create holes in the wall where you want to mount the shelf. Insert wall anchors if necessary, then screw the brackets or supports into the wall. Finally, mount your driftwood shelf securely.

Styling Your Driftwood Shelf

A driftwood shelf is only as beautiful as what you put on it. Here are some ideas for styling your new piece:

Books and Plants

Books and small plants can add life and functionality to your driftwood shelf. The green of the plants complements the natural wood, creating a harmonious look.

Coastal Décor

If you love the ocean, fill your shelf with shells, coral, and other coastal decorations. This theme ties in perfectly with the natural origins of the driftwood.

Minimalist Approach

For a more minimalist aesthetic, use fewer items, ensuring each piece stands out. Neutral colors and simple designs work best with this approach.

Maintaining Your Driftwood Shelf

Regular Cleaning

Dust and clean your driftwood shelf regularly. Use a soft cloth to wipe down the surface. Avoid using harsh chemicals that could damage the wood.

Inspecting for Wear

Periodically check the shelf for any signs of wear or damage. Tighten any loose screws and replace any parts that show significant deterioration.

Protection from Elements

If your driftwood shelf is placed outdoors or in a damp area, consider applying a waterproof sealant to protect it from the elements.

Benefits of DIY Projects

Creativity and Personalization

Creating a driftwood shelf allows you to express your creativity and personalize your space. Every decision, from the pieces of wood you select to how you arrange and decorate the final product, reflects your unique style.

Skills and Knowledge

Engaging in DIY projects enhances your skills and knowledge. Through the process, you learn about material properties, construction techniques, and design principles.

Sense of Accomplishment

Completing a DIY project provides a sense of accomplishment. Seeing a functional and beautiful object that you created with your own hands can be deeply satisfying.

Conclusion

Crafting a driftwood shelf is an enriching and rewarding experience. It allows you to bring a piece of nature into your home, creating a functional and aesthetically pleasing item with your unique touch. Whether you’re new to DIY or a seasoned crafter, this project offers an excellent opportunity to explore your creativity, learn new skills, and make something beautiful and practical. So gather your driftwood, prepare your tools, and start building your very own driftwood shelf today!

Filed Under: Driftwood Ideas Tagged With: DIY, Home Improvement, Rustic, shelf

Driftwood Railing

September 1, 2024 by admin

Have you ever considered adding a touch of natural beauty to your home with a driftwood railing? Utilizing driftwood as a construction material can provide a rustic, elegant, and organic feel that blends seamlessly with various types of decor. With its uniqueness and intriguing texture, driftwood can offer a striking contrast to modern materials, making it a versatile choice for both indoor and outdoor projects.

What is Driftwood?

Driftwood refers to wood that has been washed onto a shore or beach by the action of winds, tides, or waves. This type of wood is naturally weathered and often carries a distinguished, smooth texture due to its prolonged exposure to the elements. As a result, each piece of driftwood is unique, adding a natural and artistic element to any setting.

Sources of Driftwood

Driftwood can be sourced from a variety of locations, including oceans, rivers, and lakes. Each environment imparts different characteristics to the driftwood:

SourceCharacteristics
OceanOften bleached white by the sun and saltwater
RiversSmoother, less bleached, often darker in color
LakesLess saline environment, leading to diverse textures

Understanding the different sources can help you select the driftwood that best fits your design.

Why Choose Driftwood for Railing?

A driftwood railing can offer several compelling benefits that make it a worthwhile consideration for your space.

Aesthetic Appeal

The natural beauty of driftwood is unparalleled. Its unique shapes and textures can bring a sense of nature indoors. Driftwood railings can seamlessly blend with various home styles, from rustic to modern, adding a touch of authenticity and warmth.

Environmental Impact

Using driftwood is an eco-friendly choice. Since it’s naturally sourced, it doesn’t add to deforestation. You’re repurposing material that has already served its time in nature, which makes it an excellent choice for environmentally conscious homeowners.

Durability and Strength

Though it might seem delicate due to its weathered appearance, driftwood is often quite strong. When it comes to building a railing, the robustness of properly chosen and treated driftwood ensures long-lasting durability.

Driftwood Railing

Selecting the Right Driftwood

Choosing the right pieces of driftwood for your railing project is essential for both functionality and aesthetics.

Size and Shape

Consider the dimensions of your railing. Large, sturdy pieces are ideal for the main supports, while smaller, intricate pieces can be used for decorative elements. The shape should be naturally appealing but also fit securely within your railing structure.

Dryness and Condition

Ensure the driftwood is fully dry to prevent any warping or rotting. Seasoned driftwood, which is wood that has dried naturally over time, tends to be more stable.

Treatment and Preparation

Once you have selected the pieces, they need to be thoroughly cleaned and treated to remove any remaining salt, dirt, or pests. This can involve soaking the wood in freshwater and then allowing it to dry thoroughly.

How to Install a Driftwood Railing

The installation process for a driftwood railing can be broken down into several steps, ensuring a secure and aesthetically pleasing result.

Pre-Installation Planning

Before you begin, make sure you have a clear plan and necessary materials. You’ll need driftwood pieces, mounting brackets, screws, and possibly a sealant for the final finish.

Step-by-Step Guide

  1. Measure and Cut: Measure the area where you will install the railing and cut the driftwood pieces to fit. Ensure the cuts are clean and precise.

  2. Mounting Brackets: Attach the mounting brackets to your pre-determined points on the wall or floor. These will hold the driftwood in place. Ensure they are securely fastened.

  3. Placement: Position your driftwood pieces and secure them to the mounting brackets with screws. Check that each piece is level and firmly attached.

  4. Finishing Touches: Apply a suitable wood sealant to protect the wood from wear and tear, enhancing its longevity.

Safety Considerations

Safety is paramount. Make sure the railings are securely installed and check for any sharp edges that could pose a risk. Regular maintenance checks can ensure that the structure remains sound over time.

Driftwood Railing

Creative Ideas for Driftwood Railings

A driftwood railing doesn’t have to be purely functional; it can also be a statement piece. Here are some creative ideas to inspire you:

Combining Materials

Pair driftwood with other materials like wrought iron, glass, or metal to add sophistication and contrast. For instance, you could use driftwood as the main support with glass paneling in between for a modern look.

Light Fixtures

Incorporate lighting into your driftwood railing. LED strips or small lanterns can be attached to the driftwood to create a warm, inviting glow, perfect for enhancing outdoor spaces.

Thematic Designs

Create a theme around your driftwood railing. Nautical themes can be accentuated with ropes and seashells, while a forest-inspired design may include natural moss and vines.

Maintenance of Driftwood Railings

Maintenance is straightforward but essential to maximize the lifespan and look of your driftwood railing.

Regular Cleaning

Regular dusting and occasional washing with a mild soap solution can keep the railing looking fresh. Avoid harsh chemicals that can damage the wood.

Inspections

Perform regular inspections to check for any loose connections or damage. Early detection of issues can prevent more significant problems later on.

Driftwood Railing for Different Spaces

Driftwood railings can be adapted for various areas of your home, each offering its unique charm.

Indoor Spaces

In interior settings, driftwood railings can enhance staircases, lofts, or balconies. They can blend with wooden flooring or contrast with modern decor for a stunning visual effect.

Outdoor Spaces

For outdoor use, driftwood railings suit decks, garden bridges, and patios. They not only look natural in an outdoor environment but also withstand the elements when properly treated.

Commercial Spaces

Driftwood railings are not just for homes; they can also be a unique feature in commercial spaces like restaurants, cafes, or boutique stores. They create a memorable and inviting atmosphere for customers.

DIY vs. Professional Installation

Deciding whether to tackle the project yourself or hire a professional is an important consideration.

DIY Installation

If you enjoy hands-on projects and have basic carpentry skills, a DIY approach can be rewarding. It allows for personal touches and can be more cost-effective.

Professional Installation

Hiring a professional ensures precision and safety, particularly for complex designs or large projects. Professionals can often source better quality materials and have the tools to achieve a polished finish.

Conclusion

Choosing a driftwood railing for your home can bring a unique blend of beauty, functionality, and eco-friendliness. From sourcing and selecting the perfect pieces to installation and maintenance, this guide offers a comprehensive look into creating a stunning driftwood railing. Whether you opt for a DIY project or professional help, the end result will undoubtedly add charm and character to your space. Don’t forget the personal touches and creative ideas that can make your driftwood railing truly one-of-a-kind.

Filed Under: Driftwood Ideas Tagged With: DIY, Driftwood, Home Improvement, Railing, Rustic

How To Get A Driftwood Finish

July 19, 2024 by admin

Welcome to your guide on how to achieve that perfectly weathered, driftwood finish for your furniture and decor. In this article, you’ll discover the easy steps and necessary materials to transform any piece of wood into a stunning centerpiece with a rustic touch. Whether you’re a seasoned DIY enthusiast or just looking to try your hand at a new project, you’ll love how simple and satisfying it can be to create a look that brings a slice of seaside charm into your home. Have you ever looked at a piece of driftwood and wondered how you could bring that gorgeous, weathered look to your home decor? Achieving a driftwood finish on your furniture and DIY projects can bring a touch of coastal charm and rustic elegance to your space. It’s like bringing a piece of the beach into your own home.

In this guide, we’ll walk you through the steps to achieve that beautiful, aged driftwood finish using simple tools and materials. It’s easier than you might think, and fun too!

How To Get A Driftwood Finish

Understanding the Driftwood Finish

What is a Driftwood Finish?

A driftwood finish mimics the look of aged wood that has been naturally weathered by water and sunlight. It typically features a mix of gray, brown, and white tones, giving it a soft, antiqued look that works perfectly in shabby chic, coastal, or rustic decor.

Why Choose a Driftwood Finish?

Besides its aesthetic appeal, a driftwood finish is quite practical. It can enhance old furniture, giving it new life, and it’s versatile enough to complement a variety of interior design styles. Plus, it’s a great way to add character to your home without breaking the bank.

The Basics

Before jumping into the process, it’s useful to understand the basic steps. Here’s a quick overview to give you an idea of what to expect:

StepDescription
Step 1Gather all necessary materials and tools.
Step 2Sand the wood surface to prepare it for staining or painting.
Step 3Apply a wood conditioner if necessary.
Step 4Use a weathering mix to create a grayish tone.
Step 5Apply a driftwood stain or paint, and layer with different colors if desired.
Step 6Seal the finish with a topcoat for durability.

Step-by-Step Process to Achieve a Driftwood Finish

Step 1: Gather Your Materials and Tools

Here’s a comprehensive list of what you’ll need:

MaterialsTools
Sandpaper (80 to 220 grit)Sanding block or electric sander
Wood conditionerPaintbrushes
Driftwood stain or paintRags
Gray and white acrylic paintPlastic or disposable containers
WaterMixing sticks
Clear protective finish (optional)Gloves
White vinegarStir sticks
Steel woolDrop cloth

Having all your materials and tools ready before you start will make the process smoother and more enjoyable.

Step 2: Prepare the Wood Surface

Start by sanding your wood piece to remove any existing finish, smooth out rough spots, and open up the wood grain. This ensures that the stain or paint adheres properly. Use 80 grit sandpaper to remove heavy finishes, followed by finer grits (up to 220) to smooth the surface.

Make sure to clean up any dust residues with a damp cloth or tack cloth. A clean surface is key to achieving a beautiful finish.

Step 3: Apply Wood Conditioner (if necessary)

Applying a wood conditioner is optional but highly recommended, especially if you’re working with soft woods like pine. Wood conditioner helps to even out the absorption of stain, preventing blotchy and uneven color. Follow the manufacturer’s instructions on the conditioner bottle for the best results.

Step 4: Create a Weathering Mixture

Here’s where the magic begins! Create a weathering mixture using white vinegar and steel wool. Fill a container with vinegar, add a piece of steel wool, and let it sit for about 24 hours. The steel wool dissolves, creating a liquid that will react with the tannins in the wood, giving it a gray, weathered look.

Strain the mixture through a fine mesh or cheesecloth to remove any steel wool particles before application.

Step 5: Apply the Weathering Mixture

Using a paintbrush or rag, apply the vinegar and steel wool mixture to the wood surface. You’ll see the wood start to change color within a few minutes. Let it dry completely to fully reveal the weathered look. The color will continue to age and set over the next 24 hours.

Step 6: Apply Driftwood Stain or Paint

Once your wood is dry, it’s time to add depth and dimension with multiple layers of stain or paint.

Staining Method:

  1. Select Your Stain: Choose a driftwood or weathered gray stain.
  2. Apply the Stain: Using a brush or rag, apply the stain in the direction of the wood grain.
  3. Wipe Off Excess: After 5-10 minutes, wipe off any excess stain with a clean rag.
  4. Dry: Let it dry completely before deciding if you need a second coat.

Painting Method:

  1. Base Coat: Apply a base coat of light gray paint and let it dry.
  2. Dry Brush Technique: Dip a brush into white or darker gray paint, then remove most of it on a rag or paper towel. Lightly brush the surface, letting the base coat show through.
  3. Layering: Repeat with as many colors as desired to achieve the depth you want.

Step 7: Seal the Finish

Once you’re satisfied with the look, protect your work with a clear topcoat. Options include matte or satin polyurethane, clear wax, or a water-based polycrylic. Apply the sealer following the manufacturer’s instructions.

Tips and Tricks for the Best Results

Here are some expert tips to help you achieve the perfect driftwood finish:

  • Test First: Always test your stain or paint on a scrap piece of wood or an inconspicuous area before applying it to your entire piece.
  • Layer Colors: Don’t be afraid to layer multiple colors. This adds depth and authenticity to the finish.
  • Proper Ventilation: Work in a well-ventilated area, especially when using chemicals like vinegar and stains.
  • Gloves: Wear gloves to protect your hands from staining.

Common Mistakes and How to Avoid Them

  1. Skipping Sanding: Avoid skipping the sanding step—it ensures that your finish adheres properly.
  2. Not Letting Layers Dry Completely: Be patient. Let each layer of stain or paint dry completely before adding another.
  3. Over-staining or Over-painting: It’s easy to go overboard. Always start with less and build up as needed.

How To Get A Driftwood Finish

Projects Ideas to Try Driftwood Finish

Now that you know how to achieve a driftwood finish, here are some project ideas to get you started:

  • Furniture: Tables, chairs, or headboards.
  • Decor: Picture frames, mirror frames, or shelves.
  • DIY Creations: Wooden crates, tissue boxes, or plant stands.

Conclusion

Creating a driftwood finish is a rewarding and enjoyable process that lets you bring a touch of the coast into your home. With some basic materials and a little elbow grease, you can transform everyday items into beautiful, rustic pieces. Remember, practice makes perfect, and don’t be afraid to experiment. Enjoy bringing a piece of the beach into your home!

If you have any questions or need further assistance, feel free to reach out. Happy crafting!

Filed Under: Driftwood Ideas Tagged With: DIY, Driftwood Finish, furniture, Home Improvement, Woodworking

Driftwood Floor

May 21, 2024 by admin

Welcome to your guide on transforming your living space with the natural charm of a driftwood floor. In this article, you’ll discover how the unique textures and soothing tones of driftwood flooring can bring a sense of coastal tranquility to your home. From understanding the origins of driftwood to learning about its impressive durability and easy maintenance, you’ll gain valuable insights into why this type of flooring is an excellent choice for both aesthetics and functionality. Get ready to be inspired by the organic beauty of a driftwood floor and learn how it can elevate the ambiance of any room.

Driftwood Floor

Have you ever considered how the natural beauty of driftwood could transform your home? Driftwood floors offer an incredibly unique aesthetic that blends rustic elements with modern design, making your living space captivatingly beautiful. From understanding what driftwood flooring really is, to learning about its benefits, installation process, and maintenance tips, this article will guide you through everything you need to know about driftwood floors.

Driftwood Floor

What is Driftwood Flooring?

Driftwood flooring captures the essence of driftwood—wood that has been naturally weathered by water, sand, and sun—granting your home an incomparable charm. But it’s more than just aesthetics. This type of flooring offers practical benefits such as durability and easy maintenance.

Natural Driftwood vs. Manufactured Driftwood

In your journey to install driftwood flooring, it’s essential to recognize the difference between natural and manufactured driftwood. While natural driftwood is pieces of wood that have been shaped by natural elements, manufactured driftwood mimics this effect through chemical and physical processes.

Table: Natural Driftwood vs. Manufactured Driftwood

FeatureNatural DriftwoodManufactured Driftwood
SourceFound along beaches, lakes, and riversSourced from timber, processed to look weathered
AppearanceEach piece is uniqueConsistent yet varied facades
DurabilityNaturally resilientEngineered for strength
MaintenanceModerate to high (needs to be treated)Easier to maintain
CostCan be more expensiveTypically more affordable

Benefits of Driftwood Flooring

Choosing driftwood flooring brings a multitude of advantages, both aesthetic and practical, enhancing your home’s atmosphere.

Aesthetic Appeal

The natural, weathered look of driftwood flooring offers a one-of-a-kind appearance, evoking coastal and rustic vibes. Its unique grain and texture make each plank distinct, adding character and warmth to any room.

Durability and Longevity

Driftwood, by nature, is incredibly resilient and durable. By repurposing this hardy material into flooring, you get a surface that is built to withstand the demands of daily life, from foot traffic to spills.

Sustainable Choice

Opting for driftwood flooring can be an environmentally friendly choice. Reclaimed wood, including driftwood, reduces the need for new timber and helps in recycling resources.

Easy Maintenance

While proper care is essential for maintaining any type of flooring, driftwood is generally easier to clean and less prone to showing dirt due to its textured surface. Sweeping and occasional mopping are often all that’s needed.

Versatility

Driftwood floors blend seamlessly with various decor styles, including coastal, rustic, Scandinavian, and even modern interiors, providing a versatile foundation for your home’s aesthetic.

Types of Driftwood Flooring

When diving into driftwood flooring, you’ll encounter a few different varieties. Understanding these types will help you choose the one that best suits your needs.

Solid Driftwood Flooring

Solid driftwood flooring is crafted from a single piece of driftwood. This type provides unmistakable authenticity and a rich, natural look.

Engineered Driftwood Flooring

Engineered driftwood flooring uses a top layer of natural driftwood adhered to a plywood base. Engineered flooring offers greater stability and is often easier to install and maintain.

Reclaimed Driftwood Flooring

Reclaimed driftwood flooring refers to wood that has been salvaged and repurposed. This eco-friendly option is sustainable and often comes with a history, adding a touch of story and character to your floors.

Table: Comparison of Driftwood Flooring Types

TypeProsCons
Solid Driftwood FlooringAuthentic look, rich textureCan be expensive, harder to install
Engineered DriftwoodMore stable, easier to installMay lack the full authenticity
Reclaimed DriftwoodSustainable, comes with historyAvailability may be limited, consistency in size varies

Installation Process

Installing your driftwood flooring correctly is crucial to ensure that you can enjoy its beauty and benefits for years to come. Here’s a step-by-step guide to help you get started.

Preparing the Subfloor

Before laying your driftwood flooring, it’s vital to prepare the subfloor. Ensure it is clean, level, and dry. Address any foundational issues, as an unreliable subfloor can lead to problems down the line.

Acclimatization

Driftwood flooring needs to acclimatize to your home’s environment. Allow the wood to sit in the installation area for at least a week to adjust to temperature and humidity levels.

Installation Methods

You have several choices when it comes to how you install driftwood flooring:

  • Nail-Down Method: Secures each plank by nailing it to the subfloor. This method is often used for solid driftwood flooring.
  • Glue-Down Method: Uses adhesive to affix the wooden planks to the subfloor. It offers excellent stability.
  • Floating Floor: Utilizes a tongue-and-groove system where planks interlock above the subfloor without attachment. This is common for engineered driftwood flooring.

Finishing

Finishing your driftwood flooring includes sanding, staining, and sealing. These steps ensure that the wood looks its best and is protected from wear and tear. You can choose from a variety of finishes, including matte, satin, or gloss, to match your desired aesthetic.

Driftwood Floor

Maintenance and Care

Keeping your driftwood flooring in prime condition doesn’t require extensive effort but does necessitate some regular maintenance.

Routine Cleaning

  • Sweeping: Sweep daily to remove dust and debris.
  • Vacuuming: Use a vacuum with a hardwood attachment to avoid scratches.
  • Mopping: Mop with a damp cloth and a cleaner specifically designed for wood floors. Avoid excessive water.

Preventative Measures

To avoid damage, consider these preventative measures:

  • Place mats at entryways to capture dirt and moisture.
  • Use furniture pads to prevent scratching when moving pieces around.
  • Keep pets’ nails trimmed.

Dealing with Spills and Stains

Promptly wipe up any spills to prevent water damage and staining. For stubborn stains, use a wood-specific cleaner and gently rub the area with a cloth.

Long-Term Maintenance

Over time, your driftwood floors may require refinishing. This process involves sanding down the surface and applying a new coat of finish to rejuvenate the wood.

Seasonal Care

Wood flooring can expand and contract with changes in humidity and temperature. Using a humidifier in winter and a dehumidifier in summer can help moderate these changes and maintain your floor’s condition.

Cost Considerations

Understanding the financial aspects of installing driftwood flooring can help you budget appropriately.

Factors Affecting Cost

  • Material Quality: Solid driftwood tends to be more expensive than engineered options.
  • Source: Reclaimed driftwood might come with a premium due to its unique characteristics and the labor involved in repurposing it.
  • Installation: Professional installation increases costs but ensures a better finish and longevity.
  • Finishing and Maintenance: Initial finishing and ongoing maintenance are essential to factor into the overall cost.

Table: Cost Breakdown of Driftwood Flooring

ElementEstimated Cost (per square foot)Additional Notes
Material$5 – $15Varies based on type and quality
Installation$2 – $8Professional installation recommended
Finishing$1 – $4Includes sanding, staining, sealing
Maintenance$1 – $2 per yearRoutine cleaning and periodic refinishing
Total$9 – $29

Design Ideas and Applications

Driftwood flooring can elevate any room in your home. Here are some ideas to inspire your interior design.

Living Room

In the living room, driftwood flooring adds warmth and a stunning visual effect. Pair it with neutral-toned furniture to create a coastal haven or mix with modern elements for a more eclectic look.

Bedroom

Create a serene oasis in your bedroom with driftwood floors. Soft, weathered tones complement cozy bedding and minimalist decor, making it an inviting retreat.

Kitchen

While some might shy away from wood in the kitchen due to potential water damage, driftwood flooring offers an option that’s both stylish and practical. Use protective mats in high-risk areas and choose a durable finish to keep your floors looking great.

Bathroom

With proper sealing and maintenance, driftwood flooring can even work in bathrooms. Its rustic appearance provides a contrast to sleek, modern fixtures, creating a spa-like feel.

Office

In a home office, driftwood flooring can bring a touch of nature indoors, promoting a calm and focused atmosphere. Combine with wooden desks and open shelving for a cohesive design.

Sustainability and Eco-Friendliness

If you’re eco-conscious, driftwood flooring is a smart choice.

Eco-Friendly Material

Driftwood is a naturally occurring material, reducing the need for freshly harvested timber. Reclaimed varieties contribute further by giving new life to previously used wood.

Sustainable Practices

Many manufacturers today prioritize sustainable practices, including sourcing wood responsibly and minimizing waste during the production process. Opt for companies that certify their sustainability efforts to ensure you’re making a truly eco-friendly choice.

Potential Drawbacks

While driftwood flooring has numerous benefits, it’s also essential to understand potential drawbacks.

Cost

High-quality driftwood flooring can be an investment. Between material and installation costs, it might be pricier than other options like laminate or vinyl.

Installation Complexity

Installing driftwood flooring, especially natural and reclaimed types, requires precision and sometimes professional expertise. Improper installation can lead to issues such as uneven surfaces and gaps.

Maintenance Requirements

While generally easy to care for, driftwood flooring does require consistent maintenance to keep its appearance and durability. Neglecting routine care can lead to diminished aesthetics and potential damage.

Conclusion: Is Driftwood Flooring Right for You?

Driftwood flooring offers a unique blend of beauty, durability, and sustainability. Its versatile aesthetic can transform any room into a warm, inviting space, while its natural resilience ensures longevity. Whether you choose solid, engineered, or reclaimed driftwood, investing in this type of flooring means embracing both style and practicality.

So, is driftwood flooring the right choice for you? If you value a unique look and are willing to invest in quality and care, driftwood flooring can be a stunning addition to your home. Consider your lifestyle, budget, and design preferences, and you’ll be well on your way to making an informed decision.

Feel free to dive into this exciting journey, and soon, you’ll find yourself walking on beautiful, rustic floors that bring the essence of nature right into your home.

Filed Under: Driftwood Ideas Tagged With: Driftwood, Eco-friendly, flooring, Home Improvement, Interior Design

How Make Driftwood Sink?

February 5, 2024 by admin

So you’ve collected some beautiful pieces of driftwood and now you’re wondering how to make them sink for that perfect aquarium or terrarium setup. Look no further! In this article, we’ll explore simple yet effective methods to help you achieve your desired sinking effect with your driftwood. Whether you’re a seasoned hobbyist or just starting out, these techniques will ensure that your driftwood stays right where you want it, creating a stunning and natural underwater environment for your aquatic pets or plants.

How Make Driftwood Sink?

Why Do You Need to Make Driftwood Sink?

Driftwood is a popular and aesthetically pleasing addition to aquariums and aquatic habitats. Its natural beauty and unique shapes can enhance the overall visual appeal of the tank, creating a more natural and realistic environment for your fish and other aquatic organisms. However, one common issue with driftwood is that it tends to float on the surface of the water, disrupting the balance and stability of the tank. That is why it is essential to make driftwood sink, ensuring that it stays in place and doesn’t cause any disturbances to the aquatic ecosystem.

Benefits of sinking driftwood in aquariums

There are several benefits to sinking driftwood in aquariums. Firstly, by making the driftwood sink, you can achieve a more realistic and natural-looking setup for your aquarium. The submerged appearance of the driftwood can mimic the fallen branches and trees found in natural bodies of water, creating a more visually appealing and authentic habitat for your aquatic inhabitants.

Secondly, sinking driftwood allows for better utilization of the entire water column in the tank. When driftwood floats on the surface, it creates a barrier that restricts the movement and access of aquatic organisms to the upper water levels. By sinking the driftwood, you provide a vertical structure within the tank that fish and other inhabitants can freely swim around and interact with.

Lastly, sinking driftwood improves the overall stability of the aquarium. Floating driftwood can be easily displaced by water flow or the activities of the tank inhabitants, causing it to shift position or even float to the surface. This can lead to potential damage to plants, disruption of landscaping, or even injury to the aquarium inhabitants. Making the driftwood sink eliminates these risks and ensures that your aquarium remains harmonious and in balance.

Preventing floating driftwood in aquatic habitats

Floating driftwood can be a frustrating problem for aquarium enthusiasts, but with some careful preparation and techniques, it can be easily avoided. By following specific steps and methods, you can ensure that your driftwood stays firmly grounded in your aquatic habitat.

Preparing the Driftwood

Before you start the process of sinking driftwood, it is essential to prepare the pieces properly. This ensures that they are safe for the aquarium and helps them sink more effectively.

Selecting suitable driftwood pieces

When choosing driftwood for your aquarium, it’s important to consider certain factors. Look for pieces that are sturdy and will not easily break or fall apart. Avoid driftwood with sharp edges or splinters, as these can be harmful to your aquatic creatures. Additionally, consider the size of the driftwood in relation to the size of your tank. Overly large or overcrowded driftwood can negatively impact the aesthetics and functionality of the aquarium.

Cleaning the driftwood

Before submerging the driftwood, it’s crucial to clean it thoroughly. Start by rinsing off any visible debris, such as dirt, algae, or other unwanted particles. Then, scrub the driftwood gently with a soft brush to remove any stubborn dirt or algae. Avoid using any harsh chemicals or cleaners, as they can be toxic to aquatic life. After cleaning, rinse the driftwood thoroughly to ensure that no residue remains.

Boiling the driftwood

Boiling the driftwood is another effective method to prepare it for sinking. Boiling helps to remove any remaining impurities, kills off potential parasites or bacteria, and reduces the chances of decay. To boil the driftwood, place it in a large pot and cover it with water. Bring the water to a boil and let the driftwood simmer for at least 1-2 hours. Allow the driftwood to cool before handling it to avoid burns.

Soaking the driftwood

Soaking the driftwood is an additional step that can aid in sinking. Fill a container or bathtub with water, ensuring there is enough water to submerge the driftwood fully. Place the driftwood in the water and weigh it down with a heavy object, such as a rock or brick. Let the driftwood soak for several days or until it becomes waterlogged and sinks naturally. This process helps to remove excess tannins from the wood, which can cause water discoloration and affect the pH levels of the aquarium.

Creating Weighted Bases for Driftwood

To ensure that the driftwood remains submerged in the aquarium, you can create weighted bases that hold it firmly in place. There are several techniques you can employ to achieve this.

Using fishing sinkers

One simple method is to attach fishing sinkers to the lower end of the driftwood. Fishing sinkers are readily available at most fishing supply stores and are typically made of lead or other heavy materials. By securely fastening fishing sinkers to the driftwood using a fishing line or aquarium-safe adhesive, you can add enough weight to make the driftwood sink and stay in place.

Using epoxy putty

Epoxy putty is another excellent option for creating weighted bases for driftwood. Epoxy putty is a two-part adhesive that, when mixed together, forms a durable and solid material. Mold the epoxy putty around the lower section of the driftwood, shaping it into a weighted base. Allow the epoxy putty to harden according to the manufacturer’s instructions. The hardened epoxy putty will provide sufficient weight to keep the driftwood submerged.

Using rocks or stones

If you prefer a more natural-looking alternative, you can use rocks or stones to create weighted bases for the driftwood. Look for large and heavy rocks that are suitable for aquarium use, ensuring that they are smooth and non-toxic. Carefully arrange the rocks or stones around the base of the driftwood, positioning them in a way that adds stability and prevents the driftwood from floating. This method not only helps to sink the driftwood but also adds a touch of authenticity to the aquarium setup.

Using Driftwood Anchoring Techniques

In addition to weighting the driftwood, various anchoring techniques can be employed to keep it securely in place. These techniques help to prevent the driftwood from shifting or floating due to water currents or the activities of the tank inhabitants.

Tying the driftwood to a weight

One effective technique is to tie the driftwood to a weight at the base of the aquarium. Use a sturdy fishing line or aquarium-safe rope to fasten the driftwood to the weight. Be sure to tie it tightly and securely to prevent any movement. The weight can be a heavy rock, a ceramic ornament, or any other object that will hold the driftwood in place. This method ensures that the driftwood remains grounded even if there are strong water currents in the tank.

Using suction cups or magnets

Suction cups or magnets can also be utilized to anchor the driftwood. Attach suction cups or magnets to the base of the driftwood and affix them to the sides or bottom of the aquarium. Ensure that the suction cups or magnets are strong enough to support the weight of the driftwood. This method allows for easy removal and repositioning of the driftwood if needed.

Attaching the driftwood to a slate

Another anchoring technique involves attaching the driftwood to a piece of slate. Slate is a flat and sturdy rock-like material that provides a stable base for the driftwood. Securely fasten the driftwood to the slate using fishing line, aquarium-safe adhesive, or silicone sealant. Place the slate on the substrate, ensuring that it is stable and well-supported. This method keeps the driftwood in place and prevents it from floating or shifting.

How Make Driftwood Sink?

Driftwood Sinking Methods

Now that you have prepared the driftwood and created weighted bases or used anchoring techniques, it’s time to employ specific methods to ensure the driftwood sinks and stays submerged in the aquarium.

Soaking the driftwood in water

One of the simplest methods to sink driftwood is by soaking it in water. Fill a container or bathtub with water, ensuring that it’s deep enough to fully submerge the driftwood. Place the driftwood in the water and weigh it down using rocks or bricks. Allow the driftwood to soak for several days or until it becomes waterlogged and sinks naturally. Regularly check the water to make sure it remains clean and free from any decaying debris.

Burying the driftwood in substrate

If you prefer a more natural look, you can bury the driftwood in the substrate of the aquarium. Prepare the substrate by creating a depression or hole where the driftwood will be placed. Ensure that the depression is deep enough to fully cover and bury the driftwood. Insert the driftwood into the substrate, making sure it is stable and firmly grounded. Cover the driftwood with the surrounding substrate, creating a seamless and natural appearance. Over time, the weight of the substrate will help to sink the driftwood.

Using driftwood weights

Driftwood weights are specially designed products that can assist in sinking the driftwood. These weights are typically made of non-toxic materials and are shaped to fit securely around the base of the driftwood. Simply attach the driftwood weight to the bottom of the driftwood, ensuring it is firmly held in place. The added weight will help the driftwood sink and remain submerged in the aquarium.

Considerations for Different Aquarium Types

When sinking driftwood, it’s important to consider the specific requirements and conditions of your aquarium type. Different aquarium setups, such as freshwater aquariums, saltwater aquariums, and paludariums, may have varying needs.

Freshwater aquariums

In freshwater aquariums, it’s crucial to consider the impact of driftwood on the water chemistry. Driftwood naturally releases tannins into the water, which can cause discoloration and affect the pH levels. While some fish and plants thrive in slightly acidic water, others may require more neutral or alkaline conditions. Monitor the water parameters regularly and make adjustments as necessary to ensure a healthy and balanced environment for your freshwater inhabitants.

Saltwater aquariums

In saltwater aquariums, maintaining water quality is of utmost importance. Driftwood can introduce organic compounds into the water, potentially leading to nutrient imbalances and algae growth. Regular water testing and necessary nutrient controls are essential to prevent any negative effects on coral and other sensitive marine organisms. Additionally, ensure that the driftwood is fully cured and free from any unwanted pests or parasites that may harm saltwater species.

Paludariums

Paludariums are unique setups that combine aquatic and terrestrial elements, typically featuring both water and land areas. When sinking driftwood in paludariums, consider the specific water depth and ensure that the driftwood is appropriately positioned to maintain a balanced and visually appealing environment. Take into account the lighting and humidity requirements of the terrestrial plants and animals in the paludarium to ensure optimal conditions for their growth and well-being.

Maintenance Tips

Once you have successfully sunk the driftwood in your aquarium, it is important to perform regular maintenance to ensure its ongoing stability and well-being of the aquatic inhabitants.

Testing and adjusting water parameters

Regularly test the water parameters, including pH, ammonia, nitrate, and nitrite levels, to ensure they are within the appropriate range for your aquarium. Make any necessary adjustments to maintain a healthy and balanced environment. Monitoring these parameters will help prevent any adverse effects of the driftwood on water quality and the overall ecosystem.

Removal and repositioning of driftwood

Occasionally, you may need to remove or reposition the driftwood in your aquarium. This may be necessary for cleaning purposes or to ensure that it is still safely and securely anchored. When removing driftwood, be careful not to disturb or damage any plants, decorations, or tank inhabitants. Use caution and gentle maneuvers to minimize stress on the aquarium’s ecosystem.

Cleaning and preventing decay

Driftwood, like any other organic material, can decay over time, potentially polluting the water and negatively impacting the aquarium’s health. Regularly inspect the driftwood for signs of decay, such as soft or rotting areas. If decay is detected, remove the affected parts or replace the driftwood entirely. Additionally, perform routine cleaning of the driftwood to remove any algae or debris that may accumulate. A soft brush or algae scraper can be used to gently clean the surface without causing damage.

Alternative Options for Sinking Driftwood

While the methods mentioned above are effective for sinking driftwood, there are alternative options you can explore to achieve a similar effect.

Using artificial driftwood

If you prefer not to use natural driftwood or encounter difficulties sinking it, artificial driftwood is a viable alternative. Artificial driftwood is typically made of resin or other synthetic materials, designed to resemble the appearance and texture of real driftwood. These pieces are often pre-weighted or come with built-in bases, eliminating the need for additional sinking techniques. Artificial driftwood offers the advantage of being more durable and less prone to decay compared to natural driftwood.

Creating DIY weighted driftwood

For those who enjoy do-it-yourself projects, creating DIY weighted driftwood can be a fun and creative alternative. Start with a lightweight piece of driftwood and use the methods mentioned earlier, such as attaching fishing sinkers or using epoxy putty, to add weight to the driftwood. This allows you to customize the sinking process and create unique and personalized pieces for your aquarium.

Using other materials for a similar effect

If you prefer not to use traditional driftwood, there are other materials that can provide a similar aesthetic effect. For example, petrified wood, rocks, or ceramic ornaments can be used to create appealing submerged structures in your aquarium. These materials can be manipulated and positioned to resemble natural elements like branches or fallen trees, offering an alternative approach to achieving a visually pleasing and functional aquarium design.

Safety Precautions

While sinking driftwood can enhance the beauty and functionality of your aquarium, it’s important to prioritize the safety of your aquatic life.

Choosing non-toxic driftwood

When selecting driftwood for your aquarium, ensure that it is non-toxic and safe for your fish and other inhabitants. Certain types of driftwood may release harmful substances or have sharp edges that can injure your aquatic creatures. Always research and choose driftwood species that are known to be aquarium-safe and compatible with your specific tank inhabitants.

Avoiding sharp edges or splinters

Inspect the driftwood carefully for any sharp edges or splintered areas that may pose a risk to the aquarium inhabitants. Sand down or smooth out any rough patches to prevent potential injuries, especially to delicate fish or bottom-dwelling species. Taking these precautionary measures will help maintain a safe and comfortable environment for your aquatic creatures.

Monitoring water quality and health of aquatic life

Regularly monitor the water quality, health, and behavior of your aquarium inhabitants. Any drastic changes in water parameters, signs of stress, or unusual behavior could indicate an issue with the driftwood or its preparation. Address any concerns promptly to ensure the well-being and longevity of your aquarium’s ecosystem.

Conclusion

Making driftwood sink in aquariums is a necessary step to prevent floating and disturbances in aquatic habitats. By selecting suitable driftwood pieces, properly preparing them, creating weighted bases, and employing anchoring techniques, you can successfully sink driftwood in your aquarium. Remember to consider the specific requirements of your aquarium type, perform regular maintenance, and ensure the safety of your aquatic life. With proper care and attention, your sunken driftwood will create a stunning and harmonious natural environment for your aquarium inhabitants to thrive in.

Filed Under: Driftwood Tagged With: Decor, Driftwood, Home Improvement, Sink

Coretec Shadow Lake Driftwood

January 13, 2024 by admin

Imagine transforming your space into a charming oasis with the captivating allure of Coretec Shadow Lake Driftwood flooring. This exquisite flooring option captures the essence of nature, bringing the serenity of a lakeside retreat right into your home. With its unique combination of rustic charm and modern elegance, Coretec Shadow Lake Driftwood is the perfect choice for those seeking to create a cozy yet stylish atmosphere. Created with the highest quality materials, this flooring is not only visually stunning but also built to withstand the test of time. Let the gentle hues of weathered wood and the rich texture of Coretec Shadow Lake Driftwood transport you to a world of tranquility, where effortless beauty meets durability. Say goodbye to bland floors and hello to a space that radiates warmth and sophistication with Coretec Shadow Lake Driftwood.

Overview of Coretec Shadow Lake Driftwood

What is Coretec Shadow Lake Driftwood?

Coretec Shadow Lake Driftwood is a high-quality flooring option that combines the natural beauty of driftwood with cutting-edge technology. It is a luxury vinyl plank flooring that offers a realistic look and feel of weathered wood, providing a warm and inviting ambiance to any space. Coretec Shadow Lake Driftwood is known for its durability, versatility, and ease of installation, making it a popular choice among homeowners and designers.

Features and Benefits of Coretec Shadow Lake Driftwood

Coretec Shadow Lake Driftwood comes with a range of features and benefits that set it apart from other flooring options. Firstly, it is 100% waterproof, making it ideal for high-moisture areas such as bathrooms, kitchens, and basements. This feature ensures that the flooring does not warp or buckle when exposed to water. Additionally, Coretec Shadow Lake Driftwood is pet-friendly, as it resists scratches and stains caused by pets. It is also resistant to wear and fading, ensuring that it maintains its beauty and durability over time.

Popular Applications of Coretec Shadow Lake Driftwood

Coretec Shadow Lake Driftwood is suitable for various applications, both residential and commercial. Its authentic driftwood look adds a touch of rustic elegance to living rooms, bedrooms, and dining areas. It is also frequently used in commercial spaces such as offices, restaurants, and retail stores, as it combines style with durability. The versatility of Coretec Shadow Lake Driftwood makes it a popular choice for homeowners and designers looking for a timeless and natural flooring option.

Installation and Maintenance

Preparing the Subfloor

Before installation, it is crucial to prepare the subfloor properly to ensure a successful and long-lasting installation of Coretec Shadow Lake Driftwood. The subfloor should be clean, level, and dry. Any imperfections or unevenness in the subfloor should be addressed to prevent problems during installation. It is recommended to remove any old flooring, adhesive residues, and debris, ensuring a smooth surface for the new flooring.

Installation Process

Coretec Shadow Lake Driftwood features a floating floor design, which simplifies the installation process. It can be installed over most existing hard surfaces, including concrete, tile, and hardwood. The planks are designed with an interlocking mechanism, allowing for a secure and seamless fit. It is essential to follow the manufacturer’s installation guidelines and use the recommended installation materials to ensure optimal results.

Cleaning and Maintenance Tips

Coretec Shadow Lake Driftwood is known for its ease of maintenance. Regular sweeping or vacuuming to remove dirt and debris is recommended. Spills should be promptly cleaned with a damp cloth or mop. The use of harsh chemicals and abrasive cleaners should be avoided, as they may damage the flooring surface. It is also advisable to use felt pads on furniture legs to prevent scratches. With proper care, Coretec Shadow Lake Driftwood can maintain its beauty and performance for years to come.

Design and Appearance

Natural Driftwood Look

Coretec Shadow Lake Driftwood replicates the natural beauty of weathered and aged wood, specifically driftwood. Its authentic appearance brings a warm and inviting feel to any space, adding a touch of rustic charm. The natural textures and grain patterns of driftwood are carefully recreated, providing a realistic and organic look that is difficult to distinguish from real wood.

Color and Texture Variations

Coretec Shadow Lake Driftwood offers a range of color options to suit different interior design styles and preferences. From light, weathered tones to rich, dark hues, there is a variety of choices available. The textures and embossing on the planks mimic the subtle details found in real driftwood, adding depth and character to the flooring. With such a wide selection, finding the perfect shade and texture to complement your space is made easy.

Plank Sizes and Styles

Coretec Shadow Lake Driftwood is available in various plank sizes and styles, allowing for customization and versatility. The plank sizes range from narrow to wide, accommodating different room sizes and design preferences. Whether you prefer a traditional, standard-width plank or a more contemporary, wide-width option, Coretec Shadow Lake Driftwood offers a solution to fit your needs. The different styles, such as straight edge and beveled edge, provide additional design flexibility.

Durability and Performance

Waterproof and Pet-Friendly

One of the standout features of Coretec Shadow Lake Driftwood is its waterproof nature. This makes it an excellent flooring choice for areas prone to moisture, such as bathrooms and kitchens. The waterproof properties ensure that the planks will not expand, contract, or warp when exposed to water, providing long-lasting durability. Additionally, Coretec Shadow Lake Driftwood is pet-friendly, as it is resistant to scratches and stains caused by pets’ nails and accidents.

Resistance to Wear, Stains, and Fading

Coretec Shadow Lake Driftwood is designed to withstand the rigors of daily life. Its wear layer provides excellent resistance to scratches, making it suitable for high-traffic areas. The flooring is also resistant to stains, ensuring that spills and accidents do not leave a lasting mark. Moreover, Coretec Shadow Lake Driftwood is fade-resistant, making it suitable for areas exposed to direct sunlight. Its ability to maintain its appearance even under challenging conditions makes it a durable flooring choice.

UV Protection

Coretec Shadow Lake Driftwood is equipped with UV protection, preventing the flooring from fading or discoloring when exposed to sunlight. This feature ensures that the flooring retains its original color and finish, even in rooms with large windows or high sunlight exposure. By incorporating UV protection, Coretec Shadow Lake Driftwood stands the test of time and maintains its aesthetics for years to come.

Advanced Construction Technology

COREtec’s patented core structure

Coretec Shadow Lake Driftwood features COREtec’s patented core structure, known for its stability and strength. The core is made of a high-density composition, providing exceptional dimensional stability even in fluctuating temperature and humidity conditions.

driftwood, wooden sculpture, wood
. This feature minimizes the risk of the flooring expanding, contracting, or warping, ensuring a reliable and long-lasting installation.

Attached Cork Underlayment

Each plank of Coretec Shadow Lake Driftwood comes with an attached cork underlayment, adding additional comfort and noise reduction benefits. The cork underlayment not only creates a cushioned feel underfoot but also helps to absorb sound, making it an excellent choice for households with active lifestyles or multi-level residences.

Ease of Installation with Floating Floor Design

Coretec Shadow Lake Driftwood’s floating floor design allows for easy and efficient installation. The planks can be clicked and locked together without the need for adhesive or nails. This feature makes it a great DIY-friendly option for homeowners, saving them time and expenses associated with professional installation. The floating floor design also allows for flexibility, as the planks can be easily replaced or repositioned if needed.

Cost and Value

Comparative Price Range

When considering the cost of Coretec Shadow Lake Driftwood, it falls within the higher price range for luxury vinyl plank flooring. However, the cost is justified by the product’s exceptional quality, durability, and realistic appearance. While it may be a higher initial investment, the long-term benefits and value provided by Coretec Shadow Lake Driftwood make it a worthwhile investment.

Longevity and Warranty Coverage

Coretec Shadow Lake Driftwood is designed to last for many years. Its durable construction and resistance to wear, stains, and fading ensure that it maintains its beauty and performance over time. Most manufacturers provide warranties for their product, ranging from 10 to 30 years or more, depending on the specific collection and retailer. The extensive warranty coverage further solidifies the long-term value and peace of mind for homeowners.

Return on Investment

Investing in Coretec Shadow Lake Driftwood can yield a significant return on investment. Not only does it enhance the aesthetic appeal of a space, but it also adds value to a property. The timeless and durable nature of the flooring makes it appealing to potential buyers, thus increasing the resale value. Additionally, the low maintenance requirements and longevity of Coretec Shadow Lake Driftwood reduce the need for costly repairs or replacements, resulting in long-term savings.

Customer Reviews and Testimonials

Satisfied Customers’ Experiences

Customers who have chosen Coretec Shadow Lake Driftwood for their homes or businesses have expressed high levels of satisfaction. They praise the flooring’s realistic appearance, durability, and ease of installation. Many customers have shared their positive experiences, noting that the flooring exceeds their expectations and brings a warm and inviting atmosphere to their spaces.

Positive Feedback on Performance

Customers appreciate Coretec Shadow Lake Driftwood’s performance in various aspects. They highlight its waterproof properties, noting that it withstands spills and accidents without any damage. The flooring’s resistance to scratches and stains caused by pets and everyday use also receives positive feedback. Customers value its ability to maintain its quality and appearance even in high-traffic areas.

Impressions on Aesthetics

The aesthetics of Coretec Shadow Lake Driftwood have garnered praise from customers. They appreciate its authentic driftwood look, noting that it adds a unique and natural touch to their interiors. Customers mention the color variations, texture details, and realistic grain patterns, all of which contribute to the flooring’s striking appearance. Overall, customers are pleased with how Coretec Shadow Lake Driftwood elevates the look and feel of their spaces.

Environmental Friendliness

Recycled Materials and Sustainably Sourced Wood

Coretec Shadow Lake Driftwood demonstrates a commitment to environmental friendliness. The planks are made using recycled materials, reducing waste and the demand for new resources. Additionally, the wood used in the production of the flooring is sustainably sourced, ensuring responsible forest management practices. By choosing Coretec Shadow Lake Driftwood, customers can contribute to a more sustainable future.

Low VOC Emissions

Volatile Organic Compounds (VOCs) are chemicals that can be released from certain flooring materials and negatively impact indoor air quality. Coretec Shadow Lake Driftwood is designed to have low VOC emissions, ensuring a healthier indoor environment for occupants. The flooring meets strict emissions standards, making it a safe and eco-friendly choice for homes and businesses.

Indoor Air Quality Benefits

Coretec Shadow Lake Driftwood’s low VOC emissions contribute to improved indoor air quality. By reducing the presence of harmful chemicals in the air, the flooring promotes a healthier living and working environment.

palau beach, bay, lake
. Customers can enjoy the beauty and performance of Coretec Shadow Lake Driftwood without compromising their health or the well-being of their loved ones.

Comparisons to Other Flooring Options

Hardwood Flooring vs. Coretec Shadow Lake Driftwood

When comparing hardwood flooring to Coretec Shadow Lake Driftwood, the latter offers several advantages. While hardwood flooring provides a classic and timeless look, it is susceptible to moisture damage and requires regular maintenance. Coretec Shadow Lake Driftwood, on the other hand, is 100% waterproof and requires minimal upkeep.

kids, young, people
. Additionally, Coretec Shadow Lake Driftwood is more budget-friendly and offers greater versatility in terms of style and design options.

Laminate Flooring vs. Coretec Shadow Lake Driftwood

Laminate flooring and Coretec Shadow Lake Driftwood share some similarities, but there are key differences that set them apart. While laminate flooring is reasonably durable, it is not waterproof, making it less suitable for areas prone to moisture. Coretec Shadow Lake Driftwood, with its waterproof properties, offers enhanced durability and can be installed in wet areas. Additionally, Coretec Shadow Lake Driftwood provides a more realistic wood look and feels compared to laminate flooring.

Vinyl Flooring vs. Coretec Shadow Lake Driftwood

Coretec Shadow Lake Driftwood falls under the category of luxury vinyl plank flooring, which differs from traditional vinyl flooring. Traditional vinyl flooring often lacks the realism and quality found in luxury vinyl options like Coretec Shadow Lake Driftwood. The latter provides a more authentic wood appearance, enhanced durability, and waterproof properties. Coretec Shadow Lake Driftwood is also more resistant to scratching, fading, and staining, making it a superior choice within the vinyl flooring category.

Where to Buy Coretec Shadow Lake Driftwood

Authorized Retailers

Coretec Shadow Lake Driftwood can be purchased from authorized retailers that specialize in flooring products. These retailers have expertise in assisting customers in choosing the right flooring options for their needs and offer guidance in the installation and maintenance process. It is recommended to check the manufacturer’s website for a list of authorized retailers in your area.

Online Platforms

Online platforms provide customers with convenience and accessibility when shopping for Coretec Shadow Lake Driftwood. Various websites offer a wide selection of flooring options, including Coretec Shadow Lake Driftwood, allowing customers to compare prices, read reviews, and make informed decisions. When purchasing online, it is important to ensure that the retailer is reputable and offers genuine Coretec products.

Showrooms and Local Suppliers

Showrooms and local suppliers provide the opportunity to see and feel Coretec Shadow Lake Driftwood in person before making a purchase. They often have displays and samples available for customers to explore, allowing them to visualize how the flooring will appear in their space. Showrooms and local suppliers also offer the expertise of trained professionals who can answer questions and provide personalized recommendations based on specific requirements.

In conclusion, Coretec Shadow Lake Driftwood offers a stunning and practical flooring solution for both residential and commercial spaces. Its realistic driftwood look, durability, and ease of installation make it a popular choice among homeowners and designers alike. With its waterproof and pet-friendly features, Coretec Shadow Lake Driftwood provides peace of mind and long-lasting performance. Customers can find Coretec Shadow Lake Driftwood through authorized retailers, online platforms, and showrooms, ensuring a seamless buying experience. Choose Coretec Shadow Lake Driftwood for a beautiful, durable, and environmentally friendly flooring option that will enhance any space.

Filed Under: Driftwood Tagged With: Driftwood, flooring, Home Improvement

  • « Previous Page
  • Page 1
  • Page 2

Primary Sidebar

Driftwood4us.com, is a participant in the Amazon Services LLC Associates Program, an affiliate advertising program designed to provide a means for sites to earn advertising fees by advertising and linking to amazon.com.