• Skip to main content
  • Skip to primary sidebar
  • Terms and Conditions
  • Privacy Policy
  • Contact

Driftwood 4 Us

Just About Driftwood

Macrame

Driftwood Macrame Diy

May 22, 2025 by admin

Have you ever considered bringing the beauty of nature indoors with your own DIY projects?

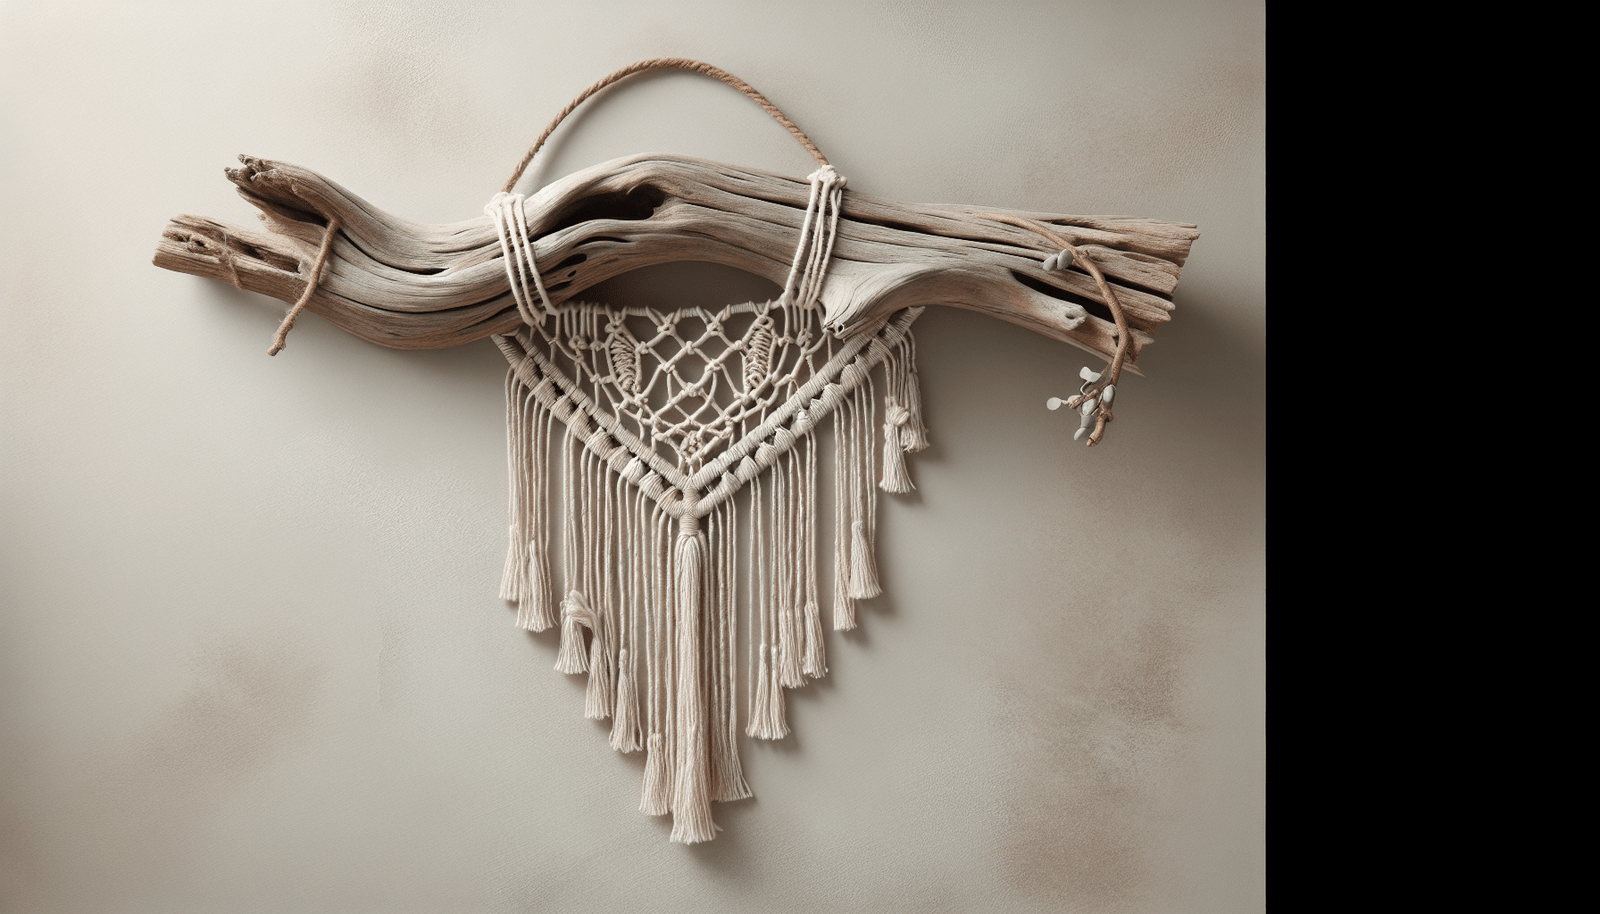
If you have an appreciation for natural decor, you might want to explore the charming blend of driftwood and macrame. Combining the organic textures of driftwood with the intricate patterns of macrame knots can create stunning works of art for your home. This guide will take you through the process of creating your own driftwood macrame masterpiece, from the materials you need to step-by-step instructions. Whether you’re a seasoned crafter or a newbie looking for a new hobby, this project is not only fun but also incredibly rewarding.
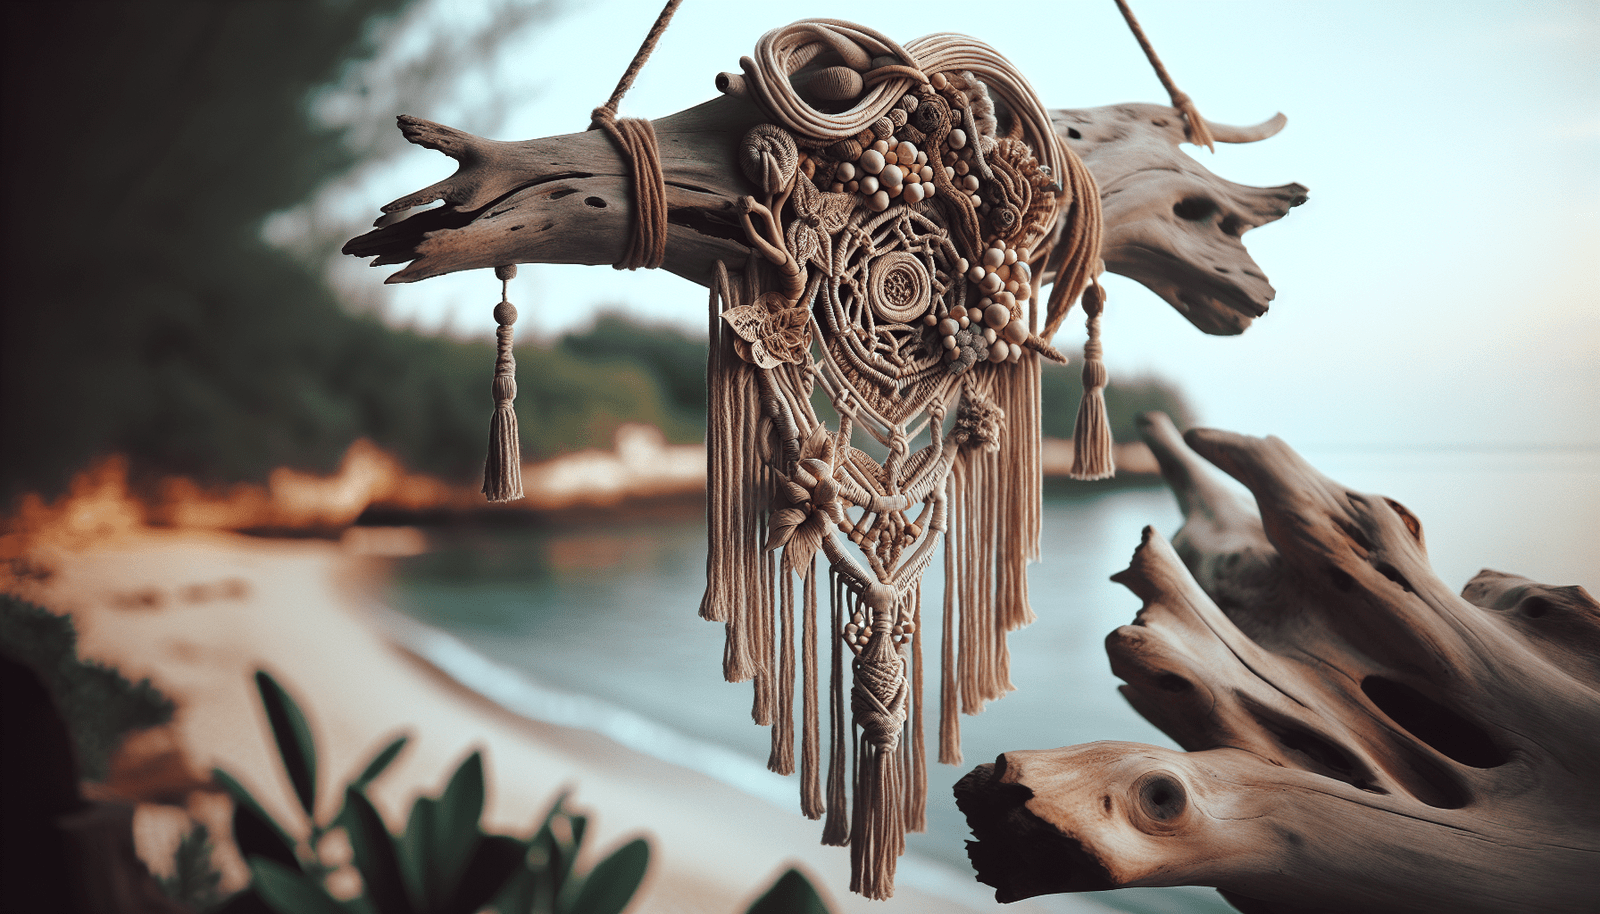
Driftwood Macrame Diy

Understanding Driftwood and Macrame

Before you get started, let’s explore what makes driftwood and macrame a perfect pair.

What is Driftwood?

Driftwood is wood that has been washed onto a shore by the tides, waves, or wind. These pieces of wood have often spent a significant amount of time floating in rivers or oceans, making their way to the shore, beautifully weathered and smooth. The unique shapes and textures of driftwood make it a popular choice for home decor, bringing a piece of nautical charm indoors.

What is Macrame?

Macrame is a form of textile production using knotting rather than weaving or knitting. This technique was particularly popular in the 1970s and has seen a resurgence in recent years. The art of macrame involves using a variety of knots to create patterns and shapes. It’s both relaxing and rewarding, offering endless possibilities for creativity.

Benefits of Creating Driftwood Macrame Decor

Integrating driftwood macrame decor into your living space can offer several benefits.

Natural Aesthetic

Combining driftwood and macrame brings nature indoors, creating a calming, natural aesthetic. The organic shapes of driftwood provide a rustic touch, while macrame adds a delicately sophisticated feel.

Customizable Designs

Driftwood macrame projects are highly customizable. You get to choose the size, shape, and pattern of your piece, ensuring it complements your existing decor and personal taste.

Eco-Friendly Craft

Utilizing driftwood supports sustainable practices. It’s a fantastic way to recycle natural materials, and macrame uses minimalistic resources, making it an eco-friendly craft choice.

Gathering Your Materials

Essential Materials

To create your driftwood macrame decor, you need to gather a few essential materials. Here’s what you’ll need:

  • Driftwood: Choose a piece of driftwood that suits your desired project size. Ensure it’s smooth and free of debris.
  • Macrame Cord: Natural fibers such as cotton rope are ideal for macrame. The thickness depends on the desired look and complexity of the knots.
  • Scissors: Sharp scissors are essential for cutting your macrame cord.
  • Measuring Tape: You’ll need this to measure and cut your cord accurately.
  • Optional: Beads or Feathers: For added detail and texture, you might want to add beads or feathers to your design.

Finding the Perfect Driftwood

Finding the perfect piece of driftwood is an enjoyable part of the process. You can look for driftwood along beaches, rivers, or lakes. Whenever you are collecting driftwood, ensure you follow any local guidelines or rules about removing natural resources.

Preparing Your Materials

Cleaning the Driftwood

Before you begin working with your driftwood, it’s crucial to clean it thoroughly. Here is a simple method:

  1. Rinse: Rinse the driftwood under clear water to remove sand and debris.
  2. Scrub: Use a brush to scrub the driftwood, if necessary.
  3. Sun-Dry: Allow the driftwood to dry in the sun for at least a day. This not only dries the wood but also helps to bleach it slightly, enhancing its color.

Cutting the Macrame Cord

Once your driftwood is ready, it’s time to prepare the macrame cord. The length of the cord will depend on the size of your project and the types of knots you’re using. A general rule is to cut cords that are four times the length of the desired finished piece. Always err on the side of cutting too much rather than too little.
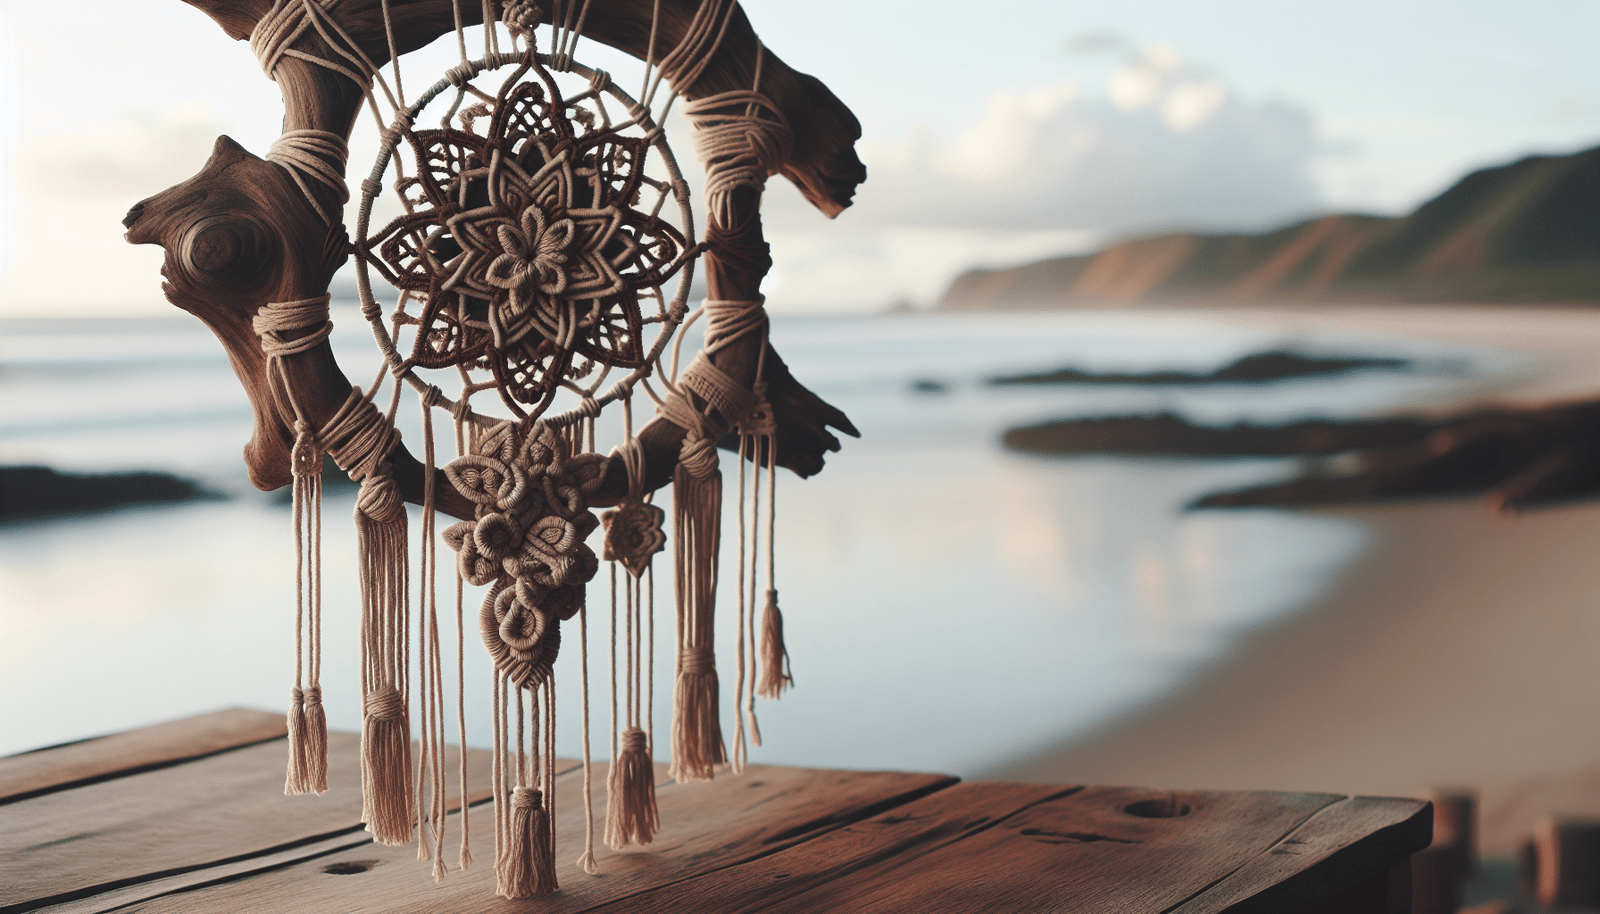
Driftwood Macrame Diy

Knots You Need to Know

There are several basic knots that form the foundation of macrame projects. Here are a few you should master:

Lark’s Head Knot

The Lark’s Head Knot is used to attach the macrame cords to the driftwood. Here’s how you do it:

  1. Fold your cord in half, forming a loop.
  2. Place the loop over the driftwood.
  3. Pull the ends through the loop, securing the cord to the driftwood.

Square Knot

The Square Knot is one of the most common knots in macrame. It consists of tying two half knots.

  1. Divide four cords into two groups of two.
  2. Cross the outer left cord over the two middle cords.
  3. Cross the outer right cord over the left cord, under the middle cords, and through the loop on the left.
  4. Pull the cords to tighten.

Half Hitch Knot

The Half Hitch Knot is versatile and often used for creating lines or patterns.

  1. Start with one lead cord and bring another cord over it.
  2. Pull the working cord under the lead cord and back to the original side.
  3. Pull tight to secure the knot.

Step-by-Step: Creating a Driftwood Macrame Wall Hanging

Now that you have your materials and know your knots, let’s create a simple wall hanging.

Step 1: Attach Cords to Driftwood

Measure and cut twelve cords, each about four times the length of your desired final product. Attach each piece of cord to the driftwood using the Lark’s Head Knot.

Step 2: Create Your Pattern

Choose a pattern that suits your style. Beginners may find it helpful to start with a simpler pattern designed with Square Knots and Half Hitch Knots. Create rows of square knots and vary the length and spacing between each row for an appealing design.

Step 3: Add Decorative Elements

If you have optional decorations like beads or feathers, now is the time to incorporate them. Beads can be added onto the cord by simply sliding them in before tying knots. Feathers can be attached at the end of cords for a bohemian touch.

Step 4: Trim the Cords

Once you have completed your design, trim the excess cord to your desired length. You might choose uniform lengths or a stylized tapered finish.

Step 5: Hang Your Artwork

Find a suitable spot in your home to display your work of art. You’ll just need a small hook or nail to hang your driftwood macrame piece.

Caring for Your Driftwood Macrame

To ensure the beauty of your macrame piece lasts, it’s essential to care for it properly.

Dust Regularly

Since dust can accumulate on the cords and driftwood, use a soft brush or duster to clean your macrame decor every few weeks.

Avoid Moisture

Keep your macrame piece away from high moisture areas, which could cause the cords to stretch or mildew.

Adjust Knots as Needed

Over time, knots may loosen. Simply tighten them up and press them back into place to maintain the integrity of the design.

Enjoying the Satisfaction of Handmade Decor

The creation of driftwood macrame decor allows you to blend your creativity with the beauty of nature’s materials. Not only does it bring a unique touch to any space, but it also offers a satisfying escape into the world of crafting. Every piece you create will have its own story, shaped by your hands and vision.

By taking the time to learn the different knots and understanding the characteristics of driftwood, you are now equipped to create a wide array of beautiful, intricate macrame projects. Whether it’s a wall hanging, plant hanger, or decorative piece, your new artistry will stand as a testament to your patience and creativity. Enjoy every twist, knot, and the gentle movement of the cords as you fashion your own exquisite driftwood macrame.
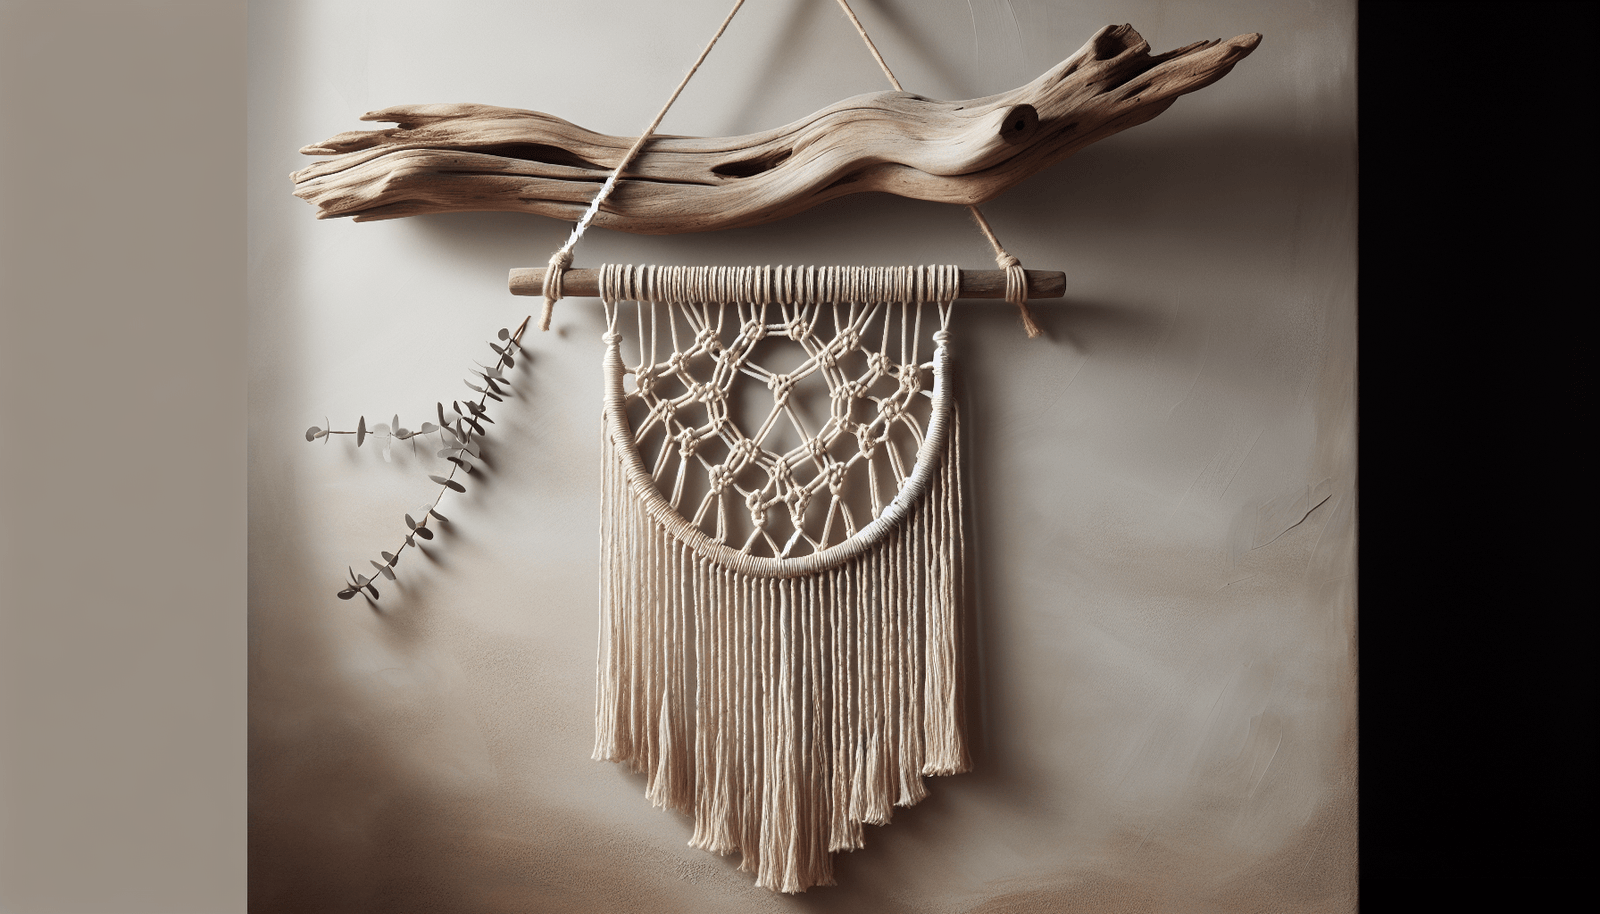
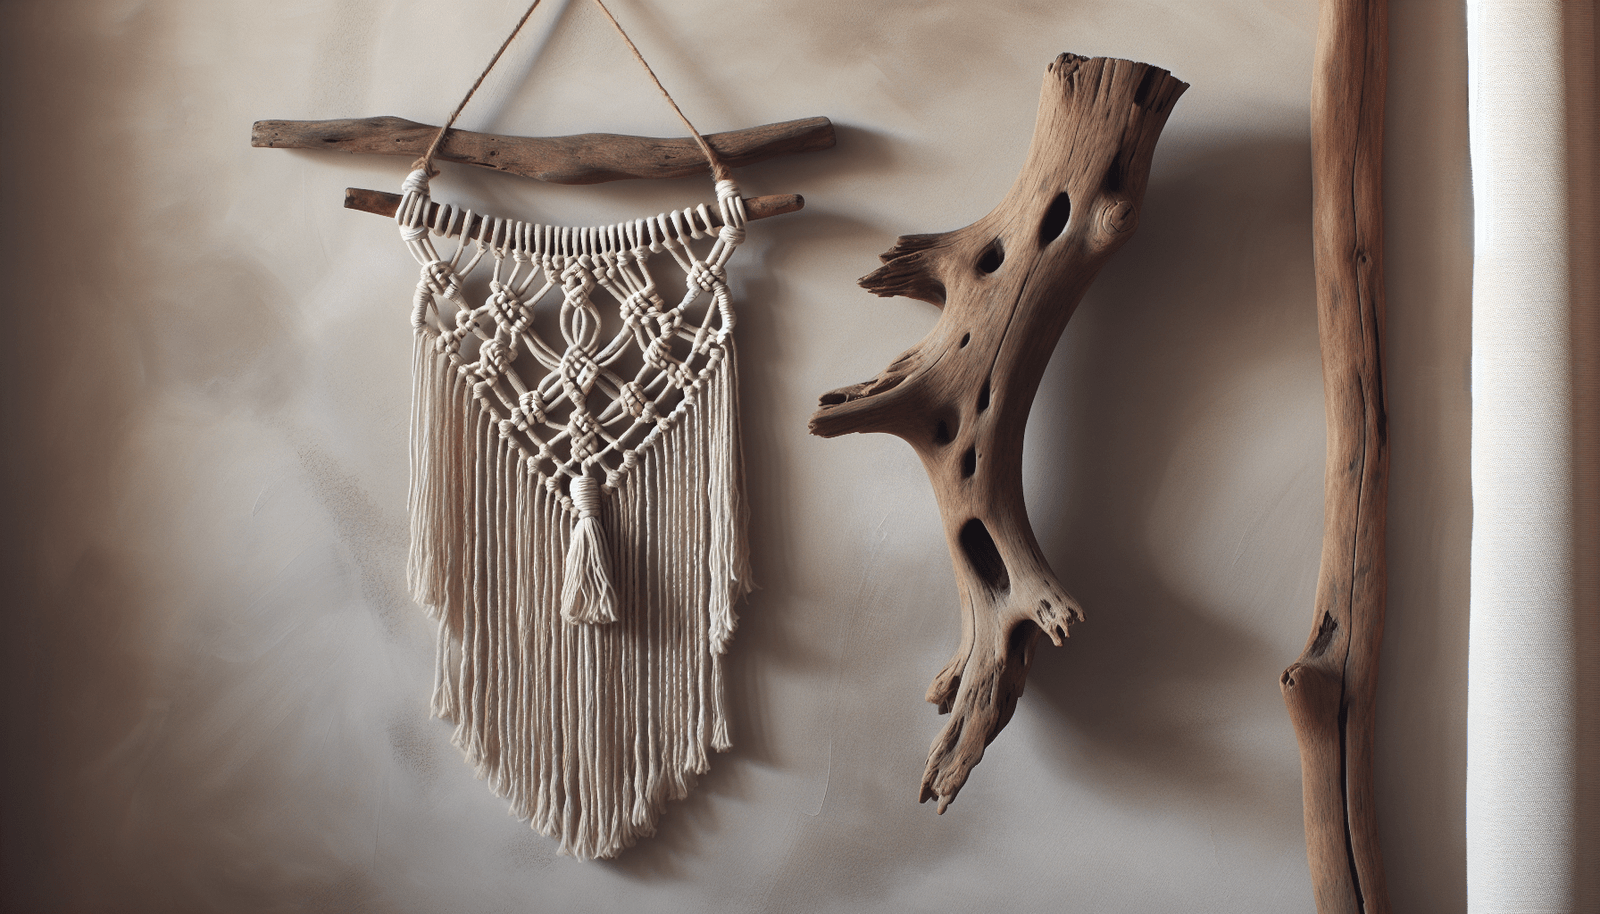
Filed Under: Driftwood Ideas Tagged With: crafting, Driftwood, Handmade, home decor, Macrame

Driftwood Macrame Wall Hanging Tutorial

May 21, 2025 by admin

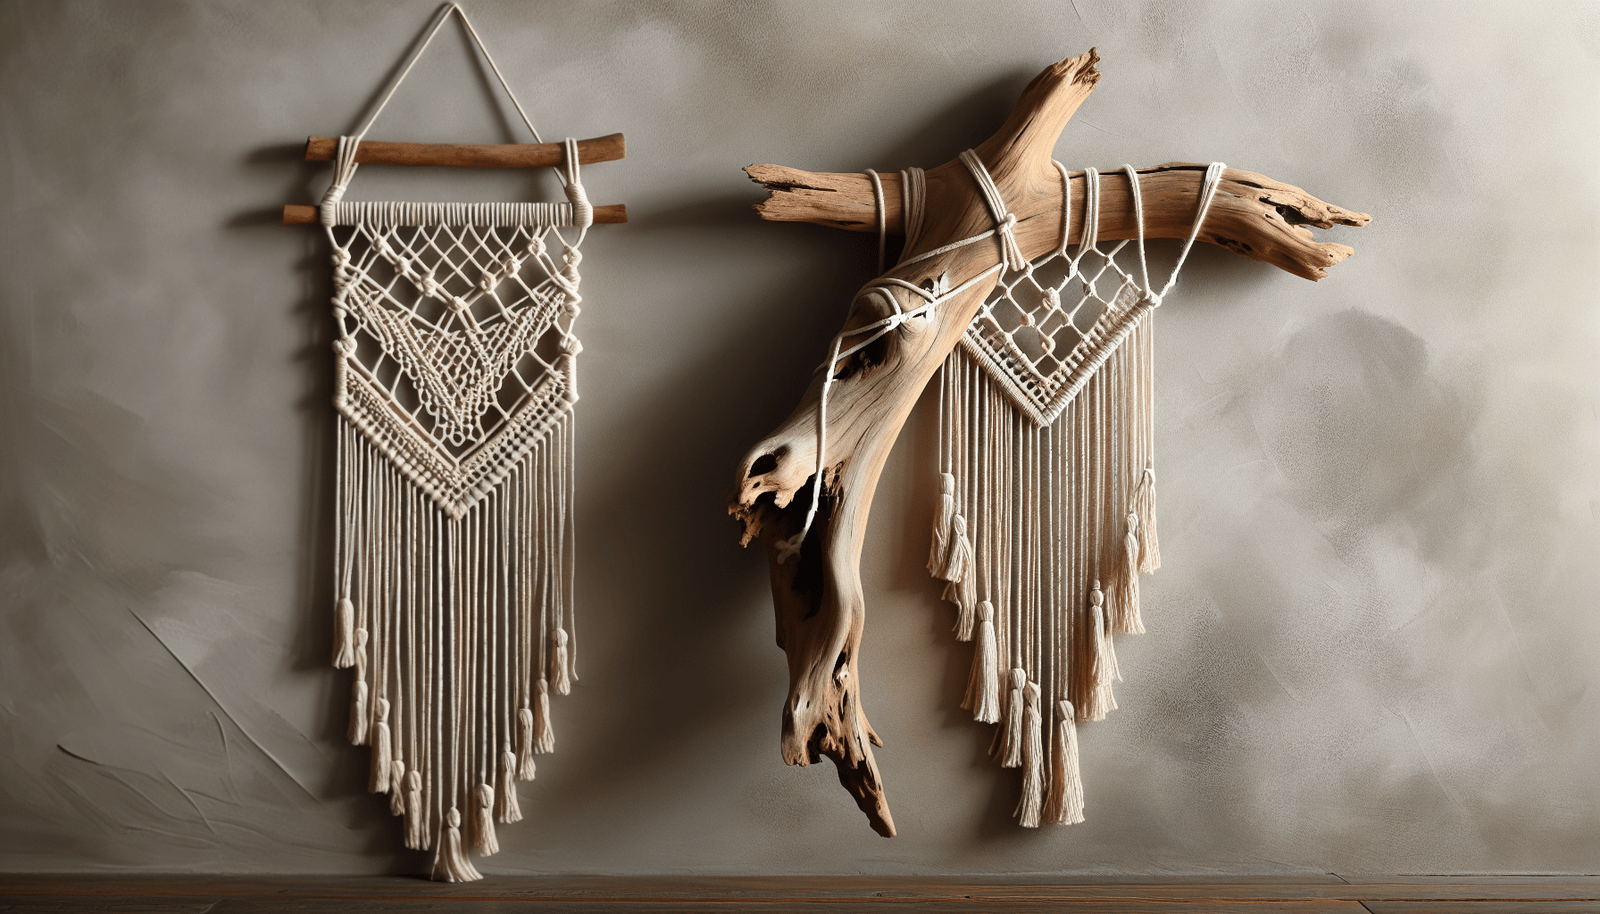
Have you ever found yourself captivated by a piece of beachy, bohemian decor and wanted to recreate the charm at home? Creating your own driftwood macrame wall hanging can be a deeply rewarding process—and a beautiful way to bring some coastal style into your space! In this tutorial, you’ll learn how to put together a stunning piece using just driftwood and macrame techniques. Whether you’re a beginner or have some experience with macrame, you’ll find this guide informative and easy to follow. So, let’s embark on this creative journey!

Driftwood Macrame Wall Hanging Tutorial

Understanding the Basics

Before you jump in, let’s talk a little about what macrame is and what materials you’ll need. Familiarizing yourself with the basic concepts and tools will make the crafting process smoother and more enjoyable.

What is Macrame?

Macrame is a form of textile-making that uses knotting rather than weaving or knitting. Its hands-on craft style allows for a wide variety of designs and styles, from intricate and detailed to simple and rustic. Macrame has been around for centuries, dating back to 13th-century Arabic weavers, and has seen a resurgence in popularity in recent decades as a favored technique for home decor.

Materials You Will Need

The materials for a driftwood macrame wall hanging are relatively simple and can be found at most craft stores or easily ordered online. Here’s a quick list:

MaterialDescription
DriftwoodChoose a piece that is sturdy, about 18-30 inches long, and suits your aesthetic.
Macrame CordTypically, cotton cords are used, but there are synthetic options as well.
ScissorsA good pair of sharp scissors will make cutting cord smooth and precise.
Measuring TapeEssential for ensuring your cords are cut to the correct lengths.
Optional: Beads or FeathersThese can be woven into your design for added flair.

Choosing the Right Driftwood

Selecting the perfect piece of driftwood is a crucial step. It should not only fit the aesthetic you’re aiming for but also be robust enough to support the weight of your macrame design. Driftwood pieces can often be found near bodies of water, or you may choose to purchase them from craft suppliers.

Preparing Your Workspace

Setting up a dedicated workspace will help keep your project organized and enjoyable. You don’t need a large area, but having a well-lit and clutter-free zone makes a big difference in your crafting experience.

Clearing and Arranging Your Area

Find a flat surface, like a table or desk, where you can easily lay out your materials. Make sure you have good lighting to minimize eye strain. It helps to cover your workspace with a fabric or mat to catch any small pieces of cord or dust.

Organizing Your Materials

Organize all your materials before beginning. Lay them out in the order of use, or keep them neatly compartmentalized. Having everything readily accessible keeps the process smooth and glitch-free.

Measuring and Cutting the Cord

The next step is to measure and cut your macrame cord. This is an important part of the method since your entire piece relies on consistent measurements and having enough cord on hand.

How to Measure Correctly

Determine the desired finished length of your wall hanging, doubling that measurement or more, depending on the complexity of your knots. It’s better to have a little extra cord than to run short halfway through your project. Use your measuring tape to accurately gauge the lengths and note how many cords you’ll need.

Tips for Cutting

Using sharp scissors, cut each strand carefully. You don’t want to fray the ends or make angled cuts which can happen if you use dull blades. Arrange the cut cords neatly in a pile, preferably in the order they’ll be used, to keep everything tidy.

Basic Macrame Knots

Learning about the basic knots is essential for creating your macrame wall hanging. These fundamental techniques will serve as the foundation for your entire design.

Square Knot

The square knot is a staple in macrame projects. It’s comprised of two cords and is relatively simple to master.

  1. Start with two cords. Let’s call them cords A and B.
  2. Cross cord A over cord B.
  3. Pull the end of cord A under cord B.
  4. Cross cord A over the working cord.
  5. Pull through and tighten.

Half Hitch Knot

The half hitch knot is perfect for adding texture to your piece.

  1. Start with two cords. Call them cords A and B.
  2. Pull cord A over cord B.
  3. Bring cord A back through the loop you created.
  4. Pull tight to secure.

Gathering Knot

This knot is often used to bring cords together at the bottom or to create loops for hanging.

  1. Gather all your cords together.
  2. Wrap a separate cord around them several times.
  3. Pull the end of the wrapping cord through the loop.
  4. Tighten it so it stays snug.

Driftwood Macrame Wall Hanging Tutorial

Designing Your Wall Hanging

Now for the creative part—designing your wall hanging. Let your imagination guide you while using the knots and elements that you’ve learned.

Plan Your Design

Having a sketch or plan removes much guesswork and helps you visualize the outcome. You can base your design on existing patterns or come up with a custom design that suits your personal style.

Start Knotting

Begin your knotting at the top of the driftwood. Work your way down as you complete each section, making use of the knots you’ve practiced. Tension control is key; keeping your knots consistent in tightness ensures a professional look.

Incorporating Different Elements

Don’t shy away from experimenting with additional materials. Beads and feathers can be easily added to the cords between knots to provide a pop of color or texture.

Finishing Touches

As you reach the end of your piece, you’ll want to focus on finishing touches. This phase adds personality and polish to your wall hanging.

Trimming Pending Cord Ends

After you’ve completed your design, trim the end cords to your desired length. This enhances the neatness of your piece and allows you to customize the look.

Adding Optional Elements

If you want to add extra details such as fringes or other decorative elements, now is the time. Carefully incorporate them, ensuring that they complement rather than detract from your walls.

Displaying Your Creation

After all the hard work, it’s finally time to display your wall hanging. Where and how you display it can make a huge difference in how it’s perceived.

Finding the Perfect Spot

Consider where the wall hanging will look best. Locations with natural light can illuminate the intricate designs and give life to your project.

Mounting Your Driftwood

Secure your work using nails, hooks, or adhesive that can bear the weight of the driftwood and cord. Make sure it’s at a suitable height, ensuring it becomes the focal point of the room.

Troubleshooting Common Issues

Even with meticulous planning, some challenges can arise while creating macrame wall hangings. Here’s how you can tackle common problems.

Uneven Knotting

If your knots appear uneven or your cords are curling, try loosening the knots slightly or using a steamer to help the strands relax. Recommence with careful attention to tension on each knot.

Running Out of Cord

In case you run out of macrame cord, you can attach additional lengths discreetly. Overlap the new and old cords with a square knot to maintain integrity and disguise the transition.

Driftwood Slippage

If your driftwood moves when knots are applied, placing rubber or felt pieces between your driftwood and the wall can stabilize your hanging.

Tips for Perfecting Your Technique

Perfecting your macrame skills takes time and practice. Here are some additional tips to elevate your craft:

  1. Practice Knots Consistently: Repetition will make complex knotting techniques second nature.
  2. Experiment with Cord Varieties: Different cord textures and colors can alter the finish drastically.
  3. Embrace Mistakes: Consider mishaps as opportunities to innovate your design.

By now, you should be well on your way to crafting a charming driftwood macrame wall hanging. With a mix of creativity, patience, and a little trial and error, you’re fully equipped to create something that is not only aesthetically pleasing but uniquely yours. Enjoy this engaging activity and watch your skills grow with each piece you create!

Filed Under: Driftwood Ideas Tagged With: DIY, Driftwood, home decor, Macrame, Wall Hanging

Driftwood Macrame Wall Hanging Diy

May 21, 2025 by admin

Have you ever wandered along a beach, come across an intriguing piece of driftwood, and wondered how you could incorporate it into your home decor? Driftwood has a natural beauty and unique character that makes it a fantastic base for creative projects. Macrame, an art form that uses knotting techniques to create intricate designs, has soared in popularity for its ability to bring an organic, artistic touch to interior spaces. What if you could combine the rustic charm of driftwood with the elegant artistry of macrame to make a stunning wall hanging?

Driftwood Macrame Wall Hanging Diy

The Allure of Driftwood and Macrame

Driftwood and macrame both carry a sense of warmth and individuality that can transform any room. Driftwood is not only a product of nature but also a symbol of resilience, having been shaped and smoothed by the tides over time. Similarly, macrame’s history of knotting and weaving is steeped in tradition, yet remains deeply personal: your hands, your knots, your creation.

Why Driftwood?

Driftwood adds a natural, earthy element to decor that is both versatile and environmentally conscious. Each piece of driftwood is unique, ensuring that no two projects are the same. Its soft tones and textures complement the delicate patterns of macrame, creating an organic piece of art.

The Macrame Revival

Macrame has made a significant comeback in modern decor thanks to its bohemian appeal and customization options. With macrame, you can experiment with various patterns and styles, allowing your creativity to shine while making a piece that fits perfectly with your aesthetic.

Getting Started with Your Driftwood Macrame Project

Creating a driftwood macrame wall hanging can seem daunting if you’re new to the craft, but breaking the process down into manageable steps makes it approachable and rewarding.

Preparing Your Driftwood

The first task is to select and prepare the driftwood that will serve as the base of your wall hanging. Look for a piece that is smooth and free of significant cracks that might weaken your design. Once you’ve selected the perfect driftwood, it’s important to clean and dry it thoroughly.

  1. Cleaning: Rinse the driftwood to remove any sand or salt deposits. Use a soft brush to gently scrub the surface.
  2. Drying: Leave the driftwood outside in a dry, sunny spot for a couple of days. This ensures it is free from moisture, making it sturdy enough to support your macrame project.

Choosing the Right Macrame Cord

The next step is choosing the macrame cord. The type and thickness of the cord will impact the overall look and style of your wall hanging. Cotton cord is a popular choice because it is soft, easy to work with, and comes in a range of colors.

  • Thickness: A medium thickness (around 3-5mm) is generally best for beginners. It balances ease of knotting with a visually appealing finish.
  • Color: Natural tones keep things earthy and organic, though colored cords can add a whimsical or modern touch, depending on your style.

Essential Macrame Knots

Before diving into your project, familiarize yourself with a few foundational macrame knots. Understanding these techniques will enable you to create intricate designs and customize patterns to your liking.

  • Lark’s Head Knot: Used to attach the cords to the driftwood.
  • Square Knot: A versatile knot that can form rows and patterns.
  • Half Hitch Knot: Ideal for creating spirals and waves.
  • Double Half Hitch Knot: Useful for crafting intricate designs and borders.

Step-by-Step Guide to Creating Your Driftwood Macrame Wall Hanging

Now that you have your supplies ready and knots memorized, it’s time to create your masterpiece. Here’s a step-by-step guide to help you through the process:

Step 1: Setup

Begin by attaching your driftwood to a flat, stable work surface. You can use clamps or weights to hold it in place. This stability ensures that your knots will be even and consistent.

Step 2: Attach the Cords

Using the Lark’s Head Knot, attach multiple cords to your driftwood. The number of cords depends on how wide you want your project to be, but starting with 8-12 cords is a good range for most projects.

Step 3: Creating Your Design

This is where the fun begins! Use the Square Knot to create the base rows of your macrame. Alternate cords as needed to create visual interest and texture. Allow your artistic intuition to guide the placement of Half Hitch and Double Half Hitch knots, intertwining them to form spirals or waves.

Step 4: Adding Depth and Layers

To add dimension, experiment with varying the lengths of dangled cords by trimming some to different lengths. You can create fringe by unraveling and combing out the ends of the cords for a fuller look.

Step 5: Finishing Touches

Once you’re satisfied with your design, it’s time to secure the loose ends. Knot the bottom of the cords securely to prevent unraveling. Trim them to your desired length, and comb them out to add a soft finish.

Personalizing Your Driftwood Macrame Wall Hanging

The beauty of DIY projects lies in personalization. With macrame, there are countless ways to let your personal style shine.

Color Variations

Color can drastically change the overall feel of your wall hanging. Try incorporating different colors of cord in your design for an ombre effect or introduce a pop of color with painted driftwood.

Beads and Natural Elements

Incorporate beads, shells, or small stones into your macrame for added texture and individuality. The inclusion of these elements can add an even further natural vibe to your creation, blending seamlessly with the driftwood theme.

Custom Patterns

Experiment with and develop your own macrame patterns. Allow your wall hanging to tell a story or simply reflect a personal meaning. Charting out designs on paper first can help to visualize the end result.

Driftwood Macrame Wall Hanging Diy

Maintaining Your Driftwood Macrame Wall Hanging

Maintaining your wall hanging ensures its longevity and continued beauty. Here are a few tips to keep it looking its best:

Regular Dusting

Dust your wall hanging regularly using a soft brush or cloth. This prevents the buildup of dirt and helps the cords retain their color and texture.

Avoid Moisture

Keep your wall hanging in a dry environment to prevent the driftwood and cords from absorbing moisture, which can lead to mold or warping.

Handling with Care

When moving or repositioning your macrame piece, handle it with care. Support the driftwood and knots to avoid strain on the macrame and risk of breakage.

Conclusion

Creating a driftwood macrame wall hanging is a fulfilling project that adds a unique, personal touch to your home. The combination of natural and crafted elements harmonizes beautifully to enhance any space. By following these steps and infusing your own creativity, you can design a piece that is truly one-of-a-kind. Whether you’re a seasoned maker or a novice, this project offers endless opportunities for artistic expression and satisfaction.

Filed Under: Driftwood Ideas Tagged With: DIY, Driftwood, home decor, Macrame, Wall Hanging

Driftwood Macrame Plant Hanger

May 21, 2025 by admin

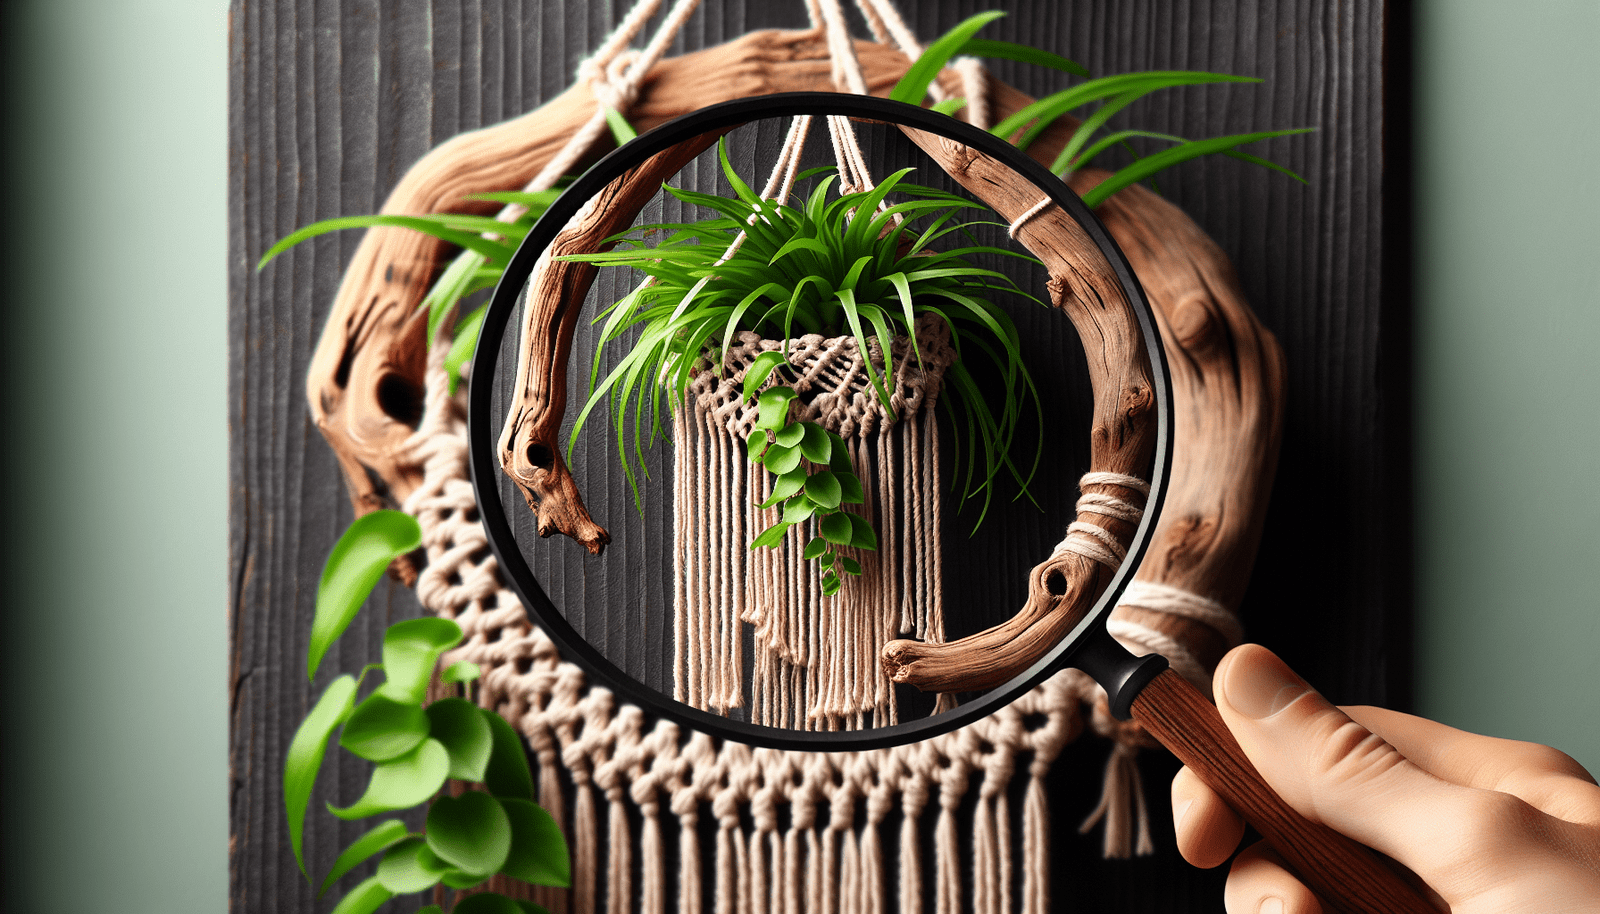
Have you ever gazed upon the intriguing charm of driftwood and wondered how you could incorporate it into your home décor? Driftwood is more than just a relic from the beach; it’s a unique, natural element that can elevate your interior design in ways that are both rustic and elegant. In this guide, you’ll learn how to create a beautiful and functional driftwood macrame plant hanger that will not only spruce up your space but also bring a bit of the outdoors inside.

Driftwood Macrame Plant Hanger

Understanding Driftwood and Its Appeal

Driftwood, swept by waves and polished by time, carries with it a story of journey and resilience. Its coarse texture and unique shapes offer a glimpse into nature’s raw beauty. Integrating driftwood into home décor has gained popularity due to its sustainable nature and aesthetic value.

Why Choose Driftwood for a Macrame Project?

Driftwood serves as an excellent medium for macrame projects because of its strength and visual appeal. Each piece is unique, granting a one-of-a-kind outcome to your creations like plant hangers. Its irregular shapes provide an interesting contrast to the uniformity of macrame knots, creating a fascinating visual dynamic.

Benefits of Using Driftwood in Home Decor

Utilizing driftwood in your decor can infuse your home with a sense of calm and earthiness. It’s a sustainable choice as it repurposes elements already present in nature. Moreover, its neutral tones make it versatile, blending seamlessly with various color schemes and styles from modern to coastal.

The Art of Macrame: A Brief Overview

Macrame is the art of knotting cords or strings in patterns to make decorative and functional objects. With roots tracing back centuries, it has evolved from traditional textiles to a modern craft form that’s perfect for home decor.

Key Macrame Knots for Beginners

To begin your macrame journey, you need to familiarize yourself with a few basic knots. Here’s a quick overview:

  • Square Knot: This is the cornerstone of many macrame projects. It involves four strands: the outer two are working cords, and the inner two are filler cords.
  • Half Hitch Knot: By knotting around a central cord, you create a chain that can form spirals.
  • Lark’s Head Knot: Commonly used to attach cords to a piece of driftwood, it’s simple and sturdy.
Knot NameDescription
Square KnotCreates a flat, wide knot.
Half HitchUsed for making rows or spirals.
Lark’s HeadSecures cords to driftwood.

The Appeal of Combining Driftwood and Macrame

When you combine driftwood and macrame, you get the best of both worlds: the rugged, natural beauty of driftwood and the intricate patterns and textures of macrame. This pairing is particularly enchanting for plant hangers as it not only cradles your green friends but also adds an artistic touch to any room.

Creating Your Driftwood Macrame Plant Hanger

Let’s now venture into the step-by-step creation of your own driftwood macrame plant hanger. Gather your tools and materials and prepare to transform them into art.

Materials Needed

To embark on this project, you’ll need the following materials:

  • Driftwood piece of your choice
  • Macrame cord (3-4mm thickness recommended)
  • Scissors
  • Tape measure
  • Plant pot
  • Hooks or ceiling mounts for hanging

Choosing the Right Driftwood

Select a piece of driftwood that’s sturdy, not brittle, and appropriately sized for the hanging space. Its shape should balance aesthetics with functionality, providing places for your cords to attach securely.

Preparing the Materials

Before you start knotting, measure and cut your macrame cords into lengths that fit your specific project. An average plant hanger typically requires cords that are about four to five times the desired finished length. You may want to start longer and trim down later to ensure you have enough material.

Step-by-Step Guide to Crafting a Driftwood Macrame Plant Hanger

Now that your materials are ready, let’s dive into the creation process. Each step below will guide you through making a simple yet beautiful driftwood macrame plant hanger.

Step 1: Attach Cords to Driftwood

Using the Lark’s Head Knot, attach your macrame cords to the driftwood. This will act as the foundation for your design. Ensure the cords are secured evenly along the driftwood to distribute weight properly.

Step 2: Form the Main Pattern

Create your main pattern using square knots. You can get creative here: form a tightly knit section at the top and then gradually loosen the pattern as you move down, or mix it up with different knot styles for varied textures.

Step 3: Create the Plant Holder

Use a series of square knots and spiral patterns to form a basket or cradle where the plant pot will sit. Ensure this section is snug enough to hold the pot securely but loose enough to insert or remove the pot easily.

Step 4: Finishing and Trimming

Once your main structure is complete, trim excess cords to your desired length, creating a tassel effect if you wish. Ensure everything is even and robust enough to hold the weight of your plant.

Step 5: Final Assembly and Hanging

Attach your finished macrame piece to hooks or ceiling mounts in your desired location. Ensure the space receives adequate light if you’re planning to hang living plants.

Driftwood Macrame Plant Hanger

Maintenance and Care for Your Plant Hanger

Maintaining your driftwood macrame hanger ensures it stays beautiful and functional for years to come. Here are some quick tips.

Caring for Driftwood

While driftwood is durable, it benefits from occasional cleaning to remove dust and buildup. Gently wipe it with a damp cloth, being careful not to disturb the macrame knots.

Macrame Cord Maintenance

Macrame cords can collect dust, especially in high-traffic areas. Light vacuuming or gentle shaking can help keep them clean. If necessary, spot clean using mild soap and water.

Tips for Plant Care in a Hanger

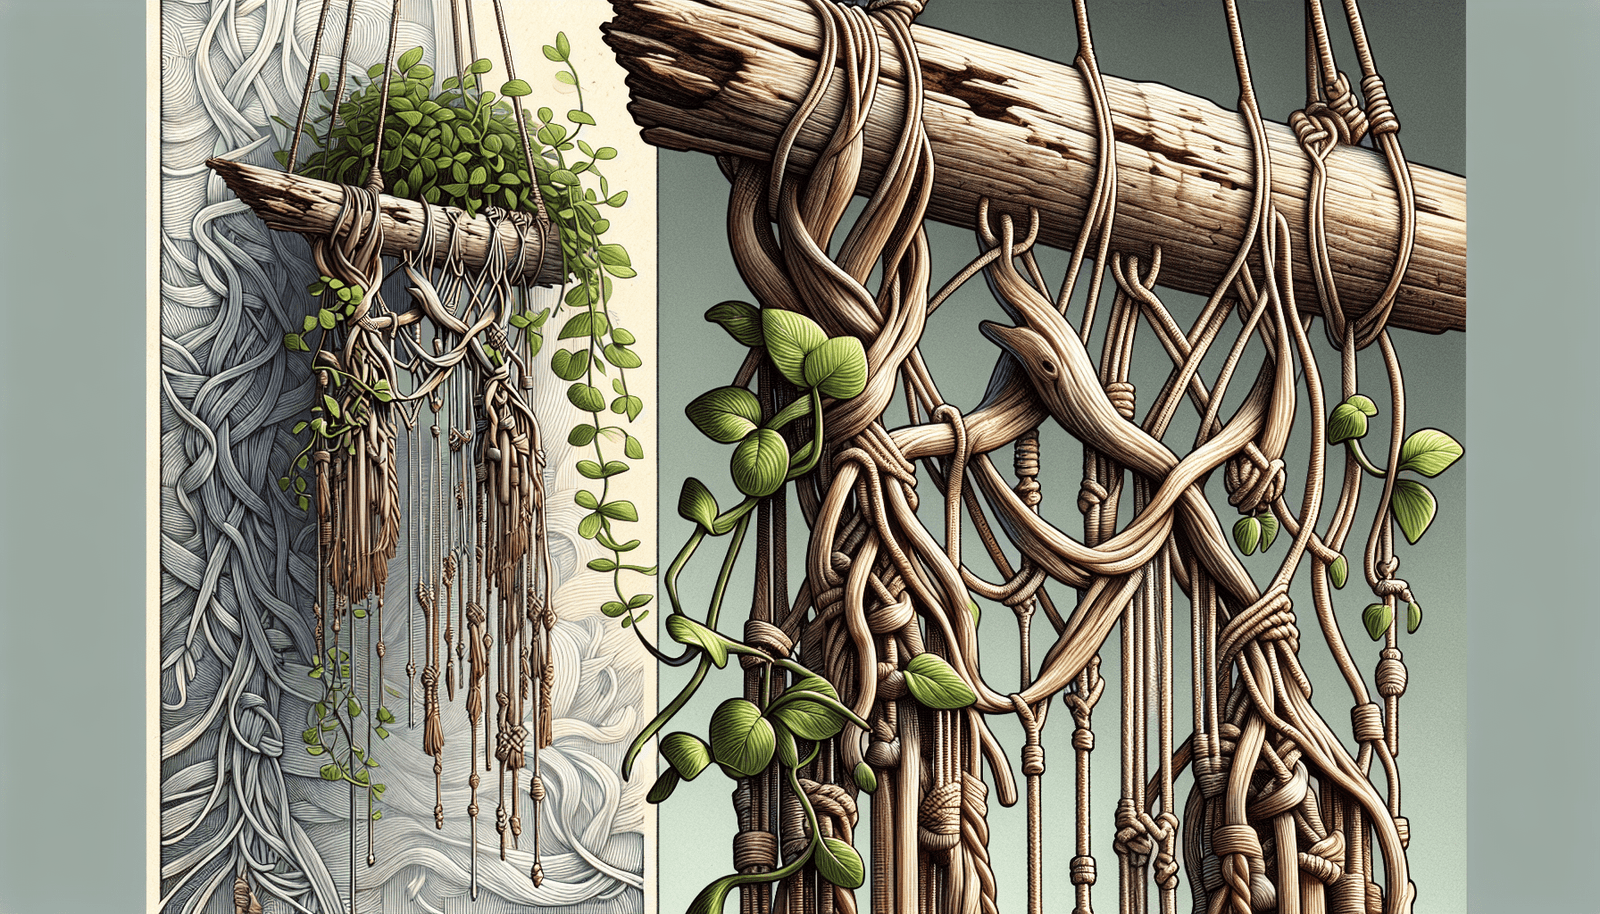
When watering the plant, ensure water doesn’t spill excessively onto the macrame cords as this may lead to discoloration. Opt for plants that thrive in hanging environments, such as trailing ivy or spider plants, which can cascade beautifully from the hanger.

Creative Variations and Personalization

Once you’ve mastered the basics, consider experimenting with different types of driftwood or macrame patterns. This customization can reflect your personal style or blend seamlessly with existing decor.

Exploring Different Macrame Patterns

Dive into more advanced macrame patterns such as the Josephine knot or clove hitch for an added challenge. These sophisticated designs can significantly enhance the visual appeal of your plant hangers.

Incorporating Different Materials

While driftwood is a fantastic choice, you can also incorporate other materials like copper pipes or metal hoops for a modern twist. Mixing different textures and materials can create a truly unique and striking piece.

Adding Decorative Elements

You can also embellish your macrame hanger with beads, feathers, or painted accents on the driftwood. These additions offer a playful touch, allowing for seasonal or thematic decorations.

The Environmental Impact and Sustainability

Driftwood macrame hangers are not just stylish; they’re a nod to sustainability. Embracing this form of decor supports eco-friendly practices and conscious living.

Sourcing Sustainable Driftwood

Ensure your driftwood is sourced responsibly. Collect pieces found naturally washed ashore without disturbing local wildlife habitats or removing too much from delicate ecosystems.

Reducing Waste with DIY Projects

Creating your own home decor reduces the demand for mass-produced items, often made with non-renewable materials. Crafting with driftwood and natural fibers promotes creativity while minimizing waste and overproduction.

Conclusion: Bringing It All Together

Creating a driftwood macrame plant hanger is more than just a project; it’s a journey into the appreciation of nature’s beauty and the joy of crafting. This timeless piece will not only adorn your space but also serve as a gentle reminder of the harmony between aesthetic appeal and sustainable living. Whether you’re a seasoned crafter or a beginner, the art of combining driftwood and macrame offers endless possibilities, accentuating your living space with rustic charm and personal flair.

Filed Under: Driftwood Ideas Tagged With: crafts, DIY, Driftwood, Macrame, Plant Hanger

Driftwood Macrame Wall Hanging

August 16, 2024 by admin

Have you ever strolled along a serene beach and stumbled upon an intriguing piece of driftwood? That simple piece of weathered wood can be transformed into stunning home decor with just a few knots and some creativity. In this article, you’ll learn everything there is to know about creating a Driftwood Macrame Wall Hanging that will add a touch of natural beauty and handmade charm to your space.

Driftwood Macrame Wall Hanging

Introduction to Driftwood Macrame Wall Hanging

Driftwood macrame wall hangings merge the rustic, earthy feel of driftwood with the intricate patterns and textures of macrame. This wonderful combination creates a unique piece of art that can effortlessly enhance the aesthetic of any room. Whether you’re a seasoned macrame enthusiast or a complete novice, this guide will walk you through each step of the process.

What is Macrame?

Macrame is a form of textile produced using knotting techniques. Its origins can be traced back to ancient Mesopotamia. This craft has experienced various revivals throughout history, with its most recent surge in popularity happening during the 1970s and again in the last few years. It’s used to create a variety of items, from wall hangings to plant hangers, jewelry, and more.

What is Driftwood?

Driftwood refers to pieces of wood that have been washed onto the shore by rivers, lakes, or oceans. Each piece of driftwood has a unique shape and texture, molded by its journey through water. This natural material adds a distinctive touch to any project, making your macrame creation one-of-a-kind.

Materials Needed

Before you begin your project, gathering all the necessary materials is essential. This ensures that you won’t have to pause your creative flow to search for supplies. Below is a list of materials you will need:

MaterialDescription
DriftwoodSelect a sturdy piece of driftwood of your desired length.
Macrame CordGenerally, 3-5 mm cotton cord is recommended.
ScissorsSharp scissors to cut cords easily.
Measuring TapeA tape measure to ensure cords are of appropriate length.
CombTo fray the ends of the cords for a boho look.
Beads (Optional)You can add wooden or ceramic beads for additional decoration.

Choosing the Right Driftwood

The driftwood you choose will serve as the anchor for your wall hanging. It should be strong enough to support the weight of the macrame and aesthetically pleasing as well. Take some time to clean and disinfect the driftwood to ensure it is free of any contaminants.

Selecting the Cord

The type of cord you select will determine the texture and durability of your wall hanging. Cotton cords are a popular choice due to their softness and ease of use. Jute or hemp cords can also be used for a more rustic look but may be harsher on the hands.

Basic Macrame Knots

Familiarizing yourself with some basic macrame knots is crucial before starting your project. Here are a few you will frequently use:

Square Knot

The square knot is one of the most fundamental knots in macrame. It’s versatile and ideal for creating patterns.

  1. Step 1: Divide your cords into four strands.
  2. Step 2: Use the outer left cord to create a loop over the two middle strands.
  3. Step 3: Pass the outer right cord over the looped left cord, under the two middle strands, and through the loop from below.
  4. Step 4: Tighten the knot.

Half Hitch Knot

The half hitch knot is another essential knot used to create various patterns and designs.

  1. Step 1: Take the left outside cord and move it over the right cord.
  2. Step 2: Pull it through the loop and tighten.

Lark’s Head Knot

This knot is perfect for attaching your cords to the driftwood.

  1. Step 1: Fold the cord in half to form a loop.
  2. Step 2: Place the loop under the driftwood.
  3. Step 3: Pull both ends of the cord through the loop and tighten.

Step-by-Step Guide to Making a Driftwood Macrame Wall Hanging

Now that you have a basic understanding of what macrame and driftwood are, and you have your materials handy, it’s time to start!

Step 1: Preparing the Cord

Measure and cut the macrame cord. A typical wall hanging may require cords that are two to six times the length of the finished product. For this guide, we’ll assume you need 10 pieces of 4-meter-long cords.

Step 2: Attaching the Cords to Driftwood

Use Lark’s Head knots to attach each piece of cord to the driftwood. You’ll end up with 20 strands hanging down.

Step 3: Creating the Design

Using the square and half hitch knots we’ve discussed, you can start creating your design. Here’s a simple pattern for beginners:

  1. Row 1: Use square knots across all strands.
  2. Row 2: Alternately space square knots to create a diamond pattern.
  3. Row 3: Continue with half hitch knots to form vertical lines.

Step 4: Adding Beads

If you decide to incorporate beads, now is the time. Slide the beads onto desired cords and secure them with additional knots.

Step 5: Finishing Touches

Once your primary design is complete, ensure all strands are hanging evenly. Trim the ends to your desired length and unravel them slightly with a comb for a fringed look.

Driftwood Macrame Wall Hanging

Tips and Tricks

Experiment with Patterns

Don’t feel confined to simple knots. Once you get the hang of basics, try experimenting with more complex patterns and techniques.

Use Different Cord Colors

Mixing various colors can add an extra layer of visual interest to your wall hanging.

Keep It Taut

Ensure that each knot is tight and secure. Loose knots can result in an uneven and unstable structure.

Practice Patience

Macrame is a craft that requires time and patience. Don’t rush through the project; enjoy the process of creation.

Why Choose Driftwood Macrame Wall Hanging?

There are several reasons to choose a driftwood macrame wall hanging as a decorative piece in your home:

Sustainable and Eco-friendly

Using driftwood and natural macrame cords is an eco-friendly way to decorate your home. Driftwood is a byproduct of nature’s processes, and using it helps in recycling marine debris.

Unique and Personalized

Each piece of driftwood varies in shape, size, and texture, making every wall hanging one-of-a-kind. You can personalize your design to reflect your taste and style.

Versatile Decor

A driftwood macrame wall hanging fits effortlessly into various interior decor styles, from bohemian and rustic to modern and minimalistic.

Maintenance and Care

Taking care of your driftwood macrame wall hanging ensures it maintains its beauty for years to come.

Regular Dusting

Regularly dust the wall hanging using a feather duster or a soft brush to keep it clean.

Avoid Moisture

As both driftwood and macrame cord can absorb moisture, it’s essential to keep the wall hanging dry. Avoid placing it in areas prone to humidity, like bathrooms.

Gentle Cleaning

For deeper cleaning, gently hand wash the cords with mild soap and water, being careful not to wet the driftwood too much. Allow it to air dry completely before rehanging.

Conclusion

Creating a driftwood macrame wall hanging is not only a gratifying way to express your creativity but also results in a stunning and unique piece of decor. Whether you are crafting for your own home or making a gift for someone special, the time and effort you invest in each knot are bound to be appreciated. So go ahead, find that perfect piece of driftwood, gather your cords, and start knotting away. Soon enough, you’ll have a beautiful piece of art hanging on your wall, reflecting your hard work and artistic spirit.

Filed Under: Driftwood Ideas Tagged With: Bohemian Decor, DIY, Driftwood, Macrame, Wall Hanging

Driftwood Macrame

August 16, 2024 by admin

Have you ever gazed at a piece of driftwood and wondered how it could become a stunning piece of art? Driftwood macramé combines the raw beauty of nature with the intricate art of knotting. It’s a perfect hobby for those who appreciate both the rugged aesthetics of driftwood and the delicate details of macramé.

What is Driftwood Macramé?

Driftwood macramé essentially melds two art forms: macramé, the art of knotting threads and cords into decorative patterns, and the natural allure of driftwood. Driftwood, often found along beaches and riverbanks, brings a rustic, organic charm to the vivid, geometric structure of macramé, making for unique and breathtaking pieces of art.

The Appeal of Driftwood Macramé

Driftwood macramé pieces are more than just decorations—they are stories of nature’s journey intertwined with human craftsmanship. Whether as a wall hanging, plant holder, or even a chandelier, these pieces add a touch of nature and creativity to any space. Each piece of driftwood tells its own story, making your artwork one-of-a-kind.

Materials You Need

Creating driftwood macramé doesn’t require a lot of materials, but selecting the right tools can make the difference between a frustrating and a fun, relaxing experience.

MaterialDescription
DriftwoodUnique pieces found along beaches or riverbanks. Clean and sand them as needed.
Macramé CordTypically cotton, but you can experiment with different types of cords.
ScissorsSharp ones to cut through the macramé cord easily.
Measuring TapeUseful for measuring the lengths of cord.
Comb or BrushTo fray the ends of the macramé cord if desired.
Hooks or RingsTo hang your creation once it’s finished.

Choosing the Right Driftwood

Finding the perfect piece of driftwood is an adventure in itself. Look for pieces that have an interesting shape or texture.

beach, nature, driftwood
. Ensure the piece is sturdy enough to hold the weight of your macramé. Cleaning driftwood can be as simple as soaking it in water and scrubbing with a brush to remove any loose debris, then allowing it to dry completely.

Selecting the Macramé Cord

The type of cord you choose for your project can greatly affect the final look. Cotton cords are popular because they are easy to work with and have a natural appearance, but jute, hemp, or synthetic cords can also be used to achieve different textures and strengths.

Basic Macramé Knots

Before diving into creating a driftwood macramé piece, understanding the basic knots of macramé is essential. Here are some fundamental knots you will use frequently.

Lark’s Head Knot

The Lark’s Head Knot is used to attach your cord to the driftwood. Fold the cord in half.

starfish, dried, driftwood
. Place the loop over the driftwood. Pull the two ends through the loop and tighten.

Square Knot

The Square Knot is the foundation of many macramé patterns. It involves four cords and can be learned by practicing the right and left half knots.

Spiral Knot

A Spiral Knot is essentially a series of half square knots. As you continue tying, the knot will naturally twist, creating a spiral effect.

Gathering Knot

The Gathering Knot is useful for finishing off your project. Bundle the cords together and wrap another cord around multiple times, then tie it off tightly.

Step-by-Step Guide to Creating Driftwood Macramé

Now that you know the basics, let’s create a simple driftwood macramé wall hanging. Choose a piece of driftwood that speaks to you and prepare your materials.

Step 1: Prepare Your Driftwood

Ensure the driftwood is clean and dry. Measure the length of driftwood to determine how wide your macramé piece will be.

Step 2: Cut Your Cords

Cut multiple lengths of macramé cord. For a small project, cut each piece to about 50 inches, but you can adjust the length based on your design.

Step 3: Attach Cords to Driftwood

Using the Lark’s Head Knot, attach each cord to the driftwood. Space them evenly to create a balanced appearance.

Step 4: Create Your Design

Choose your pattern and start knotting. Below is a simple pattern to get you started:

  1. Row of Square Knots: Create a row of square knots across the width of the driftwood.
  2. Diagonal Clove Hitch: Create diagonal lines using Clove Hitch Knots, which give a flowing effect.
  3. Fringe: Leave the ends of the cords free or fray them using a comb or brush for a bohemian look.

Step 5: Finishing Touches

Once your design is complete, trim any excess cord. If desired, add beads or other embellishments to personalize your artwork.

Advanced Techniques in Driftwood Macramé

Once you’re comfortable with basic knots and designs, there are more advanced techniques and styles to explore.

Layering Patterns

Layering different patterns and designs on one piece can add depth and complexity to your artwork. For instance, combining spirals with square knots creates a dynamic visual effect.

Adding Beads and Other Materials

Incorporating beads, stones, or shells into your macramé can add texture and visual interest. Ensure any added materials complement the driftwood and overall design.

Dyeing Macramé Cords

Dyeing your macramé cords can give a unique, custom look to your work. You can choose natural dyes or synthetic ones, depending on the effect you want.

Mixing Fibers

Mixing different types of fibers can also create interesting textures. Combining cotton with wool or hemp can provide different feels and appearances to the final piece.

Tips for Displaying Your Driftwood Macramé

Once you’ve completed your work, it’s time to display it. Here are some tips to showcase your driftwood macramé beautifully.

Finding the Perfect Spot

Choose a location where the piece can be admired. Wall hangings look great above sofas, beds, or in entryways. Ensure the spot gets enough light to highlight the details of your work.

Maintenance and Care

While driftwood macramé is relatively low maintenance, occasionally dusting it will keep it looking fresh. If your piece includes dyed cords, keep it out of direct sunlight to prevent fading.

Inspiration and Project Ideas

Looking for more inspiration? Here are some project ideas to spark your creativity.

Driftwood Plant Hanger

Combine the natural beauty of plants with driftwood macramé. Create a hanging system using macramé knots and hang small pots from your driftwood piece.

Driftwood Chandelier

Design an intricate chandelier by hanging numerous macramé strands and other decorative elements from a large piece of driftwood. This creates a statement piece perfect for any room.

Seasonal Decorations

Customize your macramé piece for different seasons. For example, add small ornaments for the holidays or incorporate flowers for a spring-themed piece.

Common Challenges and Solutions

While driftwood macramé can be incredibly rewarding, you might encounter some challenges. Here are solutions to common issues.

Uneven Tension

Maintaining even tension is crucial for a uniform appearance. Practice makes perfect; with time, your knots will become more consistent.

Finding Suitable Driftwood

If you can’t find suitable driftwood, consider purchasing it online or from craft stores. Look for pieces that match the size and aesthetic of your project.

Knotting Mistakes

If you make a mistake, don’t worry. Macramé is forgiving, and most knots can be untied and reworked. Take your time and enjoy the process.

Final Thoughts

Driftwood macramé is a beautiful fusion of natural elements and artistic creativity. Whether you’re a beginner or an experienced crafter, there’s always something new to explore in this versatile art form.

beach, wood, sand
. Through patience and practice, you can create stunning pieces that reflect both the enduring beauty of nature and the intricate artistry of human hands. Happy crafting!

Filed Under: Driftwood Ideas Tagged With: DIY, Driftwood, Handmade, home decor, Macrame

Driftwood Macrame Jewelry

July 2, 2024 by admin

Driftwood macrame jewelry combines the raw, natural beauty of beach-found driftwood with the intricate, delicate art of macrame to create truly unique wearable pieces. You’ll discover how to blend earthy textures with sophisticated knots, resulting in jewelry that’s both rustic and elegant. Whether you’re a seasoned crafter or a beginner, the joy of working with these two elements is unparalleled. Get ready to indulge in a therapeutic craft that not only expresses your creativity but also connects you with nature’s simplest treasures. Have you ever found yourself walking along the beach, picking up interesting pieces of driftwood, and wondering what you could make with them? If so, you’re in for a treat! Driftwood Macrame Jewelry is a beautiful, eco-friendly way to combine the natural beauty of ocean-weathered wood with the intricate artistry of macrame.

Driftwood Macrame Jewelry

What is Driftwood Macrame Jewelry?

Driftwood Macrame Jewelry is a form of wearable art that incorporates pieces of driftwood with macrame techniques. Driftwood, which is wood that has been naturally weathered by water and washed ashore, offers a unique and rustic charm. Macrame is a crafting technique that uses knots to create decorative patterns. When these two elements are combined, they produce stunning, one-of-a-kind pieces that echo the serenity and beauty of the sea.

The Beauty of Driftwood

Driftwood is more than just ocean debris. Each piece has its own story, shaped by the elements over time. The wood’s weathered texture and unique forms make it an intriguing material for creating jewelry. Plus, using driftwood is environmentally friendly, as it repurposes natural materials that would otherwise go to waste.

The Art of Macrame

Macrame, on the other hand, is an ancient art form that has seen a resurgence in popularity. This knotting technique can be as simple or complex as you want it to be. From basic square knots to intricate patterns, macrame offers endless possibilities for design. Its versatility makes it a perfect complement to the organic shapes and textures of driftwood.

Materials You’ll Need

Creating driftwood macrame jewelry doesn’t require a lot of tools or materials, making it accessible even for beginners. Here’s a list of what you’ll need to get started:

MaterialDescription
DriftwoodCollected pieces that are clean, dry, and free of pests.
Macrame CordCotton or hemp cords are ideal for natural aesthetics.
ScissorsSharp scissors for cutting your macrame cord.
Beads/CharmsOptional adornments to add extra flair to your pieces.
GlueTo secure knots if needed.

Choosing the Right Driftwood

When selecting driftwood for your jewelry, it’s essential to choose pieces that are lightweight and small enough to be worn comfortably. Avoid driftwood that is too bulky or heavy, as it may not work well for this purpose.

Selecting Macrame Cord

The type of macrame cord you choose will affect the overall look and feel of your jewelry. Cotton and hemp cords are popular choices due to their natural appearance. They also come in various thicknesses, so you can tailor your selection to your project’s requirements.

Basic Macrame Knots

Before diving into a project, it’s helpful to familiarize yourself with some basic macrame knots. These fundamental techniques will form the foundation of your jewelry designs.

Square Knot

The square knot is one of the most common and versatile macrame knots. Here’s how to create it:

  1. Cut two lengths of cord.
  2. Fold them in half and attach them to your driftwood using a Lark’s Head knot.
  3. Take the outer left cord and place it over the middle cords, then under the outer right cord.
  4. Take the outer right cord and place it under the middle cords, then over the outer left cord.
  5. Pull tight.
  6. Repeat these steps, alternating sides, to form the square knot.

Spiral Knot

The spiral knot is essentially a series of half-square knots that create a twisting effect. Here’s how to do it:

  1. Begin with a square knot.
  2. Continue making the same half-square knot repeatedly, without alternating sides.
  3. The cord will start to twist naturally, forming a spiral.

Lark’s Head Knot

The Lark’s Head knot is useful for attaching your cords to driftwood. Here’s how to make it:

  1. Fold a length of cord in half.
  2. Place the looped end over your driftwood piece.
  3. Pull the loose ends through the loop, tightening around the driftwood.

Designing Your Jewelry

Designing driftwood macrame jewelry allows for a lot of creativity and personal expression. Whether you prefer the look of minimalist pieces or more elaborate designs, the key is to play around with different knots and arrangements.

Planning Your Design

Before you start knotting, it can be helpful to sketch out your design. Consider the following:

  • Size of the Driftwood: How large is the piece, and how will it fit as a wearable item?
  • Cord Length: Be generous with your cord lengths to ensure you have enough material to work with.
  • Pattern: What kind of knot pattern do you want to follow? Simple or complex?
  • Adornments: Will you add beads or charms to enhance the design?

Creating a Simple Driftwood Macrame Necklace

Let’s walk through the steps of creating a simple driftwood macrame necklace.

  1. Preparation:

    • Gather your materials, selecting a piece of driftwood that is an appropriate size for a pendant.
    • Cut four lengths of macrame cord, each around 3 feet long.
  2. Attach Cord:

    • Fold the cords in half and use Lark’s Head knots to attach them to the middle of the driftwood piece. You should have eight cords hanging from the driftwood.
  3. Knotting:

    • Use the square knot technique to create a pattern below the driftwood. You can make as many or as few knots as you like, depending on the desired length of your necklace.
  4. Adding Beads (Optional):

    • Slide beads onto the cords and secure them with knots.
  5. Finishing:

    • Once you are happy with your design, trim any excess cord.
    • Apply a small amount of glue to the final knots for extra security.
  6. Tying the Necklace:

    • Use the remaining cord to create an adjustable sliding knot or simply tie the ends together to form the necklace.

Creating Bracelets and Earrings

Driftwood macrame isn’t limited to necklaces. Bracelets and earrings can also be made using similar techniques. Simply adapt the size and design to fit the type of jewelry you’re creating.

Driftwood Macrame Bracelet

  1. Preparation:

    • Choose a small piece of driftwood that will sit comfortably on your wrist.
    • Cut two lengths of macrame cord, each around 2 feet long.
  2. Attaching Cord:

    • Use Lark’s Head knots to attach the cords to each end of the driftwood piece.
  3. Knotting:

    • Use a combination of square knots or spiral knots to create a pattern that fits around your wrist.
  4. Finishing:

    • Secure the ends with knots and trim the excess cord.
    • Add an adjustable sliding knot or a clasp to finish the bracelet.

Driftwood Macrame Earrings

  1. Preparation:

    • Select two small, lightweight pieces of driftwood.
    • Cut two lengths of macrame cord, each around 1 foot long.
  2. Attaching Cord:

    • Use Lark’s Head knots to attach the cords to the middle of each driftwood piece.
  3. Knotting:

    • Create a small, delicate pattern below the driftwood using square or spiral knots.
  4. Adding Earring Hooks:

    • Attach earring hooks to the top of the driftwood pieces.
  5. Finishing:

    • Secure knots with glue and trim excess cord.

Driftwood Macrame Jewelry

Tips for Working with Driftwood and Macrame

Creating driftwood macrame jewelry is an enjoyable process, but it can come with some challenges for those new to the craft. Here are some tips to ensure your projects turn out beautifully:

Cleaning and Preparing Driftwood

Before incorporating driftwood into your jewelry, it’s essential to clean and prepare it:

  1. Cleaning:

    • Rinse the driftwood thoroughly with water to remove sand and debris.
    • Scrub it with a brush if necessary.
  2. Drying:

    • Let the driftwood dry completely. This may take several days, depending on its size.
  3. Sealing:

    • Use a natural wood sealer if you want to preserve the wood’s appearance and prevent it from deteriorating over time.

Choosing the Right Knots

The type of knot you choose will affect the overall look and functionality of your jewelry. Experiment with different knots to find what works best for your design.

Securing Knots

To ensure your jewelry is durable, it’s essential to secure your knots:

  • Tightening Knots: Make sure each knot is pulled tight to prevent slipping.
  • Using Glue: Apply a small amount of glue to the final knots for added security.

Experiment with Adornments

Don’t be afraid to add beads, charms, or other embellishments to your designs. These can add a personal touch and make your pieces stand out.

Sustainability and Ethical Considerations

Creating driftwood macrame jewelry not only allows you to express your creativity but also promotes sustainability. By using natural and repurposed materials, you are contributing to the reduction of waste and supporting eco-friendly practices.

Responsible Driftwood Collection

When collecting driftwood, it’s essential to do so responsibly:

  1. Legal Considerations: Some areas have regulations regarding the collection of driftwood. Make sure you are adhering to local laws.
  2. Minimal Impact: Avoid taking large amounts of driftwood from one area. Collect only what you need and leave enough for natural habitats and other beachgoers.

Using Ethical Materials

Choose materials that are sustainable and ethically sourced:

  • Macrame Cord: Look for cords made from organic cotton or hemp.
  • Beads and Charms: Opt for natural or recycled materials when possible.

Promoting Eco-Friendly Practices

By sharing your driftwood macrame creations, you can inspire others to adopt eco-friendly practices and appreciate the beauty of natural materials.

Conclusion

Driftwood macrame jewelry is a delightful way to bring the beauty of nature into your wardrobe. This craft combines the rustic charm of ocean-weathered wood with the intricate artistry of macrame, resulting in unique and sustainable pieces. Whether you’re a seasoned crafter or a beginner, this guide provides everything you need to get started on your journey of creating stunning driftwood macrame jewelry.

So, next time you find yourself strolling along the beach, keep an eye out for interesting pieces of driftwood. With a little creativity and some basic macrame techniques, you can transform these natural treasures into beautiful, wearable art that carries a touch of the sea’s magic wherever you go. Happy crafting!

Filed Under: Driftwood Ideas Tagged With: Accessories, DIY, Driftwood, Handmade, Macrame

Driftwood Macrame Wall Art

June 24, 2024 by admin

Dive into the soothing world of coastal decor as you explore the beauty and craftsmanship of Driftwood Macrame Wall Art. Crafted from natural driftwood and intricately woven macrame patterns, this unique wall art brings a touch of serene ocean vibes into your home. Whether you’re aiming to enhance a beach-themed room or simply add a rustic yet elegant focal point, this piece is sure to capture attention and admiration. Let the charm of the sea transform your living spaces with its natural textures and calming presence, effortlessly blending artistry with nature. Have you ever thought about how a piece of driftwood can transform your living space into a peaceful, beach-inspired retreat? Driftwood macrame wall art is an amazing blend of natural elements and intricate craftsmanship, adding a unique and stylish touch to any interior.

Driftwood Macrame Wall Art

What is Driftwood Macrame Wall Art?

Driftwood macrame wall art combines the organic beauty of driftwood with the intricate knots and patterns of macrame. Driftwood is typically found along beaches and rivers, shaped and smoothed by water and time. Macrame, on the other hand, is a crafting technique that involves tying knots to create decorative patterns and designs. When these two elements come together, they create a stunning piece of art that brings a bit of nature indoors.

Why Choose Driftwood Macrame Wall Art?

There are several reasons why this form of wall art is gaining in popularity. For starters, it embodies a sense of serenity and natural beauty, making it an excellent choice for anyone looking to create a calm and cozy atmosphere in their home. Additionally, it’s a fantastic way to recycle and repurpose natural materials, promoting sustainability.

Here are some benefits:

BenefitDescription
Unique DesignNo two pieces of driftwood are alike, ensuring your wall art is one-of-a-kind.
Eco-FriendlyUses repurposed natural materials, making it a sustainable choice.
VersatilityFits well in various decor styles – from bohemian to coastal themes.
Personal TouchYou can customize the macrame pattern to suit your personal taste.

Choosing the Right Driftwood

Before diving into your macrame project, you’ll need to find the perfect piece of driftwood. Here’s how you can identify and select the right driftwood.

Sourcing Driftwood

Driftwood can be found along beaches, rivers, and lakes. When searching for driftwood, look for pieces that are naturally weathered, free of algae or decay, and of a manageable size for your wall art project.

Preparing Driftwood

Once you have found your driftwood, it’s essential to clean and treat it. This process will ensure that your artwork is safe and long-lasting.

  • Cleaning: Soak the driftwood in a mixture of water and bleach (10:1 ratio) to remove any bacteria or algae.
  • Drying: Allow the driftwood to dry completely. This may take several days, depending on the size and thickness.

Materials and Tools Needed

To create your driftwood macrame wall art, you’ll need a few basic materials and tools.

Essential Materials

Here are the primary items you’ll need:

MaterialPurpose
DriftwoodThe base of your wall art
Macrame CordFor tying knots and creating the design
ScissorsFor cutting the macrame cord
Measuring TapeTo measure lengths of macrame cord

Optional Items

These additional items can help enhance your project:

MaterialPurpose
Beads/FeathersTo add decorative elements to your design
Fabric GlueFor securing knots, if necessary
Comb or BrushTo fringe out the macrame cords

Basic Macrame Knots

Macrame involves various types of knots, each contributing differently to the overall design. Here are a few basic knots to get you started:

Lark’s Head Knot

This is a simple and foundational knot used to attach the cord to the driftwood.

  1. Fold the cord in half to create a loop.
  2. Place the loop over the driftwood.
  3. Pull the ends of the cord through the loop, tightening it around the driftwood.

Square Knot

A versatile and commonly used knot in macrame projects.

  1. Arrange four cords: two working cords on the outside and two fillers in the middle.
  2. Cross the left working cord over the fillers and place it under the right working cord.
  3. Take the right working cord under the fillers and pull it through the loop created by the left working cord.
  4. Tighten the knot and repeat the process in the opposite direction.

Double Half Hitch Knot

Perfect for creating intricate patterns and lines.

  1. Take one working cord and place it diagonally across the other cords.
  2. Using another cord, tie a half hitch around the diagonal cord and tighten.
  3. Repeat with the same cord to form a double half hitch.

Driftwood Macrame Wall Art

Step-by-Step Guide to Creating Driftwood Macrame Wall Art

Let’s walk through creating a simple yet beautiful driftwood macrame wall art piece.

Step 1: Prepare Your Work Area

Set up a workspace where you can comfortably lay out your materials and work on your project. Make sure you have good lighting and enough room to maneuver your cords and driftwood.

Step 2: Attach the Cord to the Driftwood

Start by cutting several lengths of macrame cord. The number and length of cords will depend on your design and the size of the driftwood.

  • Use the Lark’s Head knot to attach each cord to the driftwood.

Step 3: Begin Knotting

With your cords attached, begin tying your chosen macrame knots. You can follow a specific pattern or create your own design.

  • Use Square Knots for a simple and structured pattern.
  • Incorporate Double Half Hitch knots for a more detailed design.

Step 4: Add Decorative Elements

If desired, you can include beads, feathers, or other decorations to enhance your design. Simply thread these onto your cords as you knot or attach them using fabric glue.

Step 5: Finish and Trim

Once you’re satisfied with your design, make sure all knots are securely tightened. Trim any excess cord to give your piece a clean and polished look.

Step 6: Hang Your Artwork

Find the perfect spot to display your driftwood macrame wall art. Use a sturdy nail or hook to hang your piece securely.

Caring for Your Driftwood Macrame Wall Art

Proper care will keep your wall art looking beautiful for years to come.

Cleaning

To clean, lightly dust the driftwood and cords with a soft brush or cloth. For deeper cleaning, use a vacuum with a brush attachment.

Maintenance

Check periodically to ensure that the knots remain secure. If any knots become loose, simply retighten them.

Inspiration and Styles

Driftwood macrame wall art can take on various styles, depending on the macrame techniques and additional elements you choose to include.

Bohemian Style

Characterized by an eclectic mix of colors and textures, bohemian-style macrame often incorporates beads, feathers, and varying thicknesses of cord.

Minimalist Style

Minimalist macrame focuses on clean lines and simple patterns, often using a monochromatic color scheme and fewer decorative elements.

Coastal Style

Inspired by the beach, coastal-style macrame features soft, natural colors and often includes seashells or other ocean-themed decorations.

DIY or Purchase: Which is Right for You?

While creating your own driftwood macrame wall art is fulfilling and allows for personalization, purchasing a pre-made piece can be a convenient alternative.

DIY Benefits

  • Personalization: You can create a design that perfectly matches your taste and decor.
  • Satisfaction: Completing a DIY project can be incredibly rewarding.

Purchasing Benefits

  • Time-Saving: Buying a pre-made piece saves time and effort.
  • Professional Quality: Pre-made pieces often feature professional craftsmanship and intricate designs.

Conclusion

Driftwood macrame wall art is a beautiful and unique way to bring nature and artistry into your home. Whether you choose to create your own piece or purchase one, this type of wall art will surely add a touch of elegance and serenity to any space. So why not try your hand at this wonderful craft and see how a simple piece of driftwood can transform your living space? With a little creativity and effort, you can create a stunning work of art that reflects your personal style and love for nature.

Filed Under: Driftwood Ideas Tagged With: Bohemian Decor, Driftwood, Handmade, Macrame, Wall Art

Driftwood Macrame Projects

May 31, 2024 by admin

You’re about to dive into the delightful art of crafting with “Driftwood Macrame Projects.” Imagine weaving your thread of creativity into the rugged charm of driftwood, transforming it into stunning, ocean-inspired decor for your home. This article will guide you through the basics of macrame, offering easy-to-follow steps and inspiring ideas to combine this nostalgic art form with nature’s own masterpiece—driftwood. Whether you’re a seasoned crafter or a curious beginner, you’ll find joy in these beautiful, handmade creations that add a personal touch to any space. Have you ever wondered how to bring the tranquility of the seaside into your home? Driftwood macrame projects might just be the answer! Combining the natural beauty of driftwood with the art of macrame creates stunning, one-of-a-kind pieces that can transform any space. Let’s dive into the world of driftwood macrame through this guide.

Why Choose Driftwood for Your Macrame Projects?

Driftwood holds a special allure due to its unique shapes and weathered appearance. Every piece tells a story of its journey through the elements. Incorporating driftwood into your macrame projects not only adds a touch of nature to your décor but also a personal touch that highlights your creativity.

Benefits of Driftwood Macrame

  • Natural Aesthetic: Driftwood and macrame both enhance a natural, bohemian aesthetic.
  • Environmentally Friendly: Driftwood is often collected from beaches, meaning you’re upcycling and making eco-friendly choices.
  • Durability: Driftwood is sturdy, making it a lasting base for your macrame designs.

Essential Supplies for Driftwood Macrame Projects

Before starting any new project, it’s important to gather all necessary supplies. Here’s a handy table to help you prepare:

ItemDescription
DriftwoodSelect pieces based on size, shape, and sturdiness.
Macrame CordCotton or hemp cords are popular choices for their natural look and feel.
ScissorsSharp scissors to cut your macrame cord efficiently.
Measuring TapeEssential for measuring the lengths of cords needed.
Hooks or RingsUseful for attaching your macrame pieces securely to your driftwood.
Beads and CharmsOptional, but great for adding a personal touch to your projects.
CombA comb to fray the ends of your cord for a softer look.

Driftwood Macrame Projects

Step-by-Step Guide to Your First Driftwood Macrame Project

Step 1: Choose Your Driftwood

When selecting driftwood, look for pieces that are smooth and free of splinters. The size will depend on your project. For a wall hanging, a piece that’s about 1-2 feet long works well.

Step 2: Prepare Your Materials

Measure and cut your macrame cord. A typical beginner project like a small wall hanging might require about 100-150 feet of cord.

Step 3: Basic Macrame Knots

Familiarize yourself with these basic knots:

  • Lark’s Head Knot: Used to attach the cord to the driftwood.
  • Square Knot: A staple knot in macrame that you’ll use quite often.
  • Half Hitch Knot: Great for creating rows and spirals.

Step 4: Start Your Project

Attach your cords to the driftwood using Lark’s Head Knots. Divide the cords into sections and start knotting. Follow a basic pattern like square knots for the body of your wall hanging.

Step 5: Add Personal Touches

Incorporate beads or charms if desired. Finish off by combing out the ends of the cords to create a fringed effect.

Popular Driftwood Macrame Project Ideas

Turn your driftwood macrame masterpieces into functional and decorative pieces for your home. Here are some fantastic ideas to get you started:

Driftwood Macrame Wall Hanging

Wall hangings are one of the most popular driftwood macrame projects. They can be simple or intricate, depending on your macrame skill level. Use a combination of different knots, beads, and charms to create a unique piece.

Driftwood Plant Hangers

Using driftwood as the base for a plant hanger adds a rustic touch to your indoor garden. Craft a sturdy macrame net to hold the pot and securely attach it to your driftwood piece.

Driftwood Key Holder

A smaller, simpler project like a key holder is perfect for beginners. Knot short lengths of cord into a design that includes hooks or small loops for holding keys.

Driftwood Shelving

Combine the functionality of shelves with the aesthetic of macrame and driftwood. Use strong knots and cords to create a sturdy shelf attached to a large piece of driftwood.

Driftwood Macrame Projects

Driftwood Macrame Project Tips & Tricks

Choosing the Right Cord

The type of macrame cord you choose can significantly affect the appearance and durability of your project. Here’s a quick comparison:

TypeBenefitsDrawbacks
CottonSoft, easy to work with, natural lookCan accumulate dust, less durable
HempDurable, eco-friendly, rustic lookRough texture, limited color choices
SyntheticDurable, variety of colorsLess eco-friendly, less natural look

Knot Techniques

Practicing different knot techniques can elevate your macrame projects:

Lark’s Head Knot

  1. Fold your cord in half.
  2. Place the loop over the driftwood.
  3. Pull the ends through the loop and tighten.

Square Knot

  1. Divide four cords: left, fillers, and right.
  2. Place the left cord over the fillers and under the right cord.
  3. Place the right cord under the fillers and through the loop created by the left cord. Pull tight.
  4. Repeat with the right cord to complete the square.

Half Hitch Knot

  1. Take one cord and wrap it around an adjacent cord.
  2. Pull through the loop and tighten.
  3. Repeat to create a row or spiral effect.

Finishing Touches

  • Secure loose ends with a dab of glue.
  • Comb out and trim fringes for a polished look.
  • Experiment with dyeing your cords for added color.

Common Mistakes and How to Avoid Them

Embarking on driftwood macrame projects is rewarding, but beginners can encounter some common mistakes:

Uneven Cord Lengths

Always measure your cords generously. Extra length can be trimmed, but if a cord is too short, you might have to start over.

Slippery Knots

Make sure your knots are tight, but not so tight that they distort the pattern. Practice will help you find the right balance.

Inadequate Driftwood Preparation

Ensure your driftwood is thoroughly cleaned and dried before starting. This prevents issues with odors and bugs.

Inspiration from Driftwood Macrame Artists

Let the work of inspiring artists fuel your creativity. Some to look out for include:

Windy Chien

Known for her intricate designs and innovative use of materials, Windy Chien’s work demonstrates how versatile macrame can be.

Emily Katz

Emily’s book “Modern Macrame” offers a wealth of inspiration and guides on contemporary macrame projects.

Fibers & Forest

This Instagram account showcases stunning driftwood and macrame pieces, perfectly blending rustic and modern aesthetics.

Final Thoughts

Driftwood macrame projects can be as simple or complex as you desire, making them perfect for crafters of all skill levels. They offer a wonderful way to incorporate natural elements into your home while indulging in a creative and meditative hobby. Integrating driftwood with macrame not only accentuates your living space but also brings a piece of nature’s serenity into your daily life.

Whether you’re new to macrame or a seasoned artist, the unique combinations and endless possibilities of driftwood macrame will provide infinite projects to explore. So grab your driftwood, some cord, and get knotting – your next beautiful creation awaits!

Filed Under: Driftwood Ideas Tagged With: Art Projects, DIY, Driftwood, Handmade, home decor, Macrame

MACRAME 101 – How to Prepare Driftwood

October 29, 2023 by admin

Hey there! Are you interested in learning how to prepare driftwood for your macrame textile art? Well, you’re in luck because I’ve got a fantastic video by Simply Inspired that will show you exactly how to do it. In this video, Sheena Joy demonstrates the proper techniques for cleaning and disinfecting driftwood before adding your rope. Safety is a top priority, so she emphasizes the importance of following precautions and properly disposing of chemicals. You’ll need a few supplies like sandpaper, bleach, spray paint, and safety gear like gloves and glasses. By prepping your driftwood, you’ll ensure longevity to your art and keep those creepy crawlies away. So, if you’re ready to dive into the world of macrame, grab your driftwood and let’s get started!

In addition to the driftwood preparation tutorial, Simply Inspired also offers two other videos that you might find interesting. One is all about tying a crown knot in four different ways, while the other teaches you how to create an easy rose knot. And if you have any specific requests for knots, patterns, or techniques, Sheena encourages you to leave a comment below the video. So, put on your creative hat and check out the Simply Inspired channel for more macrame inspiration.

Prepare Driftwood for Macrame

Macrame is a beautiful form of textile art that involves weaving rope or cord to create intricate patterns and designs. If you’re interested in trying your hand at macrame, one important step is to properly prepare your driftwood before adding the rope. This article will guide you through the process of preparing driftwood for macrame, ensuring longevity and cleanliness for your artwork.

MACRAME 101 - How to Prepare Driftwood

This image is property of i.ytimg.com.

Sand the driftwood

The first step in preparing driftwood for macrame is to sand it thoroughly. This helps remove any loose pieces and ensures that there is no bark left on the surface. To do this, take your well-worn driftwood and gently sand it using sandpaper. Be sure to sand all sides and edges, making the surface smooth and ready for the next steps.

Bleach the driftwood

Once the driftwood is sanded, it’s time to bleach it. Bleaching helps disinfect the wood and prevents the growth of bugs, bacteria, and mold. Although you will only be using a small amount of bleach, it’s essential to handle it with care and follow proper disposal procedures.

To bleach your driftwood, take it to a well-ventilated area, preferably a bathroom. Fill a large bucket or your bathtub with water, and then add four cups of bleach. Make sure the wood is completely submerged in the bleach solution. The bubbles you see are an indication that the bleach is working to clean and disinfect the driftwood.

Let the wood soak for 2-3 hours

After submerging the driftwood in the bleach solution, set a timer for 2-3 hours and let it soak. This soaking period ensures that the bleach thoroughly disinfects the wood. You can leave it to soak for longer if desired, but keep in mind that extended soaking may lighten the color of the wood. If you prefer a lighter shade, you can add more bleach and soak for a longer duration.

While waiting for the wood to soak, you can take the opportunity to engage in other activities. Consider going outside and enjoying some outdoor play or pursuing another hobby. The time will pass quickly, and you’ll have clean and disinfected driftwood ready for the next steps.

Wrap the driftwood in a drop cloth

Once the soaking period is complete, you’ll need to carefully remove the driftwood from the bleach solution. To prevent any bleach from dripping onto your carpet or furniture, wrap the driftwood in a drop cloth before taking it outside. This precaution ensures a safe and tidy transition.

MACRAME 101 - How to Prepare Driftwood

Allow the wood to dry for several days

After wrapping the driftwood in a drop cloth, it’s time to let it dry. Place the wrapped wood in a dry and well-ventilated area, allowing it to dry for several days. The drying process may take longer depending on the weather conditions. In hot summer weather, it might take nearly a week for the wood to completely dry out.

Lightly sand the driftwood again

Once the driftwood is dry, it’s a good idea to lightly sand it again. This step helps smooth out any rough or sharp edges that may have surfaced during the soaking and drying process. By sanding the driftwood once more, you ensure that the surface is nice and smooth, ready to be painted and used for your macrame artwork.

MACRAME 101 - How to Prepare Driftwood

Spray paint the driftwood

The next step in preparing driftwood for macrame is to spray paint it. Spray painting helps prolong the life of the wood by reducing the breaking-down process and keeping insects away. Choose a spray paint suitable for indoor and outdoor use and compatible with wood, metal, and plastic.

Apply three to four coats of spray paint to ensure even coverage. Make sure to reach every inch of the driftwood, paying attention to the sides and any intricate crevices. For extra protection and a professional finish, consider using a matte clear coat. This will provide a protective layer against wear and tear and keep your macrame artwork looking its best.

Apply multiple coats of paint

To ensure a thorough and even coating, apply multiple coats of paint to the driftwood. Each coat provides an added layer of protection and enhances the longevity of your macrame artwork. Follow the instructions on the spray paint can for drying times between coats.

Let the paint dry overnight

After applying the final coat of paint, it’s important to let it dry overnight before working with the driftwood. Even though quick-drying paint may dry faster, leaving it to dry overnight ensures that it is fully cured and ready for use. Patience is key in this step to achieve the best results.

Final result

Congratulations! You have successfully prepared your driftwood for macrame. The preparation process, including sanding, bleaching, drying, and painting, helps ensure the cleanliness, longevity, and beautiful appearance of your macrame artwork. You can now confidently start creating your macrame design on the prepared driftwood, knowing that it is clean, disinfected, and ready to showcase your artistic skills.

Remember, safety is essential throughout the process. Always wear gloves, a dust mask, and safety glasses, especially when handling chemicals such as bleach and spray paint. Properly dispose of any waste materials according to your municipality’s guidelines, ensuring a clean and environmentally-friendly outcome.

If you enjoyed this article and found it helpful, please give it a thumbs up and consider subscribing for more macrame tips and inspiration. Don’t forget to check out the recommended videos for additional knotting techniques and tutorials. And if you have any requests or specific topics you’d love to see in future articles or videos, leave a comment and let us know. Happy macrame crafting!

Filed Under: DriftWood Art Tagged With: DIY, Driftwood, Macrame

Primary Sidebar

Driftwood4us.com, is a participant in the Amazon Services LLC Associates Program, an affiliate advertising program designed to provide a means for sites to earn advertising fees by advertising and linking to amazon.com.