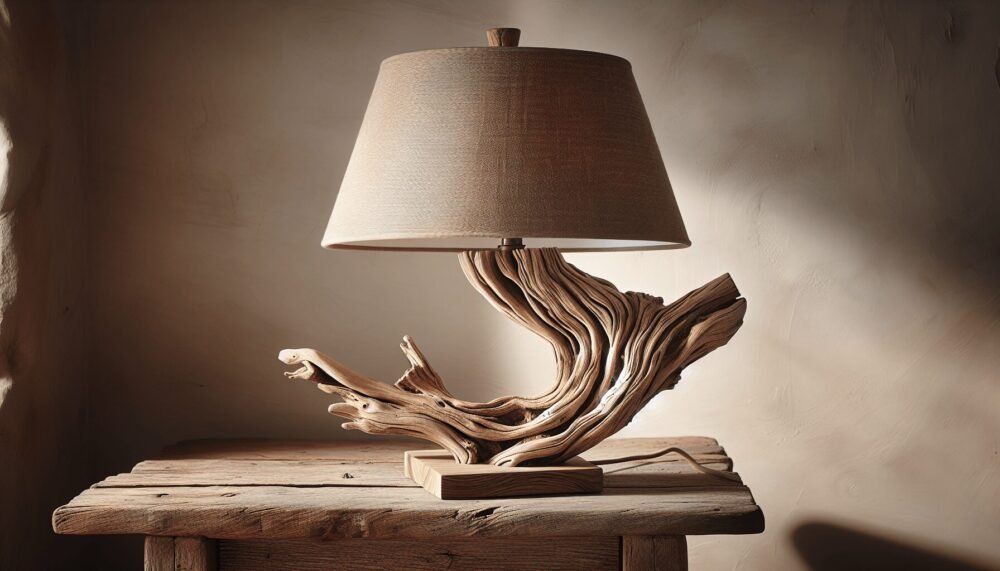
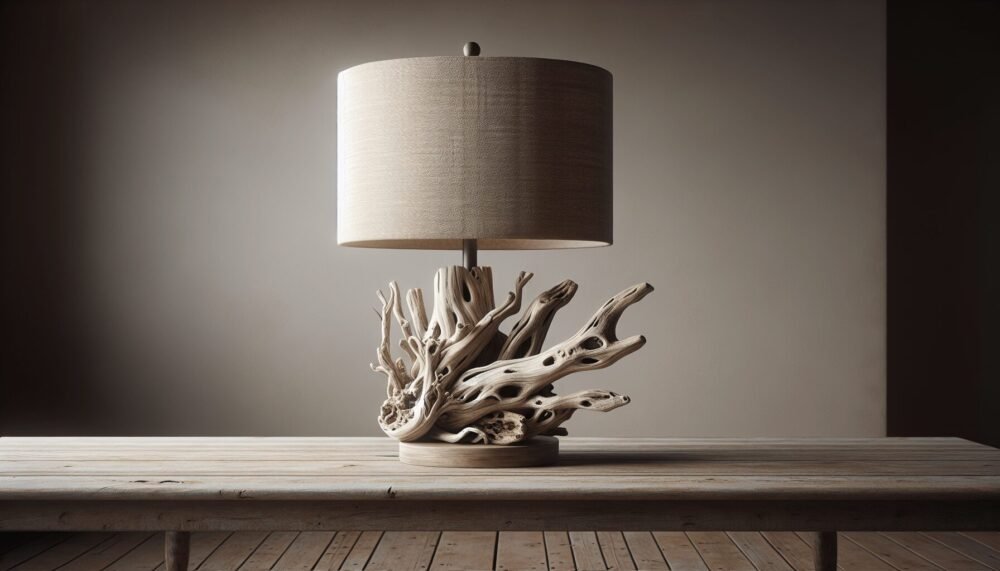
In “Driftwood Projects Unique Table Lamps,” you’ll embark on a delightful journey of creativity and craftsmanship. This article explores the art of transforming humble driftwood into stunning, one-of-a-kind table lamps that add a touch of natural elegance to any room. You’ll discover the beauty of repurposing nature’s offerings, and how each piece of driftwood carries its own story, texture, and charm. Dive in and be inspired by the innovative designs and detailed steps, ensuring you can create your own unique driftwood lamp that will surely become a conversation starter in your home. Have you ever stumbled upon a piece of driftwood during a beach stroll and wondered what you could transform it into? If crafting unique table lamps out of driftwood piques your interest, you’re in for a treat! Driftwood, with its natural, weathered appearance, offers an endless array of creative possibilities. In this friendly guide, we’ll walk you through the intriguing world of driftwood projects, focusing on creating stunning, unique table lamps.
Why Choose Driftwood for Your Projects?
Aesthetic Appeal
Driftwood has this innate, rustic beauty that can’t be replicated. Each piece is uniquely shaped and textured, making it a standout material for decorative items such as table lamps.
Eco-Friendly
Reusing driftwood is a fantastic way to embrace sustainable living. Instead of contributing to waste, you’re giving new life to nature’s masterpieces.
Easy to Work With
Driftwood is lightweight yet sturdy, making it an excellent choice for DIY projects. Plus, it’s relatively easy to manipulate into different forms.
So, gather your materials and lets set out on a creative journey to craft your own driftwood table lamps!
Materials Needed for Driftwood Table Lamps
Before we dive into the step-by-step process, let’s get you geared up with the necessary materials.
| Material | Purpose |
|---|---|
| Driftwood Pieces | Main structure of the lamp |
| Lamp Kit (socket, wiring, plug) | The electrical components needed for lighting |
| Lamp Shade | To diffuse the light and complete the lamp design |
| Sandpaper | For smoothing rough edges |
| Wood Glue | For attaching pieces together |
| Varnish or Sealant | To protect the wood and give it a finished look |
| Base (wood or metal) | To stabilize the lamp |
| Drill with Bits | For creating holes for the wiring and assembly |
| Screws and Screwdriver | To secure the base and other components |
| Protective Gear (gloves, safety glasses) | To ensure your safety during crafting |

Step-by-Step Guide to Crafting Your Driftwood Table Lamp
Step 1: Selecting and Preparing Your Driftwood
The first step is finding the right pieces of driftwood. Look for driftwood that is dry, free of pests, and not overly brittle.
Pro Tip: Larger stores often have a wider selection of driftwood, but don’t overlook small and unique pieces; they can add character.
- Clean the Driftwood: Remove any dirt, sand, or algae using a brush and soapy water. Rinse well and let it dry completely.
- Sand the Wood: Use sandpaper to smooth out rough edges. This makes the wood easier to handle and prevents potential splinters.
- Seal the Wood: Applying a coat of varnish or sealant will help preserve the wood and enhance its natural beauty.
Step 2: Designing Your Lamp
Think about the overall look you want to achieve. Do you envision a simple, minimalist lamp, or something more elaborate and artistic?
- Sketch Your Design: Take a moment to sketch your design. This doesn’t need to be perfect but should give you a general idea of what your final lamp will look like.
- Plan the Layout: Decide how your pieces of driftwood will be arranged. Consider the height and stability of your lamp.
Step 3: Assembling the Lamp Structure
Now comes the fun part—putting it all together!
- Drill Holes for Wiring: Carefully drill a hole through the center of your main piece of driftwood enough to fit the lamp cord through. If your design includes multiple pieces, you’ll need to ensure your wiring can navigate through all of them.
- Attach the Base: Secure the driftwood to your chosen base using screws. A stable base is crucial for ensuring your lamp stands upright.
- Glue Smaller Pieces: If you have smaller pieces of driftwood that add character, glue these onto the main structure.
Step 4: Wiring the Lamp
Safety first! Make sure you’re comfortable working with electrical components or consult someone who is.
- Feed the Cord: Guide the lamp cord through the hole you drilled earlier.
- Attach the Socket: Follow the lamp kit instructions to correctly connect the wiring to the socket. Make double sure all connections are secure for safety.
- Install the Bulb: Once your wiring is complete, screw in a bulb to test your work.
Step 5: Adding the Finishing Touches
Your lamp is almost ready! Now, it’s time to add those final touches.
- Install the Lamp Shade: Choose a lamp shade that complements your driftwood base. Attach it following the lamp kit’s instructions.
- Final Seal: If you didn’t do this earlier, now is a good time to apply a final coat of varnish or sealant.
Creative Variations & Tips
Don’t be afraid to get creative! Here are some additional ideas to make your lamp truly one-of-a-kind.
Adding Decorative Elements
Consider adding seashells, small stones, or other natural elements to your lamp. These can be glued onto the driftwood for added visual appeal.
Using Different Lamp Shades
The type of lamp shade you choose can drastically alter the look of your lamp. From rustic burlap to elegant silk, the options are endless.
Incorporating Multiple Driftwood Pieces
If you have several pieces of driftwood, consider stacking or intertwining them for a more complex and fascinating design.
Playing with Light Bulbs
Experimenting with different types of bulbs—such as Edison bulbs or colored bulbs—can create various moods and atmospheres in your space.

Driftwood Lamp Maintenance
Regular Dusting
Keep your lamps looking fresh by regularly dusting them. A soft, dry cloth usually does the trick.
Reapplying Sealant
Over time, the finish on your driftwood lamp might dull. Reapplying a coat of sealant every year or so will help maintain its beauty.
Checking Electrical Components
It’s always a good idea to periodically check the wiring and components of your lamp to ensure everything stays safe and functional.
Embracing the Imperfections
One of the most charming aspects of driftwood is its imperfections. Knots, splits, and weathered textures all contribute to the distinctive look of your lamp. Don’t strive for perfection; celebrate the uniqueness of each piece you create.
Inspiration From Other Driftwood Projects
Besides table lamps, driftwood has found its way into many other forms of home decor. Here are a few ideas to spark your creativity:
| Project Idea | Description |
|---|---|
| Driftwood Shelves | Combine functionality with rustic beauty by creating floating shelves |
| Driftwood Wall Art | Arrange pieces of driftwood in artistic patterns to adorn your walls |
| Photo Frames | Frame your cherished memories with driftwood for a natural touch |
| Candle Holders | Create charming, beach-inspired candle holders using smaller pieces |
Sharing Your Driftwood Masterpiece
You’ve put in the work, now it’s time to showcase your creation!
Social Media
Sharing photos of your driftwood lamp on platforms like Instagram or Pinterest can inspire others and connect you with fellow crafters.
Craft Fairs
Consider participating in local craft fairs or markets to exhibit and even sell your driftwood creations.
Gift Giving
A handmade driftwood lamp makes for a thoughtful and unique gift. It’s a wonderful way to share a piece of your creativity with loved ones.
Troubleshooting Common Issues
Even the most seasoned DIY-ers encounter hiccups along the way. Here are some common issues and how to fix them:
Uneven Lamp Base
If your lamp seems wobbly, you can add small felt pads to the bottom of the base to help level it out.
Loose Driftwood Pieces
Should any driftwood pieces come loose, a bit of strong wood glue usually does the trick to reattach them securely.
Electrical Problems
If your lamp doesn’t light up, recheck all your electrical connections. Make sure all wiring is properly secured and that the bulb you’re using is functional.
Conclusion
Creating unique table lamps from driftwood not only allows you to craft something beautiful but also sustainable. From selecting the perfect pieces to designing and assembling your lamp, the process is both rewarding and enjoyable. Remember, every piece of driftwood is a natural work of art, making each lamp a unique masterpiece. So, what are you waiting for? Gather your materials and start crafting your very own driftwood lamp today!
Happy crafting!